momo.75's '03 Sport 4.7L V8 Build

Morris, you know the plastic cap that snaps onto the metal tubing - does it seem like you could pop those apart fairly easy?
I mean, if it were on your truck, could someone come by and pretty easily pop them off of your wheels? I ask because they are just like mine.

I am able to just go up to mine and snap the plastic piece off.
I don't worry that they'll get stolen, but I do worry that they will come off.
 
Ok cool so you literally cut it clean half way down the cap, then bent the cut edge to form the flange?

Pet peeve of mine is long caps on wheels! The caps really don't need to be any more than 2" or so long!
 
cut caps are the way to go. Looks so much better.

Thanks man!

Morris, you know the plastic cap that snaps onto the metal tubing - does it seem like you could pop those apart fairly easy?
I mean, if it were on your truck, could someone come by and pretty easily pop them off of your wheels? I ask because they are just like mine.

I am able to just go up to mine and snap the plastic piece off.
I don't worry that they'll get stolen, but I do worry that they will come off.

On the set that came with my wheels, and the black set i had ordered, they had some white stuff on the inside of them that holds them together pretty good. I would think you could use silicone to do the same thing. Good thing about having the cut, them seam between the plastic cap part and the metal sleeve is slightly below the face of the wheel. It would take some work for somebody to pry those off.

Ok cool so you literally cut it clean half way down the cap, then bent the cut edge to form the flange?

Pet peeve of mine is long caps on wheels! The caps really don't need to be any more than 2" or so long!

It isn't quite half way. If you look at the comparison shot of the stock cap and the one that has been cut, you can see it is about 1" between the edge of the tape to the floor (which is the inside part of the cap). I wasn't totally put off by the longer caps, but since i could fix them like this i am more pleased with'em.....:trophy:
 
So harsh guys ;) That's the fun part about living in Colorado I guess. It's easy to go offroad whenever you want. Snow in the winter time keeps it interesting too.

Thanks again for the links momo. I've officially wasted 2 days of my life staring at my computer screen looking at the build threads. If I did a mental tally, I think I've probably spent enough in my head to buy a new 5th gen ;)

-kai-
 
Glad to help brother. lol.....try not to add all of the mods up at one time, that is like trying to figure out the universe and will cause you to go mad. Just take your time and figure out what will be best for you and how you will be using your truck. Most members on this site will be glad to help you out, so feel free to ask questions. Main thing is dow what you like. It is your ride, so make it like you want it.

Like i was saying, since you live in CO, and will more than likely be on rougher terrain, I would go ahead and switch he suspension than messing with a Spacer lift. I wish i had gone ahead and done the suspension lift first, that way i could have gotten a larger tire when i got these. I love these tires, just wish they were a size or two bigger. Unless somebody buys them, at a decent price, i will have to wait a while to upgrade.

Can't wait to see what you do first.

 
Well, you are mailing me my first mod ;)

I'll get my own thread going soon enough. Not sure people want to see pictures of the goldfish and cheerio cemetery that is the back seat but I will do some before and after shots for those that have a strong stomach. Probably won't be do the lift until May because a non-heated garage can be miserable.

What's on the docket for yours?? That's gotta be the best looking 03 I've seen. Flawless finish and that is no easy feat with that color.
 
Thanks. Believe me, i know about the Cheerios and Goldfish. I have 5 year old twins and since i work out of the house and keep them when they are out of school, i am their main transportation.....ha.

I am not sure what the next step will be. I am going to talk to the guys at bluetorchfab.com about a rear tire carrier, so we will see about that. I would love to sell my current tires and go up a size or two, but have to save up the $$ to cover the difference in price. I will be adding some lights at some point, but that $$ issue comes into play again.

Probably the next thing that happens will be another complete Adam's Polishes detail.
 
Finally had a little time to do some little mods.

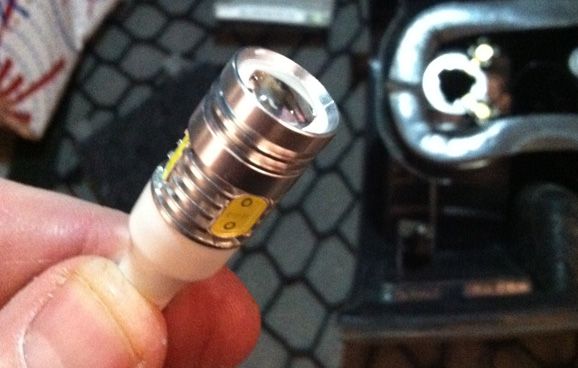
First one was upgrading my reverse lights. I had seen a couple of people talking about switching to an LED bulb for the reverse and didn't really think it would make a big difference.....I was very wrong. I contacted Whitebeauty and he hooked me up with some 9.5w led's. They have a direct beam shooting directly back, as well as led's on the sides to throw light into the reflectors. I could not be happier with the results. If you need some more light in reverse, contact Whitebeauty. Thanks man!

Quality bulbs!
LEDReverse-1_zps11ed8c39.jpg~original


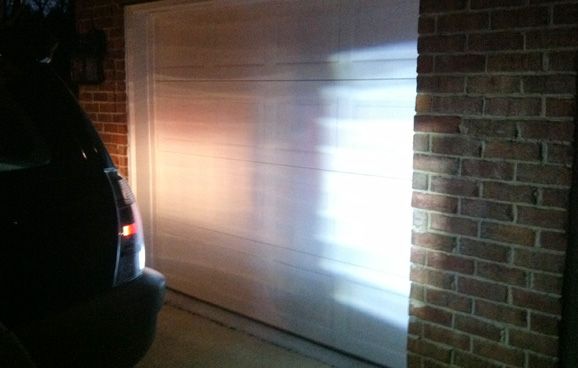
Stock on the left, LED on the right....
LEDReverse-2_zps36e358fd.jpg~original


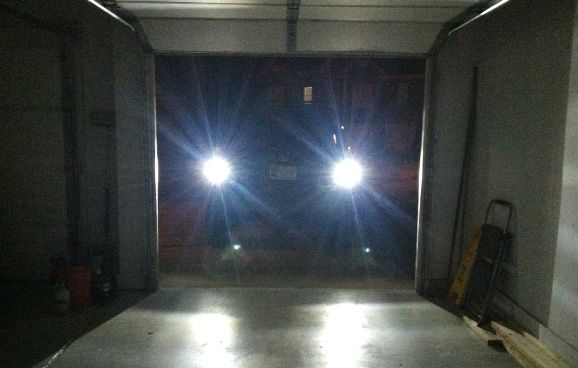
Pictures do not do them justice at all
LEDReverse-3_zps6b2bc467.jpg~original
 
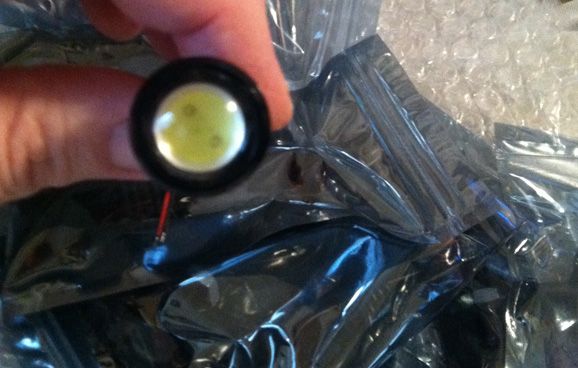
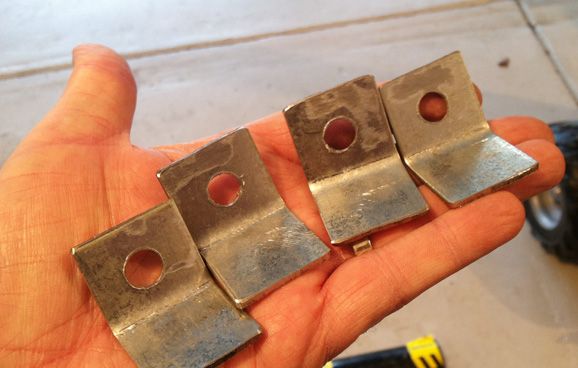
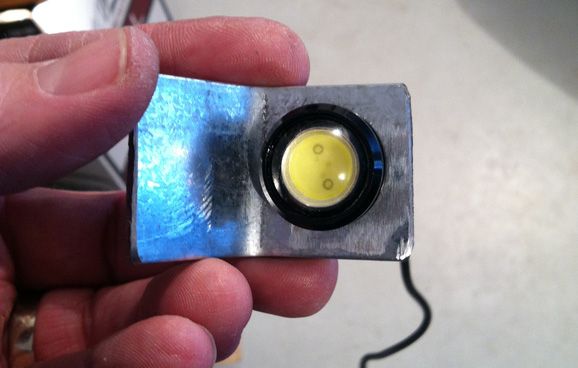
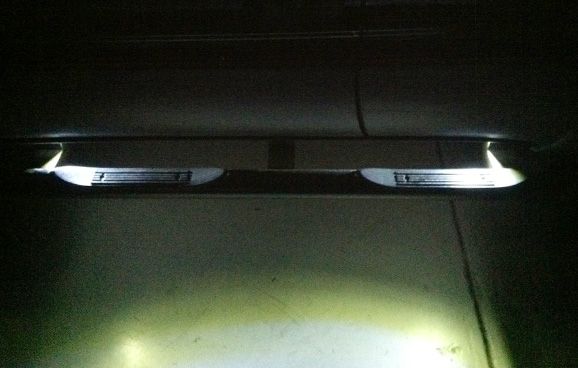
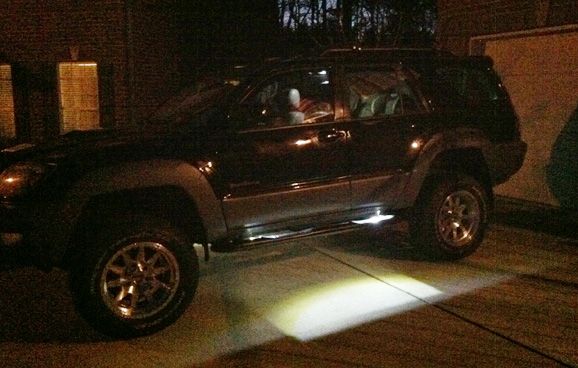
Ever since i removed my lighted running boards and replaced them with the step tubes, I (as well as my wife and kids) have missed having lights on the steps. I was glad to find these Eagle Eye LED lights on ebay, for around $4 a pair shipped. These are 3w lights, which doesn't sound like much but they put out plenty of light. I originally wanted to mount one in the rocker strip, under the doors. I would have liked to have one above each step pad but that panel is right up against the metal of the body. I decided to make some small brackets and mount them to the insides of the step tube mounts. They are far enough up under the body, where you can't see them and just at the right height to cast light on the step pads. I had clipped the wires from my running boards, so all i had to do was tie them into those. They come on when i unlock and open the doors. I am very happy with these as well.

Tiny lights
EE-1_zps132832eb.jpg~original


Brackets made out of galvanized metal strips.
EE-2_zps89ec57f9.jpg~original


EE-3_zps9c95207c.jpg~original


The perfect amount of light
EE-4_zpsdf019449.jpg~original


EE-5_zpscfeca33b.jpg~original


Now i can't wait to work on my other projects.....if it weren't for this stupid work stuff i could do them.

I will be adding some more reverse lighting. I will be mounting my 30" Hanma LED Light bar. I have one more little project that i am working on but don't want to give it away just yet, but yes it involves LED lights....lol
 
I like the upgraded lighting, momo! Those reverse lights look brilliantly bright - even if the picture doesn't do it justice... I like the lighted steps, I wouldn't mind having some light, considering how many dark places I park... It's cool because it's not on all the time (like ricey cars with the neon lights underneath) but on when you need it, them coming on with the unlock thing is awesome!

Nice work!
 
Thanks man. I am more into the stealthy look so I was very pleased with the step lights. You can't see them at all until they come on. The tail lights were kind of an afterthought. I am extremely pleased with those as well. Can't wait to get my 30" light bar mounted behind the lower grill and my extra reverse lights wired up, as well as my secret project....:rofl:
 
are reverse lights 194?

I don't have the package in front of me but I do know they are made for our reverse lights. It was just plug a play. I really wish the pics could show how much brighter they are
 
Last edited:

Members online

Forum statistics

Threads
278,316
Messages
3,554,120
Members
248,016
Latest member
Advally Service

Trending content

Back
Top