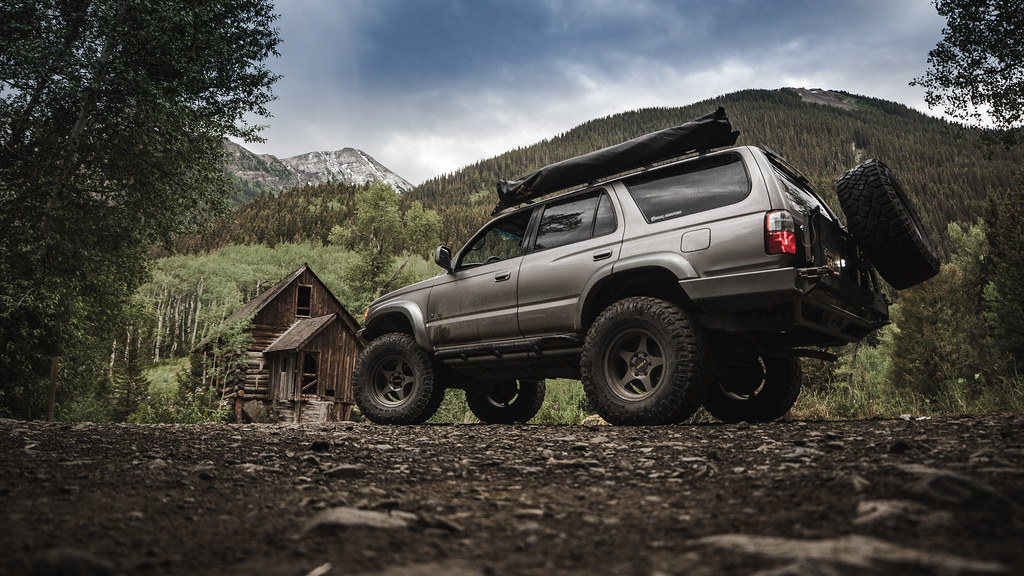
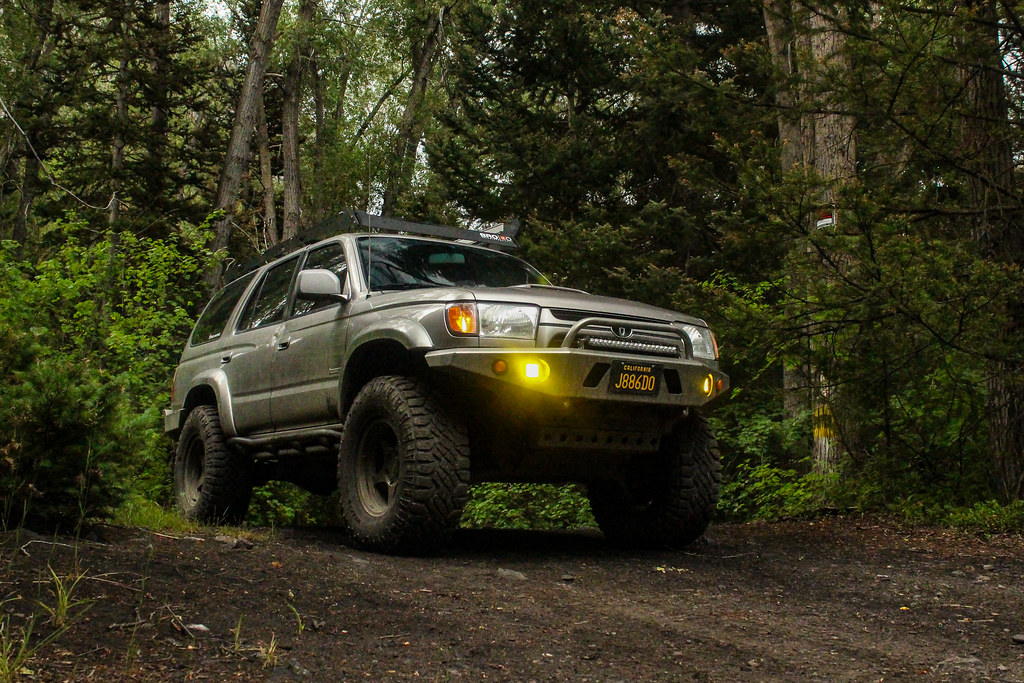
User Tag List

Reply
 
Thread Tools Rating: Thread Rating: 19 votes, 4.79 average. Display Modes
Old 08-05-2017, 07:46 PM #691
Yoter's Avatar
Yoter Yoter is offline
Member
 
Join Date: May 2012
Location: Berkeley, CA
Posts: 822
Yoter will become famous soon enough
Yoter Yoter is offline
Member
Yoter's Avatar
 
Join Date: May 2012
Location: Berkeley, CA
Posts: 822
Yoter will become famous soon enough
Quote:
Originally Posted by theesotericone View Post
You know the old saying about opinions. Here's a few shots of mine. The arms are set to E for 1 degree positive caster. That pushed my tires far enough forward to gain all the clearance I needed for 295/70r17(33.3"). I'm pretty sure you'll clear 35's if you've beat the crap or grinded the pinch welds. So in this *******s opinion thumbs up.. lol
Did the SPC arms put that gouge in your shock tower?
Seeing the cracks on Assburns towers, I would be concerned about that damage, maybe weld it up?
__________________
2000 "The Silver Legacy 2" Highlander Edition, 5speed 4x4
2000 "The Silver Legacy" Highlander Edition, 5speed 4x4 RIP
1996 Stellar Blue 5 Speed Sold
Yoter is offline   Reply With QuoteReply With Quote
Old 08-05-2017, 07:51 PM #692
theesotericone's Avatar
theesotericone theesotericone is offline
Senior Member
 
Join Date: Jul 2016
Location: Bishop, Ca
Posts: 2,332
theesotericone is just really nice theesotericone is just really nice theesotericone is just really nice theesotericone is just really nice
theesotericone theesotericone is offline
Senior Member
theesotericone's Avatar
 
Join Date: Jul 2016
Location: Bishop, Ca
Posts: 2,332
theesotericone is just really nice theesotericone is just really nice theesotericone is just really nice theesotericone is just really nice
Quote:
Originally Posted by Yoter View Post
Did the SPC arms put that gouge in your shock tower?
Seeing the cracks on Assburns towers, I would be concerned about that damage, maybe weld it up?
Yep. Both sides have gouge from contact between the UCA and tower. I'm not worried about it at all. I could easily fix it with a grinder in 5 minutes but I got bigger fish to fry.
__________________
Quote:
Only two things are infinite, the universe and human stupidity, and I'm not sure about the former. --Albert Einstein
theesotericone is offline   Reply With QuoteReply With Quote
Old 08-06-2017, 12:40 PM #693
AssBurns's Avatar
AssBurns AssBurns is offline
Senior Member
 
Join Date: Jan 2015
Location: Yucaipa, CA
Posts: 1,004
Real Name: Steven
AssBurns will become famous soon enough
AssBurns AssBurns is offline
Senior Member
AssBurns's Avatar
 
Join Date: Jan 2015
Location: Yucaipa, CA
Posts: 1,004
Real Name: Steven
AssBurns will become famous soon enough
Quote:
Originally Posted by Yoter View Post
Did the SPC arms put that gouge in your shock tower?

Seeing the cracks on Assburns towers, I would be concerned about that damage, maybe weld it up?


The cracks I had on my shock towers were well before going to SPC’s. But my SPC’s made a gouge in the towers as well. If your alignment is correct, I don’t think they hit the towers. Could be wrong though.


Sent from my iPhone using Tapatalk
__________________
The BeerRunner - http://www.toyota-4runner.org/3rd-ge...ld-thread.html
AssBurns is offline   Reply With QuoteReply With Quote
Old 08-06-2017, 01:13 PM #694
Dtreeps Dtreeps is offline
Junior Member
 
Join Date: May 2016
Location: Royal Oak, MI
Posts: 4
Dtreeps is on a distinguished road
Dtreeps Dtreeps is offline
Junior Member
 
Join Date: May 2016
Location: Royal Oak, MI
Posts: 4
Dtreeps is on a distinguished road
Thanks for the inspiration! I am hoping to follow some of your lead but keep it a bit more road oriented.
__________________
1999 Limited Radiator Bypass/ Royal Purple in Differentials / Weathertech Liners/ Tundra 231 Brakes / Gibson Stainless exhaust
FUTURE MODS: new radiator, off road bumper, rock sliders, deck plate mod,
Dtreeps is offline   Reply With QuoteReply With Quote
Old 08-06-2017, 01:15 PM #695
theesotericone's Avatar
theesotericone theesotericone is offline
Senior Member
 
Join Date: Jul 2016
Location: Bishop, Ca
Posts: 2,332
theesotericone is just really nice theesotericone is just really nice theesotericone is just really nice theesotericone is just really nice
theesotericone theesotericone is offline
Senior Member
theesotericone's Avatar
 
Join Date: Jul 2016
Location: Bishop, Ca
Posts: 2,332
theesotericone is just really nice theesotericone is just really nice theesotericone is just really nice theesotericone is just really nice
Quote:
Originally Posted by AssBurns View Post
The cracks I had on my shock towers were well before going to SPC’s. But my SPC’s made a gouge in the towers as well. If your alignment is correct, I don’t think they hit the towers. Could be wrong though.
I don't think it's an alignment thing. I think it has more to do with how you drive. I'm pretty sure we both drive faster then the average joe. Newtons Second Law is f(orce)=m(ass) x a(cceleration) us fast drivers put more force in the system. His Third Law is every action has an equal and opposite reaction. Those gouges are the reaction. Me and you are proving physics works. lol
__________________
Quote:
Only two things are infinite, the universe and human stupidity, and I'm not sure about the former. --Albert Einstein
theesotericone is offline   Reply With QuoteReply With Quote
Old 08-06-2017, 08:54 PM #696
NateMob's Avatar
NateMob NateMob is offline
Senior Member
 
Join Date: Nov 2012
Location: The Springs
Posts: 1,746
Real Name: Nathan
NateMob is on a distinguished road
NateMob NateMob is offline
Senior Member
NateMob's Avatar
 
Join Date: Nov 2012
Location: The Springs
Posts: 1,746
Real Name: Nathan
NateMob is on a distinguished road
Quote:
Originally Posted by 4-Ripcord View Post
This outta hold you all over for a couple of days at least..


The one thing that always bugged me about the CBI bumper, was the swingout pin. Not necessarily the pin itself, but the ramp it was supposed to ride up on. After just a few months of owning the bumper, the pin had created a small divot in this ramp. When opening the swingout from then on, the pin would just stop when it hit the divot and would have to be manually lifted to continue opening the swingout. It drove me crazy!

I saw that on newer CBI bumpers, they have fixed this design with just a flat shelf instead of the ramp so this was my plan.
Quote:
Originally Posted by nihkon View Post
I dig it dude!

I've had the same annoyance with mine from within the 1st week of owning it.
Maybe I'll have to talk you into cutting an extra one of those flat ramps! haha
Quote:
Originally Posted by smallfry View Post
That's a good fix.

I always hated that little ramp on their bumpers.
For those that dont want to grind off the old ramp and burn in a new one, my fix for this on my 3rd gen was to merely grind the lock pin at an angle so it matched the ramp relatively close. Didn't mess with the paint/powdercoat and was a 5 minute job. Simple enough to look at the pin's position before opening the gate also to make sure it hadn't rotated. Worked like a charm.

Keep it up Jim!

Nathan
__________________
Sold the 3rd Gen, someone totaled my 4th Gen. Sold the LT'd Tacoma. Finally got my FZJ80!
NateMob is offline   Reply With QuoteReply With Quote
Old 08-09-2017, 11:32 AM #697
aidanyota aidanyota is offline
Member
 
Join Date: Jul 2017
Location: Florida
Posts: 43
Real Name: Aidan
aidanyota is on a distinguished road
aidanyota aidanyota is offline
Member
 
Join Date: Jul 2017
Location: Florida
Posts: 43
Real Name: Aidan
aidanyota is on a distinguished road
Is it possible to remove the fender flares on an 02 without it looking terrible? Love the build by the way!
aidanyota is offline   Reply With QuoteReply With Quote
Old 08-09-2017, 11:37 AM #698
Atomic6's Avatar
Atomic6 Atomic6 is offline
Member
 
Join Date: Oct 2014
Location: Downers Grove, IL
Posts: 235
Real Name: Tim
Atomic6 will become famous soon enough
Atomic6 Atomic6 is offline
Member
Atomic6's Avatar
 
Join Date: Oct 2014
Location: Downers Grove, IL
Posts: 235
Real Name: Tim
Atomic6 will become famous soon enough
Quote:
Originally Posted by aidanyota View Post
Is it possible to remove the fender flares on an 02 without it looking terrible? Love the build by the way!
You'll have the multiple mounting holes in your fenders/body like the pic below. Since the Sport doesn't have the body cladding, it won't have the holes in the doors though.
__________________
Build Thread
KE0MYV
1998 4Runner SR5 4x4
Atomic6 is offline   Reply With QuoteReply With Quote
Old 08-16-2017, 02:40 PM #699
4-Ripcord's Avatar
4-Ripcord 4-Ripcord is offline
Elite Member
 
Join Date: Sep 2010
Location: Colorado
Age: 33
Posts: 5,317
Real Name: Jim
4-Ripcord will become famous soon enough 4-Ripcord will become famous soon enough
4-Ripcord 4-Ripcord is offline
Elite Member
4-Ripcord's Avatar
 
Join Date: Sep 2010
Location: Colorado
Age: 33
Posts: 5,317
Real Name: Jim
4-Ripcord will become famous soon enough 4-Ripcord will become famous soon enough
Looks like I will finally be able to post some updates soon, I have moved to a new place with a garage so I can finish the rear end.
__________________
'13 Tacoma TRD-OR: The Spruce Goose. BUILD
'02 Sport Ed.- V2.0: The better build. Totaled BUILD 2.0
'02 Sport Ed.- V1.0: The college build Sold BUILD
4-Ripcord is offline   Reply With QuoteReply With Quote
Old 08-24-2017, 04:30 PM #700
4-Ripcord's Avatar
4-Ripcord 4-Ripcord is offline
Elite Member
 
Join Date: Sep 2010
Location: Colorado
Age: 33
Posts: 5,317
Real Name: Jim
4-Ripcord will become famous soon enough 4-Ripcord will become famous soon enough
4-Ripcord 4-Ripcord is offline
Elite Member
4-Ripcord's Avatar
 
Join Date: Sep 2010
Location: Colorado
Age: 33
Posts: 5,317
Real Name: Jim
4-Ripcord will become famous soon enough 4-Ripcord will become famous soon enough
|July 15, 2017|

The final item before the big trip was the roof rack, the highly anticipated Rocky Mountain Racks full length aluminum rack. I also got a 270° awning.

What/Why:
I needed a rack to mount the awning and antenna mount to. I partnered up with the fine people over at Rocky Mountain Racks to get this excellent full length aluminum rack. The main difference between this style of rack and the traditional Gobi-style is that this rack uses slotted crossbars that allow you to slide carriage bolts in and mount anything you want anywhere you want.

Parts/Cost:
$800 – Rocky Mountain racks full length aluminum rack (https://www.rockymtnracks.com/)
$350 – Overland Pros Wraptor 2000 foxwing awning (Wraptor 2000 - Overland Pros)
$175 – Tred 1100 traction boards

Tools:
-7/16” socket & wrench
-10mm socket & wrench
-Impact driver or Drill with socket adaptor

Time:
Installing the rack takes 1-2 hours.

Procedure:
You will want 2 people for this install, it is a full length rack after all.
@Flemster and @RockyMtnPhoto helped me with this install. The rack will come with instructions; but to summarize, the easiest way to install the rack is to start with the main crossbars and mount feet then get the side pieces on.


For mounting the legs, this rack re-uses the threaded rail sliders from the stock crossbars. Be sure to keep the crossbar even in the middle of the vehicle. The supplied mount leg fasteners are M6 and use a 10mm socket.

20170715_161723


Once your 2 main crossbar are on, get your side pieces on. The crossbars are pre-threaded with 1/4-20 thread and the supplied fasteners will use a 7/16” socket

20170715_162222
Photo by @Flemster


Powertools make the job MUCH faster..

IMG_2945


Everything on these racks mounts with carriage bolts, they just slide right into the side of the slotted aluminum crossbars. The possibilities are endless!

IMG_2946

IMG_2947


I mentioned that I also got an awning. The awning mounts using these L-brackets. The carriage bolts make it super easy! I’ll have more pics of the awning later..

530A9999
Photo by @Flemster

IMG_3040


I also needed to re-mount my motorized CB antenna mount, here is the mount with the brackets for clamping on round crossbars:

IMG_2944


Mounted:

IMG_2957


I also added a small bracket to hold the antenna when it was down. I used the plasma cutter at work to burn this out real fast.

20170811_135051


Cleaned up and bent:

20170811_135843


Table-top press brake FTW!

20170818_081908


Bracket painted and mounted:

IMG_2951


Here it is in action, holding the antenna when it is in the down position. Without this, the antenna would whip all over the place and make one hell of a racket.

IMG_2952

IMG_2954


IMG_3038


The following trip report is with an early prototype fairing, the final version is the one pictured above.
__________________
'13 Tacoma TRD-OR: The Spruce Goose. BUILD
'02 Sport Ed.- V2.0: The better build. Totaled BUILD 2.0
'02 Sport Ed.- V1.0: The college build Sold BUILD

Last edited by 4-Ripcord; 09-10-2017 at 08:00 PM.
4-Ripcord is offline   Reply With QuoteReply With Quote
Old 08-24-2017, 04:31 PM #701
4-Ripcord's Avatar
4-Ripcord 4-Ripcord is offline
Elite Member
 
Join Date: Sep 2010
Location: Colorado
Age: 33
Posts: 5,317
Real Name: Jim
4-Ripcord will become famous soon enough 4-Ripcord will become famous soon enough
4-Ripcord 4-Ripcord is offline
Elite Member
4-Ripcord's Avatar
 
Join Date: Sep 2010
Location: Colorado
Age: 33
Posts: 5,317
Real Name: Jim
4-Ripcord will become famous soon enough 4-Ripcord will become famous soon enough
|July 15-22, 2017|

Overlanding to FJ Summit 2017

A trip that had been in the works for months.. we wanted to start in Denver and overland our way to the FJ summit in Ouray over the course of a week. Total it would be about 500 miles of off road travel.

The trails we traveled are as follows in order:
Georgia pass
Mosquito pass (still blocked by snow)
Weston Pass
Hagerman Pass
Devil’s Punchbowl/schofield pass (still blocked by snow)
Engineer pass
mineral creek
Ophir pass
Black Bear pass
Imogene pass.

30-07-17_10-36-33


Day 1:
The group all met up at 8am in conifer outside of Denver. The group consisted of @Flemster , @RockyMtnPhoto , a buddy with a red long travel first gen and myself. The first day was the longest. Started on hwy 285 and ran up Georgia pass to start things off. Crossed the continental divide for the first time of many on this trip. After Georgia pass, we were in the town of Breckenridge and we drove south a bit to Alma to attempt mosquito pass. I say attempt because we had heard this pass was still snowed in. Once we go up near the mill on the trail we confirmed this rumor and backtracked to the start of the trail. To finish off the day we headed to our alternate pass, Weston Pass, and camped there.


EPISODE 1 of the video


IMG_4419


530A0040
Photo by @Flemster


530A0055
Photo by @Flemster


Also passed through the town of Fairplay, also known as the town of South Park!

530A0303
Photo by @Flemster


20645341_1425958464118271_574808824167244266_o
Photo by @RockyMtnPhoto


530A0337
Photo by @Flemster


The awning proved to be VERY useful as it rained almost every day on this trip

530A0377
Photo by @Flemster


I was the only person without a roof top tent, so instead I used this pop up tent from Front Runner.

530A0390
Photo by @Flemster


Camp night @1

530A0422
Photo by @Flemster
__________________
'13 Tacoma TRD-OR: The Spruce Goose. BUILD
'02 Sport Ed.- V2.0: The better build. Totaled BUILD 2.0
'02 Sport Ed.- V1.0: The college build Sold BUILD

Last edited by 4-Ripcord; 04-18-2018 at 02:21 PM.
4-Ripcord is offline   Reply With QuoteReply With Quote
Old 08-24-2017, 04:31 PM #702
4-Ripcord's Avatar
4-Ripcord 4-Ripcord is offline
Elite Member
 
Join Date: Sep 2010
Location: Colorado
Age: 33
Posts: 5,317
Real Name: Jim
4-Ripcord will become famous soon enough 4-Ripcord will become famous soon enough
4-Ripcord 4-Ripcord is offline
Elite Member
4-Ripcord's Avatar
 
Join Date: Sep 2010
Location: Colorado
Age: 33
Posts: 5,317
Real Name: Jim
4-Ripcord will become famous soon enough 4-Ripcord will become famous soon enough
Day 2:
We got a late start on Monday, making a killer breakfast. The plan for the day was very full. We did not have any time to spare for slowdowns. Upon descending the pass, drew (in the first gen) noticed he was losing brake pressure. We inspected and found a cracked brake line due to stupid people routing his hard line all the way up to his control arm… We limped him to the end of the trail to the road that leads to Leadville where Alex and I headed into town to get new brake lines while drew and will took the tire off in preparation for our return.

Leadville is a small town, and is the highest us city at 10,200ft, but luckily they still had a chain auto parts store. We were able to replace the hardline, but the whole situation had put us severely behind schedule. The good thing about a trip like is the schedule is very loose to begin with. With the remaining time we had in the day, we traveled west out of Leadville across the turquoise reservoir and up to Hagerman pass.
When we neared the summit, the views were so spectacular we just had to stop and enjoy them. We decided to have lunch also as we cowered under a rainstorm that was become the normal weather for this trip. Before we left, a passerby told us of a double rainbow that was visible from a nearby hilltop. Many group members ran to see it before we set off to descend the pass. As dusk approached we still needed to find a campsite, we descended deeper into the valley to find camp.

20170716_142841

530A0602
Photo by @Flemster


530A0728
Photo by @Flemster


530A0814
Photo by @Flemster


530A0826
Photo by @Flemster

IMG_4665

20617136_1425961030784681_7858456406494868711_o


Day 3:
We got an early start on, we needed to catch up! The plan was a bit different today though, we were going to head for the devil’s punchbowl cliff jumps outside of aspen Colorado. The daredevils among us headed straight for the high jump. We expected the water to be very cold, but I don’t think any of us were prepared for how strong the current of such a small body of water could be! After conquering the fear of the jump you had to immediately shift your focus to finding your way to the exit or risk being washed down a rocky waterslide. We did see one other poor guy go down it, he did not look like he enjoyed it. Once we all got our showers, which would turn out to be the last one we would get all week, we headed back out on the road we drove in on.

Our next destination was marble Colorado and the famous crystal mill. The trail leading up to the crystal mill was called devils punchbowl, not to be confused with the cliff jumps we had just come from bearing the same name. The ascent up the trail was one of the most spectacular drives of the trip. The way the rain fell through the sunbeams literally looked like it was raining glitter. We got to see the aftermath of an avalanche before we finally arrived at the mill itself. It was definitely worth the trip to it. The whole area was breathtaking. The student architects among us could not stop taking photos. Our plan from here was to assess the condition of the pass and hopefully make it across to paradise valley to make camp near the ski town crested butte. However some other enthusiasts we met on the trail informed us the pass was still unpassable. We expected this though, and our backup plan was to take some dirt roads around the long way to crested butte. But first we had to stop at the best bbq place any of us had been to. The journey to paradise valley through the dirt roads took us deep into the night, we arrived in camp after midnight. Mostly everyone promptly setup tents and went to sleep.


In Basalt

530A0946
Photo by @Flemster


Will’s truck had been rear ended the night before our big trip. The truck was definitely going to be totaled, but that didn’t stop us from sending Milton off without a bang!

530A0952
Photo by @Flemster


The cliff Jumps

530A0991
Photo by @Flemster


20170718_130749


Somewhere on the road to Marble, CO
530A1020
Photo by @Flemster


Heading up

530A1513
Photo by @Flemster


At the Famous Crystal Mill

20170718_181249

530A1426
Photo by @Flemster


IMG_4864


From here on out through the evening, we were driving at night taking the long way around to crested butte.
__________________
'13 Tacoma TRD-OR: The Spruce Goose. BUILD
'02 Sport Ed.- V2.0: The better build. Totaled BUILD 2.0
'02 Sport Ed.- V1.0: The college build Sold BUILD
4-Ripcord is offline   Reply With QuoteReply With Quote
Old 08-24-2017, 04:32 PM #703
4-Ripcord's Avatar
4-Ripcord 4-Ripcord is offline
Elite Member
 
Join Date: Sep 2010
Location: Colorado
Age: 33
Posts: 5,317
Real Name: Jim
4-Ripcord will become famous soon enough 4-Ripcord will become famous soon enough
4-Ripcord 4-Ripcord is offline
Elite Member
4-Ripcord's Avatar
 
Join Date: Sep 2010
Location: Colorado
Age: 33
Posts: 5,317
Real Name: Jim
4-Ripcord will become famous soon enough 4-Ripcord will become famous soon enough
Day 4:
We awoke to a breathtakingly beautiful valley. While we were tearing down and preparing to leave, a stunt plane came ripping through the valley. It sounded like a gang of Harleys. We were not fast enough to get any photos or videos of it, so you will just have to imagine it. The plan for the day was to travel into crested butte for a little then head south to lake city and run engineer pass.


20170719_091732

20170719_131811


Not a bad place to live at all..

20170719_134655


Engineer pass was without a doubt the most scenic part of the trip.

20170719_180627

20170719_181121

20170719_181134

20543951_1425961284117989_5487521220538803056_o
Photo by @RockyMtnPhoto


Some remaining snow on the way up

20170719-IMG_5057

20170719-IMG_5049

20170719_185841

20170719-IMG_5063

20170719-IMG_5073

20170719-IMG_5148


The group at the top of Engineer pass:

20170719-IMG_5083


Late night camping spot hunting on Mineral Creek trail

530A2367
Photo by @Flemster
__________________
'13 Tacoma TRD-OR: The Spruce Goose. BUILD
'02 Sport Ed.- V2.0: The better build. Totaled BUILD 2.0
'02 Sport Ed.- V1.0: The college build Sold BUILD
4-Ripcord is offline   Reply With QuoteReply With Quote
Old 08-24-2017, 04:32 PM #704
4-Ripcord's Avatar
4-Ripcord 4-Ripcord is offline
Elite Member
 
Join Date: Sep 2010
Location: Colorado
Age: 33
Posts: 5,317
Real Name: Jim
4-Ripcord will become famous soon enough 4-Ripcord will become famous soon enough
4-Ripcord 4-Ripcord is offline
Elite Member
4-Ripcord's Avatar
 
Join Date: Sep 2010
Location: Colorado
Age: 33
Posts: 5,317
Real Name: Jim
4-Ripcord will become famous soon enough 4-Ripcord will become famous soon enough
Day 5:

Day 5 was pretty relaxing. The camp spot we had at the top of the mineral creek trail was spectacular. The guided trail runs for the FJ summit event were in full swing so we saw plenty of convoys go by too. We went south through the animas forks ghost town and into the town of Silverton. The only trail we really ran was Ophir pass before camping near Alta lakes.


Waking up at camp on mineral creek:

20170720_081726

20170720_081702


Ophir pass

20170720_153755


Day 6:

Day 6 we ran Ophir pass backwards to get to the top of Black bear pass then ran that.

20170721_103828

20170721_114808

20170721_124323

530A2847
Photo by @Flemster


It had been raining off and on all day. Before we descended, a group of bikes had to descend the “shelves”. Already a very exposed and steep section of the trail, only made harder now that the shale rock was slippery. The bikers hand walked each bike down.


20170721-IMG_5376

20170721_142316

20170721-IMG_5397

20170721_143035


Day 7:

For the final trail day of the event, we ran Imogene pass. After that was done we hung around a bit in Ouray to check out the event itself.

530A3308
Photo by @Flemster


20170721-IMG_5501


You can see the Black Bear pass switchbacks from Imogene

20170721-IMG_5504


Heading up to the top

20170722_130406


20170722-IMG_5561

530A3681
Photo by @Flemster


530A3708
Photo by @Flemster

20170722-IMG_5628


20545490_1425960767451374_3106646637845398373_o
Photo by @RockyMtnPhoto
__________________
'13 Tacoma TRD-OR: The Spruce Goose. BUILD
'02 Sport Ed.- V2.0: The better build. Totaled BUILD 2.0
'02 Sport Ed.- V1.0: The college build Sold BUILD

Last edited by 4-Ripcord; 04-11-2018 at 11:42 AM.
4-Ripcord is offline   Reply With QuoteReply With Quote
Old 08-24-2017, 04:34 PM #705
4-Ripcord's Avatar
4-Ripcord 4-Ripcord is offline
Elite Member
 
Join Date: Sep 2010
Location: Colorado
Age: 33
Posts: 5,317
Real Name: Jim
4-Ripcord will become famous soon enough 4-Ripcord will become famous soon enough
4-Ripcord 4-Ripcord is offline
Elite Member
4-Ripcord's Avatar
 
Join Date: Sep 2010
Location: Colorado
Age: 33
Posts: 5,317
Real Name: Jim
4-Ripcord will become famous soon enough 4-Ripcord will become famous soon enough
|August 19, 2017|

It was time to swap out the ICON suspension for some KING shocks, perks of the job and all

What/Why:
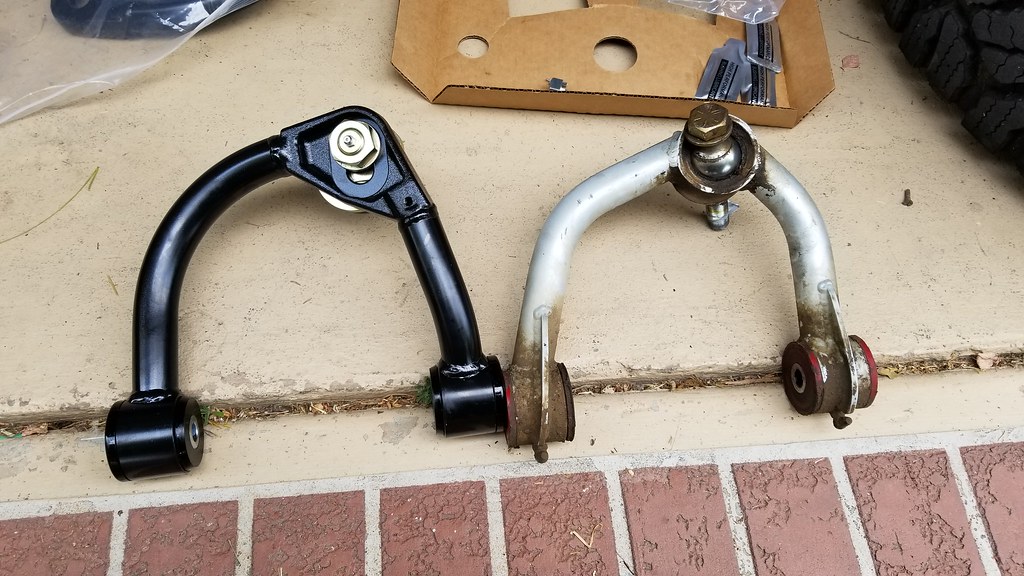
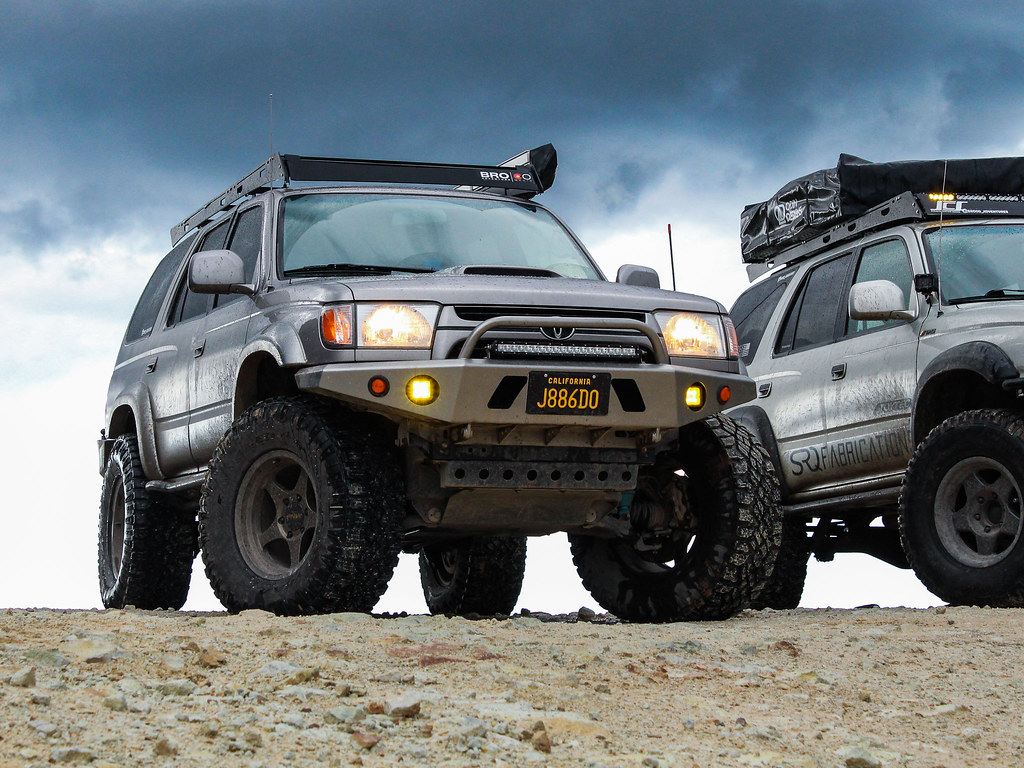
The main reason for this swap was that I wanted to get 12” travel shocks in the back, which involved custom brackets on the frame and on the axle housing. I got a clean axle housing to replace my rusty one. I have mentioned in the past how I was never satisfied with how I mounted the 10” ICONS. I also swapped in some SPC control arms in place of the all pro uniballs, the reason for this was that the uniball was starting to squeak and I didn’t want to deal with it. I also wanted some more caster adjustability.

Parts/Cost:
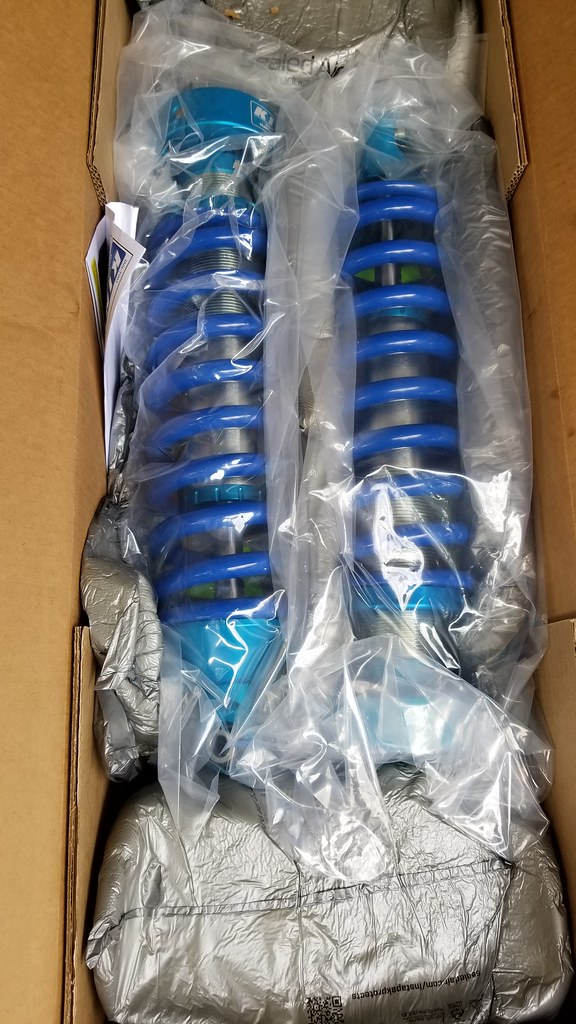
$1250 – King 2.5 coilovers (extended travel)
$1000 – (2x) King 2.0 12” shocks w/remote resi, compression adj, finned resi
$400 – SPC upper control arms
$100 – Used axle housing
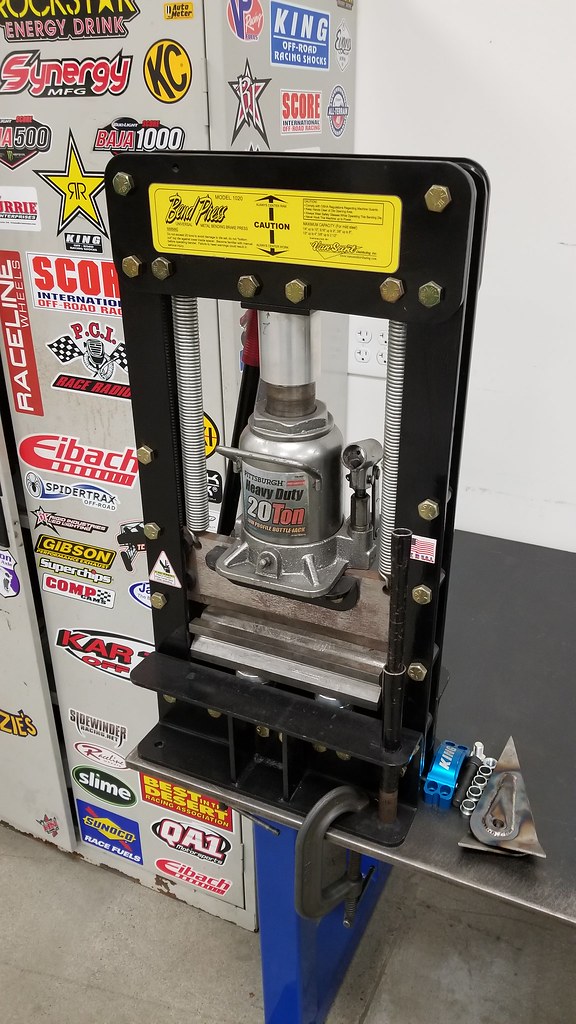
Tools:
Basically all the tools..

Time:
The front was 5-ish hours because I ran into some slowdowns getting the all pro arms off. The rear was a lot of custom time over the course of a few weeks…

Procedure:

Lets start with the front..

SPC compared to the old All Pro arms..

20170709_125814


Fancy new parts:

20170709_131129


All in, sorry I didn’t take a whole lot of progress pics but we have all seen my truck taken apart enough

20170709_150004


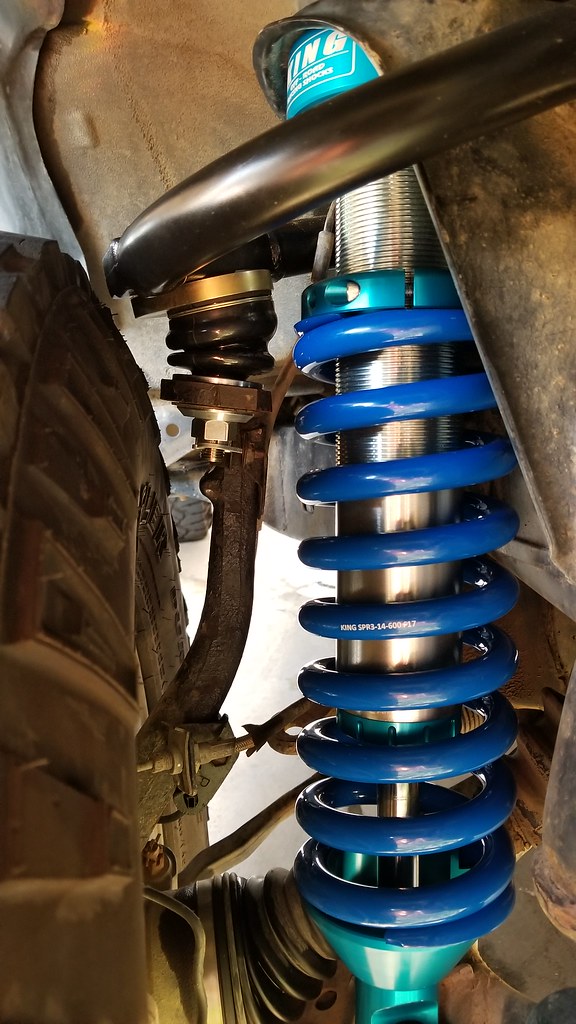
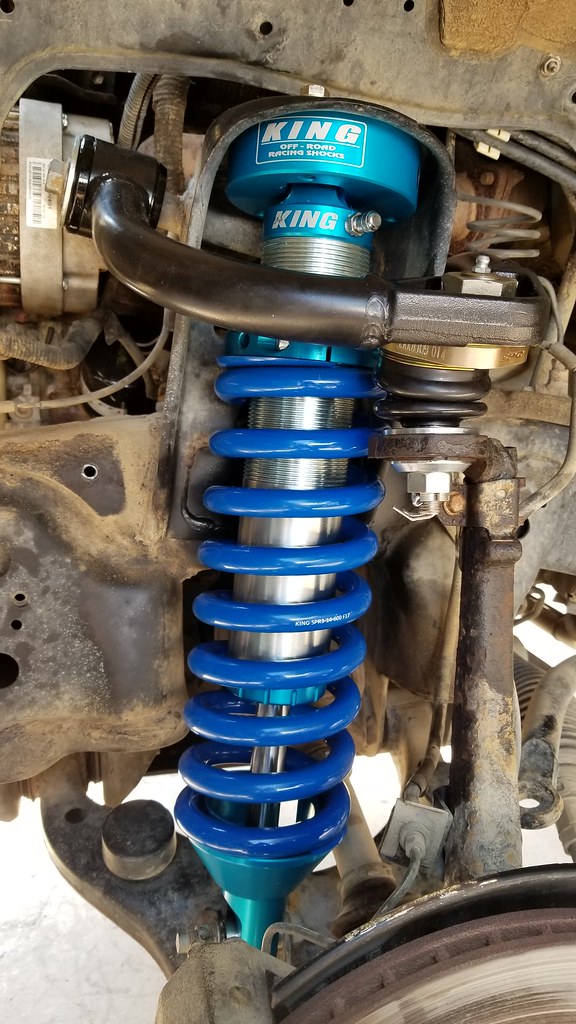
*NOTE: the coilovers are adjusted WAY too tall in this pic. I reduced the preload by a lot after this was taken*

20170709_182321


I set the SPC to the E setting. This brought the front axle forward from the neutral setting, which should help with the tire rubbing near the pinch weld.

UCA


================================================== ========================

Now on to the rear…


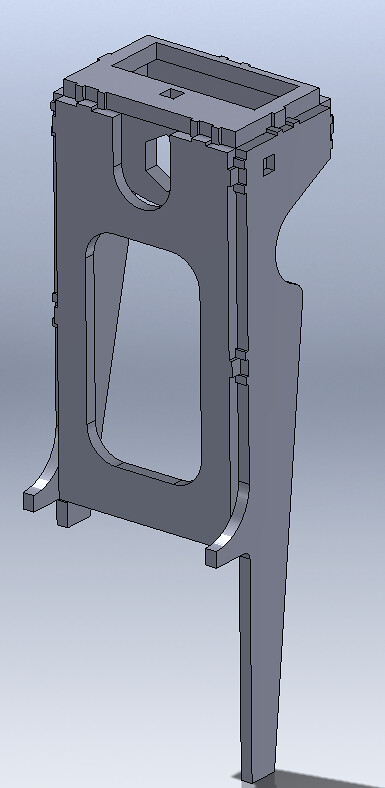
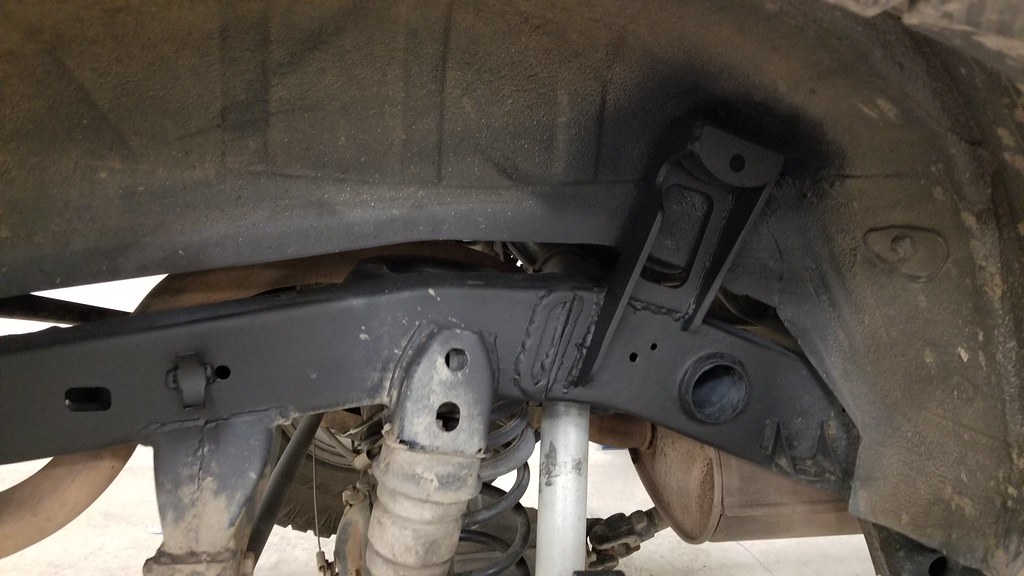
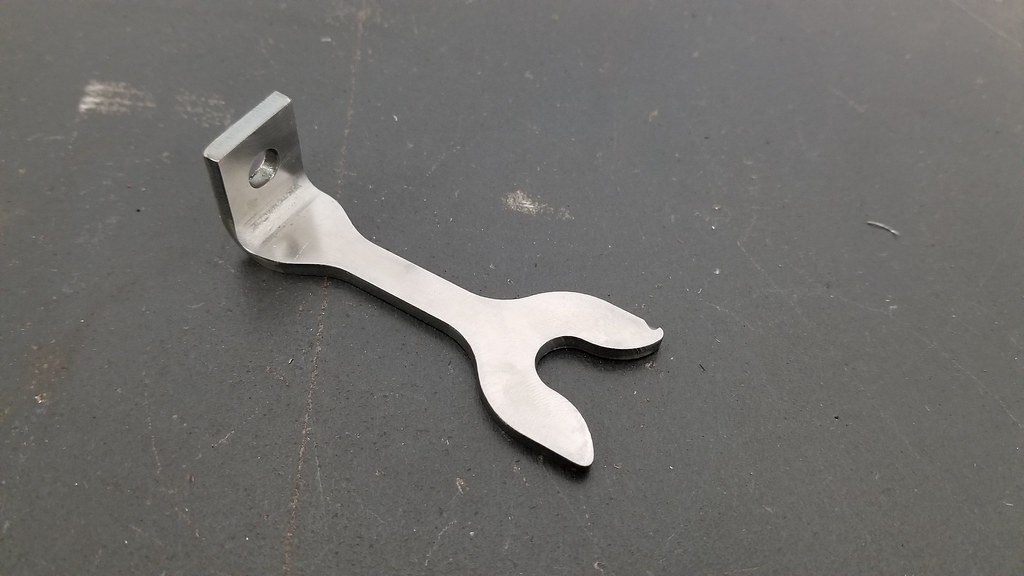
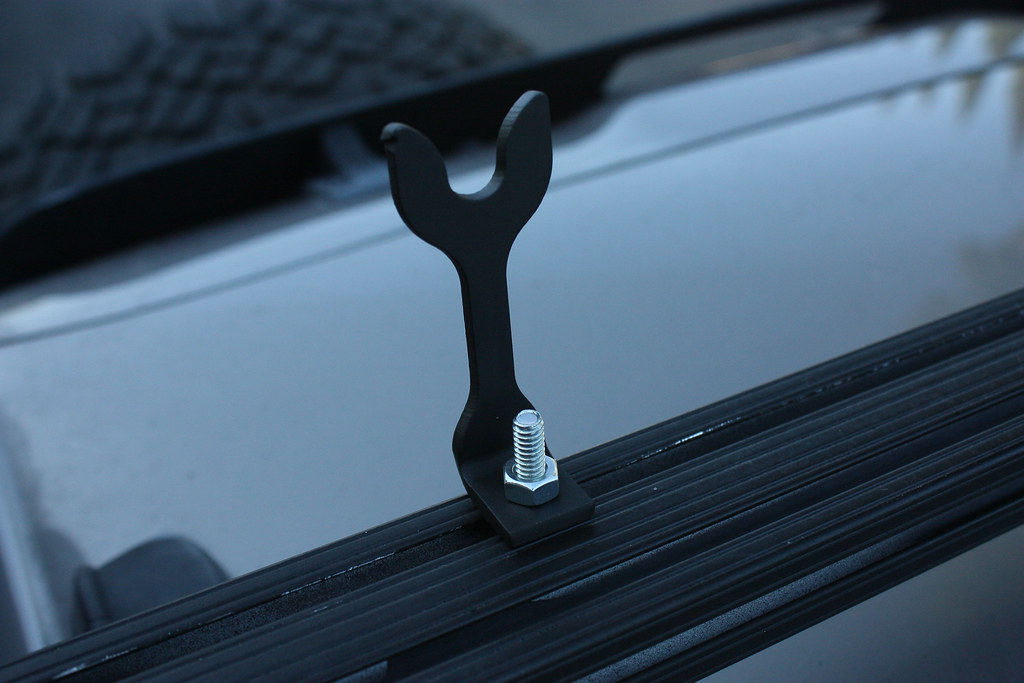
This was my design for the rear upper shock mounts.

image004

image006


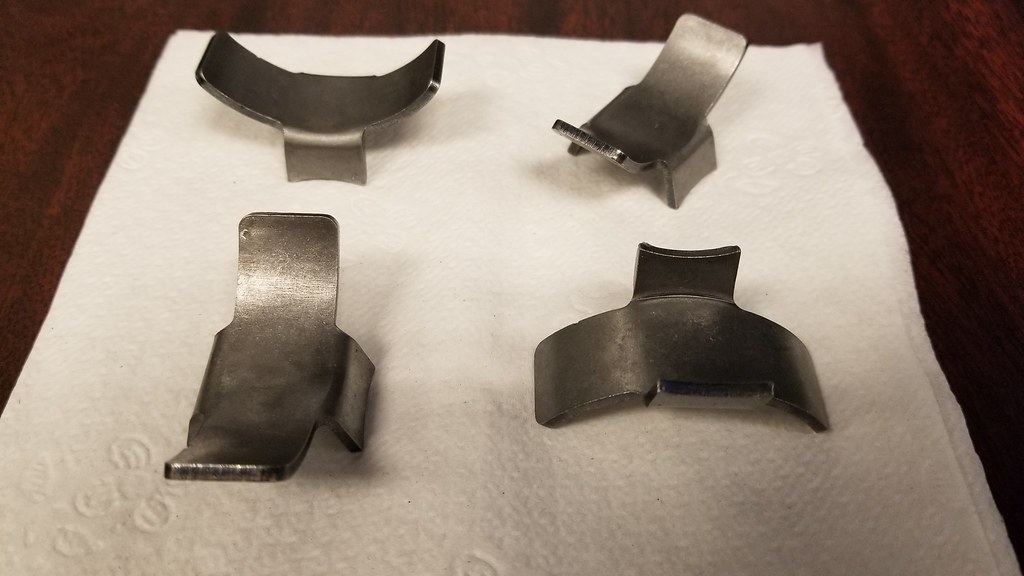
All the pieces cut out:

20170707_132548


Starting with the mounting plates

20170712_162630


Didn’t take any pics between that and the fully welded units..

20170712_165043


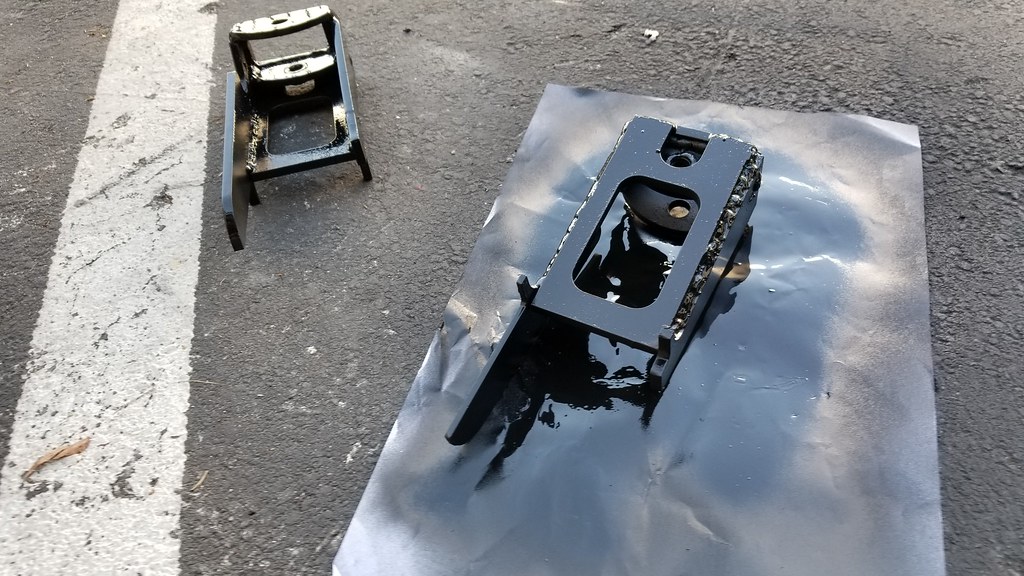
Painted the back sides BEFORE welding them on, there’s no way to get to it after..

20170712_170907


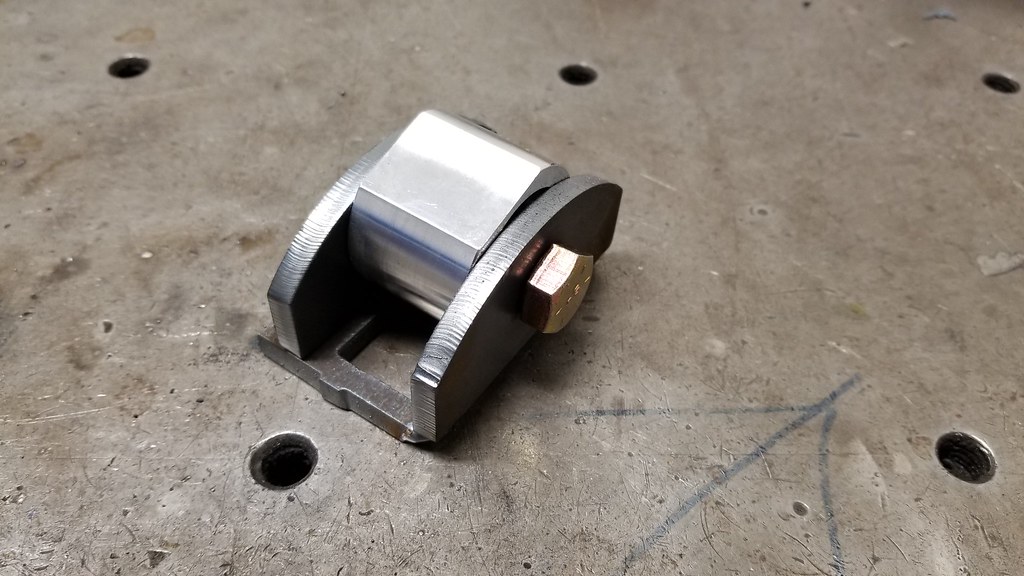
Picked up a few reservoir saddles..

20170713_114358


Here is the new rear axle I mentioned. It will be so nice to get rid of my rusty one!!!

20170604_2003021_zps4kcf1hab


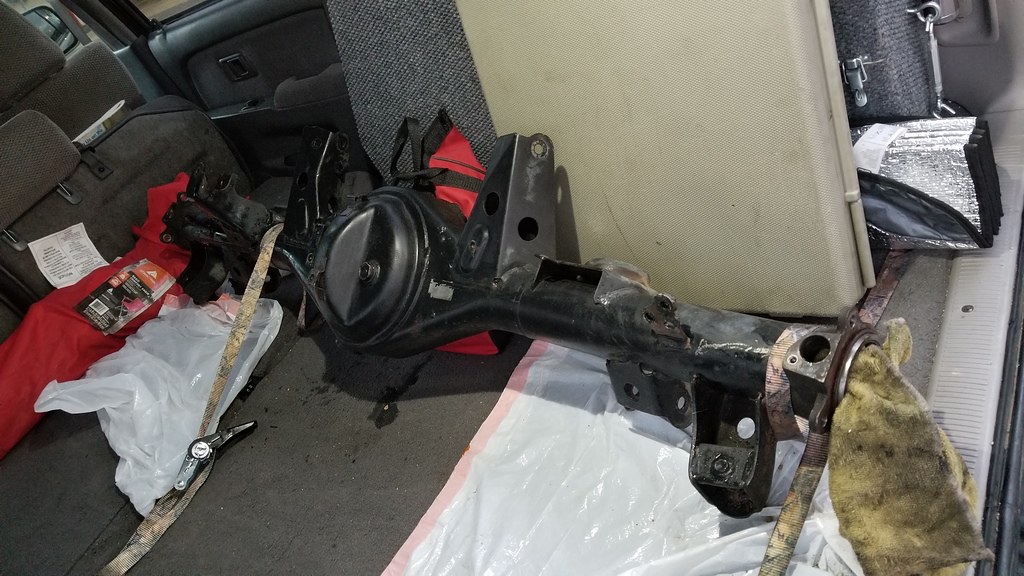
Stock shock mounts cut off

20170707_130011


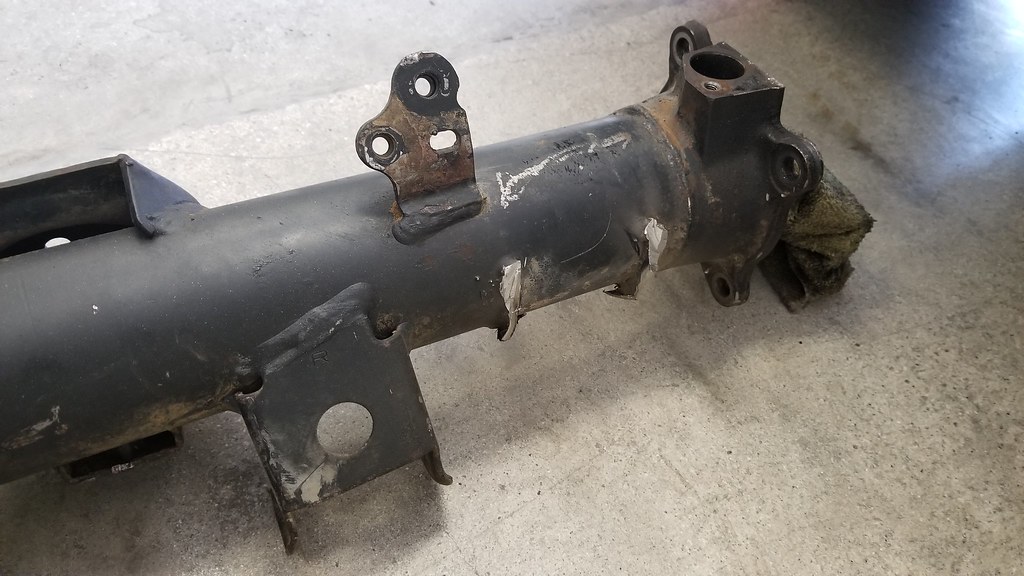
For the Axle shock mounts you need to cut off the factory lower shock mounts. To position the new lower mounts, I used the published lengths of King 2.0 12” shocks: 19.585” compressed and 31.585” extended (bolt center to bolt center).

Now measure from the upper mount 24.585” with the axle at ride height position. This will be the length of the shock at ride height, 5” of uptravel and 7” of downtravel.

20170808_123233


Swapped the axle seals for new ones

20170810_125243


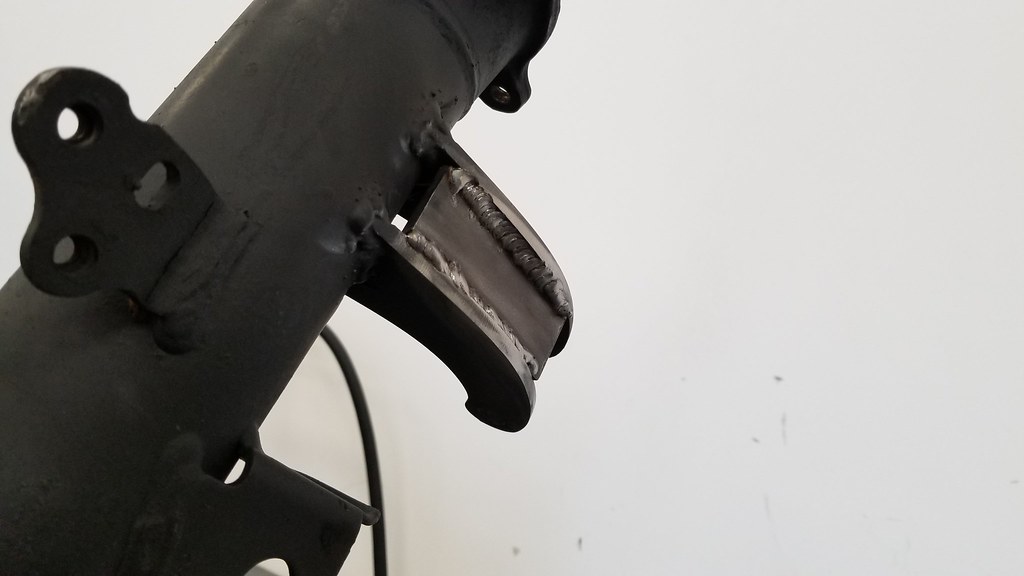
Cutting the old upper mounts off

20170713_162852


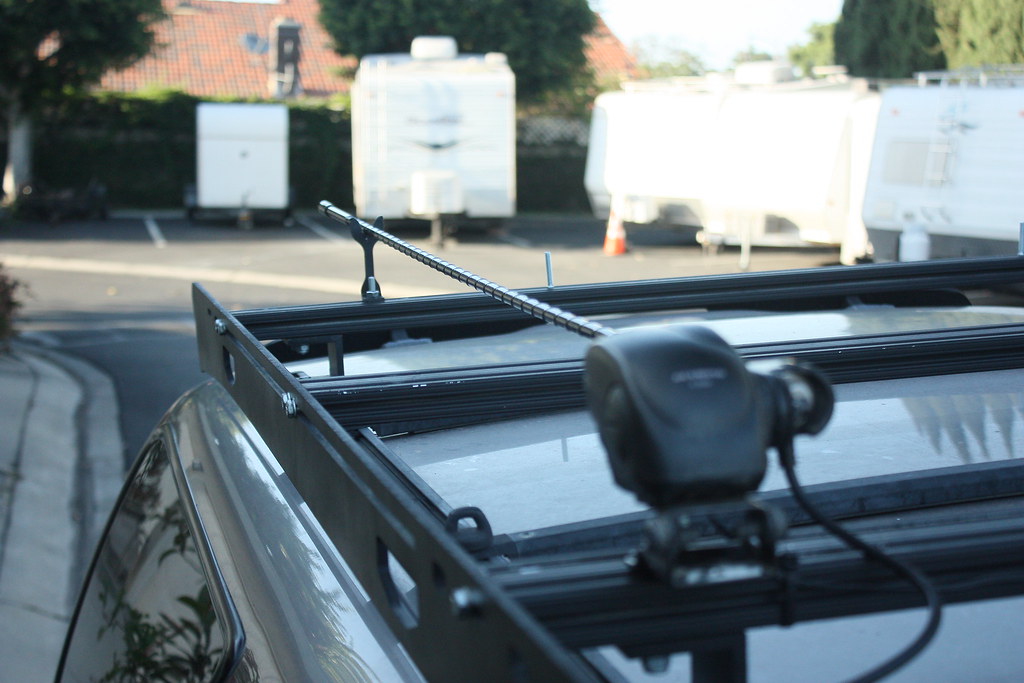
Welded on new ones and the reservoir saddles:
I did have to pound the wheel well to make some clearance for the mount, but this isn’t necessary. I could have just moved both mounts down a bit.

20170807_173730
__________________
'13 Tacoma TRD-OR: The Spruce Goose. BUILD
'02 Sport Ed.- V2.0: The better build. Totaled BUILD 2.0
'02 Sport Ed.- V1.0: The college build Sold BUILD

Last edited by 4-Ripcord; 12-03-2018 at 04:58 PM.
4-Ripcord is offline   Reply With QuoteReply With Quote
Reply

Thread Tools
Display Modes Rate This Thread
Rate This Thread:

Posting Rules
You may not post new threads
You may not post replies
You may not post attachments
You may not edit your posts

BB code is On
Smilies are On
[IMG] code is On
HTML code is On

Forum Jump

Similar Threads
Thread Thread Starter Forum Replies Last Post
Ripcord's 2002 4Runner Sport Ed. 4-Ripcord 3rd gen T4Rs 1292 08-19-2018 08:26 PM
2002 SR5 Sport: Standard Bucket or Sport Bucket Seats? swampy_swimmer 3rd gen T4Rs 15 12-12-2011 05:20 PM
Looking at an 2002 Sport 4wd rrflyer 3rd gen T4Rs 14 01-23-2011 02:40 PM
New To Me: 2002 Sport Anti-Everything 3rd gen T4Rs 9 05-25-2005 09:37 PM

Powered by vBadvanced CMPS v3.2.2

All times are GMT -4. The time now is 08:38 AM.

Powered by vBulletin® Version 3.8.11
Copyright ©2000 - 2024, vBulletin Solutions Inc.
Search Engine Optimisation provided by DragonByte SEO (Pro) - vBulletin Mods & Addons Copyright © 2024 DragonByte Technologies Ltd.
Feedback Buttons provided by Advanced Post Thanks / Like (Lite) - vBulletin Mods & Addons Copyright © 2024 DragonByte Technologies Ltd.
User Alert System provided by Advanced User Tagging (Lite) - vBulletin Mods & Addons Copyright © 2024 DragonByte Technologies Ltd.
***This site is an unofficial Toyota site, and is not officially endorsed, supported, authorized by or affiliated with Toyota. All company, product, or service names references in this web site are used for identification purposes only and may be trademarks of their respective owners. The Toyota name, marks, designs and logos, as well as Toyota model names, are registered trademarks of Toyota Motor Corporation***Ad Management plugin by RedTyger
 
Copyright © 2020