02-05-2016, 02:03 PM
|
#106
|
 |
Member
|
|
Join Date: Jan 2016
Location: Grover Beach, CA
Posts: 64
|
|
|
Member
Join Date: Jan 2016
Location: Grover Beach, CA
Posts: 64
|
Know what im ordering today .... i was on the fence til i read this
|

|
 Reply With Quote Reply With Quote
|
|
02-07-2016, 10:33 AM
|
#107
|
 |
Member
|
|
Join Date: Sep 2015
Location: SoCal
Posts: 208
|
|
|
Member
Join Date: Sep 2015
Location: SoCal
Posts: 208
|
Looking Good
Great build so far! Very clean. I will be following your thread to see what you decide on the lift. I am on the fence due to garage height limitations.
__________________
Wild_Turkey Build Thread 
2015 SR5 Premium 4x4 / 3rd row seat: Bilstein 6112/5160 @2.5"F/2"R // Total Chaos UCA // C4Fab Rock Sliders / Fuel Tank Skid / Lo Pro Winch Bumper // 17x8 FN F(X) Pro Wheels // BFG AT KO2 275/70R17 // ARB Compressor/ Fridge/ Rear Air Locker // KC HiLites // James Baroud Grand Raid // Canvasback cargo liner // Rear Diff Breather Mod
|
|
|
Reply With Quote
|
|
02-09-2016, 02:10 AM
|
#108
|
 |
Senior Member
|
|
Join Date: Aug 2015
Location: Central Oregon
Posts: 1,641
Real Name: Max
|
|
|
Senior Member
Join Date: Aug 2015
Location: Central Oregon
Posts: 1,641
Real Name: Max
|
Quote:
Originally Posted by CenCalTrail

Know what im ordering today .... i was on the fence til i read this
|

|
|
|
Reply With Quote
|
|
02-09-2016, 02:13 AM
|
#109
|
|
Senior Member
|
|
Join Date: Aug 2015
Location: Central Oregon
Posts: 1,641
Real Name: Max
|
|
|
Senior Member
Join Date: Aug 2015
Location: Central Oregon
Posts: 1,641
Real Name: Max
|
Quote:
Originally Posted by wild_turkey
Great build so far! Very clean. I will be following your thread to see what you decide on the lift. I am on the fence due to garage height limitations.
|
Thanks, man! I am hoping it will be sooner rather than later, but there are some other things on the bucket list that might be more important at the moment (i.e. On-board air, sliders, etc) Stay tuned though, I will try to keep things as interesting as possible! 
|
|
|
Reply With Quote
|
|
02-09-2016, 02:34 AM
|
#110
|
 |
Member
|
|
Join Date: Apr 2008
Location: Denver, CO
Age: 55
Posts: 183
|
|
|
Member
Join Date: Apr 2008
Location: Denver, CO
Age: 55
Posts: 183
|
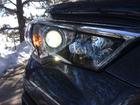
I used your build thread as a guide to help decide On which hid kit to buy.
I have the same hid kit from xenon depot and I am very satisfied with how it came out. The amount of light that it orojects, I now see objects that I never noticed before. Now very clear. I actually look forward to driving at night. Only issue I had was when I had about 500 pounds in the cargo area. The hid was pointed a little more upwards from the weight and did get flashed by another vehicle.
Same interior bulbs from xenon depot. The map lights are now a very bright useable light. The second row festoon bulb is brighter than stock halogen, but does not seem as bright as the front map light. Maybe there's two lights in front. Aldo having a black interior probably doesn't help.
Thanks for the help
|
|
|
Reply With Quote
|
|
02-09-2016, 03:30 AM
|
#111
|
|
Senior Member
|
|
Join Date: Aug 2015
Location: Central Oregon
Posts: 1,641
Real Name: Max
|
|
|
Senior Member
Join Date: Aug 2015
Location: Central Oregon
Posts: 1,641
Real Name: Max
|
Diff/locker breather relocation

This DIY post has been relocated to my website. Please see the link below for the original post in it's entirety!
Rear Differential Breather(s) Relocation
Last edited by MTN4RNR; 08-04-2017 at 12:34 AM.
|
|
|
Reply With Quote
|
|
02-09-2016, 03:46 AM
|
#112
|
|
Senior Member
|
|
Join Date: Aug 2015
Location: Central Oregon
Posts: 1,641
Real Name: Max
|
|
|
Senior Member
Join Date: Aug 2015
Location: Central Oregon
Posts: 1,641
Real Name: Max
|
Quote:
Originally Posted by kuh
I used your build thread as a guide to help decide On which hid kit to buy.
I have the same hid kit from xenon depot and I am very satisfied with how it came out. The amount of light that it orojects, I now see objects that I never noticed before. Now very clear. I actually look forward to driving at night. Only issue I had was when I had about 500 pounds in the cargo area. The hid was pointed a little more upwards from the weight and did get flashed by another vehicle.
Same interior bulbs from xenon depot. The map lights are now a very bright useable light. The second row festoon bulb is brighter than stock halogen, but does not seem as bright as the front map light. Maybe there's two lights in front. Aldo having a black interior probably doesn't help.
Thanks for the help
|
It's funny that you say you look forward to driving at night, I feel the same way. The cut-off with the HID's is sublime. Technically the same as with the halogens, but much more noticeable. It's a bummer that the 4R doesn't have the same 'adjustable headlight' tech as the Tundra. We have a pair of them as work trucks, and the feature is nice for when they are hauling weight, just adjust the knob, and away you go!
Yeah, I definitely noticed an output difference with the festoon light, but after living with it for a few weeks now, I can't say that it has really bothered me at all. Hence I haven't swapped it.
Glad I could help with your build! Looking great!
Last edited by MTN4RNR; 02-11-2016 at 02:03 PM.
|
|
|
Reply With Quote
|
|
02-10-2016, 06:45 PM
|
#113
|
 |
Member
|
|
Join Date: Feb 2016
Location: Austin, Texas
Posts: 185
|
|
|
Member
Join Date: Feb 2016
Location: Austin, Texas
Posts: 185
|
Quote:
Originally Posted by MTN4RNR
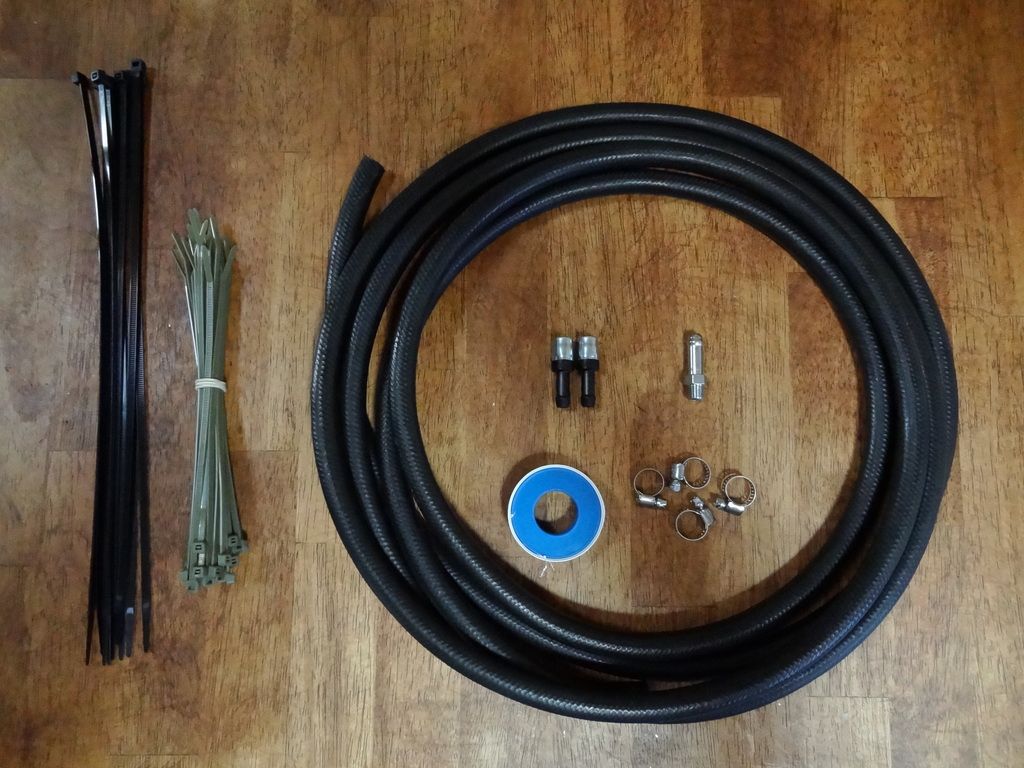
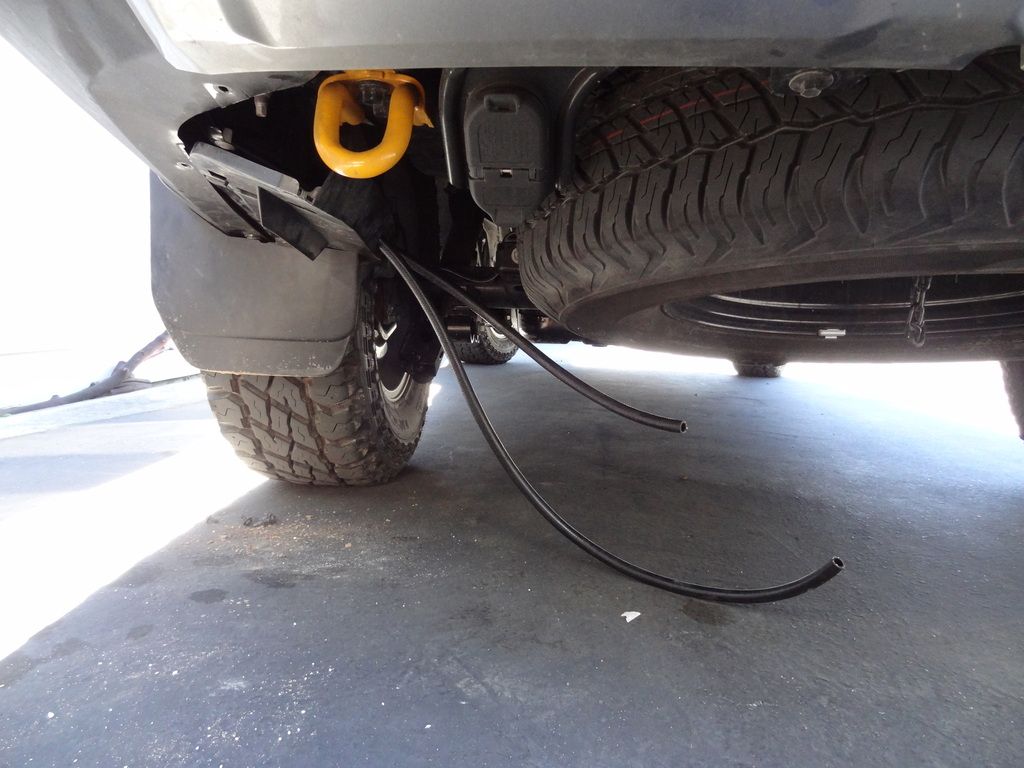
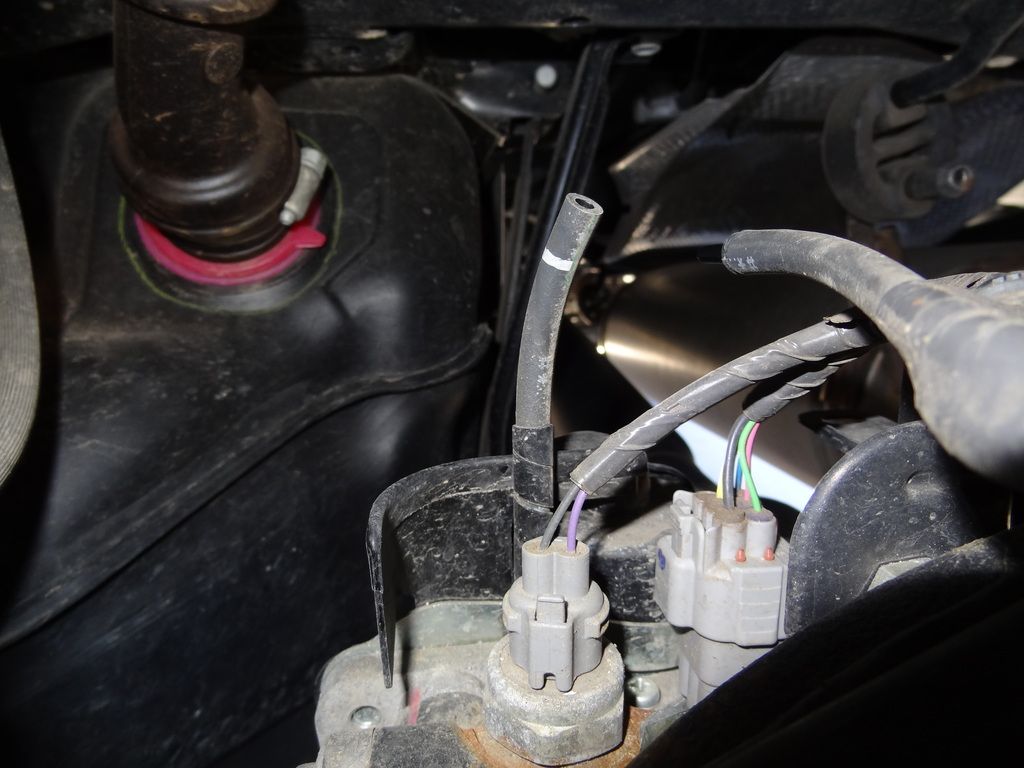
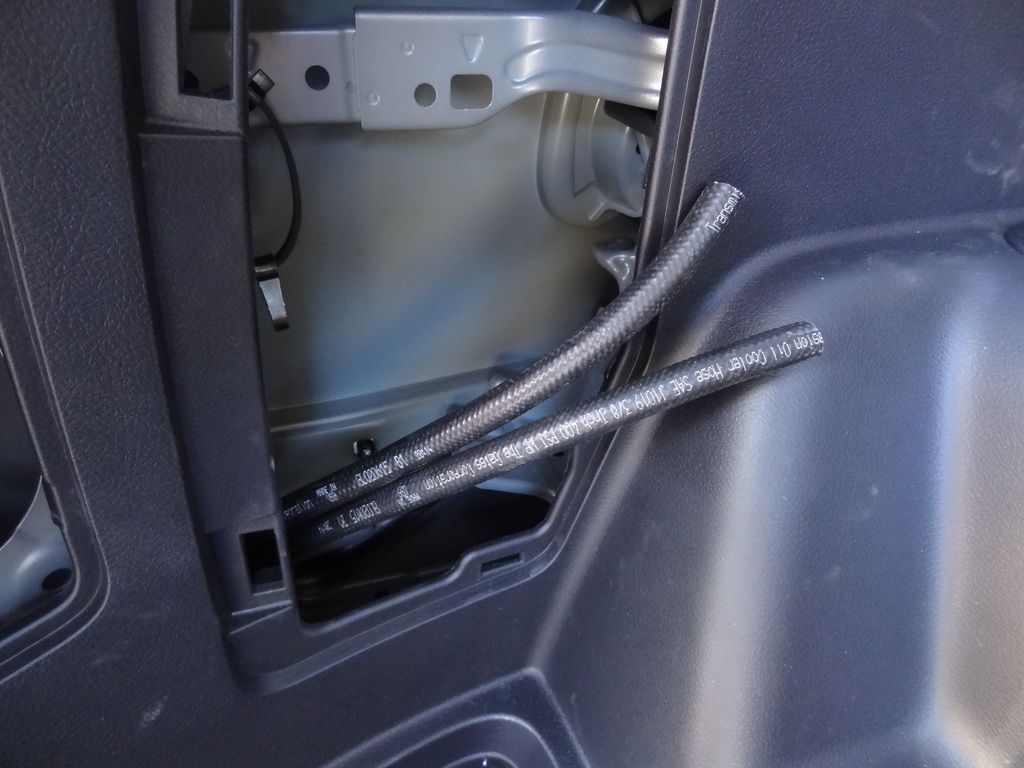
After reading of many members of this forum relocating their differential breathers to avoid inevitable milky gear oil, I decided to give it a go. A little cheap insurance later on down the road can't hurt, and if nothing else, I got some good one on one time with the rig, getting to know a little more about her. I have a trail, and thus a locker. So a separate breather for that as well, because overkill. I decided to use the T4R.org standard OEM Toyota front differential (2-way) breathers. Let's get into it:
Parts used:
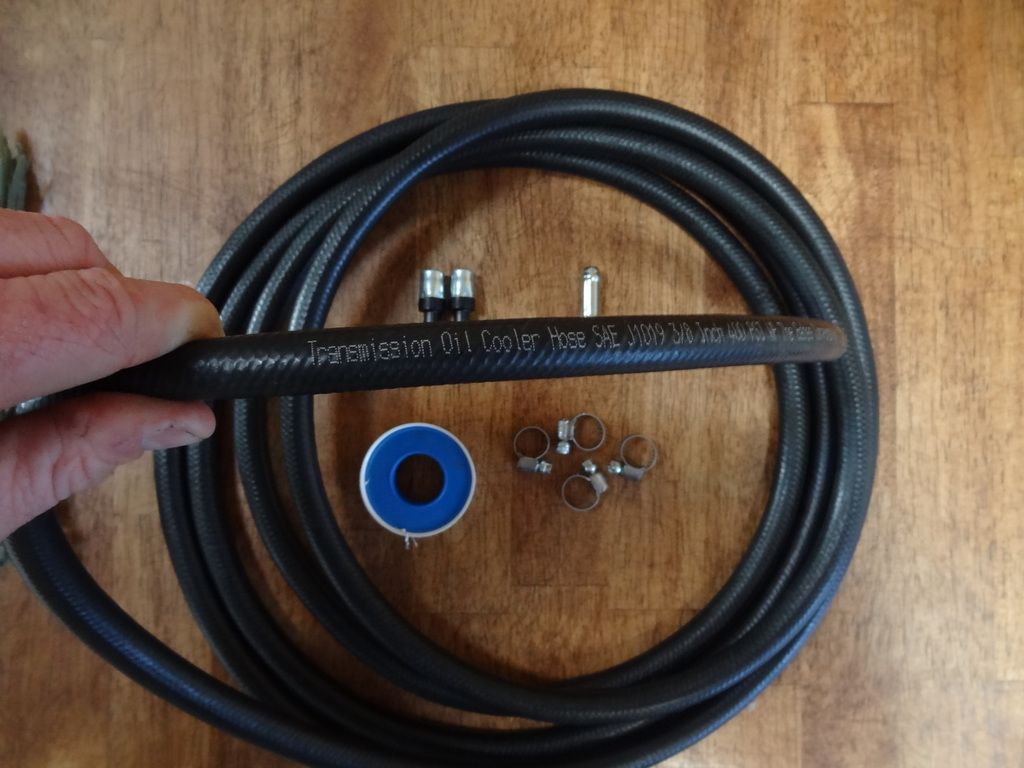
- 14' Transmission oil cooler hose, 3/8"
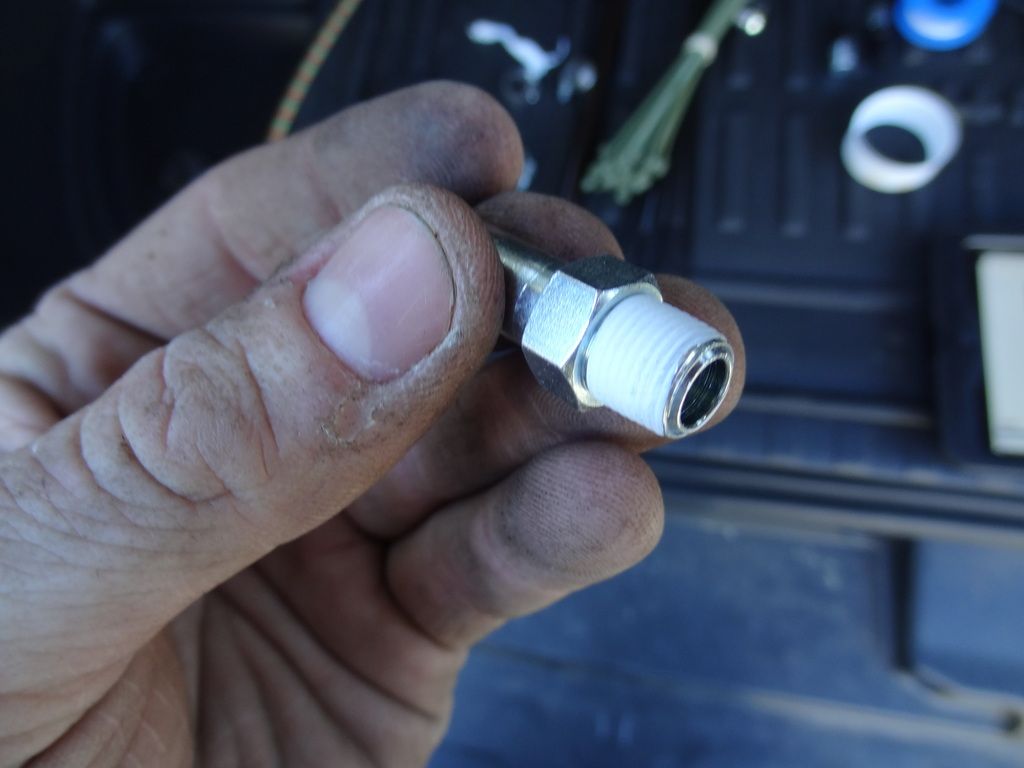
- Toyota part 90404-51319 (Union)
- Toyota part 90930-03136 (Breathers) (x2)
- Stainless steel hose clamp (x4)
- Enough zip ties to hold it all together
- Teflon tape
- Sierra Nevada Torpedo IPA
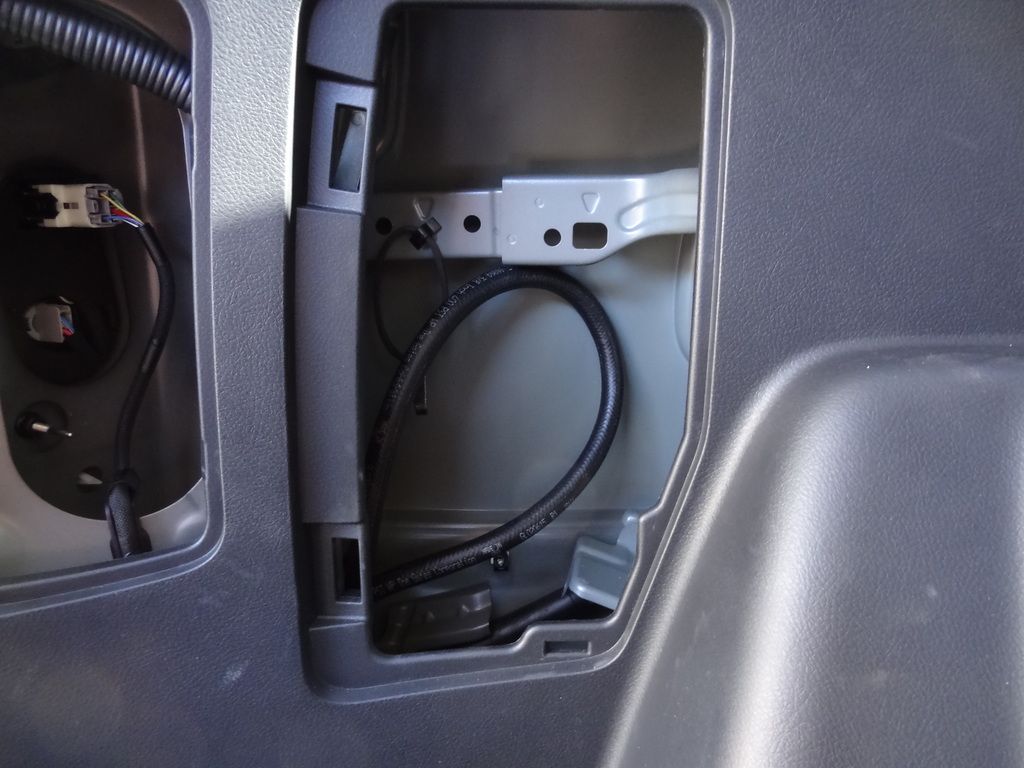
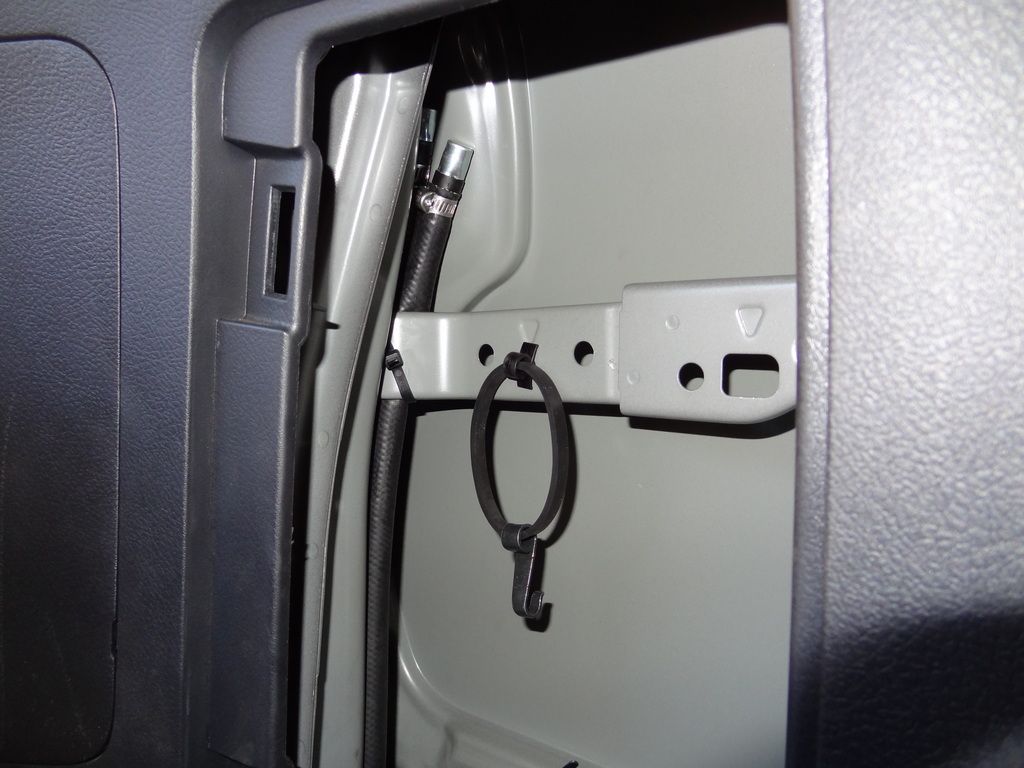
I want the breathers to end up in the jack/tool compartment on the driver's side of the cargo area. I decided to use the same route as
@ hoeftm2002
in his write up here. An unused grommet in the cavity below the jack/tool mount. First step was to remove the tools/jack and drop the spare. I located the grommet, removed it and fed my lines through.
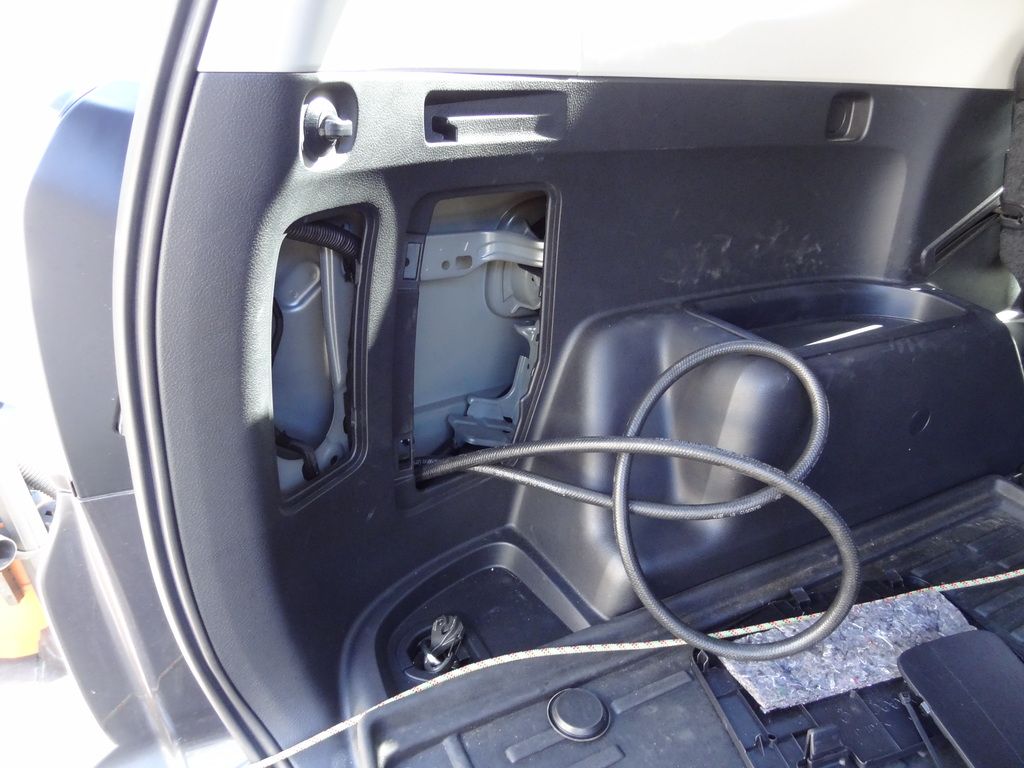
I stopped when I had a good loop in the compartment
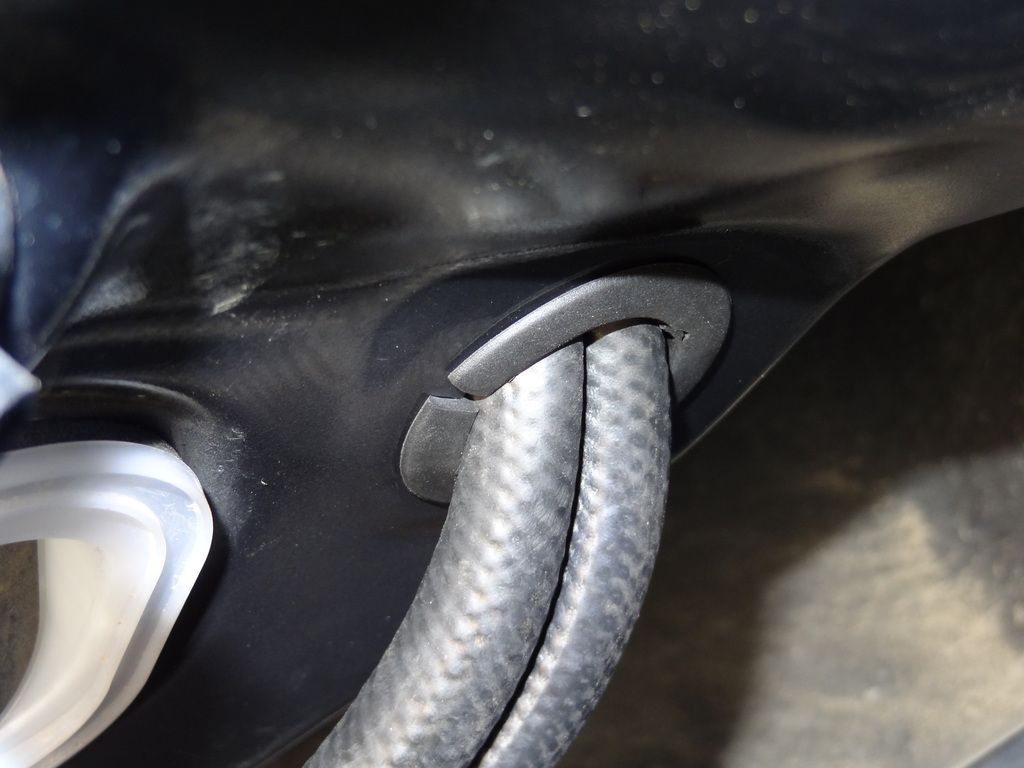
Removed the stock 1-way valve, added some teflon tape to the new nipple and installed it on the rear differential
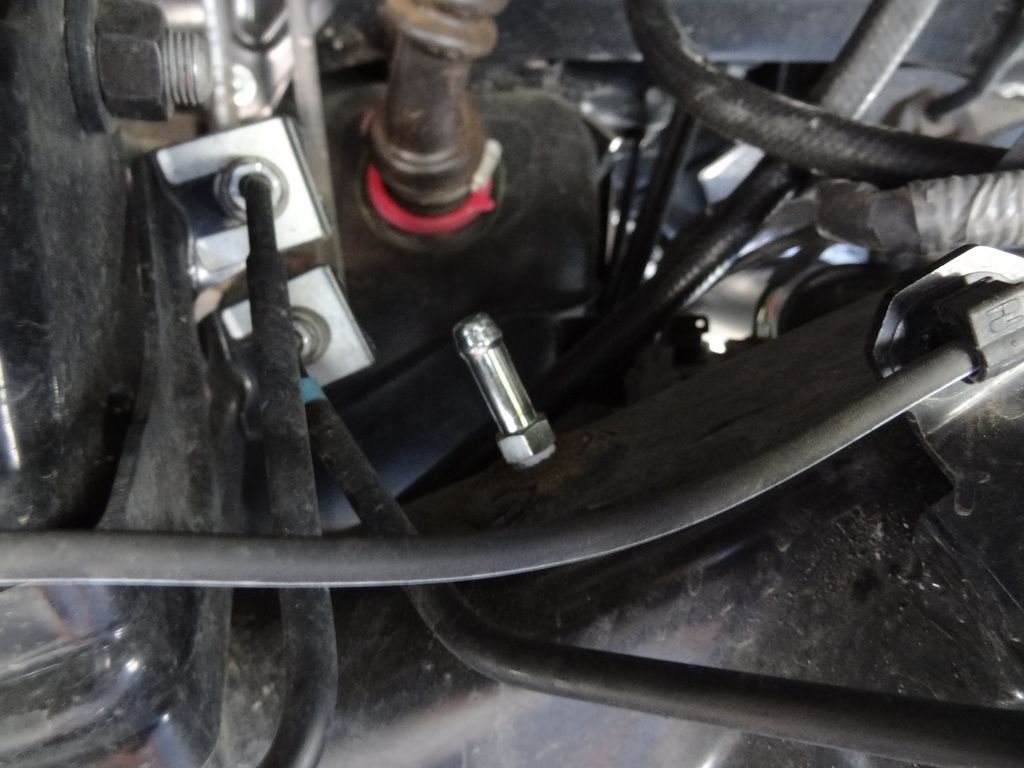
I then pulled the connector off of the e-locker breather hose, leaving the end exposed
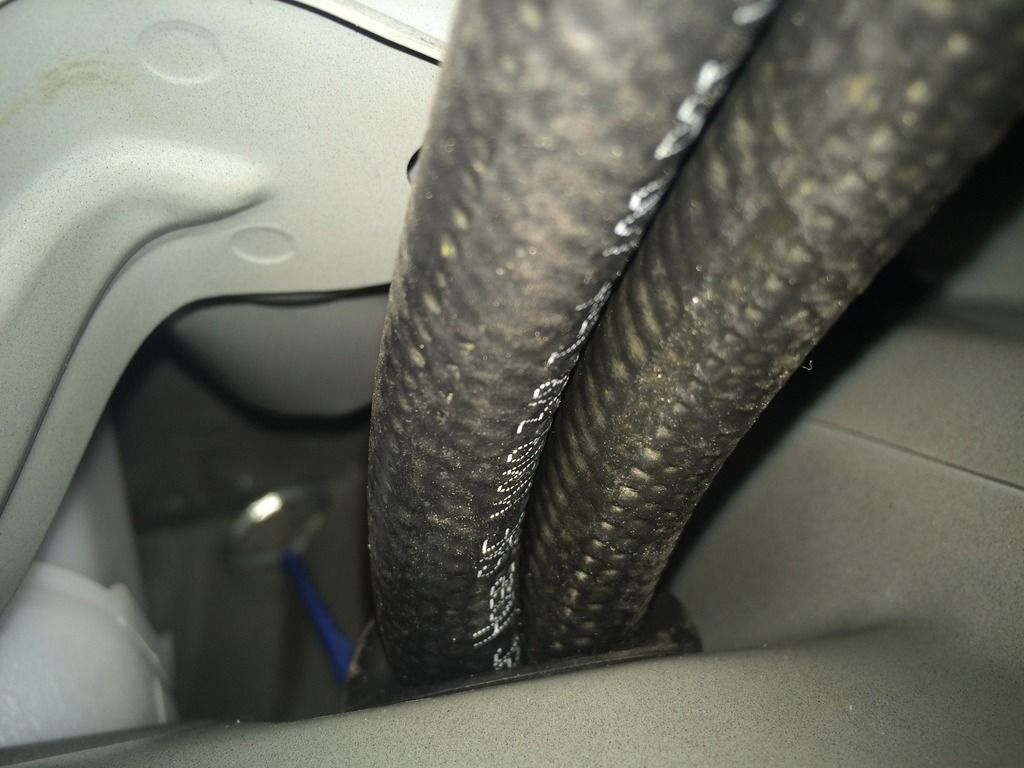
Routed the lines from the fender to the axle along the fuel tank fill line
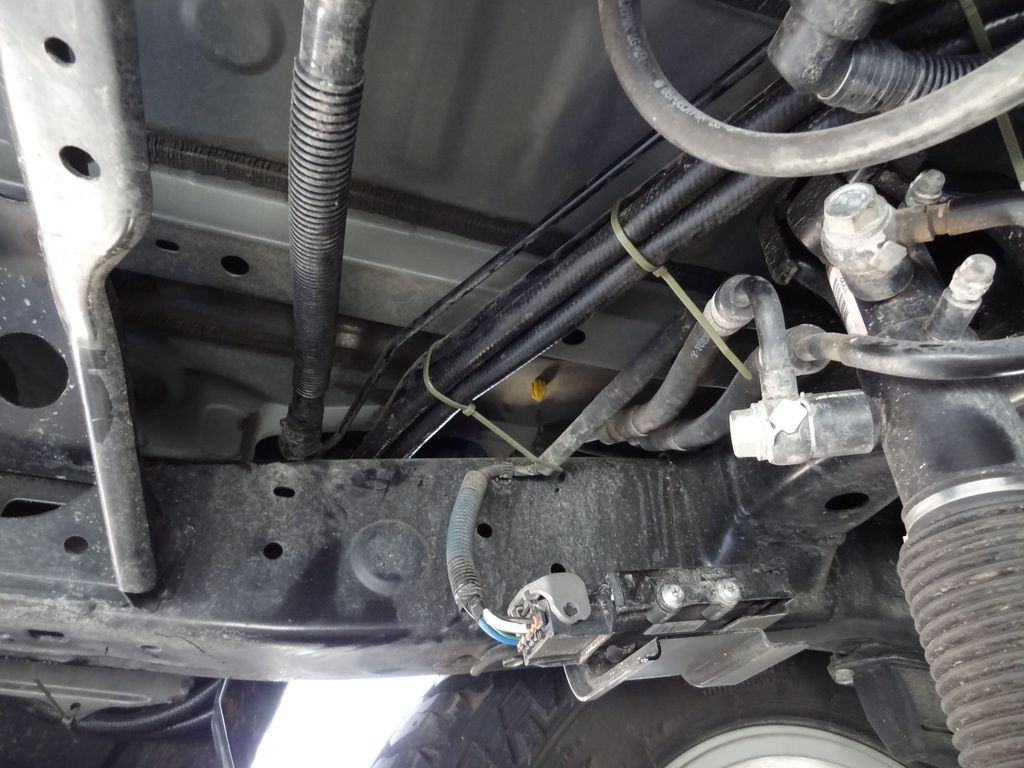
I left some wiggle room to account for suspension travel
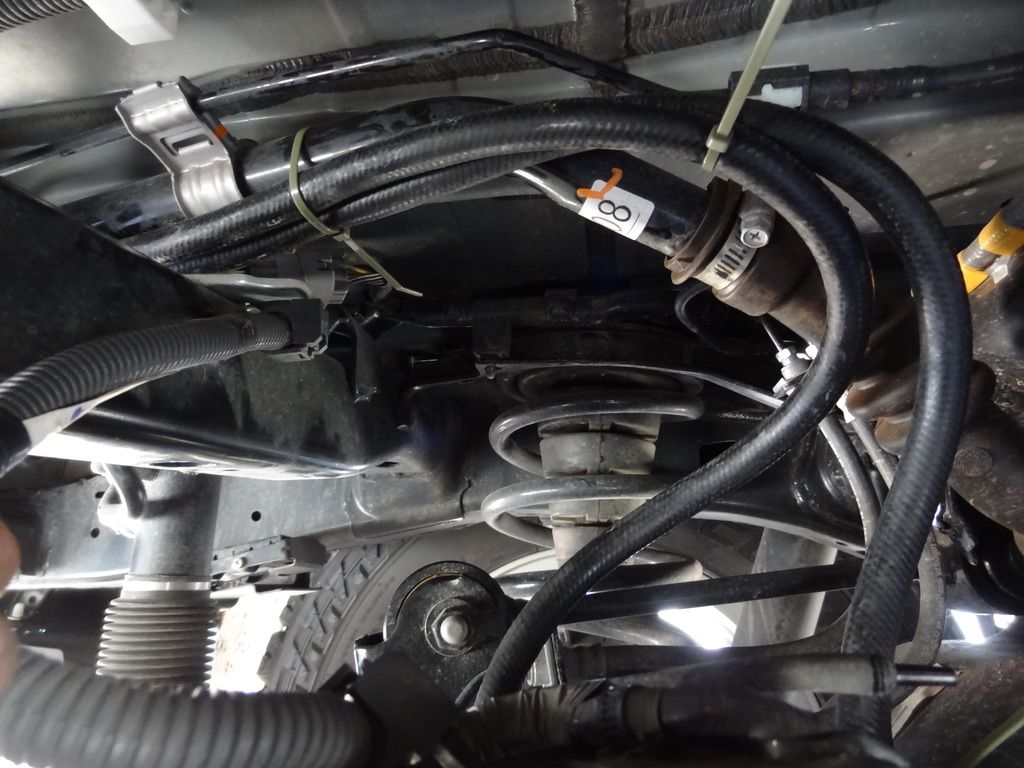
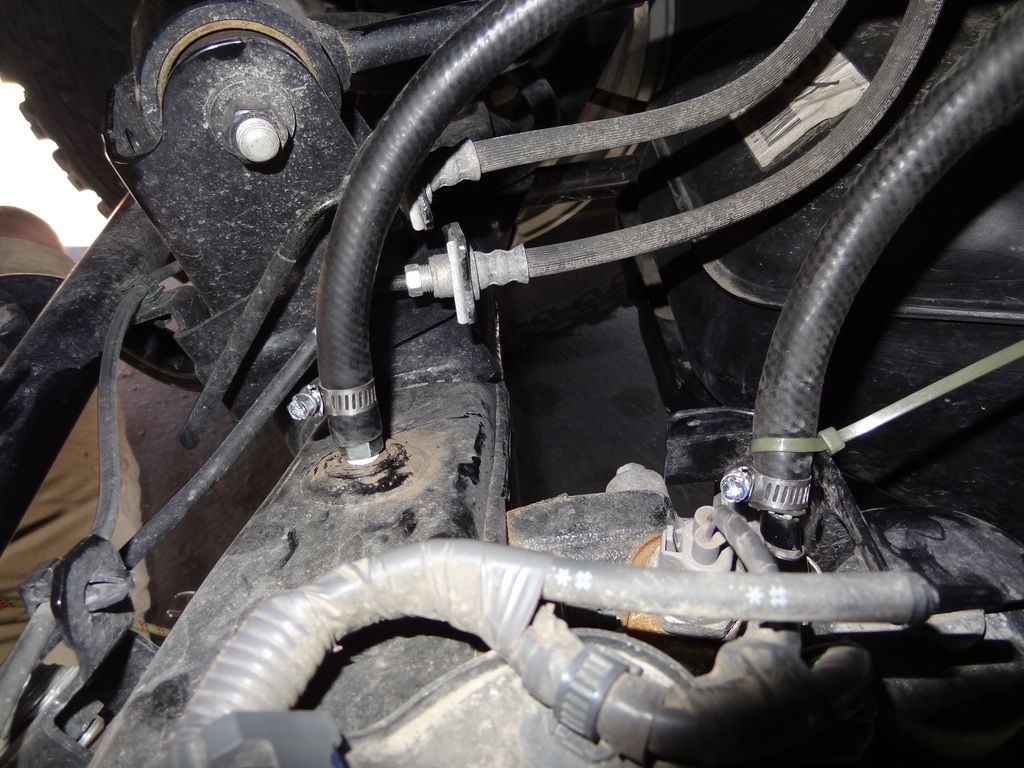
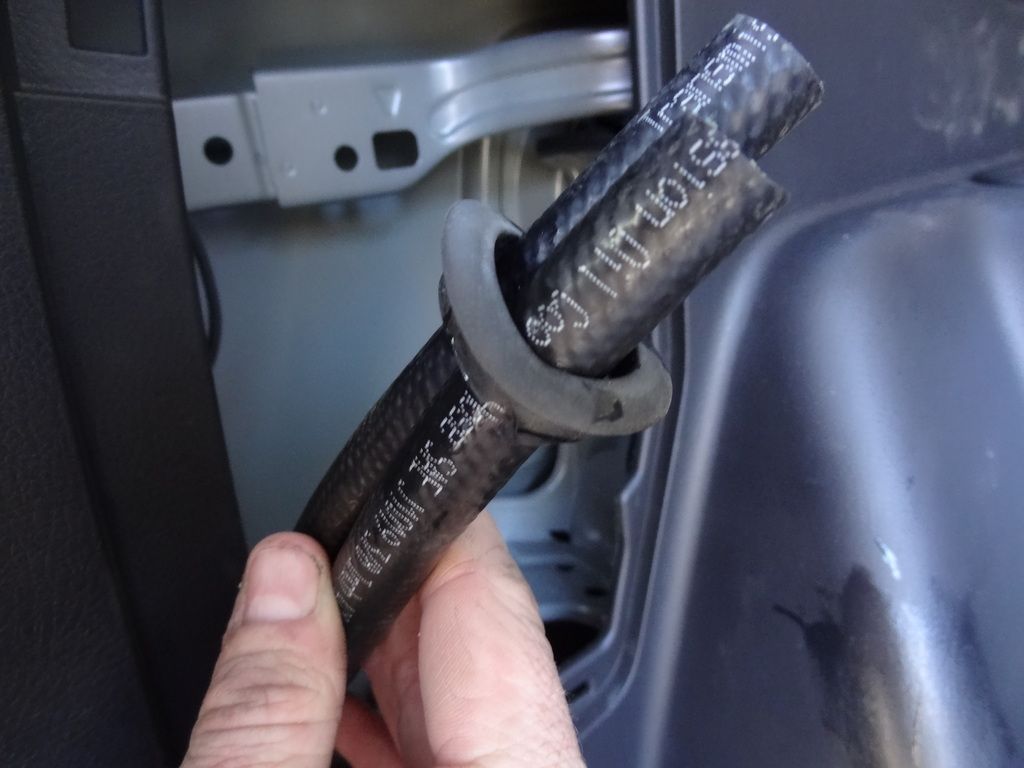
I attached the hose ends to the installed nipple, and the end of the e-locker hose using the hose clamps. The e-locker hose that is attached fits into the new transmission cooler line loosely, but will clamp down with the hose clamp tightly. I used a zip tie on the e-locker line to keep it from moving around too much. Be sure to route away from the exhaust, too close might get a bit toasty.
I cut the line in the cargo area, and cut the OEM grommet plug to fit around the lines.
This is where things got a bit sideways. I spent the better part of an hour trying to seat the grommet plug in the hole to no success. I then took the rear fender bumper off to get a better look.
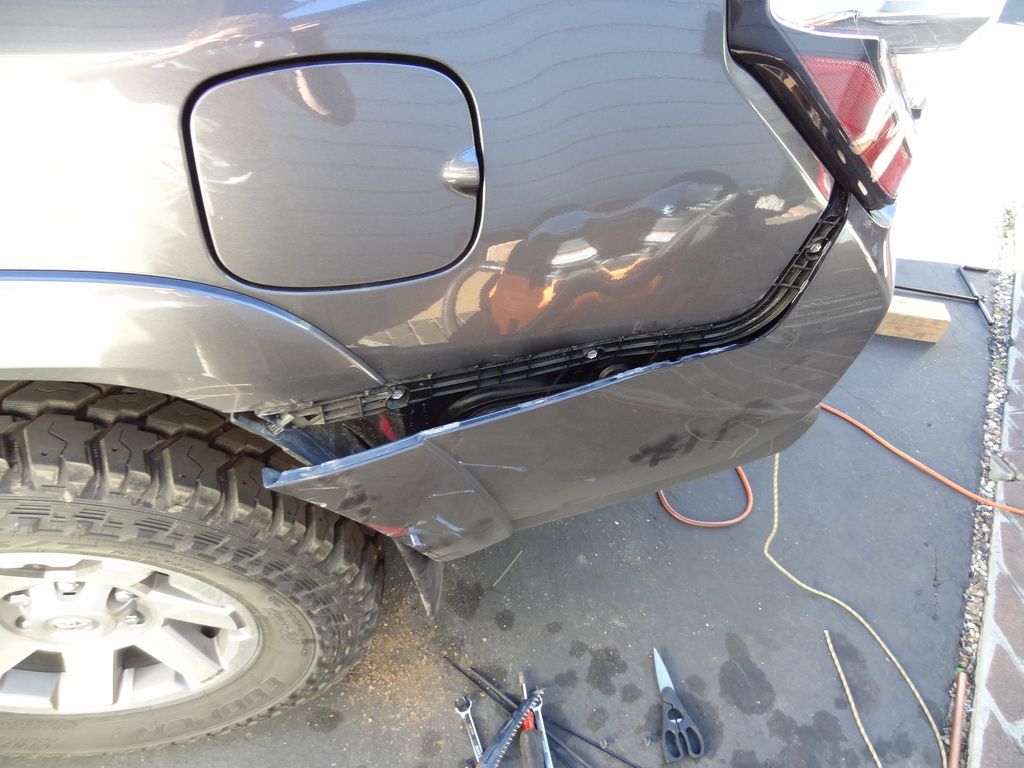
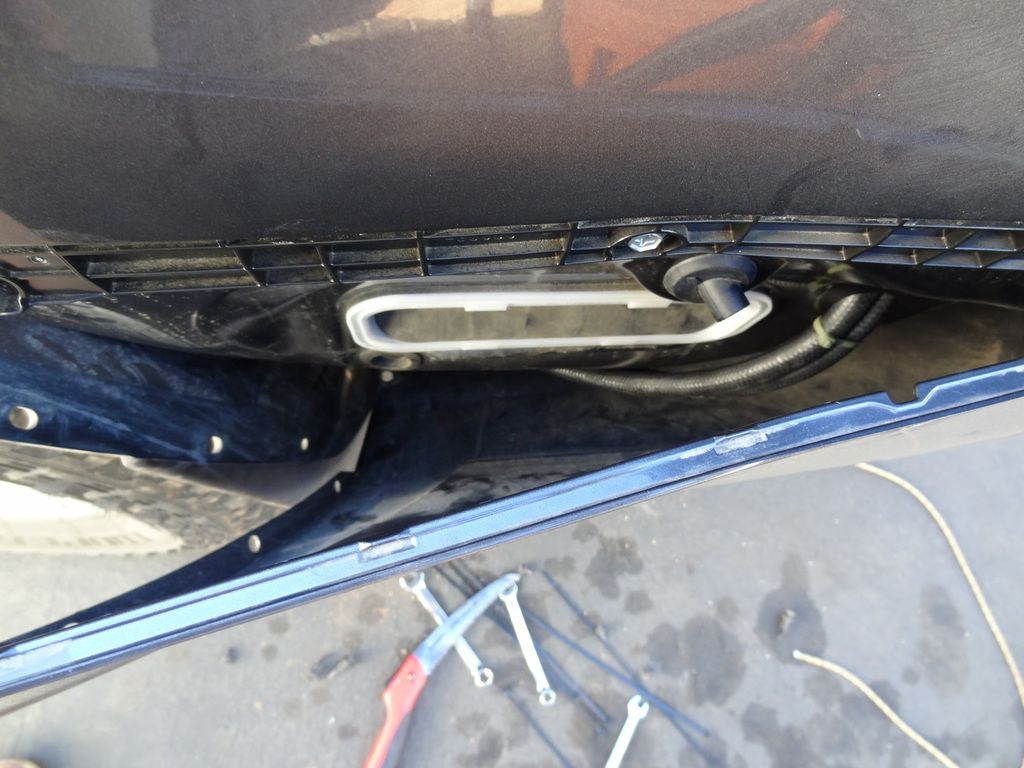
I decided to install the grommet plug from the outside. I cut the plug along the edge, and fit it around the lines. With a bit of soap, I was able to fit it in for a decently sealed fit. Hind sight, don't cut the plug, just remove the bumper edge first and feed from the outside. Done deal.
Install the breather valves on the hoses with hose clamps.
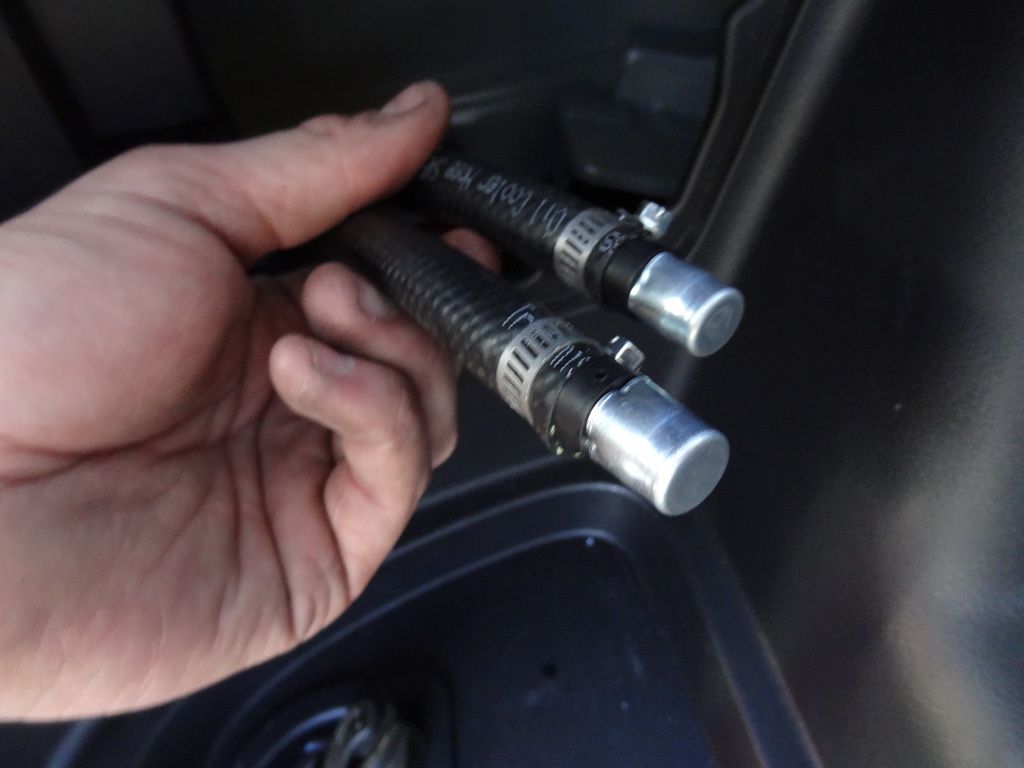
Zip tie the hoses into a spot that is convenient for you.
Reinstall the spare tire, put the jack/tools away, install the covers, finish your beer, done.
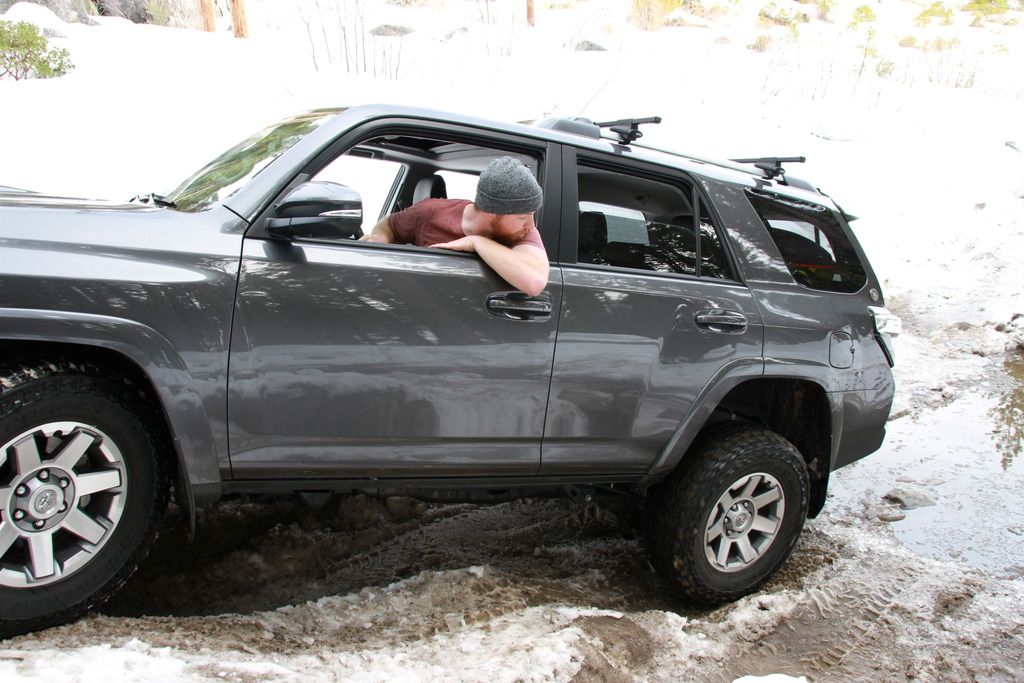
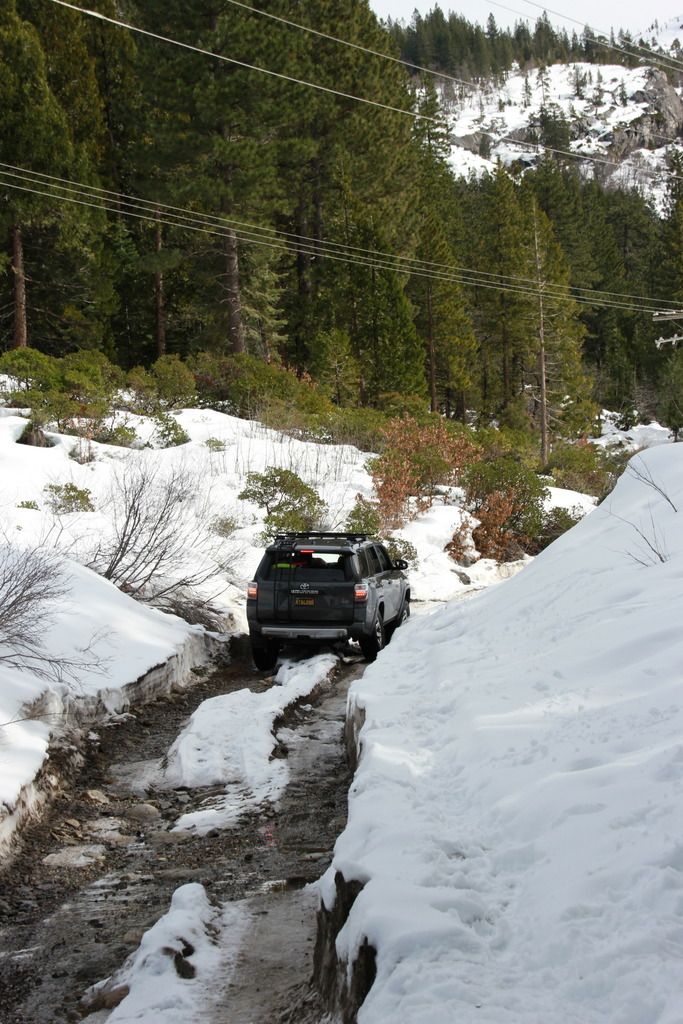
Now, to find a creek crossing... More to come... |
Do the new breather valves rattle next to the sheet metal or did you zip tie them away from the sides? Avoid ghost rattles. 
__________________
16' TEP OME suspension, ARB bumper and rack, Budbuilt Sliders
SOLD 85' 4runner Built SOLD 03 FJ100 SOLD 92' FJ80
Sold 14' trd crewmax tundra
|
|
|
Reply With Quote
|
|
02-10-2016, 07:13 PM
|
#114
|
|
Senior Member
|
|
Join Date: Aug 2015
Location: Central Oregon
Posts: 1,641
Real Name: Max
|
|
|
Senior Member
Join Date: Aug 2015
Location: Central Oregon
Posts: 1,641
Real Name: Max
|
Quote:
Originally Posted by Racehoss
Do the new breather valves rattle next to the sheet metal or did you zip tie them away from the sides? Avoid ghost rattles. |
I haven't driven it yet since the install. It's not my work commuter, but I will carry some extra zips with me when I go out next time to square anything away if I need to. The big scare came when I was attempting to use a paint can opener to push the grommet plug back in, and I let it slip from my hands. Definitely an oh sh!t moment.
THANKFULLY I was able to fish it out. God knows what I would have done with a rattle in the back of the truck for the next 10 years...
Last edited by MTN4RNR; 02-11-2016 at 11:41 AM.
|
|
|
Reply With Quote
|
|
02-15-2016, 11:47 AM
|
#115
|
|
Senior Member
|
|
Join Date: Aug 2015
Location: Central Oregon
Posts: 1,641
Real Name: Max
|
|
|
Senior Member
Join Date: Aug 2015
Location: Central Oregon
Posts: 1,641
Real Name: Max
|
|
|
|
Reply With Quote
|
|
02-15-2016, 12:22 PM
|
#116
|
 |
Senior Member
|
|
Join Date: May 2009
Location: SF Bay Area, CA
Posts: 1,345
|
|
|
Senior Member
Join Date: May 2009
Location: SF Bay Area, CA
Posts: 1,345
|
Quote:
Originally Posted by MTN4RNR
|
Did you leave your GF behind on Valentine's Day 
__________________
IG @go.xplre
|
|
|
Reply With Quote
|
|
02-15-2016, 02:22 PM
|
#117
|
|
Senior Member
|
|
Join Date: Aug 2015
Location: Central Oregon
Posts: 1,641
Real Name: Max
|
|
|
Senior Member
Join Date: Aug 2015
Location: Central Oregon
Posts: 1,641
Real Name: Max
|
Quote:
Originally Posted by weeeee
Did you leave your GF behind on Valentine's Day |
Haha, no. Fortunately, I know better than that!

|
|
|
Reply With Quote
|
|
02-16-2016, 10:28 AM
|
#118
|
 |
Member
|
|
Join Date: Aug 2015
Location: chicago
Posts: 49
|
|
|
Member
Join Date: Aug 2015
Location: chicago
Posts: 49
|
Awesome pics and a awesome truck!
|
|
|
Reply With Quote
|
|
02-18-2016, 01:30 AM
|
#119
|
|
Senior Member
|
|
Join Date: Aug 2015
Location: Central Oregon
Posts: 1,641
Real Name: Max
|
|
|
Senior Member
Join Date: Aug 2015
Location: Central Oregon
Posts: 1,641
Real Name: Max
|
Took apart the cargo area to start taking some measurements for building a rear tie-down platform. Gotta see what's underneath before I start drawing!
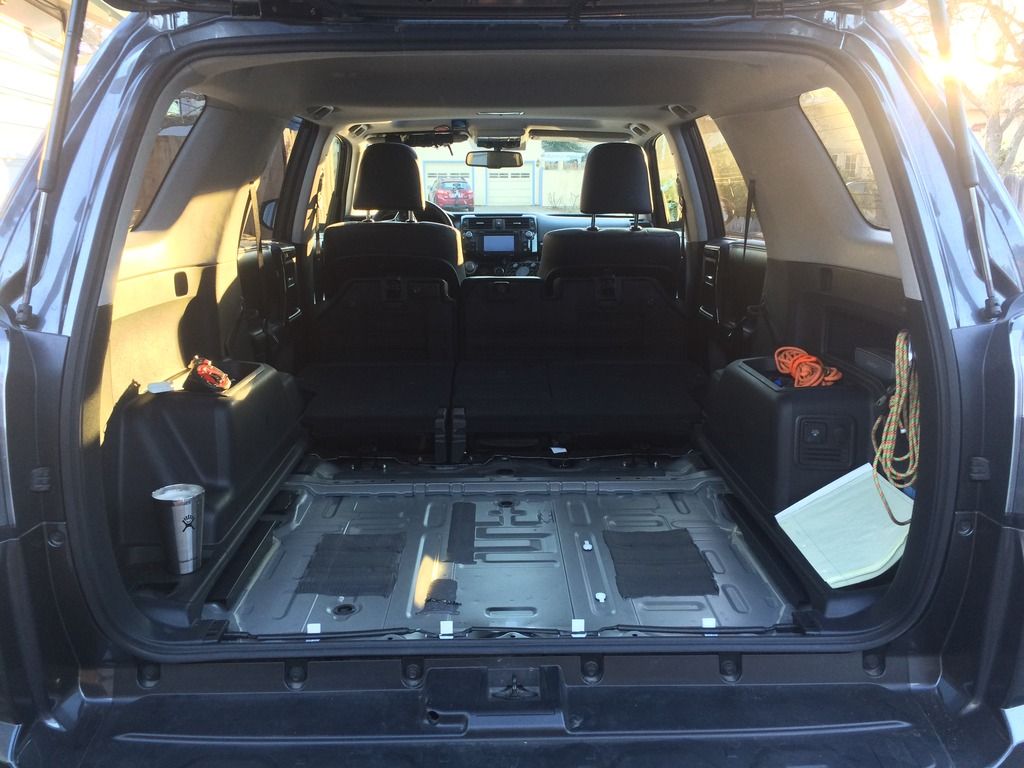
And drawing!
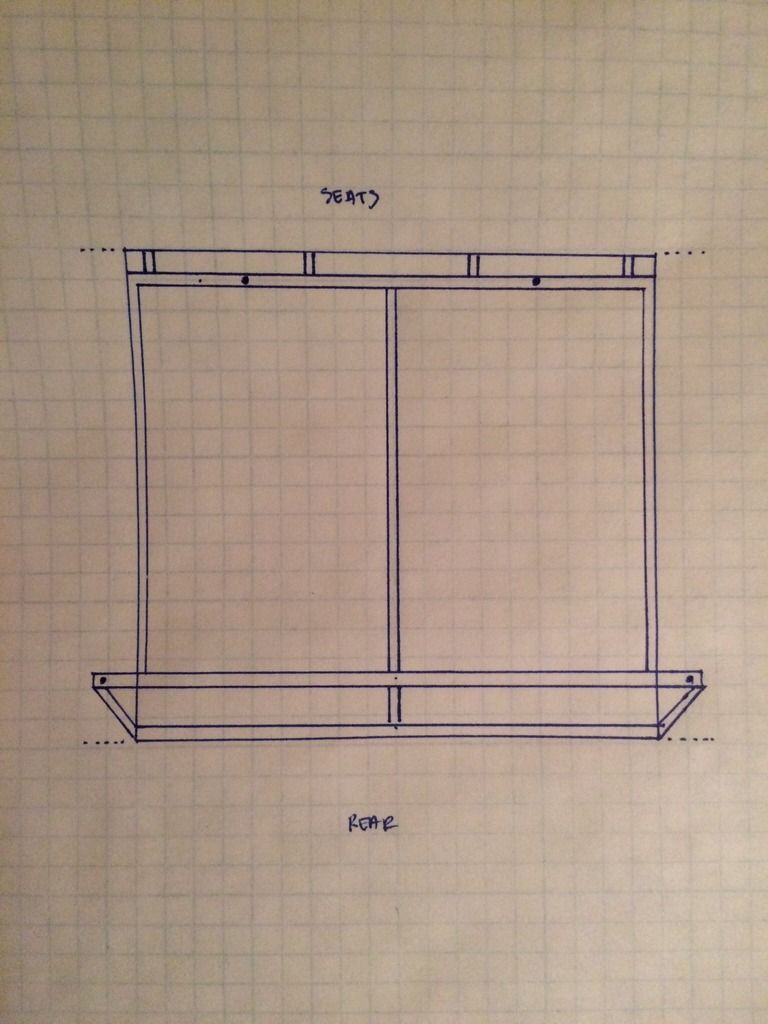
Let's see where this goes...
|
|
|
Reply With Quote
|
|
02-18-2016, 02:08 AM
|
#120
|
|
Member
|
|
Join Date: Jan 2016
Location: BC, Canada
Posts: 63
|
|
|
Member
Join Date: Jan 2016
Location: BC, Canada
Posts: 63
|
Great build! Looking forward to updates, and might steal some ideas!
|
|
|
Reply With Quote
|
| Thread Tools |
|
|
| Display Modes |
Rate This Thread |
 Linear Mode Linear Mode
|
|
 Posting Rules
|
You may not post new threads
You may not post replies
You may not post attachments
You may not edit your posts
HTML code is On
|
|
|
|