Dual Battery Setup
I've been planning this for several months now- getting parts together and doing research. Nothing new here really, but I had a few goals in mind with this setup.
1- I wanted an extremely "clean" installation. No wires running everywhere- pretty much stock in appearance.
2- Keep the cost down and use the original/stock battery as the aux. The relay was the most expensive part at $70- but I think I have less that $150 in the entire thing.
3- Super reliable and simple.
4- Ability to automatically charge both batteries when the truck is running, separate the batteries manually, and self jump start all from one switch.
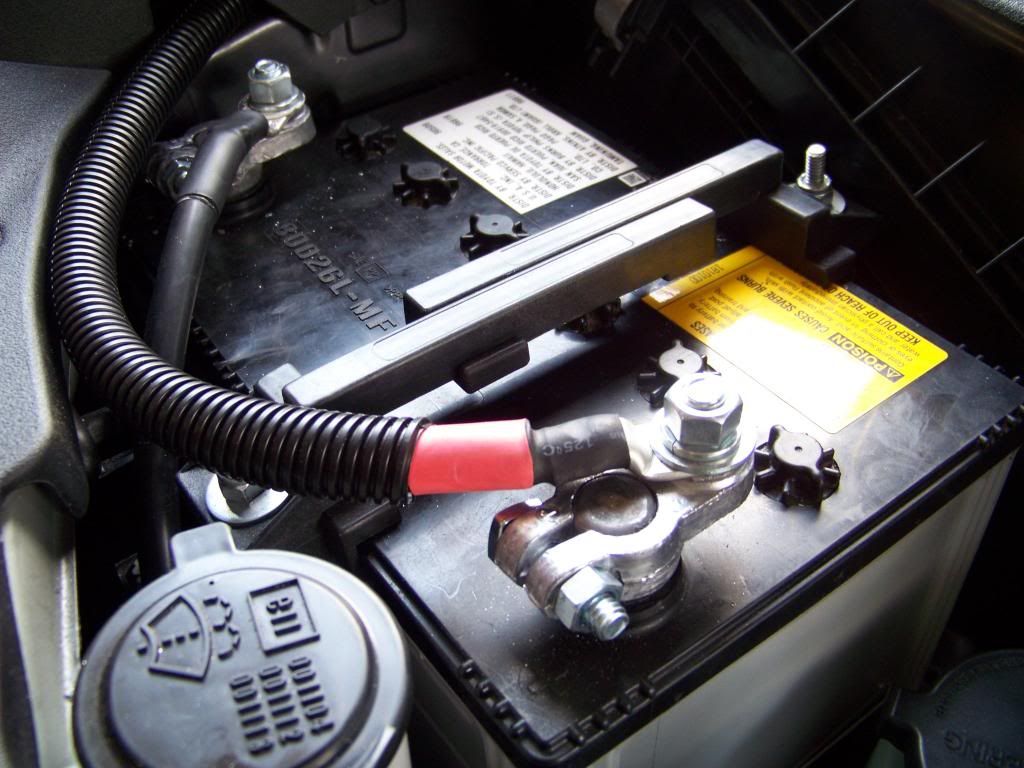
5- This setup is a little different than most. My "Main" battery is a deep cycle/starting battery, so it won't suffer any damage if it's drained completely. With 160 minutes reserve capacity, this battery will power my accessories a long time before it's depleted. The Aux battery is to be used solely as a starting battery if the Main battery is dead.
PARTS LIST
*1 PAC 500 relay
*2 ANL Fuse Holders
*2 200A ANL Fuses
*Approx 12 feet of 2ga copper wire (
http://www.harborfreight.com/300amp-...set-69537.html )
*10 2ga Ring Terminals
*1/2" Split Loom (Approx)10 feet
*Battery Hold Down/tray
*2 Battery Terminal Clamps
*Battery Terminal Covers
*Custom bracket for P/S pump res.
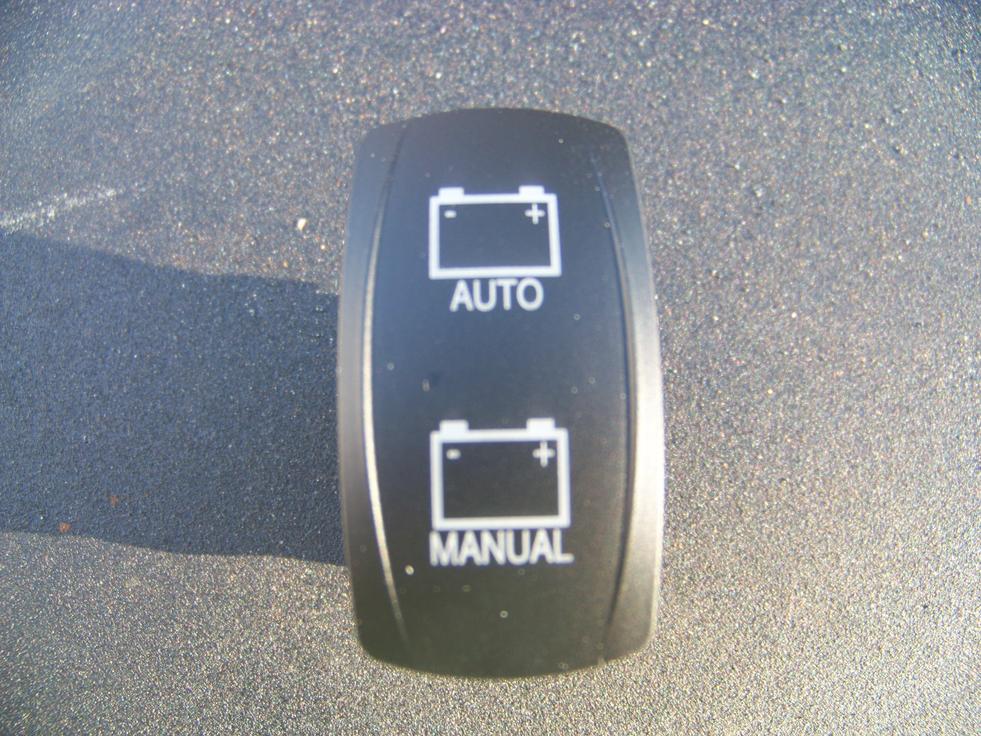
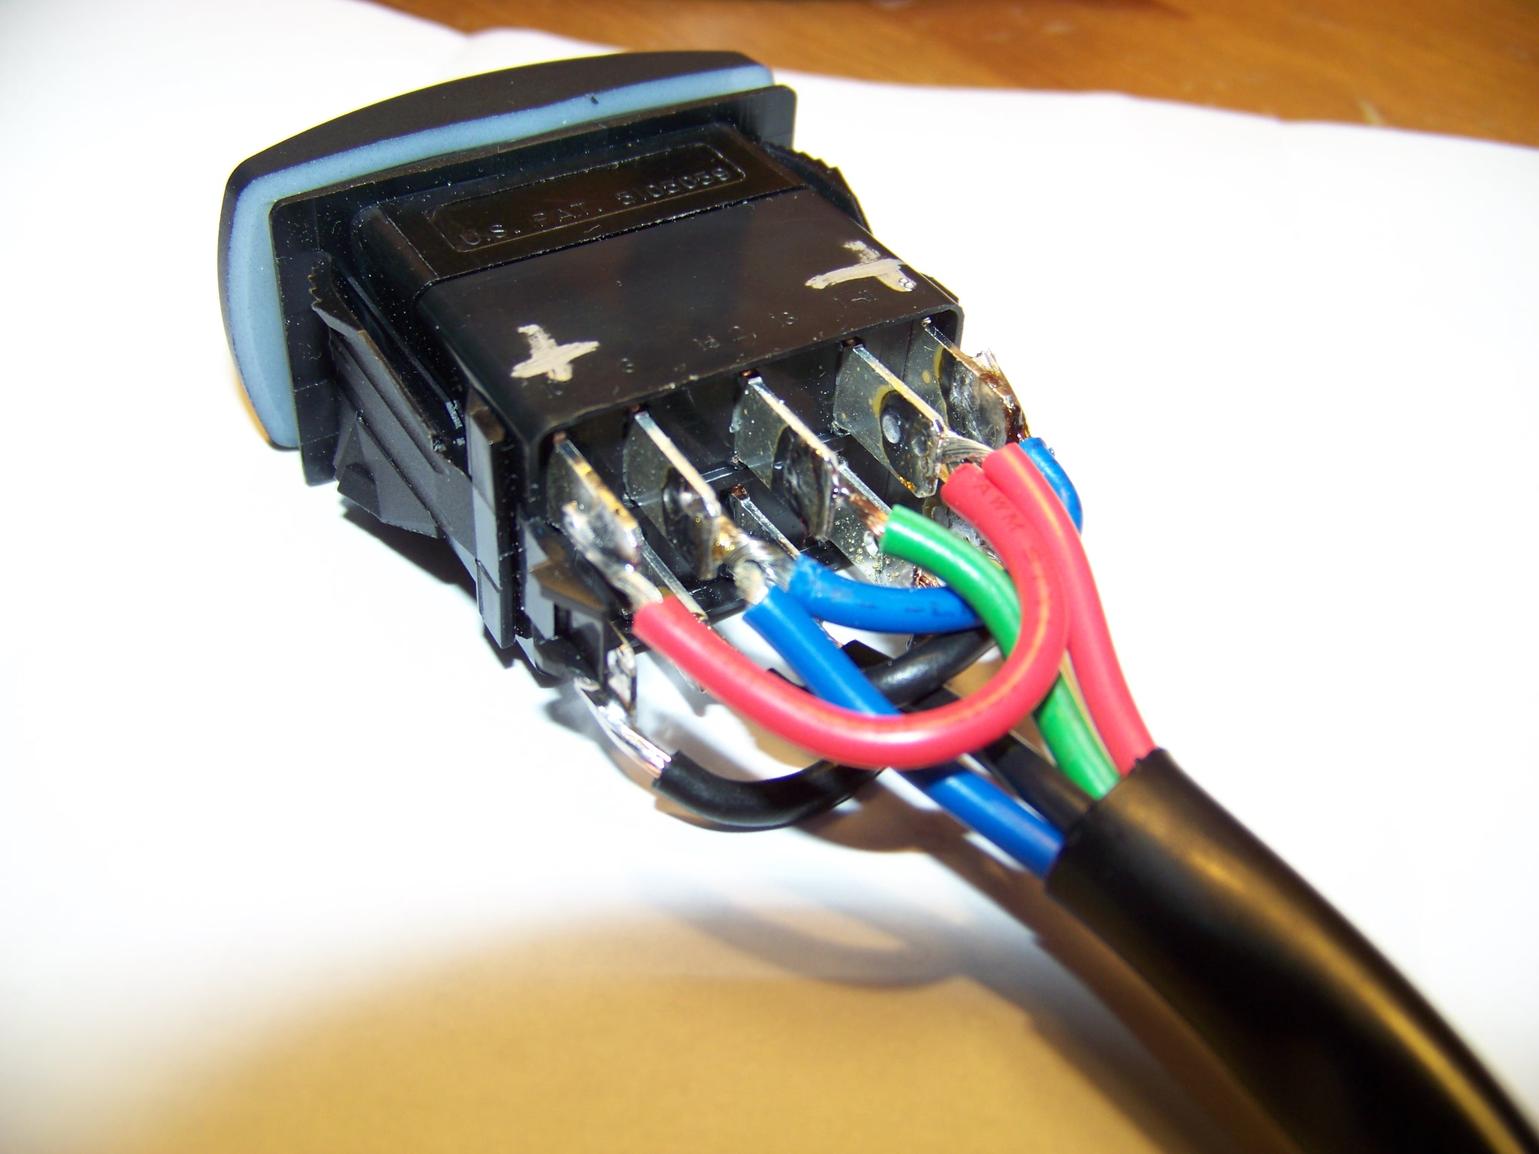
*ON/OFF/ON switch- or OTRATTW V-Series Contura Switch # VJD2UHTB : DPDT ON/OFF/ON, GREEN/DAYLIGHT BRIGHT RED BOTH INDEPENDENT LED'S.
*12V Indicator LED
*2 Gammatronix LED's (optional)
http://www.ebay.com/itm/6v-12v-24v-P...item2c752a2133
****This is the basic underhood wiring string.
Main Battery positive terminal / 200a ANL fuse / PAC Relay / 200a ANL Fuse / Aux Battery positive terminal. Aux Battery Negative to ground. The PAC relay also needs a ground and a power source to connect .
**Here's a wiring diagram using a simple SPDT switch along with an LED to indicate when the batteries are connected.
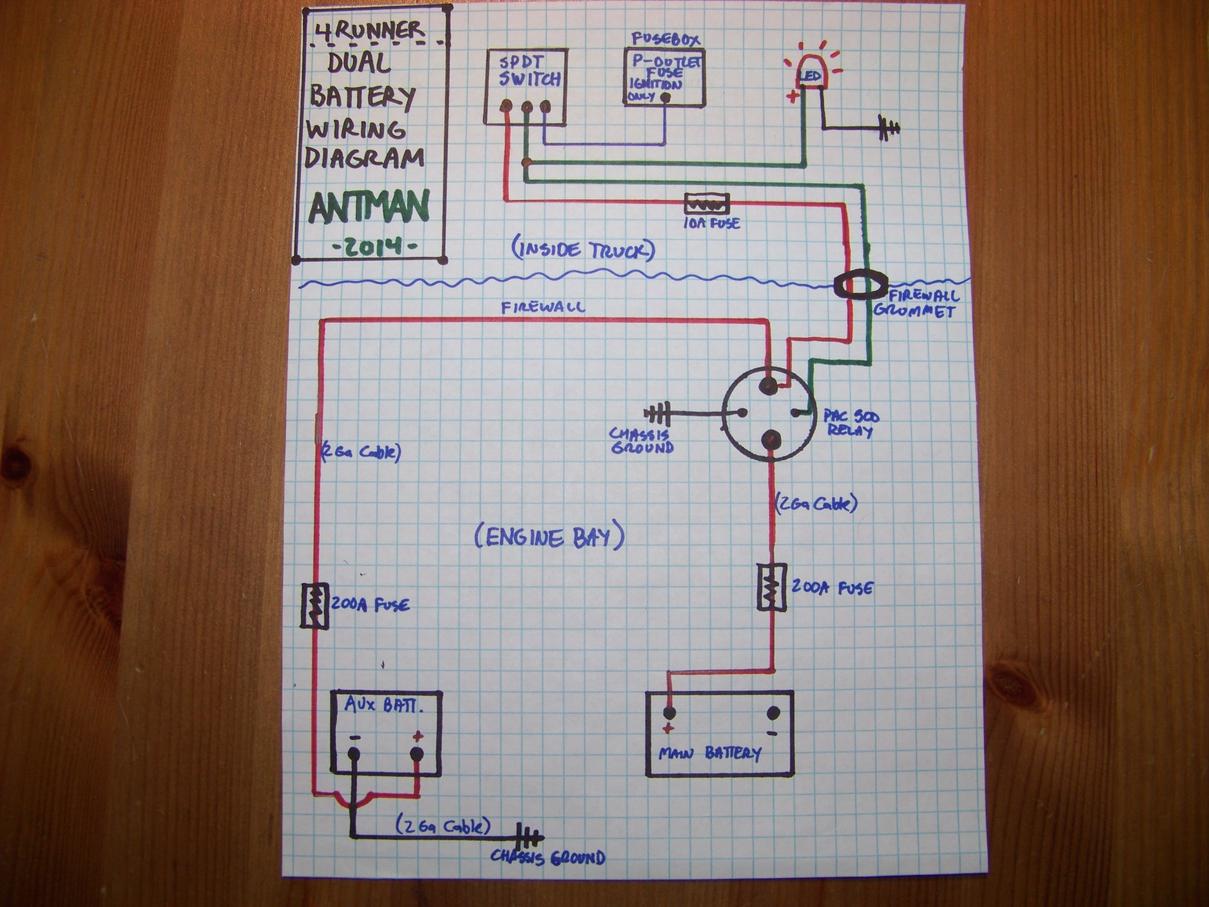
The diagram below incorporates the optional custom switch I used, a DPDT from OTRATTW.

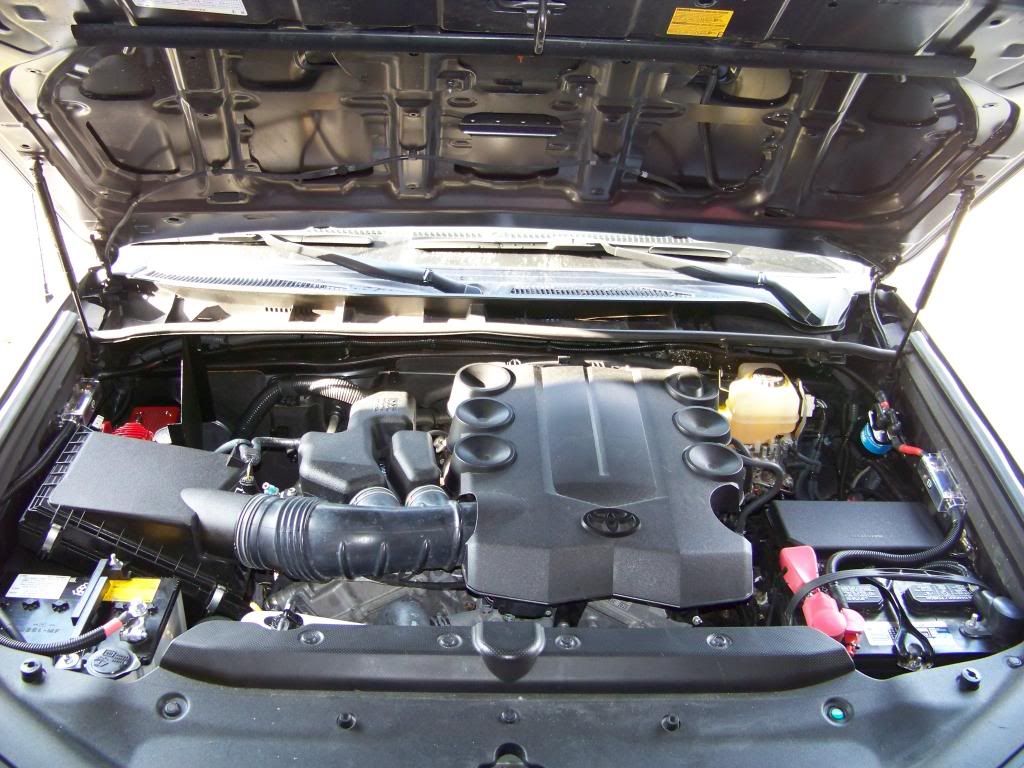
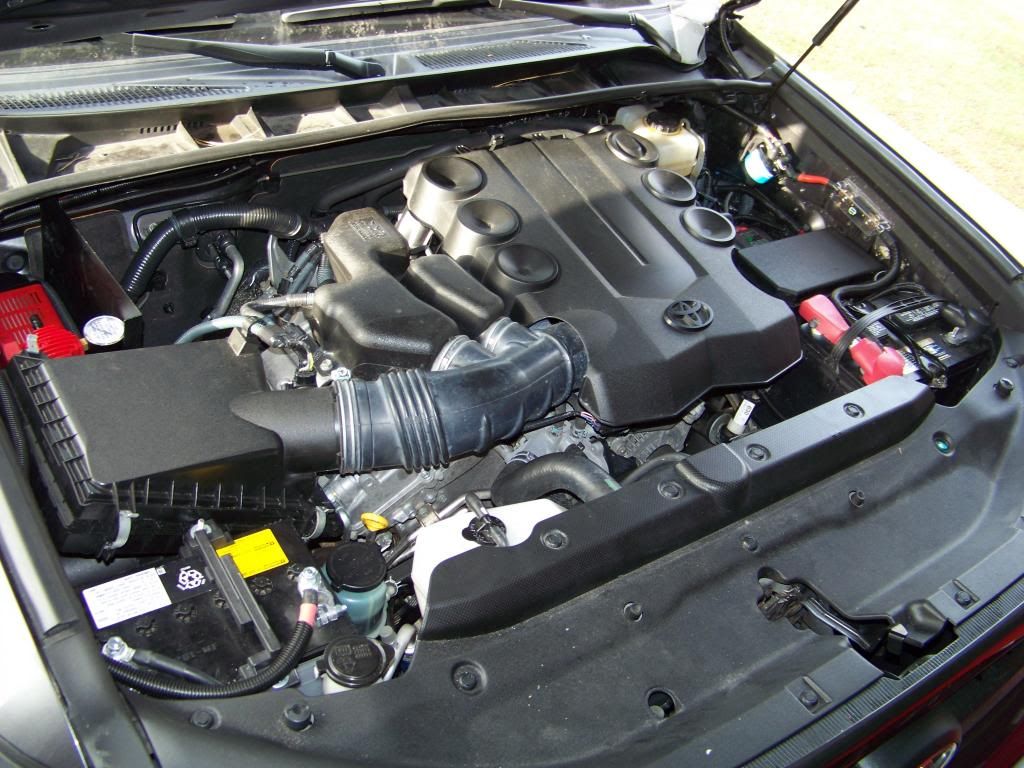
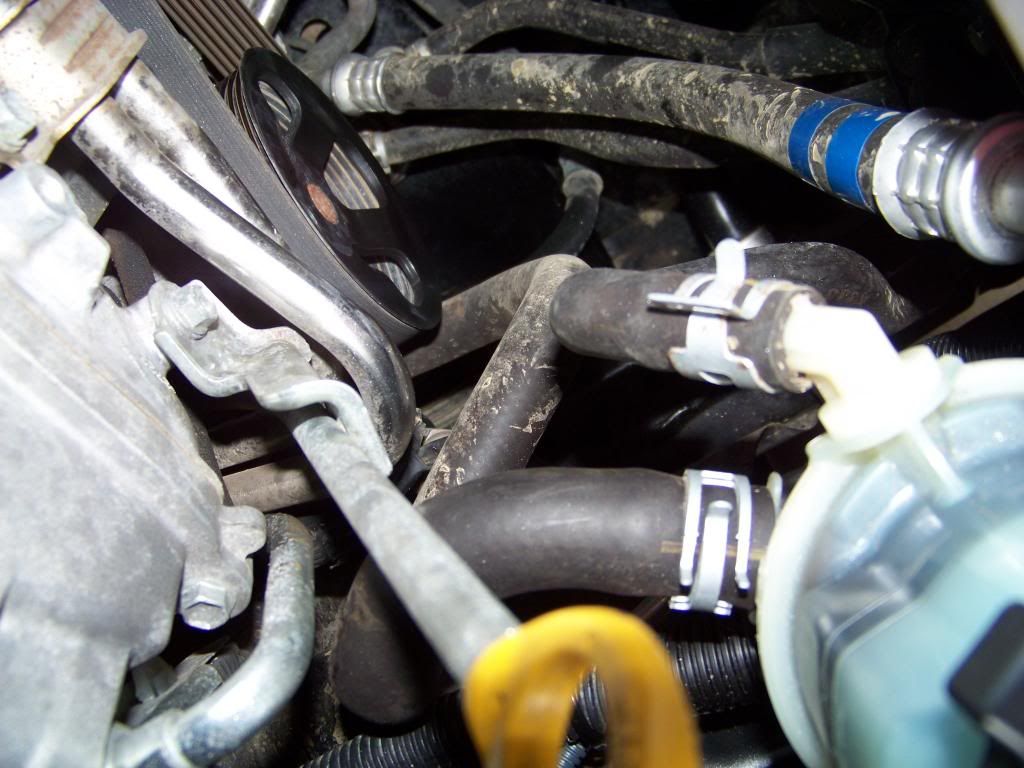
By far, the hardest part of this was relocating the A/C lines and the power steering reservoir so they were out of the way and safe from rubbing with the battery in there. I had to make 2 custom brackets to accomplish this. Honestly, buy the ABR battery tray and be done with it. I spent 2 days fabbing and re-fabbing brackets until I was happy. It worked out well, but gees, what a pain!
Here are some pics-
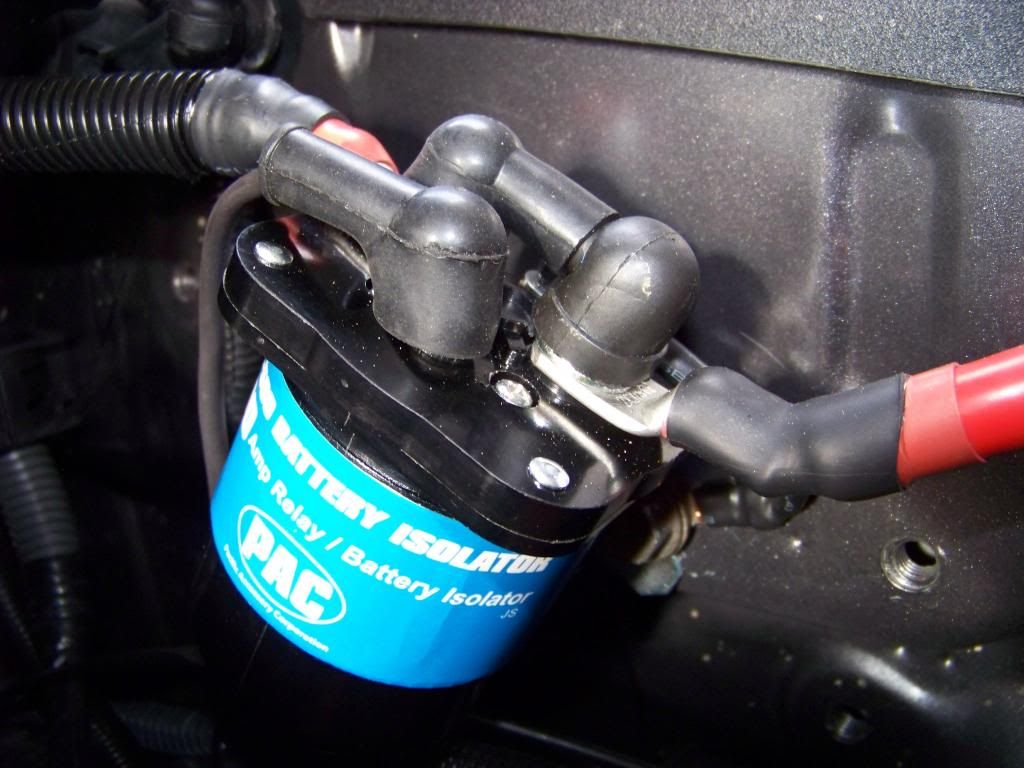
**This is the PAC 500 relay- the key to the system. This will allow the batteries to be connected or separated. The 500A rating allows it to be robust enough to handle self-jump starting.
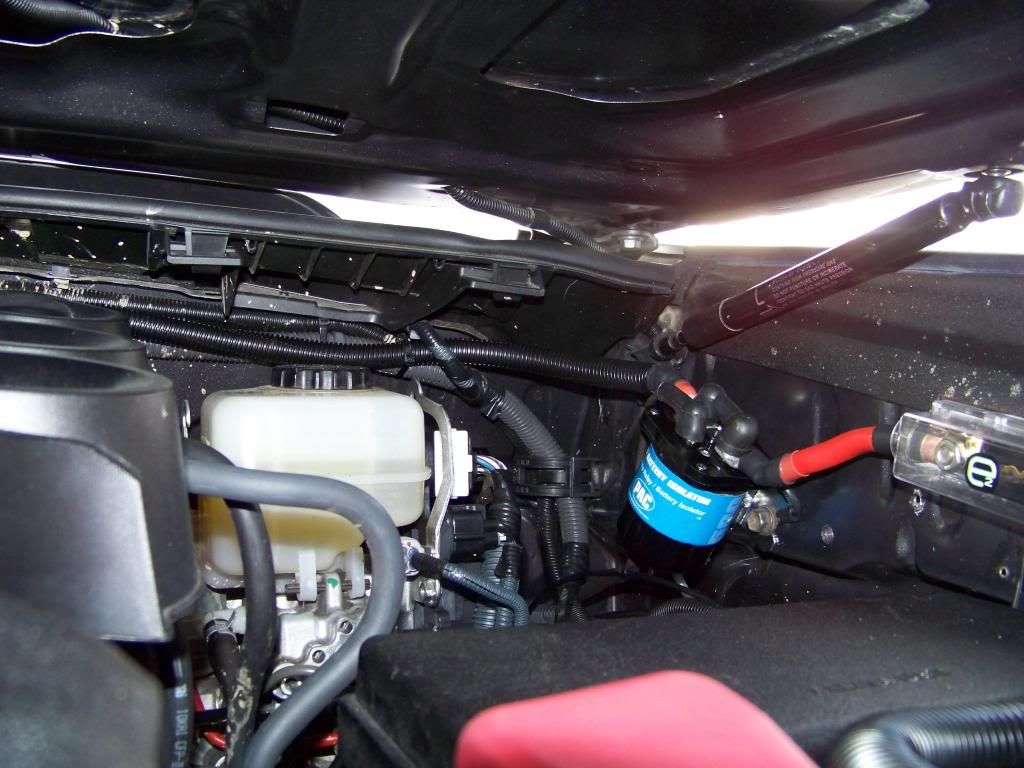
**I wanted to use the factory threaded holes on the fender wall, but the relay was too close to the hood strut. I had to modify it a little bit, imagine that. Basically I just took the bracket off and drilled another hole so it could slide down in the mount further. This picture shows the clearance with the hood almost closed. There is plenty of room now.
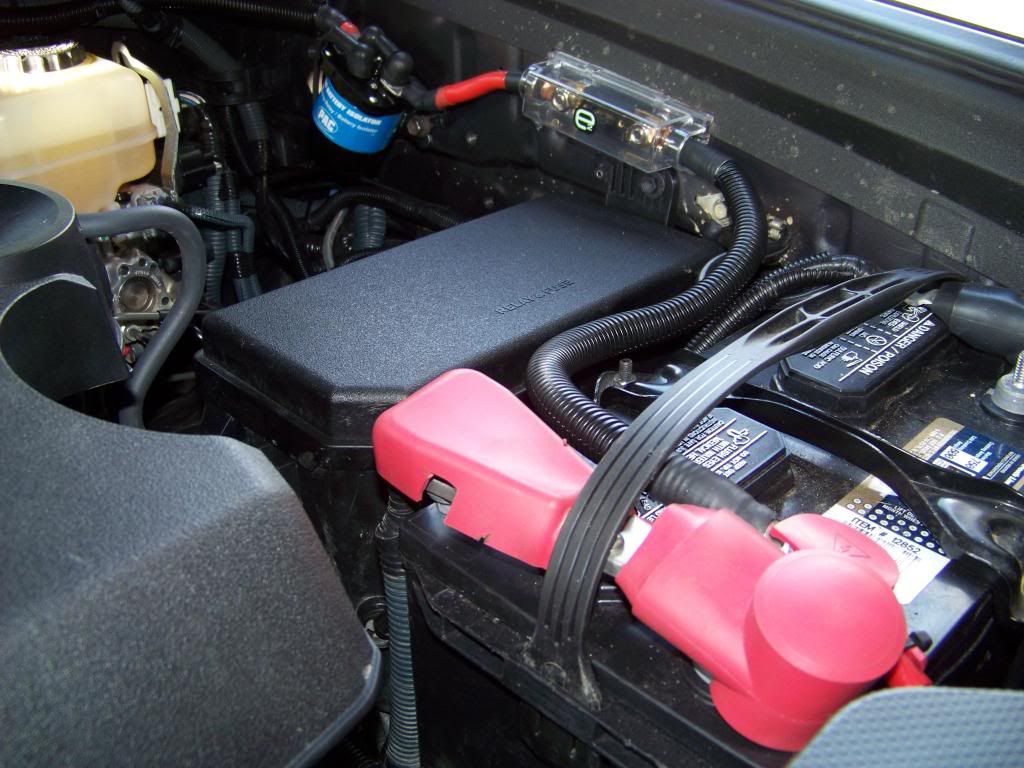
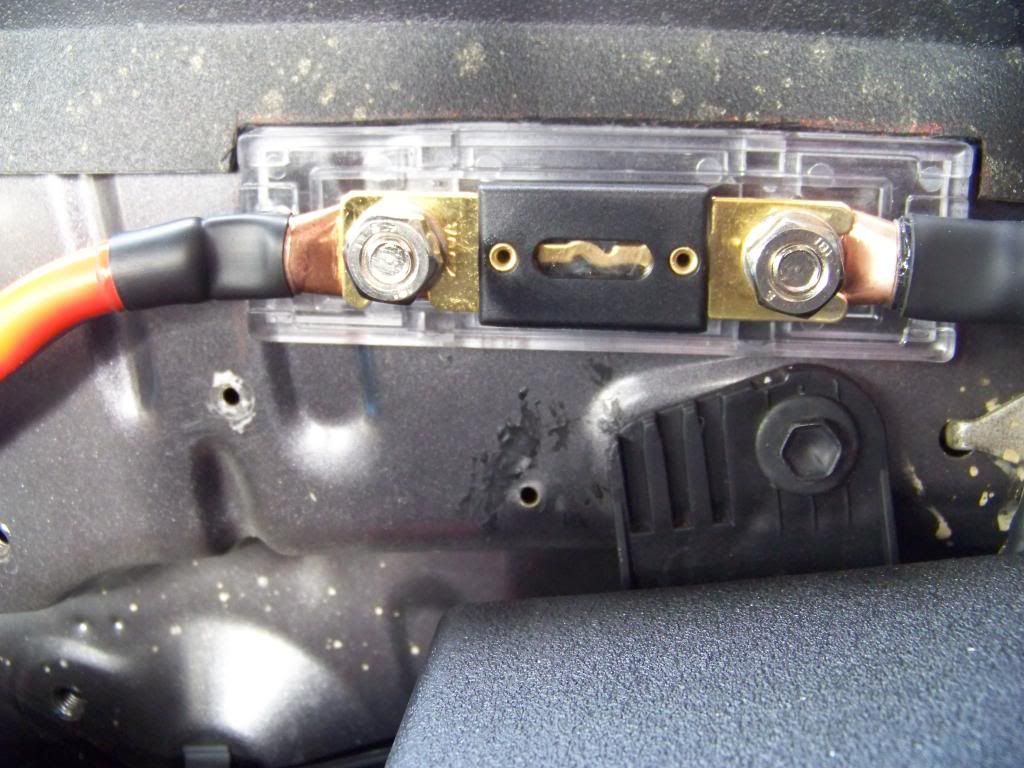
**Two fuses are required. These are 200A ANL fuses. 1 for each battery- between the positive terminal and the relay.
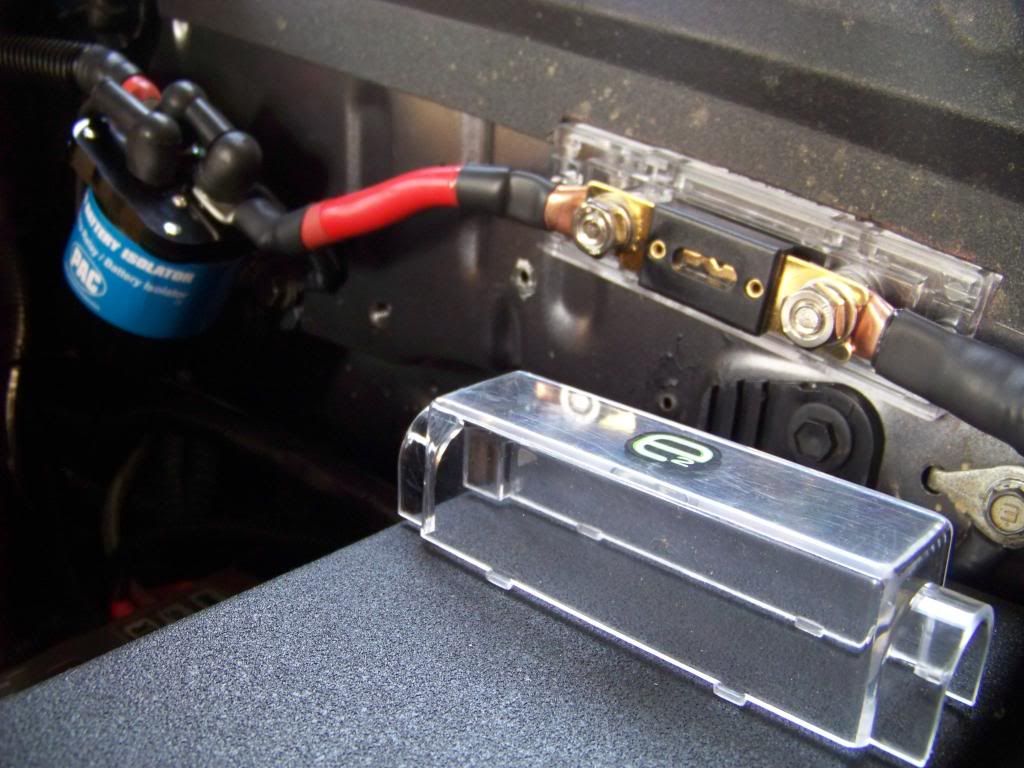

**Cable routing to the second battery.
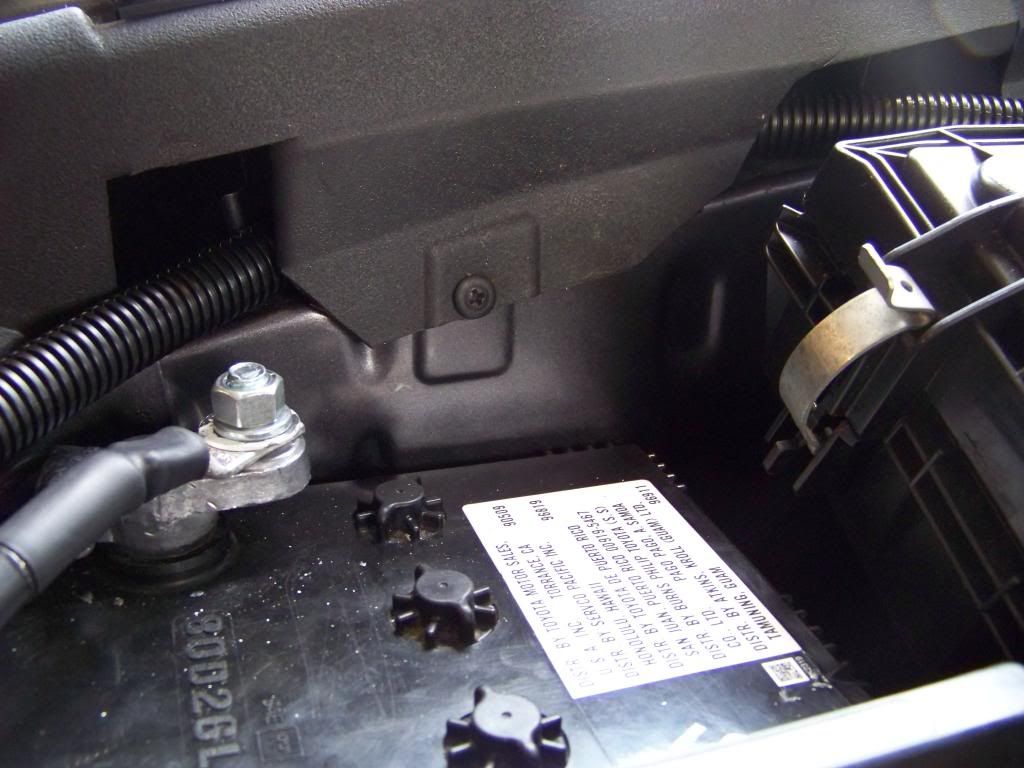
**The negative cable routes to the frame and connects under an existing bolt that holds an A/C line bracket.
**This shows just how close the P/S bracket is to the battery. I have an aluminum sheet there to protect from rubbing- but it has a small gap there (though it doesn't look like it in the picture).
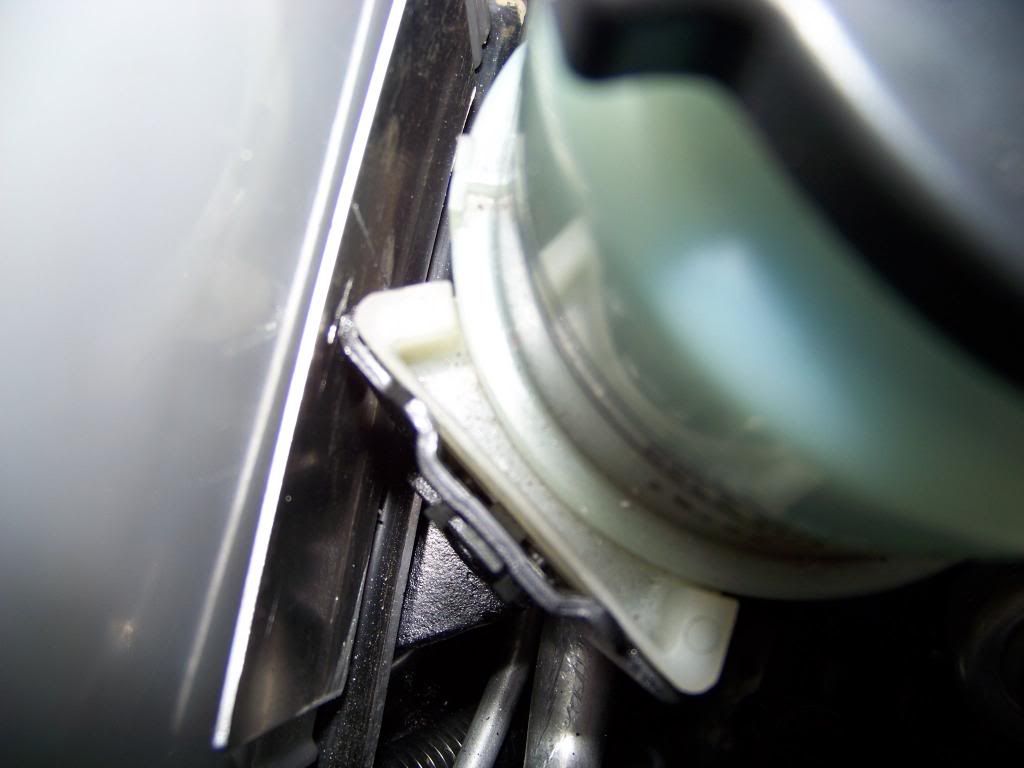
**The A/C line and the P/S lines can't touch or they will eventually rub through. The hose with the two blue lines (A/C) is about 1/2" away from the P/S line.
Overall I'm very happy with the result! All the 2 ga wiring is split loomed and has marine heat shrink applied. I spent A LOT of time planning this project!
I tested out a self jump-start and it works flawlessly.
Happy Modding!


 I can't get the rust out of those hairline scratches for the life of me... What did you do / what do you recommend? Or did you not go after the hairline scratches ?


 Linear Mode


