Hi All!
So I recently installed heated seats for both the driver and passenger side on my 2008 Toyota 4runner Sport. The link for the actual elements is here (
Dorman 628-040 Universal Seat Heater Kit : Amazon.com : Automotive). They get really hot, it's great!
UNPLUG YOUR BATTERY
1.) WIRE YOUR SEAT FIRST, I realized it is a lot easier to wire the seat before actually putting the elements into the seat. Take off the fuse box cover under the steering wheel and use the diagram to figure out a 10A fuse.
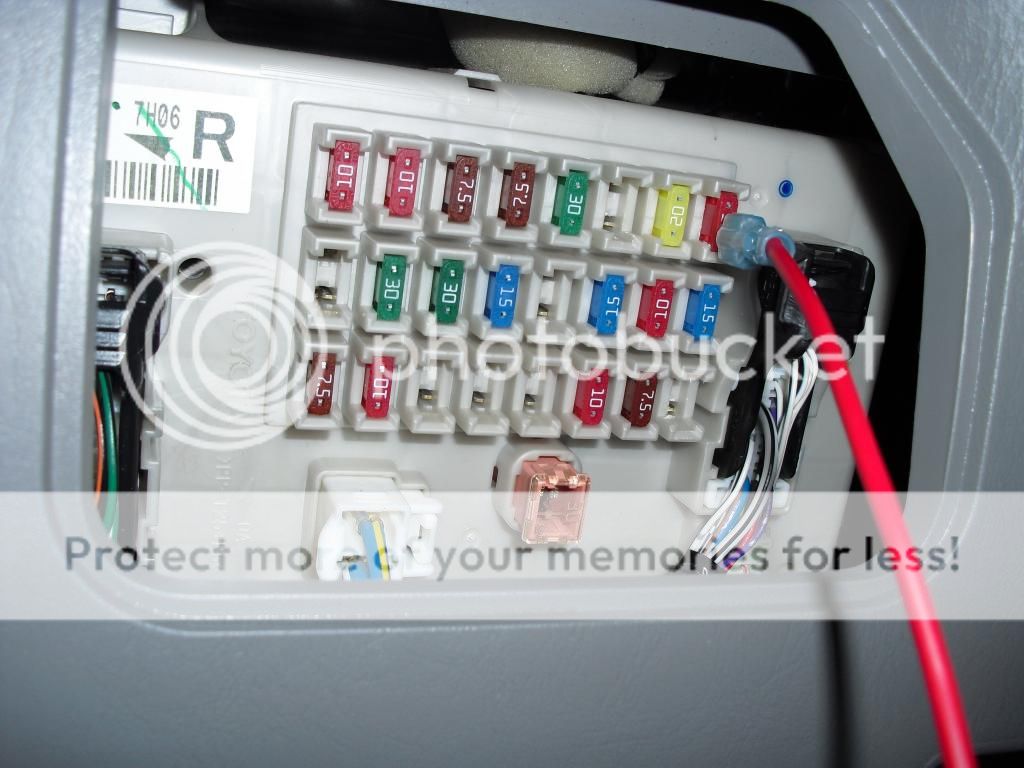
2.) The "Add A Fuse" that came with the kit was too big, so i had to take a pair of wire clippers to it and make it skinnier by clipping off some of the metal, I kept trying to shove the add a fuse into the same fuse and it would not fit, so I finally trimmed it and it worked!
3.) There is a ground you must attach to a bolt of some sort, I found a random bolt below the fuse box and just removed the bolt and slipped on the ground.
4.) Then you must remove the center console (where the shifter is), this is really simple, it has clips so all you have to do is force up and wiggle it a little. The console will have a couple wires attached to it, depending on your model, there is the DAC button and the 12V outlet, just unclip those and it will look like this...

5.) Run the wires from the fuse box, behind the mats ( I zip-tied some of the wires to other wires to keep it neat) and and run it up into the console area.
6.) The kit you have will have different sized buttons, they are in the instructions... Mine was 3/4" so you drill a hole into the actual console part and insert the button...

7.) Now that the button is installed, you simply just plug it into the wires that are snaked from the fuse box.
8.) The wiring is now complete, the next step is to take off the seats from the 4 bolts that hold down the seat...

9.) Tilt the seat backward and take off all of the wires attached, the air bag, power to the seat (if powered), and take the seat out.
10. This is where it gets tricky, there are several clips on the chair that you have to undo, first start by unhooking the rear "skirt" that makes the back of the seat all neat and undo all of the clips that are behind that. This lets the cover that covers the top of the seat to become free.
11.) The bottom is a little easier, just undo all the clips and pull both the top and bottom out of the back of the seat to the front so it looks like this...

12.) The elements look like this...

and have sticky double sided tape where the yellow appears on the border. MAKE SURE THAT WHEN YOU APPLY, YOU PUT THE CORD FACING TOWARDS THE BOTTOM OF THE SEAT.
13.) The way the seat is assembled is there are clips that hold the cover close to the foam, as seen below

you have to remove some of these clips so you have enough room to apply the elements.
14.) Starting with the top "back" of the seat, remove some of these clips from the wire that runs within the foam (this is a lot easier to see when you are actually doing it) and un-stick the element and apply, i personally used zip-ties to re-connect the cover to the foam, but I bet you could use wire, string, clips...
15.) The bottom is trickier because there is that cross stitch in the middle of the seat bottom that is also attached with clips and is why the element has a hole in the middle so you can attach a tie down in the middle. Remove some of the clips as stated for the back and also remove the clips on the middle stitch, apply the element and START with the middle stitch, using zip-ties etc... to attach it back to the foam.

16.) Once you have both pads installed and are tied down, slip the covers back through the crack (for lack of a better word) and reattach the covers to where they were on the back of the seat (all the clips you undid when you were initially taking the cover off) I did these once again with zip ties.
17.) The rest is simple, once the seat is back to normal, run the 2 sockets that are attached to the wires that are in the console (you can kind of see them in the above picture of the console area) and run them under the carpet by stretching the plastic a little bit so that the wires fit under, and run the sockets to where the other cords come out of the carpet (once again, easier to see when you are actually doing it).
18.) Plug the 2 cords that are coming out of the seat into the two plugs you just ran under the carpet and re-clip all the wires into the seat.
19.) re bolt the seat into the car and clip the button wire (wire that is coming off of the button) into the wire harness, and pop that back into place.
20.) Reattach your battery and test out, at first it didnt work so I had to readjust the add a fuse and it eventually worked. A little note that I also didnt know, it wont work unless that ground is grounded!


 Linear Mode


