
How to: '14 dash in an '11 - & How to Drop Glove Box

Dingo79

New member
First off, A great big thank you to all contributors on this forum. I regularly visit to get ideas and helpful information about my 4Runner.

I want to share a small mod I made to my 4runner. The mod might not be everyone's cup of tea but there is also some helpful info on how to remove the glove box assembly on a 2011 4Runner in the following posts. I hope someone finds it useful.

Having sat in a 2014 runner, I could not get over how dull the area on the dash above the glove box on 2010-2013's looked in comparison. Here is a pic of what I am talking about:
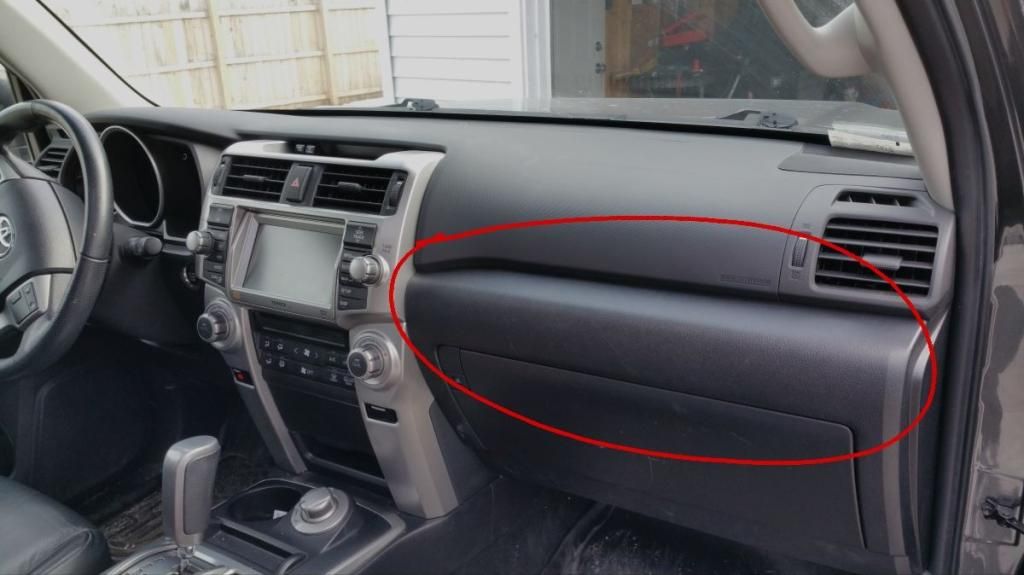


So in this mod we will go from that, to this:
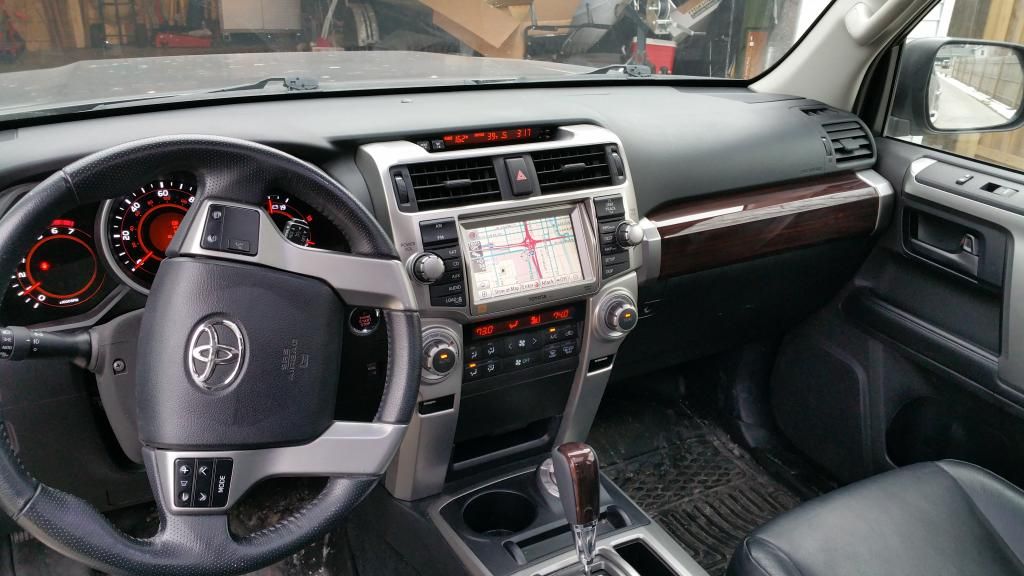


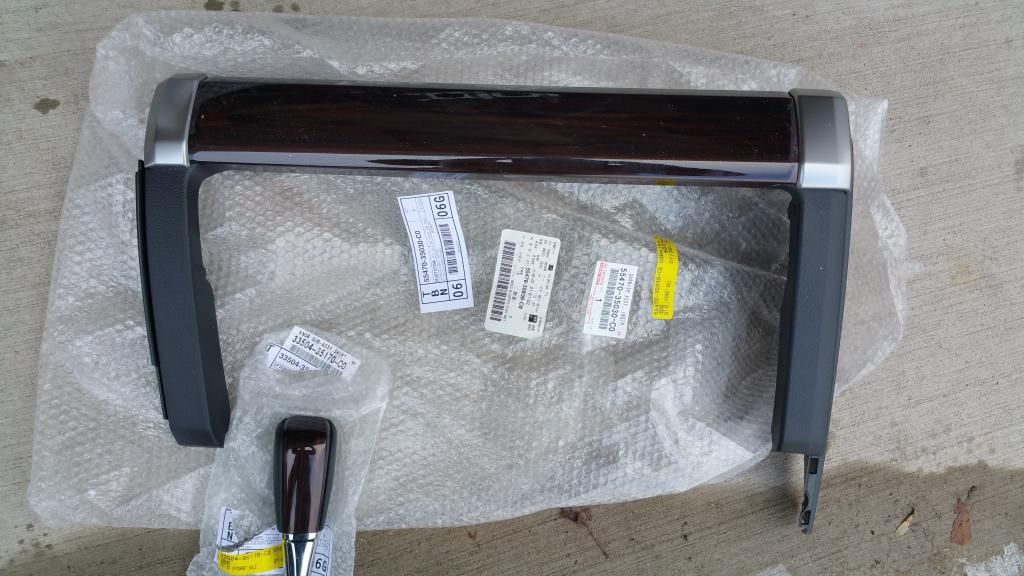
To begin you will need the following parts. The part numbers are visible in the pictures below. I also chose to swap out the matching gear shift lever for 2014 model years. Total for parts was about $400 delivered to my door. The gear shift lever swap is pretty straight forward so I won't be covering that here. Also note that there are two different versions of this trim piece available, a silver one and a black one for the SR5 and Trail models. The one I used is for Limited models. I believe all three to be interchangeable.


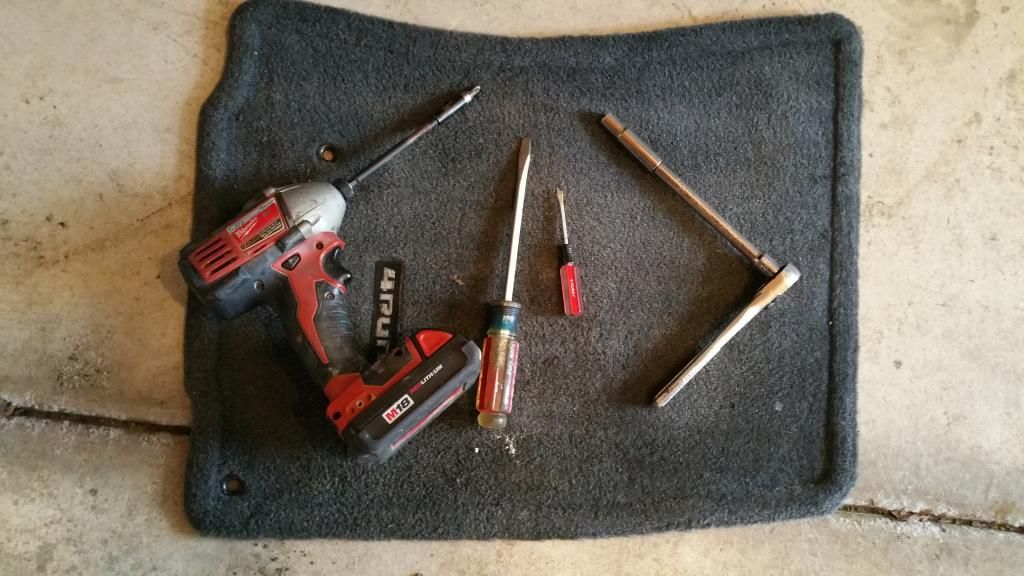
Next, you need the following tools. All bolts we will remove are either 10mm or phillips heads. I used a Milwaukee impact driver but a regular phillips head screw driver will work just as well.


STEP 1:
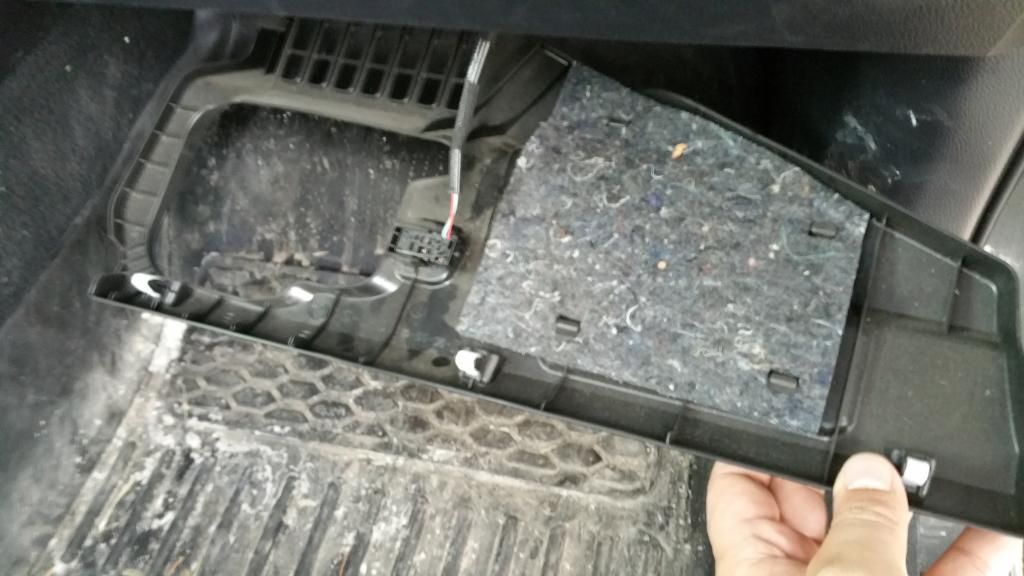
Remove the plastic trim below the dashboard area in the passenger's side foot well. A simple tug downward will disengage the clips that hold it on. The courtesy LED simply pops out as a unit.
 
Register to hide this ad
STEP 2:
Remove the plastic trim pictured below. This also just pops off.


STEP 3:
Pull the climate control assembly forward. It is held on by clips and a firm tug forward will get it loose. You don't have to remove the assembly completely for this mod. Also note that I removed the climate control knobs, but this is not necessary.


STEP 4:
Remove the small rectangular trim pictured below. This is the area in the bottom left corner of the glove box. It pops right off. Beneath it are two bolts. These bolts secure the knee airbag. Sorry for the crappy pic. I forgot to photograph this step. The bolt location is somewhat visible in the next step.


STEP 5:
Drop the airbag assembly and remove the two lower bots for the glove box assembly. The airbag assembly is held on by three bolts and a few plastic clips. Two of the bolts were removed in the last step. The third bolt (furthest away from driver's side) can stay in and the airbag assembly will pivot down on it and out of the way. You don't have to remove it completely for this mod but you can if you want to. You will have to remove the passenger's side kick plate to gain access to the third bolt if you want to remove it completely. The two lower bolts for the glove box assembly will become visible and easily accessible once the airbag is out of the way.

 
STEP 6:
Remove the three upper bolts for the glove box assembly. These bolts are in the glove box, covered by plastic tabs as shown below. The tabs pop right off using a screwdriver inserted along the top of each tab.


STEP 7:
Pull the glove box straight forward. There are clips that hold it down but a firm tug will pull it free. This is what it looks like when its detached. Unfasten the wire harness at the two white clips and disconnect the three electrical connections.


And here is a look at the dash with the glove box removed.


STEP 8:
Remove the nine phillips heads screws pictured below. This is the back side of the glove box assembly.

 
Then just pop off the trim piece we are replacing. Here is a pic of the old and new trim pieces side by side:


STEP 9:
Clip the new trim piece to the glove box assembly and re-fasten the nine screws you removed in the previous step. Here is the glove box and trim all put together and back in place:


STEP 10:
Re-install all of the pieces you removed, in reverse order. One thing to note as you are reinstalling the air bag - there is a small hook that latches into a slot near the two mounting bolts you removed in step 5. Make sure you re-hook this before reinstalling the bolts. I missed this the first time. You will not be able to screw it down if you miss this. Here is the best pic I have of this:

 
Couple more pics:

Before:


After:


A close up showing the fit:


This entire process took me about 45 Min. You might be able to get it done faster as I was just figuring out how everything went together. I hope you like the write up and I hope someone out there finds this useful at some point!
 
Great write-up! Wood trim isn't my thing personally, but it does add some flavor to your 4Runner.

Thanks! Yeah, I know what you mean about wood trim. I went back and forth a little while on whether I should go with wood or with this:


That's what the SR5 version looks like.

I am happy with the results and am sure that either would look better than what I had!
 
Thanks! Yeah, I know what you mean about wood trim. I went back and forth a little while on whether I should go with wood or with this:


That's what the SR5 version looks like.

I am happy with the results and am sure that either would look better than what I had!


First off, thank you for taking the time to post this.
Secondly, do you happen to have the SR5 part number. I never considered this, because I did not know it was possible.
 
Looks good. Nice write-up. Damn - I'd be afraid to mess with an airbag.

I hear ya' Philsey. I was also hesitant about messing with the Airbag but in this case I didn't really touch the airbag mechanism itself. I only unscrewed the trim piece that it is attached to and moved it a coupe of inches. I didn't disconnect it or anything.
 
First off, thank you for taking the time to post this.
Secondly, do you happen to have the SR5 part number. I never considered this, because I did not know it was possible.


I have the SR5 and trail part #'s. Looking for them though I realized that the last pic I put up might actually be the trail version instead. I now think that the SR5 version looks like this:


But I cant really say for sure. It would be helpful if some of the 2014 SR5 and trail owners on the forum could confirm which color goes to each model.
 
Cool - I will use this info to finalize the glovebox USB/TRRS iPod connector mod I started a while back, but never wrapped up. :cheers:
 
I have the SR5 and trail part #'s. Looking for them though I realized that the last pic I put up might actually be the trail version instead. I now think that the SR5 version looks like this:


But I cant really say for sure. It would be helpful if some of the 2014 SR5 and trail owners on the forum could confirm which color goes to each model.

Silver color is in my SR5 Premium version.
 
Damn I kinda dig that :) def does look better than the blank canvas over there. thanks for the writeup :thumb:
 
Having a '14 I never even thought about this but it looks good and thank you for posting the write up. My preference would have been the trail over the limited piece but it still looks 10x better then the blankness of the 10-13 (no offense to anyone and but I do think it adds a lot). Thanks again
 

Members online

Forum statistics

Threads
278,316
Messages
3,554,120
Members
248,016
Latest member
Advally Service

Trending content

Back
Top