This will be added to my build thread, and mod thread, at some point. Doing this from my phone on Tapatalk, and the site on my iPhone is being stupidly slow. Thought that when people search, this would be a good way for them to see it, without having to dig through a bunch of BS.
There have been many things going around.
First, work. My new schedule blows. I've got so much stuff I need to get done, but not enough time to do it.
Second, time. Seems to get away from me all the time.
I need to get my tank done, my shocks mounted, all that jazz.
Took the truck out today, and wouldn't ya know it, the damn alternator shat the bed. Well, IDK if it really did, I probably could just clean it up, but what the hell. Didn't want to risk it going out again with the girl and baby in the car.(Read PERFECT time to do an upgrade.)
So. I upgraded.
Went to Advanced Auto and got a CS-144 from a 1995 Cadillac Deville with the heated windshield. Also bought the harness for the alternator.
The stock alternator will put out 85 Amps. The Cadillac one will put out 140.
Step 1 is to remove the stock alternator. Here's a shot of the two next to each other.

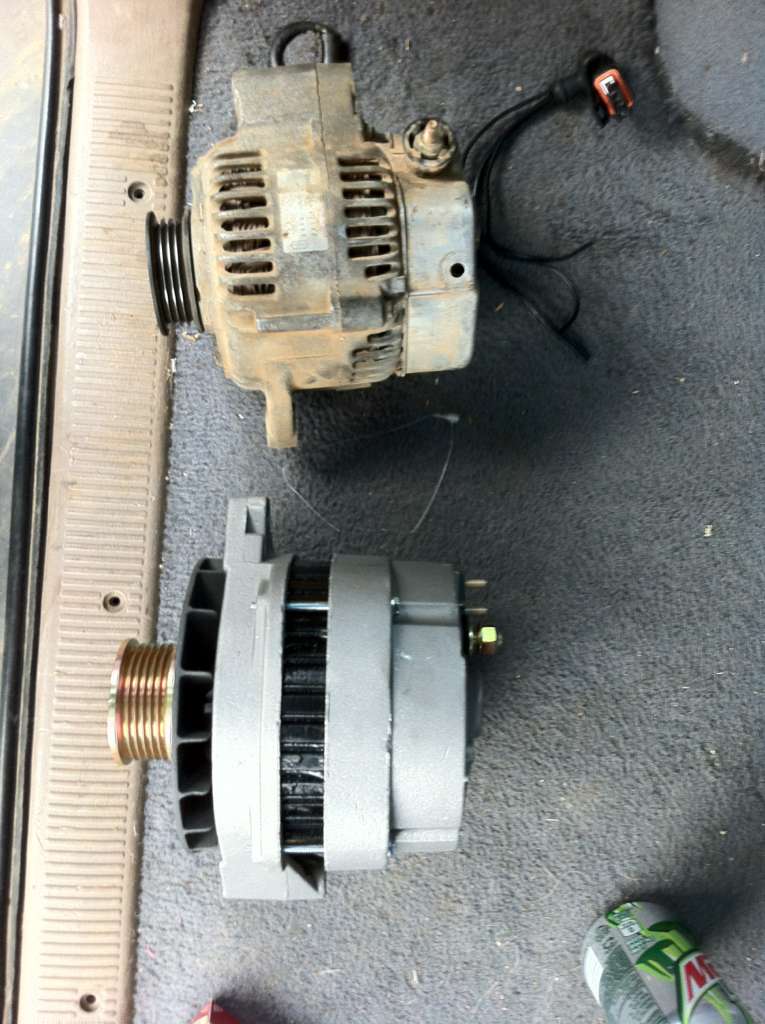

There is a nice size difference in the two.
Here was the tricky part.
The harness I got from the store was one color. All black. The wires, plug, it all was black.
With a little research, I figured it out.
If you look on the plug, there is an S, F, L, and a P.
S is the Sense wire. This is also the thickest wire. This wire goes to the white wire on the Toyota harness.
The F wire is the field/ignition wire. This will go to the red wire on the Toyota harness.
The L wire is the lamp wire. This will go to the yellow wire on the Toyota harness.
P is the stator wire, though there isn't one. It's used to run older style tachs.
There are 4 prongs, but only three wires. Don't ask me why.
Now, you can do two different things here.
You can work in the small area I the engine compartment and try to splice the wires together.
OR, you can do what I did.
I cut the Toyota connector of the harness. :o
Then, I stripped all the wires. I mean ALL the wires. All 9.
Then, I took the CS144 harness, and attached it to the Toyota connector. I stripped the white wire further than the rest, because I had to solder the white wire on to the thick wire of the CS144 harness. Didn't take a pic of this part.
With the other two wires, I just twisted them together.
Then, I bought some weather proof butt connectors, and put them on the end of the CS144 harness. Here's what I had:

Then, I brought that over to the front, and put the harness on the other side and crimped it down.

The only wire you NEED to connect is the yellow wire to the L wire. I just went ahead and did all three.
Now, those "weather proof" connectors are basically shrink wrap. So, the obvious comes into play here. Shrink it.
The reason for keeping the stock connector was incase I ever decide to go back to a stock alternator.
Now, when you put the alternator in, you're going to run into a space problem. Simply solution for this.
Loosen the bottom bracket bolt from the block. Here's a pic. It's a 14mm bolt. The bolt is in the socket, the big silver thing. ;)

Now that that's out of the way, the alternator will slide in easy.
Now, you need a spacer. I used three washers, and tacked them together. A pic:

You need to do one of two things with the post connector. You can either drill it out and bend the tabs, or cut it off and put a different connector on there.
I chose to drill and bend.
After that, put the bolts in, put the tensioner back, plug it in, and you've got a upgraded alternator. More pics.


The CS144 has a 6 rib pulley on it.
The Toyota has a 4 rib pulley.
You can see if you can replace the pulley; you'll need a pulley with a 17mm hole, the size of the bolt on the CS144.


