I'm new on the forum and want to try and contribute something before going off and asking a million questions about lifts, tires and whatnot.
Here is some info and pics from installing a Morimoto HID kit from theretrofitsource. It took about an hour start to finish done outside during a light snowfall- pretty easy stuff. I don't claim this is the best way or to be an expert. This is just what worked for me.
I used the stock projector housings but will probably upgrade to the Mini DS2 projectors when the weather (Minnesota) is better (more on that below).
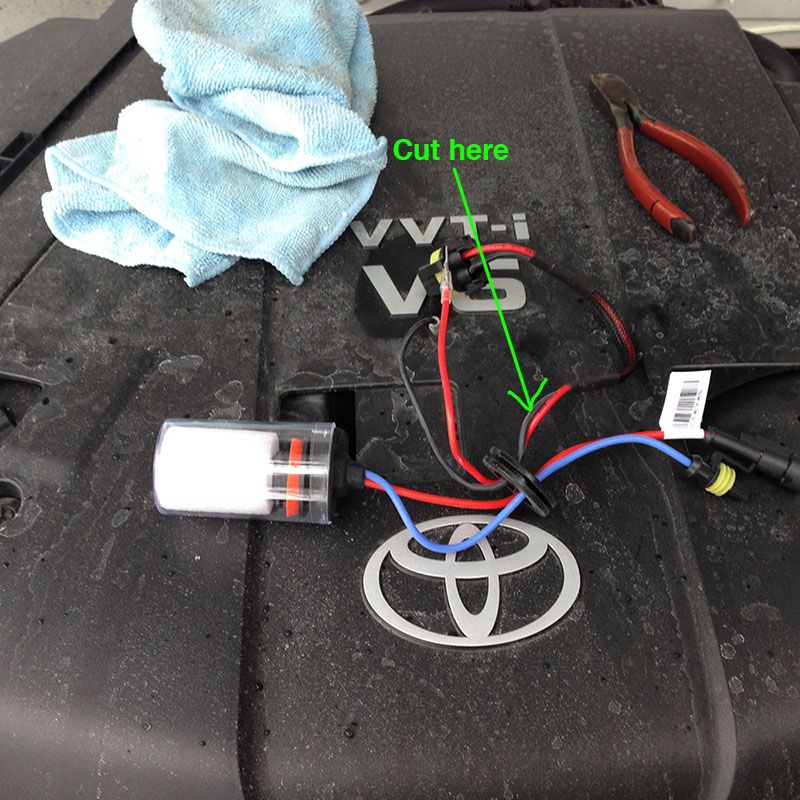
So here we have one of the HID bulbs. Since 4R headlights have external wiring, we can lose the pass-through. Just cut the wires and pull them from the grommet. Don't touch the glass! TRS included some alcohol wipes for cleaning the bulbs. I do this regardless since you don't know how they've been handled from manufacture to your possession. I also save the protective foam and plastic covers for the factory bulbs.
 Passenger side
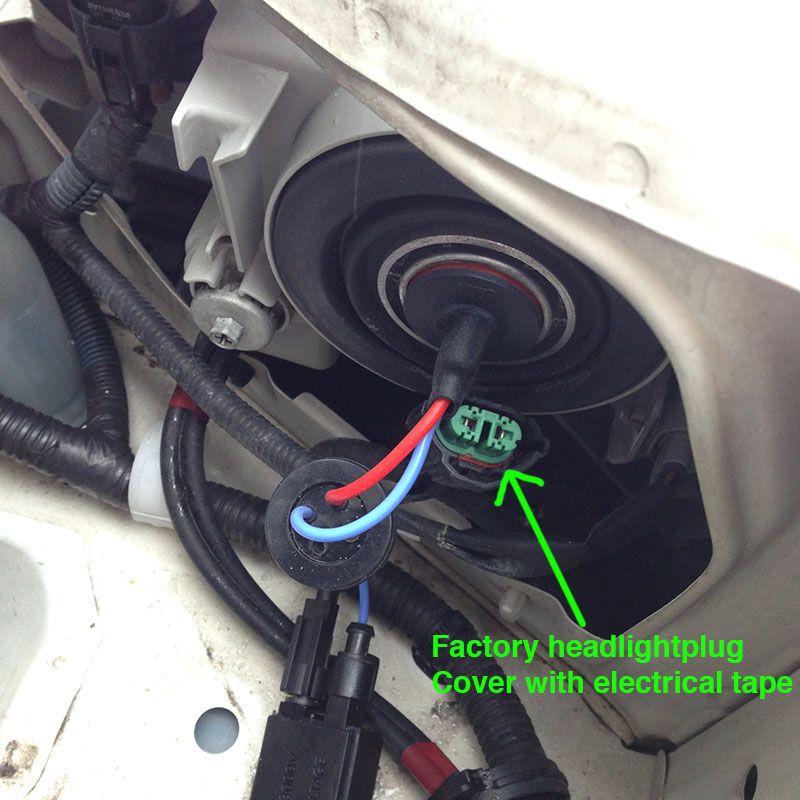
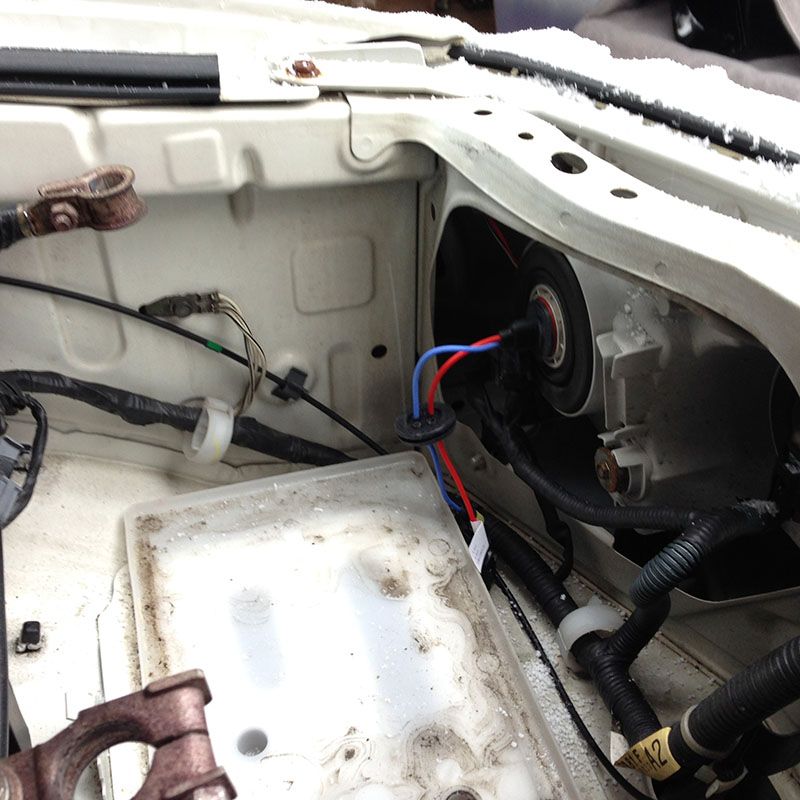
Below is the passenger side bulb installed and the factory headlight plug disconnected. This won't be re-used so seal it up with some electrical tape.
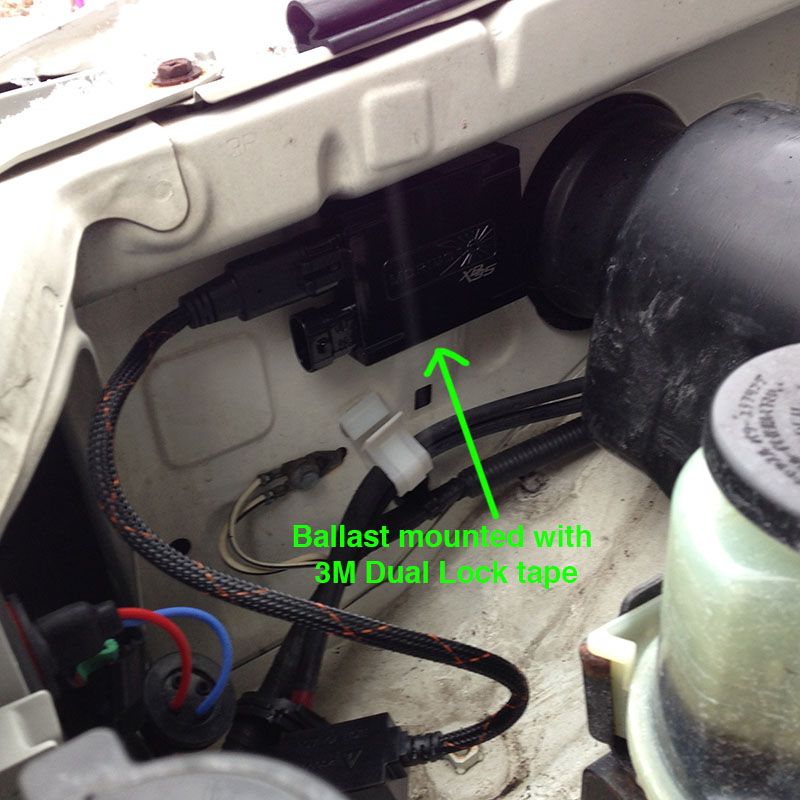
I mounted the ballast with 3M Dual Lock tape. Its like velcro, but both sides are little plastic nubs that lock together- no fabric. Be sure to wipe down the area with a cleaner before applying the tape.
Here is the ignitor mounted the same fashion as the ballast

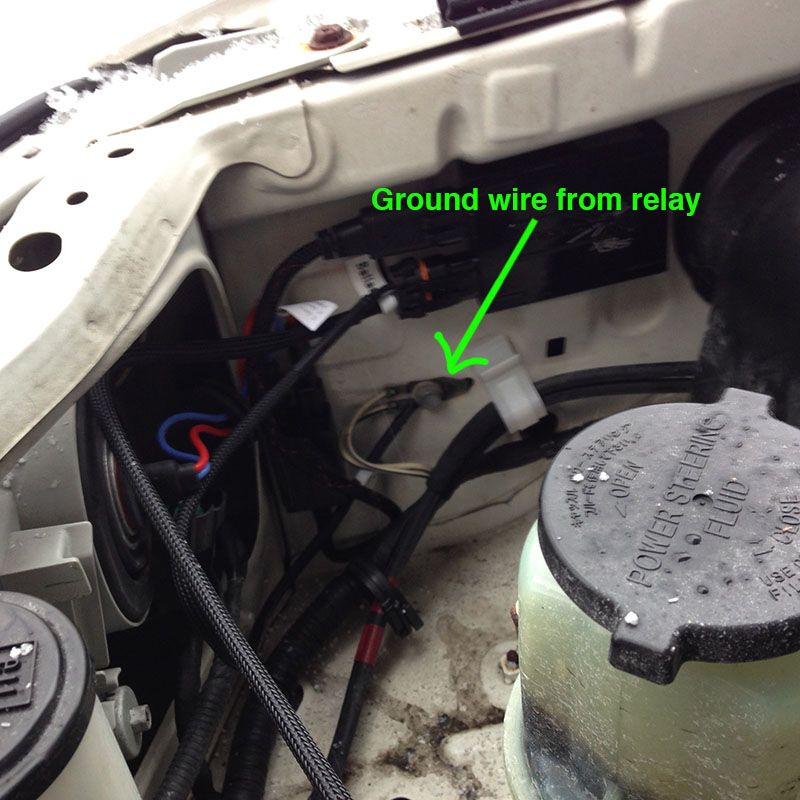
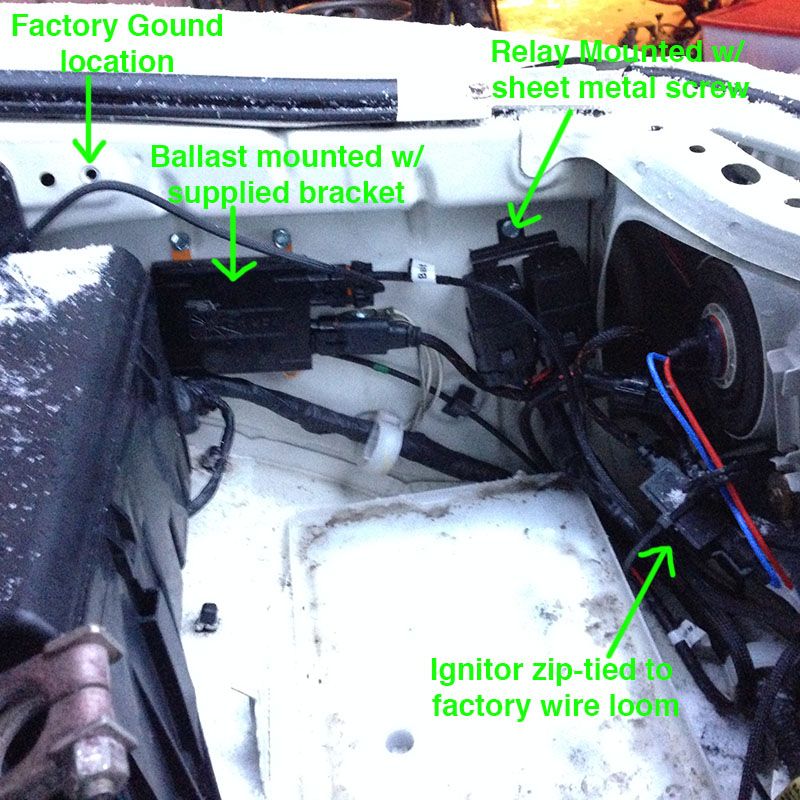
Everything wired up. The power lead from the relay to the ballast is plugged in and the ground wire connect to a factory grounding point.
Note: I ran the power lead from the relay under the radiator bracket (tucked in after this pic was taken). There is a factory wire loom under there you can connect to with some zip ties. Access requires removing the plastic trim which is just a bunch of expanding plastic clips. Don't lose them!
 Driver's Side
On to the driver's side. I assume when you popped the hood, you realized the battery would need to come out for this. The factory bulb has been removed and HID bulb installed. Don't cover up the factory headlight plug. This will connect to the relay harness to switch the lights on/off.
Wired up! I used a 3/16" bit to drill a hole for the relay bracket. I also utilized the supplied bracket for the ballast on this side (I later went back and did this on the passenger side too). It was a more secure installation assuming you don't mind a few new holes in the engine compartment. I wrapped several turns of duct tape about 1/2" down the drill bit to prevent it from plunging in. Dab a bit of grease on the threads of the sheet metal screws and you're good to go.
I zip-tied the ignitor to the factory wiring as it was convenient. You can also see the hole for the factory ground point (removed to take out battery) where the relay ground will go. I ran the positive power wire from the relays in front of the battery tray and around to the back of the battery before connecting to the positive terminal (zip-tied to factory wiring). There's plenty of length to do this and its kept out of the way.
Once the battery's back in everything is tucked away for the most part.
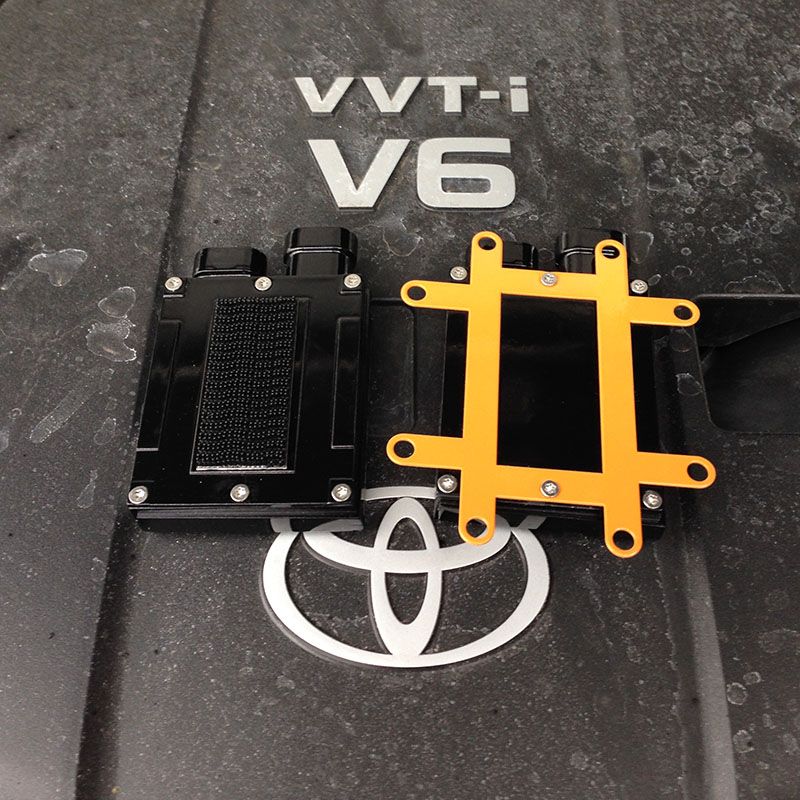
With respect to the mounting the ballasts, I'm sure tape or the brackets are both fine (Note: The tape does not come with the kit, it was purchased seperately). I just changed my mind midway through and used the brackets. Below is an image of both. It's just two small torx screws holding the brackets on.
*When you're all done, you'll need to normalize the driver's window, rear window and sunroof. This is done by rolling them down/back about half-way, then rolling them up, holding the button for about a second after they're fully closed. (Thanks to this forum for that info, I would have been lost otherwise)
Overall, I'm pretty happy with the results. I like that there are two separate relays so if one craps out, you're not stuck in the dark. It's definately a lot more light on the road. I'll post some beam shots asap.
My reason for mentioning the Mini DS2 projectors in the beginning is the beam pattern of the factory projectors. While there is a defined, stepped cutoff and you won't be blinding oncoming traffic, it's not as clean a pattern as it could be. I can only assume some output is being lost here due to their inefficiency.
I hope this was helpful and I'm happy to answer any questions I can.
Cheers,
Luke


