Then attach the rear shocks. The angle of the bottom shock mount was a little too much so put the bottom end on as well as possible then get the floor jack out and use it to raise the axle while pounding on the end of shock mount with a rubber mallet till it slides on and bolt it on.
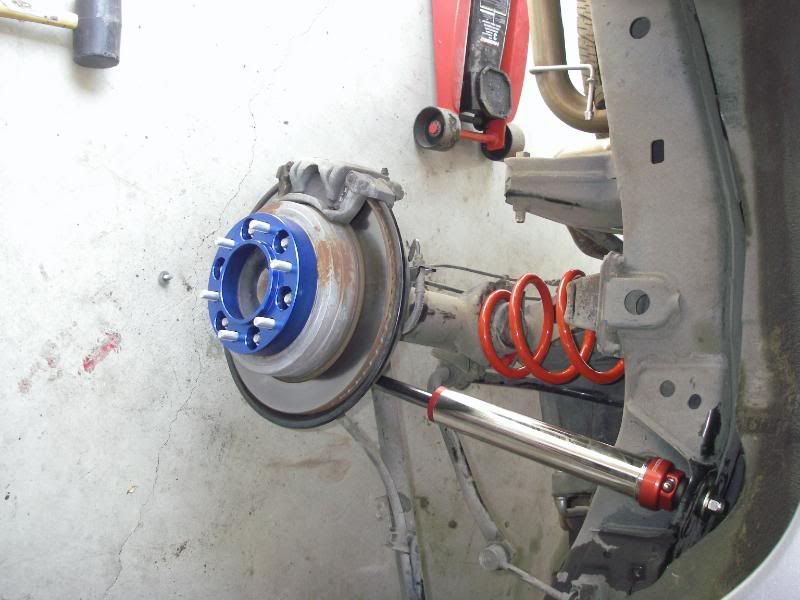
Do not tighten the top mount yet as you need to torque it down while under weight of the vehicle. The bottom mount can be torqued however. See the instructions for torque specs. A pic with spacers installed
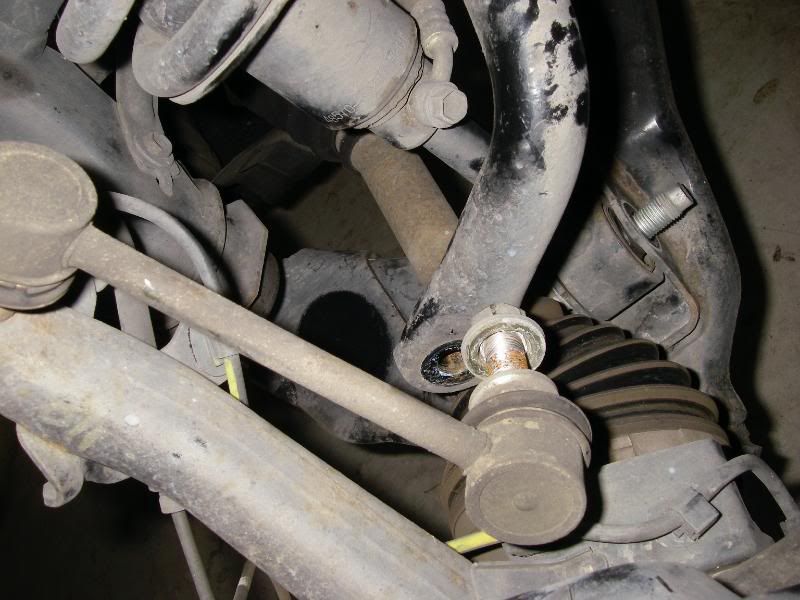
Now time for the fronts. remove the cotter pin and castle nut from the tie rod, save the cotter pin.
Flip the castle nut upside down and screw it on till the bottom of it is just above the top of the tie rod stud.
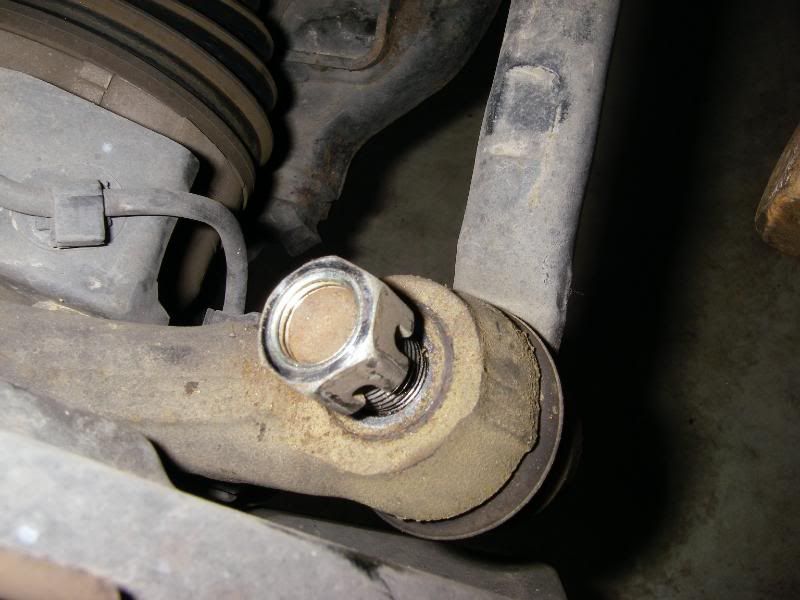
Get out a mallet and bang the crap out of it till it comes out, be careful not to hit it too hard or you will screw up the castle nut and need a new one or worse screw up the tie rod stud.
After that comes out remove the sway bar mounting nut and disconnect the sway bar.
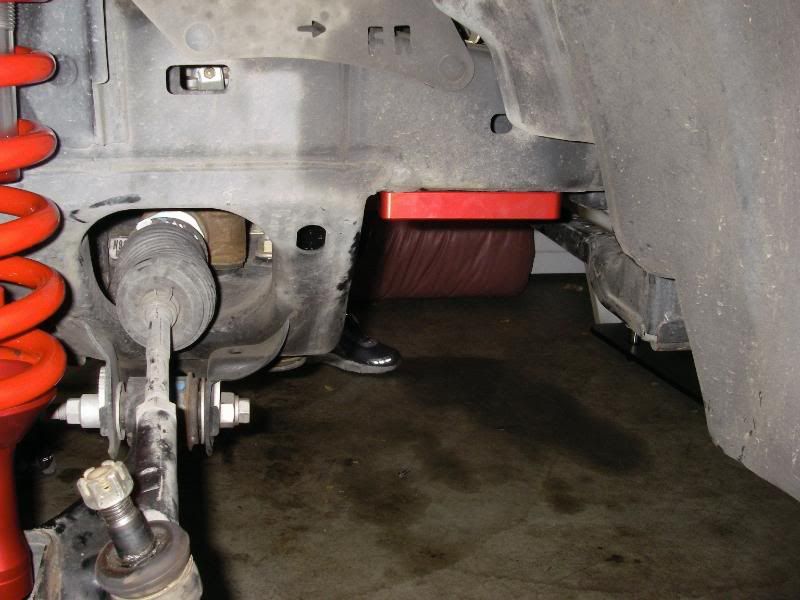
Take off the front skid plate and remove the mounting brackets that hold the sway bar to the frame. Get the sway bar relocation blocks and bolt them on to the frame using the original bolts from the factory brackets. Put those in the large holes in the relocation blocks.
remove the front shocks and get the bottle jack out and put in inbetween the upper control arm and the top of the wheel well. Use a small piece of wood or something to put in between the top of the jack and the top of the wheel well as it will slip and fall out if you don't. Install the new coilover and torque it as per instructions.

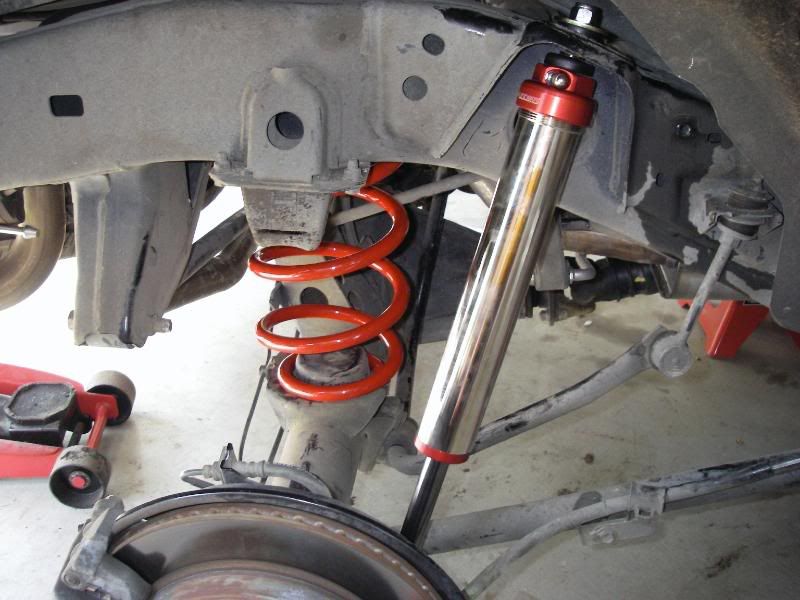
Here is a pic of the new coilover and the sway bar relocation block on the frame.
Mount the sway bar back on the blocks with the hardware provided and reattach it to the factory mounting place by the wheel. Attach the tie rods back and put the castle nut back on and the cotter pin back in. Voila, new suspension just like that. Here is a final pic after completion.
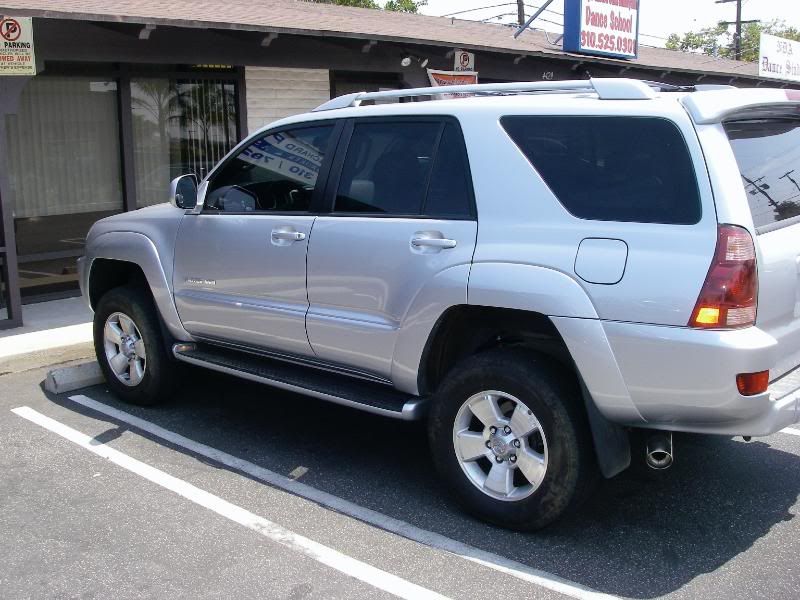
Let me say the ride with these is awesome, I hit some speed bumps in an empty parking lot at about 30 mph and could barely even feel them, can't wait to hit up the desert. Now I just need some 285/70's for it. Also, this project was much easier than the Saab, rebuilding a strut is a pain in the ass.
If anyone is in Socal and wants to do this but needs help let me know and I'll come help you out. Saved me a few hundred bucks doing it my self.


