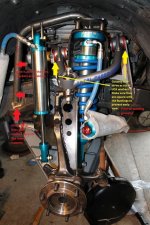
Pearl's mod/build LT rear/DK +3.5 LT/Custom Baja Bumper/Thorley Headers/Manual T-case

4RunnerAquasport

Senior Member
Meet "Pearl"
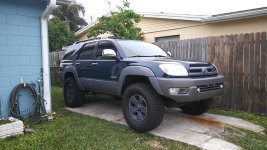
22519576_1546301898794945_4966997556301239568_n.jpg
Bought this truck from a T4R.org member here in Florida and I like how he got 35" tires stuffed under this thing, from reading this forum no doubt. She's pretty fast, rides good and handles great. But, I want some V8 Long Travel!

Califab, King, and Metal Tech LT medium springs w Wheelers Super Bumps are going in the back. It will be quite awhile and a lot of PBJ before I can afford the TC front kit w Kings. Pics are lacking for now.
 

Attachments
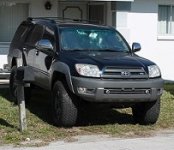
  • Pearl cropped.jpg
    Pearl cropped.jpg
    35.4 KB · Views: 4,344
  • IMG_4174.jpg
    IMG_4174.jpg
    138.1 KB · Views: 4,227
  • 22519576_1546301898794945_4966997556301239568_n.jpg
    22519576_1546301898794945_4966997556301239568_n.jpg
    101.9 KB · Views: 5,791
Last edited:
Register to hide this ad
Meet "Pearl"
View attachment 284290
Bought this truck from a T4R.org member here in Florida and I like how he got 35" tires stuffed under this thing, from reading this forum no doubt. She's pretty fast, rides good and handles great. But, I want some V8 Long Travel!

Califab, King, and Metal Tech LT medium springs w Wheelers Super Bumps are going in the back. It will be quite awhile and a lot of PBJ before I can afford the TC front kit w Kings. Pics are lacking for now.

Glad to see you picked up where he left off. Nice parts, seems you're off to a great start!
 
Glad to see you picked up where he left off. Nice parts, seems you're off to a great start!
Hey Man! Thanks for checking in!!
I was going through your thread the other day after reading rickashays thread "35s on 4th gen". All you guys, BlackWorksInc, t-man, LTDSC, momo.75, the_josh, have some great info!! Probably more threads I haven't found yet either lol. Jealous of all the great builds lol!!

My 5th gen build has been fun and "LE Mae" can really put some moves on a trail although she's a bulky 6k lbs. Love me some power line roads at 50 mph, and LE gets it done pretty well, but the abuse is starting to takes it's toll. I landed so hard one day I broke an ASB link. Lucky I didn't bend a spindle.

And of course it's like the proverbial "Lays syndrome", you can't have just one. I plan to make "Pearl" a lot more whoop friendly and not so damn heavy. So with that said, ANY F-ups you see me in the middle of, PLEASE call me out lol. Thanks again and Happy Super Bowl Sunday everyone!
 
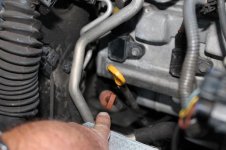
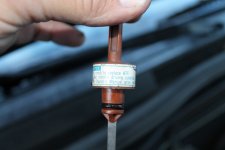
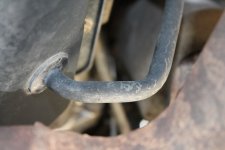
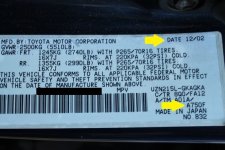
Forgot to mention "Pearl" has one of the few A750s with a dipstick. Stick says Type IV. That's one of the things I'm going to have serviced with a fluid exchange here soon. IMG_4105.jpgIMG_4107.JPGIMG_4113.JPGIMG_4110.JPG
Discrepancy on mileage in the carfax w ODO, so I already had the Aisin T Belt kit put in there just to be safe. Mechanic showed me the other belt and it was OEM and cf shows it was done at a dealer in JAX @ 90,176 miles. The writing is still pretty clear on the belt itself, so who knows if cf is correct.
 

Attachments

  • IMG_4105.jpg
    IMG_4105.jpg
    53 KB · Views: 4,514
  • IMG_4107.JPG
    IMG_4107.JPG
    105 KB · Views: 4,459
  • IMG_4113.JPG
    IMG_4113.JPG
    122.9 KB · Views: 4,655
  • IMG_4110.JPG
    IMG_4110.JPG
    99.6 KB · Views: 4,435
Last edited:
Pearl's gettin some LT rear

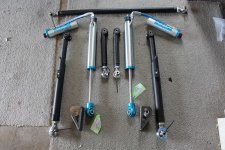
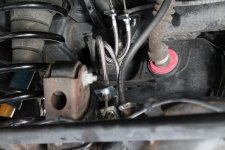
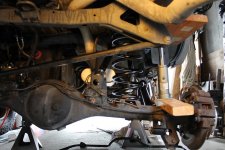
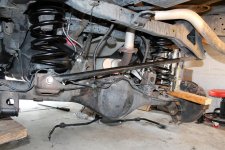
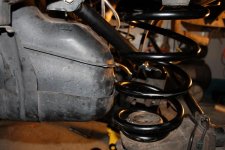
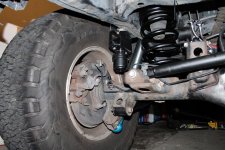
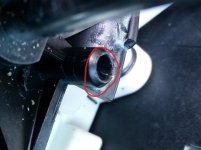
CaliFab and Metal Tech so far......checking my clearance Clarence. Metal Tech brake line extensions look good and ABS wires have some slack so they'll be ok. Drivers spring contacts the tank at full droop. Have to put a little length in the lower links and go from there. Front Coil Overs are being built with a Late May early June delivery.
 

Attachments

  • IMG_4185 - Copy.jpg
    IMG_4185 - Copy.jpg
    119 KB · Views: 4,387
  • IMG_4186 - Copy.jpg
    IMG_4186 - Copy.jpg
    132.6 KB · Views: 4,579
  • IMG_4187 - Copy.jpg
    IMG_4187 - Copy.jpg
    133.6 KB · Views: 4,614
  • IMG_4190 - Copy.jpg
    IMG_4190 - Copy.jpg
    141.4 KB · Views: 4,382
Last edited:
Metal Tech rear spring contact

EDIT: I was WRONG....No more clearance issues!
Sorry about that. Apparently the Kings I'm installing aren't as long as I thought. They stop well short of any bind. I was big time wrong on this one. CaliFab offset links still have some travel left tho. Already wondering about going longer........

I've done some research today with no luck so far. I've been cycling the suspension without shocks to make sure of any issues. What I found is the axle needs to move aft to clear the driver spring on the tank. Driver side spring is marked with a "D" and installed on that side just to clarify.

[MENTION=130999]Inv4drZm[/MENTION], [MENTION=101553]t-man[/MENTION], [MENTION=63060]rickashay[/MENTION] any advice and ugh...criticism lol would be greatly appreciated.

So here is my question: I'm wondering how much extension the drive shaft slip yoke can handle and I'm also still learning about pinion angle and if I should be concerned with that. The CaliFab heims have a good bit of adjustment with plenty of shank inside the link for strength so that part should be OK.

I moved the axle 1/4" over stock length and I still have some contact and a little bit of droop left on the CaliFab links. I plan on limit straps but would like to get full down travel before I do that.
IMG_4191.jpg
 

Attachments

  • IMG_4191.jpg
    IMG_4191.jpg
    81.1 KB · Views: 5,477
Last edited:
EDIT: I was WRONG....No more clearance issues!
Sorry about that. Apparently the Kings I'm installing aren't as long as I thought. They stop well short of any bind. I was big time wrong on this one. CaliFab offset links still have some travel left tho. Already wondering about going longer........

I've done some research today with no luck so far. I've been cycling the suspension without shocks to make sure of any issues. What I found is the axle needs to move aft to clear the driver spring on the tank. Driver side spring is marked with a "D" and installed on that side just to clarify.

[MENTION=130999]Inv4drZm[/MENTION], [MENTION=101553]t-man[/MENTION], [MENTION=63060]rickashay[/MENTION] any advice and ugh...criticism lol would be greatly appreciated.

So here is my question: I'm wondering how much extension the drive shaft slip yoke can handle and I'm also still learning about pinion angle and if I should be concerned with that. The CaliFab heims have a good bit of adjustment with plenty of shank inside the link for strength so that part should be OK.

I moved the axle 1/4" over stock length and I still have some contact and a little bit of droop left on the CaliFab links. I plan on limit straps but would like to get full down travel before I do that.
View attachment 292437

Glad it resolved itself. You shouldn't need to worry about the slip yoke unless you are flying over whoops or jumping it, simply flexing on any trail will keep the driveshaft centered, one wheel goes down, the other up.

Some adjust their link lengths to fine-tune their pinion angle but IMO you are still using factory geometry and I'm not sure how much you can really change it without getting too crazy. You would need to lengthen the upper links and ideally shorten the lowers but with your lowers already threaded out 1/4" it may not be possible to do much.
 
Glad it resolved itself. You shouldn't need to worry about the slip yoke unless you are flying over whoops or jumping it, simply flexing on any trail will keep the driveshaft centered, one wheel goes down, the other up.

Some adjust their link lengths to fine-tune their pinion angle but IMO you are still using factory geometry and I'm not sure how much you can really change it without getting too crazy. You would need to lengthen the upper links and ideally shorten the lowers but with your lowers already threaded out 1/4" it may not be possible to do much.

Yes Sir, I don't think the yoke will be a problem either. I am going to leave the 1/4" of length (both uppers and lowers lengthened a 1/4") and see how it acts. I hadn't messed with a rear axle since I did my 5th gen 2 years ago. I forgot that until everything is mocked up together and the shocks are in place the pinion was way out, and the droop was way more than even a 29" shock would travel. Still learning.
I am thinking about moving the upper shock mount an 1" higher for more up travel. Waiting to see how the Super Bumps and MT extensions make contact as well.
IMG_4193.jpg

I do like speeding down power line and fire roads, and there aren't a lot of obstacle/articulation trails near me. My family has settled in AZ so I will be out there hitting some desert one day. Thank you very much for hittin me back tho!! Probably be picking your brain more in the future.
 

Attachments

  • IMG_4193.jpg
    IMG_4193.jpg
    100.1 KB · Views: 4,814
Last edited:
4the Gen Shifter Maintenance- avoiding the wet noodle shifter

I did a little prevent job while waiting on my coilovers to be built. I guess people that have broken shifters have a hard time fixing them and are expensive to replace. [MENTION=119796]alia176[/MENTION] Thanks I stole your pic he he.
102_6546.jpg
Having been through a couple threads on the matter, I landed on this from 2010 and it had been bumped recently.
http://www.toyota-4runner.org/4th-gen-t4rs/60082-2003-toyota-4runner-floppy-shifter.html
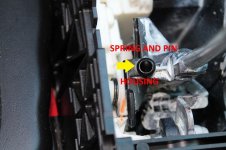
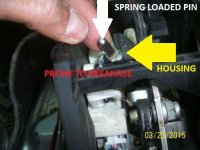
I found through other peoples trial and error, that the housing that holds a pin and spring loaded system to keep tension on the underside of the shifter guide plate, usually breaks after years of abuse and especially when people force a stubborn shifter.
So I have a small step by step from the point at which you get the console removed, which is not difficult at all. Here is a link to some schematics of the fasteners. All you need is a couple of small flat blades and a pick maybe. Most of these Toyota panels pull right out and pop right back in.
https://www.top4runners.com/ja/2007/footwells.html

My first step is simple: Unscrew your shifter KNOB and remove the small plastic cover that has the gear selection on it. It has four release tabs usually can be done with your fingers.
View attachment 295278
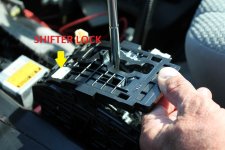
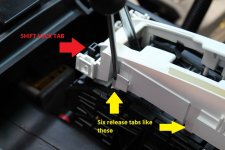
Then remove the small white cover underneath that. Small flat blade may be needed. I think there are six release tabs and a small shift lock tab that will need to removed.
IMG_4227.JPG
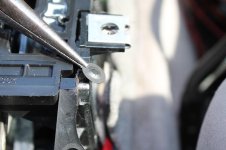
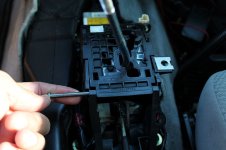
Then your gonna use your small flat blade maybe 2, and work this retaining clip off the pin it sits on at the top rear corner of the shifter housing.
View attachment 295282
It looks like this
IMG_4212.jpg
Then you remove the pin
IMG_4210.JPG
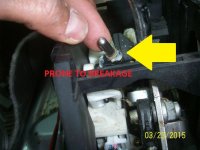
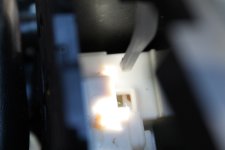
Now when you lift up on the guide plate, there are two guide tabs at the front, so pull back and up being careful not to break the shifter lock release button, it's spring loaded and has a small tang that sits down on top of the release mechanism. Moving the shifter forward or backward as you lift may help. Next slide please.....
IMG_4218.JPG
IMG_4221.JPG
 

Attachments

  • IMG_4212.jpg
    IMG_4212.jpg
    55.2 KB · Views: 4,707
  • IMG_4218.JPG
    IMG_4218.JPG
    110.3 KB · Views: 4,515
  • 102_6546.jpg
    102_6546.jpg
    74 KB · Views: 4,729
  • IMG_4210.JPG
    IMG_4210.JPG
    98.7 KB · Views: 4,569
  • IMG_4221.JPG
    IMG_4221.JPG
    90 KB · Views: 4,555
  • IMG_4227.JPG
    IMG_4227.JPG
    134.9 KB · Views: 4,656
Last edited:
Shifter Maintenance- avoiding the wet noodle shifter

Now when you lift up the guide plate make sure the pin isn't stuck to the underside of the plate. The grease gets viscous and sticky and the pin will pop out. If it did it should be right in that general area.
102_6546.jpg
Now here is a close up of a cracked housing, so make sure you give yours a good inspection. Stole another pic thanks [MENTION=132117]ExpeditionBill[/MENTION]
broken housing.jpg
Mine looked good so I started looking for solutions to avoid the broken shifter syndrome.
IMG_4199.jpg
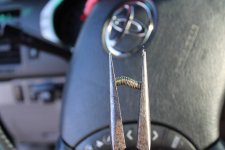
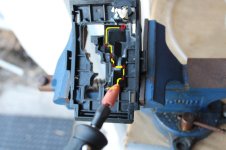
Now some people have cut a coil out of the spring to ease some of the stress on the pin making contact on the underside of the guide plate. This may work for you, but my shifter was fine P thru D, so I didn't want to change that. What I did was press the spring together with some pliers to collapse some of it's strength.
IMG_4201.JPG
Then I studied the path on the under side of the guide plate where the spring rides. You can see (not that great in my picture) there are little hips and valleys that this pin rides in to lock itself into each individual gear. Mine was stiff between 4th and 5th and almost impossible from 3rd down to 2nd. So my solution was to Dremel out a couple thousandths of plastic out of these hips in the troublesome areas and put it all back together. I has really helped 4th to 5th, but 3rd down to 2nd is still a little sticky so I will take a little more plastic off at a later date. At the cost of what I heard a new shifter can be, I hope this helps some folks prevent
"THE SLOPPY SHIFTER SYNDROME"
PS if it's already broken [MENTION=1102]TeryT[/MENTION] has a brilliant and simple solution using a rubber band and a washer http://www.toyota-4runner.org/4th-gen-t4rs/60082-2003-toyota-4runner-floppy-shifter-2.html (Post #27) to keep his in 4th when he's towing.
EDIT: 9/30/18 Shifter was still a little stiff so I went back in, cut a half of ring out of the guide pin spring and took a little more of the guide track with the Dremel. I'm concerned about cutting too much off the spring and the guide track, so I'm taking very small increments out. Still a tad sticky going from 3rd down to 2nd but I want a little resistance there for dropping down into 2nd as you can easily drop too far into 1st and possibly do some damage.
 

Attachments

  • 102_6546.jpg
    102_6546.jpg
    79.1 KB · Views: 4,496
  • broken housing.jpg
    broken housing.jpg
    128.3 KB · Views: 4,331
  • IMG_4199.jpg
    IMG_4199.jpg
    82.2 KB · Views: 4,299
  • IMG_4201.JPG
    IMG_4201.JPG
    124.2 KB · Views: 4,347
  • IMG_4211.jpg
    IMG_4211.jpg
    69.3 KB · Views: 4,045
Last edited:
Spindles removed for gussets - Start of the TC Dual Front

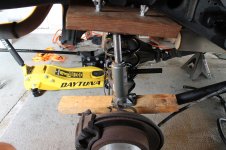
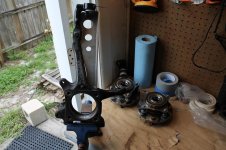
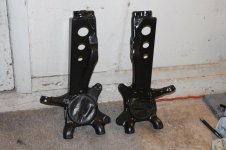
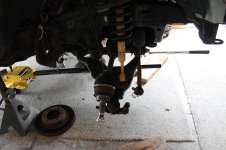
Pulled the Spindles this morning and dropped them off at a local welder this afternoon. Heat index is killing me today. Plenty more to do but I'm taking the Siesta for now......
 

Attachments

  • IMG_4230.jpg
    IMG_4230.jpg
    86.6 KB · Views: 4,034
  • IMG_4229.jpg
    IMG_4229.jpg
    105.3 KB · Views: 3,929
  • IMG_4231.jpg
    IMG_4231.jpg
    104.9 KB · Views: 3,988
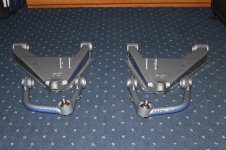
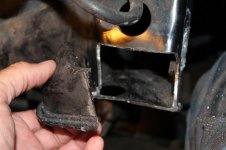
TC Dual Front Con't-Bump stop repo

I haven't been on my angle grinder in awhile....scared me. Gettin it done though. Pretty much used up a new 4.5" Home depot diamond blade on both horns. Not the easiest thing I've ever done and it ain't like this was a big deal. Just a little cutting lol. Good Fabricators have got some real passion for they're craft because a lot of this work ain't fun. IMG_4234 - Copy.jpg

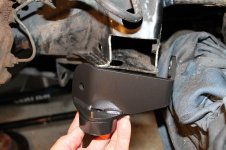
Here is the TC repo bracket painted and ready to be bolted up. You can see how the fitment needs to be. It's not easy marking a cut line for this job. I took some measurements, made some reference lines with my speed square, then eyeballed the rest lol. I have to clean up the rough edges and paint on this passenger side.
IMG_4235 - Copy.jpg

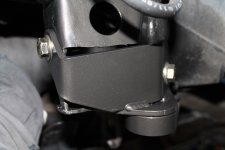
Here is the driver side all bolted up and painted. Didn't butcher it too bad I guess.
IMG_4236 - Copy.JPG
 

Attachments

  • IMG_4234 - Copy.jpg
    IMG_4234 - Copy.jpg
    56.8 KB · Views: 4,202
  • IMG_4235 - Copy.jpg
    IMG_4235 - Copy.jpg
    73.2 KB · Views: 4,367
  • IMG_4236 - Copy.JPG
    IMG_4236 - Copy.JPG
    135.8 KB · Views: 4,261
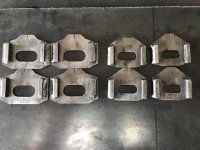
Outta town working so I sent my cam tab gussets over to my buddy Tim at Timbo's Customs in Auburndale, Fl. to get em welded up. Still a long way to go.....Damn I wish I'd learned how to weld.
 

Attachments

  • FB_IMG_1531490541936.jpg
    FB_IMG_1531490541936.jpg
    30.7 KB · Views: 4,049
Agonizingly slow going here lol. Shock tower gussets mocked up with the frame and tower metal prepped and ready for glue. No welding experience. The one regret that's eating at me now.....
IMG_4318.jpg
On the positive side,
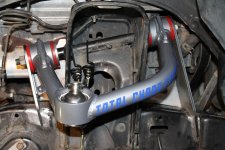
Total Chaos fitment on the pass side gussets looking pretty damn good out of the box tho. Hoping the other side is the same.
 

Attachments

  • IMG_4318.jpg
    IMG_4318.jpg
    133.6 KB · Views: 1,325
Mock up/test fit

Just checking the hoop and secondary and how it lines up with the LCA mounting bracket. Trying to at least go through the fit and clearances of everything before she gets a ride on a roll back over to the welders. Prep work is done for the cam tab and tower gussets. Lots of shiny metal. Really wish I could say I did the welding on this project, but I'm not gonna try and learn "how" on these critical parts.
 

Attachments

  • IMG_4323 - Copy.jpg
    IMG_4323 - Copy.jpg
    135.8 KB · Views: 1,200
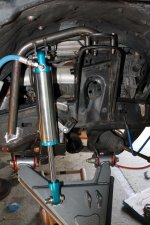
Here is everything mocked up (pass. side) with the hub installed. Have to put on roller tires for the tow truck over to the weld shop. Anthony over at Apex Fabrication-Merritt Island, will be ready to go on Monday. Still have to put the drivers side together over the weekend. I've outlined a couple tips for the tower gussets and where the reservoir brackets and the Boss (lower hoop support to the frame) gets welded to the shock hoop and frame. [MENTION=236676]TOTAL CHAOS[/MENTION] everything is going together quite nicely w minimal cutting and grinding on the tower gussets. Thank You!!
 

Attachments

  • IMG_4324 - Copy.jpg
    IMG_4324 - Copy.jpg
    139.4 KB · Views: 1,409
Here is everything mocked up (pass. side) with the hub installed. Have to put on roller tires for the tow truck over to the weld shop. Anthony over at Apex Fabrication-Merritt Island, will be ready to go on Monday. Still have to put the drivers side together over the weekend. I've outlined a couple tips for the tower gussets and where the reservoir brackets and the Boss (lower hoop support to the frame) gets welded to the shock hoop and frame. [MENTION=236676]TOTAL CHAOS[/MENTION] everything is going together quite nicely w minimal cutting and grinding on the tower gussets. Thank You!!


Great job! Thanks for posting progress pics :dancin:

TOTAL CHAOS
WWW.CHAOSFAB.COM
 

Members online

No members online now.

Forum statistics

Threads
278,309
Messages
3,554,075
Members
248,016
Latest member
Advally Service

Trending content

Back
Top