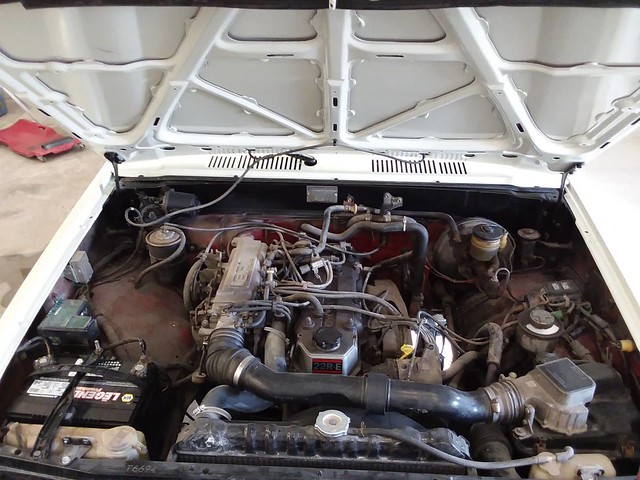
Ok, so the big weekend finally came this past weekend: paint the engine bay day! I've spent at least 3 or 4 weekends getting all the components off, organizing new vs. old parts for reassembly, cleaning the awful oil mess and undercoating off the paint and engine, etc. During that time, I was also cleaning and painting almost all the removed metal parts (brackets, etc) so that when it came time to reassemble, everything was clean and ready. I also had to rewrap a few of the wire bundles as they had become embedded with engine oil. So I used a combination of Tessa tape and some new plastic wire loom. I also tried this fiberglass heat shielded woven sleeve thing. However, it only worked for one set of wires (alternator power bundle) as you have to slide the whole thing into it, no slit like in the wire looms.
Here's an example of one of the parts I painted, more of an experiment. The MAF aluminum housing was pretty oxidized, and after wire wheeling it, it was super shiny. So I have this darker gray I've been using as an accent color for some of the brackets and brake lines. I decided to paint it and I think it came out great, definitely better than the oxidized and shiny cleaned up version. I realize it's not original, but frankly, it looked like ass no matter how I cleaned it.


On to the finale, engine bay painting. So I had used a wire wheel as much as I could to get the gunk off, then some 320 grit sandpaper on the harder to reach areas. Given the engine was still in, I realized that it would be a crapshoot on how things turned out behind the engine. But the areas I couldn't get to were not visible, and frankly, anything is better than a giant red engine bay when the rest of the 4Runner is factory 033 white. Then I used some wax/grease prep wipes, wrapped the engine in a sheet and duct tape, laid a towel over the transmission housing, and did some masking paper work for the frame areas. All the paint supplies I got from automotivetouchup.com, as they can mix aerosol cans of factory Toyota colors from ways back. I was able to get 3 cans of 033 white, 3 cans of primer and 3 cans of clear coat. They recommend 3 to 4 coats of primer, 3 to 4 coats of base, then 4 to 5 coats of clear. Between each coat of each layer, wait 10 to 15 minutes. After each all coats of a layer, 30 minute wait. I did this outside and it was a bit windy, so I definitely ended up with some issues in corners where it looks like dust particles and overspray got together and made a 3d sort of pattern. They say to sand it after the primer coat, but there was no way I had the time to sand, re-wash, wait for it to dry, re-mask the paper, etc. It wasn't in the visible areas, and I did try wet sanding one area/wiping it up with a wet rag. It did look better on subsequent coats, but it wasn't worth the effort at this point given the time suck this has been. Weather has been a problem but this past weekend gave me upper 70's with low humidity on Saturday and overcast to do the actual painting. Plus, rain wasn't in the forecast until late Sunday night, giving me 24 hours of time for it to dry properly with the hood off. Mind you, I've never painted anything of this magnitude before, so I was pretty nervous.
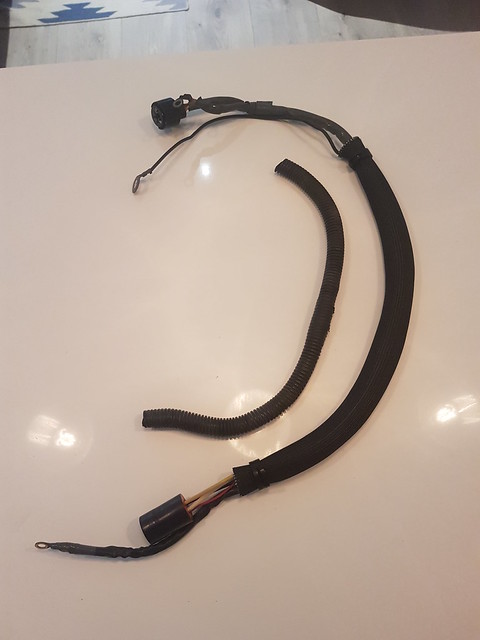
Here we go, all the wiring removed through the fender wells.

So here it sits right before I was about to put on the primer.

And this is after all the coats of primer had been applied.

Here is after all 4 base coats.

And finally, after 5 clear coats (did an extra as it will see abuse from fluids and such)


Now with the hood and fenders back on, finally some color continuity! I also painted the hood prop that same dark grey, and repainted the hood hinges/wire wheeled the bolts to remove caked on red paint and rust.

It may be a bit early for this comparison photo, as it will look better once the components are all back in. But nonetheless, this is from the day I picked it up back in late March. I'm ecstatic.
I still have to do some wet sanding with a 1500 or 2000 grit next weekend, but I'm not going to go crazy, just on the visible areas. Obviously there is some detritus in the clear from being outside on a windy day (and it's white which doesn't help conceal anything). But I'm super happy on how it turned out, and looking forward to finally getting this thing back together over the next few weekends.


