Another weekend with 1 day of work, and unfortunately, it was on the hottest day of the year. Faced with 95+ temperatures and humidity severely limited the length of my work. But I've also got an extended 5 day holiday over the 4th of July where I'm 95% sure I'll at least be able to start it back up before I send it to the exhaust shop to complete the cat-back piece (and another issue I discovered, read below).
I started with the exhaust header, well, because I was super excited to get this thing in there. When I had my 1985 4Runner after college over 10 years ago, I always wanted to get one but never got around to it before I sold it. And also, it was logically a good idea given the amount of components still not installed on the driver's side of the engine bay. It's an LCE header and I also got new exhaust studs, plus the 4-wire heated O2 sensor, high flow cat, assorted flanges.
[
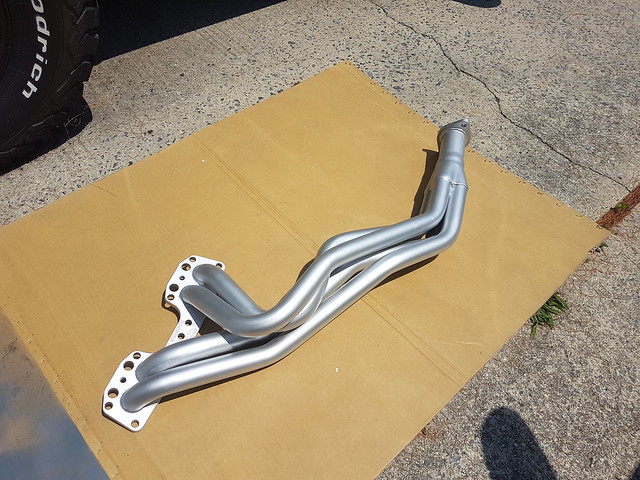
Header studs installed, to what I thought would be a good torque. LCE says 10 lb/ft but it did not seem like enough so I pushed a little past those clicks. Don't really understand how if the flange nuts have to be done at 32 lb/ft, a stud at 10 lb/ft is going to hold once you start cranking those nuts down. But Toyota doesn't actually give torque specs for those studs, so apparently it's a crapshoot. Forums didn't seem to have a consensus either.

After installing it, my worst fears were confirmed on 2 of the studs. The lower front-most and rear-most studs both wouldn't torque to 32 and kept spinning, pulling the stud slowly out of the block. I tried removing the header, and re-cranking those 2 studs, but after putting it back on, the nuts still wouldn't torque. So I need to helicoil it, chase it, or something. I may just leave it up to the exhaust shop once I'm finished starting it back up, as I need them to do the catback work anyway for new pipes. It's not like they pull right out, so for testing it, 6 out of 8 holding tight should get me by until then.


Next was the lower #5 (or #7 depending on who you ask) steel radiator pipe. No individual pictures as I was on the verge of passing out and just needed to get shit done. Then I started on the power steering/alternator bracketry. One thing I was concerned about was grounding for the alternator, seeing as I powder coated the front adjuster bracket. Lower one was still bare steel where the long bolt goes through. Also, where the eyelet ground from the alternator wire harness connects from the factory, to the upper power steering pump bracket, was also coated. So I decided to just skip all that, and screw that eyelet into the dipstick tube holder that goes right to the block. No idea why it doesn't go there from factory as I'm sure it's better right on the block. If anyone sees issues with that adjuster bracket being powder coated for grounding purposes, let me know. But I think the grounding is mainly handled by the small wire that bolts right to the alternator on top with the nut, then the ground extension from the harness completes the ground (the one I moved to the oil dipstick/block screw).
[


Upper power steering idler pulley bracket installed, completing the jigsaw puzzle.

Nice front view. Had all the bolts ceramic coated (except the alternator hold down bolt for fear of grounding issues).

Ferrite bracket installed.

Sky started to rumble, so I jammed in one of the silicone radiator hoses to connect the water pump and the lower steel radiator hose. The clamps that came with them are pure garbage, I miss the spring ones (never thought I'd say that).
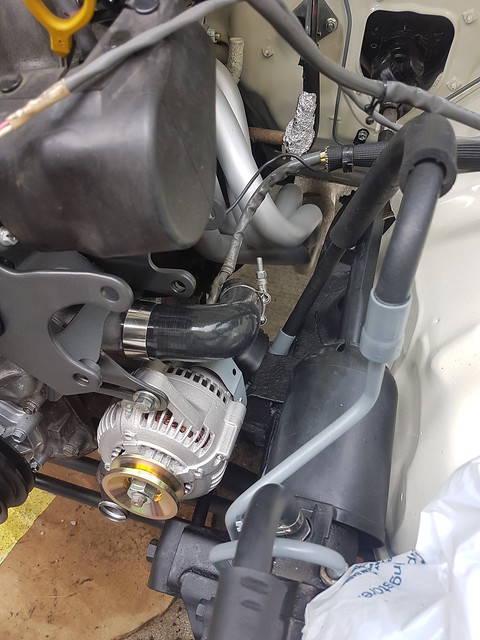
And here's where I stood right before the skies opened up and I was burnt to a crisp. Also reinstalled the firewall grommets (A/C lines, heater lines) that I cleaned up and protected with some Car Guys plastic/vinyl/rubber restorer (great product, use it everywhere).

Next steps are getting the power steering pump, hoses, reservoir, idler pulley, main pulley, fan clutch pulley, belts all in. Then I'll move to finish up the hydraulic systems (brake and clutch) just to get that all out of the way. Then it's radiator and remaining few hoses. Air intake components and battery will round it out before I start it up again.


