Wow, almost 3 months since my last post. A lot (of planning) has happened as I've been awaiting for the weather to turn. I don't have anywhere indoor to work on this, so living in the Northeast only gives me a solid 4 months to get things done. And as it's coming up on topless season, I need to hurry up my current predicament ...
I started the head gasket back in mid-April as I wanted to get the coolant leak/oil leaks fixed for the summer. Note that I "was" planning on dropping in a brand new engine in Spring of 2021 from 22REperformance, and I took this head gasket/timing chain overhaul as an educational challenge to buy me a leak free summer. But ... as plans usually go, I ran into issues. Stripped everything down and began taking off the head bolts. All the exhaust side ones were next to impossible to crack loose, but 7/8 of them eventually started turning. The last one (2nd in from firewall on exhaust side) would not budge with my 36" breaker bar. After tapping it with a hammer to loosen up all the carbonized oil, I thought I broke it loose. But I actually broke it off. Then I had to use a pry bar to get the rocker assembly off, while loosening the other 2 stuck exhaust bolts as there was so much build up in the rocker bolt channels, I couldn't pull them out. When I finally got the rocker assembly off, unfortunately I saw that I cracked the head bolt off in the block about 1/8" above the surface. Shit.

I tried a few methods with a propane torch (stud extractor, brand new vice grips), and it was not going anywhere. At this point, I would have had to get it towed, or take out the engine block to take to a machine shop for them to attempt to get it out. I instead, decided to speed up the engine replacement process by a year, and ordered an engine from Yota1. My thought process: original engine with original internals. I could put this thing back together after getting the head resurfaced/valve job, and then end up blowing out the bottom end. I know that I already had some blow-by in the piston rings so I took the easy way out (non-wallet wise). My engine just got put on the truck and should be hear in time for the weekend after Memorial Day.
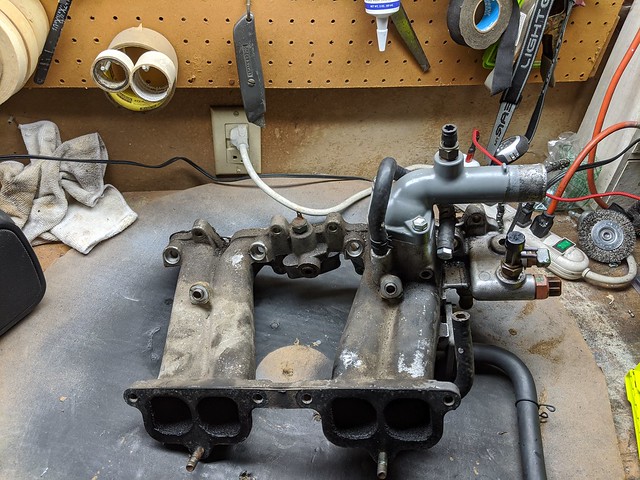
Now that the bad news is out of the way, let's move on to progress in a positive direction. I completed refinishing, cleaning, painting the intake plenum and manifold that I had powdercoated by 22REperformance. I'm still trying to work out a way to disassemble the throttle body completely so I can get all the parts painted or powder coated, but the butterfly valve staked screws are proving a problem. I already trashed one ebay throttle body in trying to remove it, so in no way to I trust myself to do this on my own. I tabled that piece to a later date, but I did polish it up real nice for now and readjusted the TPS (with 4crawler's allen head screws so I can adjust it on the truck in the future).
Here is the manifold with all the accessories on it (some new some painted):

And the plenum (before/after):

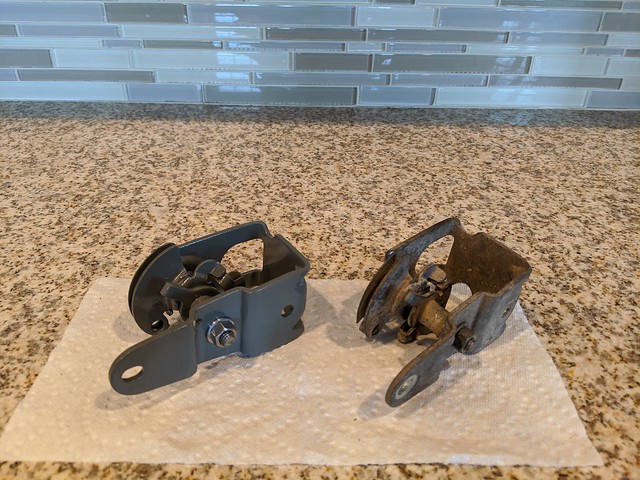
I also (carefully) painted and reassembled the throttle body brackets as well, I just haven't put them on yet as it makes storing this awkward. Note: I've been using Duplicolor Engine Enamel - New Ford Gray as my accent color throughout the engine bay (aside from satin black on some pieces). Primer -> Base -> Matte clear, all Duplicolor Engine Enamel brand line (ceramic). It holds up ok, would love to powder coat in the future, but some of these parts make it tough to do son.


I ordered new OEM heater hoses, the ones that wrap around the block. I decided to prime and paint these as well, as they notoriously rust and are thin. I'll be doing the same thing to my other steel radiator hose (once I get the old engine out -> the one near the alternator/back of timing cover):

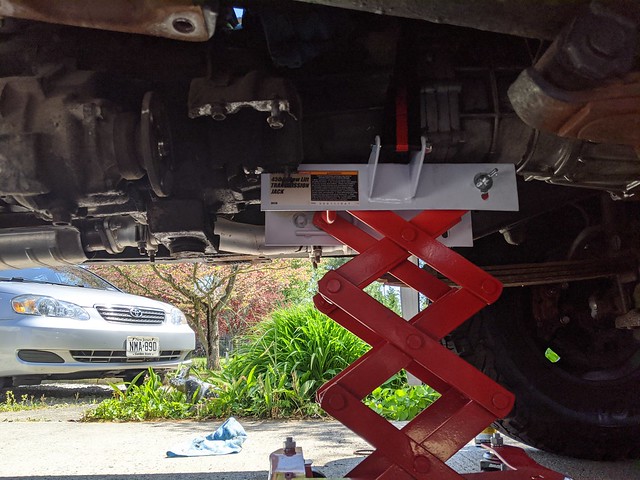
Next, I started the process of removing the engine. I've never done anything like this before, so all new for me. Since I was waiting on the engine, I decided to take the transmission out and start the horrible process of cleaning 35 years of oil leaks and driveshaft grease. I knew it was going to be bad, just like my engine bay was. So I wasn't looking forward to it. Taking the driveshafts out took longer than expected but glad I had my stubby Milwaukee impact wrench.
Used a tranny jack from Harbor Freight to get it out, this wasn't too terrible. I've heard getting it back in is the tricky part. There was oil in the bellhousing but not much. It doesn't look like I had a rear main seal leak, as that was one of my suspicions. Most of the oil leak was from the rear of the valve cover/half moons and ran down the passenger side, seeping everwhere it could for god knows how long.

Then began decrudification part 2: Revenge of the W56. I used Gunk, I used brake cleaner, Super Clean, power washer. Didn't put a dent in it (Ghostbusters 2 reference). At the end of the day, the most effective was a plastic razor blade scraper. And once that was off, a variety of stainless steel fine wire wheels to get as much as I could. There were still spots I couldn't get too, but this isn't a show car, and I'm probably replacing the transmission and transfer case next Spring anyway as I found plenty of metal shavings on the magnetic transmission and transfer case drain plugs

.
Bottom half scraped with scraper:

Bottom half after wire wheeling:

Apparently I didn't take any pictures of it complete, probably because I was so tired of looking at that thing after spending about 8 to 10 hours cleaning it. Note, there were spots I couldn't reach but also couldn't be seen. I took the liberty of knowing I would just paint over it, not great but you'll see below that it came out pretty damn good.
[missing picture]
I decided to use Eastwood AlumaBlast 2k to give it an original aluminum cast look with a bit of flake. I used their Self-Etch primer in black, and luckily, it held:

Then came the Alumablast and a 2k Matte Clear coat. Came out amazing:

Then I painted the flanges, and the upper dust cover traditional satin black with a matte clear. I also painted the sensors (transfer case and reverse light) just because. We'll see if it flakes off when I torque them in:


I finshed it up by installing new drain/fill plugs and installing a Marlin Crawler short shift kit (no picture yet).
Next up this weekend, weather permitting (looks like rain at least Saturday), I'm going to degrease the undercarriage, rust proof the crossmember frame area, and pull out the engine. Look for many more updates now that the weather is better!


