I went ahead and rebuilt all the door checkers in the third gen. Its not something you realize is an issue, until it is pointed out to you that your doors dont stay open and they just fly open with the slightest effort.
The truck has over 280k miles on it now, and its seen some rough terrain. I also used to get in and out of the truck A LOT for work. Like probably 15+ door cycles a day for several years. So my door checkers were about as worn out as they could be, probably more worn than most with this mileage even.
Getting them out is simple and easy, just like Tim shows in the video. Getting them apart isnt too bad either. Just drill out the spot welds like Tim shows. I will say that not all of mine were you able to access the side of the spot weld Tim uses in the video because of the positioning of the bolt, so I had to use a center punch and drill through the other side. No big deal.
 20210823_181441
 by
Unner Unner, on Flickr
Like Tim mentions in the video, the bumpers for lack of a better word on the front doors were very worn and clinging on for life on mine. The way these bumpers had disintegrated had caused the metal stop plate that the bumper rests on to begin damaging the metal housing that the fixators rest in.
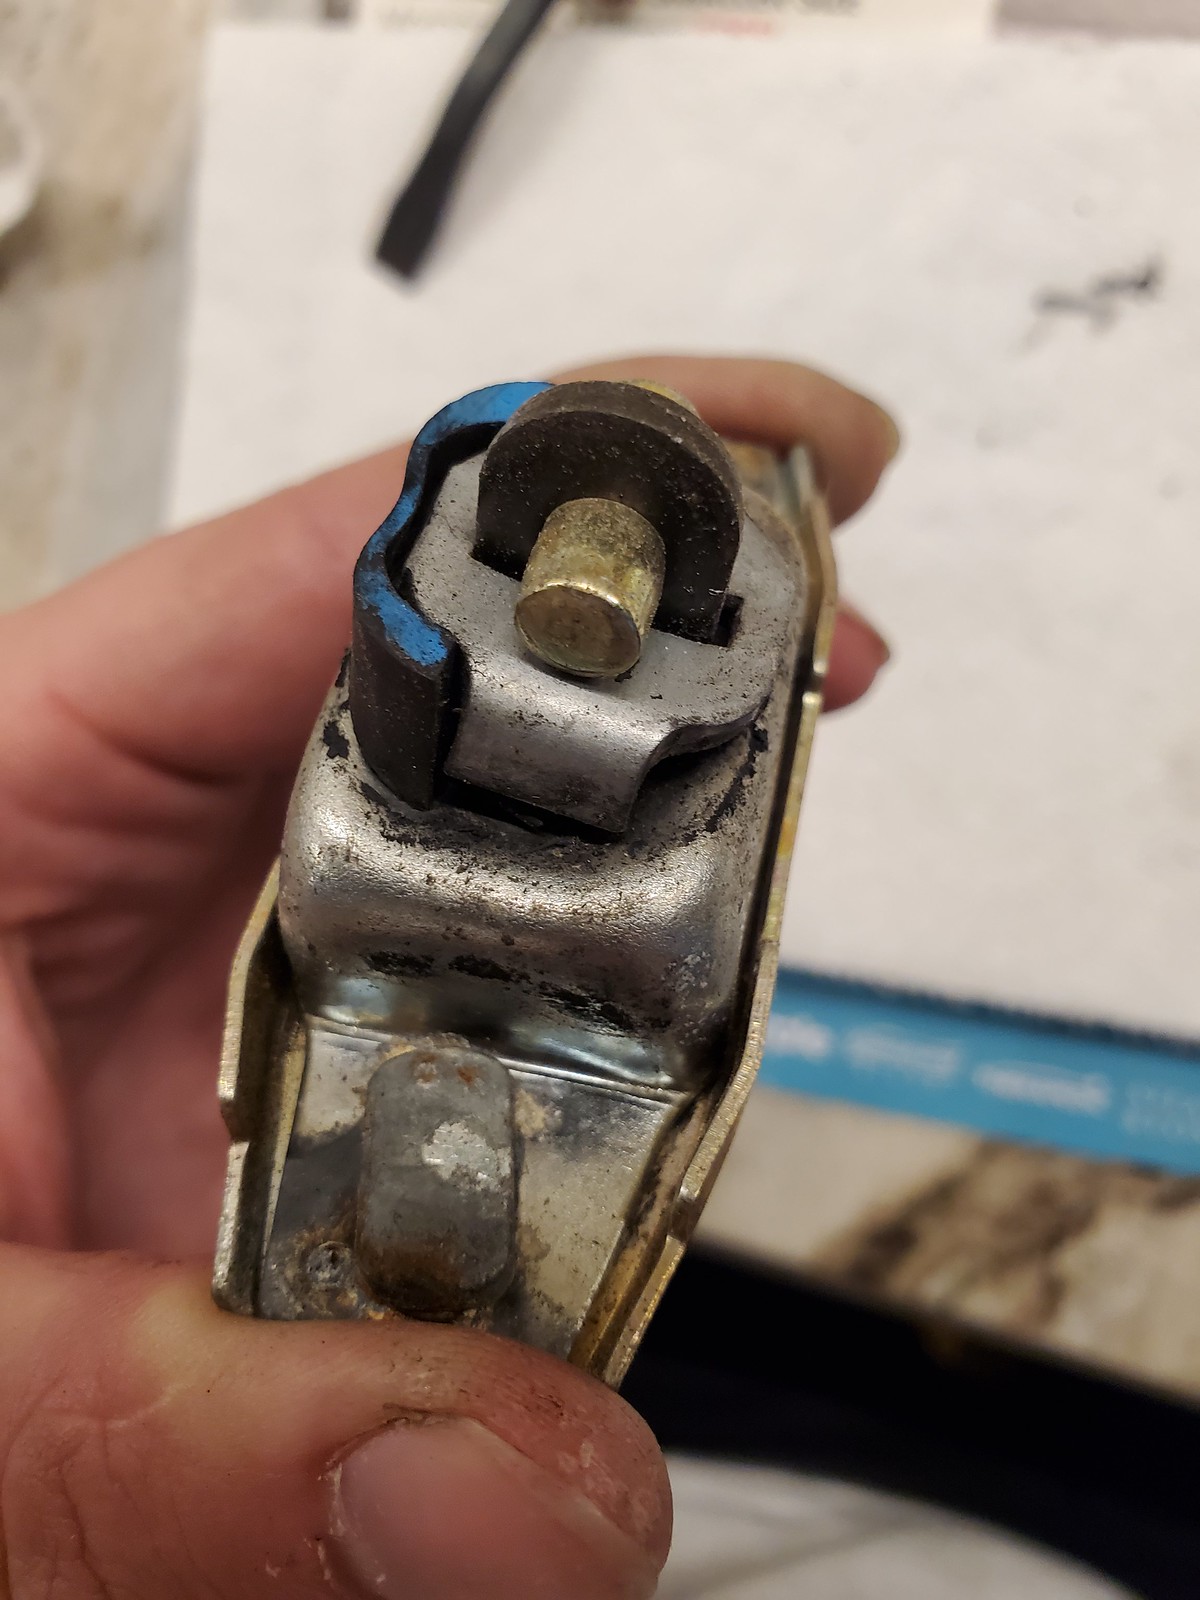 20210823_180636
 by
Unner Unner, on Flickr
The passenger one was a little bent up, but not too bad. The driver one was very bent. I had to straighten that housing out with a large diameter punch because there was no way it was going to go back together right with the new parts. Pics of the driver side one before straightening are below.
 20210823_180730
 by
Unner Unner, on Flickr
I wanted to fix up these rubber bumpers because one, I didnt want the metal housing to continue to get damaged and two, I wanted to have that nice cushion when the door does get opened all the way to the max. Gives it a little more luxury feel.
So, I started searching online to see if these were available, or how much a new checker would cost. The bushings are not available separately, and a new checker is $100. Not gonna happen when the whole rebuild kit was like $30 for all 4 doors.
While I was searching, I noticed that it looked like other Toyotas used the same style of bumpers on their checkers, namely Camrys. I had the idea then that I might be able to harvest these from donor cars to use on my checkers. So, with the pick and pull junkyard being open another 90 minutes I threw some tools in a bag and headed out there.
There are never 4Runners here, so I wasnt going to be able to pull them off donor 4Runner rear doors, but I did find a nice 2011 Camry. I popped open the rear door, got the panel off with a couple screws and some tugging and then the checker came right out just like the 4Runner ones. And it has the exact same bumper on it!
I didnt want to buy the whole checker, because I had no need for the whole thing. I thought about trying to press that pin out of the end of the checker to get the new bushings on, but that seemed risky. What I did instead was took a very sharp razor blade and sliced the checker on the bottom side, straight up, You want to make a nice straight cut, until the rubber is able to be separated from itself. Now you can twist the bushing free of the checker.
Bingo, now you have a new bumper for your old 4Runner checkers. I went around the yard pulling various door panels seeing what vehicles had the same ones, and what kind of shape they were in. I pulled door panels off Camrys from 1997-2011 and they all had the correct style of bumper. The Avalon uses a different system, and the Corolla doesnt have the bumper at all from the factory. Makes sense being that it is the base model economy type car. I only bothered checking rear doors since they would be in the best shape overall. Some were in better shape then others, and by the time I was done I had a nice handful of them so I could experiment if needed. I went to pay and they let me go without a charge other than the $3 entry fee. So, for $3, and 90 minutes, including drive time I had a way to fix the checkers.
Old bumper versus junkyard bumper.
 20210822_170119
 by
Unner Unner, on Flickr
The Junkyard ones slip right onto the 4Runner ones just like the originals.
 20210822_170129
 by
Unner Unner, on Flickr
Now the only issue was that slice I had to put in there. You can probably just leave it like that without issue for awhile, but I wanted these to go another 280k miles. So what I did was put a little superglue into the cut on the bumper and then squeezed it together.
 20210823_165248
 by
Unner Unner, on Flickr
And to make extra sure it wouldnt come apart I wrapped it tight with a zip tie.
 20210823_165431
 by
Unner Unner, on Flickr
After you do the rest of the rebuild per Tims video you just install as normal.
 20210823_174105
 by
Unner Unner, on Flickr
A few pics from the rebuild process.
New versus old fixators.
 20210823_105659
 by
Unner Unner, on Flickr
 20210823_232107
 by
Unner Unner, on Flickr
 20210823_170709
 by
Unner Unner, on Flickr
Good as new, and now Im into the new door checkers about $35, maybe 8 hours total time, and saved about $350. Plus, I think these new checkers are stiffer than OEM ones, and will probably last longer. The doors feel really solid now, which is nice.


