 08-21-2014, 08:38 PM
|
#46
|
 |
Senior Member
|
|
Join Date: Jul 2010
Location: Denver, CO
Posts: 1,433
|
|
|
Senior Member
Join Date: Jul 2010
Location: Denver, CO
Posts: 1,433
|
Great thread! I'm at the step where you remove the flange and I just can't get the damn thing to come off. Thought/ideas?! Thanks!
Update: I got it off by using some love taps...
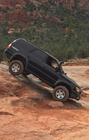
New question though! Is this flange damaged? I can't tell if it's significant enough to tear the new seal. Unfortunately I'm going to have to use it because I need to put this back together and get to work tomorrow. However, I can definitely repeat this job again much easier!
Thanks!
__________________
2004 Sport Edition V8. 3" OME lift. 5th Gen Brakes. 285/70 Duratracs. JBA UCAs. SCS Ray10s. DT Headers.
1997 4-Runner Limited w/ factory locker. Totaled in February 2018. Still miss it.
Last edited by atalarico; 08-21-2014 at 09:23 PM.
|

|
 Reply With Quote Reply With Quote
|
|
08-22-2014, 12:11 PM
|
#47
|
|
Senior Member
|
|
Join Date: Jul 2010
Location: Denver, CO
Posts: 1,433
|
|
|
Senior Member
Join Date: Jul 2010
Location: Denver, CO
Posts: 1,433
|
*bump* Anyone have any opinions on the flange being damaged? Thanks!
__________________
2004 Sport Edition V8. 3" OME lift. 5th Gen Brakes. 285/70 Duratracs. JBA UCAs. SCS Ray10s. DT Headers.
1997 4-Runner Limited w/ factory locker. Totaled in February 2018. Still miss it.
|
|
|
Reply With Quote
|
|
12-29-2014, 03:27 PM
|
#48
|
|
Senior Member
|
|
Join Date: Jul 2010
Location: Denver, CO
Posts: 1,433
|
|
|
Senior Member
Join Date: Jul 2010
Location: Denver, CO
Posts: 1,433
|
Just wanted to add a few updates in case anyone else finds this helpful:
1.) Still no leaking after quite a few thousand miles, so I think that flange was in decent enough shape still.
2.) A really nice side effect is that I no longer have issues disengaging my 4wd with the push button on my 97 Limited! I used to have to turn my car off to disengage 4wd with the push button after it worked fine for years. It would disengage after I turned the engine back on, but it was annoying. Now it engages and disengages without any issues. Pretty happy about that and I never would have thought this would be the fix for it.
__________________
2004 Sport Edition V8. 3" OME lift. 5th Gen Brakes. 285/70 Duratracs. JBA UCAs. SCS Ray10s. DT Headers.
1997 4-Runner Limited w/ factory locker. Totaled in February 2018. Still miss it.
|
|
|
Reply With Quote
|
|
08-24-2015, 12:39 AM
|
#49
|
 |
Member
|
|
Join Date: Oct 2014
Location: AZ
Posts: 190
|
|
|
Member
Join Date: Oct 2014
Location: AZ
Posts: 190
|
Some follow on info for anyone doing this project: If you need seal drivers, head to your local Ace Hardware and shop in the conduit and PVC aisles - you will find something. Pics below show a large shimming washer and 2.5" PVC pipe extender being used on the rear seal, and a 2" box adapter being used for the front seal.
|
|
|
Reply With Quote
|
|
08-24-2015, 12:43 AM
|
#50
|
|
Member
|
|
Join Date: Oct 2014
Location: AZ
Posts: 190
|
|
|
Member
Join Date: Oct 2014
Location: AZ
Posts: 190
|
Semi-related: The lisle tool works good for pulling the tcase shifter seals (use a socket to install new ones). The transfer case adapter seal and transfer case input seal can be installed with a standard seal driver. The transmission input seal is a bit more tricky, as there is a specific depth - I shimmed it with the same washer used to install the tcase ouput seal (see above).
|
|
|
Reply With Quote
|
|
01-13-2016, 09:51 PM
|
#51
|
|
Junior Member
|
|
Join Date: Mar 2014
Location: Alberta
Posts: 9
|
|
|
Junior Member
Join Date: Mar 2014
Location: Alberta
Posts: 9
|
Thanks to all of you for this thread.
I feel I can handle this repair on my '98 4Runner now that I've read all these posts, and the photos are invaluable.
What a great community!
Quote:
Originally Posted by bugman-74

Some follow on info for anyone doing this project: If you need seal drivers, head to your local Ace Hardware and shop in the conduit and PVC aisles - you will find something. Pics below show a large shimming washer and 2.5" PVC pipe extender being used on the rear seal, and a 2" box adapter being used for the front seal.
|
|
|
|
Reply With Quote
|
|
05-23-2016, 07:50 AM
|
#52
|
|
Junior Member
|
|
Join Date: May 2016
Location: Hungary
Posts: 4
|
|
|
Junior Member
Join Date: May 2016
Location: Hungary
Posts: 4
|
Great thread, nice writeup!
Hey!
I'm in this process, but can't get the center 30mm nut off (front flange on the transfer case). Car is on the ground, locked center diff, breaker bar + 2ton lift, impact wrench, but nothing, the nut won't move. I'm afraid I'm going to break something inside the transfer case if I try harder..
Any ideas?
Cheers
|
|
|
Reply With Quote
|
|
06-05-2016, 12:11 PM
|
#53
|
 |
Senior Member
|
|
Join Date: Nov 2014
Location: Huntsville, AL
Posts: 3,929
|
|
|
Senior Member
Join Date: Nov 2014
Location: Huntsville, AL
Posts: 3,929
|
Just wanted to say thanks
@ BigFishAllDay
I've now used all of your write ups on my truck and they made the process so easy on those jobs. If I'm ever out in NM I owe you lunch or something.
Thanks for the great write ups!
__________________
2008 Toyota 4Runner Limited 4x4 - Salsa Red, DD, Mostly Stock, 89k miles
2001 Toyota 4Runner SR5 4x4 - Not Stock, Lifted, Armored, 291k miles
1987 Toyota Supra N/A - Stock, 2nd Owner, 92k miles
|
|
|
Reply With Quote
|
|
06-16-2016, 12:17 AM
|
#54
|
|
Junior Member
|
|
Join Date: Jun 2016
Location: Whitehorse, Yukon
Posts: 3
|
|
|
Junior Member
Join Date: Jun 2016
Location: Whitehorse, Yukon
Posts: 3
|
Staked Nut
Informative write up, however you do not have to make special tools to unstake the nut, just put an impact on the nut and it spins right off, or use a breaker bar if you don't have an impact. Using an impact wrench wrench allows you to avoid securing the transfer case output flange from turning with a bar.
|
|
|
Reply With Quote
|
|
06-16-2016, 12:20 AM
|
#55
|
|
Senior Member
|
|
Join Date: Nov 2014
Location: Huntsville, AL
Posts: 3,929
|
|
|
Senior Member
Join Date: Nov 2014
Location: Huntsville, AL
Posts: 3,929
|
Quote:
Originally Posted by Tungsten63
Informative write up, however you do not have to make special tools to unstake the nut, just put an impact on the nut and it spins right off, or use a breaker bar if you don't have an impact. Using an impact wrench wrench allows you to avoid securing the transfer case output flange from turning with a bar.
|
Unstaking the nut is still a good idea to avoid damage to the threads.
__________________
2008 Toyota 4Runner Limited 4x4 - Salsa Red, DD, Mostly Stock, 89k miles
2001 Toyota 4Runner SR5 4x4 - Not Stock, Lifted, Armored, 291k miles
1987 Toyota Supra N/A - Stock, 2nd Owner, 92k miles
|
|
|
Reply With Quote
|
|
06-16-2016, 12:20 AM
|
#56
|
|
Junior Member
|
|
Join Date: Jun 2016
Location: Whitehorse, Yukon
Posts: 3
|
|
|
Junior Member
Join Date: Jun 2016
Location: Whitehorse, Yukon
Posts: 3
|
Quote:
Originally Posted by LC120Sumi
Hey!
I'm in this process, but can't get the center 30mm nut off (front flange on the transfer case). Car is on the ground, locked center diff, breaker bar + 2ton lift, impact wrench, but nothing, the nut won't move. I'm afraid I'm going to break something inside the transfer case if I try harder..
Any ideas?
Cheers
|
Perhaps the front output shaft has reverse threads.
|
|
|
Reply With Quote
|
|
06-16-2016, 12:31 AM
|
#57
|
|
Junior Member
|
|
Join Date: Jun 2016
Location: Whitehorse, Yukon
Posts: 3
|
|
|
Junior Member
Join Date: Jun 2016
Location: Whitehorse, Yukon
Posts: 3
|
Quote:
Originally Posted by Unner
Unstaking the nut is still a good idea to avoid damage to the threads.
|
Just took mine off with impact and didn't damage threads. You're more likely to damage threads by hammering on a punch in this area, not necessary at all.
|
|
|
Reply With Quote
|
|
06-16-2016, 11:38 AM
|
#58
|
|
Junior Member
|
|
Join Date: Jun 2016
Location: uk
Posts: 3
|
|
|
Junior Member
Join Date: Jun 2016
Location: uk
Posts: 3
|
|
|
|
Reply With Quote
|
|
06-21-2016, 12:49 PM
|
#59
|
 |
Member
|
|
Join Date: Aug 2014
Location: Gainesville, Ga
Posts: 196
|
|
|
Member
Join Date: Aug 2014
Location: Gainesville, Ga
Posts: 196
|
Quote:
Originally Posted by Tungsten63
Just took mine off with impact and didn't damage threads. You're more likely to damage threads by hammering on a punch in this area, not necessary at all.
|
Are you saying you didn't have to punch the "dent" out and the nut smoothed its self out when you used an impact wrench to remove? I'm tackling the job this weekend and would love to skip the hammer and punch part at the start. Thanks!
__________________
[I]1999 Limited w/rear locker, OME Springs Bilstein shocks, black TRD FJ wheels, Ryno skid, satoshi grill, Hilux snorkel, HID retro-fit headlights, Coastal off-road front bumper, Smittybilt 9500 winch, Shrockworks sliders 
|
|
|
Reply With Quote
|
|
06-21-2016, 12:53 PM
|
#60
|
|
Senior Member
|
|
Join Date: Jul 2010
Location: Denver, CO
Posts: 1,433
|
|
|
Senior Member
Join Date: Jul 2010
Location: Denver, CO
Posts: 1,433
|
So, I remember reading a lot about this when I was doing the output shaft seal up front a few years ago. A lot of people would say, yeah, use an impact and don't worry about unstaking the nut. However, there were a few people who would say don't do that because you'll strip the threads off of the part the nut screws onto (the transfer case?).
I used an impact, and it seemed fine to me. I wouldn't want to do it a bunch of times, but I have a feeling the impact effectively unstakes the nut as it's removing it anyway. Those threads are beefy.
__________________
2004 Sport Edition V8. 3" OME lift. 5th Gen Brakes. 285/70 Duratracs. JBA UCAs. SCS Ray10s. DT Headers.
1997 4-Runner Limited w/ factory locker. Totaled in February 2018. Still miss it.
|
|
|
Reply With Quote
|
| Thread Tools |
|
|
| Display Modes |
Rate This Thread |
 Linear Mode Linear Mode
|
|
 Posting Rules
|
You may not post new threads
You may not post replies
You may not post attachments
You may not edit your posts
HTML code is On
|
|
|
|


