 02-27-2014, 09:46 AM
|
#61
|
 |
Member
|
|
Join Date: Apr 2010
Location: Eastern PA
Posts: 775
|
|
|
Member
Join Date: Apr 2010
Location: Eastern PA
Posts: 775
|
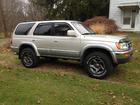
If I can do this in 20* weather with a real feel of 11* in a garage with no lights or heat, anyone can! Took me 7 hours...
Forgot to mention I did this alone, including the lowering of the auto trans, which is MUCH HEAVIER than the 5 speed.
Some things of note, I proved the manual wrong 2x in the removal of this transmission.
1. The manual says you must remove the crossover pipe in order to remove the trans, that is simply not true. I didn't remove the crossover pipe when I took out either the auto or manual.
2. The manual says you have to remove the sway bar to take out the trans. I didn't touch it for the removal of the manual trans but for the auto trans I simply unbolted the sway bar where it bolts to the endlinks which allows it to pivot on the points where it is connected to the frame. Found that to be the easiest way.
Last edited by Swimmerboy2112; 02-27-2014 at 10:03 AM.
|

|
 Reply With Quote Reply With Quote
|
|
02-27-2014, 01:54 PM
|
#62
|
 |
Elite Member
|
|
Join Date: Nov 2006
Location: Pocono Mountains
Posts: 7,498
|
|
|
Elite Member
Join Date: Nov 2006
Location: Pocono Mountains
Posts: 7,498
|
Quote:
Originally Posted by Swimmerboy2112

2. The manual says you have to remove the sway bar to take out the trans. I didn't touch it for the removal of the manual trans but for the auto trans I simply unbolted the sway bar where it bolts to the endlinks which allows it to pivot on the points where it is connected to the frame. Found that to be the easiest way.
|
When I did my clutch I undid the brackets on the sway bar and that works, too. I had recently replaced the swaybar bushings so I knew those would come off easy and I didn't like the look of my endlinks.
__________________
'99 4Runner SR5 5spd 3.4L V6 4WD(U.S), original '99 Talls in front, OME 906s in back, Hella fogs, Trekmaster shocks in front, Billy in back, no running boards, FIAMM horns, Alpine sound, Michelin LTX M/S2's, owned since new.
'97 HiLux SW4 5spd 4WD(Japan model bought in Brazil assembled in Argentina, very close to a 3.0 4Runner/Surf)
'71 FordWillys Jeep CJ5 (with straight six Ford Maverick 3.0 liter engine--lives in the mountains north of Sao Paulo Brazil)
My Backyard Frame Swap
|
|
|
Reply With Quote
|
|
02-27-2014, 04:07 PM
|
#63
|
|
Member
|
|
Join Date: Apr 2010
Location: Eastern PA
Posts: 775
|
|
|
Member
Join Date: Apr 2010
Location: Eastern PA
Posts: 775
|
Here's my trans plug.

Looks like I have the following colors,
blue with a yellow stripe
white with a black stripe
black with a pink stripe
red with a yellow stripe
purple with a red stripe
white with a red stripe
green
black with a yellow stripe
Last edited by Swimmerboy2112; 02-27-2014 at 04:10 PM.
|
|
|
Reply With Quote
|
|
02-27-2014, 04:11 PM
|
#64
|
|
Member
|
|
Join Date: Apr 2010
Location: Eastern PA
Posts: 775
|
|
|
Member
Join Date: Apr 2010
Location: Eastern PA
Posts: 775
|
Quote:
Originally Posted by TheDurk
When I did my clutch I undid the brackets on the sway bar and that works, too. I had recently replaced the swaybar bushings so I knew those would come off easy and I didn't like the look of my endlinks.
|
Good to know!
|
|
|
Reply With Quote
|
|
02-27-2014, 06:19 PM
|
#65
|
|
Member
|
|
Join Date: Apr 2010
Location: Eastern PA
Posts: 775
|
|
|
Member
Join Date: Apr 2010
Location: Eastern PA
Posts: 775
|
@ danthemanx07
So here's a crude drawing of the layout of the plug, the numbers I have labeled the pin are for my reference.

So this is what i've gathered, correct me if the pin location is incorrect, I'm just trying to get an idea of what I need to do.
Dan in your picture it's hard to tell exactly which pin (referring to my drawing) that your white w/red wire and red w/yellow wire goes to.
Dan
1 blue w/yellow
2 not used
3 black w/white
4 black
5 white w/red
6 purple
7 red w/yellow
8 green
9 black w/red
10 black w/yellow
Jon & I
1 blue w/yellow
2 not used
3 white w/black
4 black w/red
5 red w/yellow
6 purple w/red
7 white w/red
8 green
9 not used
10 black w/yellow
So Dan, you said you did the following; (pin location refers to my drawing)
black to black w/white (pin 3 to pin 4) for clutch depress
black w/yellow to white w/red (pin 10 to pin 5) for clutch release
black w/yellow to red w/yellow (pin 10 to pin 7) for reverse switch
Therefore I would need to connect the following;
white w/black to black w/red (pin 3 to pin 4) for clutch depress
black w/yellow to red w/yellow (pin 10 to pin 5) for clutch release
black w/yellow to white w/red (pin 10 to pin 7) for reverse switch
I hope some of this makes sense?
|
|
|
Reply With Quote
|
|
02-27-2014, 06:35 PM
|
#66
|
|
Elite Member
|
|
Join Date: Nov 2006
Location: Pocono Mountains
Posts: 7,498
|
|
|
Elite Member
Join Date: Nov 2006
Location: Pocono Mountains
Posts: 7,498
|
I have a paper '99 EWD (Electrical Wiring Diagram) book. Would a scan of those pages help you?
I can tell you the two position detection switches on the J-shift T-case are for the ADD system. One side does 4H and the other does 4L. If I look at the truck I can remember which is which. The switch on the 5-speed trans is just for the back-up light. The dash light is controlled by the position switch on the front diff. That's all you have to do underneath.
As far as the J-shift 5-speed goes, the lever engages the TC, which closes a position switch, which closes the ADD relay, which enables vacuum to front diff actuator which engages the diff and closes the switch that turns on the dash light.
Forgive me if you knew all this.
__________________
'99 4Runner SR5 5spd 3.4L V6 4WD(U.S), original '99 Talls in front, OME 906s in back, Hella fogs, Trekmaster shocks in front, Billy in back, no running boards, FIAMM horns, Alpine sound, Michelin LTX M/S2's, owned since new.
'97 HiLux SW4 5spd 4WD(Japan model bought in Brazil assembled in Argentina, very close to a 3.0 4Runner/Surf)
'71 FordWillys Jeep CJ5 (with straight six Ford Maverick 3.0 liter engine--lives in the mountains north of Sao Paulo Brazil)
My Backyard Frame Swap
Last edited by TheDurk; 02-27-2014 at 06:48 PM.
|
|
|
Reply With Quote
|
|
02-27-2014, 07:27 PM
|
#67
|
|
Member
|
|
Join Date: Apr 2010
Location: Eastern PA
Posts: 775
|
|
|
Member
Join Date: Apr 2010
Location: Eastern PA
Posts: 775
|
Quote:
Originally Posted by TheDurk
I have a paper '99 EWD (Electrical Wiring Diagram) book. Would a scan of those pages help you?
I can tell you the two position detection switches on the J-shift T-case are for the ADD system. One side does 4H and the other does 4L. If I look at the truck I can remember which is which. The switch on the 5-speed trans is just for the back-up light. The dash light is controlled by the position switch on the front diff. That's all you have to do underneath.
As far as the J-shift 5-speed goes, the lever engages the TC, which closes a position switch, which closes the ADD relay, which enables vacuum to front diff actuator which engages the diff and closes the switch that turns on the dash light.
Forgive me if you knew all this.
|
I didn't know that, thank you for the info.
I think for ease of wiring sake i'm just going to put the t-case from the auto trans on my 5 speed transmission.
|
|
|
Reply With Quote
|
|
02-27-2014, 07:32 PM
|
#68
|
|
Elite Member
|
|
Join Date: Nov 2006
Location: Pocono Mountains
Posts: 7,498
|
|
|
Elite Member
Join Date: Nov 2006
Location: Pocono Mountains
Posts: 7,498
|
Quote:
Originally Posted by Swimmerboy2112
I didn't know that, thank you for the info.
I think for ease of wiring sake i'm just going to put the t-case from the auto trans on my 5 speed transmission.
|
So all you have to do on the 5-speed is connect to the back-up switch wires which go to the shifter in the auto and now need to go to the switch on the 5-speed trans.
__________________
'99 4Runner SR5 5spd 3.4L V6 4WD(U.S), original '99 Talls in front, OME 906s in back, Hella fogs, Trekmaster shocks in front, Billy in back, no running boards, FIAMM horns, Alpine sound, Michelin LTX M/S2's, owned since new.
'97 HiLux SW4 5spd 4WD(Japan model bought in Brazil assembled in Argentina, very close to a 3.0 4Runner/Surf)
'71 FordWillys Jeep CJ5 (with straight six Ford Maverick 3.0 liter engine--lives in the mountains north of Sao Paulo Brazil)
My Backyard Frame Swap
|
|
|
Reply With Quote
|
|
02-27-2014, 07:36 PM
|
#69
|
|
Member
|
|
Join Date: Apr 2010
Location: Eastern PA
Posts: 775
|
|
|
Member
Join Date: Apr 2010
Location: Eastern PA
Posts: 775
|
Quote:
Originally Posted by TheDurk
So all you have to do on the 5-speed is connect to the back-up switch wires which go to the shifter in the auto and now need to go to the switch on the 5-speed trans.
|
Yeah I need to do 3 things to make this work.
-hook up the reverse light switch
-hook up the clutch "down" switch
-hook up the clutch "up" switch
|
|
|
Reply With Quote
|
|
02-28-2014, 09:55 AM
|
#70
|
|
Member
|
|
Join Date: Apr 2010
Location: Eastern PA
Posts: 775
|
|
|
Member
Join Date: Apr 2010
Location: Eastern PA
Posts: 775
|
Figured out the wiring! YAY!
White wire with the black stripe to the black wire with the red stripe (pin 3 to pin 4) for the clutch depress.
Black wire with the yellow stripe to the white wire with the red stripe (pin 10 to pin 7) for the clutch release.
Red wire with the yellow stripe to the black wire with the yellow stripe (pin 5 to pin 10) for the reverse switch.
Boom! Hope this helps someone out. This is on a 97 Limited model.
|
|
|
Reply With Quote
|
|
03-01-2014, 12:21 AM
|
#71
|
|
Member
|
|
Join Date: Jul 2012
Location: New Bern, NC
Posts: 534
|
|
|
Member
Join Date: Jul 2012
Location: New Bern, NC
Posts: 534
|
Quote:
Originally Posted by Swimmerboy2112
Figured out the wiring! YAY!
White wire with the black stripe to the black wire with the red stripe (pin 3 to pin 4) for the clutch depress.
Black wire with the yellow stripe to the white wire with the red stripe (pin 10 to pin 7) for the clutch release.
Red wire with the yellow stripe to the black wire with the yellow stripe (pin 5 to pin 10) for the reverse switch.
Boom! Hope this helps someone out. This is on a 97 Limited model.
|
Sorry I have been out of packet - Mardi Gras has started here.
Glad you got it figured out though. Sounds like you are well on your way to getting it on the road.
__________________
2005 GX470
3.4l A340 Automatic to R150F Manual Transmission Swap
http://ttora.com/forum/showthread.php?t=159482
|
|
|
Reply With Quote
|
|
03-01-2014, 09:16 AM
|
#72
|
|
Member
|
|
Join Date: Apr 2010
Location: Eastern PA
Posts: 775
|
|
|
Member
Join Date: Apr 2010
Location: Eastern PA
Posts: 775
|
Quote:
Originally Posted by danthemanx07
Sorry I have been out of packet - Mardi Gras has started here.
Glad you got it figured out though. Sounds like you are well on your way to getting it on the road.
|
Mardi Gras! Very nice, always been on my bucket list.
I will be soldering everything today and mounting the master cylinder and clutch pedal.
Also I ordered an ecu from a 97 4x4 manual, probably gonna throw that in.
Just gotta wait for Marlin to get some damn clutches in stock and I'll be on the road again! 
|
|
|
Reply With Quote
|
|
03-01-2014, 09:46 AM
|
#73
|
|
Member
|
|
Join Date: Jul 2012
Location: New Bern, NC
Posts: 534
|
|
|
Member
Join Date: Jul 2012
Location: New Bern, NC
Posts: 534
|
Quote:
Originally Posted by Swimmerboy2112
Mardi Gras! Very nice, always been on my bucket list.
I will be soldering everything today and mounting the master cylinder and clutch pedal.
Also I ordered an ecu from a 97 4x4 manual, probably gonna throw that in.
Just gotta wait for Marlin to get some damn clutches in stock and I'll be on the road again! |
It is an experience that is for sure.
Justa word of caution on the mounting of the master cylinder - be very careful. Measure 5 times and drill once. One of the other guys that I was collaborating with on this when I did mine drilled his too low and then had to cut and re weld his clutch pedal to make it work.
Please let me know how the marlin clutch works out. I was cheap and just put my donor clutch in, but at some point an upgrade will be necessary.
__________________
2005 GX470
3.4l A340 Automatic to R150F Manual Transmission Swap
http://ttora.com/forum/showthread.php?t=159482
|
|
|
Reply With Quote
|
|
03-02-2014, 10:25 AM
|
#74
|
|
Member
|
|
Join Date: Apr 2010
Location: Eastern PA
Posts: 775
|
|
|
Member
Join Date: Apr 2010
Location: Eastern PA
Posts: 775
|
Quote:
Originally Posted by danthemanx07
It is an experience that is for sure.
Justa word of caution on the mounting of the master cylinder - be very careful. Measure 5 times and drill once. One of the other guys that I was collaborating with on this when I did mine drilled his too low and then had to cut and re weld his clutch pedal to make it work.
Please let me know how the marlin clutch works out. I was cheap and just put my donor clutch in, but at some point an upgrade will be necessary.
|
Well it's in but it's really loose. The idiot previous owner decided it would be a good idea to drill a hole in the firewall right where I needed to drill the holes to mount the pedal, so needless to say it's more like a slot rather than a hole.
I guess I'm gonna get some 1/8" steel, drill the holes and tack weld it to the firewall for support.
|
|
|
Reply With Quote
|
|
03-02-2014, 10:35 AM
|
#75
|
|
Member
|
|
Join Date: Jul 2012
Location: New Bern, NC
Posts: 534
|
|
|
Member
Join Date: Jul 2012
Location: New Bern, NC
Posts: 534
|
Quote:
Originally Posted by Swimmerboy2112
Well it's in but it's really loose. The idiot previous owner decided it would be a good idea to drill a hole in the firewall right where I needed to drill the holes to mount the pedal, so needless to say it's more like a slot rather than a hole.
I guess I'm gonna get some 1/8" steel, drill the holes and tack weld it to the firewall for support.
|
That was my back up if I screwed mine up.
I think I have a template that one one of the other guys I was collaborating with made up in a design program for drilling the holes. PM you email address and I will email it to you if I can find it.
__________________
2005 GX470
3.4l A340 Automatic to R150F Manual Transmission Swap
http://ttora.com/forum/showthread.php?t=159482
|
|
|
Reply With Quote
|
 Posting Rules
|
You may not post new threads
You may not post replies
You may not post attachments
You may not edit your posts
HTML code is On
|
|
|
|


 Linear Mode


