 04-18-2014, 05:46 PM
|
#1
|
 |
Senior Member
|
|
Join Date: Oct 2012
Location: Smyrna, TN
Posts: 1,031
|
|
|
Senior Member
Join Date: Oct 2012
Location: Smyrna, TN
Posts: 1,031
|
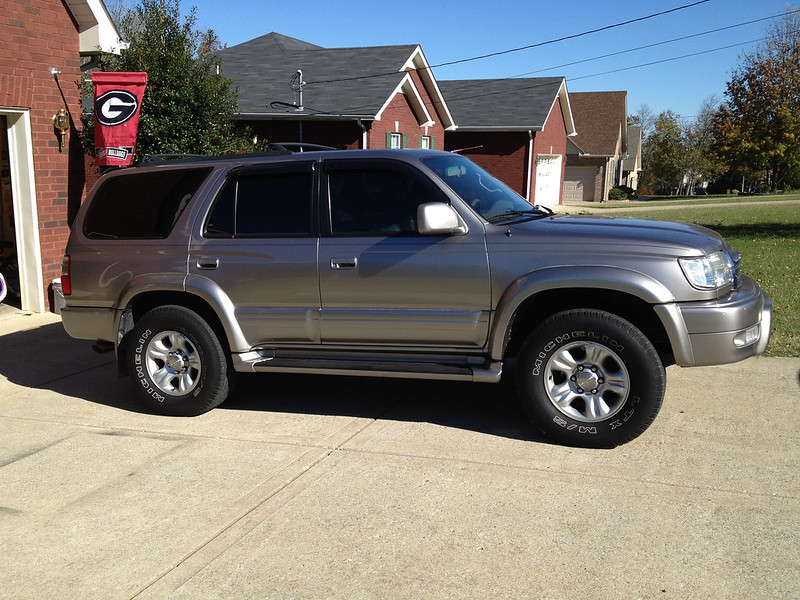
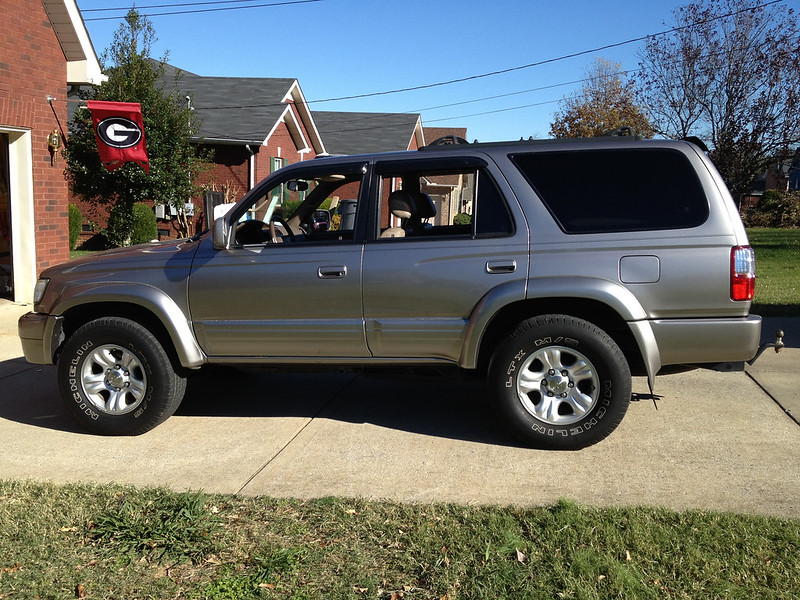
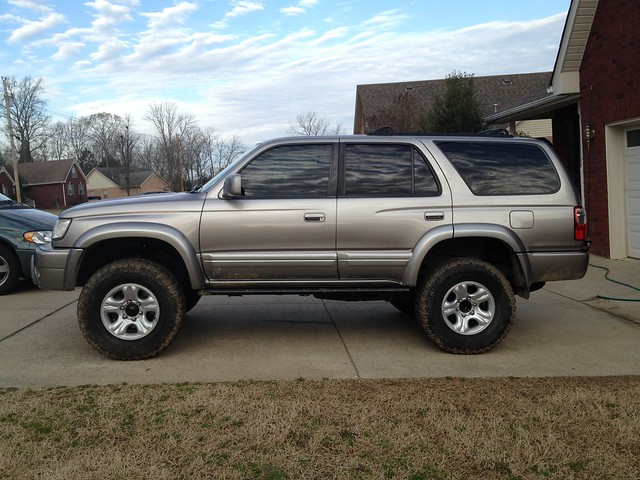
Murph's Build and Off Road Thread
Murph's TrailRunner
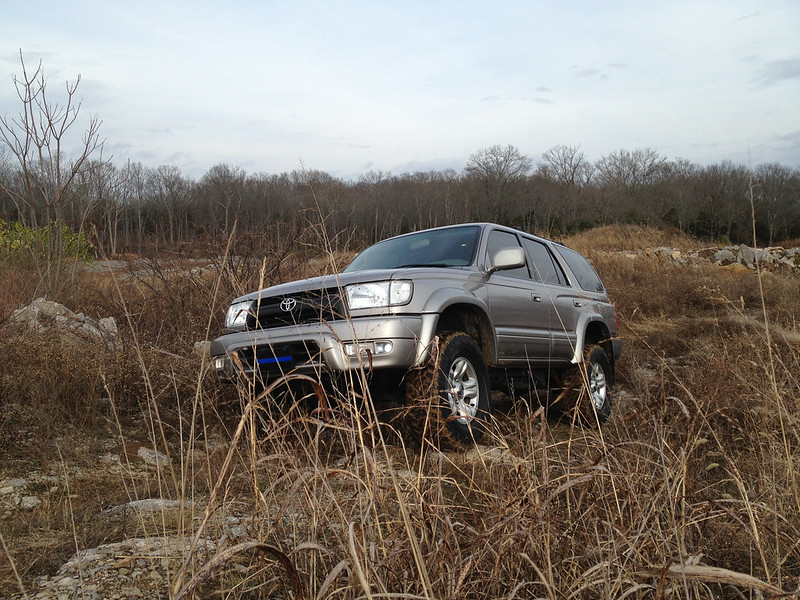
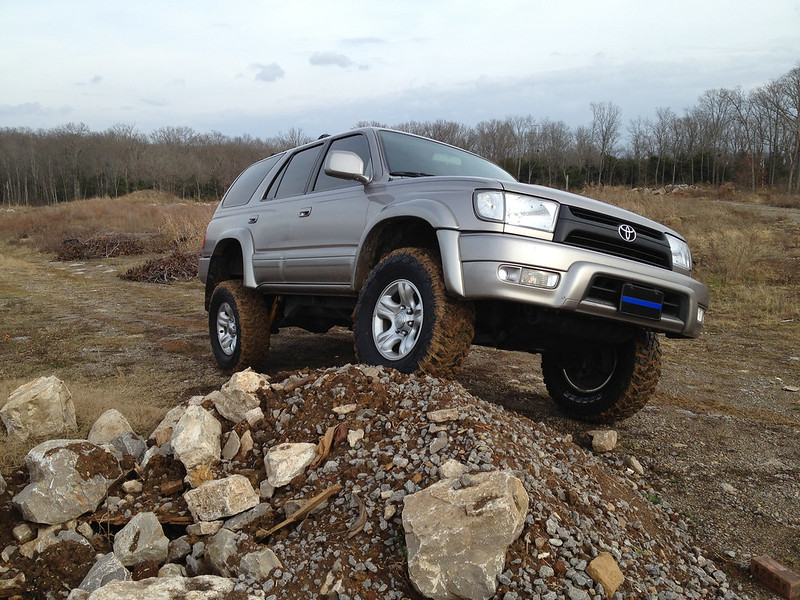
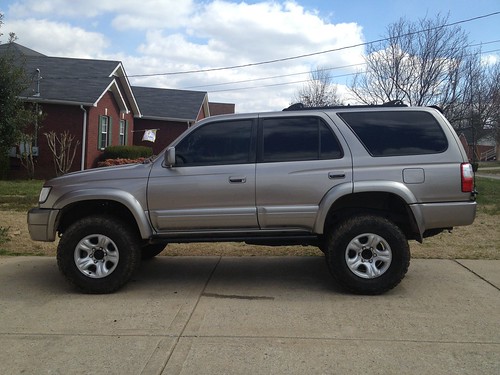
2001 Toyota 4Runner Limited 4WD - Locked
In the fall of 2012, I was inspired by
@ Fjatheart
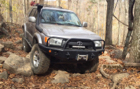
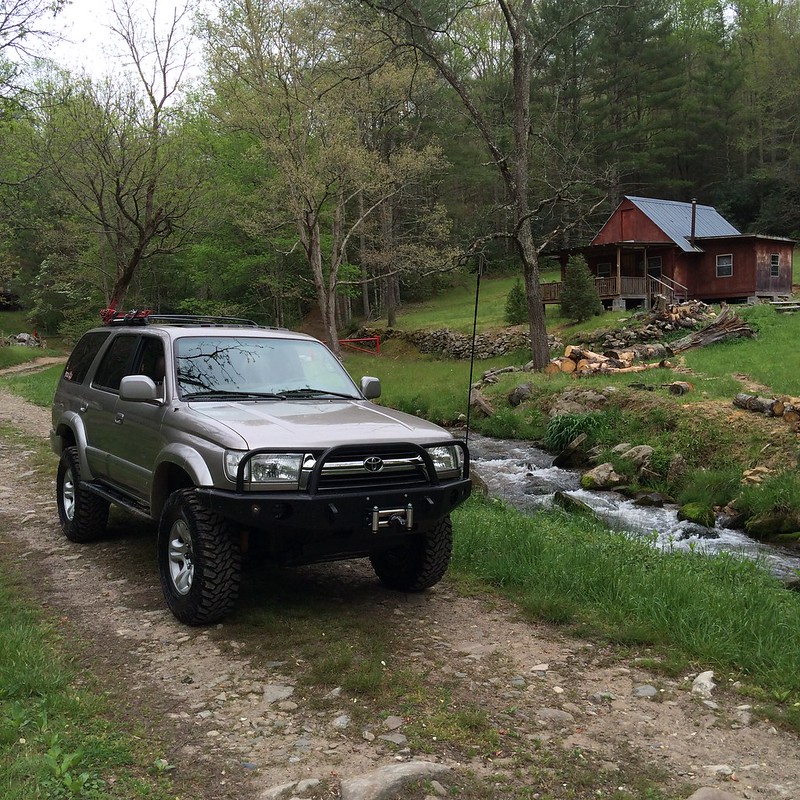
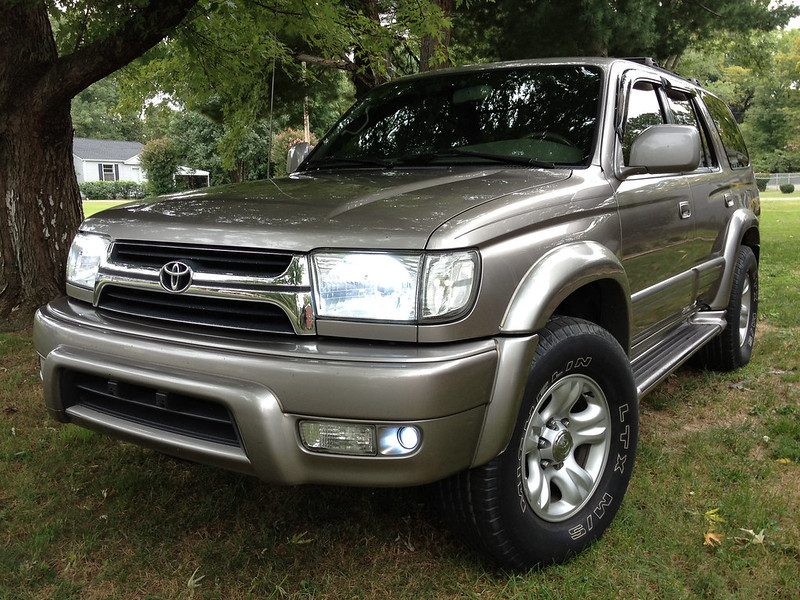
to buy an off road capable rig. He had an FJ40 that he wheeled and an 01 4Runner that he was planning to build into a trail capable daily driver. After searching many FJ80s and 4Runners, I purchased this 2001 4Runner Limited on October 27, 2012. It was completely stock except for a TRD cat-back exhaust, K&N air intake, and an aftermarket Stereo/CD/DVD player with 12" subs and amps. I started modding it just days after I brought it home.
What it looked like the day I bought it:
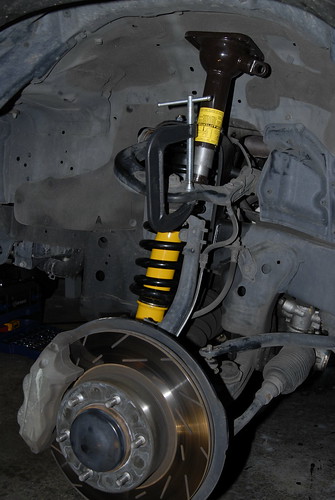
 Suspension:
Front - Old Man Emu 883 coils with OME 9004 shocks
Rear - OME 891 coils with Bilstein 5100 Tundra shocks (part# 24-100144)
SPC Light Racing UCAs
Toytec Diff Drop
Front & Rear swaybar removed (destroyed the driver's side mount twice, so I'm done with it!)
Armor:
Shrockworks Front Winch Bumper with Full Hoops
Stubbs Welding HD-SKO Sliders
Budbuilt Front Skid and Belly Pan Skid
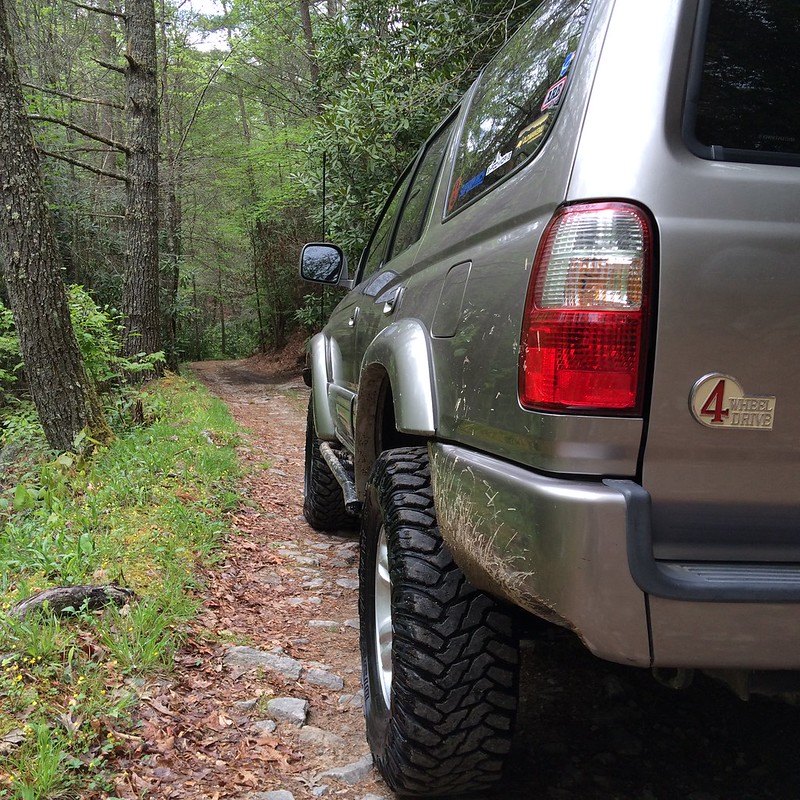
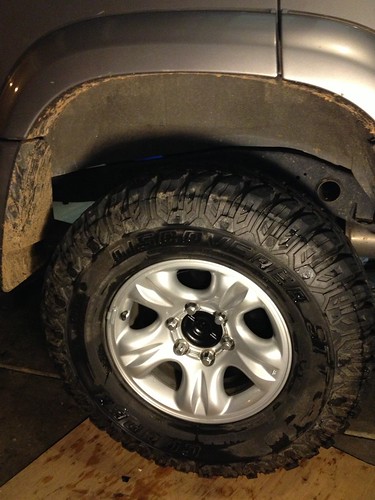
Tires & Wheels:
265/75R16 Cooper Discoverer STT tires
Stock 16" Limited wheels (minus center caps)
Matching spare
Powertrain & Steering:
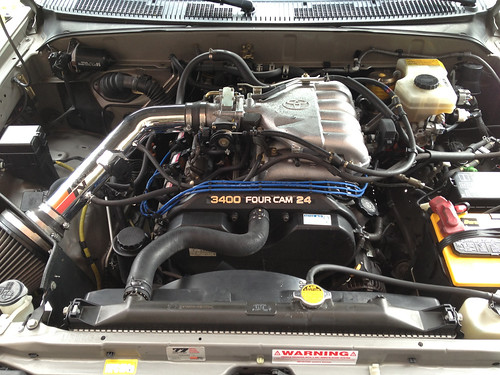
Stock 3.4L V6
Stock air intake with ISR Mod (Intake Silencer Removal)
TRD cat-back exhaust
Safari-LTD Steering Gear (11/06/2013)
4.30 gears
Rear e-locker (retrofit from a 1999)
Genuine Toyota Front Wheel Bearings
Genuine Toyota CV Boots on original Axles
Denso A/F sensor (10/31/12)
Plugs & Wires (11/4/12)
Denso Radiator (10/1/2013)
Exterior:
Snorkel
PIAA 510 fog lights in front bumper
4' Wilson CB antenna on front bumper
PlastiDip rear badges
Pinstripes by the trails of Tennessee
Sport hood installed (04/09/16)
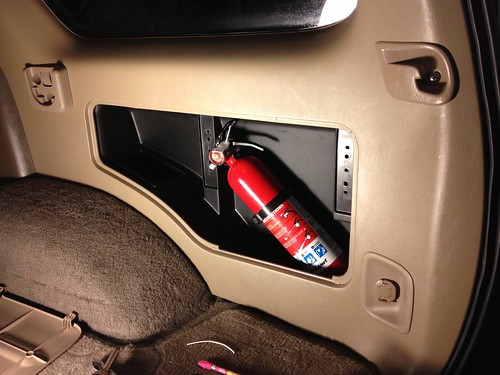
Interior:
6th seat in cargo area (2nd gen front bucket w/ 3rd gen rear 3-pt seat belt) (Currently removed)
Cobra 19 DXVI installed in place of ashtray
Constant 12V plugs (console and rear)
Weathertech Floormats
BlueSea USB port
Fire Extinguisher
ARB Fridge/Freezer
Recovery Gear:
Superwinch Talon 9.5SR with Viking Amsteel Blue Synthetic Rope
Factor55 ProLink winch thimble
Superwinch roller fairlead
CO2 onboard air tank
Hi-Lift jack with roof rack mount
Various straps, shackles and other gear
Things to come:
Electric rear locker (axle housing and diff purchased (3/21/2016)
CBI (or homemade) rear bumper with Tire Carrier
Whitson Metal Works Roof Rack
Modular drawer system
Last edited by ugamurph; 11-23-2016 at 10:59 PM.
|

|
 Reply With Quote Reply With Quote
|
|
04-18-2014, 05:47 PM
|
#2
|
|
Senior Member
|
|
Join Date: Oct 2012
Location: Smyrna, TN
Posts: 1,031
|
|
|
Senior Member
Join Date: Oct 2012
Location: Smyrna, TN
Posts: 1,031
|
Murph's Build and Off Road Thread
Because I didn't actually keep up with a build thread since I bought the 4Runner, a lot of this will be a look back at what was done. It'll take some time for me to catch up. I'll be including not only mods and maintenance stuff, but there will be some off-roading pictures thrown in too.
I hope y'all enjoy.
Murph
|
|
|
Reply With Quote
|
|
04-18-2014, 07:44 PM
|
#3
|
|
Member
|
|
Join Date: Dec 2012
Location: Upstate NY
Posts: 190
|
|
|
Member
Join Date: Dec 2012
Location: Upstate NY
Posts: 190
|
I'd love to see pictures of the 6th seat. I'm looking for ideas. How did you bolt it in?
__________________
1998 4runner Ltd - 4x4 E-locker - TBU 199mm - B&M Tranny Cooler - Ultra-Guage - Rust Bucket
|
|
|
Reply With Quote
|
|
04-18-2014, 08:26 PM
|
#4
|
|
Senior Member
|
|
Join Date: Oct 2012
Location: Smyrna, TN
Posts: 1,031
|
|
|
Senior Member
Join Date: Oct 2012
Location: Smyrna, TN
Posts: 1,031
|
Quote:
Originally Posted by gmv4k

I'd love to see pictures of the 6th seat. I'm looking for ideas. How did you bolt it in?
|
Those pictures and details will be up eventually. I should have started a build thread back in 2012 when I bought the T4R. Now I'm having to play catch up and it's going to take me some time. I'll try to get them up quickly.
Check back regularly for more updates.
_Murph_
|
|
|
Reply With Quote
|
|
04-18-2014, 08:29 PM
|
#5
|
|
Senior Member
|
|
Join Date: Oct 2012
Location: Smyrna, TN
Posts: 1,031
|
|
|
Senior Member
Join Date: Oct 2012
Location: Smyrna, TN
Posts: 1,031
|
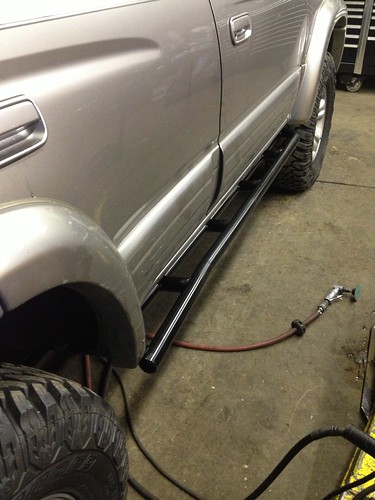
The first mod was removing the running boards
"instant lift". Maybe not, but it did make it look better.
Before:
After:
|
|
|
Reply With Quote
|
|
04-18-2014, 08:30 PM
|
#6
|
|
Senior Member
|
|
Join Date: Oct 2012
Location: Smyrna, TN
Posts: 1,031
|
|
|
Senior Member
Join Date: Oct 2012
Location: Smyrna, TN
Posts: 1,031
|
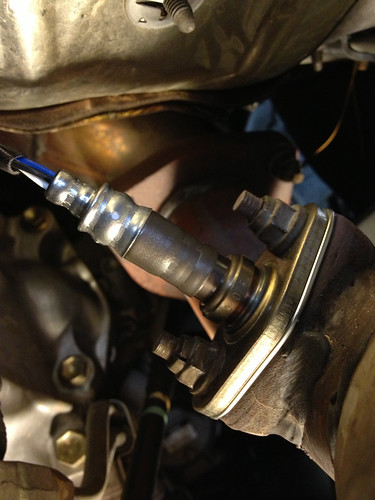
On the drive home, the check engine light came on. After checking the codes, I determined that I needed to replace the pre-cat A/F ratio sensor. I ordered a Denso (part #234-9002) from Amazon for much cheaper than anywhere else. Of course, it was an easy plug and play install.
New sensor with gasket:

Old sensor:
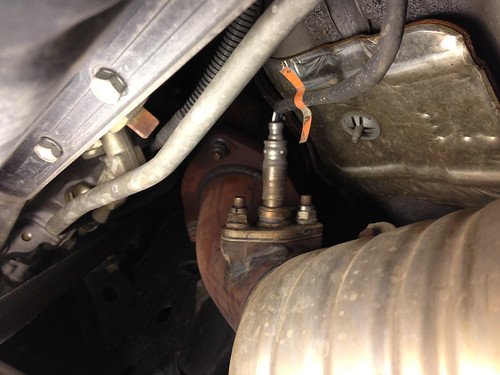
New sensor installed:
The CEL codes also indicated a misfire on two of the cylinders.
This is why:
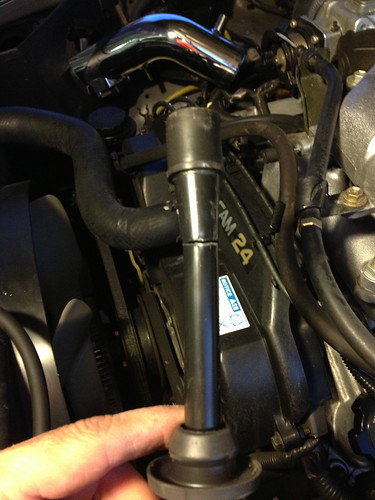
I installed new NGK plug wires and spark plugs.
Pretty Blue Wires:
|
|
|
Reply With Quote
|
|
04-19-2014, 04:33 PM
|
#7
|
|
Senior Member
|
|
Join Date: Oct 2012
Location: Smyrna, TN
Posts: 1,031
|
|
|
Senior Member
Join Date: Oct 2012
Location: Smyrna, TN
Posts: 1,031
|
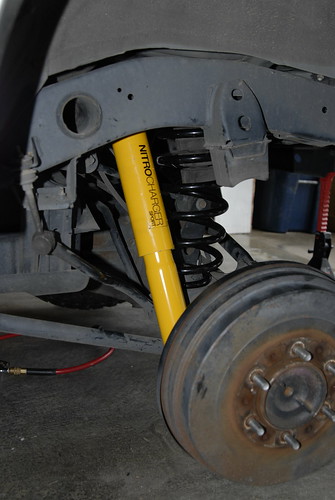
The day after I bought my tires, I received my Old Man Emu 883/891 lift with OME 9004/60027 shocks from Toytec.
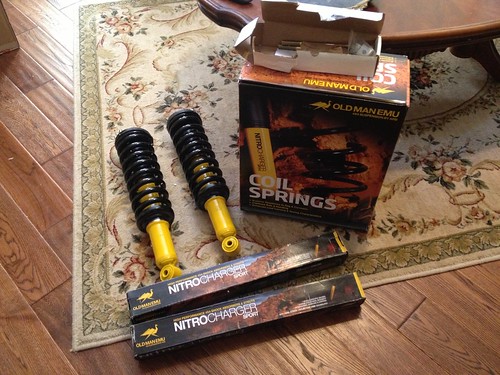
I paid the extra money to have Toytec assemble the front shocks/coils. I loved the "running man" hieroglyphics that they added. A special touch.
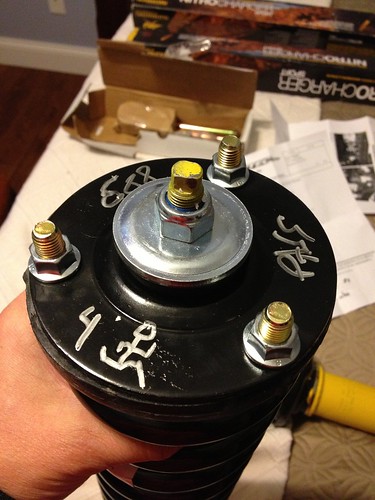
(11/29/12)
|
|
|
Reply With Quote
|
|
04-19-2014, 04:35 PM
|
#8
|
|
Senior Member
|
|
Join Date: Oct 2012
Location: Smyrna, TN
Posts: 1,031
|
|
|
Senior Member
Join Date: Oct 2012
Location: Smyrna, TN
Posts: 1,031
|
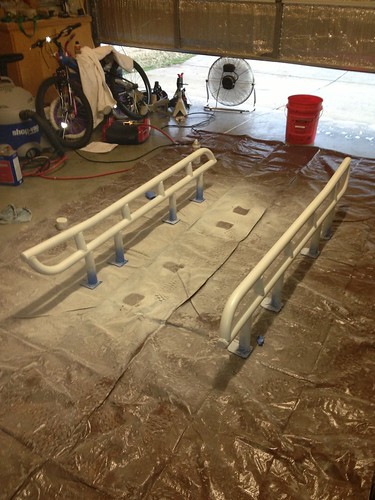
On 12/06/12, the UPS man brought these all the way from Susanville, CA.
Stubbs Welding HD-SKO sliders
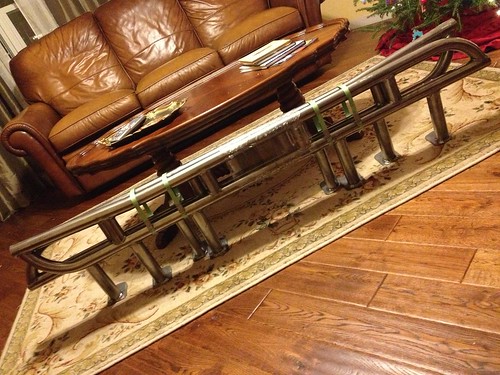
I took them out to the garage and "mocked them up".
|
|
|
Reply With Quote
|
|
04-19-2014, 04:36 PM
|
#9
|
|
Senior Member
|
|
Join Date: Oct 2012
Location: Smyrna, TN
Posts: 1,031
|
|
|
Senior Member
Join Date: Oct 2012
Location: Smyrna, TN
Posts: 1,031
|
Finally getting to the stuff everyone wants to see….
On 12/8/12,
@ Fjatheart
and I filled the day by installing the OME lifts on both of our 4Runners. That was a LONG day!
Before...
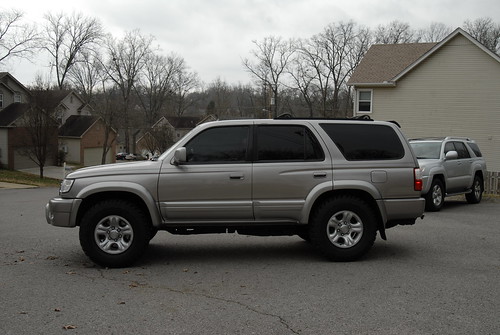
Front going on…
Rear going in:
The money shot…
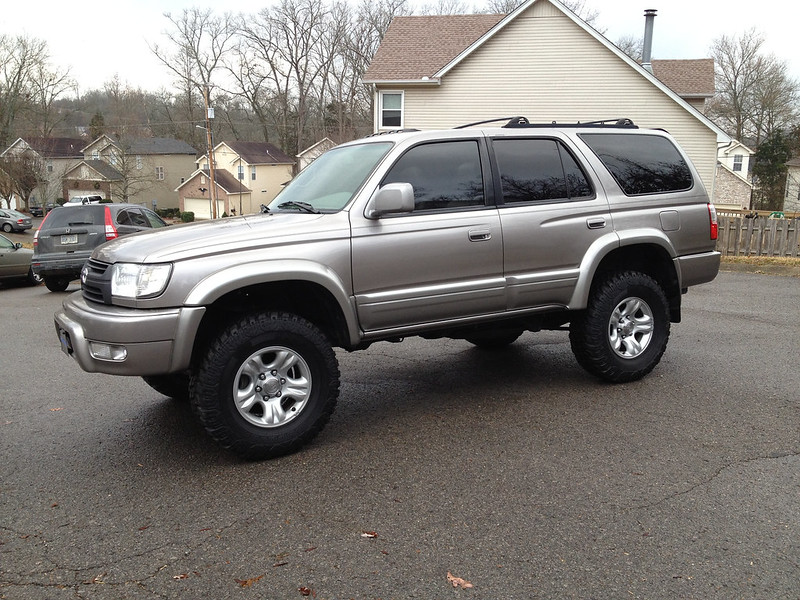
And a couple of after lift poser shots…
(12/08/12)
Last edited by ugamurph; 04-19-2014 at 04:39 PM.
|
|
|
Reply With Quote
|
|
04-19-2014, 04:40 PM
|
#10
|
|
Senior Member
|
|
Join Date: Oct 2012
Location: Smyrna, TN
Posts: 1,031
|
|
|
Senior Member
Join Date: Oct 2012
Location: Smyrna, TN
Posts: 1,031
|
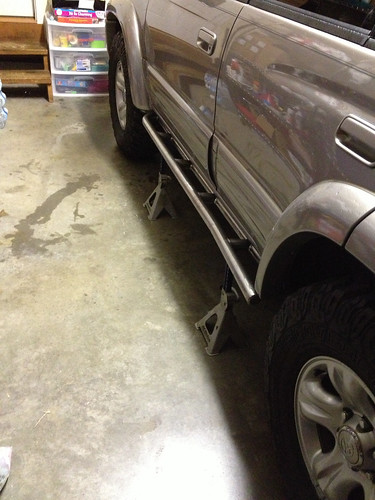
Once my lift was on, it was time to get working on the sliders and having them installed. Over the next few days, I primed and painted them. One thing that I do regret is using the white "bare metal" primer. I found out quickly that when the topcoat gets scratched, the white shows through like a sore thumb.
These Stubbs HD-SKO sliders are great looking and very strong. I liked the fact that the legs came pre-welded. If I could go back and do it again, I would have had Richard weld in some gussets between the legs and mounting plates for a little extra rigidity and strength. Since I don't have a welder of my own, I had Essentially Off Road of Murfreesboro, TN weld them on.
Primer...
Paint...
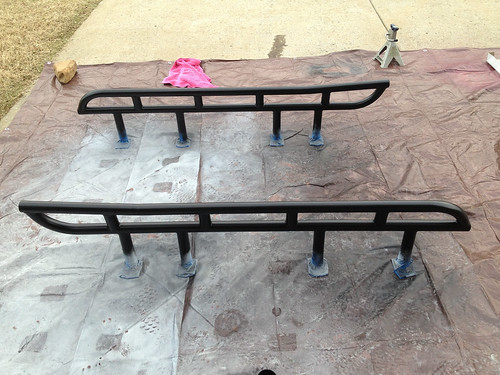
Mounting by EOR

(Installed 12/20/12)
|
|
|
Reply With Quote
|
|
04-20-2014, 03:46 PM
|
#11
|
|
Senior Member
|
|
Join Date: Oct 2012
Location: Smyrna, TN
Posts: 1,031
|
|
|
Senior Member
Join Date: Oct 2012
Location: Smyrna, TN
Posts: 1,031
|
After about a month and a half of driving with the 4Runner lifted, I started smelling some grease coming from the front end.
I looked under the truck and found this on the driver's side inner fender and frame.
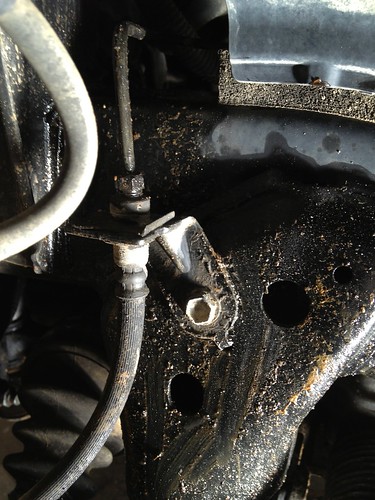
At first, I thought maybe it was coming from the brake line. But then I found this…
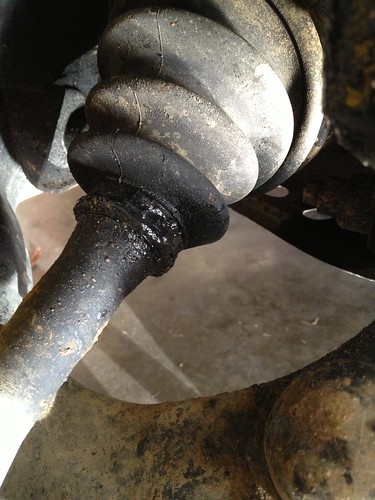
The inner CV boots were leaking on both sides. The driver's side was worst. I went ahead and rebooted both CV axles. It was a very time consuming and messy job, but not too difficult. The hardest part was finding that sweet spot to "pop" the axle out of the front differential.
Several items I bought from Lowe Toyota in Warner Robins, GA for the 4Runner. The new CV boots are in there somewhere.
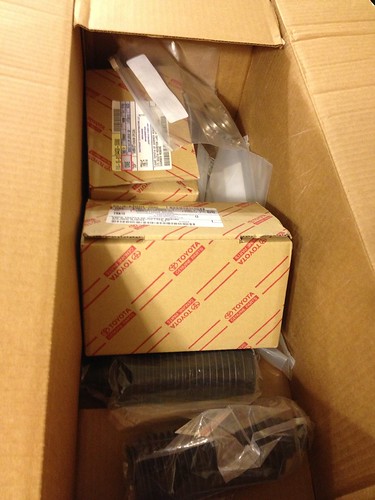
Sorry… No pictures of the actual job being done. My hands were too greasy to handle the camera or iPhone.
Last edited by ugamurph; 04-22-2014 at 09:00 PM.
|
|
|
Reply With Quote
|
|
04-20-2014, 03:48 PM
|
#12
|
|
Senior Member
|
|
Join Date: Oct 2012
Location: Smyrna, TN
Posts: 1,031
|
|
|
Senior Member
Join Date: Oct 2012
Location: Smyrna, TN
Posts: 1,031
|
The box in that last post contained a few other parts that I used for some small projects over the next couple of months.
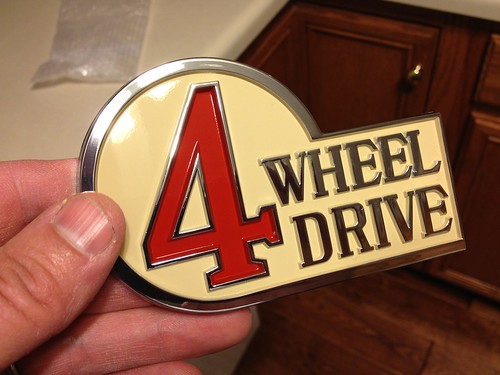
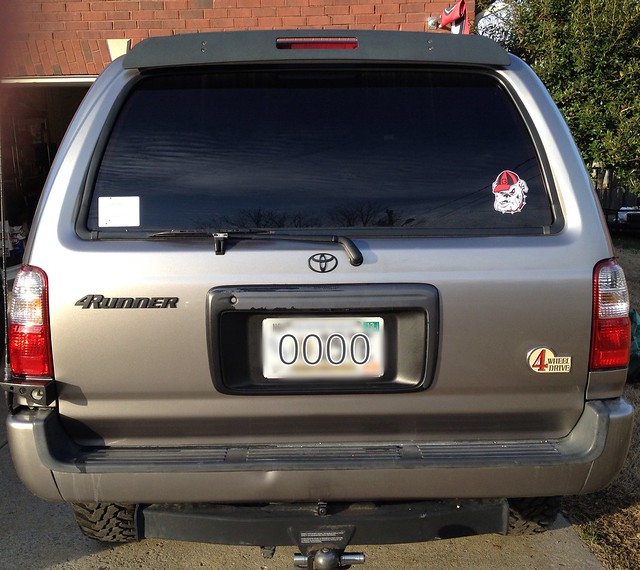
I decided to give the 4Runner a retro OEM look with the FJ40 "4 wheel drive" badge.
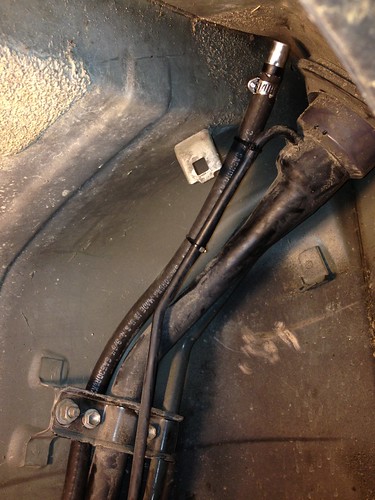
I extended the rear diff breather
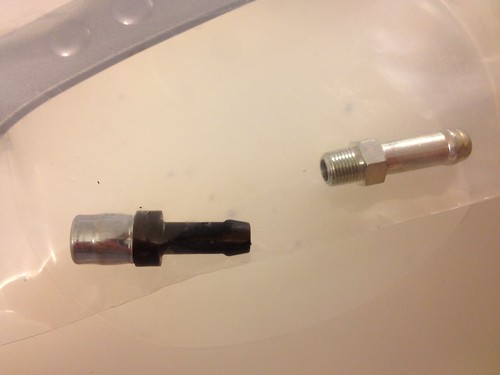
Many people push the breather through the gasket around the gas filler neck. I chose to run it up behind but not through that gasket.
I cleaned and painted my drums and hubs to give the 4Runner a cleaner look

And, since my hubs were clean and black, I decided to show them off by removing the center caps from my wheels. I like the utilitarian look of it.
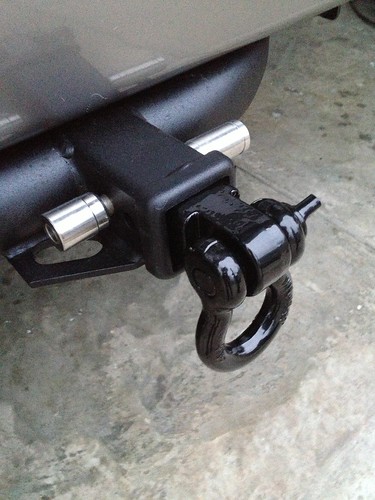
I found this Uhaul tube style trailer hitch on Craigslist to replace my OEM hitch. It tucked up under the 4Runner a little better than the stock hitch offering a touch more of a departure angle. I ended up giving my OEM hitch to
@ Fjatheart
. He used it until he bought a replacement rear bumper with a built in hitch.
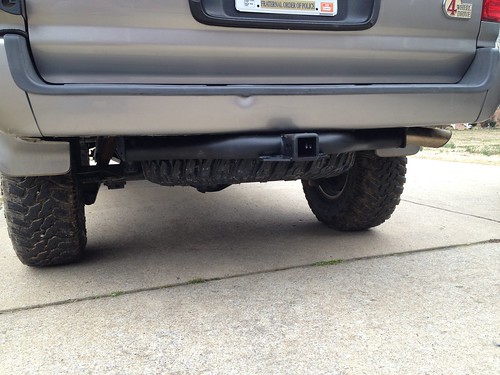
(Feb & March 2013)
|
|
|
Reply With Quote
|
|
04-21-2014, 11:52 PM
|
#13
|
|
Senior Member
|
|
Join Date: Oct 2012
Location: Smyrna, TN
Posts: 1,031
|
|
|
Senior Member
Join Date: Oct 2012
Location: Smyrna, TN
Posts: 1,031
|
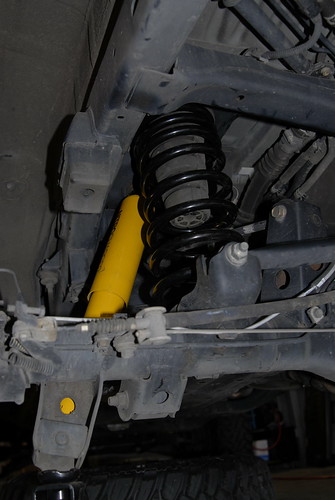
The Old Man Emu lift that I installed on the 4Runner was the "Heavy" lift that included the 891 coils and 60027 shocks in the rear intended for 4Runners with extra weight in the back. Since I didn't have a heavier aftermarket bumper or a drawer system in the back, the ride was a little rough and jarring. Trying to remedy that problem, I tried a couple of different solutions. In March of 2013, I found a good deal on a set of front coils from a 1997 FJ80 to use on the rear of the 4runner. I purchased them and installed them keeping the OME 60027 shocks. The FJ80 coils were 7.5/8 wrap coils and gave at least 1-1/2" to 2" more lift than the OME 891 coils.
This picture shows the unloaded height difference between the LC80 coil and the OME 891.
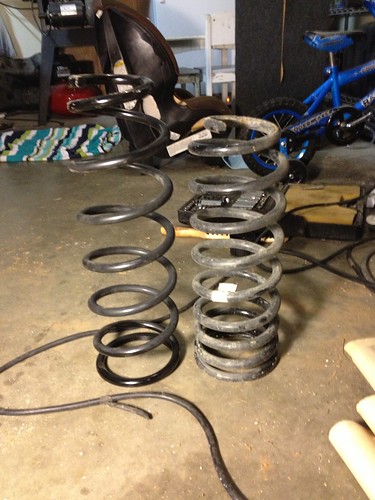
The FJ80 coils lifted the rear even higher and created a lot of rake with the OME 883s in the front.
I rode around with this setup for a couple of weeks. At first, I didn't mind the rake. But, after awhile I decided I would prefer it be closer to level. Obviously the FJ80 coils offered a ton of flex, but the ride was still pretty rough. After more research and learning more and more about how coils and shocks work, I determined that the harsh ride wasn't because of the coils. I decided to try a different set of shocks. I ordered some Bilstein 5100 shocks that were built for the rear of a Tundra with 0 - 2" of lift. Bilstein part #24-100144. These were a near direct bolt-on for the 4Runner. The shocks came with a vulcanized bushing that did not fit the lower shock mount of the 4R. I pressed out the vulcanized bushing and pressed in a Daystar bushing that would fit the 4R's lower mount.
The new shocks

and installed

Since I was starting to not like the rake of the FJ80 coils, I went ahead and re-installed the OME 891s.
I have kept this setup since then and have been pleased with the ride quality. Whenever I end up putting a replacement rear bumper/tire carrier on, I will probably want to go back to a heavier shock such as the OME 60027.
(03/22/13)
|
|
|
Reply With Quote
|
|
04-21-2014, 11:54 PM
|
#14
|
|
Senior Member
|
|
Join Date: Oct 2012
Location: Smyrna, TN
Posts: 1,031
|
|
|
Senior Member
Join Date: Oct 2012
Location: Smyrna, TN
Posts: 1,031
|
The next trail ride was coming up, so I picked up a couple of "just in case" accessories.
Recovery
and Safety
|
|
|
Reply With Quote
|
|
04-21-2014, 11:55 PM
|
#15
|
|
Senior Member
|
|
Join Date: Oct 2012
Location: Smyrna, TN
Posts: 1,031
|
|
|
Senior Member
Join Date: Oct 2012
Location: Smyrna, TN
Posts: 1,031
|
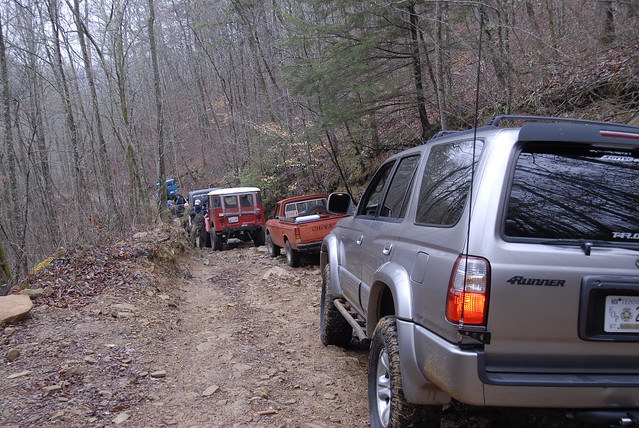
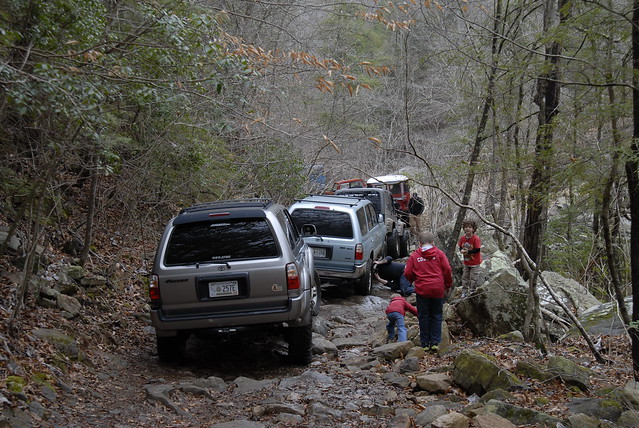
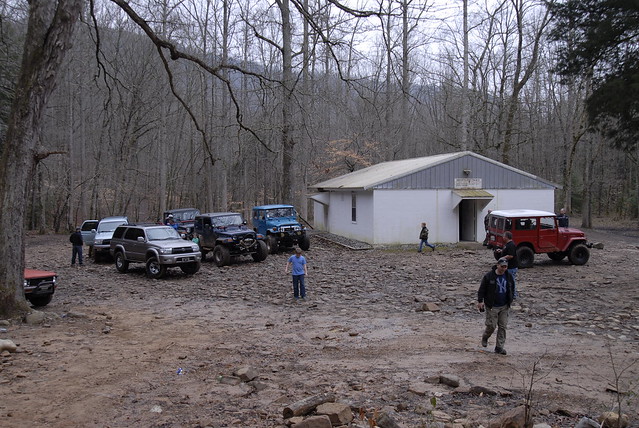
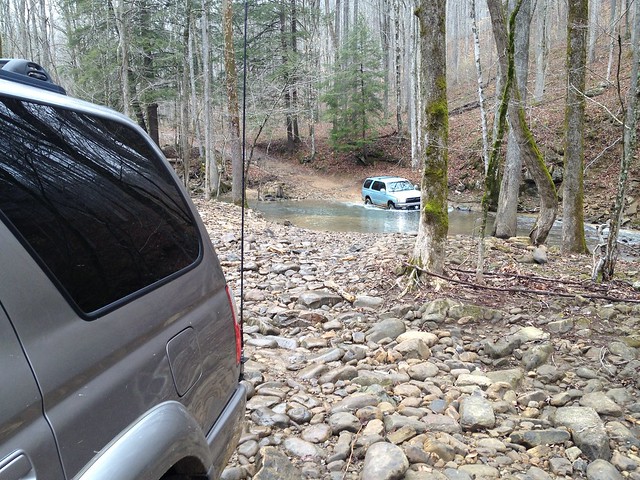
Murph's Build and Off Road Thread
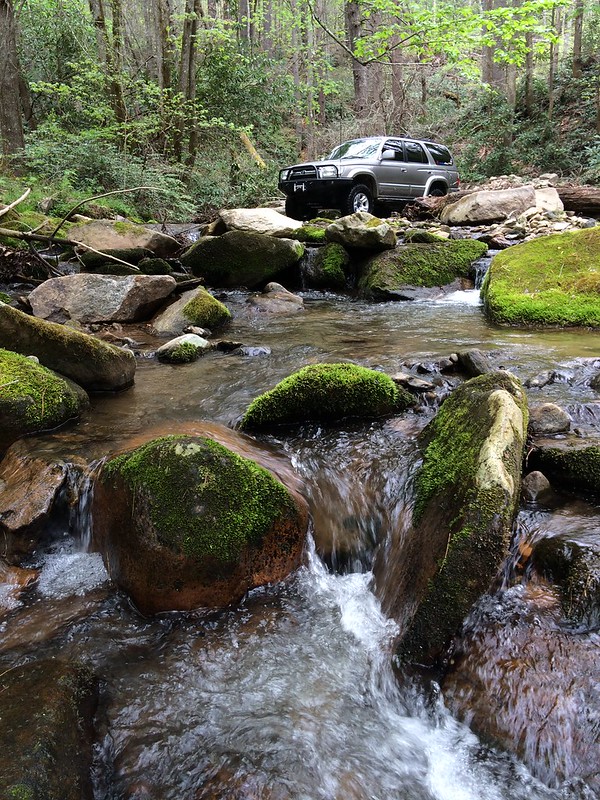
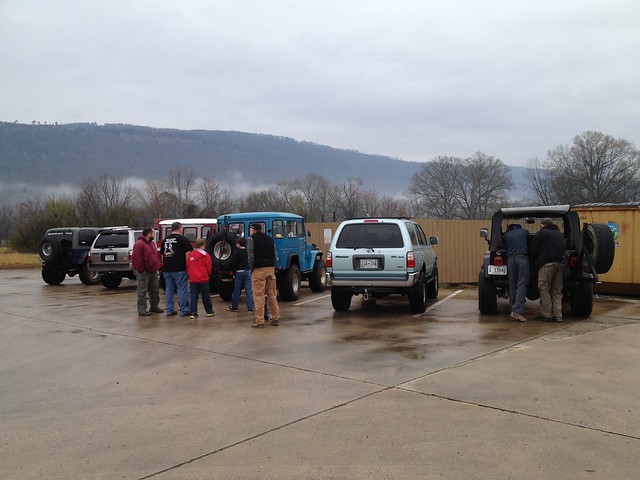
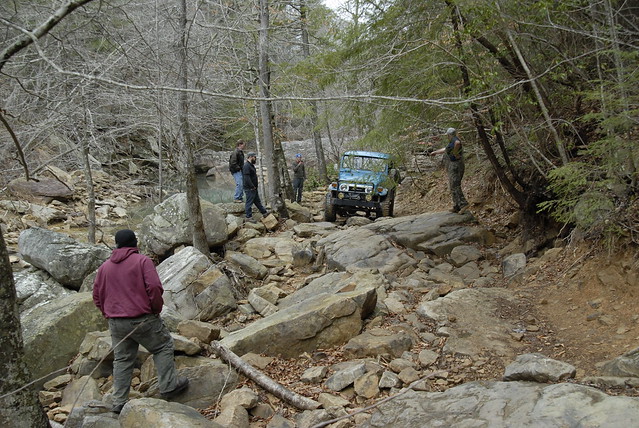
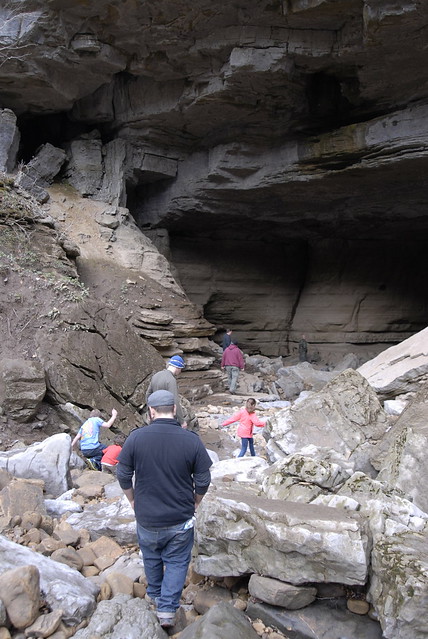
In March of 2013, I had my first chance to go on a trail ride at Coppinger Cove near Chattanooga, TN. I had heard some great things about riding there and was excited to be able to go.
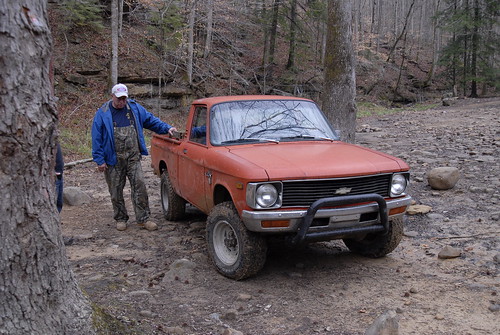
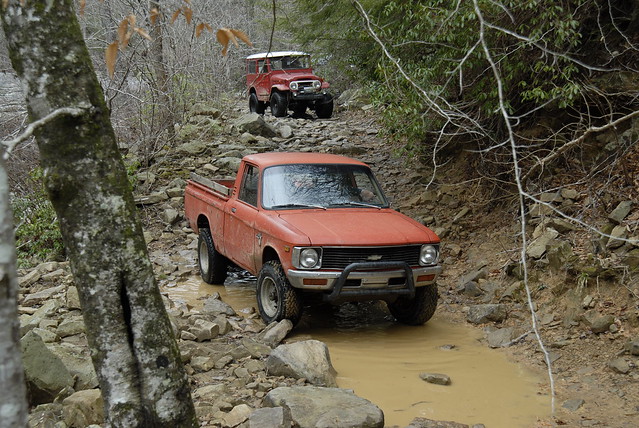
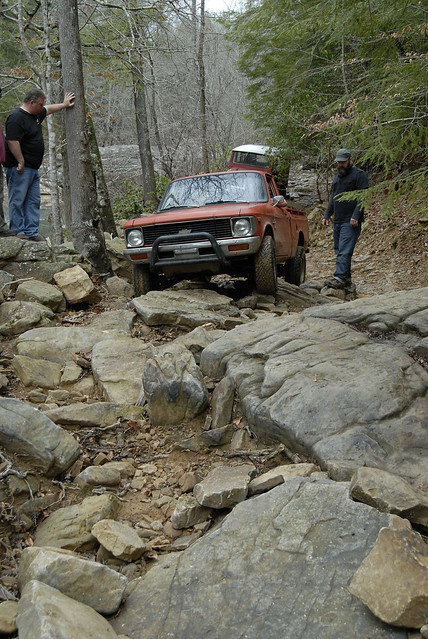
We met up with a great group of guys including two FJ40s, two 4Runners, two Wranglers and a Chevy LUV. Yes, a nearly stock Chevy LUV!
Enjoy the pictures.
Met for breakfast and getting ready to head out.
This is an old block building church that holds a service once a month for the "locals".
This is Brian and his Chevy LUV. He taught us that LUV stands for Light Utility Vehicle.
Two of my favorite trail buddies. And
@ Fjatheart
's T4R in the background.

One of many caves in this area. The opening was over 50 ft high.
From the inside out
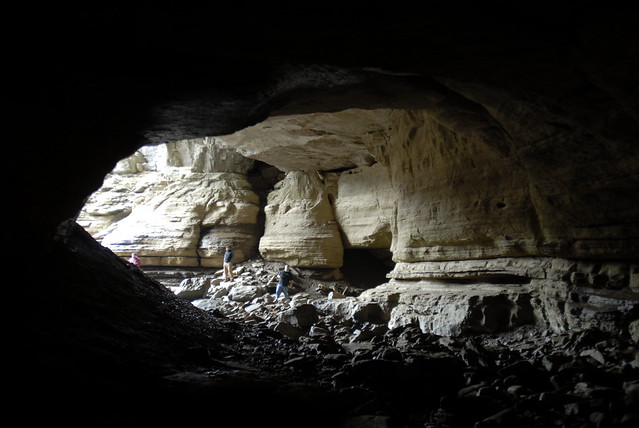
@ Fjatheart

The Cove is full of God's beauty.
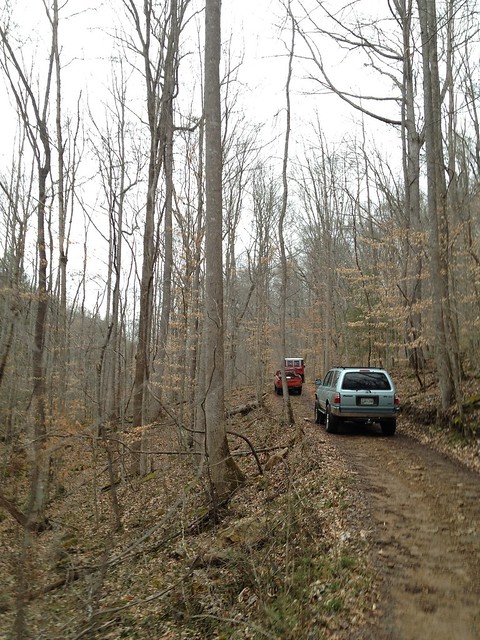
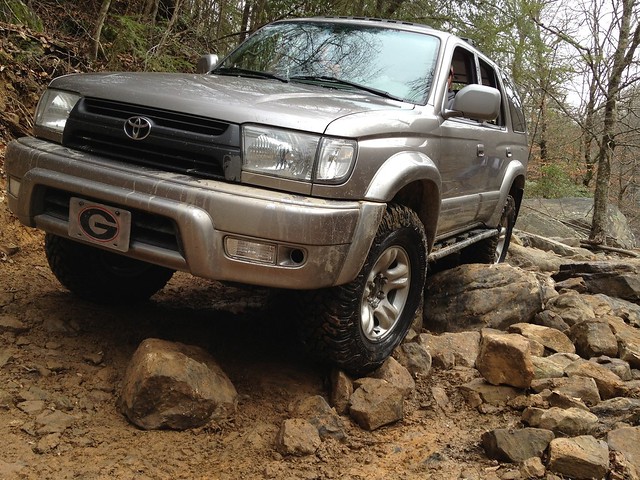
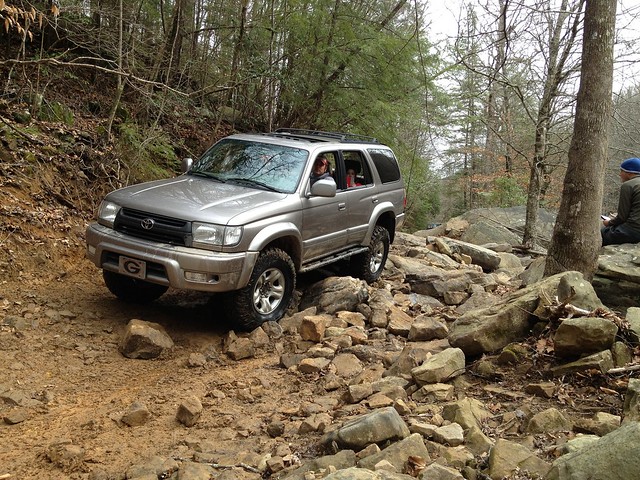
One of the many creek crossings.
Look at that flex.
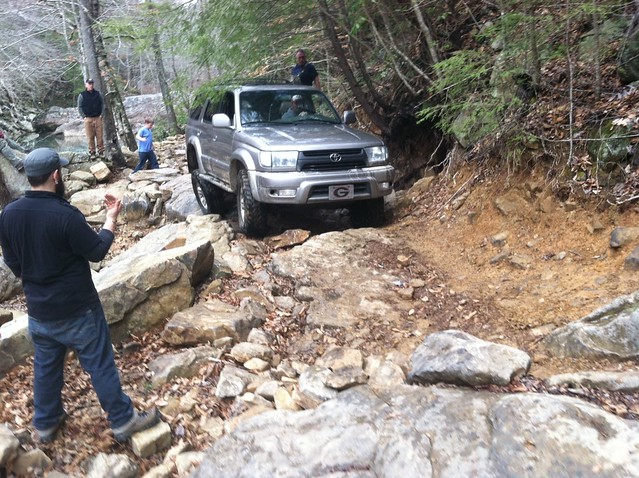
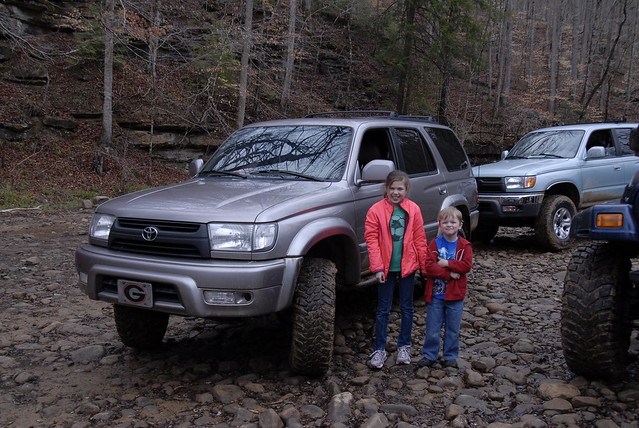
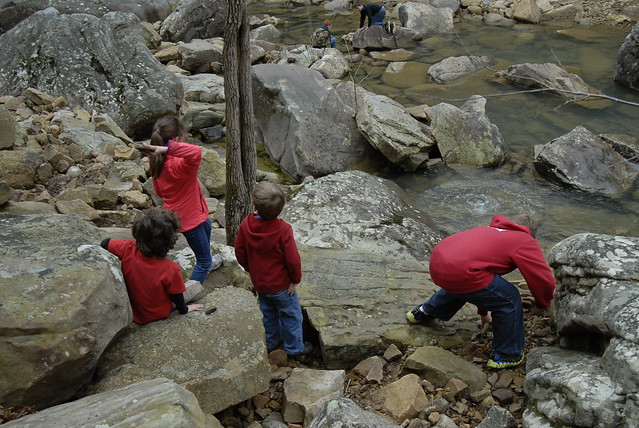
The kids enjoyed playing in the rocks as much as we did.
Last edited by ugamurph; 02-09-2015 at 12:53 PM.
|
|
|
Reply With Quote
|
 Posting Rules
|
You may not post new threads
You may not post replies
You may not post attachments
You may not edit your posts
HTML code is On
|
|
|
|


 Hybrid Mode


