First let me say, if this is redundant let me know and I'll remove it. The only writeup i could find was the 4crawler one and it seemed outdated with pictures that were still difficult for me to use. Anyways, heres my attempt on a How-To. Let me know what you all think guys. Its also on my thread, but figured it might get a bit more exposure here.
So I haven't seen anyone really do a good step by step on the body lifts so I thought I would give it a go at a simple write up. Let me preface this by saying the lift was very easy. The only part that was mind numbingly anger inducing was that Toytec doesn't tell you which length bolts you use to replace your factory ones with and they supply more bolts than needed. It would of made the process much faster and simpler if they simply added that info, and for the likes of me I can't fathom why they don't have that in the instructions. Some moron didn't do their job it seems. Anyway, rant over. Any input would be great and i'll amend the write-up if needed.
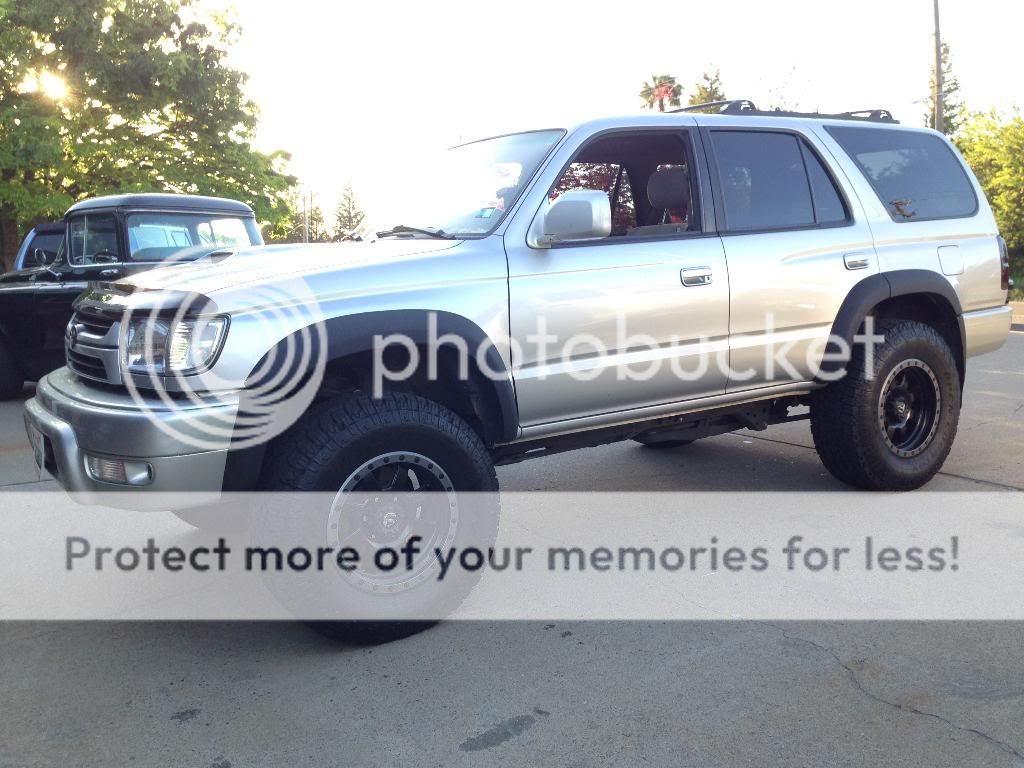
Starting Point:
 Finished Product:
Tools Needed to complete the lift:
Jack with enough lift to reach the body and extend at least 2" higher or jack plus wood blocks.
Philips screw driver
27mm socket
17mm socket
14mm deep socket
13mm socket
13mm box wrench
12mm deep socket
12mm socket
12mm box wrench
Step 1: Remove the front bumper
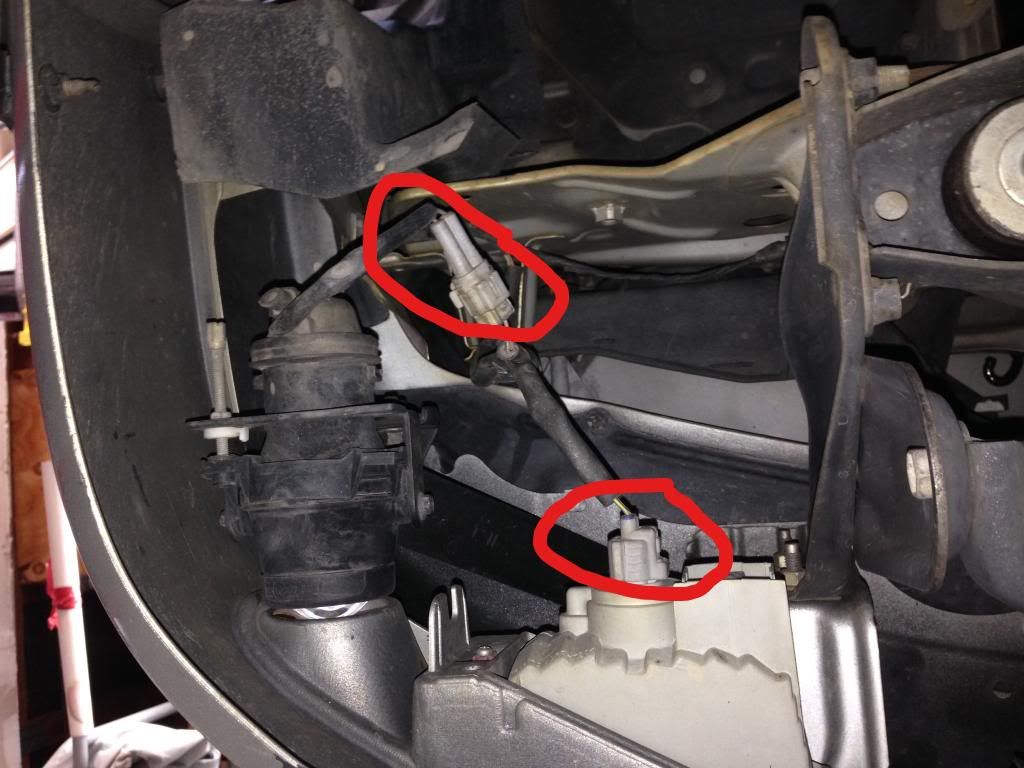
*Before unbolting the front bumper make sure to disconnect the turn signals and fog lights(if equipped).
*
Drivers side
 Passenger side
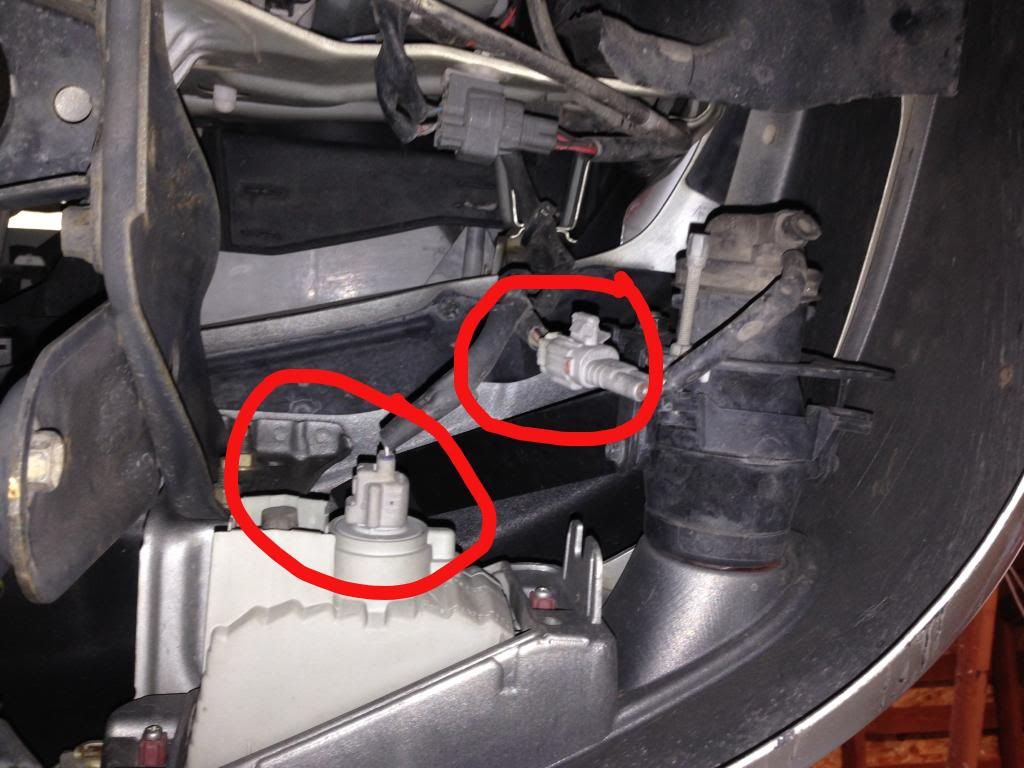
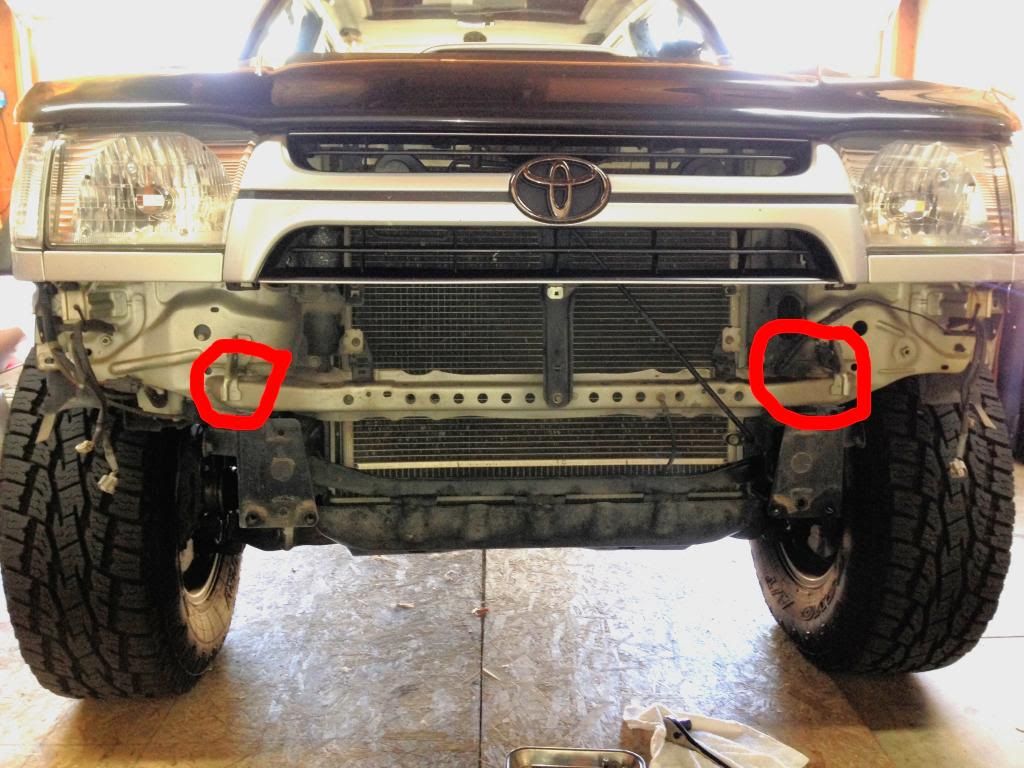
In order to remove the front bumper there are 4 bolts and 1 nut on each side of the vehicle; 4 bolts on each frame plate and 1 nut on each side in the inner wheel well mounting the bumper to the fender. The 8 bolts attaching the bumper to the frame are 14mm and the nuts attaching the bumper to the fender are 12mm.
Inner wheel well opening to remove nut attaching bumper to fender - Drivers Side
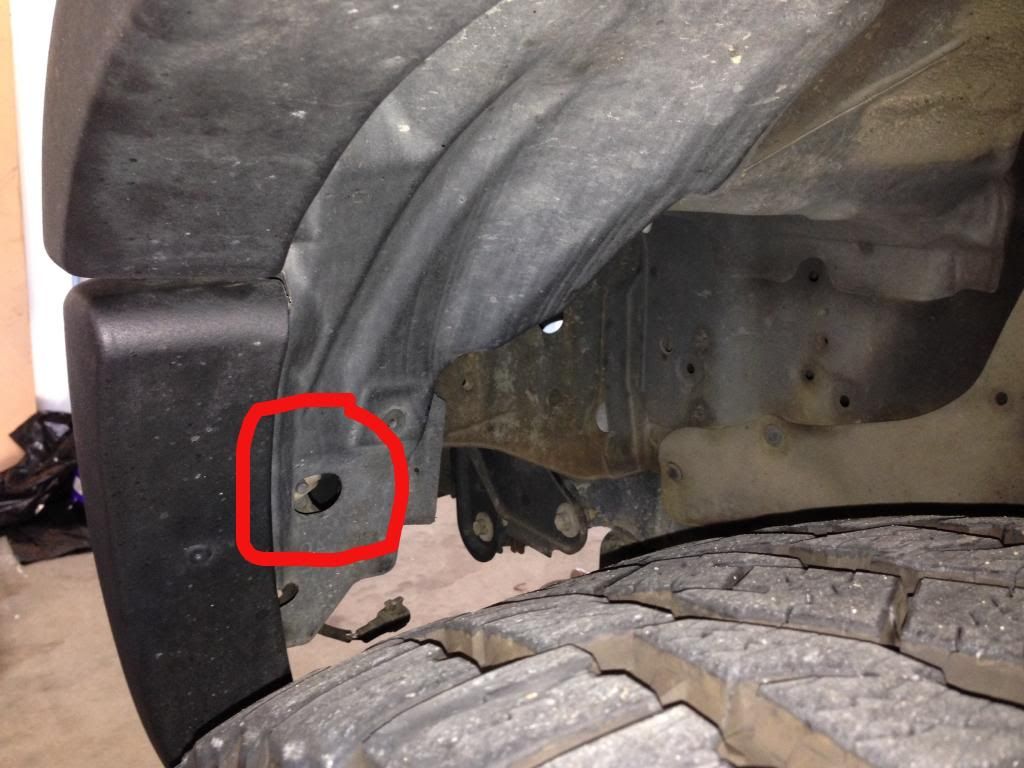 Inner wheel well opening to remove nut attaching bumper to fender - Passenger Side
 The drivers side frame plate(looking from the front of vehicle)
 The passenger side frame plate(looking from the front of vehicle)

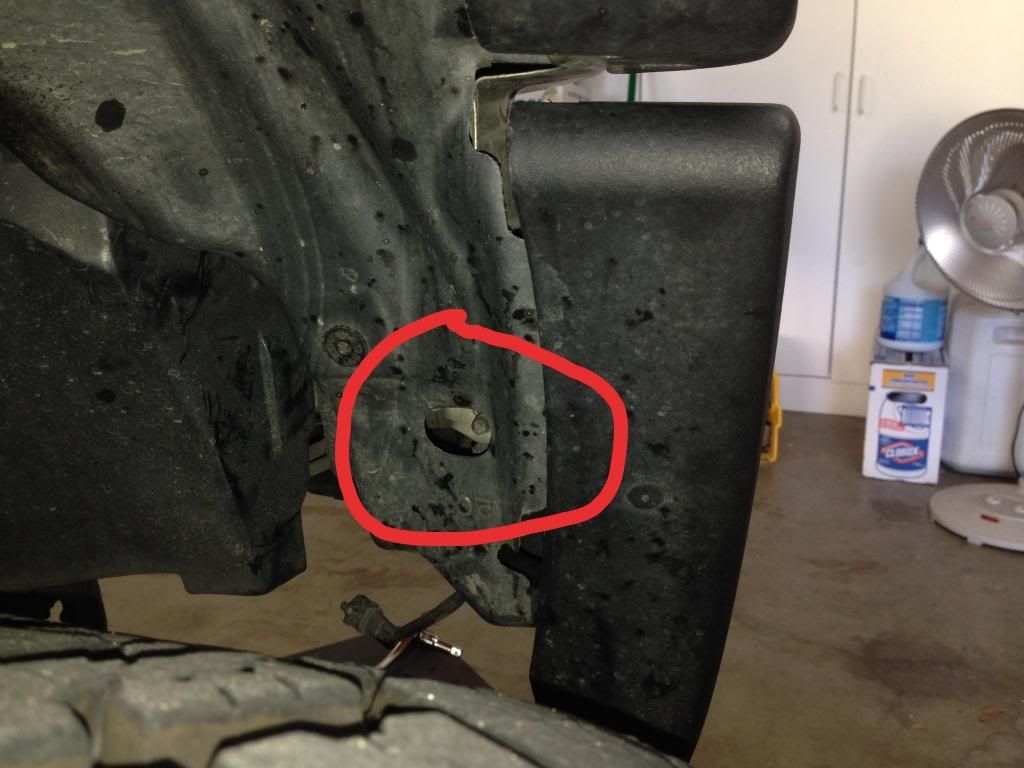
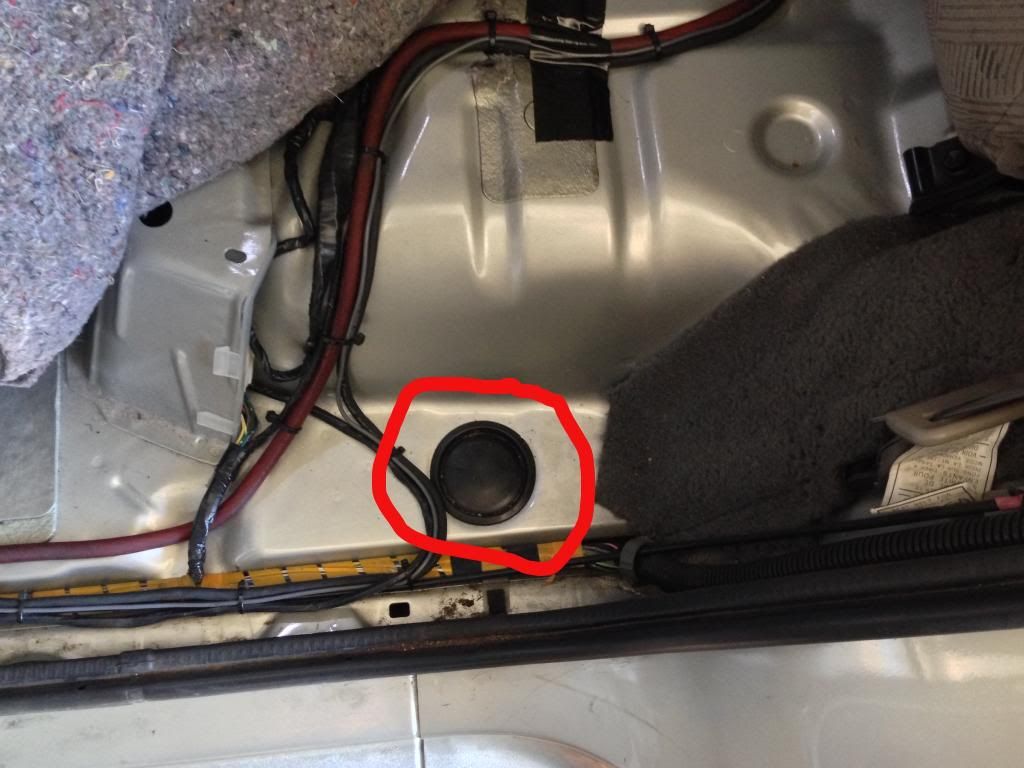
Once you have all the bolts/nuts removed and the electrical disconnected you should be able to giggle the bumper a bit and pull it from the fender mounts. You now have access to both front body mounts and should look similar to this.
Front bumper removed - circled the body mount bolts
Step 2 - Interior panel removal
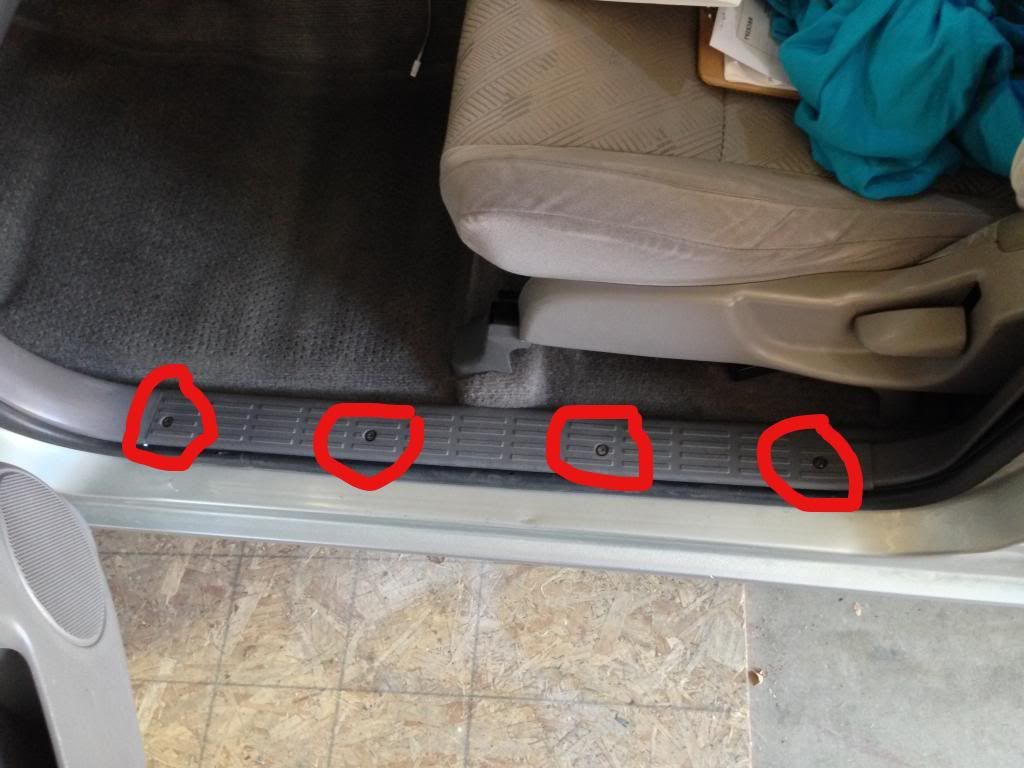
I started on the drivers side and worked my way around to the passenger side. First step is to remove the drivers side door sill plate. Remove the 4 screws then pull the plate up.
Drivers side door sill plate
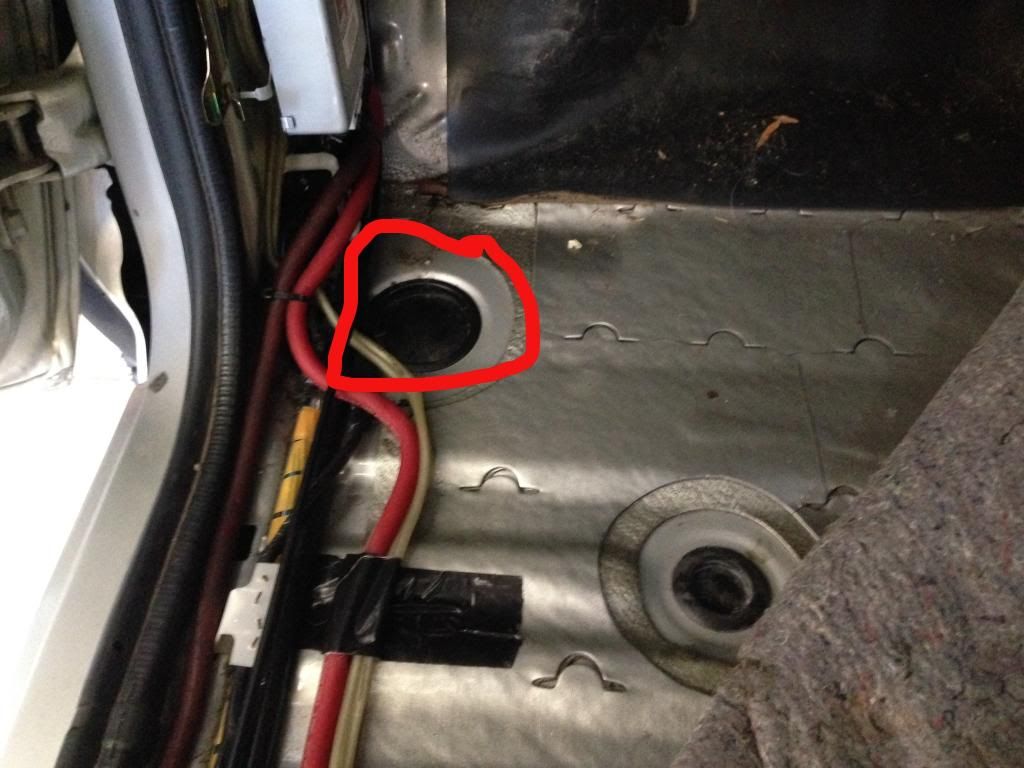
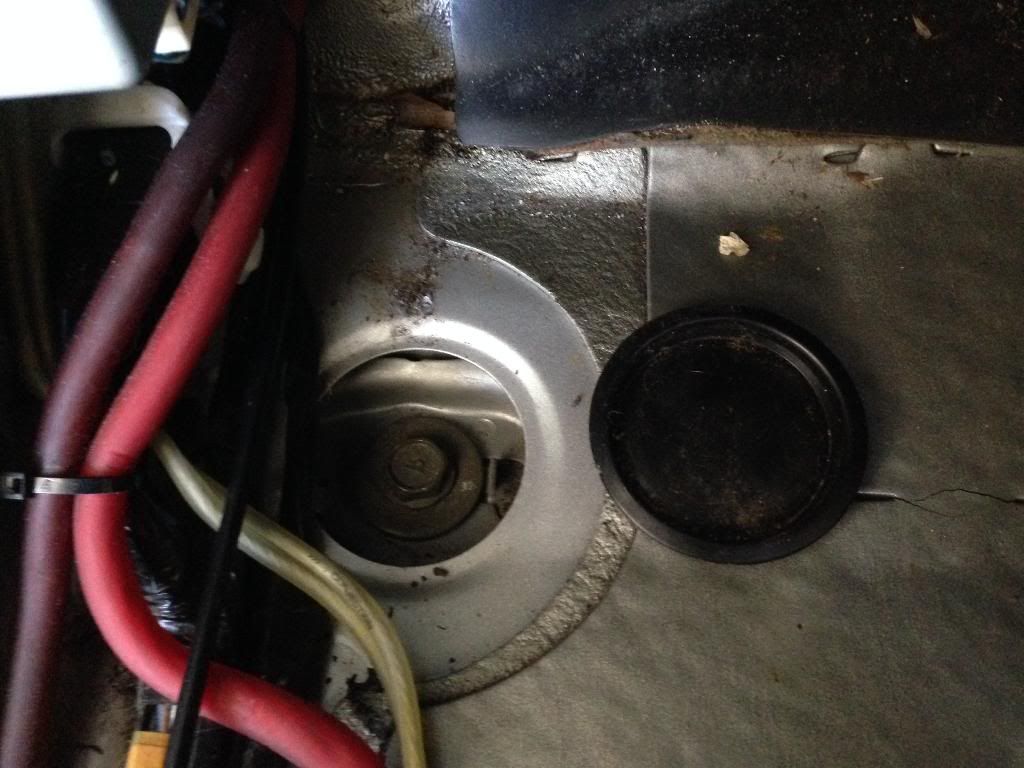
Next grab the kick panel by your foot and pull back on it towards the seat and it will pop right off. Then pull back the carpet and you can see your first interior body mount cover.
First body mount cover - Drivers seat
 Cover removed
Next, move to drivers sider passenger door and remove the door sill plate there as well, it's 2 screws.
Drivers side passenger sill plate
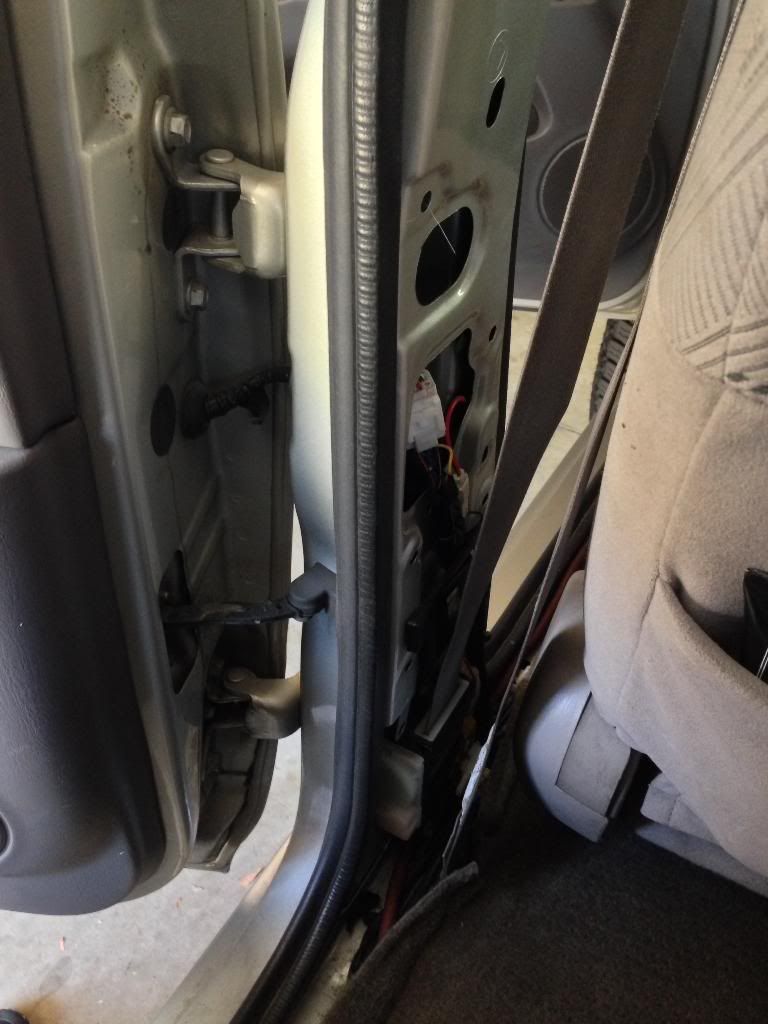
Next remove the drivers side interior B pillar panel. Its the panel that is in-between the drivers front and rear door. It has a few light duty clips and will just pull right off the body and lift out of place.
B pillar removed
Next slide the drivers seat as far forward as it can go, then pull up the rear carpet near the seat belt bolt on the floor and you will see the next body bolt cover.
Drivers seat rear body bolt

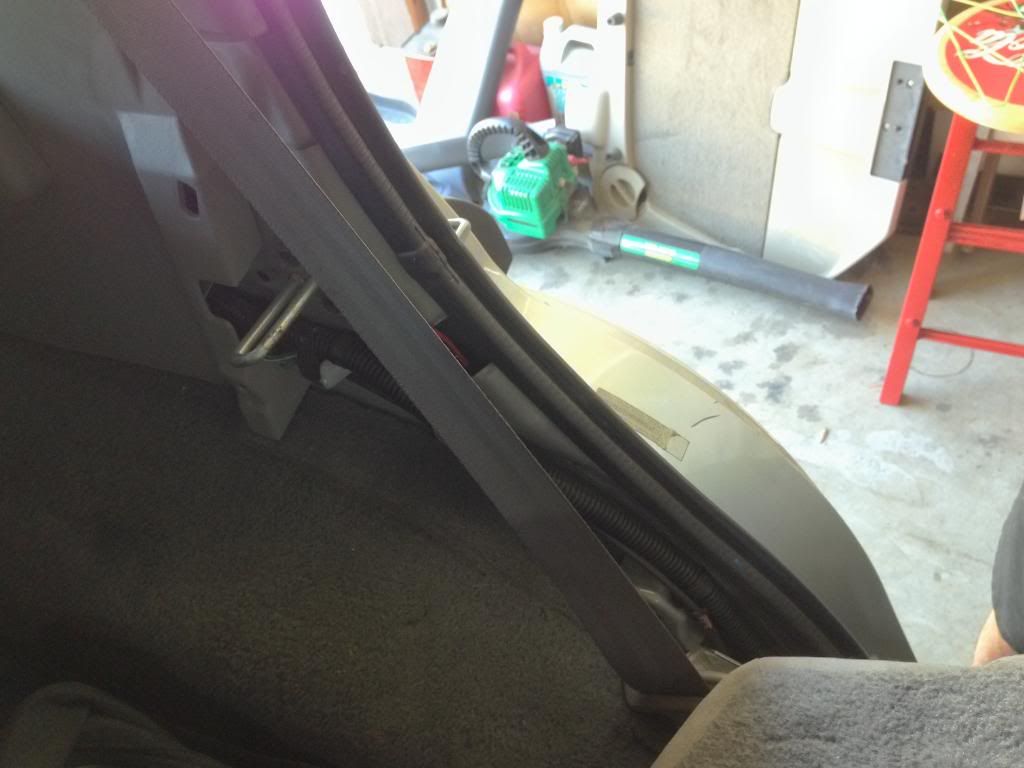
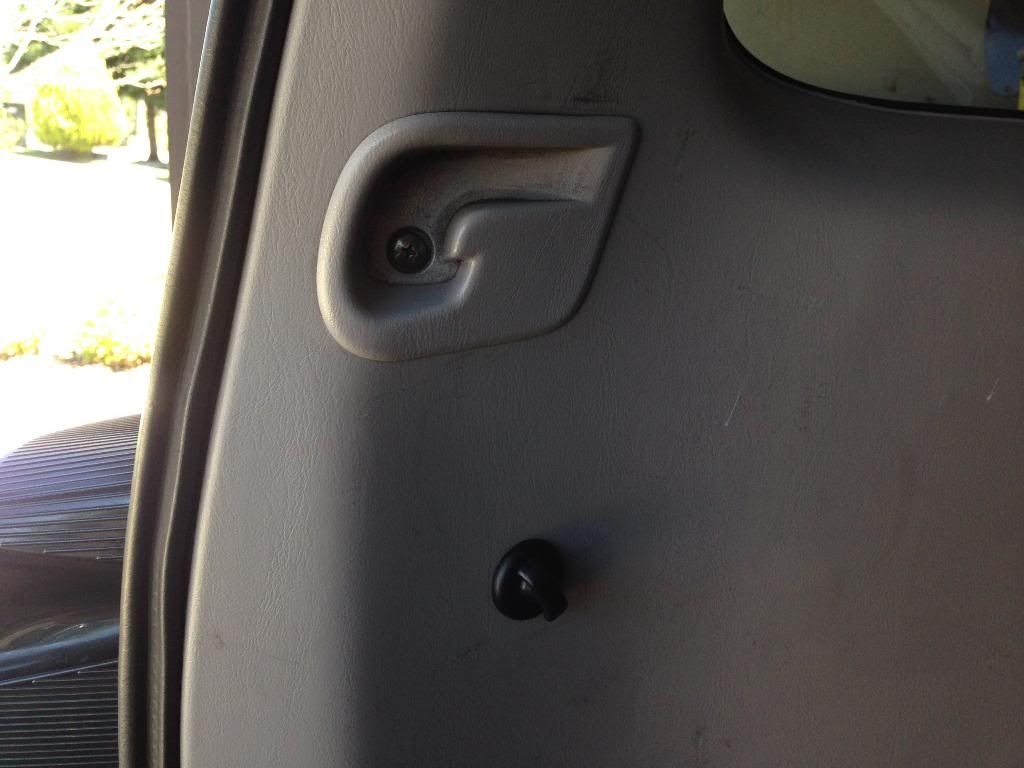
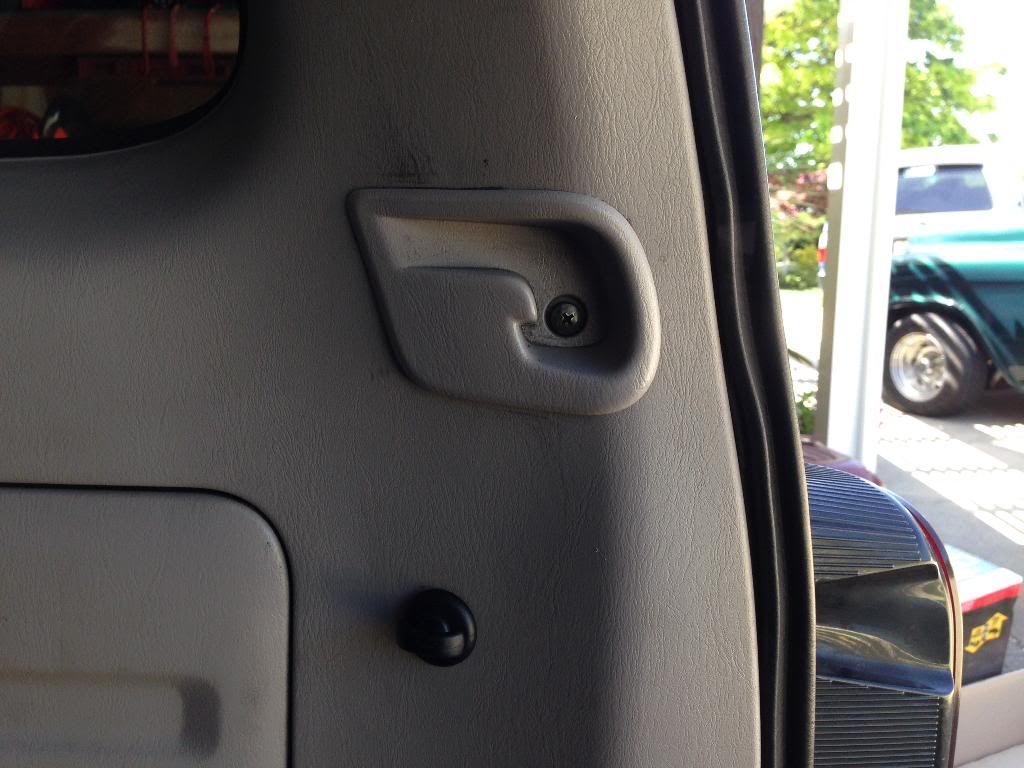
Next fold down your rear seat and remove the interior panel behind the passenger door next to the passenger backrest. It has a few light duty clips and should pull away and off the body fairly easy. Make sure all the clips came off with it or pull them out and put them back on the panel you removed.
Drivers side passenger backrest panel
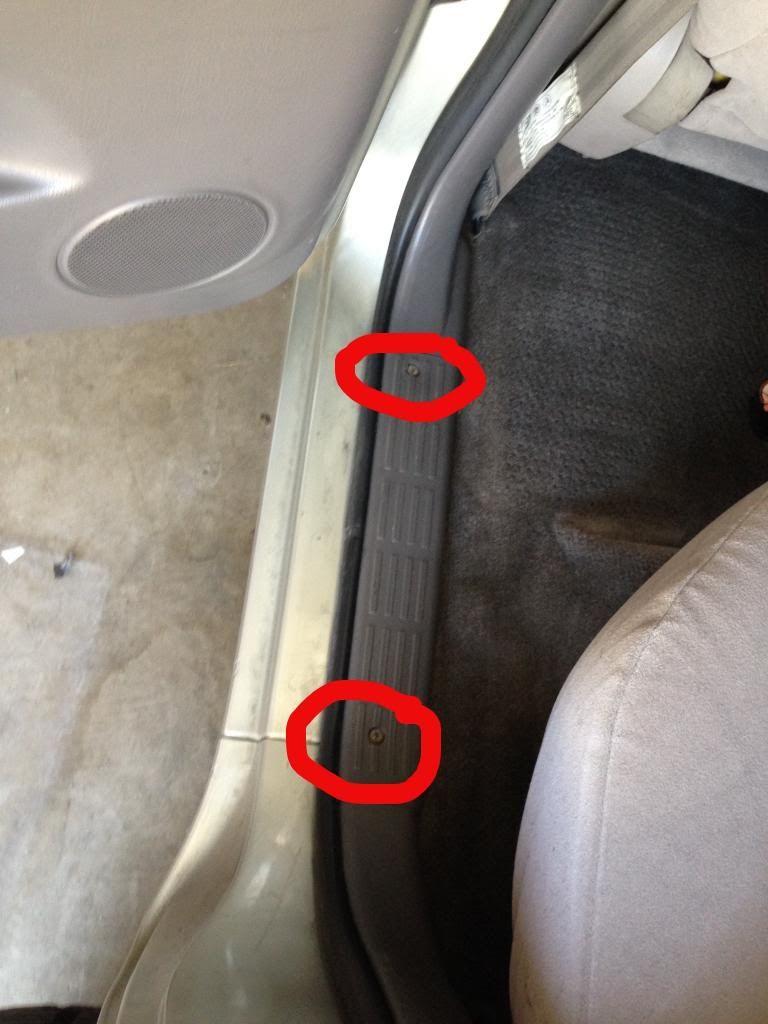
Partially fold the backrest back up and pull the carpet back underneath the seat and you will see the next body bolt near the door sill.
Drivers side passenger body bolt #2
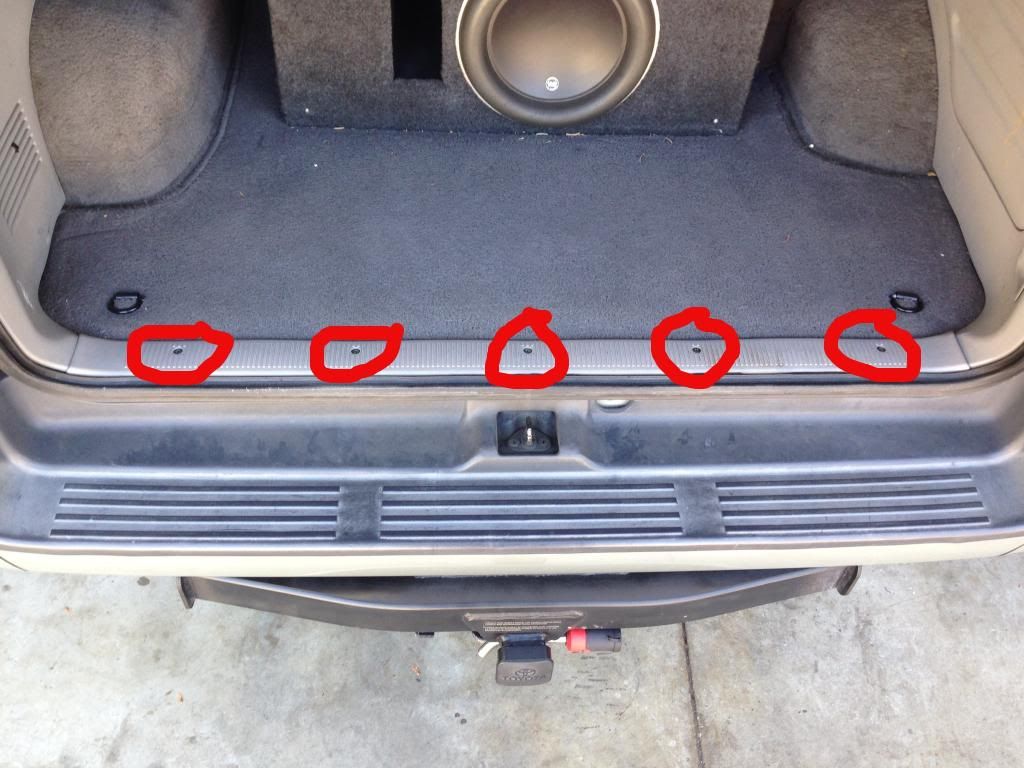
Move to the rear cargo area now and begin disassembly there by unscrewing the 5 screw on the sill plate and removing the plate.
Rear hatch sill plate - 5 screws
Next remove the rear cargo cover catch sleeves(no idea what they are really called). Remove the single philips screw and slide the plate out.
Drivers and passenger catch sleeves


 Linear Mode


