 09-13-2016, 10:57 PM
|
#31
|
 |
Member
|
|
Join Date: Mar 2015
Location: Bozeman, Montana
Age: 25
Posts: 917
Real Name: Phoenix
|
|
|
Member
Join Date: Mar 2015
Location: Bozeman, Montana
Age: 25
Posts: 917
Real Name: Phoenix
|
AFE filter arrives
So my afe air filter showed up today so that I could get rid of the k&n. Overall the afe has a much better quality fit and finish. It blocks all the light when held up to a flashlight unlike the k&n which had little holes all over in the filter media. And the best part is it actually seals properly. I highly recommend the afe drop in filter and that anyone running a k&n check to make sure they're filter is actually sealing. I currently have a fitment issue filled with k&n but I dont see it really going anywhere. But I was able to get a full refund at autozone so I really dont care at this point.
afe seal
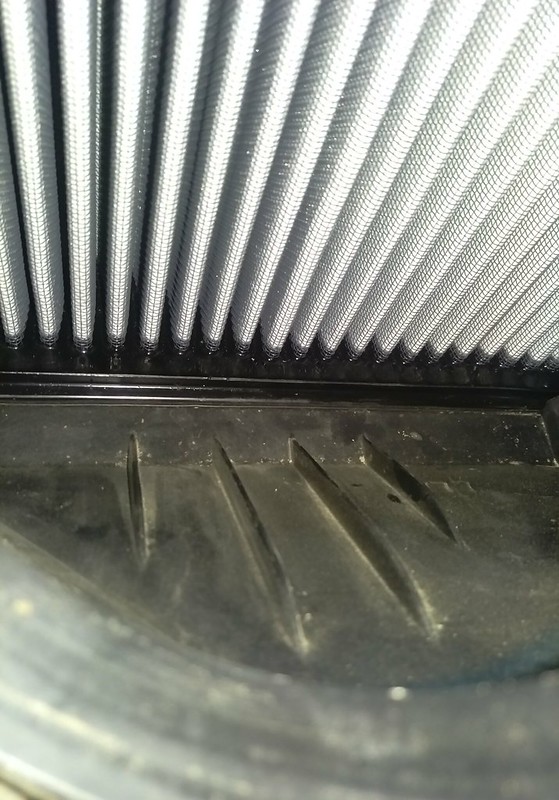 IMAG0287 IMAG0287 by Phoenix Black, on Flickr
On the k&n that lower lip would never seat leaving about an 1/8th inch gap along the bottom for dirt to come in
Also finished modeling the lower control arm mount skids so those will be getting built soon.
 rcam skid model rcam skid model by Phoenix Black, on Flickr
And started looking for some new all terrains to replace the bridgestones that I have now because they are absolutely horrible in anything offroad. Right now its coming down to the BFG at ko2, general grabber at2, and the kuhmo roadventure at 51, the latter looking like the winner due to cost and the good reviews. Id love a set of bfgs but theyre just too expensive for me right now. So let me know what you think about these tires.
__________________
98 Limited - Solid Axle Swapped,Turboed,And On 37s - Build
Transgo Shit Kit Writeup - Click Here
Last edited by Black798; 07-02-2017 at 12:59 PM.
|

|
 Reply With Quote Reply With Quote
|
|
09-14-2016, 12:30 AM
|
#32
|
 |
Senior Member
|
|
Join Date: Jan 2015
Location: Yucaipa, CA
Posts: 1,004
Real Name: Steven
|
|
|
Senior Member
Join Date: Jan 2015
Location: Yucaipa, CA
Posts: 1,004
Real Name: Steven
|
Great looking build so far. Looking forward to what else you have planned for this. 
Sent from my iPhone using Tapatalk
|
|
|
Reply With Quote
|
|
09-17-2016, 11:33 PM
|
#33
|
|
Member
|
|
Join Date: Mar 2015
Location: Bozeman, Montana
Age: 25
Posts: 917
Real Name: Phoenix
|
|
|
Member
Join Date: Mar 2015
Location: Bozeman, Montana
Age: 25
Posts: 917
Real Name: Phoenix
|
Rear end finally done
So I spent this afternoon finalizing everything in the rear suspension and getting it dialed in. First up was to extend the bump stops down 2 inches to accommodate the longer rear shocks so I made some drop brackets using some 1/8th inch plate and 2x1x1/8 square tubing.
Welded together
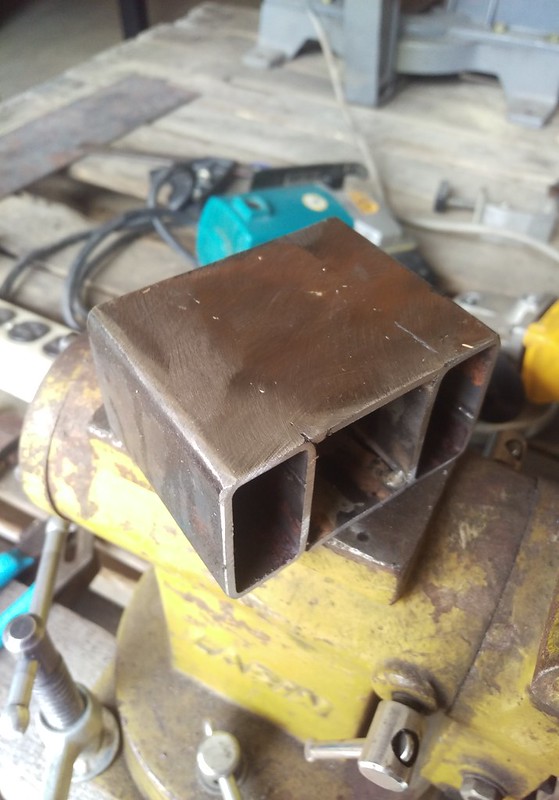 IMAG0298 IMAG0298 by Phoenix Black, on Flickr
Ended with this
 IMAG0300 IMAG0300 by Phoenix Black, on Flickr
While I had the thing in the air I also took the time to secure the bumpstops into the upper spring perch with some wire so when the coils get loose at full flex they will reseat properly and I wont be chasing them down the trail.
Thats about everything that will be happening this week aside from maybe washing it, next week should be the diff breather or lcam skids depending on how much time I have
__________________
98 Limited - Solid Axle Swapped,Turboed,And On 37s - Build
Transgo Shit Kit Writeup - Click Here
Last edited by Black798; 07-02-2017 at 01:03 PM.
|
|
|
Reply With Quote
|
|
09-25-2016, 04:08 PM
|
#34
|
|
Member
|
|
Join Date: Mar 2015
Location: Bozeman, Montana
Age: 25
Posts: 917
Real Name: Phoenix
|
|
|
Member
Join Date: Mar 2015
Location: Bozeman, Montana
Age: 25
Posts: 917
Real Name: Phoenix
|
Extended diff breather install
I finally decided to use the parts hat have been sitting on my workbench for the last three months and extend the rear diff breather up to the gas filler cap.
What is it and why:
The stock rear differential breather on the 4runner stubs out at the top of the axle housing, for daily driving this isn’t an issue but when crossing deep water this breather “plug” can become submerged. When this happens the rapid change in temperature causes a vacuum in the axle housing that can either suck water through the one way breather plug or the wheel bearing seals. By extending the breather plug up and replacing it with a different style of breather the axle is allowed to both “inhale” and “exhale” through the plug rather than just exhale, preventing the entry of water through the wheel bearing seals.
Parts needed and cost:
Toyota union P/N 90404-51319
Toyota Plug, Breather P/N 90930-03136
6 feet of 3/8in fuel line
8 inches of 5/8in heater hose (this is optional but I used it to insulate the breather line from rubbing)
Zip ties
Teflon tape
2 3/8in hose clamps
The two Toyota parts cost me about 17$ at the dealer and the 3/8 fuel line was 10$ at autozone. I had the rest of the things laying around from other projects. Total cost should be around 30$
Basic Procedure:
I followed this write-up so refer to this for more detail.
The basic things that need to be done are, remove the stock breather and replace it with the Union (I also wrapped the union threads with Teflon tape to provide a better seal), route the fuel line up to the gas cap and through the gasket, install the breather plug and your done.
In the write-up I linked they remove one of the clips securing a plastic shroud, I found that this isn’t needed and you can just run the fuel line next to the other pipes by pulling it up with a piece of wire.
Another little side note is make sure that you leave enough slack in the fuel line to allow for your axle to droop.
Pictures:
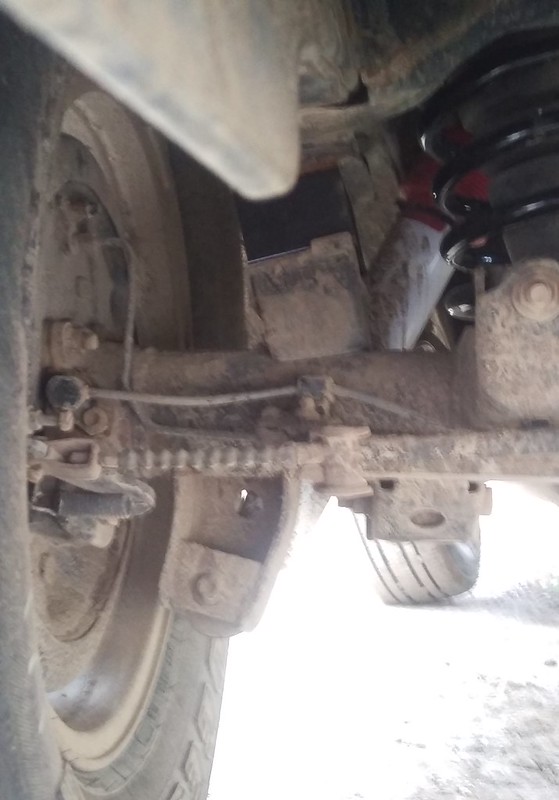
Connection at diff
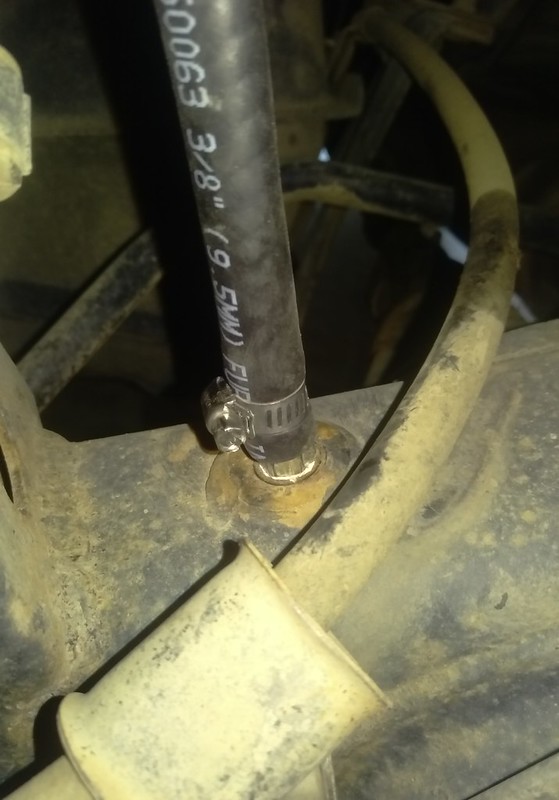 IMAG0325 IMAG0325 by Phoenix Black, on Flickr
Hose routing
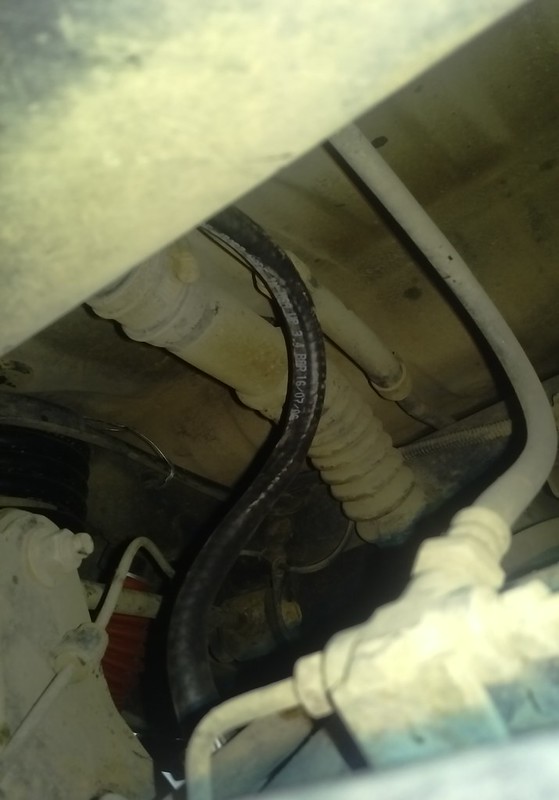 IMAG0327 IMAG0327 by Phoenix Black, on Flickr
Connection at gas cap
IMAG0327 by Phoenix Black, on Flickr
__________________
98 Limited - Solid Axle Swapped,Turboed,And On 37s - Build
Transgo Shit Kit Writeup - Click Here
Last edited by Black798; 07-02-2017 at 01:04 PM.
|
|
|
Reply With Quote
|
|
09-30-2016, 11:40 AM
|
#35
|
|
Junior Member
|
|
Join Date: Apr 2016
Location: Northern VA
Posts: 23
|
|
|
Junior Member
Join Date: Apr 2016
Location: Northern VA
Posts: 23
|
nice build so far
|
|
|
Reply With Quote
|
|
10-29-2016, 11:27 PM
|
#36
|
|
Member
|
|
Join Date: Mar 2015
Location: Bozeman, Montana
Age: 25
Posts: 917
Real Name: Phoenix
|
|
|
Member
Join Date: Mar 2015
Location: Bozeman, Montana
Age: 25
Posts: 917
Real Name: Phoenix
|
Update
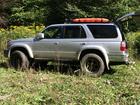
Haven't updated this much recently because not much has really happened, just daily driving and enjoying the 4runner. This last week I did take care of some things though, I installed a set of 10mm trim packers in the back to gain 3/8 of an inch of lift and to help with the appearance when fully loaded with gear. I also wrapped the steering wheel in 550 cord because it was starting to get a hole in the top and as a side benefit I now have almost 100ft of paracord that can easily be taken off and used if need be.
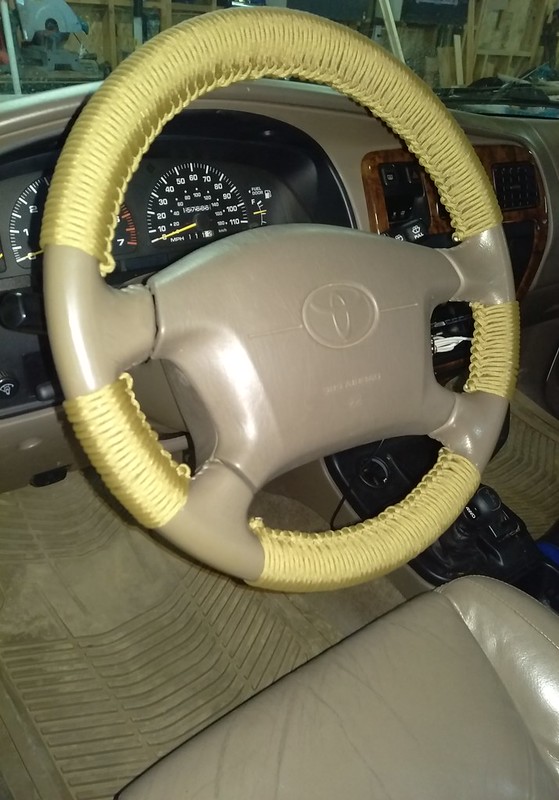 IMAG0461 IMAG0461 by Phoenix Black, on Flickr
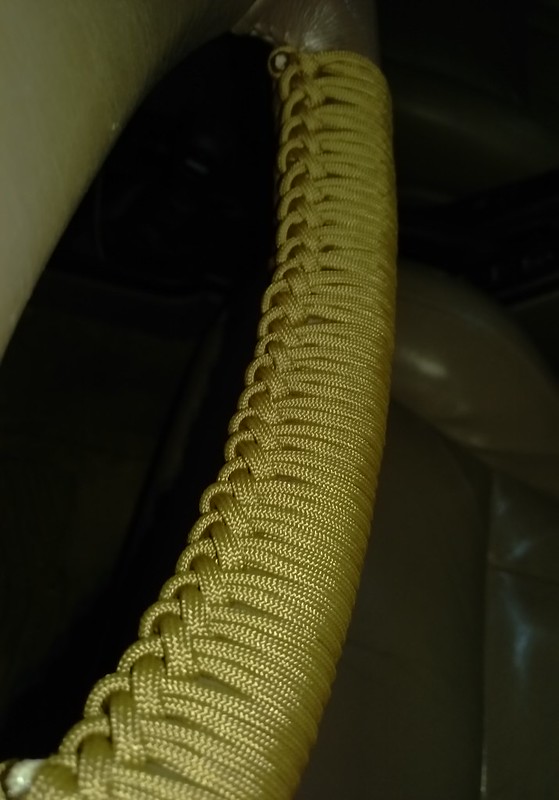 IMAG0462 IMAG0462 by Phoenix Black, on Flickr
Also got in on the October discount tire sale and picked up a set of 265/70/16 falken wildpeak at3w's for 428$ out the door that will go on during springbreak. Just ordered them now to save a bit of money. So far I really like these tires, they seem like a cross between a duratrac and KO2 so it will be interesting to see how they preform.
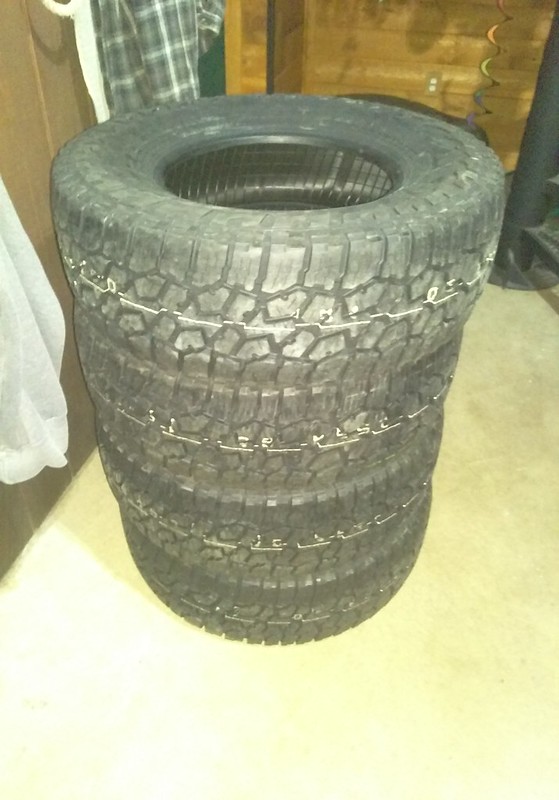 IMAG0475 IMAG0475 by Phoenix Black, on Flickr
Last weekend I also got out with some friends for some fun in the hills and the mud. Definitely not my favorite type of wheeling because of all the cleanup but it was still fun to get out of town for awhile and put the runner through its paces, I also got a nice lesson on recovery in the rain. Long story short my buddy tried to turn around on a pretty narrow spot in the road and he started sliding of the road since he doesn't have any weight in the back of his truck, and of course right on cue it started pouring rain. It ended up taking 45 minutes of tugging and re rigging to get him back on the road but all ended well. Unfortunately I didn't get any pictures of it except for back down at the trail head. Also made me realize how much I HATE mud. Never again am I doing that. My friends dont care but they dint ever clean up after they do that.
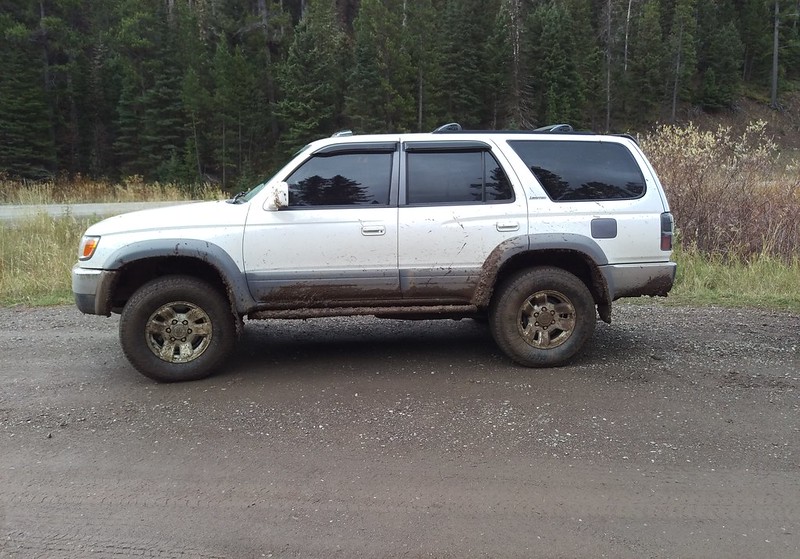 IMAG0421 IMAG0421 by Phoenix Black, on Flickr
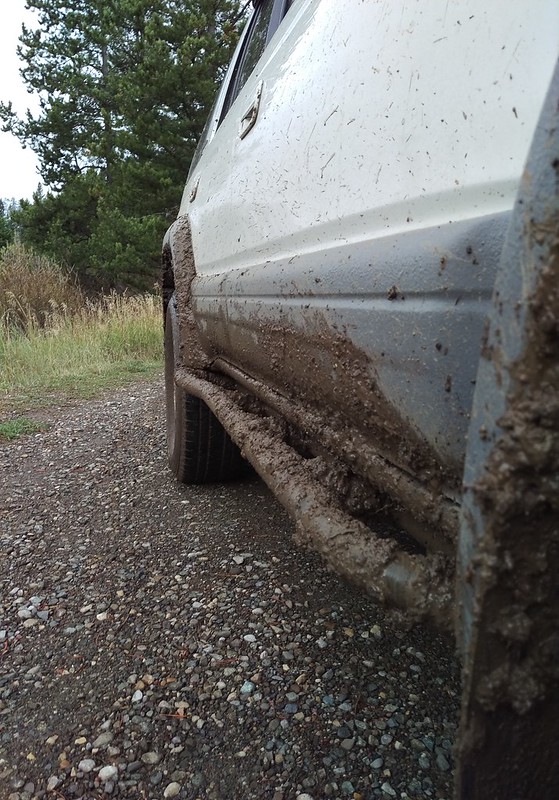 IMAG0425 IMAG0425 by Phoenix Black, on Flickr
__________________
98 Limited - Solid Axle Swapped,Turboed,And On 37s - Build
Transgo Shit Kit Writeup - Click Here
Last edited by Black798; 07-02-2017 at 01:07 PM.
|
|
|
Reply With Quote
|
|
11-01-2016, 10:44 AM
|
#37
|
 |
Member
|
|
Join Date: Oct 2016
Posts: 613
|
|
|
Member
Join Date: Oct 2016
Posts: 613
|
In to see good pics of the wild peaks installed.
Highly considering these.
When do you plan on having them mounted?
Sent from my iPhone using Tapatalk
|
|
|
Reply With Quote
|
|
11-01-2016, 11:03 AM
|
#38
|
|
Member
|
|
Join Date: Oct 2016
Posts: 613
|
|
|
Member
Join Date: Oct 2016
Posts: 613
|
Why did you go with the limit straps?
Wouldn't a diff drop reduce your binding issue?
Sent from my iPhone using Tapatalk
|
|
|
Reply With Quote
|
|
11-01-2016, 11:43 AM
|
#39
|
|
Member
|
|
Join Date: Mar 2015
Location: Bozeman, Montana
Age: 25
Posts: 917
Real Name: Phoenix
|
|
|
Member
Join Date: Mar 2015
Location: Bozeman, Montana
Age: 25
Posts: 917
Real Name: Phoenix
|
Planning on having the wildpeaks mounted in early March before I head to Moab for spring break. Have to get through the winter ice first so I'll have a set of blizzaks on until then.
I went with the limit straps because a 1 inch diff drop only corrects for a 1/2 inch of cv angle because of the way it moves the diff and because of the extended travel coil overs it wouldn't be enough. I wanted to make it so that my cv joints would be close to their strength at the stock angle. So the limit straps give a positive stop and allow me to tune the front end a little better and keep the ball joints from being the stop which should help them last a little longer. I could probably let it travel a little more, which I probably will later this year, but so far with the travel I get in the rear I don't really find myself wishing for more down travel in the front. I'd rather have better up travel but for that I'll need to make some sway bar discos when funds allow.
__________________
98 Limited - Solid Axle Swapped,Turboed,And On 37s - Build
Transgo Shit Kit Writeup - Click Here
|
|
|
Reply With Quote
|
|
11-13-2016, 10:53 PM
|
#40
|
|
Member
|
|
Join Date: Mar 2015
Location: Bozeman, Montana
Age: 25
Posts: 917
Real Name: Phoenix
|
|
|
Member
Join Date: Mar 2015
Location: Bozeman, Montana
Age: 25
Posts: 917
Real Name: Phoenix
|
Spent a few hours today making a bracket to move the cruise control motor and making some room in the engine bay for things to come.
Before
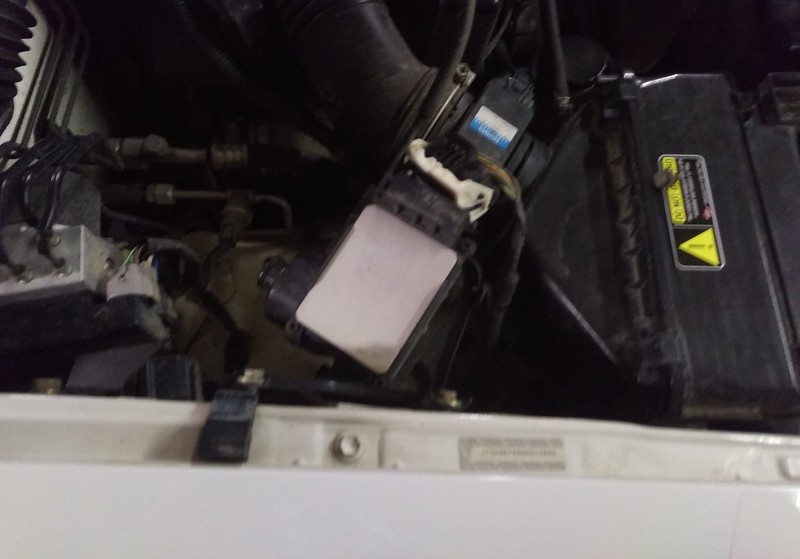 IMAG0509 IMAG0509 by Phoenix Black, on Flickr
After
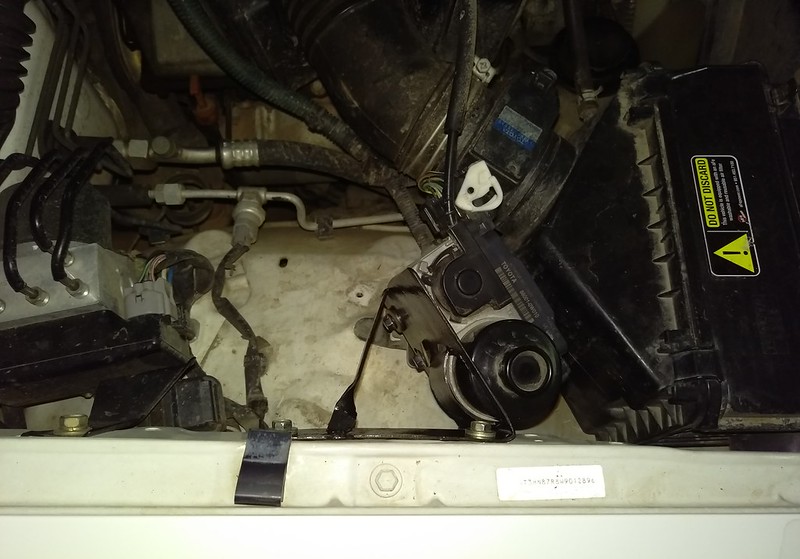 IMAG0510 IMAG0510 by Phoenix Black, on Flickr
__________________
98 Limited - Solid Axle Swapped,Turboed,And On 37s - Build
Transgo Shit Kit Writeup - Click Here
Last edited by Black798; 07-02-2017 at 01:09 PM.
|
|
|
Reply With Quote
|
|
12-04-2016, 07:57 PM
|
#41
|
|
Member
|
|
Join Date: Mar 2015
Location: Bozeman, Montana
Age: 25
Posts: 917
Real Name: Phoenix
|
|
|
Member
Join Date: Mar 2015
Location: Bozeman, Montana
Age: 25
Posts: 917
Real Name: Phoenix
|
Today I was finally able to put the added space in the engine bay to use with the install of my arb compressor. All, I have to say about this thing is that its build quality is top notch and it is worth the cost.
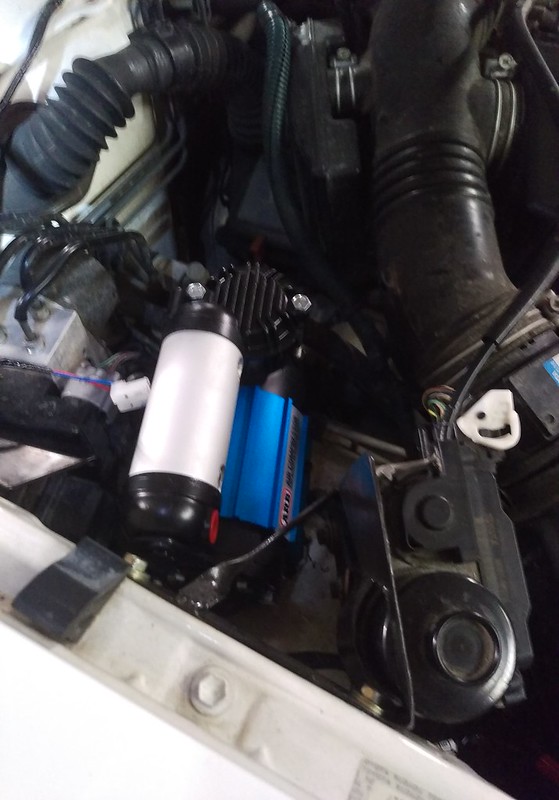 IMAG0553 IMAG0553 by Phoenix Black, on Flickr
I choose to mount the switch where the factory e locker switch would be untill I have the need for more switches. I think then Ill make a new switch panel to go in the area where the fog light switch is.
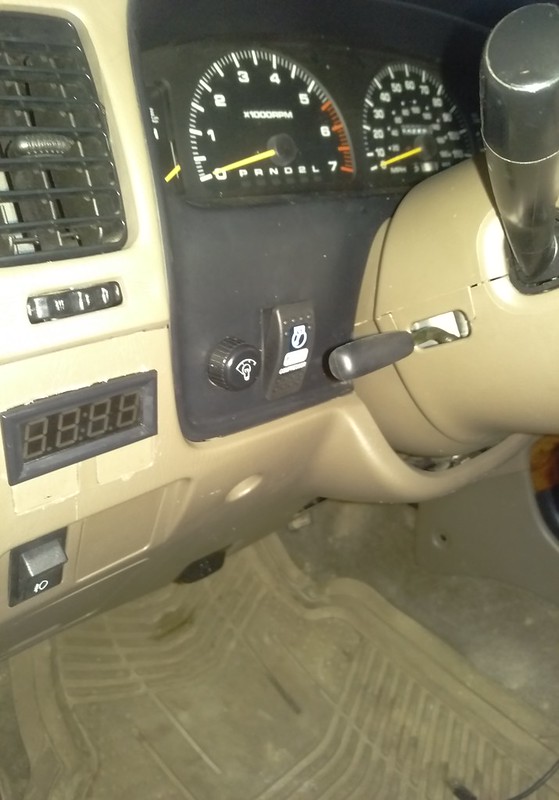 IMAG0556 IMAG0556 by Phoenix Black, on Flickr
And how it sits as of late.
 IMAG0518 IMAG0518 by Phoenix Black, on Flickr
__________________
98 Limited - Solid Axle Swapped,Turboed,And On 37s - Build
Transgo Shit Kit Writeup - Click Here
Last edited by Black798; 07-02-2017 at 01:10 PM.
|
|
|
Reply With Quote
|
|
12-04-2016, 11:35 PM
|
#42
|
|
Junior Member
|
|
Join Date: Aug 2016
Location: Western Nebraska
Posts: 16
Real Name: John
|
|
|
Junior Member
Join Date: Aug 2016
Location: Western Nebraska
Posts: 16
Real Name: John
|
nice work! slow and steady wins the race!
__________________
1996 SR5, 4x4, Rear Locker, 195,xxx, 265/75/16 Hankook Dynapro ATMs, Tundra 5100 Billies, Eibach Springs, LX450 rear end, Tacoma Rims -- Work in Progress
|
|
|
Reply With Quote
|
|
12-05-2016, 09:06 AM
|
#43
|
|
Member
|
|
Join Date: Mar 2015
Location: Bozeman, Montana
Age: 25
Posts: 917
Real Name: Phoenix
|
|
|
Member
Join Date: Mar 2015
Location: Bozeman, Montana
Age: 25
Posts: 917
Real Name: Phoenix
|
Thanks! Slow and steady definitely is the mantra with this build. It might not be the most built up one out there but it gets me from point A to B and is damn good at it. I wouldn't really see the fun in going from stock to fully built overnight anyway, especially since you never really "finish" building one of these.
__________________
98 Limited - Solid Axle Swapped,Turboed,And On 37s - Build
Transgo Shit Kit Writeup - Click Here
|
|
|
Reply With Quote
|
|
01-02-2017, 11:59 AM
|
#44
|
|
Member
|
|
Join Date: Mar 2015
Location: Bozeman, Montana
Age: 25
Posts: 917
Real Name: Phoenix
|
|
|
Member
Join Date: Mar 2015
Location: Bozeman, Montana
Age: 25
Posts: 917
Real Name: Phoenix
|
New LBJs and custom transmission mount.
Yesterday I installed some new OEM toyota lower ball joints and bolts. When /I got the old joints off they still felt tight even with 160,000 miles on them, but after seeing some of the LBJ failure horror stories I feel a lot better driving around on new ones that I know the history of. I think the hardest part of this job was getting the OTRE to release, a word of advice to anyone doing this, either get the right tool, or just beat on the lower ball joint around the OTRE stud to get it to come loose (I did this and it took a good bit of beating).
I also finally found what has been clunking in my front end when I would spin the tires in 4wd. Turns out when the dealer replaced the front diff mounts before they sold the 4runner to me, they forgot one of the top cushions that holds the diff still. So without that every time the driveline would get under load the diff would start to beat on the cross member. After watching how it was moving I now also think this may have contributed to my cv breakage since it was allowing for close to an inch of movement on the driver side.
I also made a new transmission mount. I knew the original has been worn out for a while but I really didn't want to replace it with a stock mount seeing as this truck is going to be seeing a lot more 4 low action and just general abuse than a stock mount is designed for. I searched for a long time to find a poly mount for the auto trans but I couldn't find on. I decided I would just make one similar to the innovations manual trans mount.
After driving for a while with this new mount the increase in vibration is hardly noticeable. When idling and just slightly off idle there is a noticeable increase in vibration but with the radio on you cant hear it at all, also anywhere above 1200 rpms and you would have a very hard time noticing any vibration changes at all. Another benefit of this mount is that my shifters dont move all over the place now. I would say there is some finish work that needs to be done too clean it up but Im going to wait until the weather warms up to do it. So now onto the pictures.
Lower ball joint
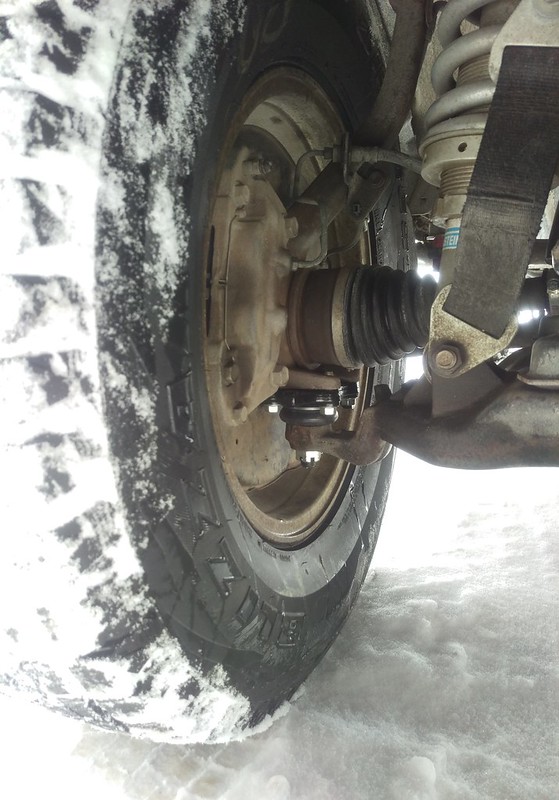 IMAG0579 IMAG0579 by Phoenix Black, on Flickr
Trans mount
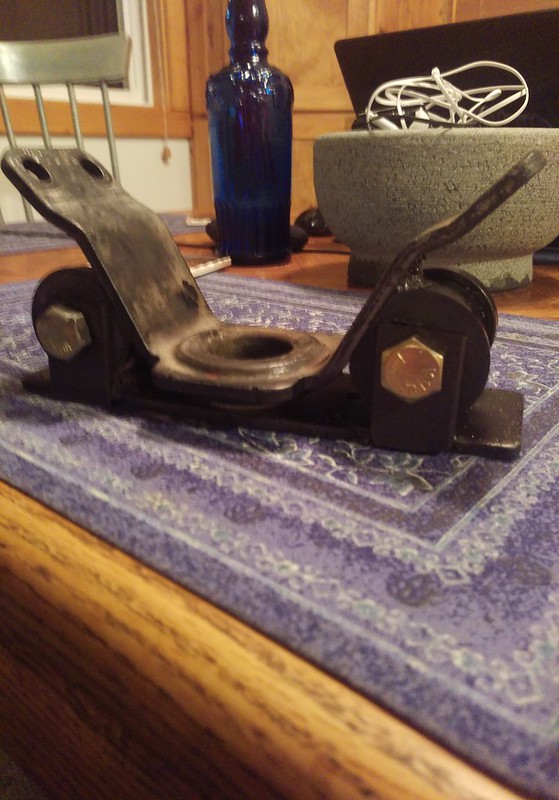 IMAG0580 IMAG0580 by Phoenix Black, on Flickr
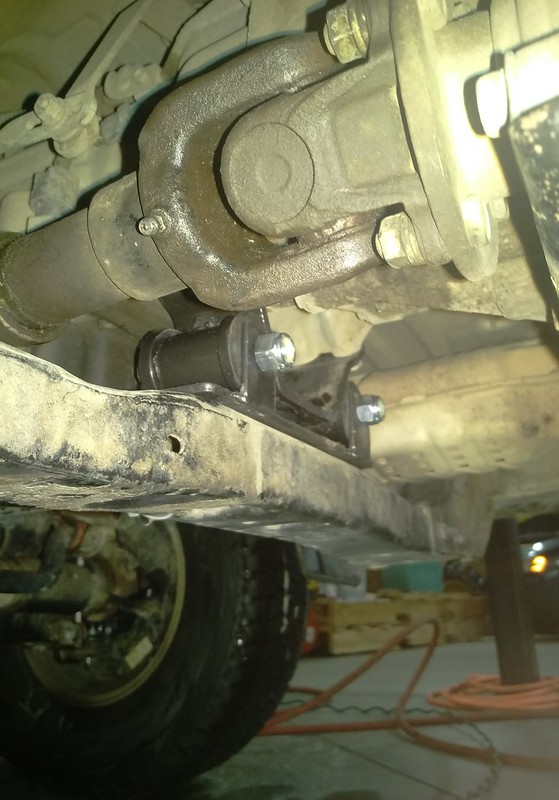 IMAG0581 IMAG0581 by Phoenix Black, on Flickr
__________________
98 Limited - Solid Axle Swapped,Turboed,And On 37s - Build
Transgo Shit Kit Writeup - Click Here
Last edited by Black798; 07-02-2017 at 01:11 PM.
|
|
|
Reply With Quote
|
|
01-02-2017, 06:47 PM
|
#45
|
|
Member
|
|
Join Date: Oct 2016
Posts: 613
|
|
|
Member
Join Date: Oct 2016
Posts: 613
|
Black798's 98 limited build thread
Have you replaced your otre's already or just decided to leave the old ones in?
Sent from my iPhone using Tapatalk
|
|
|
Reply With Quote
|
 Posting Rules
|
You may not post new threads
You may not post replies
You may not post attachments
You may not edit your posts
HTML code is On
|
|
|
|


 Linear Mode


