Home Menu

Site Navigation


User Tag List

Reply
 
Thread Tools Rate Thread Display Modes
Old 10-12-2016, 09:09 AM #1
ramonortiz55 ramonortiz55 is offline
Senior Member
 
Join Date: Apr 2015
Location: Texas
Posts: 3,649
ramonortiz55 has a spectacular aura about ramonortiz55 has a spectacular aura about
ramonortiz55 ramonortiz55 is offline
Senior Member
 
Join Date: Apr 2015
Location: Texas
Posts: 3,649
ramonortiz55 has a spectacular aura about ramonortiz55 has a spectacular aura about
Installing Savage Rear Bumper w/Swingout - **Pictures!**

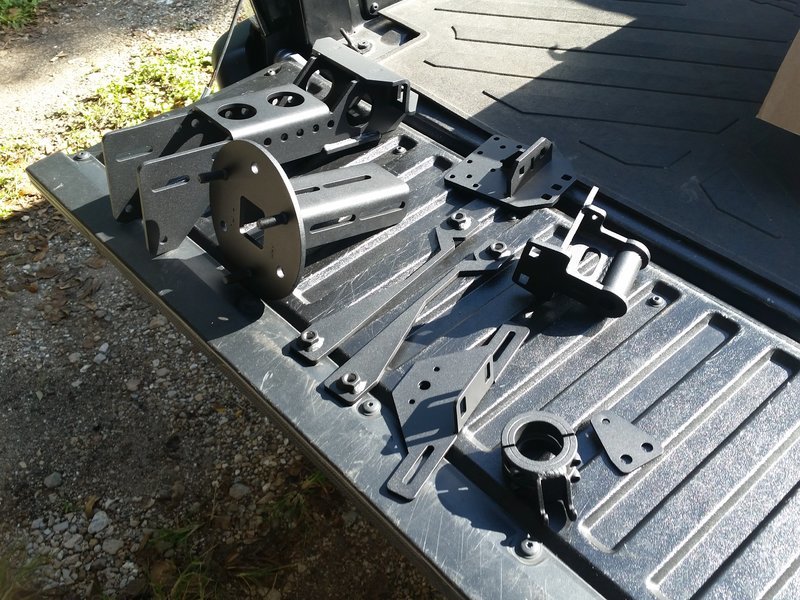
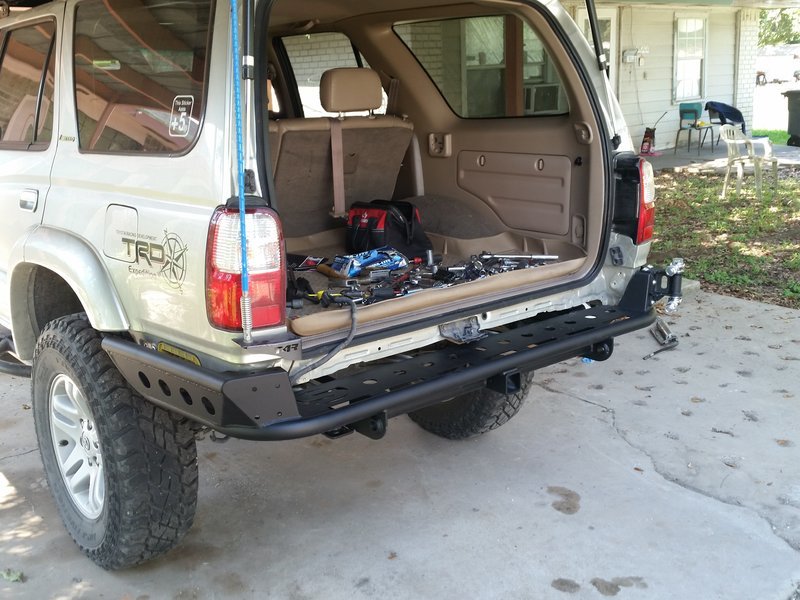
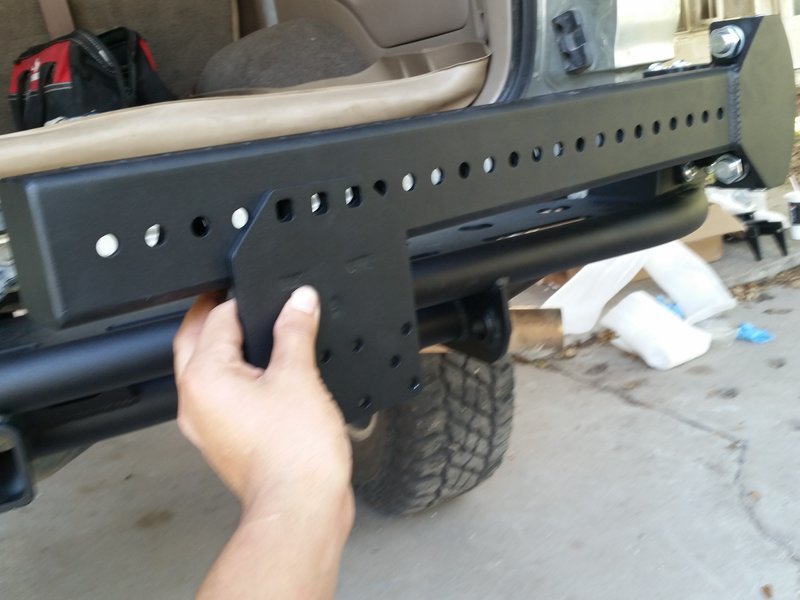
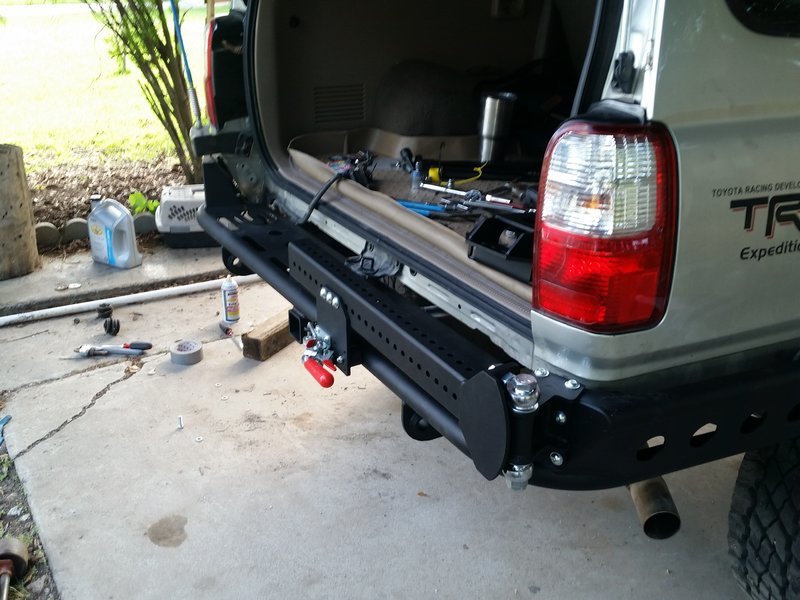
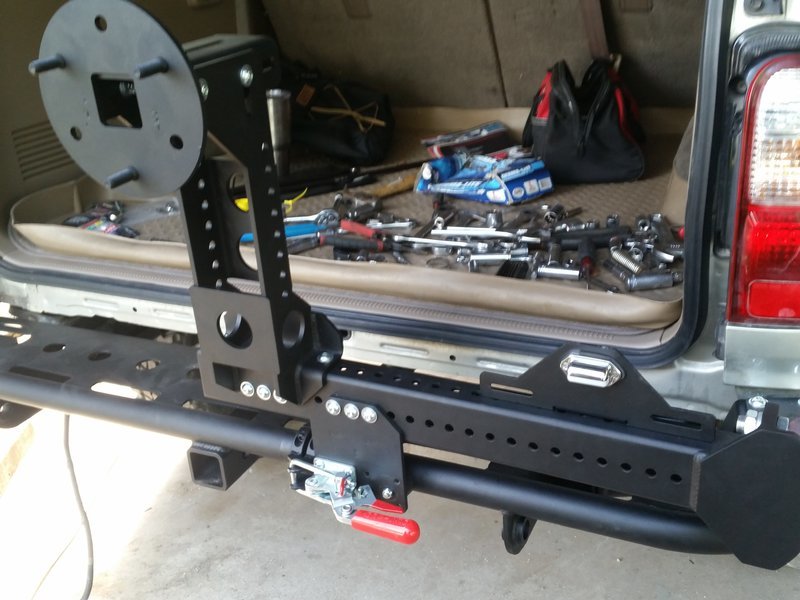
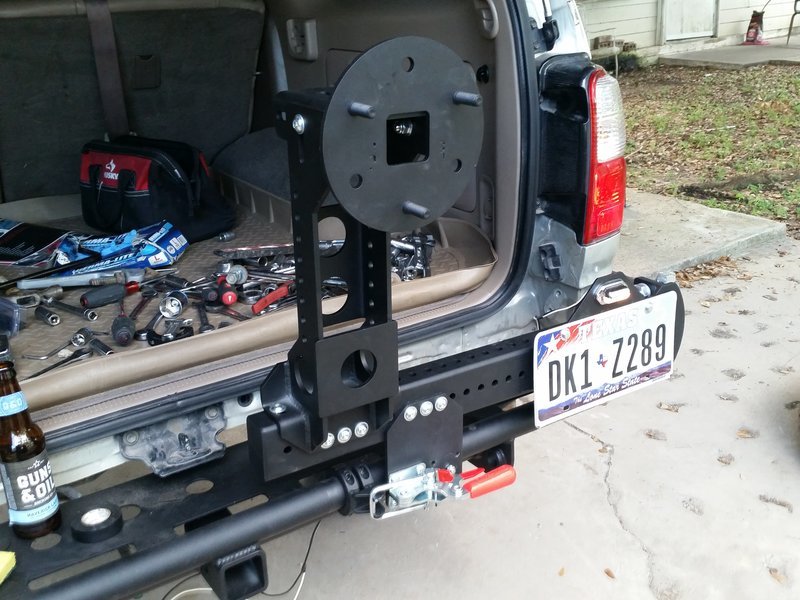
I received my Savage Rear bumper with swingout a few months ago, I barely had the time to have it sent for powdercoating and getting it installed.


I decided to do a writeup on the installation since the vendor didn't provide any. Hopefully this helps anyone that is interested in buying this setup in regards to installation.


This will be installed on a 2001 4runner.


The morning sunlight was not good with me - So I apologize in advance if any of the pictures are too dark. I try to make this as comprehensive as possible.


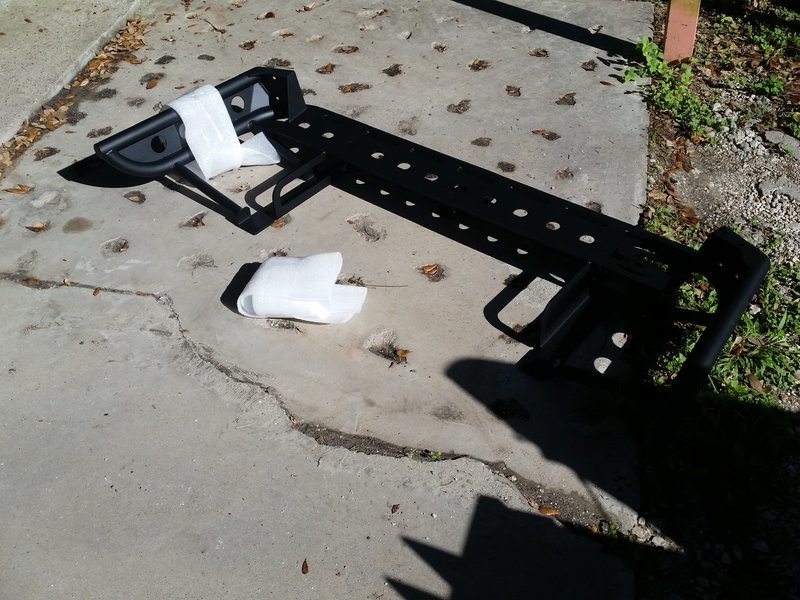
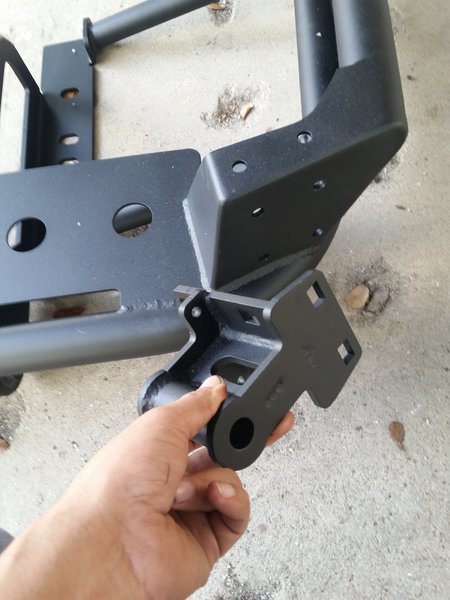
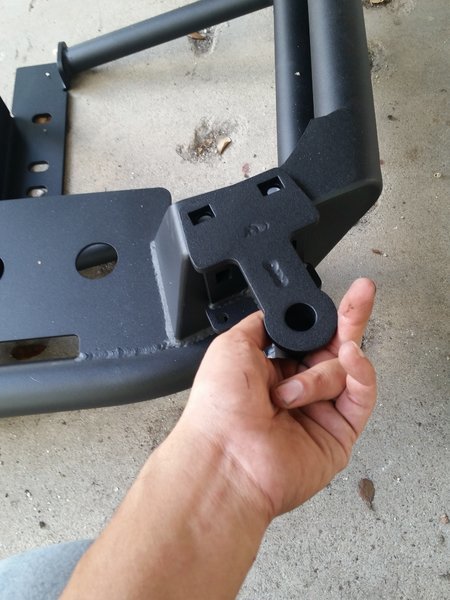
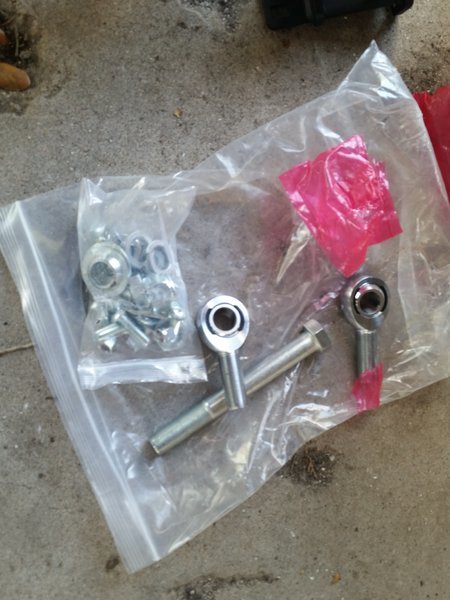
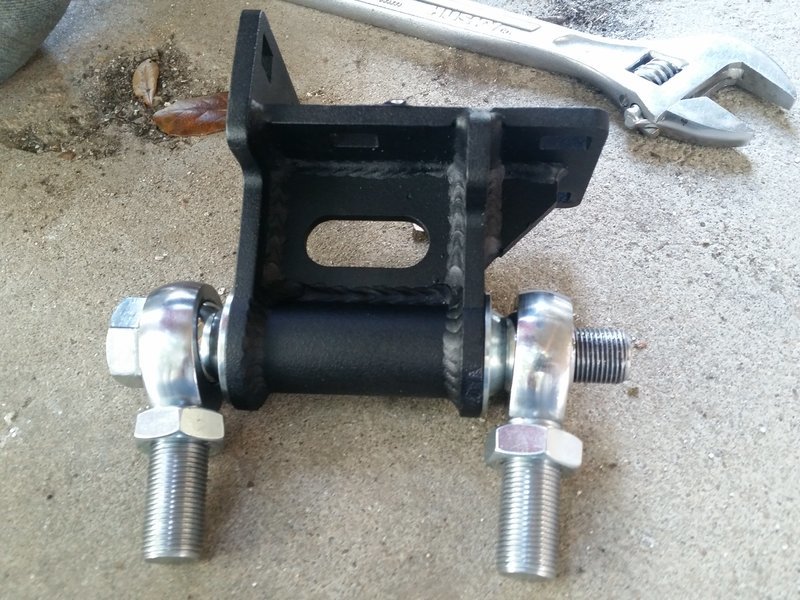
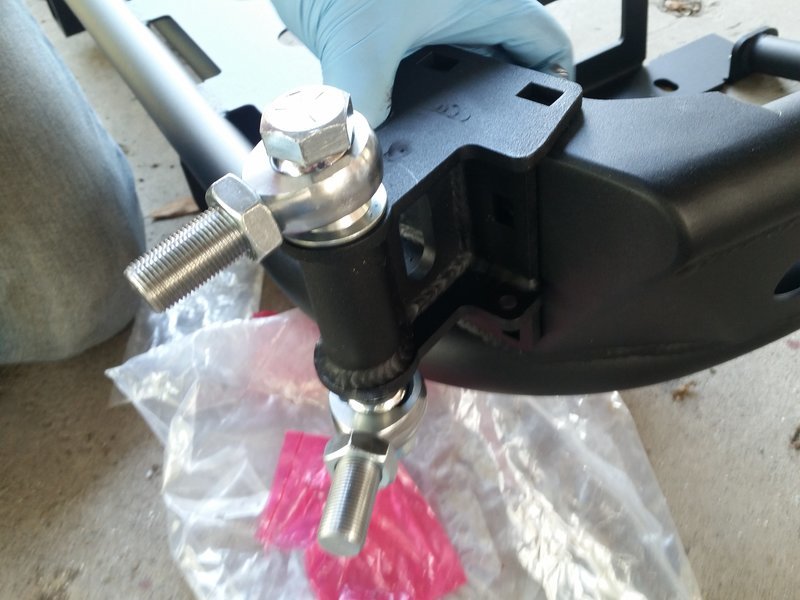
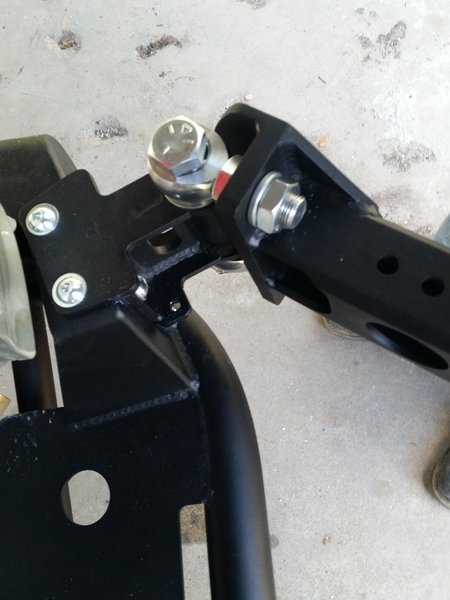
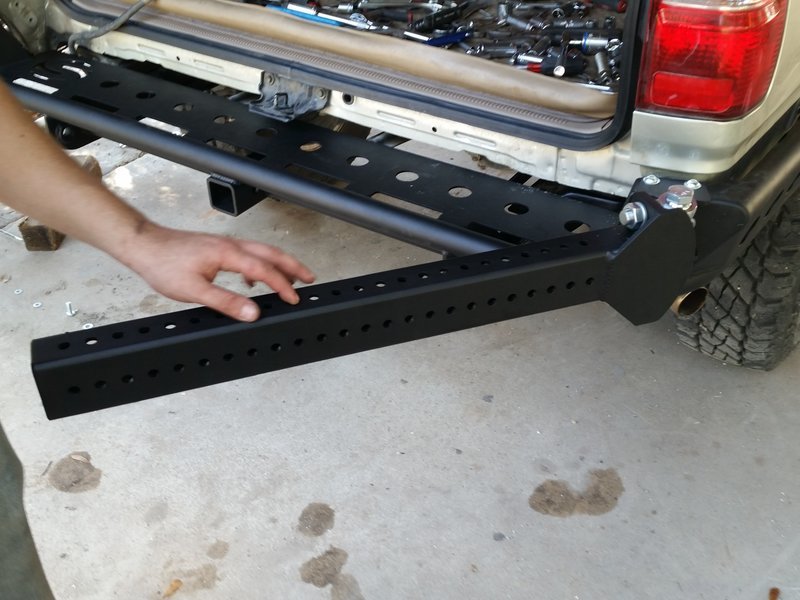
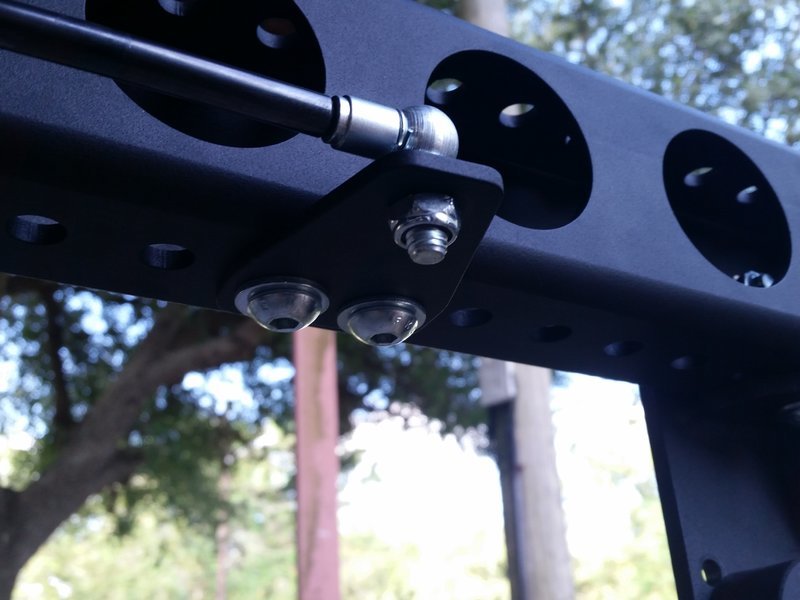
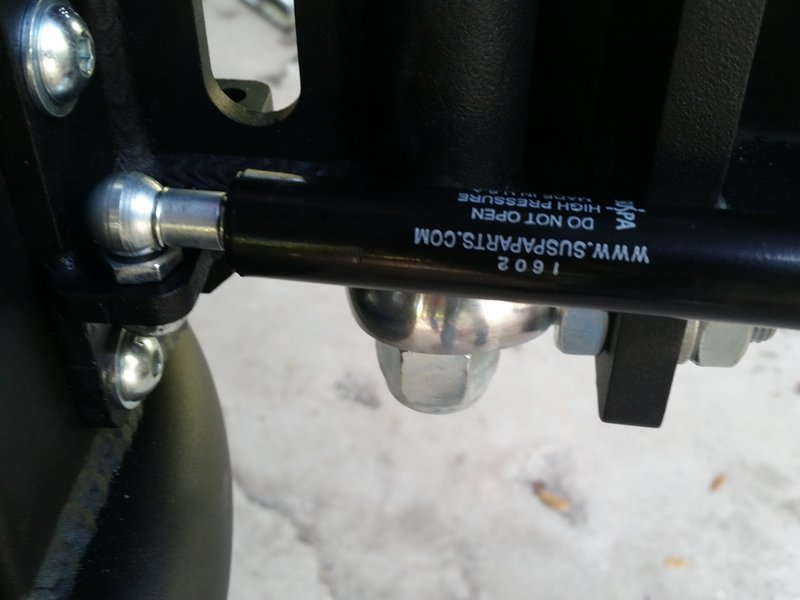
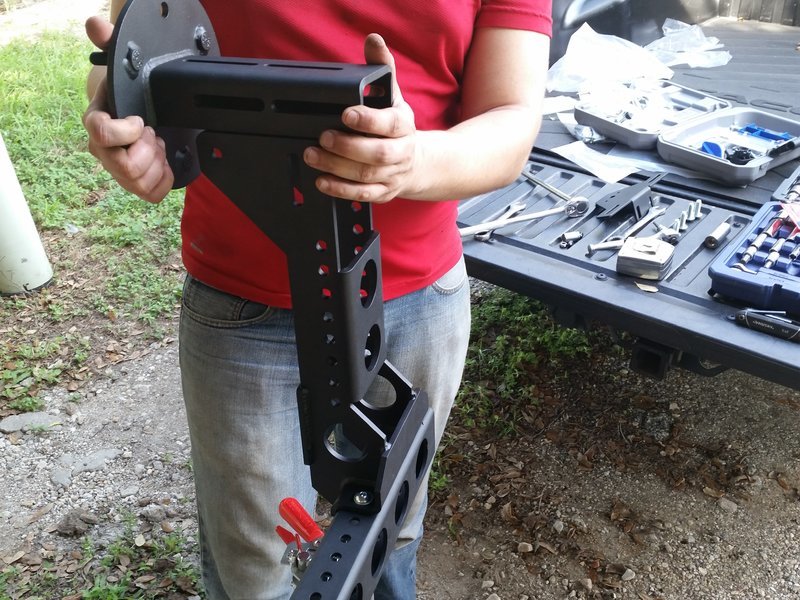
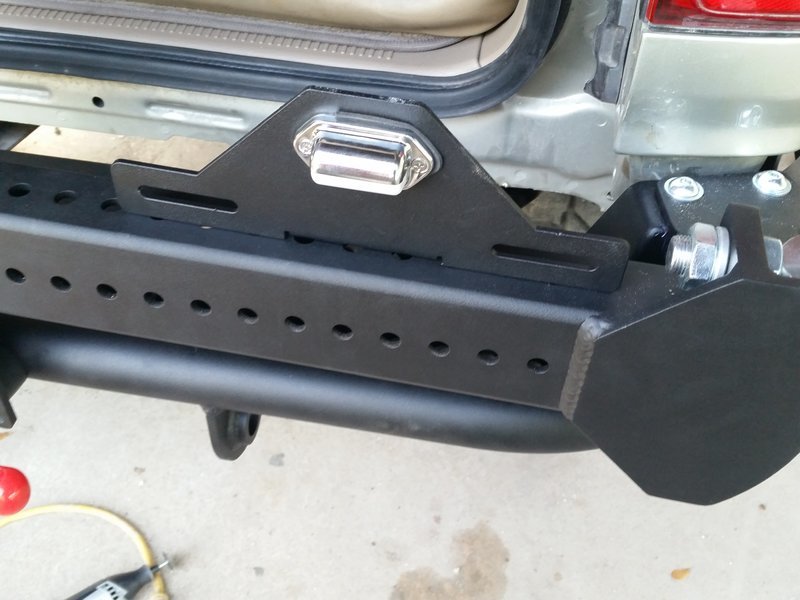
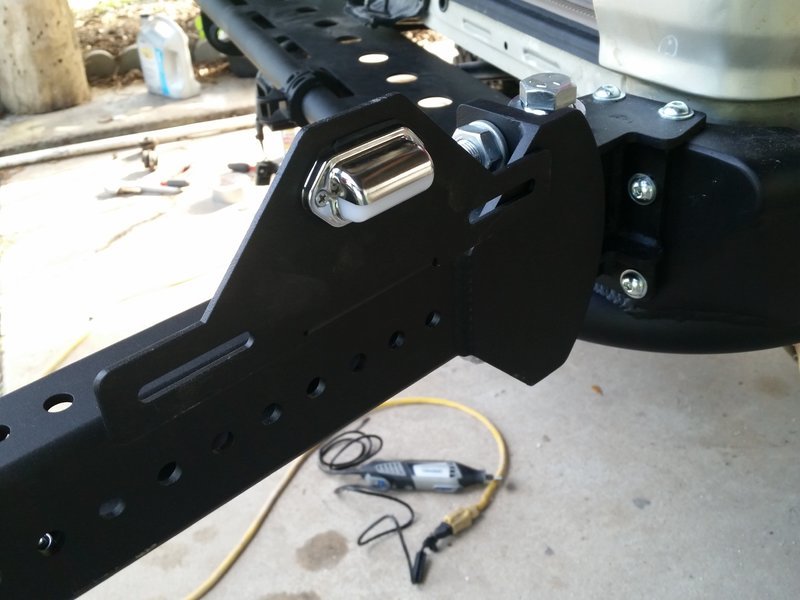
Here is the powdercoated bumper and swingout assembly:


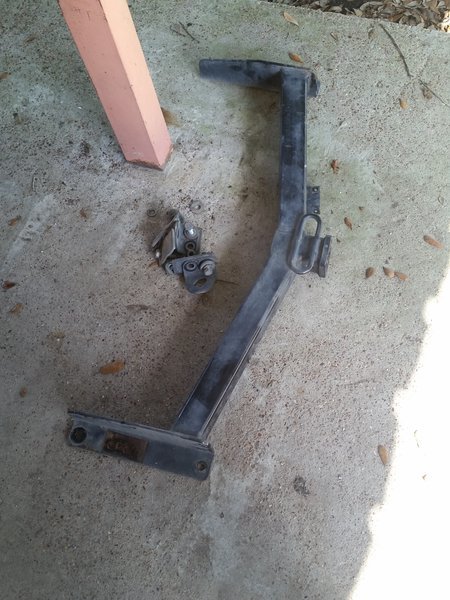
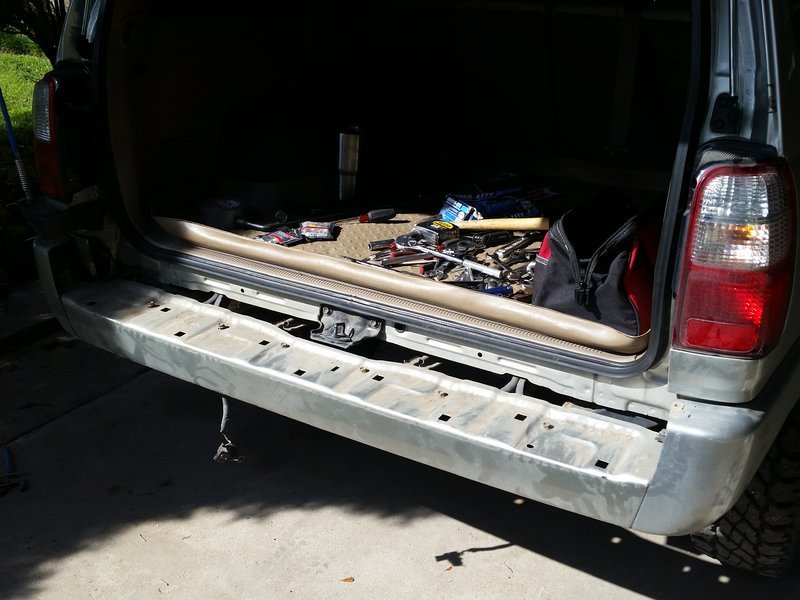
First step is to obviously remove the rear bumper and hitch:


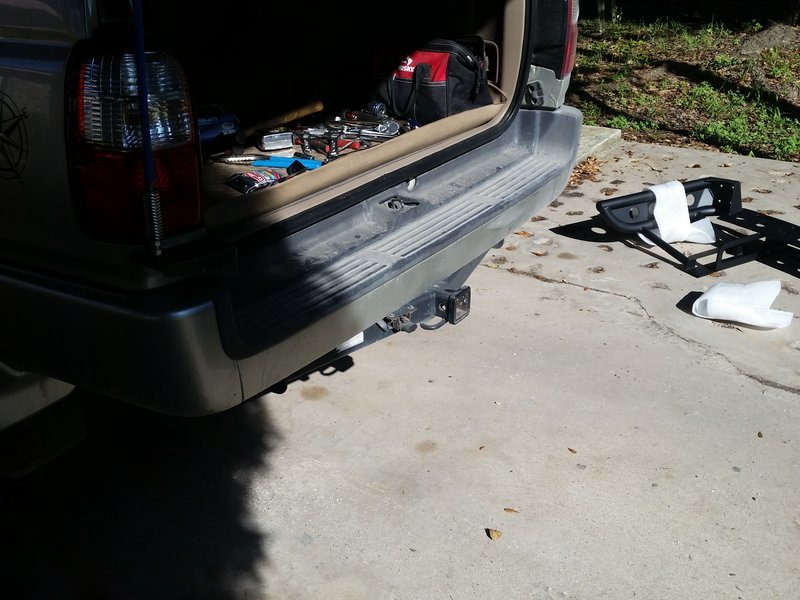
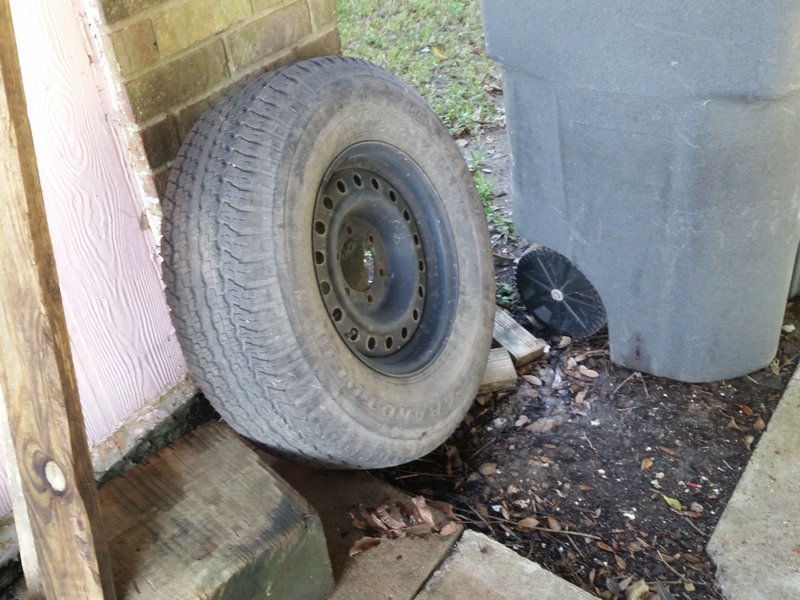
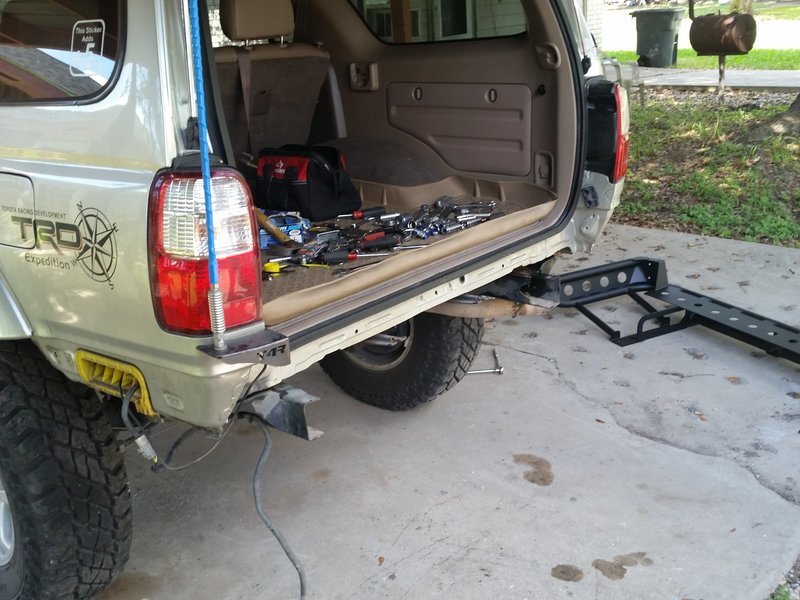
Drop the spare and get it out of the way:


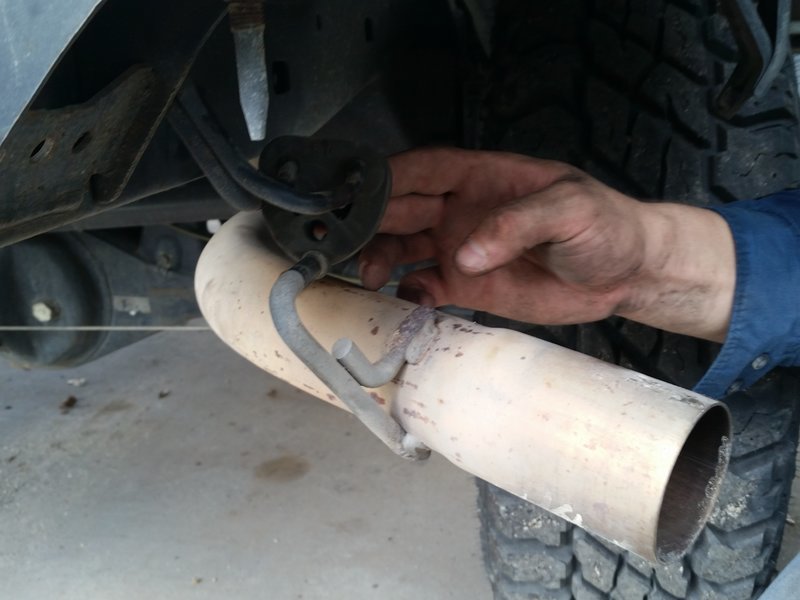
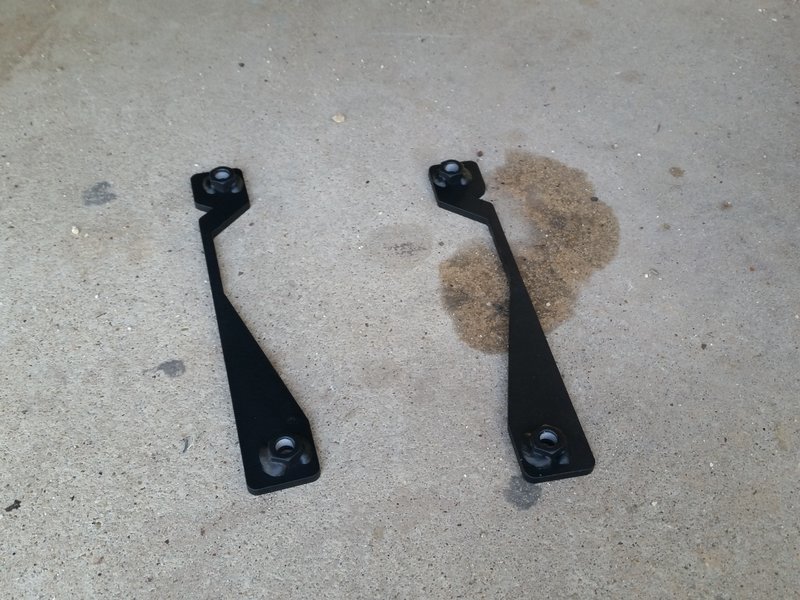
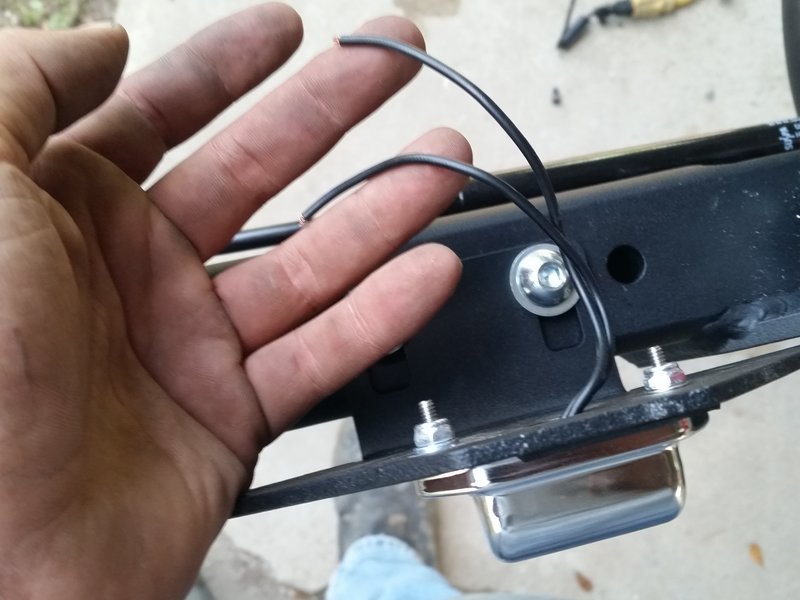
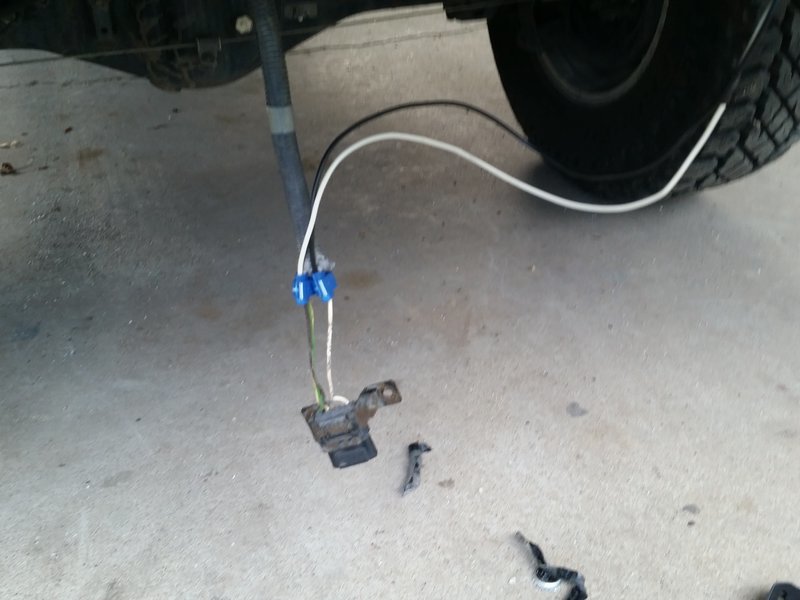
Since the hitch is the first thing to go, I made sure the trailer wiring harness bracket was disconnected from the hitch:


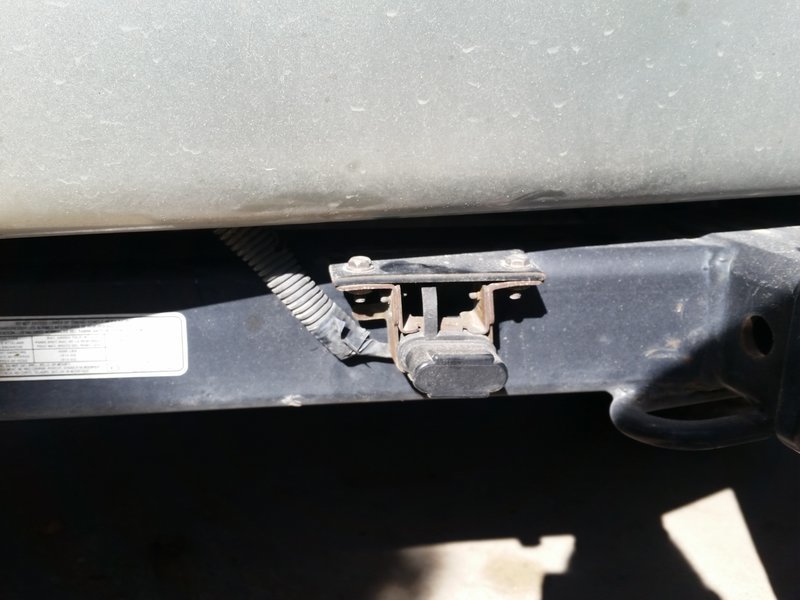
The hitch receiver is held in place to the frame with a total of 8 bolts - 4 on each side:


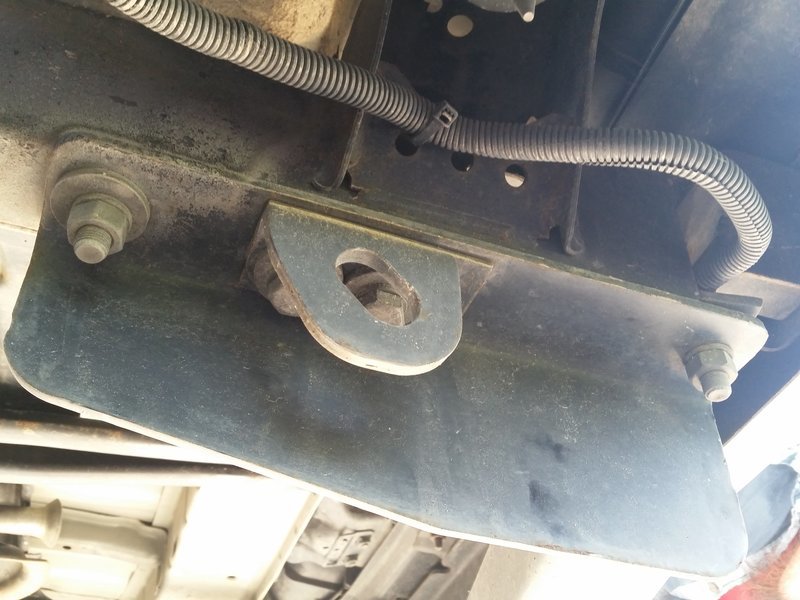
Removing the eight bolts will drop the hitch receiver:


Next remove the mudflaps, there are about 3 screws that hold the mudflaps onto the 4runner. They are located against the wheel well:


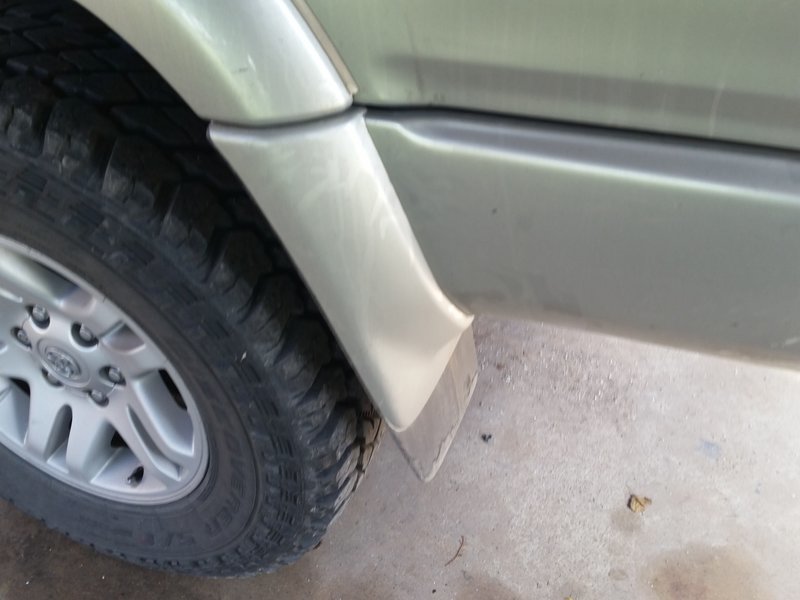
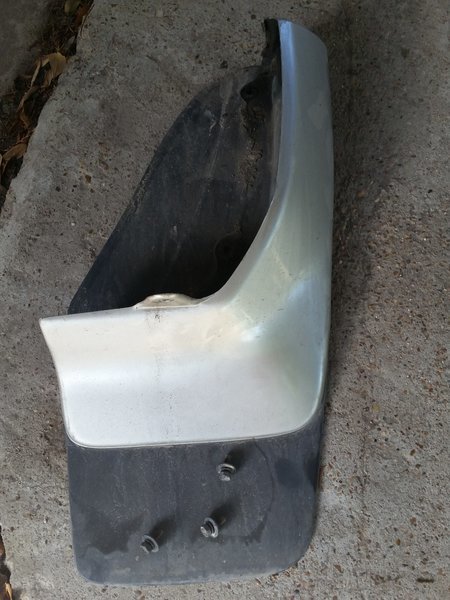
Removing the mudflaps will reveal a bolt, take it out:


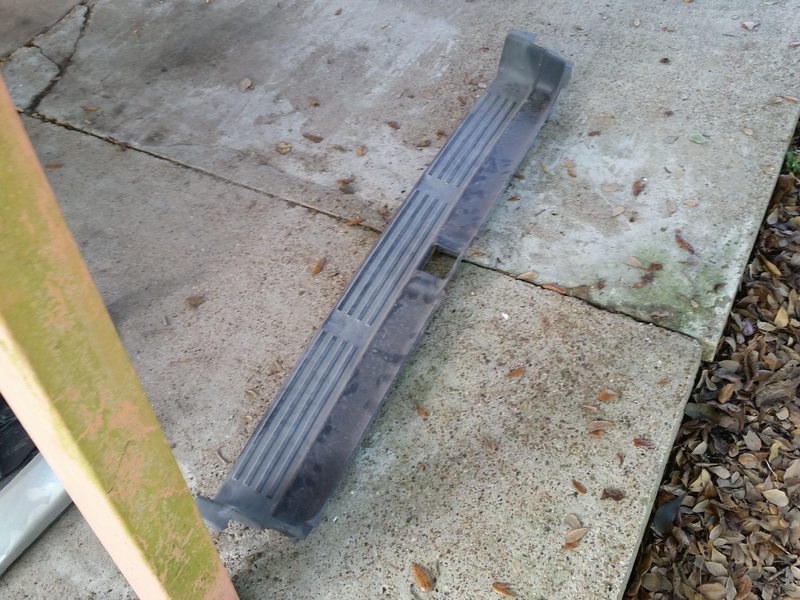
Once that bolt is off, remove the bumper cover. These are held firmly in place with tabs, crawl underneath the vehicle and push the tabs out with a flathead, pliers, etc.


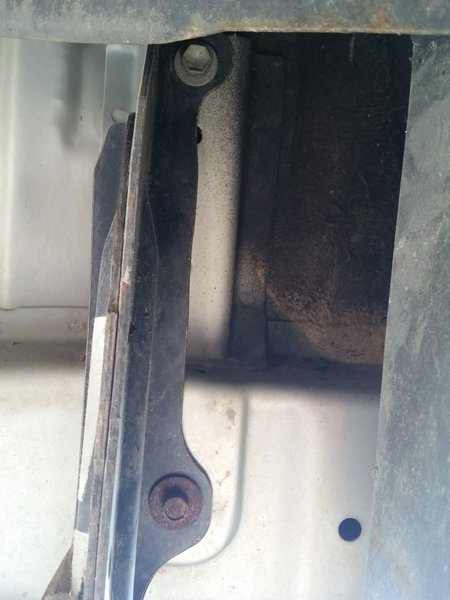
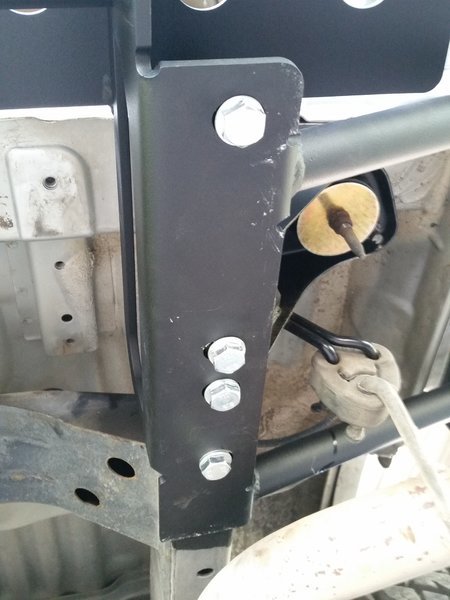
Once that black bumper cover is gone, it will reveal a black bracket with two bolts, remove the top two bolts on EACH side of the bumper:


The bumper is now being held in place by four bolts underneath the vehicle, two on each side on this bracket:


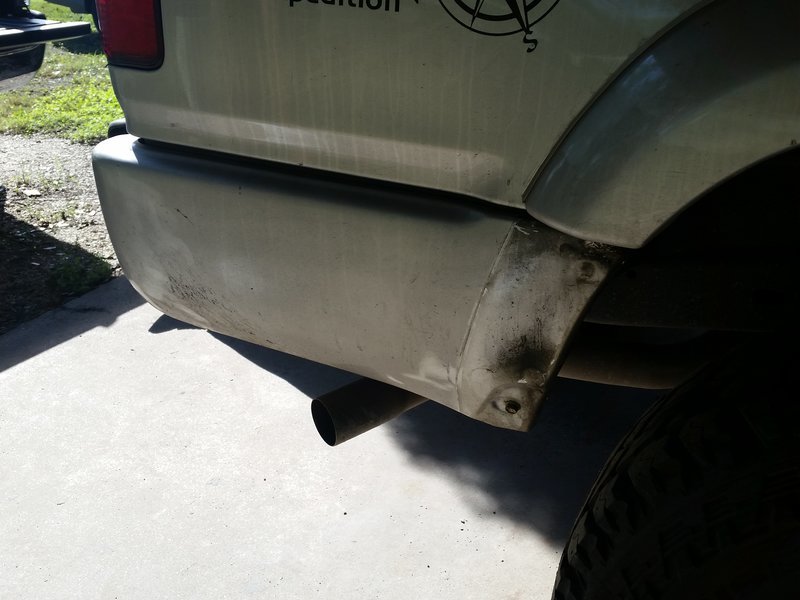
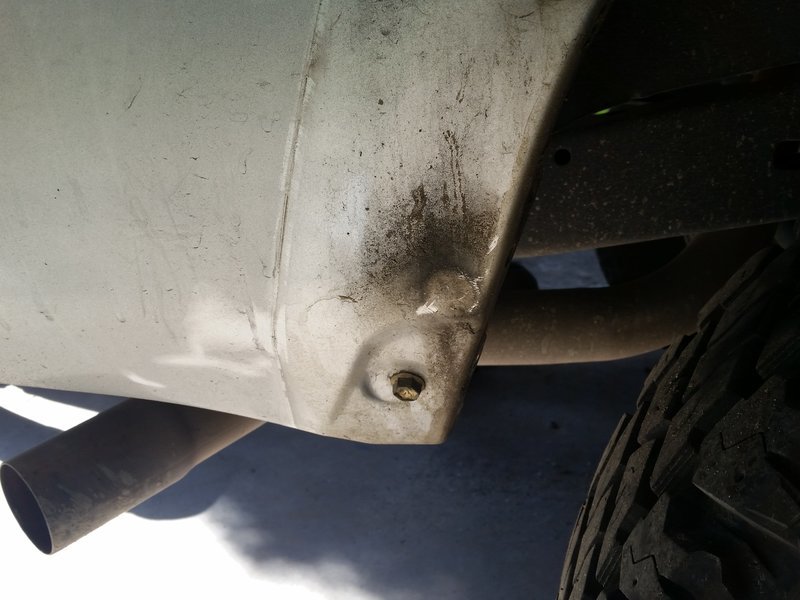
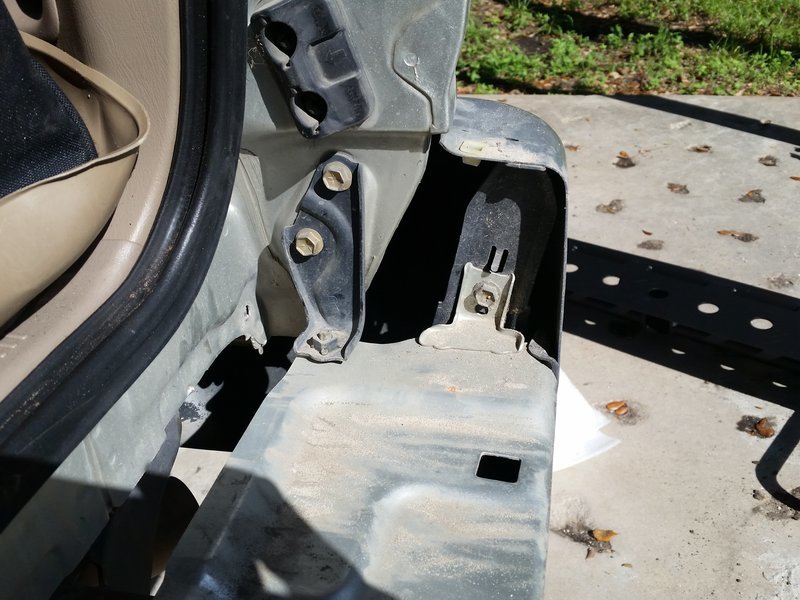
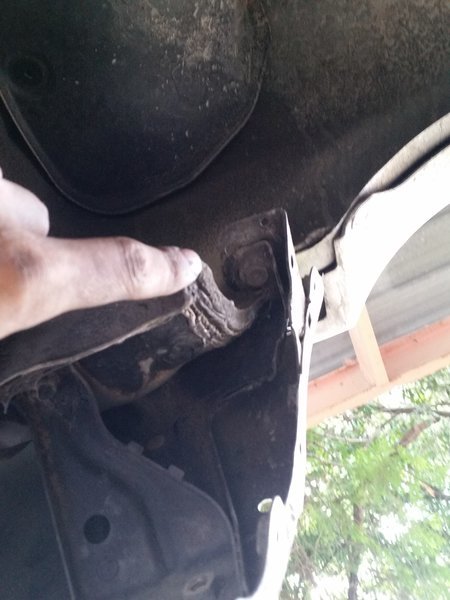
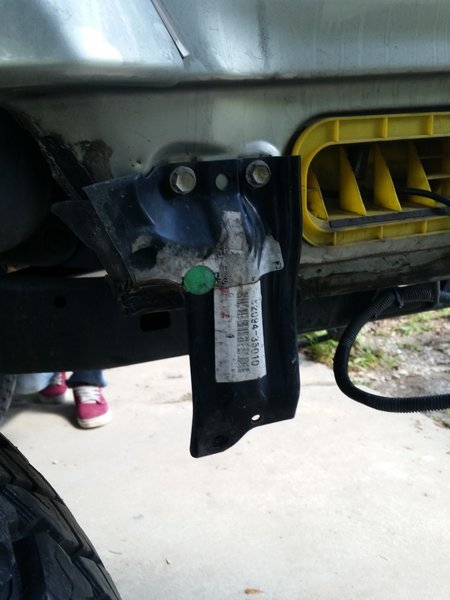
Oooops.. found two more bolts - The bolts are located where the bumper ends at the mudflap - notice the fuel filler neck cover - One on each side - These are a little hidden.


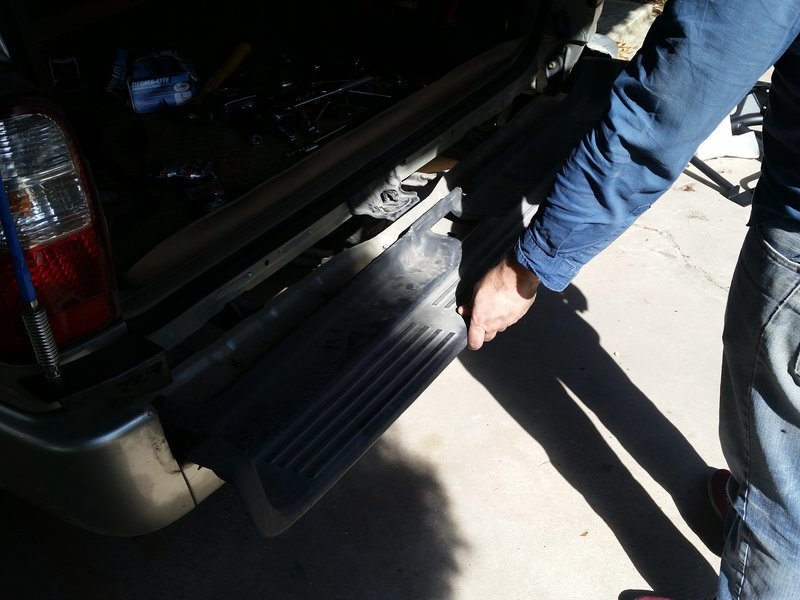
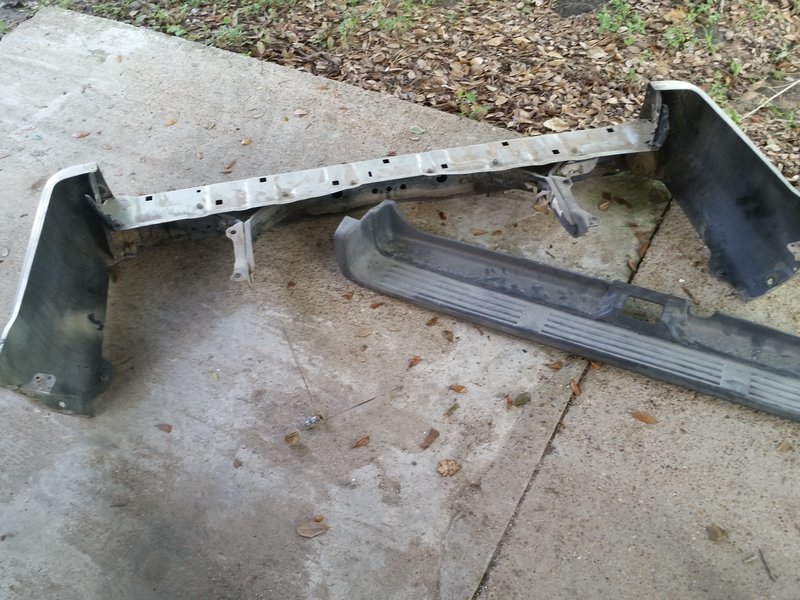
The bumper should now come off:


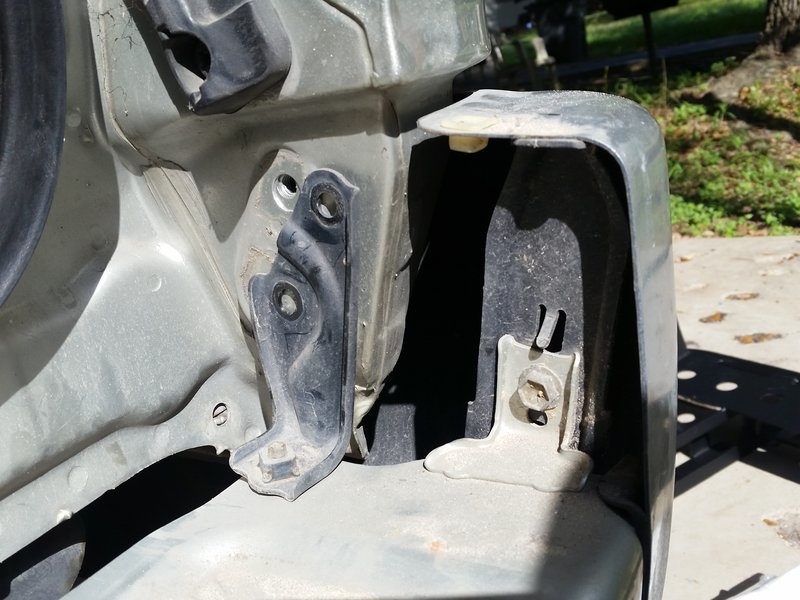
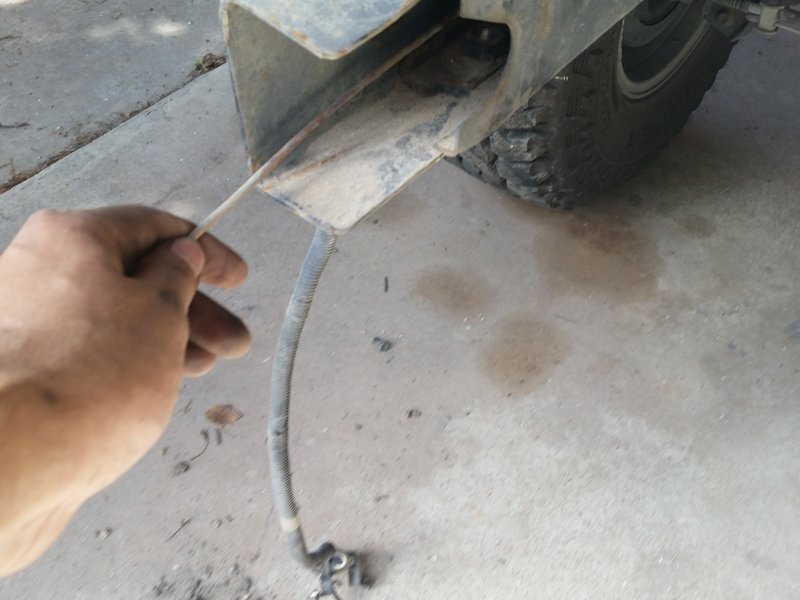
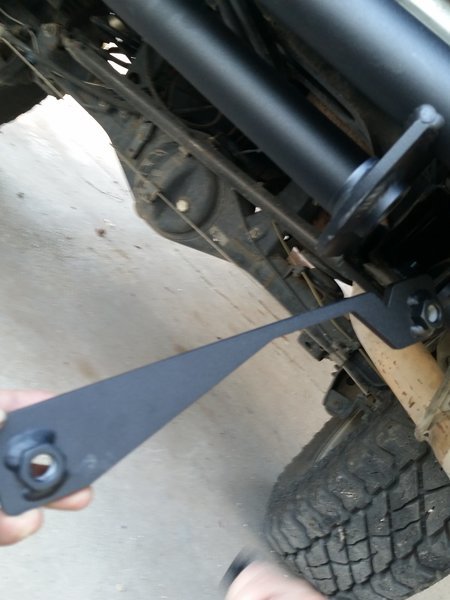
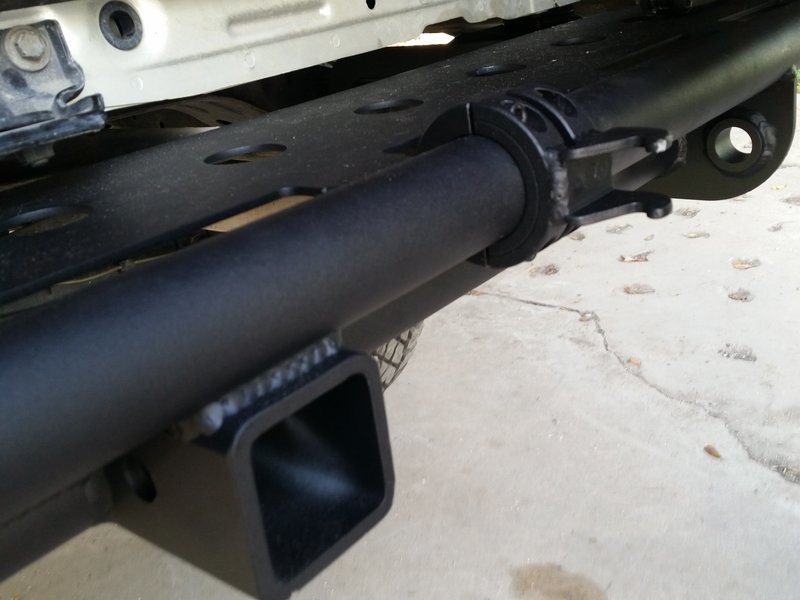
Inside of the frame rails, a long rod with a bolt welded on it will be seen, pull them out:


ramonortiz55 is offline   Reply With QuoteReply With Quote
Old 10-12-2016, 09:10 AM #2
ramonortiz55 ramonortiz55 is offline
Senior Member
 
Join Date: Apr 2015
Location: Texas
Posts: 3,649
ramonortiz55 has a spectacular aura about ramonortiz55 has a spectacular aura about
ramonortiz55 ramonortiz55 is offline
Senior Member
 
Join Date: Apr 2015
Location: Texas
Posts: 3,649
ramonortiz55 has a spectacular aura about ramonortiz55 has a spectacular aura about
In order to get the bumper in, the rubber grommet that holds the exhaust tail piece must be removed:


When the bumper was removed, this black bracket was revealed - one on each side. Remove this also:


Feed your cat:


Once you're finished feeding the cat, it is time to install your bumper:


This is the hinge bracket where the swingout attaches to. Make sure this gets installed FIRST before installing. When the bumper is purchased, Savage only drills pilot holes for the hinge bracket. Drill them out BEFORE getting the bumper powdercoated or painted.


Hinge hardware:


Assemble and bolt on like this:


Install bumper:


Picture of hinge for the swingout:


Only FOUR bolts were used to set the bumper. In the bumper kit, these two brackets were included:


These go into the frame rail:


The first and last bolt now threads into that bracket:


This plate is used to install the locking lever:


Install the "anchor" for the locking lever:


Install the locking lever:


Now the gas strut is installed:


ramonortiz55 is offline   Reply With QuoteReply With Quote
Old 10-12-2016, 09:10 AM #3
ramonortiz55 ramonortiz55 is offline
Senior Member
 
Join Date: Apr 2015
Location: Texas
Posts: 3,649
ramonortiz55 has a spectacular aura about ramonortiz55 has a spectacular aura about
ramonortiz55 ramonortiz55 is offline
Senior Member
 
Join Date: Apr 2015
Location: Texas
Posts: 3,649
ramonortiz55 has a spectacular aura about ramonortiz55 has a spectacular aura about
Strut bracket that is attached to the arm:


Pop open a beer and enjoy your progress:


Behold the tire carrier stand:


Next, the license plate bracket is installed.


Hmm.. time to run some wiring:


I decided to tap into the trailer wiring, good thing they were labeled. I tapped into "Tail" and "Ground", black and white:


Run wiring and attached using quick splices - I made sure it was well wrapped in electrical tape:


Clamped it to the rear tube of the bumper, where it is hidden. No, I don't mind the hose clamps. It cant be seen unless you are looking for it.


Now complete:


Enjoy the rest of that six pack!
ramonortiz55 is offline   Reply With QuoteReply With Quote
Old 10-12-2016, 11:13 AM #4
TravisM's Avatar
TravisM TravisM is offline
Member
 
Join Date: Sep 2016
Location: Colorado
Posts: 99
TravisM is on a distinguished road
TravisM TravisM is offline
Member
TravisM's Avatar
 
Join Date: Sep 2016
Location: Colorado
Posts: 99
TravisM is on a distinguished road
The most detailed write up on this I've seen so far. Excellent job
Where did you get that TRD Expedition sticker? Definitely unique!
__________________
1999 Silver 4Runner (The Silver Ghost)
TravisM is offline   Reply With QuoteReply With Quote
Old 10-12-2016, 11:24 AM #5
ramonortiz55 ramonortiz55 is offline
Senior Member
 
Join Date: Apr 2015
Location: Texas
Posts: 3,649
ramonortiz55 has a spectacular aura about ramonortiz55 has a spectacular aura about
ramonortiz55 ramonortiz55 is offline
Senior Member
 
Join Date: Apr 2015
Location: Texas
Posts: 3,649
ramonortiz55 has a spectacular aura about ramonortiz55 has a spectacular aura about
Quote:
Originally Posted by TravisM View Post
The most detailed write up on this I've seen so far. Excellent job
Where did you get that TRD Expedition sticker? Definitely unique!
I love doing write-ups, a lot of people install setups and when asked if they did a writeup, they always say "I was in a rush, couldn't take pictures".

I try to give back to the T4R.org community by doing my part.

I have dozens of more writups, I have them posted on TW, I need to bring them over here.

I picked it up from a decal maker here in town, I love it! One of the first mods I ever did.
ramonortiz55 is offline   Reply With QuoteReply With Quote
Old 10-12-2016, 11:25 AM #6
ramonortiz55 ramonortiz55 is offline
Senior Member
 
Join Date: Apr 2015
Location: Texas
Posts: 3,649
ramonortiz55 has a spectacular aura about ramonortiz55 has a spectacular aura about
ramonortiz55 ramonortiz55 is offline
Senior Member
 
Join Date: Apr 2015
Location: Texas
Posts: 3,649
ramonortiz55 has a spectacular aura about ramonortiz55 has a spectacular aura about
For those of you wondering.

I will get a full spare and lug nuts next week lol.

That is why the stock spare is still down there.
ramonortiz55 is offline   Reply With QuoteReply With Quote
Old 10-12-2016, 11:47 AM #7
kolelt kolelt is offline
Senior Member
 
Join Date: Sep 2013
Location: new jersey
Posts: 4,830
kolelt will become famous soon enough kolelt will become famous soon enough
kolelt kolelt is offline
Senior Member
 
Join Date: Sep 2013
Location: new jersey
Posts: 4,830
kolelt will become famous soon enough kolelt will become famous soon enough
Not to hijack your thread. Great write up bud. I to have the same bumper. I did few things different. Especially wiring the license plate light. Here's how I did it. I ran it to inside the car near the passenger side. I also installed a connector. So if you have to re love the bumper you just unplug it and your good to go. And I'll show you few tips from making your license plate not rattle or scratch the paint.


I just t- taped into the trailer wire. But inside the truck. Right where it plugs into the little box.


For license plate. Go to Home Depot and get this door thing. One side is sticky other side is soft.


And I put a lock on my tire.

Also recommend putting silicone in the hole where the wires come out for the license plate to seal it. Guarantee water will ruin it if not.
__________________
97 3.4 JDM/5 Speed swap/eLocker Swap/ICON CDC all around/+more.....
kolelt is offline   Reply With QuoteReply With Quote
Old 10-12-2016, 11:49 AM #8
BoomSticks's Avatar
BoomSticks BoomSticks is offline
Member
 
Join Date: Mar 2016
Location: Denver Metro
Posts: 243
BoomSticks is on a distinguished road
BoomSticks BoomSticks is offline
Member
BoomSticks's Avatar
 
Join Date: Mar 2016
Location: Denver Metro
Posts: 243
BoomSticks is on a distinguished road
Did I see this rig on HOTOR?
__________________
"Bender" Silver 99 Limited with e-locker.
BoomSticks is offline   Reply With QuoteReply With Quote
Old 10-12-2016, 11:50 AM #9
MACT4R's Avatar
MACT4R MACT4R is offline
Senior Member
 
Join Date: Nov 2015
Location: San Diego
Posts: 1,120
Real Name: Mike or MAC
MACT4R is on a distinguished road
MACT4R MACT4R is offline
Senior Member
MACT4R's Avatar
 
Join Date: Nov 2015
Location: San Diego
Posts: 1,120
Real Name: Mike or MAC
MACT4R is on a distinguished road
Great write up and sub'd. I'm getting the same bumper in the future. This is easy to follow.
__________________
03 4Runner SR5 V8 aka Lola
07 Lexus GX 470 aka Miss Daisy: luxury stock
97 4Runner V6 4wd with E-locker aka Lucy Pearl
MACT4R is offline   Reply With QuoteReply With Quote
Old 10-12-2016, 01:43 PM #10
ramonortiz55 ramonortiz55 is offline
Senior Member
 
Join Date: Apr 2015
Location: Texas
Posts: 3,649
ramonortiz55 has a spectacular aura about ramonortiz55 has a spectacular aura about
ramonortiz55 ramonortiz55 is offline
Senior Member
 
Join Date: Apr 2015
Location: Texas
Posts: 3,649
ramonortiz55 has a spectacular aura about ramonortiz55 has a spectacular aura about
Quote:
Originally Posted by BoomSticks View Post
Did I see this rig on HOTOR?
I don't even know what HOTOR is
ramonortiz55 is offline   Reply With QuoteReply With Quote
Old 10-12-2016, 01:44 PM #11
ramonortiz55 ramonortiz55 is offline
Senior Member
 
Join Date: Apr 2015
Location: Texas
Posts: 3,649
ramonortiz55 has a spectacular aura about ramonortiz55 has a spectacular aura about
ramonortiz55 ramonortiz55 is offline
Senior Member
 
Join Date: Apr 2015
Location: Texas
Posts: 3,649
ramonortiz55 has a spectacular aura about ramonortiz55 has a spectacular aura about
Quote:
Originally Posted by kolelt View Post
Not to hijack your thread. Great write up bud. I to have the same bumper. I did few things different. Especially wiring the license plate light. Here's how I did it. I ran it to inside the car near the passenger side. I also installed a connector. So if you have to re love the bumper you just unplug it and your good to go. And I'll show you few tips from making your license plate not rattle or scratch the paint.


I just t- taped into the trailer wire. But inside the truck. Right where it plugs into the little box.


For license plate. Go to Home Depot and get this door thing. One side is sticky other side is soft.


And I put a lock on my tire.

Also recommend putting silicone in the hole where the wires come out for the license plate to seal it. Guarantee water will ruin it if not.
Thanks for the tips! I didn't think about running the wiring behind the taillight like that.
ramonortiz55 is offline   Reply With QuoteReply With Quote
Old 10-12-2016, 04:03 PM #12
BoomSticks's Avatar
BoomSticks BoomSticks is offline
Member
 
Join Date: Mar 2016
Location: Denver Metro
Posts: 243
BoomSticks is on a distinguished road
BoomSticks BoomSticks is offline
Member
BoomSticks's Avatar
 
Join Date: Mar 2016
Location: Denver Metro
Posts: 243
BoomSticks is on a distinguished road
Quote:
Originally Posted by ramonortiz55 View Post
I don't even know what HOTOR is
Heart of Texas Off Road group on facebook.

Or maybe Texas Overland.
__________________
"Bender" Silver 99 Limited with e-locker.
BoomSticks is offline   Reply With QuoteReply With Quote
Old 10-12-2016, 04:53 PM #13
ramonortiz55 ramonortiz55 is offline
Senior Member
 
Join Date: Apr 2015
Location: Texas
Posts: 3,649
ramonortiz55 has a spectacular aura about ramonortiz55 has a spectacular aura about
ramonortiz55 ramonortiz55 is offline
Senior Member
 
Join Date: Apr 2015
Location: Texas
Posts: 3,649
ramonortiz55 has a spectacular aura about ramonortiz55 has a spectacular aura about
Quote:
Originally Posted by BoomSticks View Post
Heart of Texas Off Road group on facebook.

Or maybe Texas Overland.
Texas Overland, I am on there
ramonortiz55 is offline   Reply With QuoteReply With Quote
Old 10-12-2016, 07:49 PM #14
Bijan's Avatar
Bijan Bijan is offline
Member
 
Join Date: Feb 2015
Location: Denver
Age: 38
Posts: 922
Bijan is on a distinguished road
Bijan Bijan is offline
Member
Bijan's Avatar
 
Join Date: Feb 2015
Location: Denver
Age: 38
Posts: 922
Bijan is on a distinguished road
We both did the same thing w/ the handle and put it on the way it SEEMS to go...then had to reverse it.
__________________
2002 SR5 // Lifted // Armored // Blown // OPN DFFS
BUILD
Bijan is offline   Reply With QuoteReply With Quote
Old 10-12-2016, 08:04 PM #15
kolelt kolelt is offline
Senior Member
 
Join Date: Sep 2013
Location: new jersey
Posts: 4,830
kolelt will become famous soon enough kolelt will become famous soon enough
kolelt kolelt is offline
Senior Member
 
Join Date: Sep 2013
Location: new jersey
Posts: 4,830
kolelt will become famous soon enough kolelt will become famous soon enough
Quote:
Originally Posted by Bijan View Post
We both did the same thing w/ the handle and put it on the way it SEEMS to go...then had to reverse it.
Don't think there is a right or wrong way. Just have the right amount of tension.
__________________
97 3.4 JDM/5 Speed swap/eLocker Swap/ICON CDC all around/+more.....
kolelt is offline   Reply With QuoteReply With Quote
Reply


Posting Rules
You may not post new threads
You may not post replies
You may not post attachments
You may not edit your posts

BB code is On
Smilies are On
[IMG] code is On
HTML code is On

Forum Jump

Similar Threads
Thread Thread Starter Forum Replies Last Post
FS..2004 4runner Rear Cbi rear bumper with swingout. So Cal ProjectV8Runner For Sale: T4R Items 3 04-18-2016 09:24 PM
CBI Offroad Rear Bumper w/Swingout UTAH Wikki For Sale: T4R Items 3 12-02-2015 02:20 PM
Savage rear swingout bumper 4everun22 3rd gen T4Rs 10 11-18-2015 12:44 PM
Bajarack or rear bumper w/swingout 98WhiteT4R 3rd gen T4Rs 35 06-11-2014 09:41 PM

Powered by vBadvanced CMPS v3.2.2

All times are GMT -4. The time now is 08:53 AM.

Powered by vBulletin® Version 3.8.11
Copyright ©2000 - 2024, vBulletin Solutions Inc.
Search Engine Optimisation provided by DragonByte SEO (Pro) - vBulletin Mods & Addons Copyright © 2024 DragonByte Technologies Ltd.
Feedback Buttons provided by Advanced Post Thanks / Like (Lite) - vBulletin Mods & Addons Copyright © 2024 DragonByte Technologies Ltd.
User Alert System provided by Advanced User Tagging (Lite) - vBulletin Mods & Addons Copyright © 2024 DragonByte Technologies Ltd.
***This site is an unofficial Toyota site, and is not officially endorsed, supported, authorized by or affiliated with Toyota. All company, product, or service names references in this web site are used for identification purposes only and may be trademarks of their respective owners. The Toyota name, marks, designs and logos, as well as Toyota model names, are registered trademarks of Toyota Motor Corporation***Ad Management plugin by RedTyger
 
Copyright © 2020