 04-30-2017, 11:05 AM
|
#16
|
 |
Senior Member
|
|
Join Date: Sep 2016
Location: North Vancouver, BC
Posts: 1,740
Real Name: Just call me the Grease Monkey
|
|
|
Senior Member
Join Date: Sep 2016
Location: North Vancouver, BC
Posts: 1,740
Real Name: Just call me the Grease Monkey
|
I updated my Mexico trip Parts 2 and 3 above.
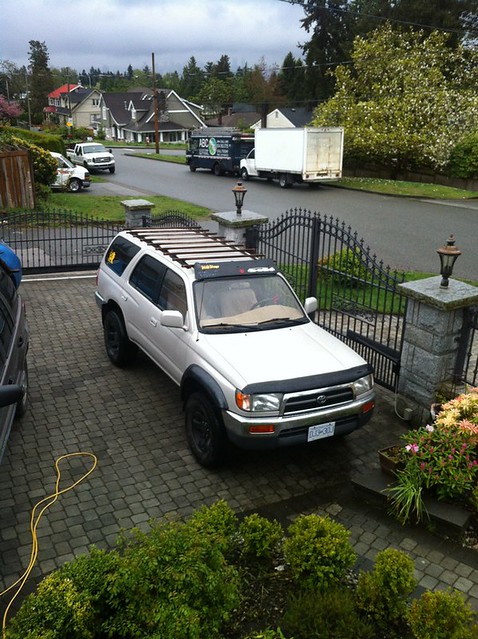
There is a new '97 Limited accident wreck at the wreckers this week so I stopped by to get parts for two mods. One mod was super easy, the other was medium easy.
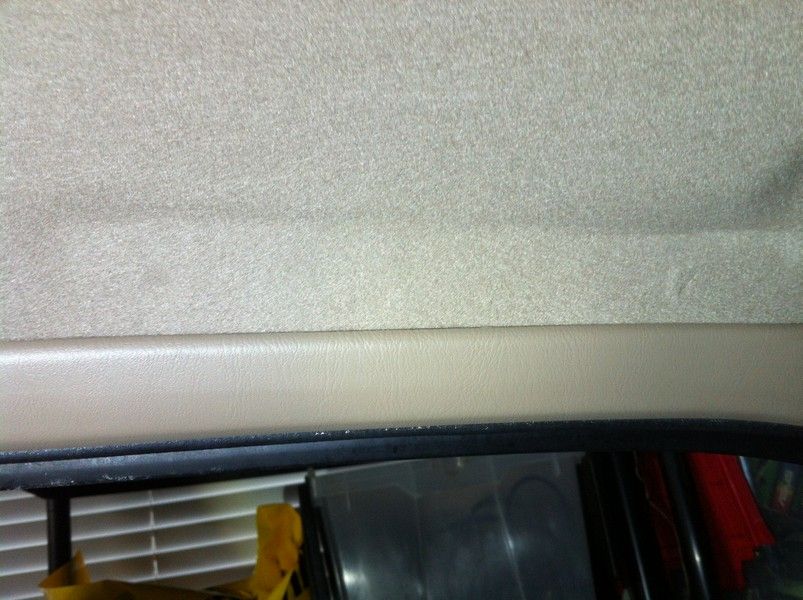
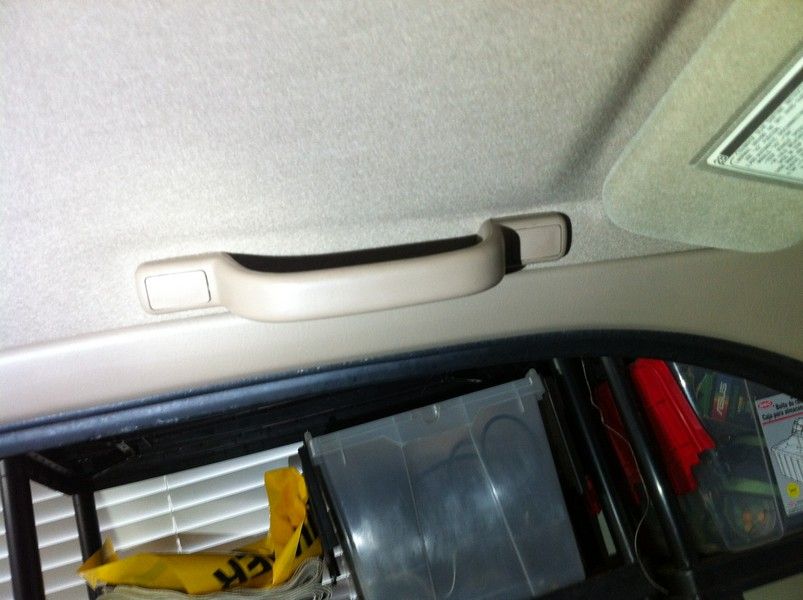
I pulled off the passenger side grab handle and put it on my driver side. Usually the screws are super tight but these ones were actually loose. You can feel along the fabric on the drivers side where the depressions are from the two existing holes. So all I did was make a little hole with a razor blade and screwed the new one in. Done.

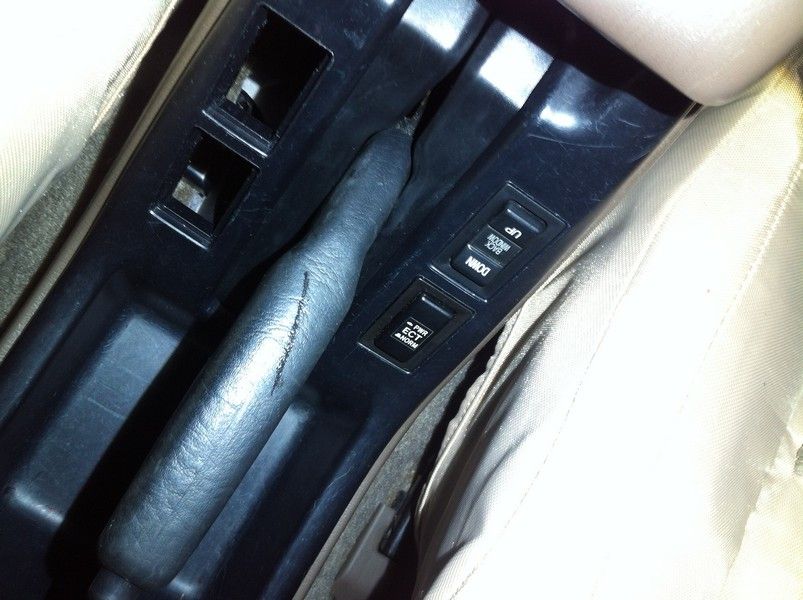
The other mod I finished was the power antenna disable switch, see here. I picked up the ECT ("eject") button from the wreck and hooked the multimeter up to it. It turns out that the black/yellow and green/red wires are the ones that switch on and off in continuity. So I just hooked those up to the wires I ran back from splicing the blue wire in the antenna harness behind the cigarette lighter, and put it in a blank spot in the center console (mine is manual transmission so I don't have an eject button). Done!!! The only thing wrong now is the button says ECT so I wonder how easy it is to re-letter it. Does anyone have any suggestions?
I also took the rear window up/down button which I hope to wire into the hatch door as described here so I don't have to go to the front and turn on the ignition every time I want to adjust the hatch window when sleeping in the back. Edit: it won't fit, it sticks too far back so I'll just have to get a little one from the electronics store.
__________________
My Snow and Sand build thread
Mark_BC's 2000 Limited Salvage Build
Determined to keep them from becoming parts trucks. Yes, even the one I just picked up as a parts truck...
|

|
 Reply With Quote Reply With Quote
|
|
05-12-2017, 10:58 PM
|
#17
|
|
Senior Member
|
|
Join Date: Sep 2016
Location: North Vancouver, BC
Posts: 1,740
Real Name: Just call me the Grease Monkey
|
|
|
Senior Member
Join Date: Sep 2016
Location: North Vancouver, BC
Posts: 1,740
Real Name: Just call me the Grease Monkey
|
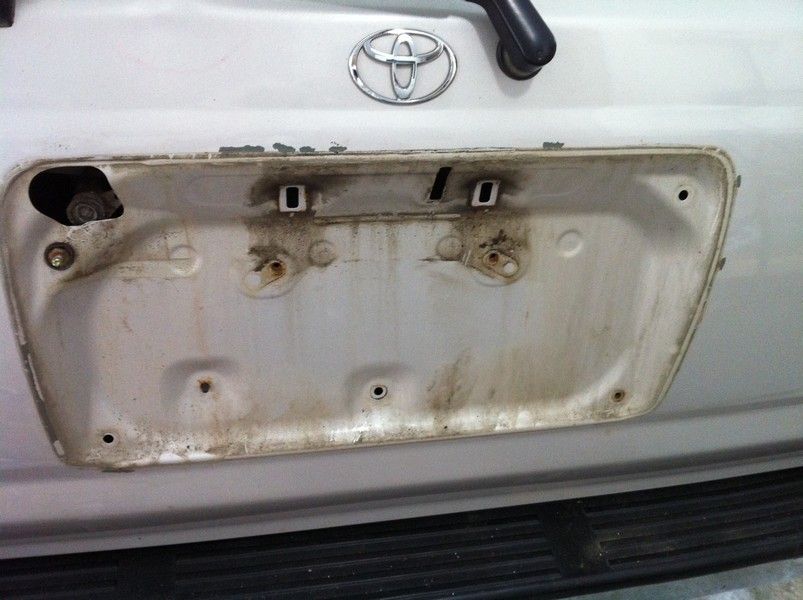
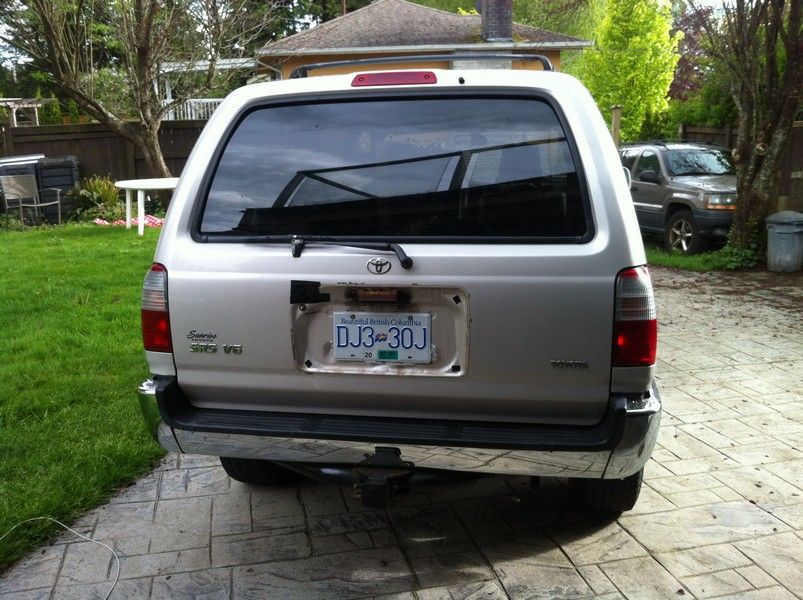
Got that son-of-a-b!tch rear license plate bezel off last week. I have a few reasons for opening up into the rear hatch: 1) bezel causing rusting where it chaffes the paint so I have to put a rubber gasket on it. 2) while I have it off I'll paint it, 3) a nasty dent under the windshield wiper that would be impossible to access unless the bezel comes off, 4) the rear outside latch handle mechanism is pretty rusty and the only way to clean that up is to take it off, and 5) put in a local up/down switch for the hatch window.
- Managed to pull off the interior panel. You have to start at the bottom, you can't pull it off at the top.
- Unscrewed 10 or so bolts holding on black metal panel cover.
- Unscrewed the two bolts holding the rear latch on. They can be accessed using a socket extension. For one, I cut a little notch in the white plastic cover over the window gear tooth thing, which allowed me to get in to the bolt. This way you don't need to remove the window mechanism at all, you work around it.
- Unscrewed the one bolt holding the bezel on.
- Removed license plate.
- Squeezed with needle nose pliers (longer ones with the bent tips would be ideal) the four plastic clips from the inside, holding the bezel on.
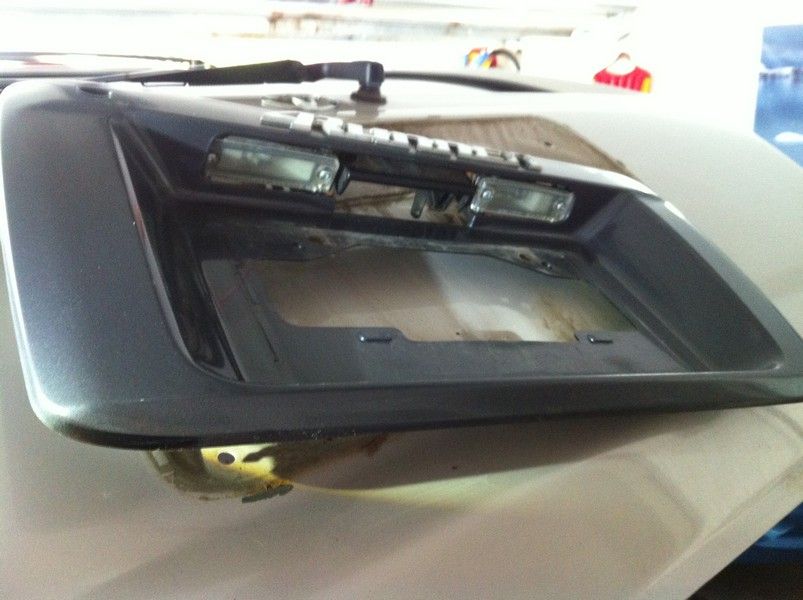
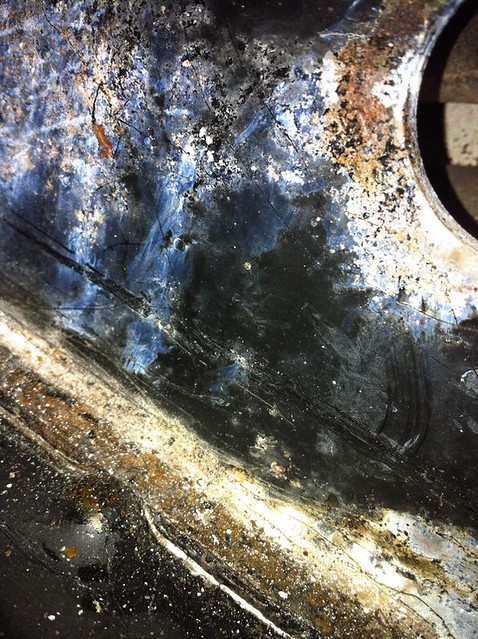
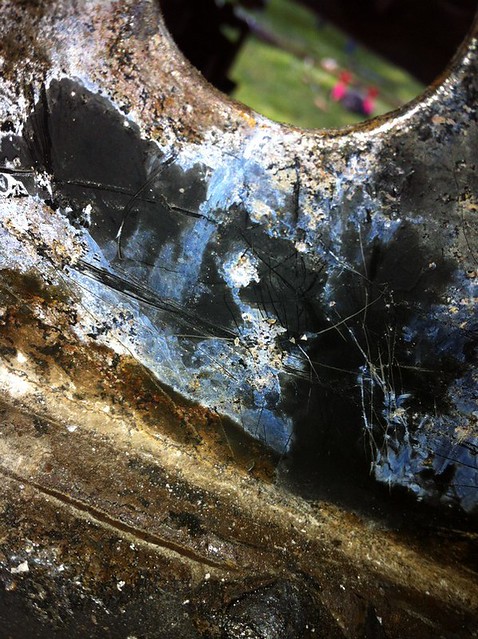
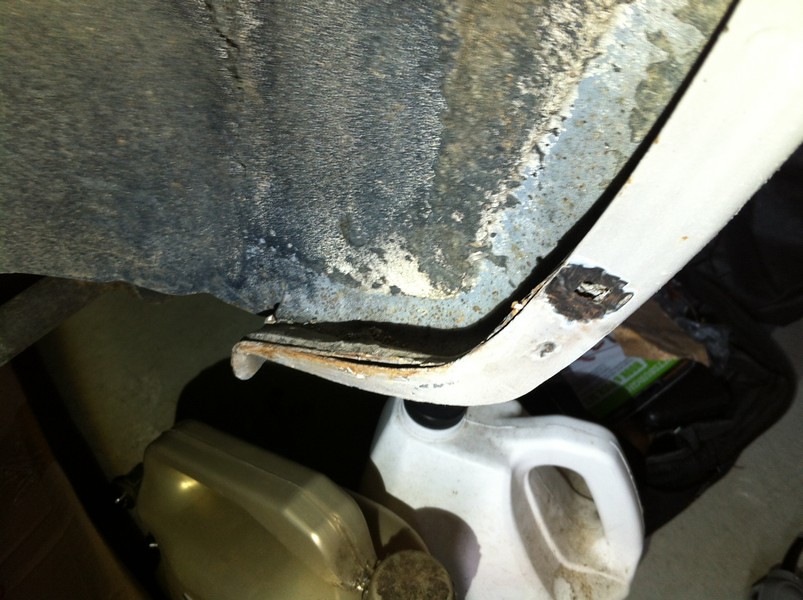
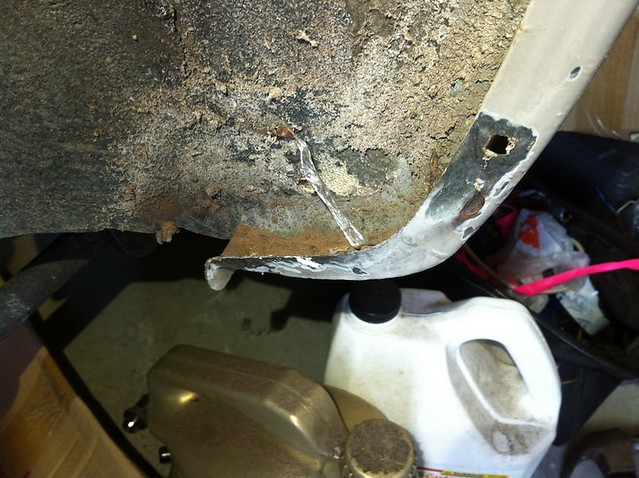
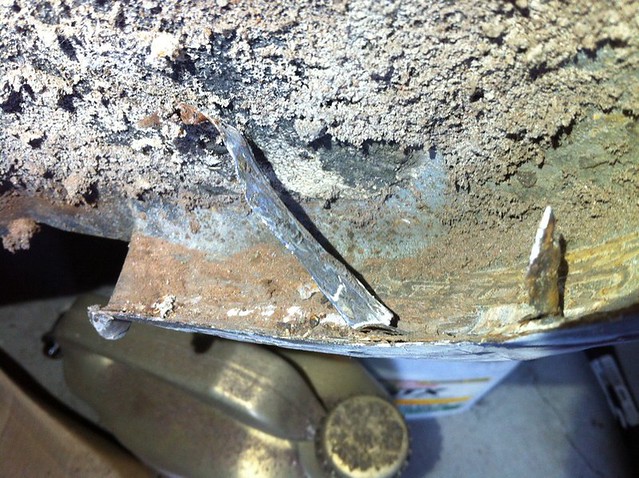
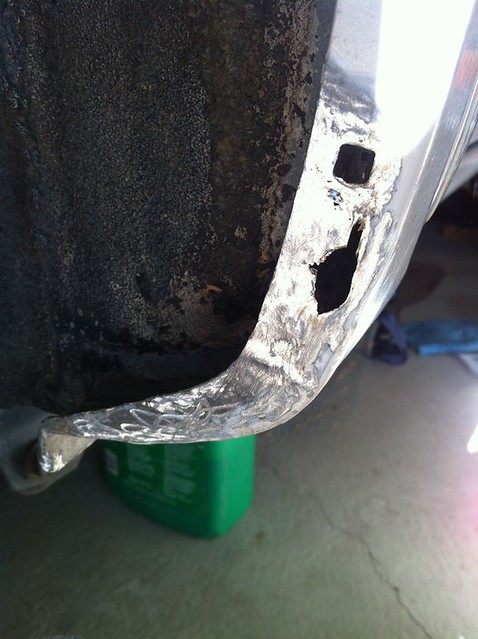
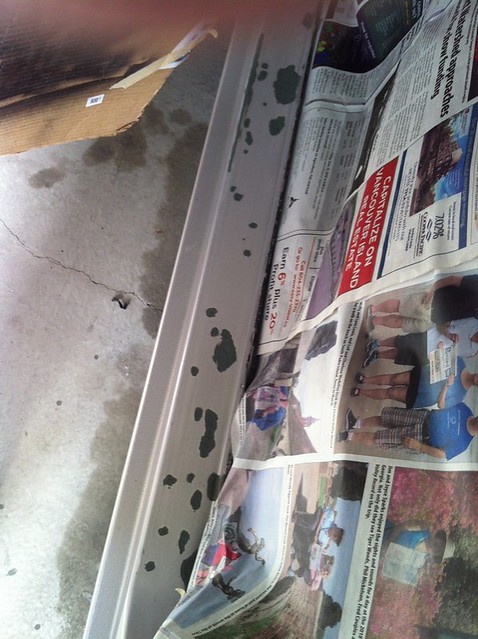
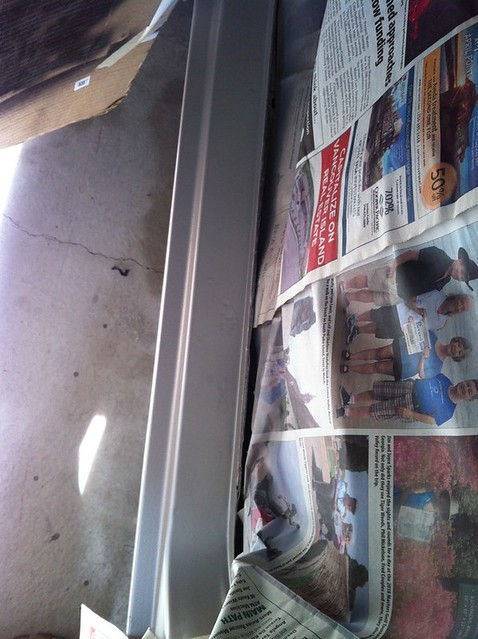
- Pried bezel off hatch a ways but the key cylinder came with it. It has two screws to remove it from the bezel but unfortunately you can't access them until you take the bezel a few inches off the hatch, and that's about as far as you can go without stressing the lock mechanism. So I got a little Philips bit and turned it with needle nose pliers and the screws were in very loosely so they came undone.
- Then you can pull it away, to reveal this mess:
__________________
My Snow and Sand build thread
Mark_BC's 2000 Limited Salvage Build
Determined to keep them from becoming parts trucks. Yes, even the one I just picked up as a parts truck...
|
|
|
Reply With Quote
|
|
05-12-2017, 10:59 PM
|
#18
|
|
Senior Member
|
|
Join Date: Sep 2016
Location: North Vancouver, BC
Posts: 1,740
Real Name: Just call me the Grease Monkey
|
|
|
Senior Member
Join Date: Sep 2016
Location: North Vancouver, BC
Posts: 1,740
Real Name: Just call me the Grease Monkey
|
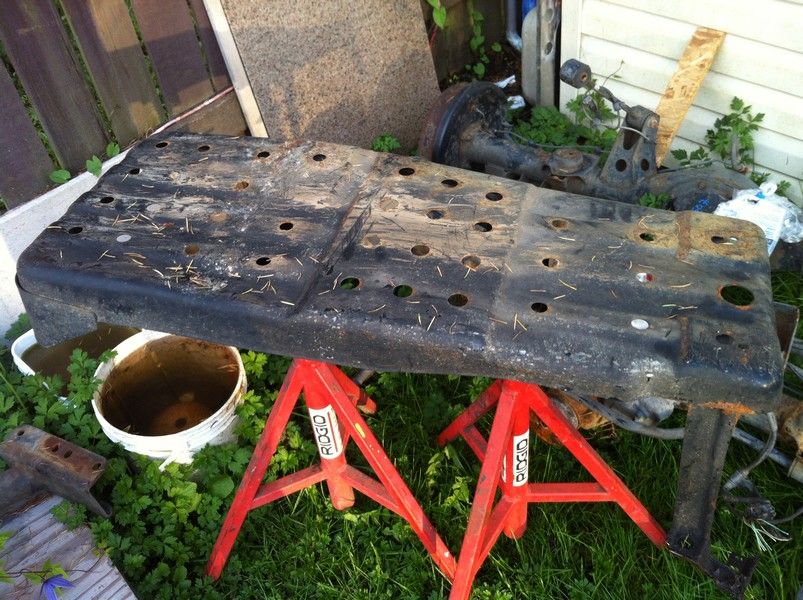
Picked up a gas tank skid plate in decent shape from a 2001 at the junkyard. A little bit of rust and one minor dent but it should clean up well. Think I paid too much for it.
I took the 4runner to the paintless dent repairman today to fix several minor dings along the doors, one on the hood, and an ugly dent on the rear hatch by the windshield wiper. It bent the horizontal ridge under the wiper which is a lot more difficult to fix than a flat panel. Also, there is a reinforcement piece inside there and there is no way to access this area from taking the inside panel off, so luckily I had the rear bezel off to access it through the key cylinder hole.
Before:
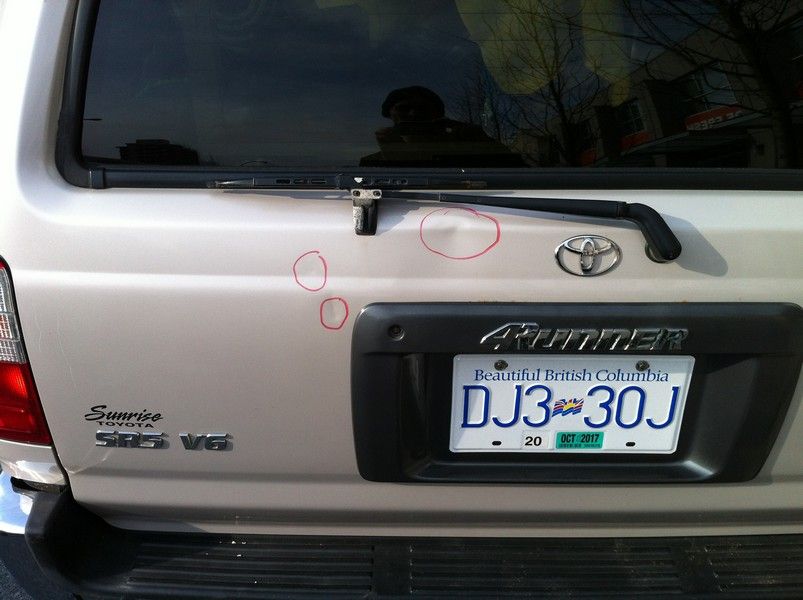

After:
Pretty impressive what a good dent repairman can do. You can still see some slight rippling there but you have to know it's there to see it. It cost a few hundred bucks for everything but so does a good detail. Otherwise I'd be looking for a new rear hatch... Maybe I'm too much of a perfectionist.
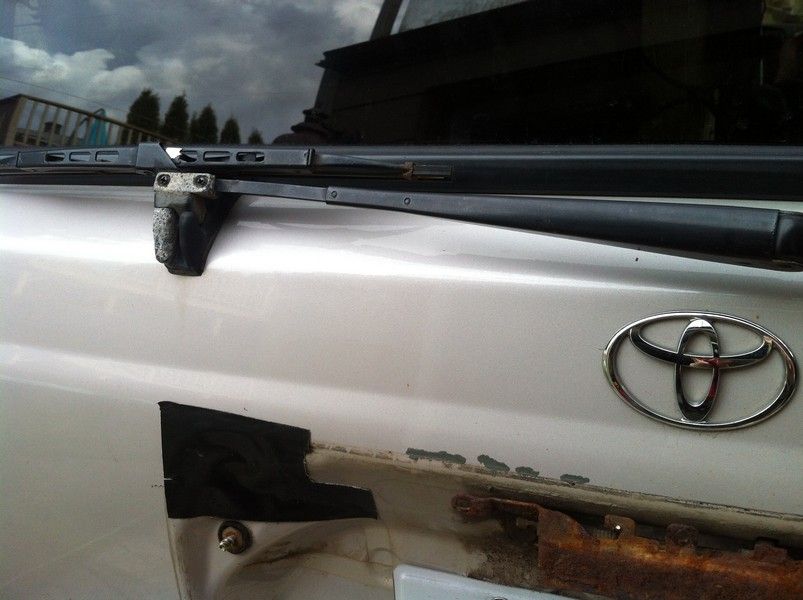
Now to fix up the scuffs from the bezel, repaint it, fix the rust on the latch, and put it back on.
The most important question of all: what colour should I paint the rear bezel? I am liking the chrome wheels and bumpers and I have some silver rim paint I like. Would silver look weird? Or should I paint it that dark grey like it is now? Black to match the bumper plastic trim?
__________________
My Snow and Sand build thread
Mark_BC's 2000 Limited Salvage Build
Determined to keep them from becoming parts trucks. Yes, even the one I just picked up as a parts truck...
|
|
|
Reply With Quote
|
|
05-13-2017, 04:55 PM
|
#19
|
 |
Member
|
|
Join Date: Jan 2017
Location: North of 60
Posts: 253
|
|
|
Member
Join Date: Jan 2017
Location: North of 60
Posts: 253
|
Quote:
Originally Posted by Mark_BC

The most important question of all: what colour should I paint the rear bezel? I am liking the chrome wheels and bumpers and I have some silver rim paint I like. Would silver look weird? Or should I paint it that dark grey like it is now? Black to match the bumper plastic trim?
|
I need to pull mine as well, it's starting to crack and the gasket has rolled in at one spot underneath.
You have some chrome, so you could go with a lighter silver, but if it were mine I would stick with a similar shade of grey!
|
|
|
Reply With Quote
|
|
05-13-2017, 05:37 PM
|
#20
|
|
Senior Member
|
|
Join Date: Sep 2016
Location: North Vancouver, BC
Posts: 1,740
Real Name: Just call me the Grease Monkey
|
|
|
Senior Member
Join Date: Sep 2016
Location: North Vancouver, BC
Posts: 1,740
Real Name: Just call me the Grease Monkey
|
Quote:
Originally Posted by Roamed YT
I need to pull mine as well, it's starting to crack and the gasket has rolled in at one spot underneath.
You have some chrome, so you could go with a lighter silver, but if it were mine I would stick with a similar shade of grey!
|
I think I'll go with black to match the plastic on the bumper, window trim and windshield wiper.
__________________
My Snow and Sand build thread
Mark_BC's 2000 Limited Salvage Build
Determined to keep them from becoming parts trucks. Yes, even the one I just picked up as a parts truck...
|
|
|
Reply With Quote
|
|
09-19-2017, 01:21 AM
|
#21
|
|
Senior Member
|
|
Join Date: Sep 2016
Location: North Vancouver, BC
Posts: 1,740
Real Name: Just call me the Grease Monkey
|
|
|
Senior Member
Join Date: Sep 2016
Location: North Vancouver, BC
Posts: 1,740
Real Name: Just call me the Grease Monkey
|
The weekend before last (Labour Day) I went up to the Chilcotins for my yearly exploration trip, this time to look for fossils in the Teepee / Relay Mountains area. I went with my dog and didn't hit the road until Saturday after lunch. We had to stop in Squamish for supplies, a small cooler, ice etc. and some sushi.
Saw a nice Hilux Surf RHD from Japan at the top of the Hurley:
We didn't really get off road until dark in an area I've never been to before. I thought I took the correct turnoff to the final spur road but soon enough the moon was straight ahead of me which meant I was going south when I should be going north... oh well. After probably a hundred water bars and 15 km we got to the end of the road. I slept in the car and in the morning I checked the GPS. I was waaaayy off from where I needed to be. It turns out I went to the end of the Bonanza road which wasn't on my older map. I confirmed with 2 GPS's and they don't lie. So we headed back down and went up the correct road and 2 hours later were at the end of the Paradise Creek road, at lunch time...
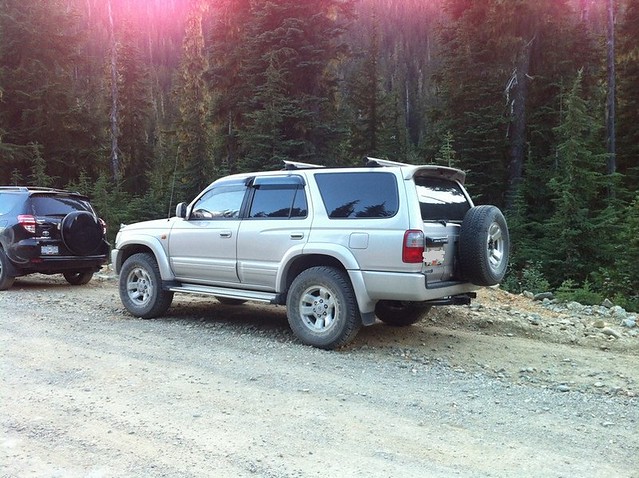
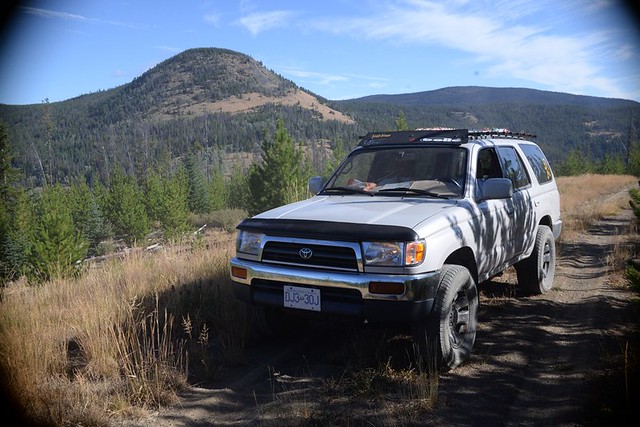
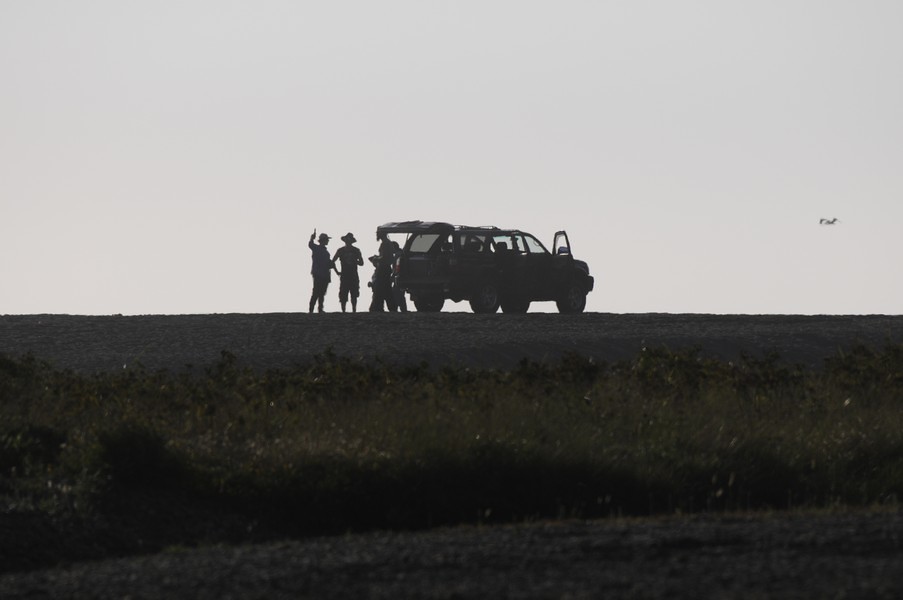
End of the road:
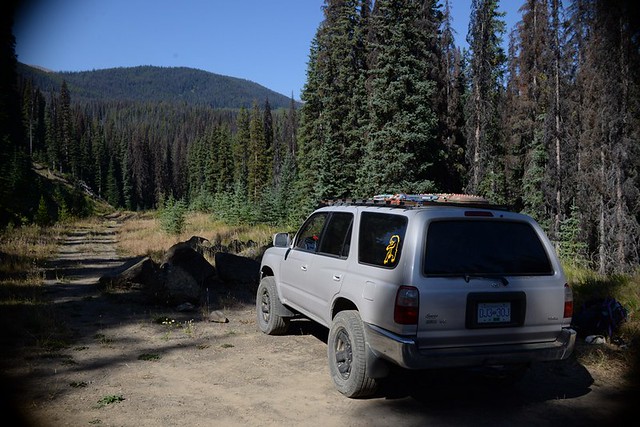
Then we had to hike another 10 km or so up the old deactivated road. That's where I was headed, those mountains. Relay on the left and Teepee on the right.
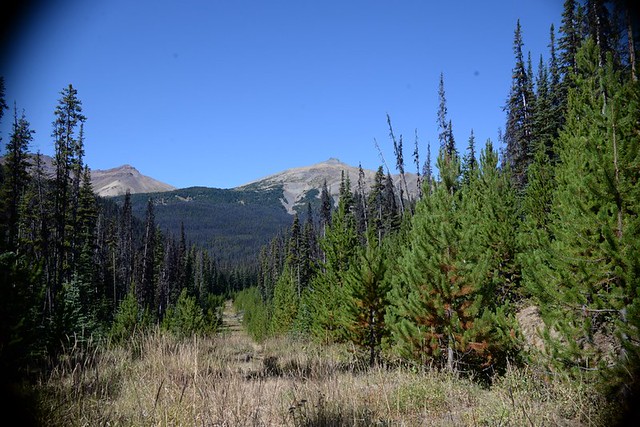
At the end of the trail we had to do a bushwhack / flagged route through the forest up to the alpine. It was really dry and I was worried I wouldn't find water. This area probably hadn't seen any meaningful rain in 4 months.
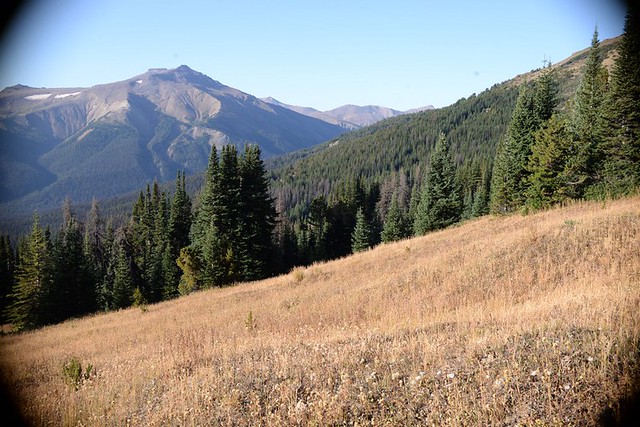
Looking back:
That is Teepee Mtn which I decided not to attempt since I didn't have time:
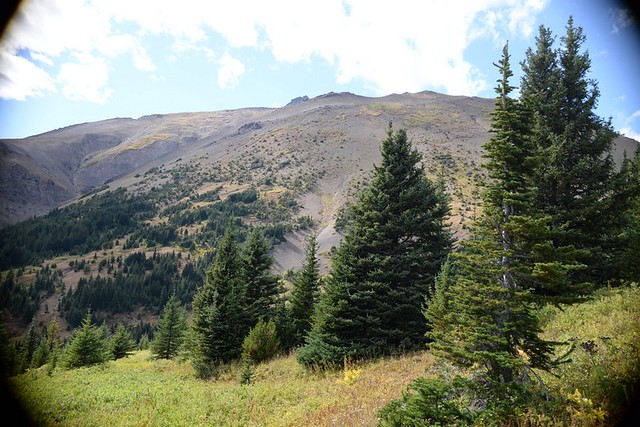
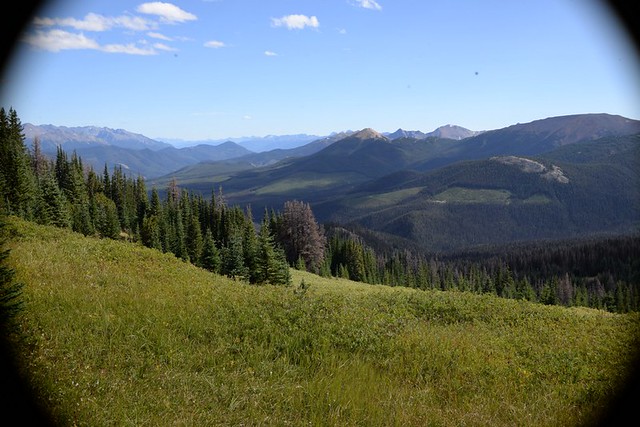
This is looking a little to the left, towards Relay Mtn which is joined to Teepee Mtn by a ridgeline:

Instead I went around the back of it, to the right.

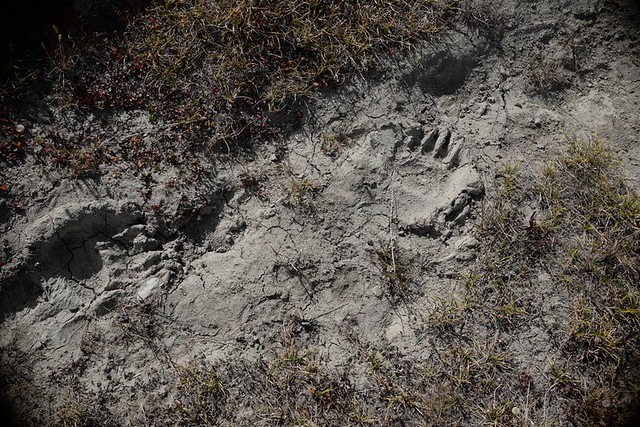
In the pass going around the mountain we found these grizzly tracks. Great, I love grizzlies. NOT
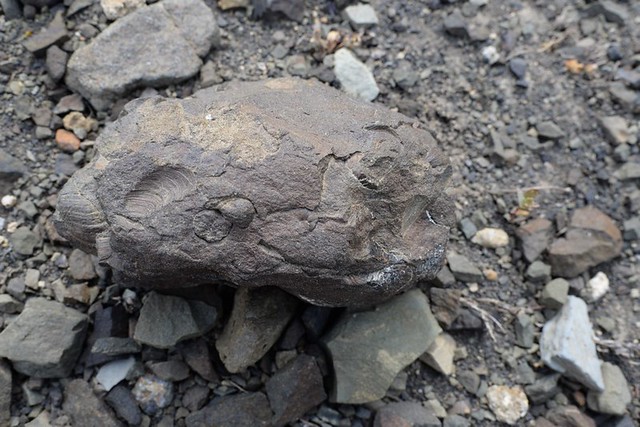
We found fossils. There are Ammonites up here but there were only clams in this particular location. Next time!!!
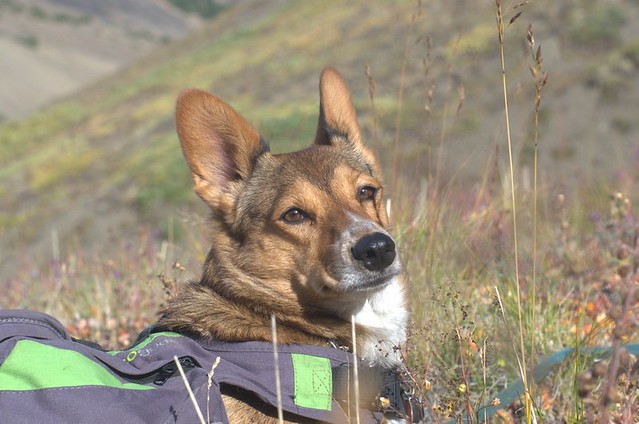
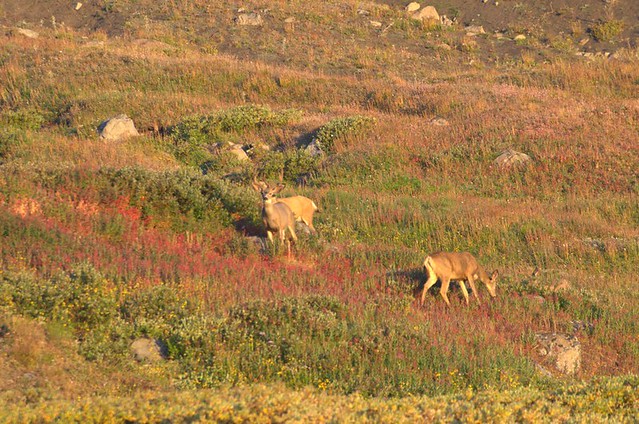
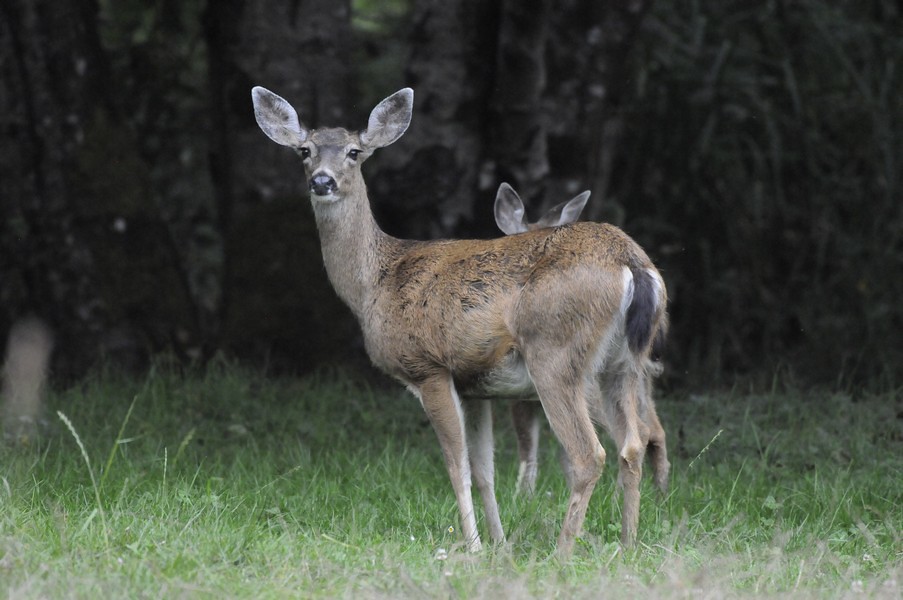
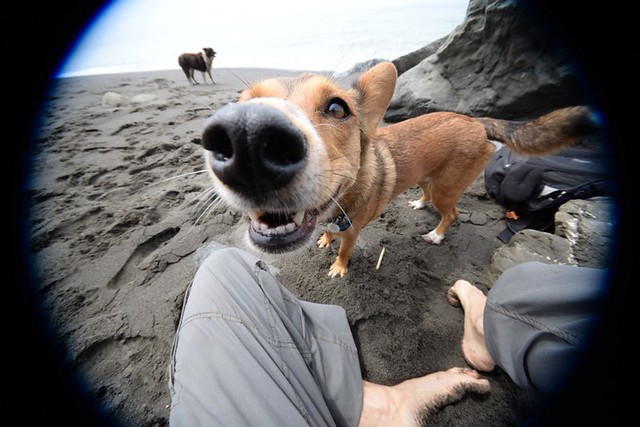
There was a deer that evening hanging around, a nice big male with antlers. It was making noises in the absolute silence of the night, I haven't experienced silence like that for a while, you forget what it's like. Well Reina gets really freaked out so she clawed some holes in my tent and was up every half hour barking at the slightest noise. Once the deer exhaled which really freaked her out.
In the morning they were about 100 m away grazing and I was watching them. Finally Reina saw them and she freaked. She was trembling she was so scared. So they bounded off as I yelled at her to shut up. She won't be coming again...
And then some big rocks in the talus slope above gave way and caused an avalanche. Holy cow did my dog ever freak. Poor girl. All from those nasty grizzly encounters we previously had. See here and here for the previous trip reports. I used Snowy the 4runner to get up there those times.
On the way out:
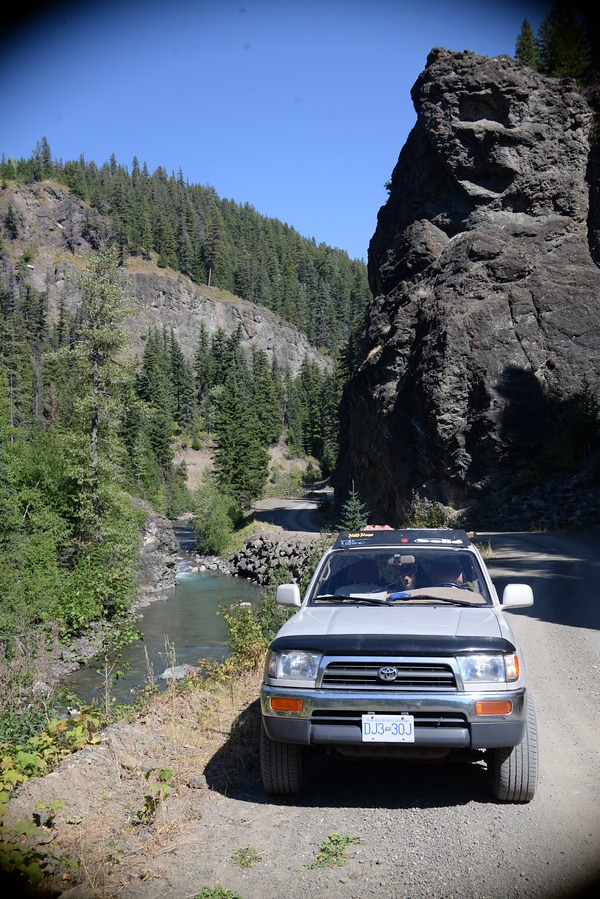
It was bloody hot on the way out as we went down in elevation. No problems with the 4runner of course.
__________________
My Snow and Sand build thread
Mark_BC's 2000 Limited Salvage Build
Determined to keep them from becoming parts trucks. Yes, even the one I just picked up as a parts truck...
Last edited by Mark_BC; 09-21-2017 at 12:35 AM.
|
|
|
Reply With Quote
|
|
09-20-2017, 12:55 AM
|
#22
|
|
Senior Member
|
|
Join Date: Sep 2016
Location: North Vancouver, BC
Posts: 1,740
Real Name: Just call me the Grease Monkey
|
|
|
Senior Member
Join Date: Sep 2016
Location: North Vancouver, BC
Posts: 1,740
Real Name: Just call me the Grease Monkey
|
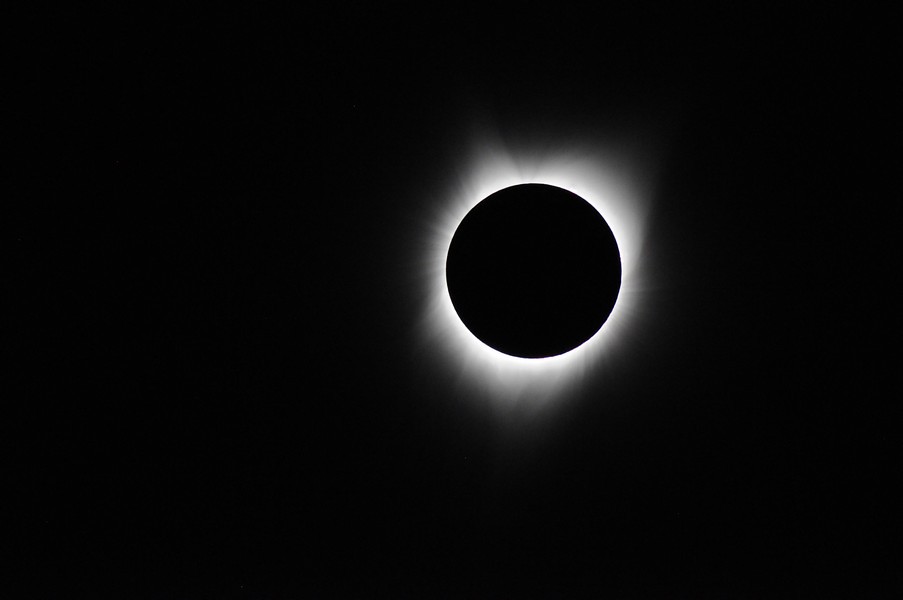
This August I did a trip down to northern California in Sandy, to meet my friend Mark for some abalone diving and to check out the Lost Coast. As luck would halve it, my drive down coincided perfectly with the total eclipse of the heart in Oregon.
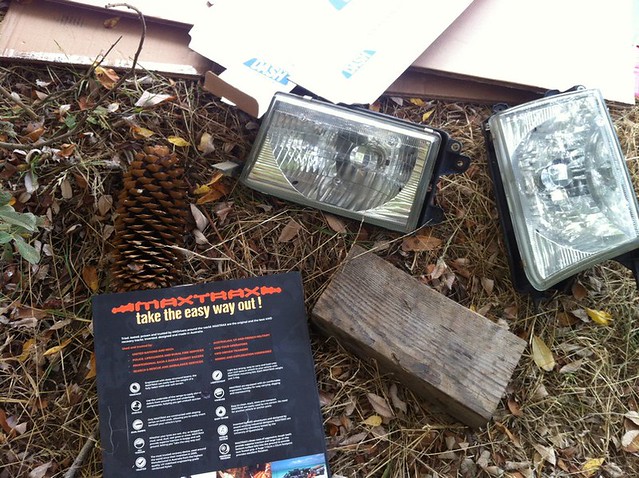
On the way down I stopped off at Yuri's place in Vancouver, WA to pick up some clear '99 headlights and a piece of Limited fender flare that I was missing.
Then I made my way down to the eclipse path in Oregon and looked for a place to sleep. The empty lots in Independence wanted $90 to park on a gravel lot in the middle of town. Everywhere else was filled up so I headed for the McDonald Forest shown on Google Maps. It was a nice drive and when I got to the peak of the hill there was a parking lot with lots of recreationists. I organised my stuff and planned to sleep in the car there overnight but the rangers came by and kicked me out. I asked where I could stay and the only place available seemed to be the Walmart parking lot in Corvallis so I went down there.
At Walmart I noticed that I had lost a nut from the lower control arm bracket since I literally just finished swapping the rear end out the weekend before and didn't torque them up properly. The bolt was still half hanging in there. The next morning I went to Napa and got a new nut.
Then the real show began. We ended up at a golf course parking lot with a bunch of other people and one family had an extra pair of glasses they gave me. It was cool to see the moon partially over the sun but other than that, no big deal. Even at 90% it wasn't anything to write home about. But at 98% it started to get kinda weird out... it was getting cold, and dark. Then we got to 100%... Holy cow was that ever cool. There was a giant black disc in the sky surrounded by a corona and you could look directly at it. Everyone was cheering and in a couple minutes it was over and I packed up and headed out. Unfortunately everyone else was doing the same thing so the road out to I-5 was crawling. Fortunately I was at the southern part of the eclipse path so I think I beat most people coming from the north. All down I-5 I listened to NPR and the live coverage of the eclipse as it moved east. I'm glad I saw that; now I have 2 total eclipses under my belt.

We turned off onto the 199 at Grants Pass and made a stop at the Illinois River area which was nice. But we pushed on into California. I checkedout one of the offical campsites and marvelled at how people will pay money to sleep in an overcrowded lot 20 feet from a highway. So we bush camped up a road in one of the recreation areas in the redwoods. I got some of the biggest pine cones in the world from a sugar pine.
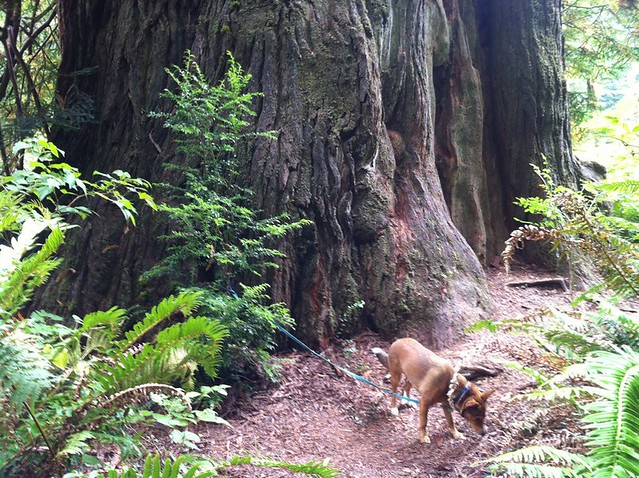
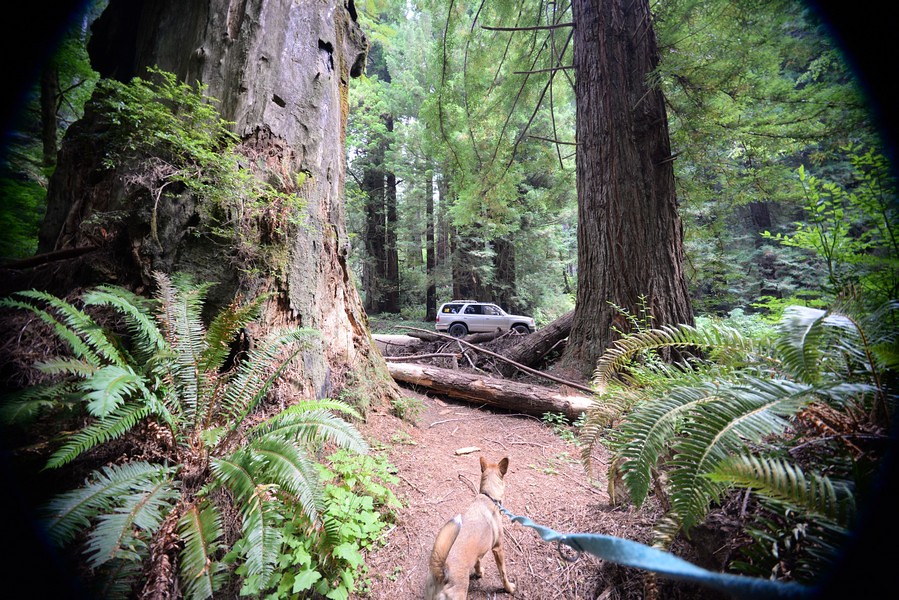
The next day we drove through Jedediah Grove State Park over to Crescent City. This is a beautiful forest but everything was brown and covered in dust.
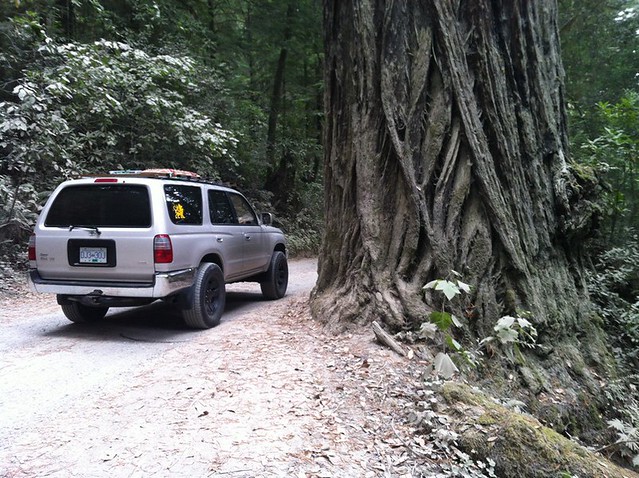
Unbelievable that a tree can be that big:
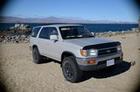
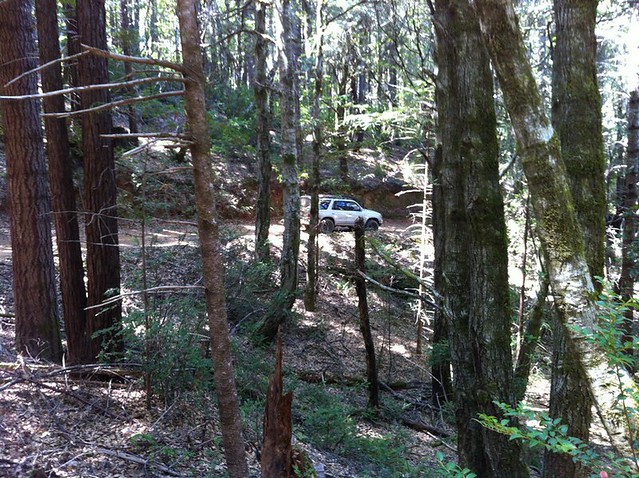
A 4runner in its natural habitat!
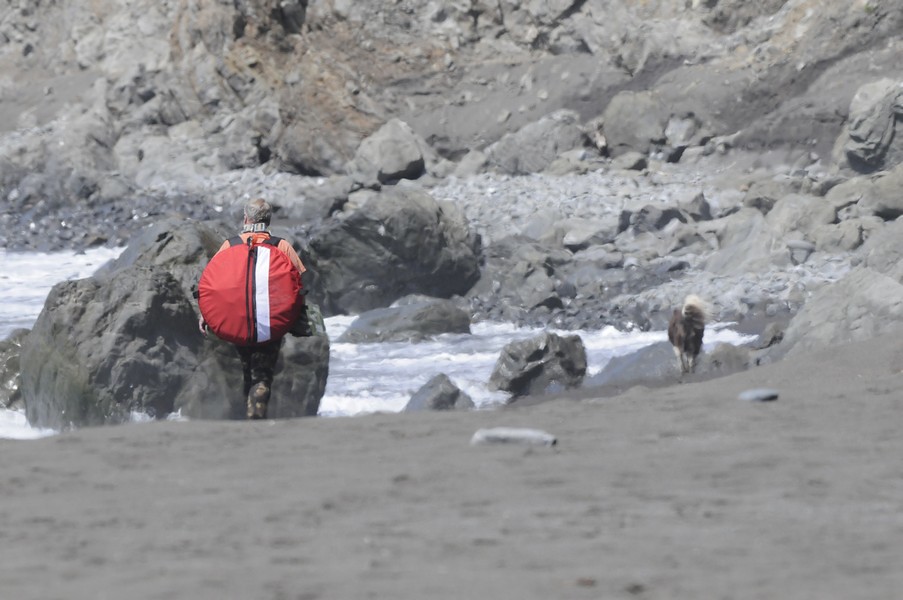
Got the fishing license in Crescent City then headed south. Restocked up in Leggett and then took the dirt road up to Usal. I found Mark at the best campsite, by the crick.
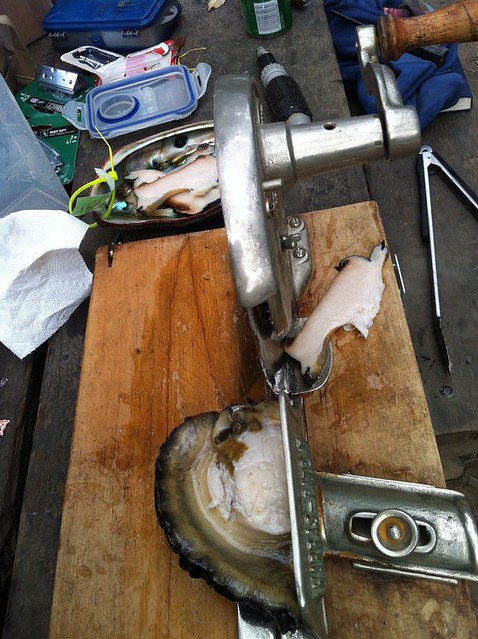
The next day he went out abalone diving while I watched the kids. I went out the next day but I couldn't get ay. I had to swim a quarter mile out to the rock and go down to 12 feet but I couldn't hold my breath long enough. I used to work in aquariums and breath hold when I cleaned the windows so I got pretty good but now I could only hold it for 20 seconds with all the waves bashing me around. Plus it was 1 foot visibility and I didn't know I was at the bottom until my head hit it... I need to practise breath holding now.
We drove out on the beach for our dives and threw the gear on my unfinished roof rack to and from camp. It works really well, I love the full length rack! Nice and low too.

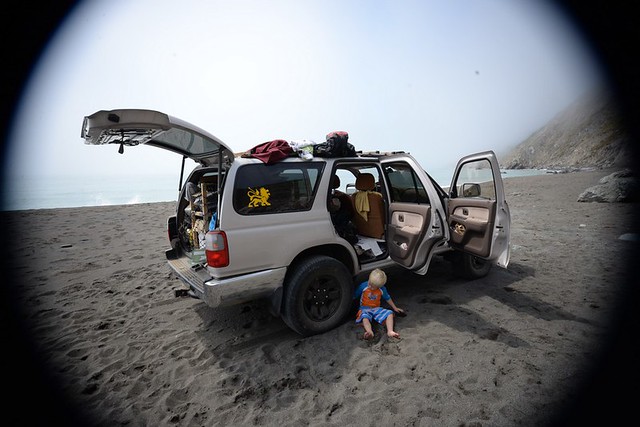
Funny, probably half the vehicles out there were 4runners...
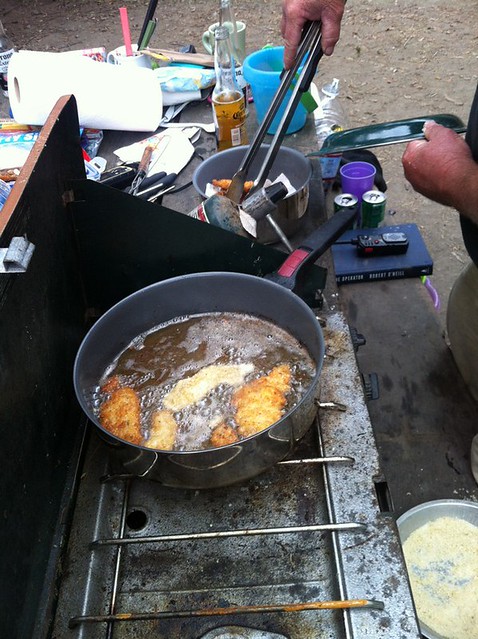
Anyways, we fried up the abalones which were really good.
After a couple days Mark headed south and I headed north up the Usal Road. Some years it isn't passable but this year they did some grading at the very north end so it wasn't too bad. Just ruts you have to watch out for. It's a beautiful area through second growth redwood forests cloaking the steep hills of the coast with occasional peaks of the ocean through the trees.

I can flex too!

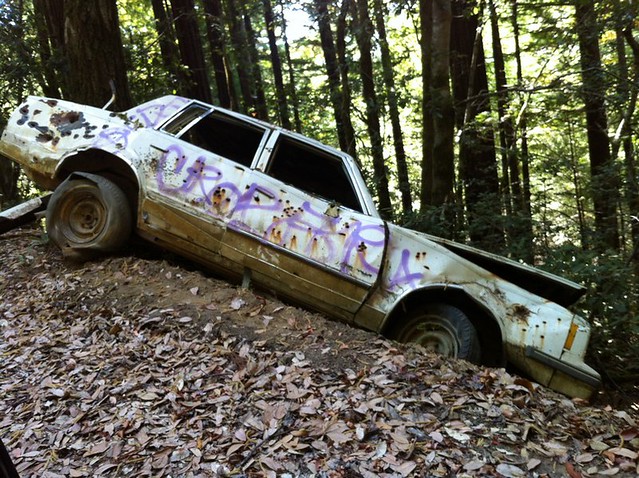
This guy didn't make it:
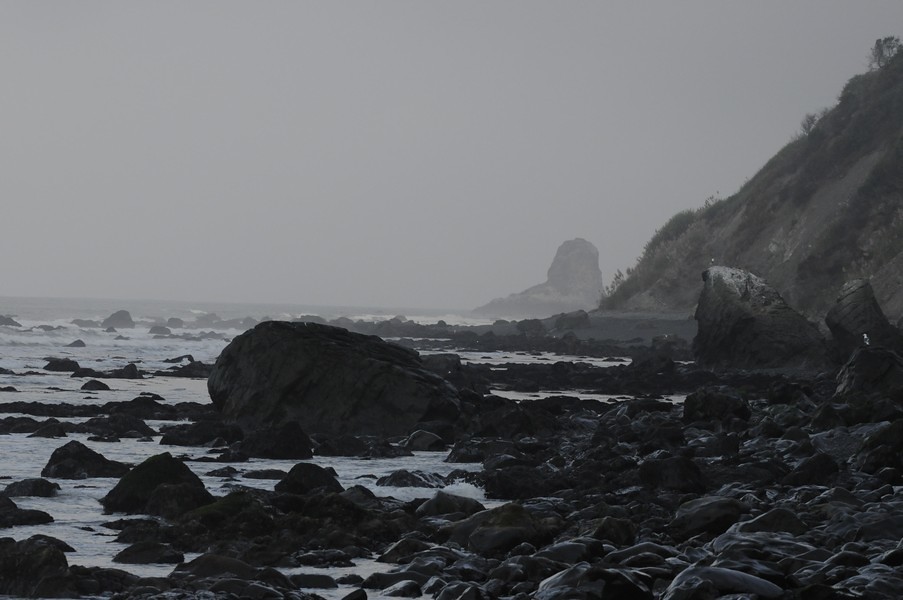
Back out on the "paved" road, I continued up to Shelter Cove and checked out the black sand beach.

Then further north up to Honeydew. That is a pretty rough road. Honeydew was really hick and the road out to the ocean didn't show that it went through on the maps that I was looking at so I headed east back out to 101 through Humboldt Redwoods State Park. That was a mistake because it does poke through north of Petrolia, the old abandoned coastal road that I missed out on! It goes all the way to just south of Eureka!!! Bummer. So instead of sleeping on a deserted stretch of California beach I slept at a rest stop on I-5. Oh well, more to explore next time. It is a beautiful area and kind of unbelievable how undeveloped it is. It is like 100 km of California coastline that has hardly any development and really low population. There are lots of parks there with long hikes into the back country. I could spend a lot of time exploring this area.
The next day I bombed through the thick forest fire smoke in northern Cali and southern Oregon, slept at a rest stop in Washington, and got home the next morning.
No problems with the 4runner except I had to stop every hour on rough roads to check all the bolts I changed on the rear end because they were jiggling loose. I got lucky with my rear end swap, I got a good one.
__________________
My Snow and Sand build thread
Mark_BC's 2000 Limited Salvage Build
Determined to keep them from becoming parts trucks. Yes, even the one I just picked up as a parts truck...
|
|
|
Reply With Quote
|
|
10-01-2017, 10:20 PM
|
#23
|
|
Senior Member
|
|
Join Date: Sep 2016
Location: North Vancouver, BC
Posts: 1,740
Real Name: Just call me the Grease Monkey
|
|
|
Senior Member
Join Date: Sep 2016
Location: North Vancouver, BC
Posts: 1,740
Real Name: Just call me the Grease Monkey
|
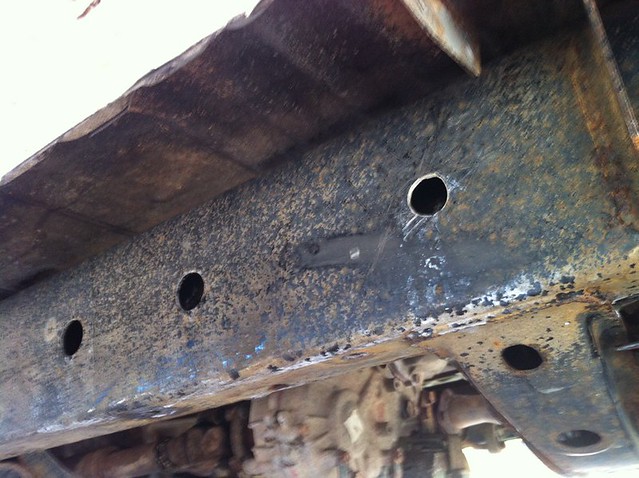
Last weekend I prepped my frame for Eastwood Internal Frame Coating. I drilled one additional hole in the bottom of the side with the gas tank skid plate since that takes up one threaded hole which is open on the other side to allow draining. Then I removed the skid plate bolt so it doesn't get permanently glue din with the paint and tapped out all the threaded holes on the bottom of the frame to clean out rust, and I'll do it again after painting.
Then I enlarged most of the other holes so I could stick my finger in to feel around at regular intervals. It's actually pretty clean. I removed any flaking I could find but there is only so much you can do through the holes. Then I blew it out.
After this I got a spray bottle with methanol and sprayed the hell out of it so it dripped out the holes. Then I did the same with acetone and also glugged it in the side holes so it really soaked everything. Then once dry I got out the Ospho. Oh the Ospho...
They warn to you to take safety precautions and man they ain't kiddin'. I had my sealed safety glasses on so my eyes were fine but any whiff would send me off choking so I just held my breath and ran in to do the spraying. I tried to spray everywhere inside every hole. I noticed lots was dripping out so I put a container under to recover most of it. Where it dripped on the concrete it sizzled and turned it white.
They say to let it dry overnight so the next day I hosed it out and let it dry for a week. I only did the lower central portion of each side. I still have to do the front and rear sections where they slope up but this is a good start, on the easy parts.
Today I sprayed inside the frame with Eastwood internal frame saver. I looked on Youtube first and found out that the hose they give you will permanently curl making it difficult to push it in the frame holes so I cut a piece of plumber's snake and zap strapped / electrical taped it to that which made it pretty easy to go in and out, although the zap strap was getting caught on the holes.
But first I cut a coat hanger and tried to loosen up as much rust in there as I could but not much came out.
Then I got around to spraying. It covers well. I used 2 cans, and that was only for the central sections. I still have the front and rear sections to do, both sides, so that will take 2 more cans.
People warned that it would be messy so I put down cardboard but it wasn't too bad. I put bolts in the threaded holes first to keep the threads clean, then removed the bolts.
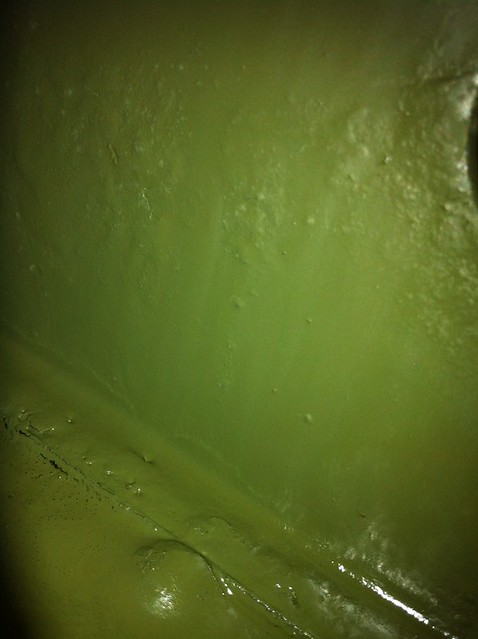
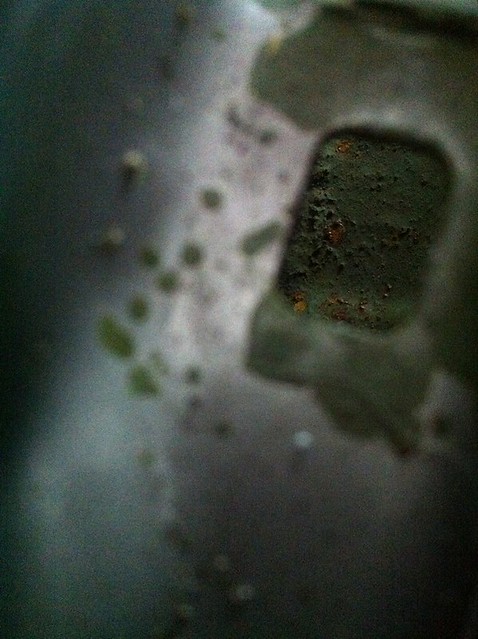
Some enlarged holes I drilled: That brown stuff isn't rust, it is the wax a PO put on, which I now have to sandblast off to prep for painting:
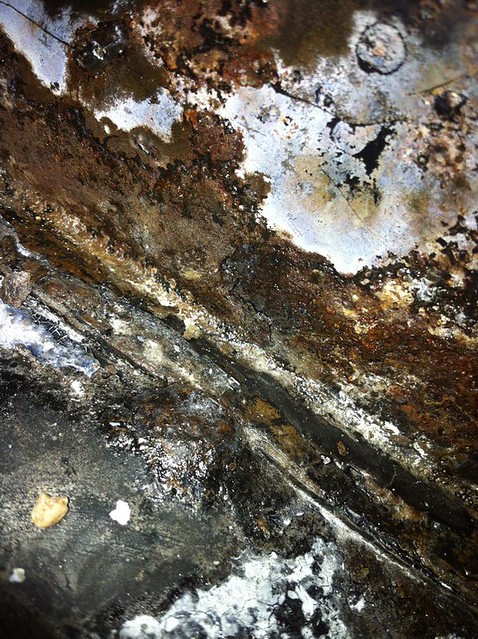
You can see the scratches from the coat hanger treatment in this one:
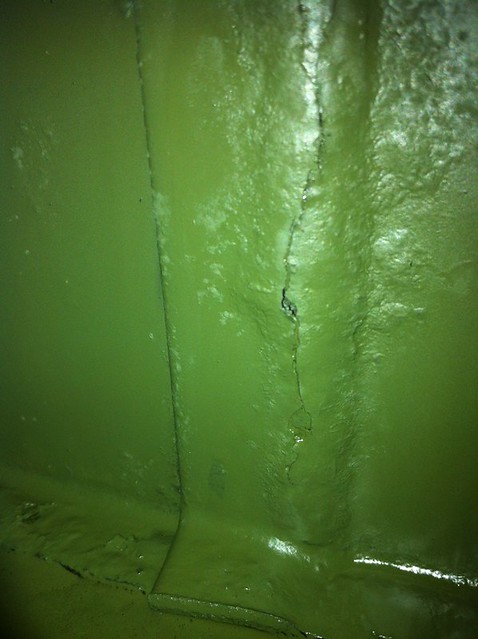
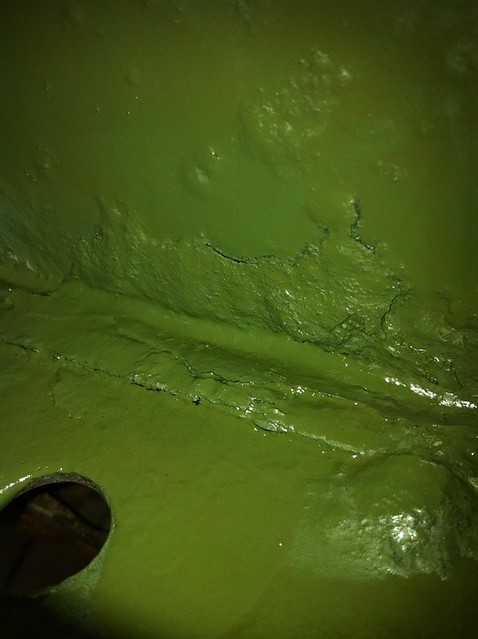
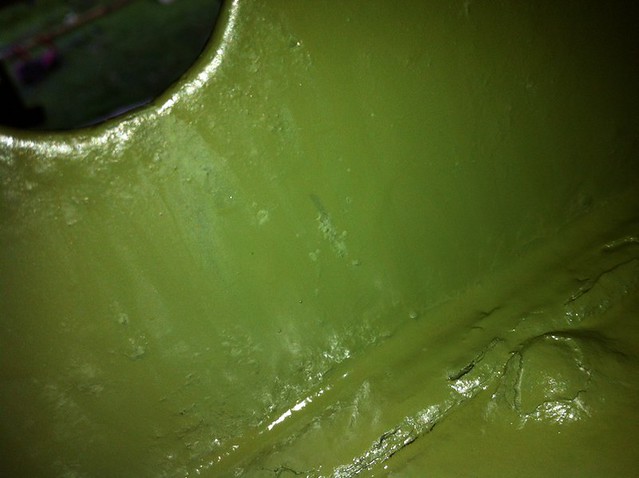
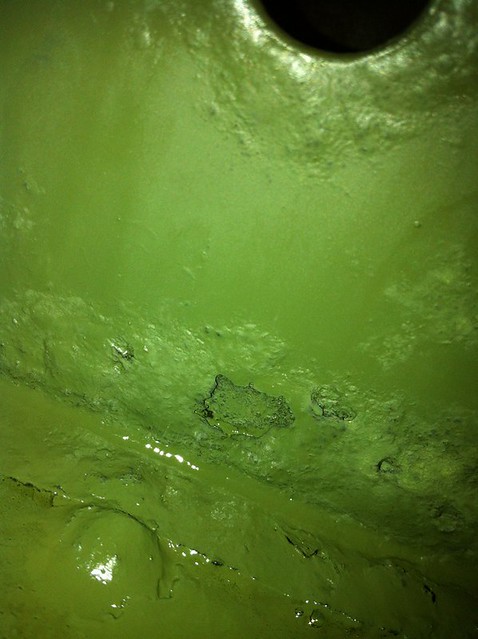
You can see that there is still some significant rust flakes in there even after my coat hanger treatment. The good part about this stuff is it easily shows where the rust scale still is so I can go back in with some stronger tools to try to knock that sh!t off. I'd like to put on another coat or two focusing on the bottom where the corrosion is worst. And the other good part about this stuff is you can see any new rust developing because it is against green so you can check it every year.
Now the frame should hopefully be the last thing to go if I keep an eye on it. Hopefully one meeleeeon km's.
I also took off the edge plastic trim piece for the carpet on the driver's side. There are some holes down into the rockers and there is a bit of rust developing there so I'll do the exact same thing with the frame saver in there. I'm gonna be going through a lot of this stuff... I put that sh!t on everything!!!
Also I am trying to figure out how to run wires into the dash from the outside and I noticed a big hole in the driver's side of the engine bay, near the windshield around the brake reservoir. Look for it and you'll find it. This goes into the fender and it would be easy to punch a hole through from inside the cockpit, through the side of the panelling to the left of your left foot (open the door and look inside the fender), to provide a second hole out of the fender, where there isn't much water gushing down from the rain. I'd rather put it there that monkey around with drilling through the firewall by the brakes / clutch area, where water runs down from the windshield.
__________________
My Snow and Sand build thread
Mark_BC's 2000 Limited Salvage Build
Determined to keep them from becoming parts trucks. Yes, even the one I just picked up as a parts truck...
Last edited by Mark_BC; 10-02-2017 at 03:30 PM.
|
|
|
Reply With Quote
|
|
05-30-2018, 03:00 AM
|
#24
|
|
Senior Member
|
|
Join Date: Sep 2016
Location: North Vancouver, BC
Posts: 1,740
Real Name: Just call me the Grease Monkey
|
|
|
Senior Member
Join Date: Sep 2016
Location: North Vancouver, BC
Posts: 1,740
Real Name: Just call me the Grease Monkey
|
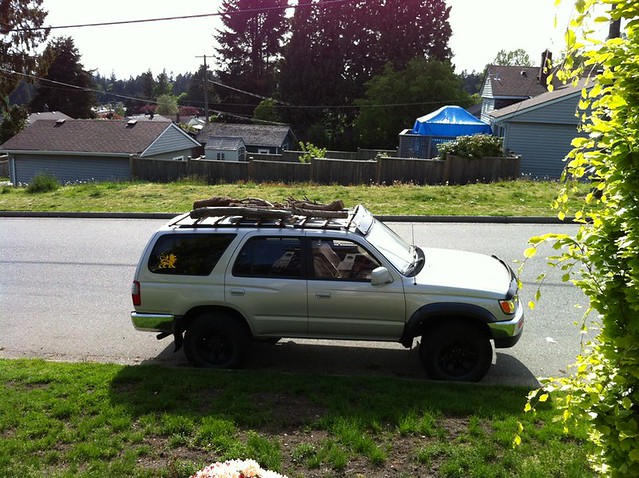
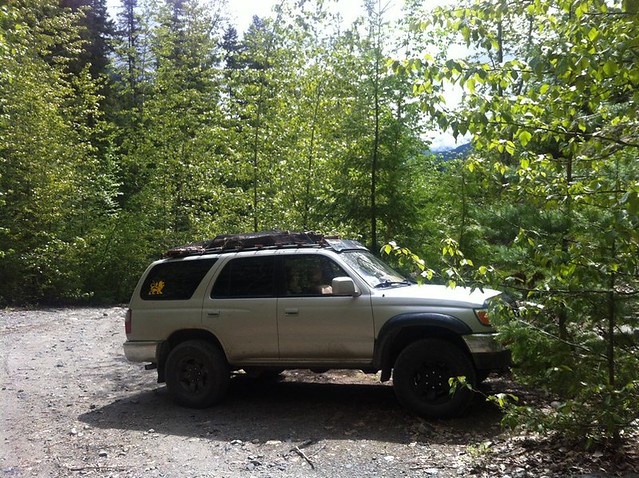
I really like my full length roof rack. It would be nice to actually finish it sometime and paint it so it doesn't rust. Great for lumber or lugging old mattresses to the dump.
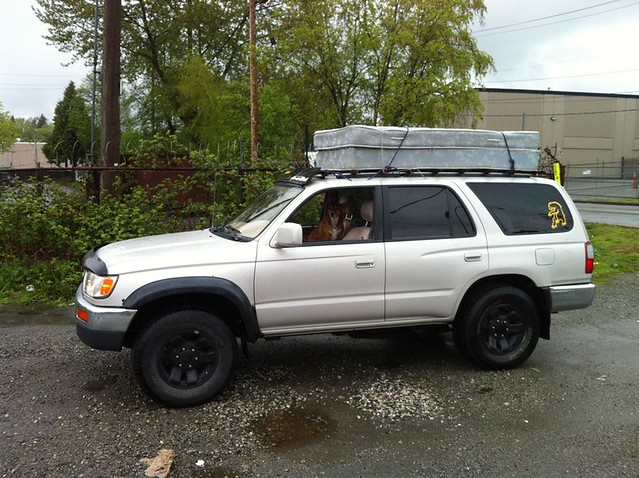

Two weekends ago we took an early trip up to the Chilcotins.
Drying out the firewood on the roof a week before:
The Hurley had just opened! I survived the Hurley! It was pouring up top of course but only spitting down below.
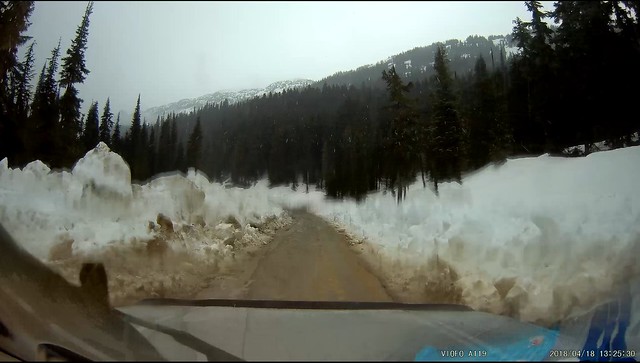
These little cars sure can move at the right tire pressure! 22 psi seemed to be the sweet spot. Handled like a dream flying down the gravel road.
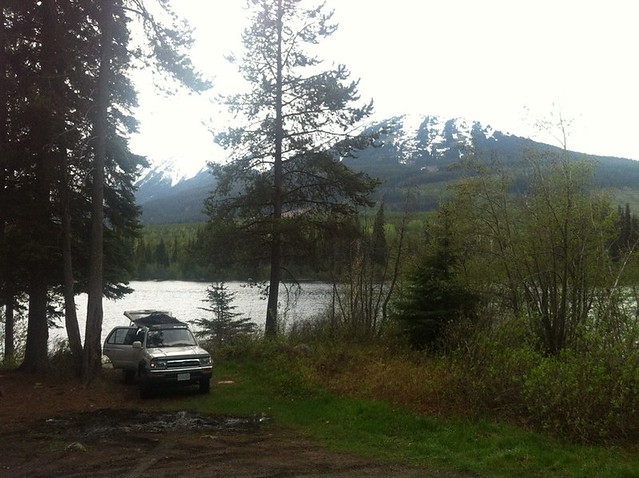
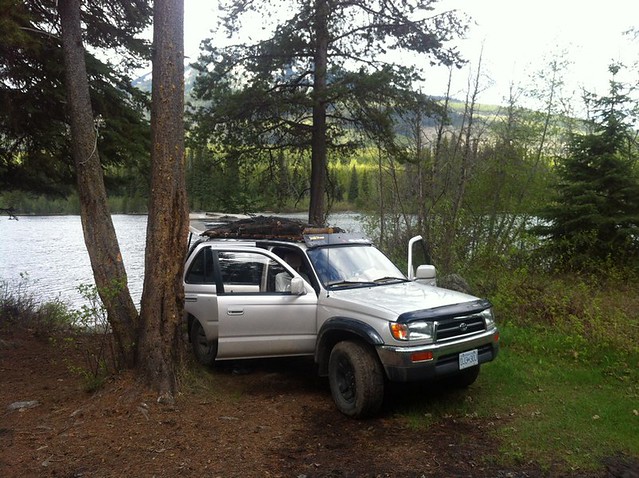
We went looking for Gwenyth Lake which I knew was there somewhere and it didn't disappoint. Lakefront camping with no one else there and a loon serenading in the morning.
Got to Gold Bridge next morning and the Tyax lodge was closed so we decided to drive east to the dam and then cross over to Seton Portage. Lots of hydro projects here with powerlines everywhere. We took the rough road along Anderson Lake to the Birkenhead Lake area.
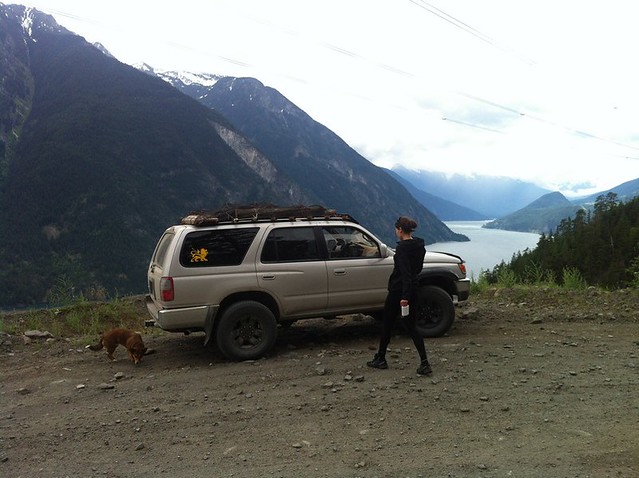
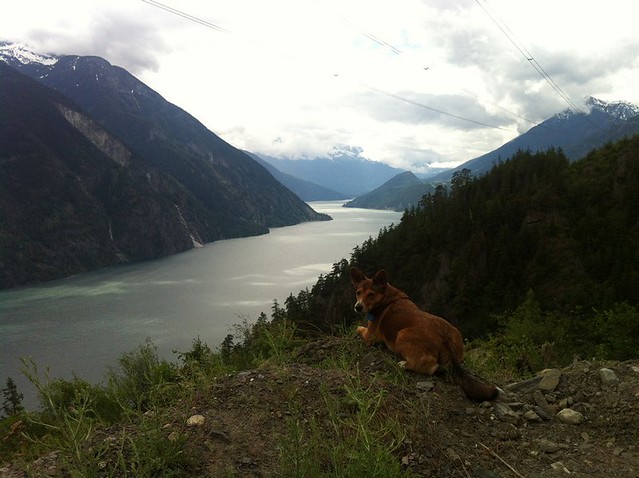
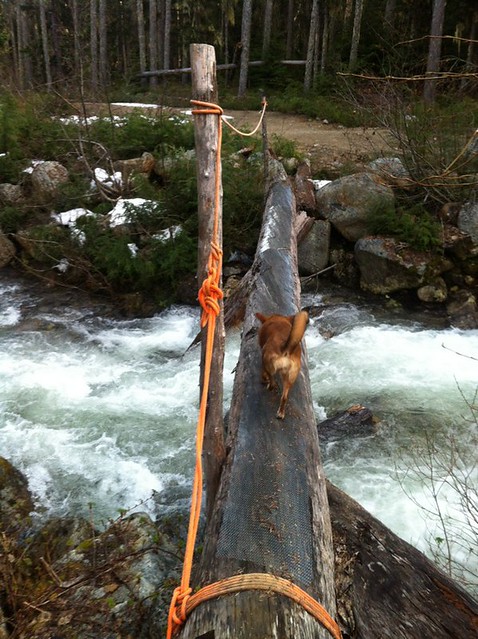
Everyone and his dog was at Birkinhead Lake for the long weekend but a short drive up a side road took us to Phelix Creek which was raging.
A nice afternoon hike up the trail and over a sketchy log bridge.
Then home that night.
We'll go back better armed to get to the hot springs.
__________________
My Snow and Sand build thread
Mark_BC's 2000 Limited Salvage Build
Determined to keep them from becoming parts trucks. Yes, even the one I just picked up as a parts truck...
|
|
|
Reply With Quote
|
|
06-18-2018, 02:31 AM
|
#25
|
|
Senior Member
|
|
Join Date: Sep 2016
Location: North Vancouver, BC
Posts: 1,740
Real Name: Just call me the Grease Monkey
|
|
|
Senior Member
Join Date: Sep 2016
Location: North Vancouver, BC
Posts: 1,740
Real Name: Just call me the Grease Monkey
|
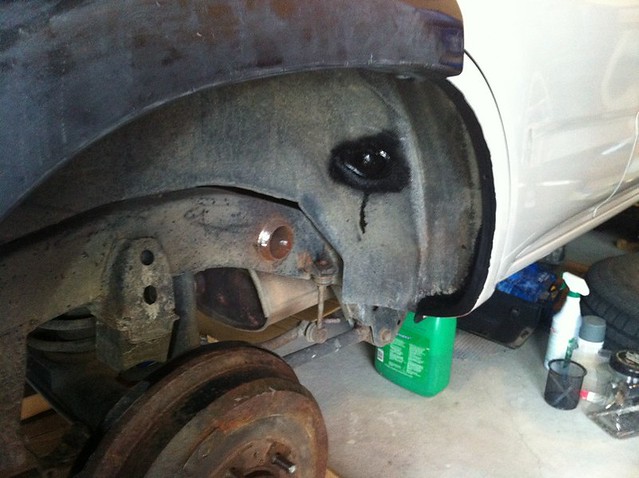
I had some rust forming in the lower pinch weld in the rear wheel well. The pinch weld had separated and was rusting between. I didn't want that progressing so I went to town with the dremel.
My plan was to rip it apart down to sound metal and then fill it back up with the goopy stuff they put in there. I started a thread on it here. I removed the stuff fairly easily and cleaned it up. There wasn't much metal left when I was finished with it.
Also I checked inside my rockers and they are rusting again!!! I went through all the effort to soak them with Ospho then several coats of spraying in Eastwood Frame Paint, and then after one day of driving on the Oregon coast with rain and salt spray, it all starts rusting through again!!!!! (I did rinse off the salt within 1 day)
Screw this frame paint, I'm just going to use Fluid Film. On accessible areas underneath I'll remove all rust and properly paint. Also I might use Por15 in other areas.
So anyways, I decided to just use bondo which I think will work fine. I used the long strand stuff and it sets pretty fast. This is what it looked like after that:

Then I used some fine bondo filler:
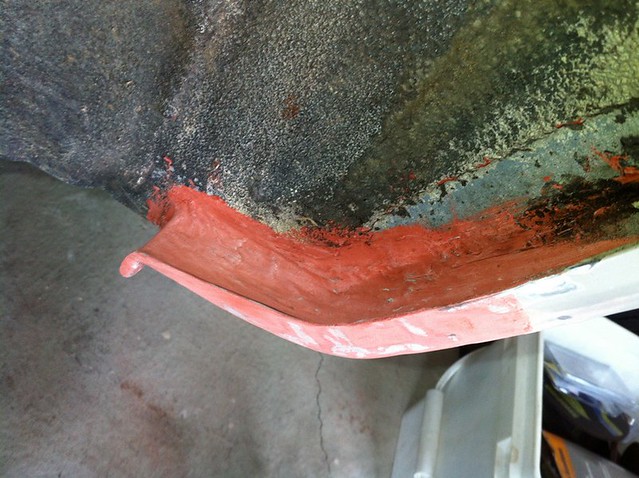
Primed up where the metal was showing:

I also went around all the clip holes through the whole wheel well arch and ground off the rust bubbles and touched up with primer.
Then I got some rubberized rocker panel paint to go over it all to protect it. I also cleaned up and re-rubberized that bolt that sticks through from the rear seat belt. This stuff looks really nice. If I want to make the underside look nice I'll powerwash all the wheel wells and put this stuff on it. We'll see how it holds up first. Low on the list of priorities...
Then I turned my attention to the driver's door rocker panels which are getting the stupid rust bubbles again. Last time I only primed them, and didn't top coat so I guess it was getting through. This time I bought the touch up paint from the place linked from toyotareference.com with
@ octanejunkie
's help. They get bad reviews for customer service but the paint seems great. A perfect match from what I can see in the garage. We'll see when it's outside I guess. If it is that good of a match I might get a few more cans just to have on hand. The good part about that is if you get any overspray on the other areas it isn't a problem...
I didn't do a very good job of making the paint all nice and smooth underneath so you can definitely see the areas where I ground off and primed. Maybe later I'll do a better job and then clear coat it. For now I just want it covered.
And I also finally painted up the center caps for my mom's 4runner that I painted the wheels of a few years ago. Now her wheels will look complete. This paint looks great and it seems to be holding up well. It is Rust-oleum silver rim paint. I put them on little blocks of wood to keep them off the cardboard. I previously stripped most paint off with aircraft stripper. This didn't do a compete job and kind of screwed up the plastic. But I sanded the rest of the paint off and the surface of the plastic to make a good adhering surface for the new paint.

__________________
My Snow and Sand build thread
Mark_BC's 2000 Limited Salvage Build
Determined to keep them from becoming parts trucks. Yes, even the one I just picked up as a parts truck...
Last edited by Mark_BC; 06-18-2018 at 03:12 AM.
|
|
|
Reply With Quote
|
|
04-13-2019, 05:48 PM
|
#26
|
|
Senior Member
|
|
Join Date: Sep 2016
Location: North Vancouver, BC
Posts: 1,740
Real Name: Just call me the Grease Monkey
|
|
|
Senior Member
Join Date: Sep 2016
Location: North Vancouver, BC
Posts: 1,740
Real Name: Just call me the Grease Monkey
|
291,472 km Got around to checking the compression on Sandy as per
@ mtbtim
's video. Passed with flying colours. The numbers actually seem a bit high, maybe the gauge wasn't calibrated right. So I guess the cream under the oil cap is from short trips? But they aren't short trips. Also the coolant seemed to go down a little bit, maybe there's a leak somewhere else. And as to the sweet smelling white exhaust, maybe that's because the cat is shot?

Plugs were a little carbony so I washed in POR degreaser then water and sanded the electrode a bit. They have about 25,000 km on them I think so this will be their mid-life check and clean.

Throttle body looks clean.

So that's great. She's in the garage so the next big items are the front differential swap and new clutch. Also would like to get the manual hubs together and swapped in.
__________________
My Snow and Sand build thread
Mark_BC's 2000 Limited Salvage Build
Determined to keep them from becoming parts trucks. Yes, even the one I just picked up as a parts truck...
Last edited by Mark_BC; 04-13-2019 at 05:58 PM.
|
|
|
Reply With Quote
|
|
04-20-2019, 02:08 PM
|
#27
|
|
Senior Member
|
|
Join Date: Sep 2016
Location: North Vancouver, BC
Posts: 1,740
Real Name: Just call me the Grease Monkey
|
|
|
Senior Member
Join Date: Sep 2016
Location: North Vancouver, BC
Posts: 1,740
Real Name: Just call me the Grease Monkey
|
So I checked compression on the truck I used to call Snowy, the dark green one that lives at my mom's house. But I since got a white one so I can't call Snowy Snowy anymore. She will hereafter be named Sea because she lives close to the ocean. The new white one will now be known as Snowy and of course, Sandy will stay as Sandy. I could never rename you, Sandy! You're a legend after all that Baja sand you've been through. Anyone know how to rename threads since the title is now wrong????!!!!
Anyways, I suspected a bad head gasket because it went through at least three overheating events where the needle was way up at the top. One of those was from the rear heater lines rusting out and draining all the coolant. The other two were from going up a steep mountain slowly with a bad fan clutch so there wasn't enough cooling. The exhaust looks kind of white and smells sweet. And the oil cap has cream under it.
But I since realised that most vehicles of that era have stinky exhaust, probably because the cats are old. And the white exhaust could be from old gas with water in it. And the cream under the oil cap could be from taking short trips.
The results were 210 and 215 psi across the board. So she's good!!! I have no blown head gaskets! Talk about paranoia man. Amazing that it's still so good after overheating like that.
So now she needs some new LBJ's, some rear tail lights, a new windshield, and probably a new steering rack guide, new fan clutch, oil change, PCV valve, change power steering fluid, new shocks, yadda yadda yadda the usual stuff, and she'll be ready to go!!
Plus I'll work on the cosmetic things like replacing the pieces of rust hanging on the front and back that were once called bumpers, and clean the paint up.
I'll also get the new rear end cleaned up and painted and ready to swap in since the one in there now rusted out and I had to JB weld the pumpkin cover.
__________________
My Snow and Sand build thread
Mark_BC's 2000 Limited Salvage Build
Determined to keep them from becoming parts trucks. Yes, even the one I just picked up as a parts truck...
Last edited by Mark_BC; 04-20-2019 at 04:23 PM.
|
|
|
Reply With Quote
|
| Thread Tools |
|
|
| Display Modes |
Rate This Thread |
 Linear Mode Linear Mode
|
|
 Posting Rules
|
You may not post new threads
You may not post replies
You may not post attachments
You may not edit your posts
HTML code is On
|
|
|
|


