Home Menu

Site Navigation


User Tag List

Reply
 
Thread Tools Rating: Thread Rating: 8 votes, 5.00 average. Display Modes
Old 04-05-2017, 10:04 AM #1
ramonortiz55 ramonortiz55 is offline
Senior Member
 
Join Date: Apr 2015
Location: Texas
Posts: 3,649
ramonortiz55 has a spectacular aura about ramonortiz55 has a spectacular aura about
ramonortiz55 ramonortiz55 is offline
Senior Member
 
Join Date: Apr 2015
Location: Texas
Posts: 3,649
ramonortiz55 has a spectacular aura about ramonortiz55 has a spectacular aura about
Replacing Valve Cover Gaskets - A True Write Up - **PICTURES**

I decided to create a writeup for Replacing the valve cover gaskets on my 2001 4runner since I couldn't find a true write up on here.

Most of the valve cover gaskets involved no pictures, not enough, or missing information.

So here we go:

Decided to do a detailed writeup for swapping the valve cover gaskets on my 2001 4runner.

This job took me nearly two days - It was my first time doing this and I do like to take my time while working on cars. I've been known to start working on a car, leave it alone and come back and finish it a few days later. LOL.

I know some of you are not as patient as me, I just am never in a rush when working on cars.

So this it the list of items needed with Toyota Part numbers:

1. Valve cover gaskets - Part #11213-62020 - 2 Total
2. Spark Plug Tube gaskets - Part #11193-16010 - 6 Total
3. Intake Plenum Gaskets - Part #17176-62040 - 2 Total
4. Washer Seals - Part #90210-05007 - 16 Total
5. Camshaft Plugs - Part #11188-62010 - 2 Total
6. Halfmoon Plugs - Part #11183-62010 - 4 Total
7. PCV Valve Grommet - Part #90480-18001 - 1 Total
8. Toyota FIPG seal packing - Part #00295-00103 - 1 Tube

[COLOR=rgb(255, 0, 0)]**Throw the PCV Valve Grommet and Spark Plug Tube Gaskets in the Freezer a night before. I will explain why later**[/COLOR]

Mandatory parts picture:


My research links:

[COLOR=rgb(0, 102, 204)]http://www.toyota-4runner.org/3rd-gen-t4rs/91765-valve-cover-gasket.html[/COLOR]

[COLOR=rgb(0, 102, 204)]http://www.toyota-4runner.org/3rd-g...e-cover-gasket-replacement-part-s-n-pics.html[/COLOR]

[COLOR=rgb(0, 102, 204)]http://www.yotatech.com/f2/5vzfe-leaky-valve-covers-fixed-56k-beware-149594/[/COLOR]

[COLOR=rgb(0, 102, 204)]http://www.toyota-4runner.org/3rd-gen-t4rs/109197-valve-cover-gasket-replacement-job.html[/COLOR]

Now let's tackle this job!

First step is removing the airbox assembly, loosen airbox bolts and straps:


unplug mass airflow sensor and any other connectors in the vicinity:


There will be a smaller airbox towards the firewall with some airlines connecting into it, remove the airhoses and the small airbox:


Don't forget the airhoses that run towards the front of the engine towards the piping of the airbox:


Loosening these thinner clamps will help removing the piping to the airbox:


Remove another plug, this one is right besides the accelerator cable:


Three cooling lines will be feeding into the throttle body, these can be removed also:


Another plug:


Remove the accelerator cable off the throttle, this can be done by clocking the body of the spring and sliding it out carefully:


Another picture of everything removed:


Remove the two top nuts that are holding the throttle in position:


Now remove the bottom bolts that are holding the throttle in position:

ramonortiz55 is offline   Reply With QuoteReply With Quote
Old 04-05-2017, 10:05 AM #2
ramonortiz55 ramonortiz55 is offline
Senior Member
 
Join Date: Apr 2015
Location: Texas
Posts: 3,649
ramonortiz55 has a spectacular aura about ramonortiz55 has a spectacular aura about
ramonortiz55 ramonortiz55 is offline
Senior Member
 
Join Date: Apr 2015
Location: Texas
Posts: 3,649
ramonortiz55 has a spectacular aura about ramonortiz55 has a spectacular aura about
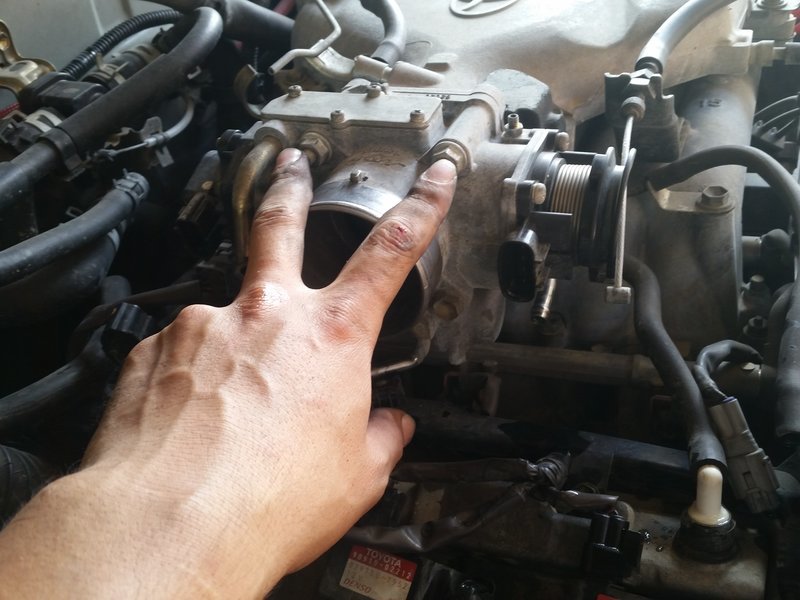
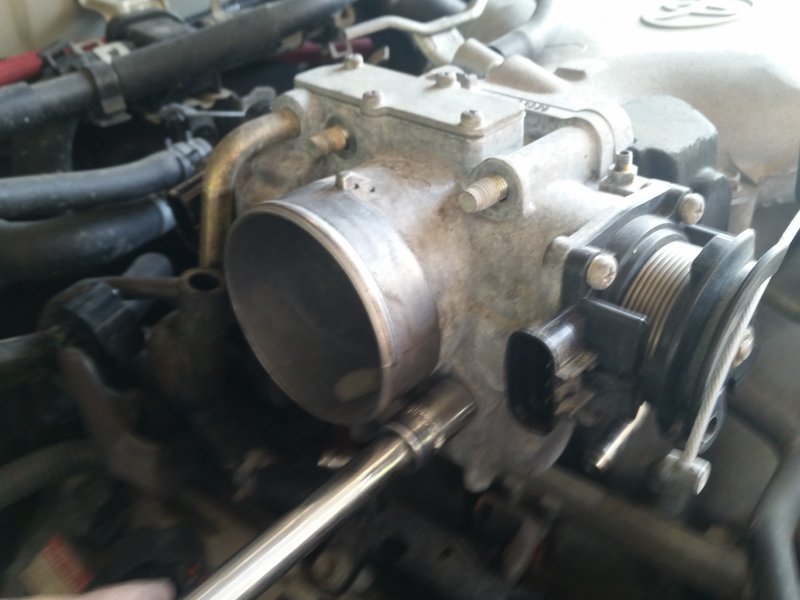
Pull off the throttle gently, pay real close attention how the metal gasket is oriented. It needs to go back the same way or your truck will explode:


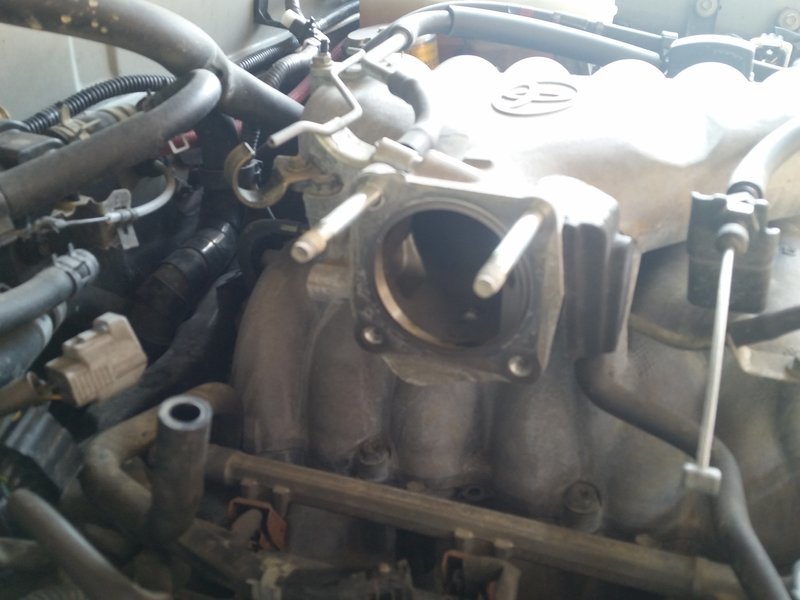
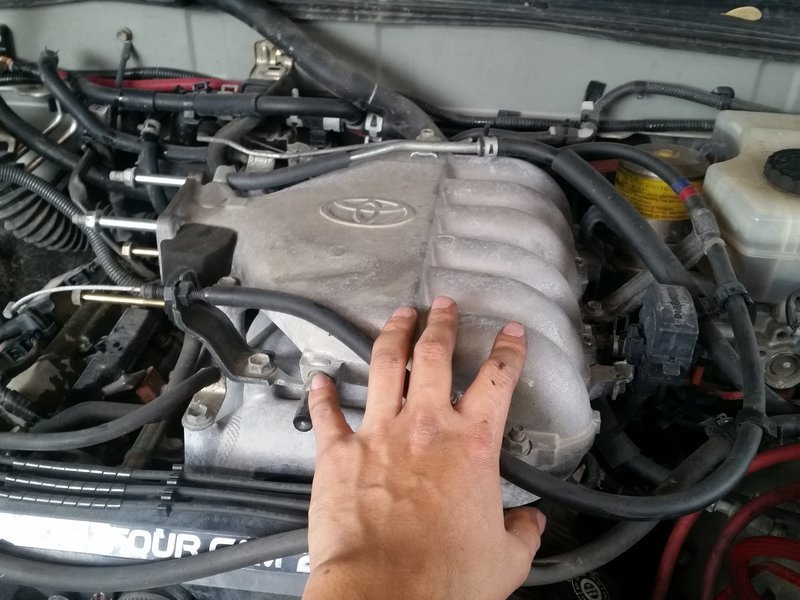
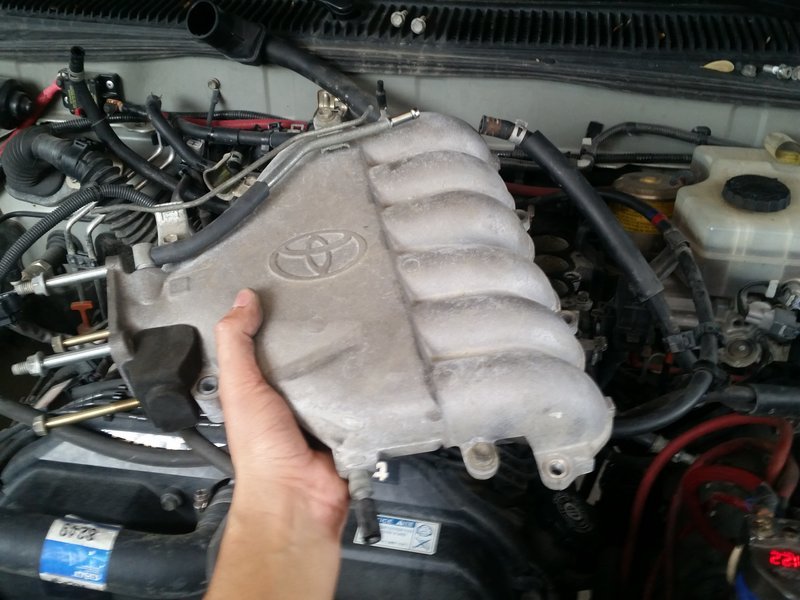
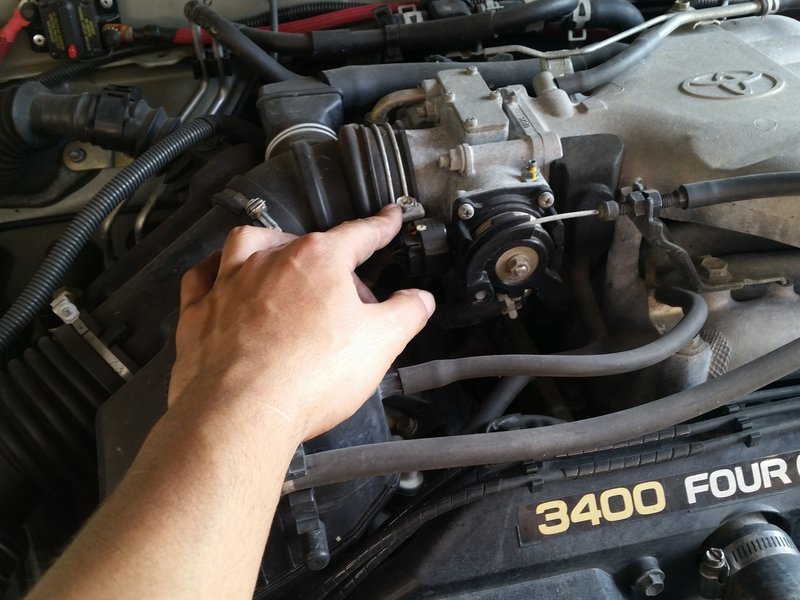
Next, we will remove the upper intake manifold. Make sure to give it a good stare before you start. Nice, hard, evil stare. You're going to own that intake manifold. It's yours. Touch it. Feel it. Be the Manifold:


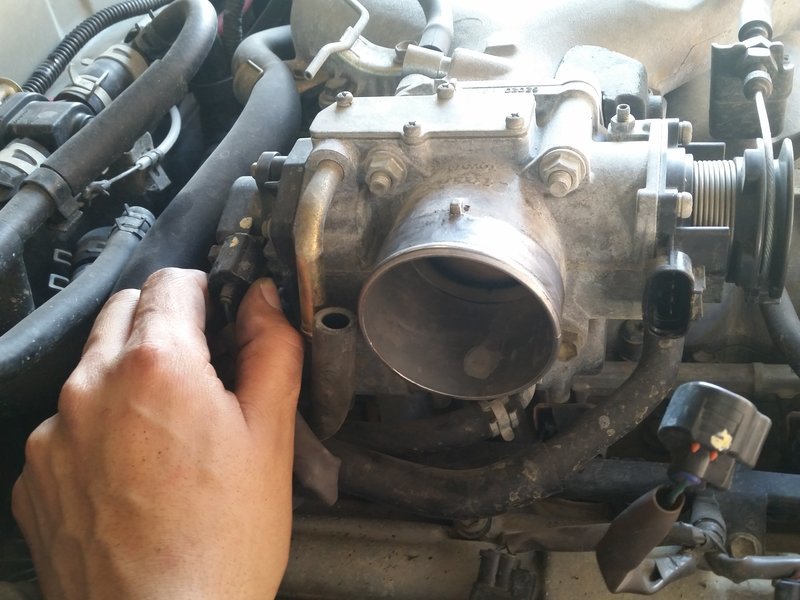
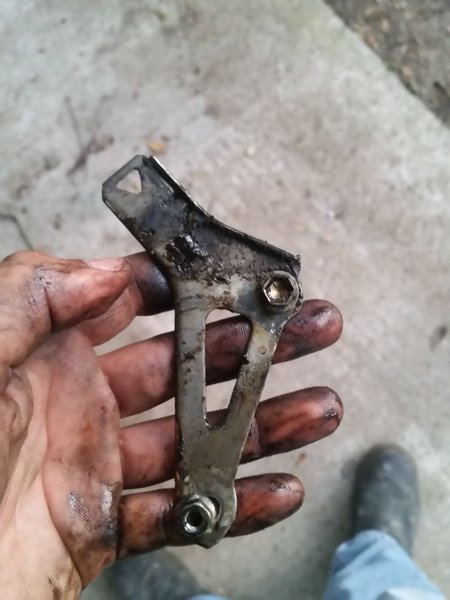
To remove it loosen these brackets that hold the speedometer cable:


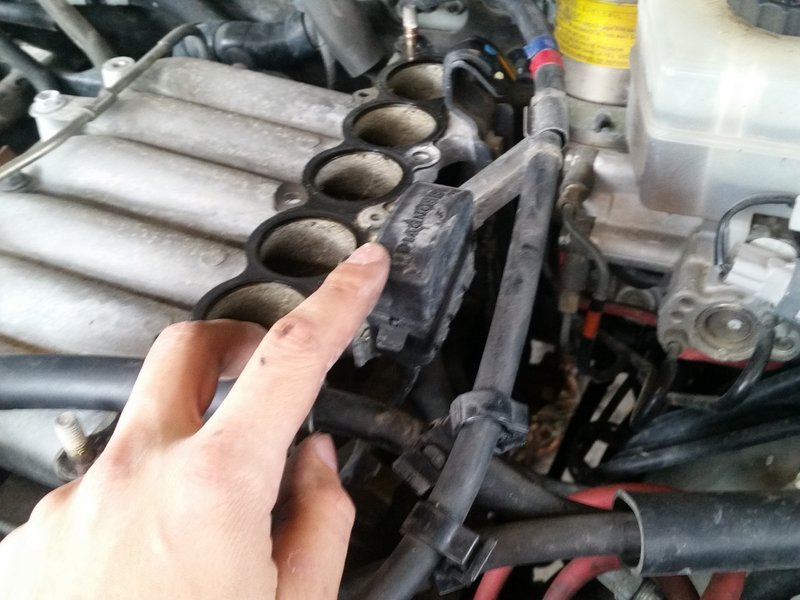
and these other brackets that are on the driver's side of the manifold. (the bracket with the blue paint might need to be removed from the other end if you cant fit a ratchet at the upper bolt):


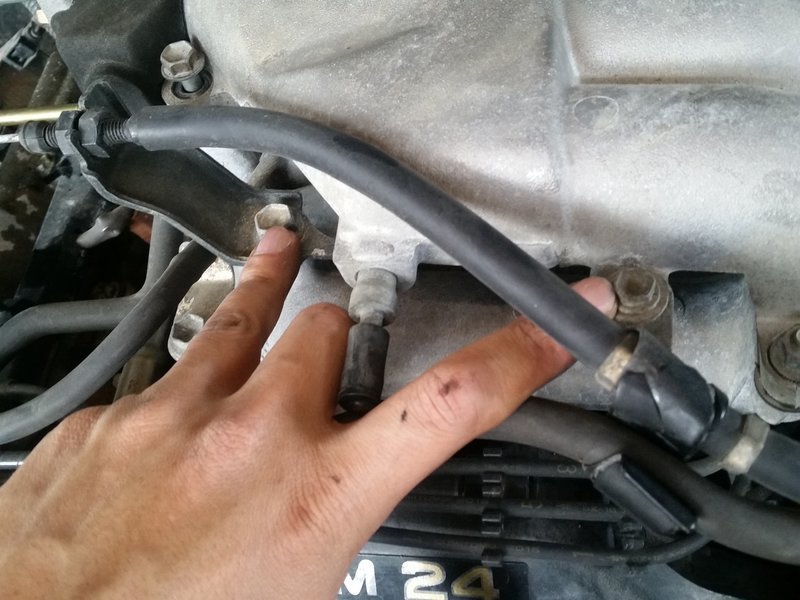
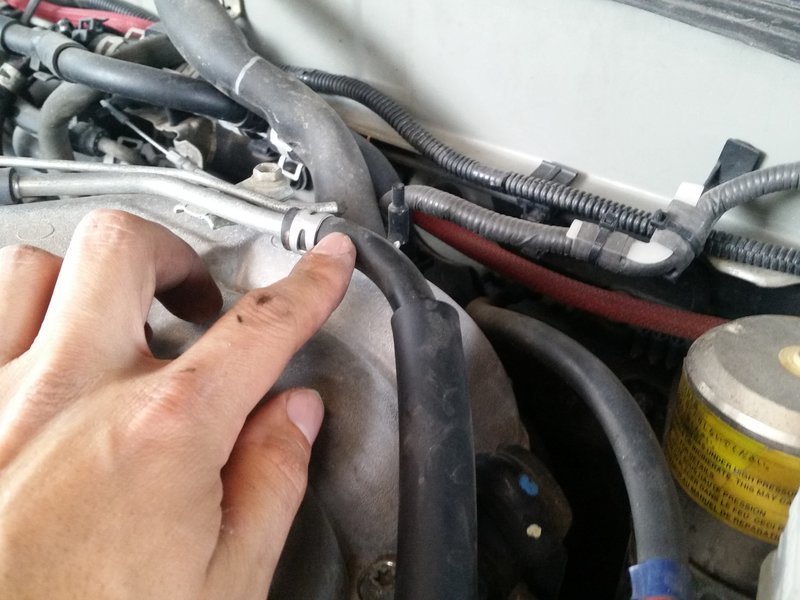
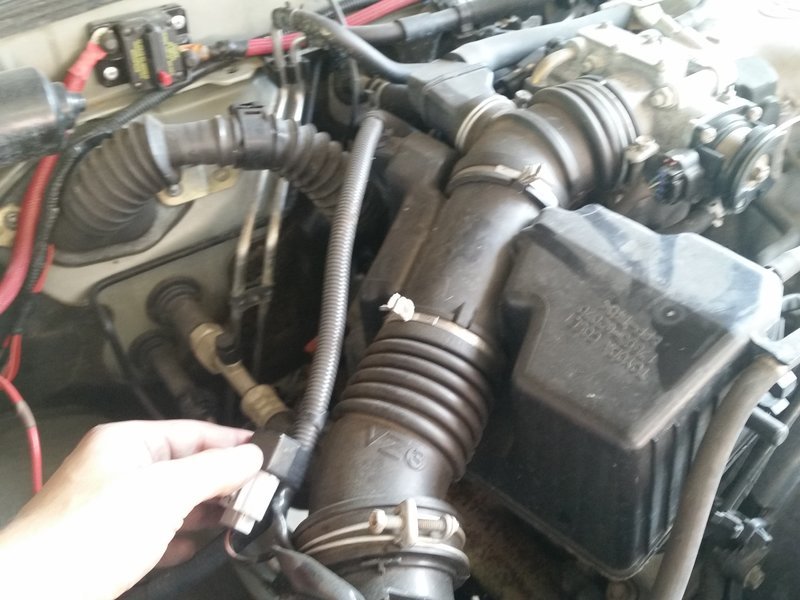
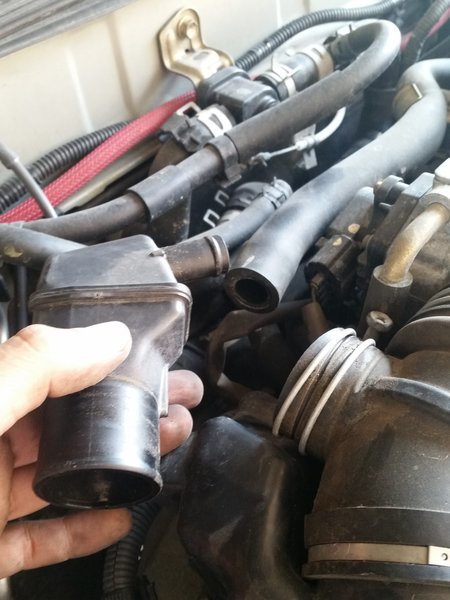
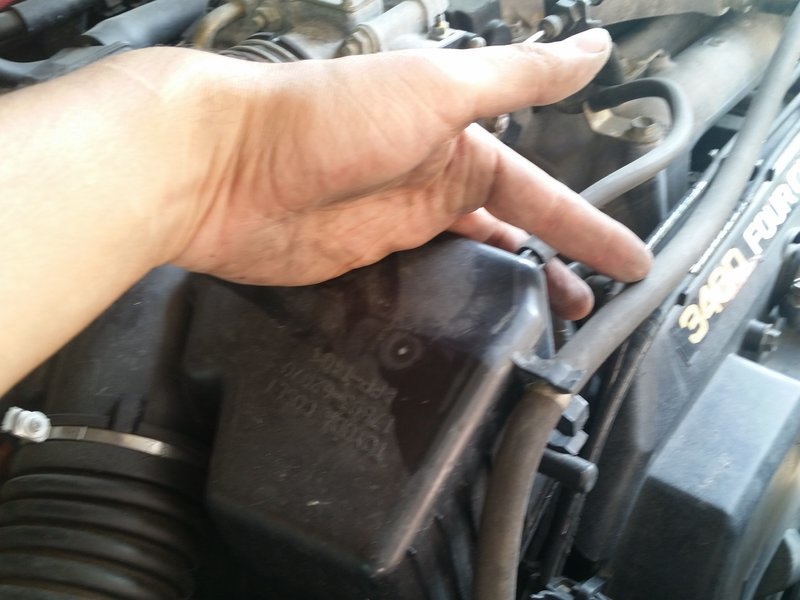
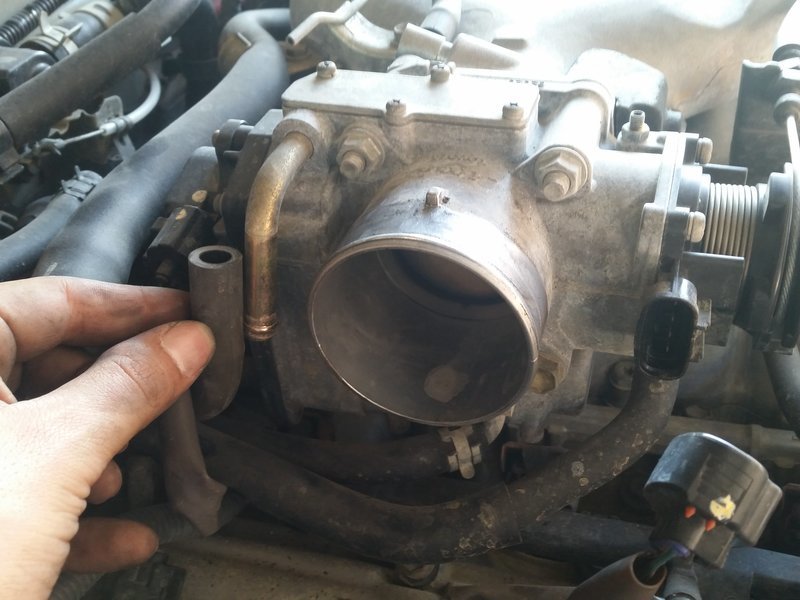
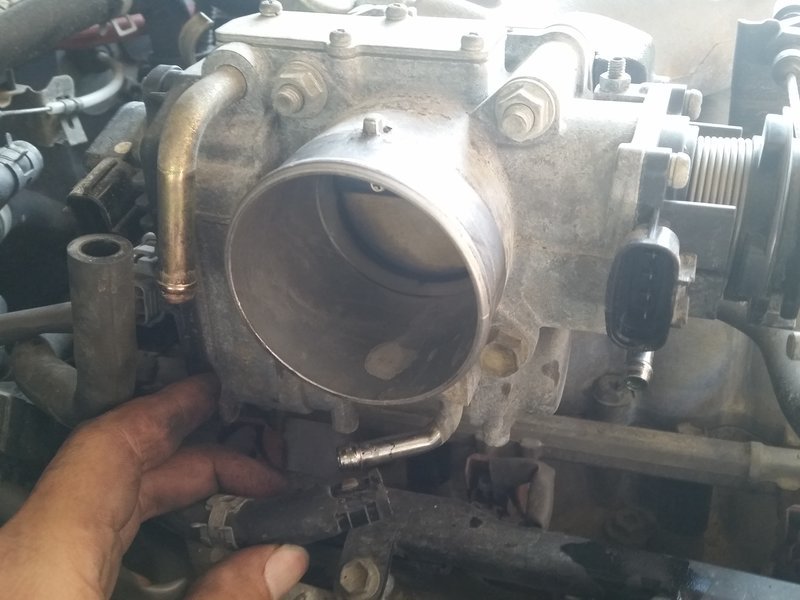
disconnect this hose at the far end of the manifold, on top:


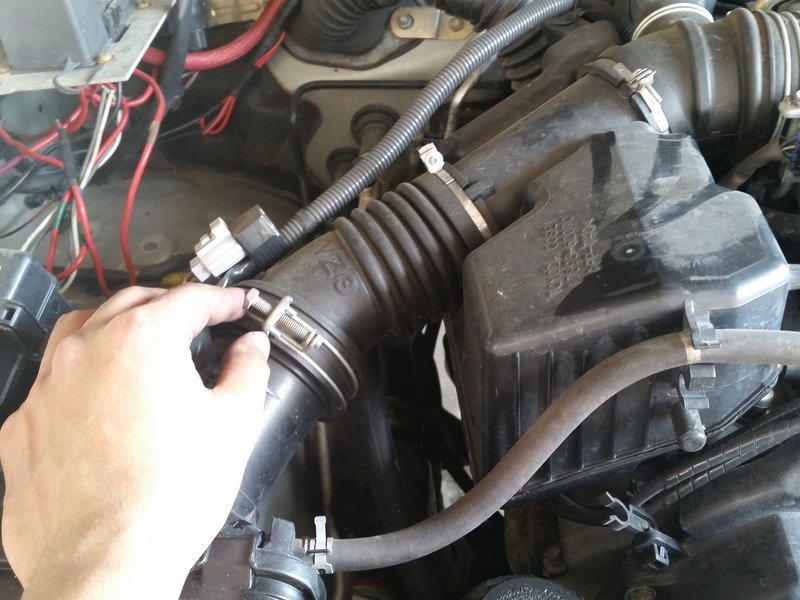
Next, remove all the other bolts that hold down the intake manifold - Not pictured. Manifold should then come off.


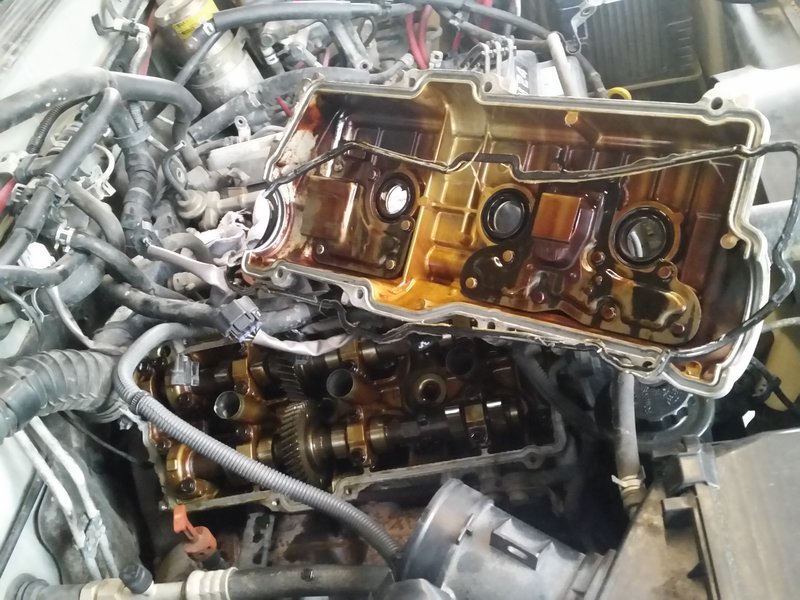
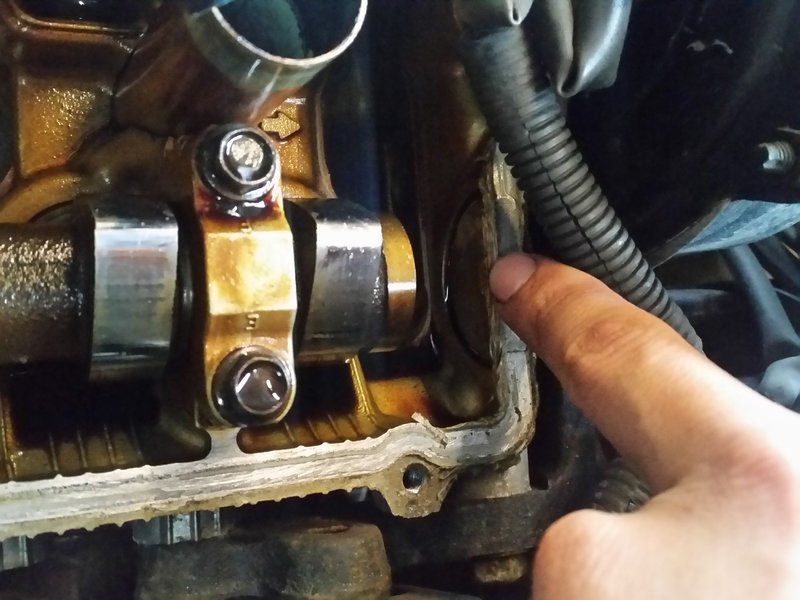
Now time to remove the lower intake manifold -

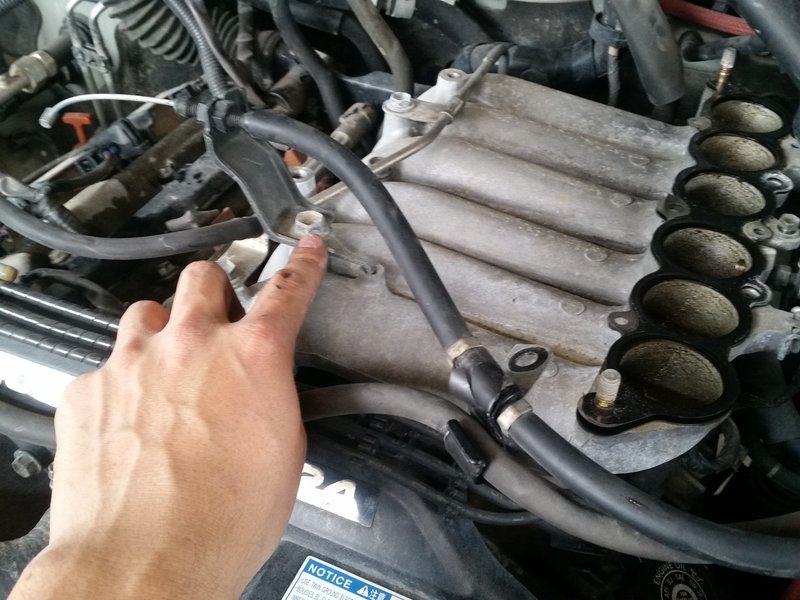
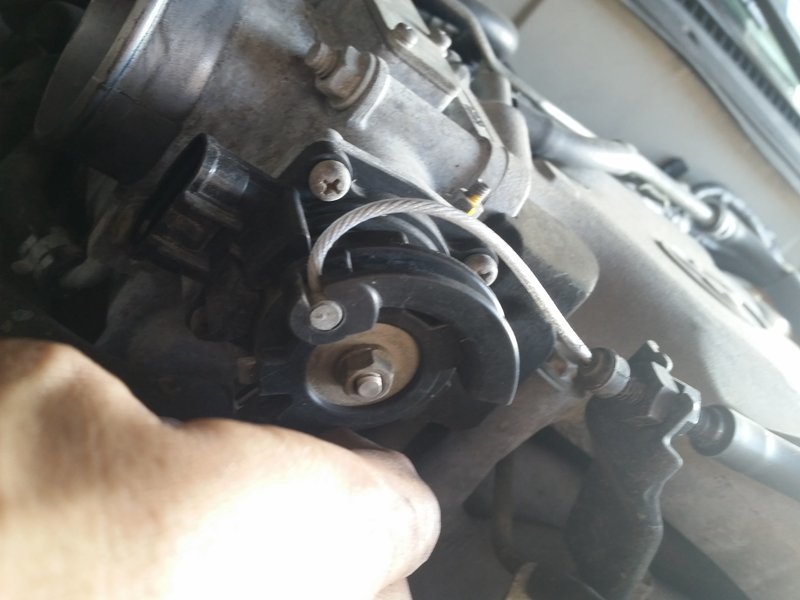
If for some reason you couldn't take the speedometer bracket off due to it being too congested, you can take it off now:


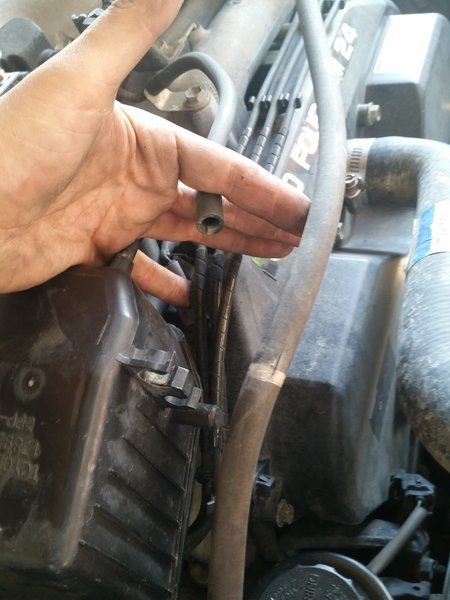
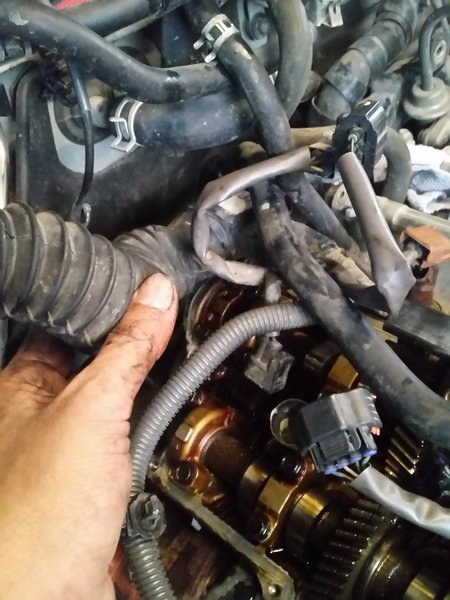
This stainless tubing has hose attached to the ends, take off the hose. I didn't have to remove the tubing itself, just the hose.


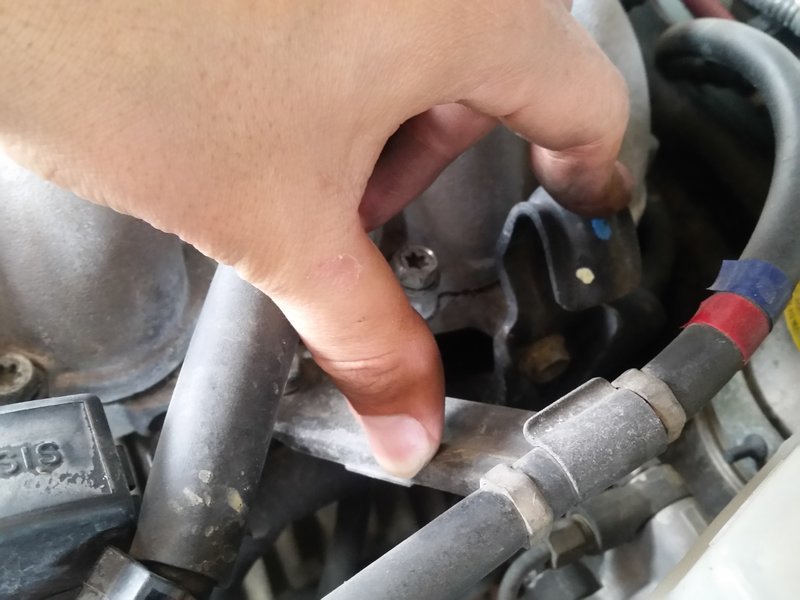
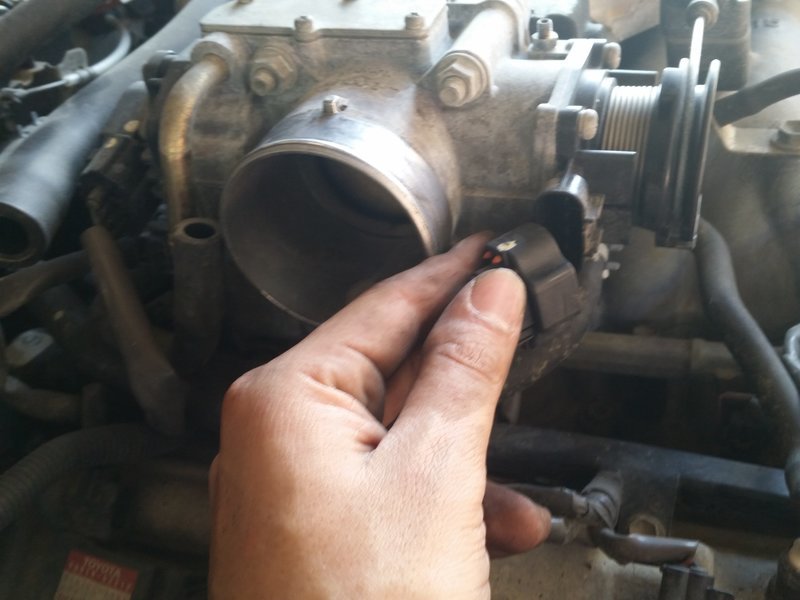
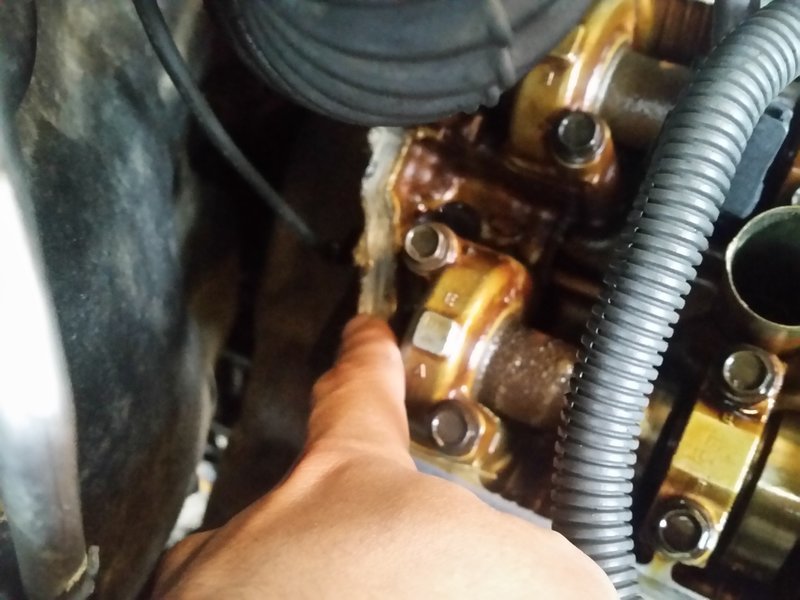
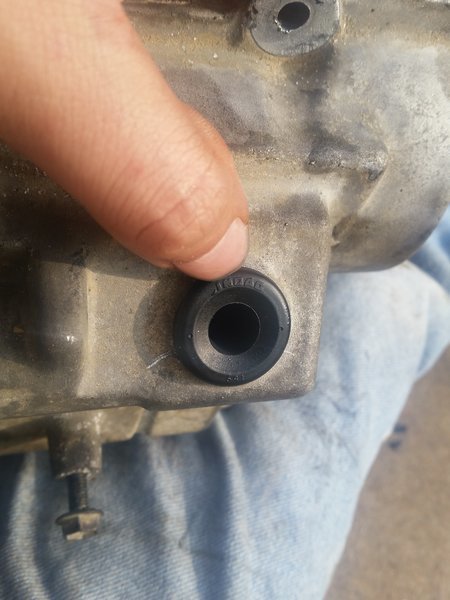
Remove the computer diagnostics port that is attached on the driver's side of the manifold:


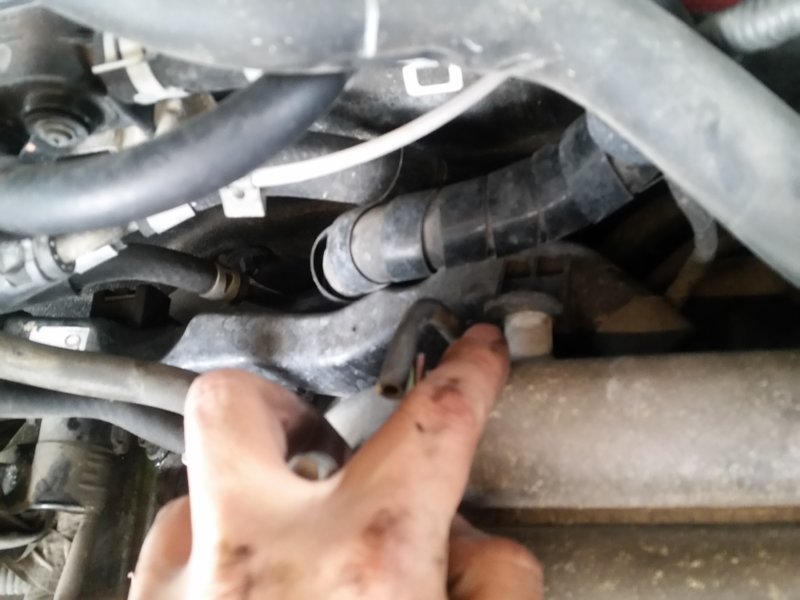
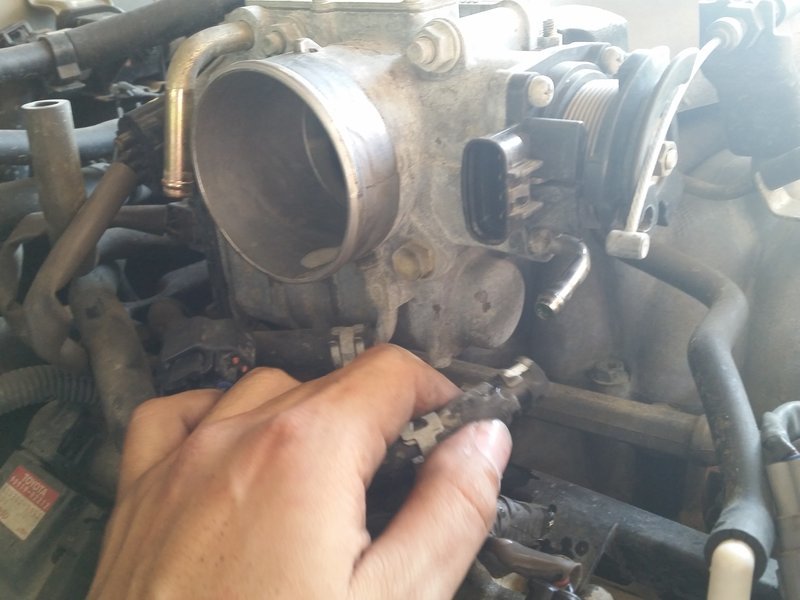
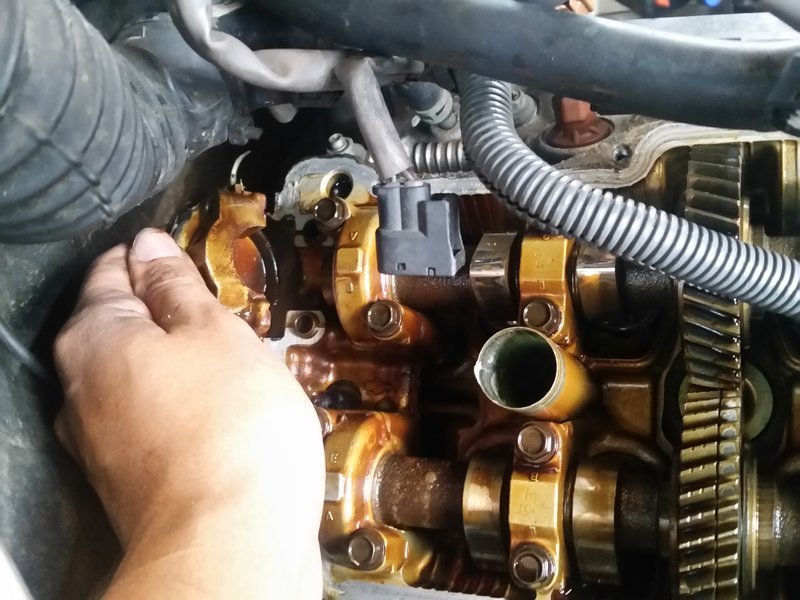
At the back of the lower intake manifold, there is a bolt holding the wiring harness, remove it.


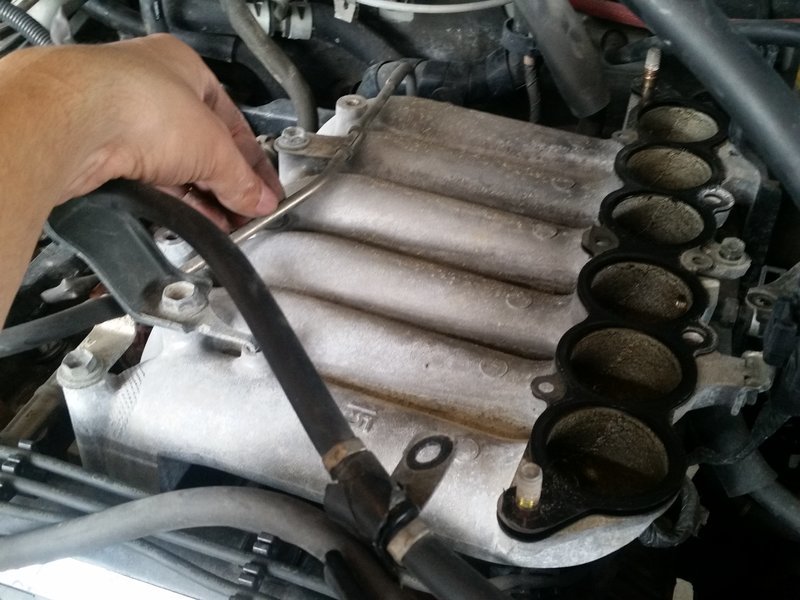
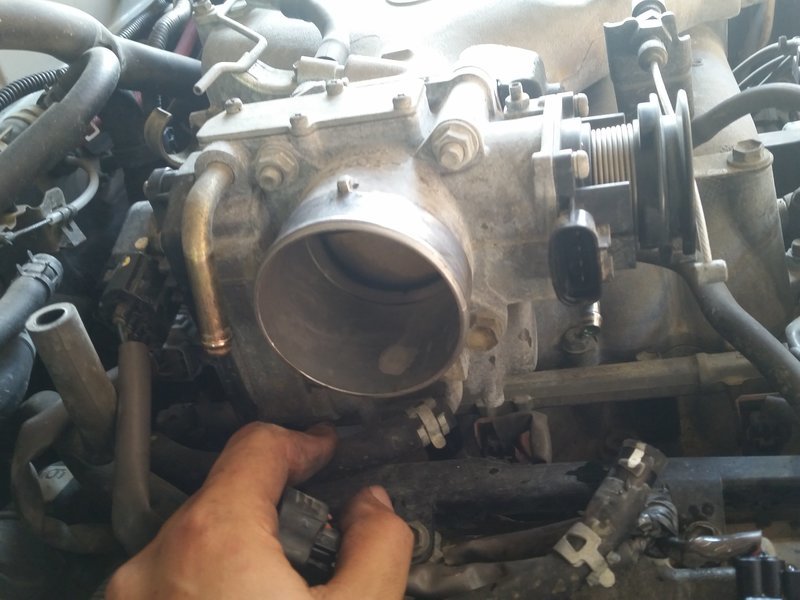
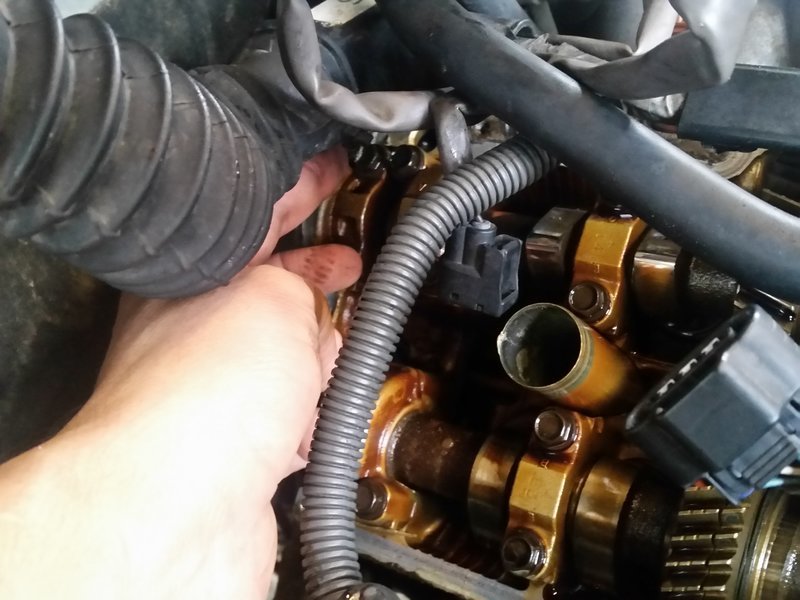
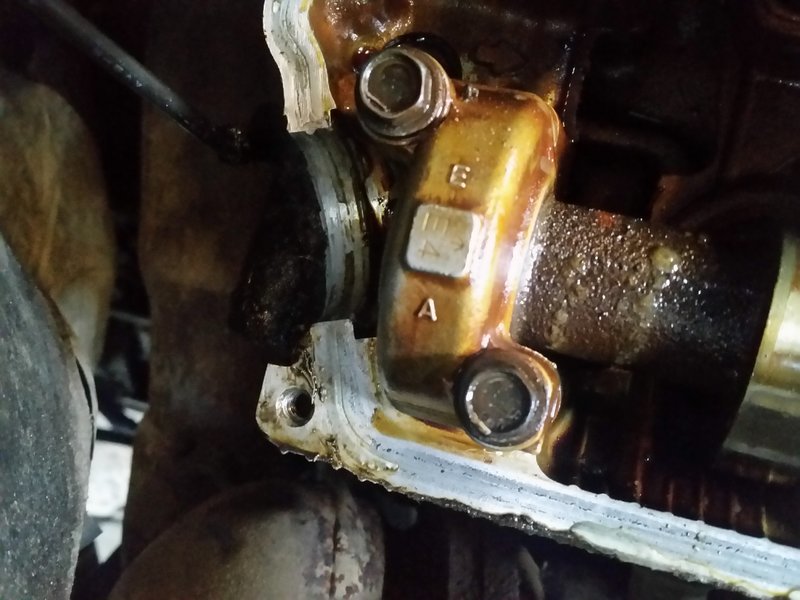
At this time, the bolts holding the lower intake manifold can now be removed.


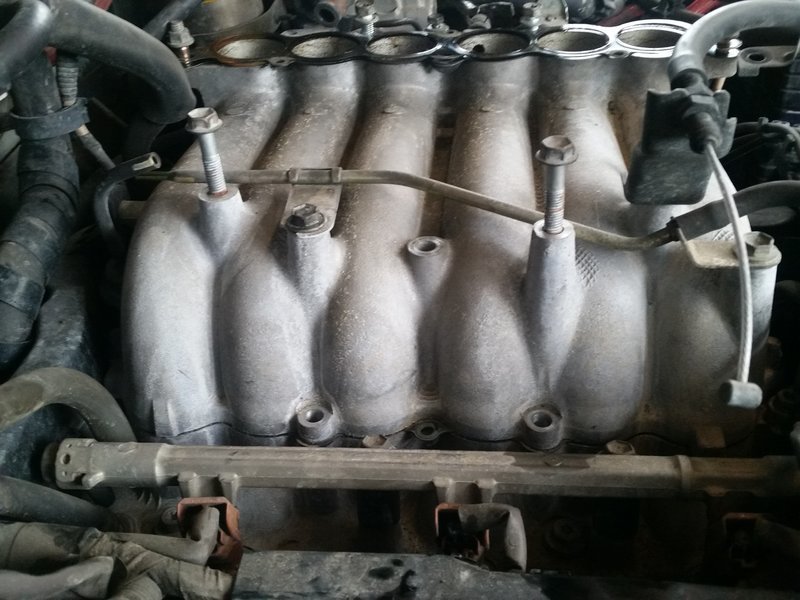
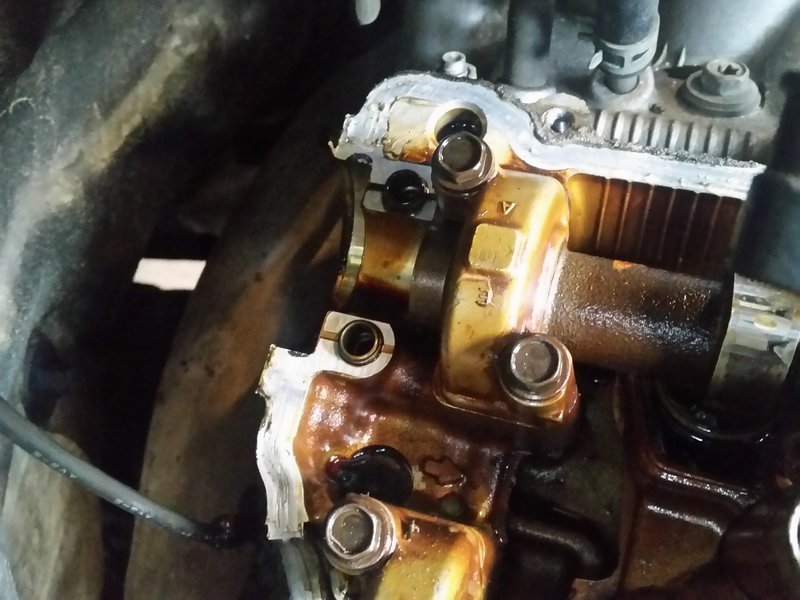
Remove the remaining bolts holding the lower intake manifold down:


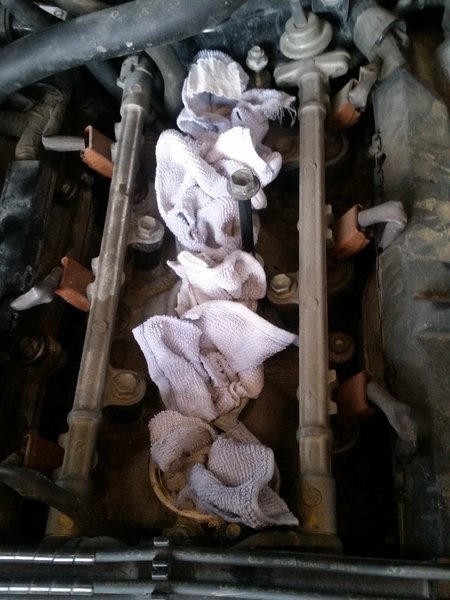
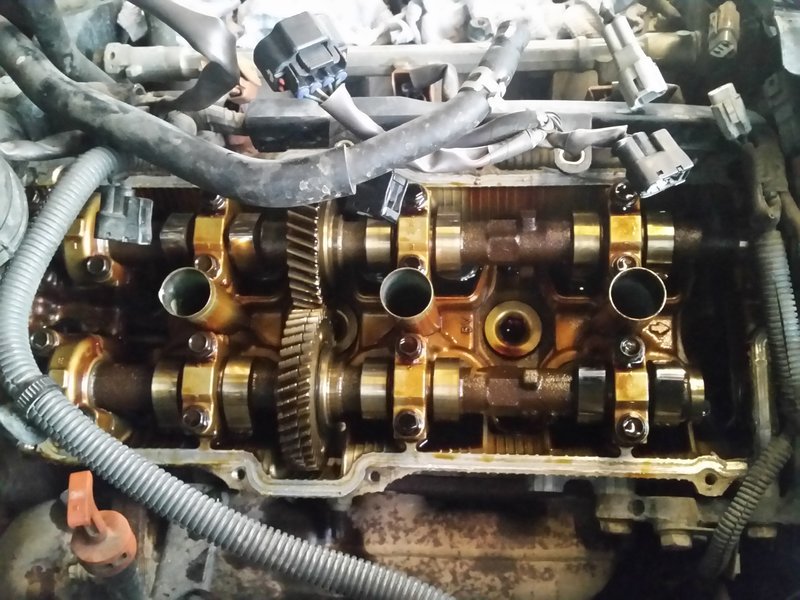
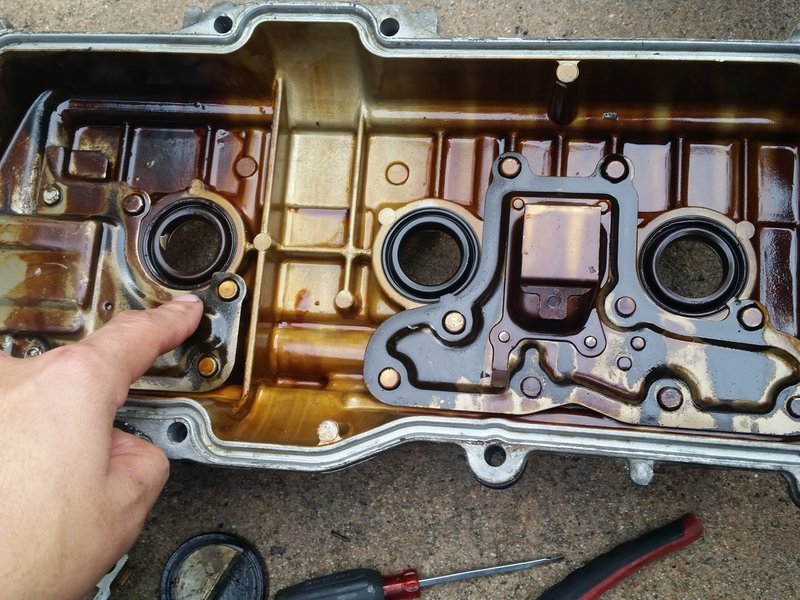
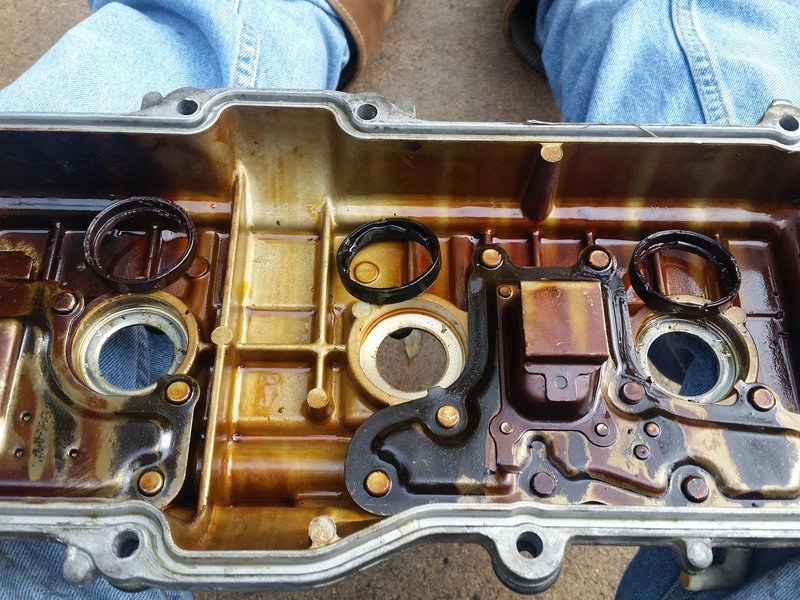
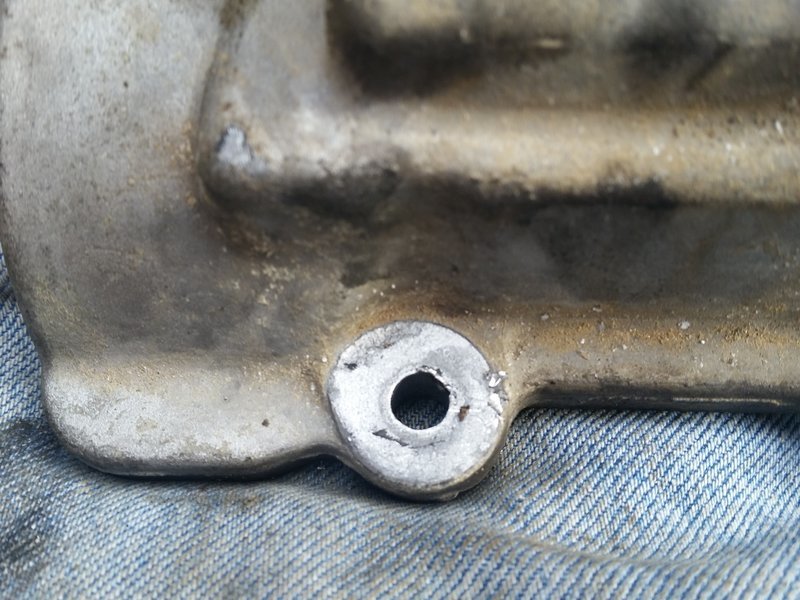
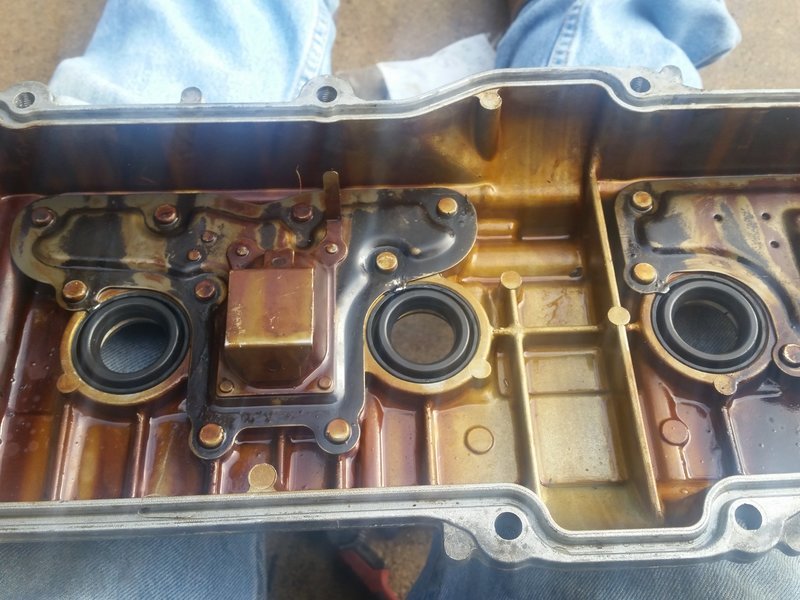
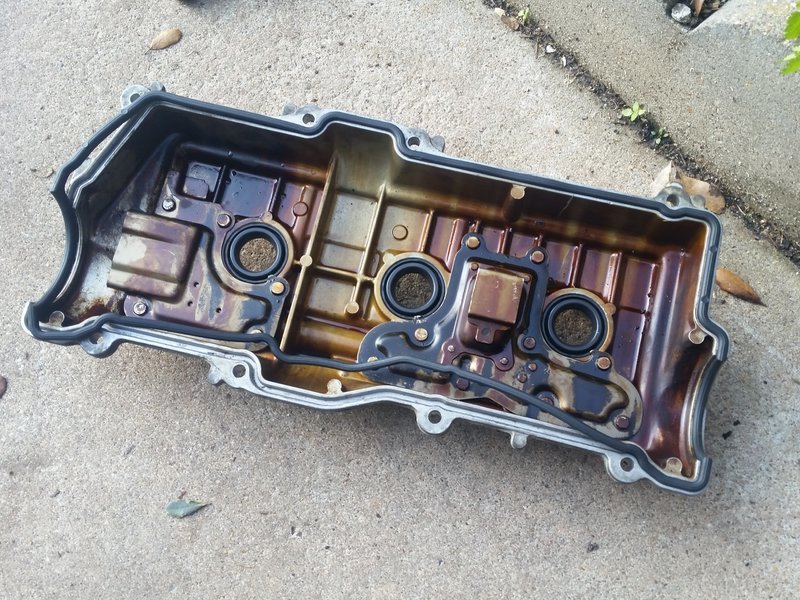
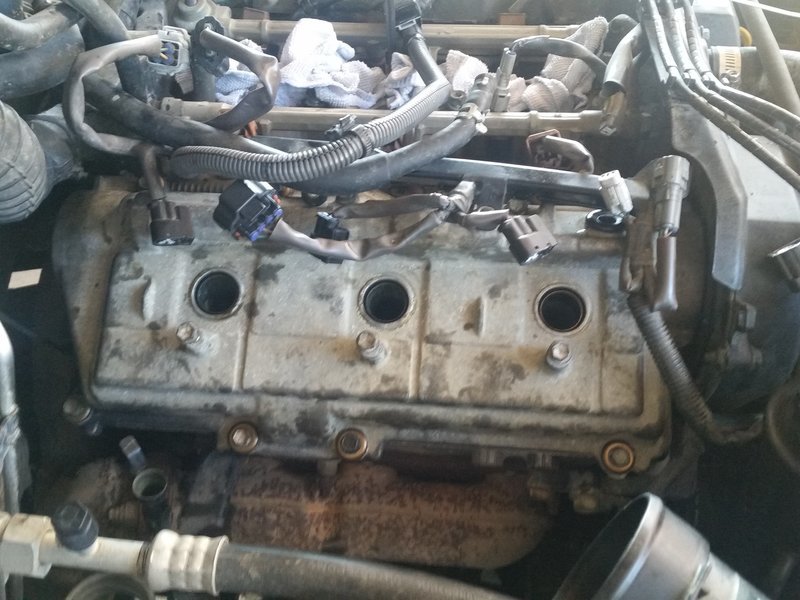
Once the lower intake manifold is removed, cover up the exposed intake chambers with a rag, tape, etc to prevent stuff from falling in there. You do NOT want a bolt falling in there. Might as well jump off a bridge:


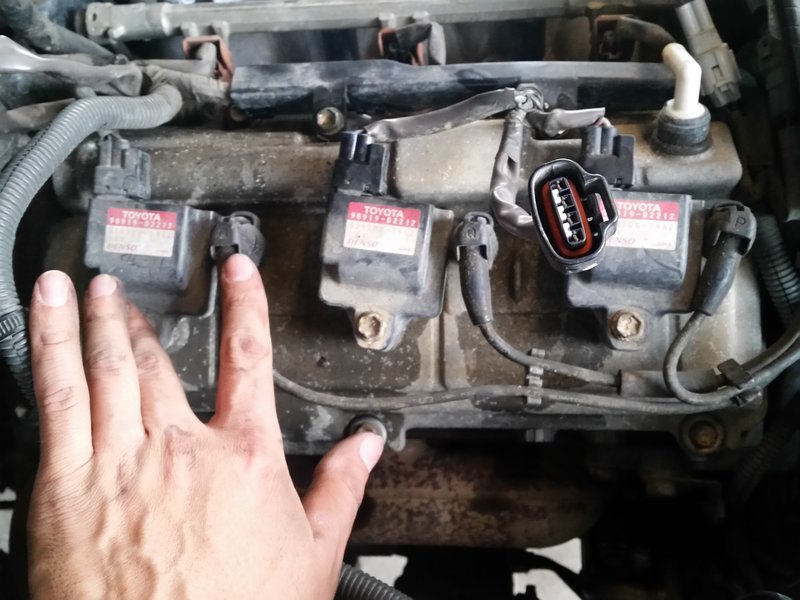
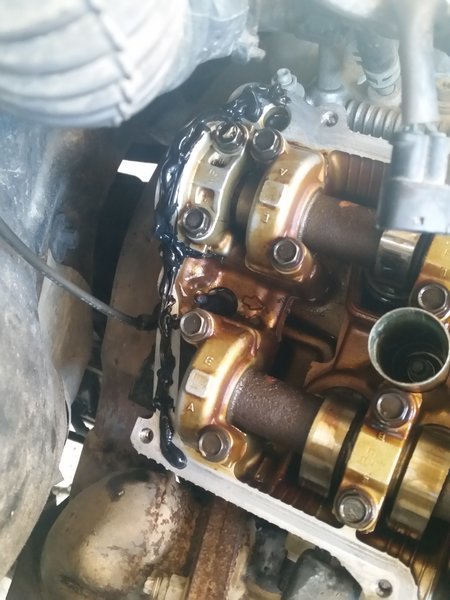
Moving onto the passenger side valve covers, remove the spark plug wires and coil packs:


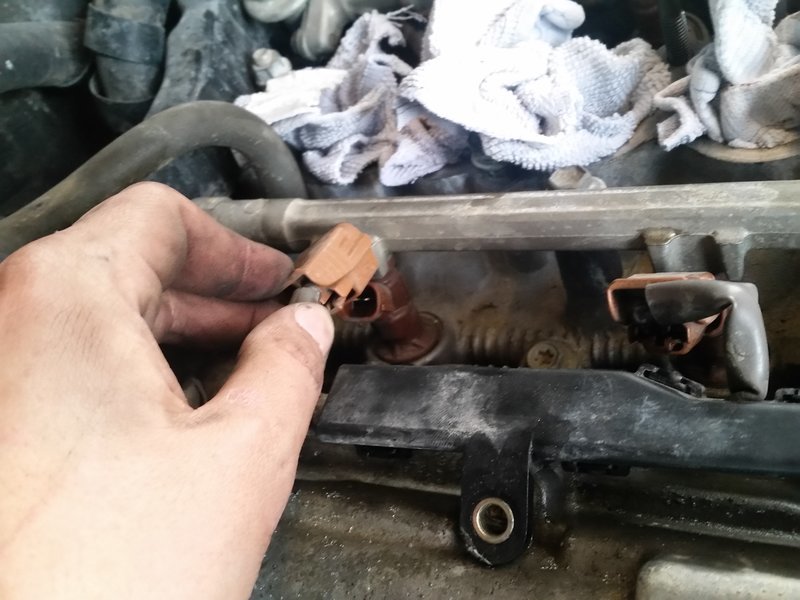
disconnect the injectors:


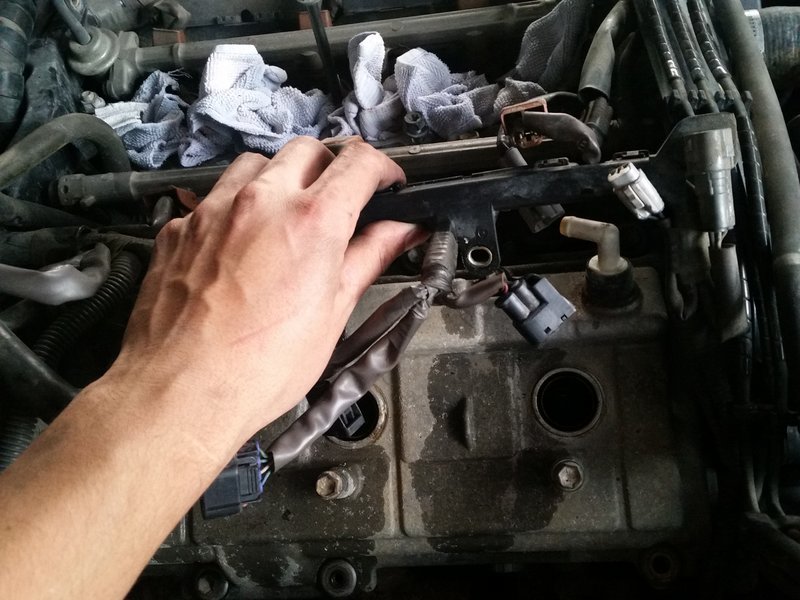
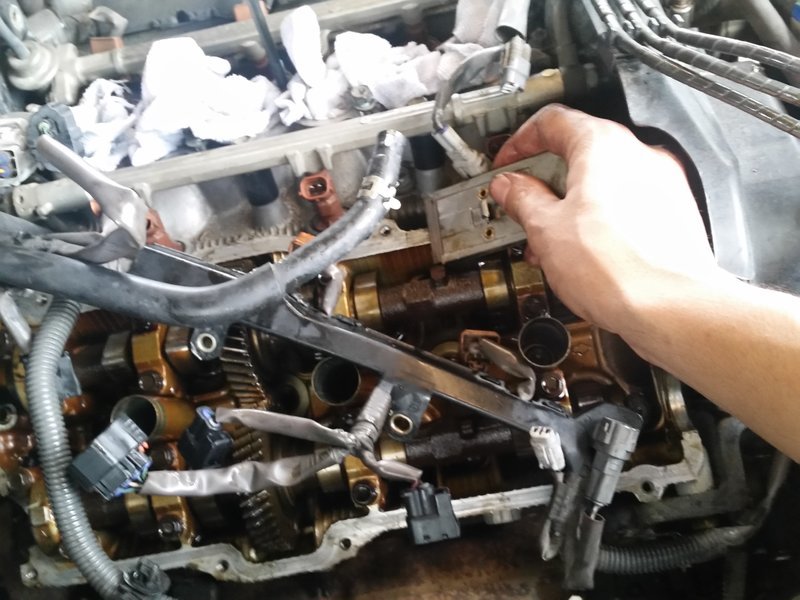
Remove the bolts holding down a wire bracket - This will not be able to be removed completely, but taking the bolts off will make the job easier. It will give you room to work with.
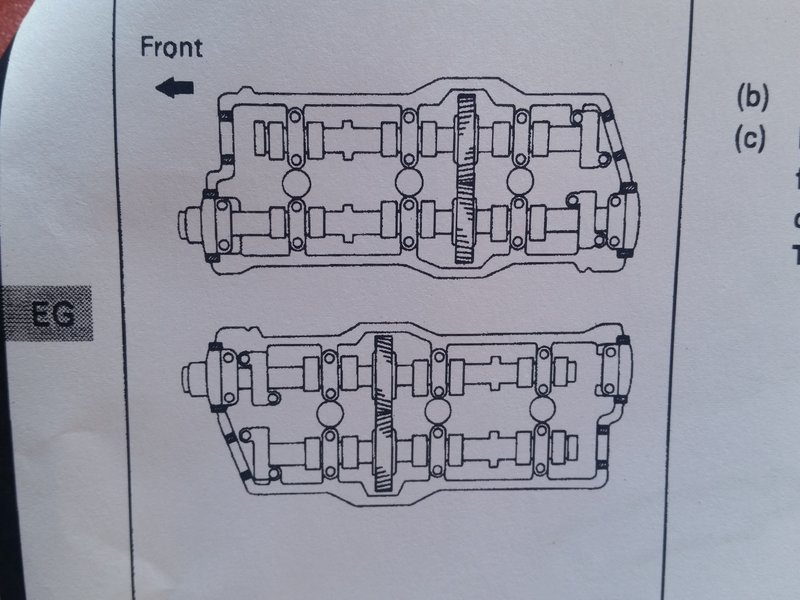
ramonortiz55 is offline   Reply With QuoteReply With Quote
Old 04-05-2017, 10:06 AM #3
ramonortiz55 ramonortiz55 is offline
Senior Member
 
Join Date: Apr 2015
Location: Texas
Posts: 3,649
ramonortiz55 has a spectacular aura about ramonortiz55 has a spectacular aura about
ramonortiz55 ramonortiz55 is offline
Senior Member
 
Join Date: Apr 2015
Location: Texas
Posts: 3,649
ramonortiz55 has a spectacular aura about ramonortiz55 has a spectacular aura about
At this time, the valve cover can be removed:


So beautiful, so clean. Thanks to frequent oil changes


At the end of the engine heads there will be a wiring harness attached to a bracket, close to where my hand is at. If you feel around, you will find it. This will need to be removed:


Looks like this:


There are two halfmoon plugs per side:

one in the front:


one in the back:


one camshaft plug in the back that is being held down by two bolts:


The halfmoon plugs can be removed with some channel locks. Gently pry upward. UPWARD. You may wiggle a little. Just not much. Don't want to crack the head. :anonymous:

Removed:


Remove the camshaft plug:


At this time, make sure your supervisor approves your work:

ramonortiz55 is offline   Reply With QuoteReply With Quote
Old 04-05-2017, 10:06 AM #4
ramonortiz55 ramonortiz55 is offline
Senior Member
 
Join Date: Apr 2015
Location: Texas
Posts: 3,649
ramonortiz55 has a spectacular aura about ramonortiz55 has a spectacular aura about
ramonortiz55 ramonortiz55 is offline
Senior Member
 
Join Date: Apr 2015
Location: Texas
Posts: 3,649
ramonortiz55 has a spectacular aura about ramonortiz55 has a spectacular aura about
After you have received supervisor approval, clean off the old gasket material using any scraping tool. Make sure to scrape well in the areas where the halfmoon and camshaft plugs go:


After that is done get your valve cover and flip it over. The spark plug tube gaskets will now be replaced:


Grab a small screwdriver and tap the gasket from the other side:


Pull out the PCV grommet:


Now remove the old washers seals:


I did this by tapping it from the other end with a small flat head screwdriver:


At this point, go back to the freezer and grab the THREE replacement gaskets and the PCV grommet:


Pop the new PCV grommet in:


Pop the new replacement gaskets in. Some people use a large socket to get them to sit right. Since I froze them, they were able to shrink. Making my job easier:


Sit the new valve cover gasket carefully:


Notice the areas that will need seal packing, this is where the FIPG goes. Be generous. Don't skimp out, you want a nice noticeable ooze when you sit it on the head:


Install with new camshaft plug:

ramonortiz55 is offline   Reply With QuoteReply With Quote
Old 04-05-2017, 10:07 AM #5
ramonortiz55 ramonortiz55 is offline
Senior Member
 
Join Date: Apr 2015
Location: Texas
Posts: 3,649
ramonortiz55 has a spectacular aura about ramonortiz55 has a spectacular aura about
ramonortiz55 ramonortiz55 is offline
Senior Member
 
Join Date: Apr 2015
Location: Texas
Posts: 3,649
ramonortiz55 has a spectacular aura about ramonortiz55 has a spectacular aura about
Now goes the halfmoon plugs:


Same procedure, a nice noticeable ooze:


The Toyota manual indicated to add extra FIPG to the indicated locations:


I made sure it was on there


Set the cover on carefully:


Torque the valve cover bolts down to


The procedure for the driver's side is the same as the left, with the exception of a wiring harness section going above the valve covers:


I didn't chase down the harness to see what it was for, I just worked around it.

Once the driver's side is done, install everything as it was removed. Replace the plenum gaskets between the manifolds.


Done!

Last edited by ramonortiz55; 09-07-2017 at 09:32 AM.
ramonortiz55 is offline   Reply With QuoteReply With Quote
Old 04-05-2017, 10:17 AM #6
Airmapper's Avatar
Airmapper Airmapper is offline
Member
 
Join Date: Jan 2017
Location: Bowling Green, KY
Posts: 211
Real Name: Travis
Airmapper is on a distinguished road
Airmapper Airmapper is offline
Member
Airmapper's Avatar
 
Join Date: Jan 2017
Location: Bowling Green, KY
Posts: 211
Real Name: Travis
Airmapper is on a distinguished road
Wow, nice. I'm saving this for later.

I'm sure I'll be thanking you a lot when I eventually get to tacking this.
__________________
2000 Toyota 4Runner Limited
Photo Album - Build Thread - YouTube Channel
Airmapper is offline   Reply With QuoteReply With Quote
Old 04-05-2017, 10:19 AM #7
ramonortiz55 ramonortiz55 is offline
Senior Member
 
Join Date: Apr 2015
Location: Texas
Posts: 3,649
ramonortiz55 has a spectacular aura about ramonortiz55 has a spectacular aura about
ramonortiz55 ramonortiz55 is offline
Senior Member
 
Join Date: Apr 2015
Location: Texas
Posts: 3,649
ramonortiz55 has a spectacular aura about ramonortiz55 has a spectacular aura about
Quote:
Originally Posted by Airmapper View Post
Wow, nice. I'm saving this for later.

I'm sure I'll be thanking you a lot when I eventually get to tacking this.
It was a biAtch doing this for the first time.

It took me two days to finish it - I don't rush thru projects.

I've been known to start a project and go watch a few hours of TV then come back and finish it the next day lol.

I seriously take my time with everytime, that's why I don't mind doing this write-ups.
ramonortiz55 is offline   Reply With QuoteReply With Quote
Old 04-05-2017, 10:37 AM #8
afg10000's Avatar
afg10000 afg10000 is offline
Member
 
Join Date: Oct 2012
Location: oma-ha, NE
Posts: 841
afg10000 is on a distinguished road
afg10000 afg10000 is offline
Member
afg10000's Avatar
 
Join Date: Oct 2012
Location: oma-ha, NE
Posts: 841
afg10000 is on a distinguished road
Very friendly write up. Nice work.
__________________
'96 Limited - Locker - 127k- totaled out -
'01 Limited 175k - sunken and resurrected - stock, other than TBU 231mm
'98 Limited - Locker -158k-Bilstein 5100 Tacos- Toytec/Eibach 3" lift coils- diff drop-265/75/16 Duratracs -OME 890's-Bilstein 5125's, panhard bar drop, TBU 231mm, Spidertrax 1.25' spacers, Savage sliders, 2nd gen SC/URD 7th, JBA exhaust, HID retrofits -
afg10000 is offline   Reply With QuoteReply With Quote
Old 04-05-2017, 10:47 AM #9
Kingpin4534 Kingpin4534 is offline
Junior Member
 
Join Date: Mar 2017
Location: Durham NC
Posts: 2
Kingpin4534 is on a distinguished road
Kingpin4534 Kingpin4534 is offline
Junior Member
 
Join Date: Mar 2017
Location: Durham NC
Posts: 2
Kingpin4534 is on a distinguished road
This is a great write up. I needed something like this. Thanks
Kingpin4534 is offline   Reply With QuoteReply With Quote
Old 04-05-2017, 10:47 AM #10
JWaldz's Avatar
JWaldz JWaldz is offline
Moderator
 
Join Date: Oct 2010
Location: Colo Springs, CO
Age: 37
Posts: 5,150
Real Name: Waldo
JWaldz is a jewel in the rough JWaldz is a jewel in the rough JWaldz is a jewel in the rough
JWaldz JWaldz is offline
Moderator
JWaldz's Avatar
 
Join Date: Oct 2010
Location: Colo Springs, CO
Age: 37
Posts: 5,150
Real Name: Waldo
JWaldz is a jewel in the rough JWaldz is a jewel in the rough JWaldz is a jewel in the rough
You guy should be thanking me, cus I'm the one that forced @ramonortiz55 to do the job in the first place. He wanted to take it to a mechanic, psshhh noob

__________________
'99 Toyota 4Runner LTD - Dual Locked | Geared | Mid-Travel | 35s | Armored
Sponsors: Coastal OR | Extreme LED | SherpaEC | Overland GG

3G Build: ShowGirl | Instagram: ^Click Above^ | FB Page: JWaldz4R | T4R Mod: Contact Me
JWaldz is offline   Reply With QuoteReply With Quote
Old 04-05-2017, 11:04 AM #11
ramonortiz55 ramonortiz55 is offline
Senior Member
 
Join Date: Apr 2015
Location: Texas
Posts: 3,649
ramonortiz55 has a spectacular aura about ramonortiz55 has a spectacular aura about
ramonortiz55 ramonortiz55 is offline
Senior Member
 
Join Date: Apr 2015
Location: Texas
Posts: 3,649
ramonortiz55 has a spectacular aura about ramonortiz55 has a spectacular aura about
Quote:
Originally Posted by jwaldz View Post
you guy should be thanking me, cus i'm the one that forced @ramonortiz55 to do the job in the first place. He wanted to take it to a mechanic, psshhh noob :d

gtfo
ramonortiz55 is offline   Reply With QuoteReply With Quote
Old 04-05-2017, 11:09 AM #12
hugo2go's Avatar
hugo2go hugo2go is offline
Member
 
Join Date: Dec 2010
Location: SGV
Age: 41
Posts: 509
hugo2go is on a distinguished road
hugo2go hugo2go is offline
Member
hugo2go's Avatar
 
Join Date: Dec 2010
Location: SGV
Age: 41
Posts: 509
hugo2go is on a distinguished road
Awesome write up!
Thank you for the part number list as well
hugo2go is offline   Reply With QuoteReply With Quote
Old 04-05-2017, 11:14 AM #13
fourfive's Avatar
fourfive fourfive is offline
Senior Member
 
Join Date: Nov 2014
Location: Marietta, Georgia
Posts: 1,500
fourfive is a jewel in the rough fourfive is a jewel in the rough fourfive is a jewel in the rough fourfive is a jewel in the rough
fourfive fourfive is offline
Senior Member
fourfive's Avatar
 
Join Date: Nov 2014
Location: Marietta, Georgia
Posts: 1,500
fourfive is a jewel in the rough fourfive is a jewel in the rough fourfive is a jewel in the rough fourfive is a jewel in the rough
Nice write up. Thanks for taking the time to do this.
__________________
1. Black 2002 SR5 4x4 5vz: Front Toytec Ultimate coilovers/eibach 600#, SPC UCA, durobumps Rear Bil5100/Superflex, SS adjustable panhard, PCK, durobumps Body Lift 2" 4crawler Tires 315/75/16 BFG KO2 Wheels SCS F5 Matte black 16x8 3.5bs Armor Custom bolt on rock sliders (no frame drilling)
2. Black 2001 SR5 4x4 5vz: stock
3. Black 2018 TRD Pro (wife’s): Armor Custom bolt on rock sliders (U-bolts)
fourfive is offline   Reply With QuoteReply With Quote
Old 04-05-2017, 11:47 AM #14
ramonortiz55 ramonortiz55 is offline
Senior Member
 
Join Date: Apr 2015
Location: Texas
Posts: 3,649
ramonortiz55 has a spectacular aura about ramonortiz55 has a spectacular aura about
ramonortiz55 ramonortiz55 is offline
Senior Member
 
Join Date: Apr 2015
Location: Texas
Posts: 3,649
ramonortiz55 has a spectacular aura about ramonortiz55 has a spectacular aura about
Quote:
Originally Posted by hugo2go View Post
Awesome write up!
Thank you for the part number list as well
Quote:
Originally Posted by fourfive View Post
Nice write up. Thanks for taking the time to do this.
you welcome!
ramonortiz55 is offline   Reply With QuoteReply With Quote
Old 04-05-2017, 11:49 AM #15
amalik amalik is offline
Senior Member
 
Join Date: Sep 2013
Location: Denver
Posts: 2,350
amalik is on a distinguished road
amalik amalik is offline
Senior Member
 
Join Date: Sep 2013
Location: Denver
Posts: 2,350
amalik is on a distinguished road
damn dude. write-up galore by you this morning!
amalik is offline   Reply With QuoteReply With Quote
Reply


Posting Rules
You may not post new threads
You may not post replies
You may not post attachments
You may not edit your posts

BB code is On
Smilies are On
[IMG] code is On
HTML code is On

Forum Jump

Similar Threads
Thread Thread Starter Forum Replies Last Post
Any other gaskets I should replace when doing to valve cover gaskets? michaelreed 4th Gen T4Rs 0 07-23-2013 09:08 AM
po325 code after replacing valve cover gaskets hmbrews 3rd gen T4Rs 1 02-02-2010 05:08 PM
Which Valve cover gaskets? mitfan311 Maintenance/Detailing 0 11-15-2009 09:43 PM
DIY Valve Cover Gaskets MHartley Classic T4Rs 7 01-16-2009 04:56 AM
valve cover gaskets patgensel 4th Gen T4Rs 1 11-12-2006 08:40 PM

Powered by vBadvanced CMPS v3.2.2

All times are GMT -4. The time now is 05:49 AM.

Powered by vBulletin® Version 3.8.11
Copyright ©2000 - 2024, vBulletin Solutions Inc.
Search Engine Optimisation provided by DragonByte SEO (Pro) - vBulletin Mods & Addons Copyright © 2024 DragonByte Technologies Ltd.
Feedback Buttons provided by Advanced Post Thanks / Like (Lite) - vBulletin Mods & Addons Copyright © 2024 DragonByte Technologies Ltd.
User Alert System provided by Advanced User Tagging (Lite) - vBulletin Mods & Addons Copyright © 2024 DragonByte Technologies Ltd.
***This site is an unofficial Toyota site, and is not officially endorsed, supported, authorized by or affiliated with Toyota. All company, product, or service names references in this web site are used for identification purposes only and may be trademarks of their respective owners. The Toyota name, marks, designs and logos, as well as Toyota model names, are registered trademarks of Toyota Motor Corporation***Ad Management plugin by RedTyger
 
Copyright © 2020