 12-21-2017, 02:51 PM
|
#61
|
 |
Senior Member
|
|
Join Date: Dec 2013
Location: SF Bay Area California
Posts: 2,763
|
|
|
Senior Member
Join Date: Dec 2013
Location: SF Bay Area California
Posts: 2,763
|
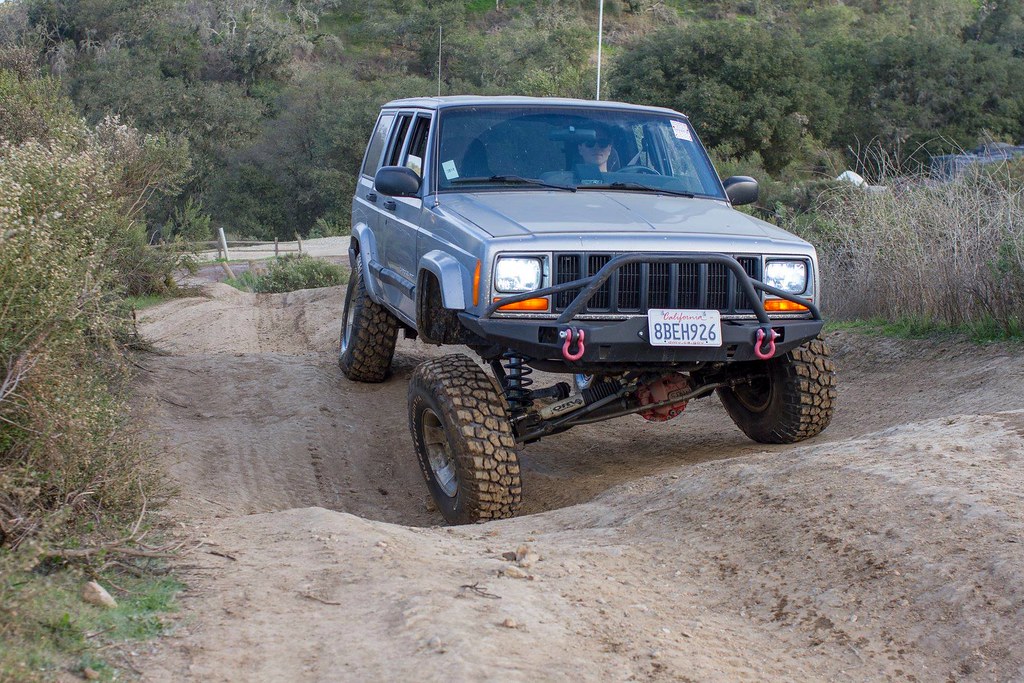
loving the new additions drew!!
WE GOTTA link up soon, 2018 is right around the corner and its beginning to look like a great year to get out and use our rigs! lets plan a MOAB trip
__________________
1998 Desert Dune Toyota 4runner Limited 4x4 w/ factory e-locker
2000 BLACK Toyota 4runner Limited 4x4 w/ factory e-locker Build Thread
2002 Thundercloud Metalic Toyota 4runner Limited 4x4
Build Thread

|

|
 Reply With Quote Reply With Quote
|
|
01-09-2018, 12:07 PM
|
#62
|
 |
Member
|
|
Join Date: Aug 2014
Location: Bay Area, CA
Age: 30
Posts: 433
Real Name: Drew
|
|
|
Member
Join Date: Aug 2014
Location: Bay Area, CA
Age: 30
Posts: 433
Real Name: Drew
|
Quote:
Originally Posted by infamousRNR

loving the new additions drew!!
WE GOTTA link up soon, 2018 is right around the corner and its beginning to look like a great year to get out and use our rigs! lets plan a MOAB trip
|
Sorry I'm just seeing this Sean, but we definitely should! Let's get together in the next couple weeks to work something out!
__________________
1999 Black SR5 Highlander 4wd V6 Automatic ( Build Thread) 
2001 Millennium Silver SR5 Sport 4wd V6 Automatic (Build Thread V2)
|
|
|
Reply With Quote
|
|
01-17-2018, 02:12 AM
|
#63
|
|
Member
|
|
Join Date: Aug 2014
Location: Bay Area, CA
Age: 30
Posts: 433
Real Name: Drew
|
|
|
Member
Join Date: Aug 2014
Location: Bay Area, CA
Age: 30
Posts: 433
Real Name: Drew
|
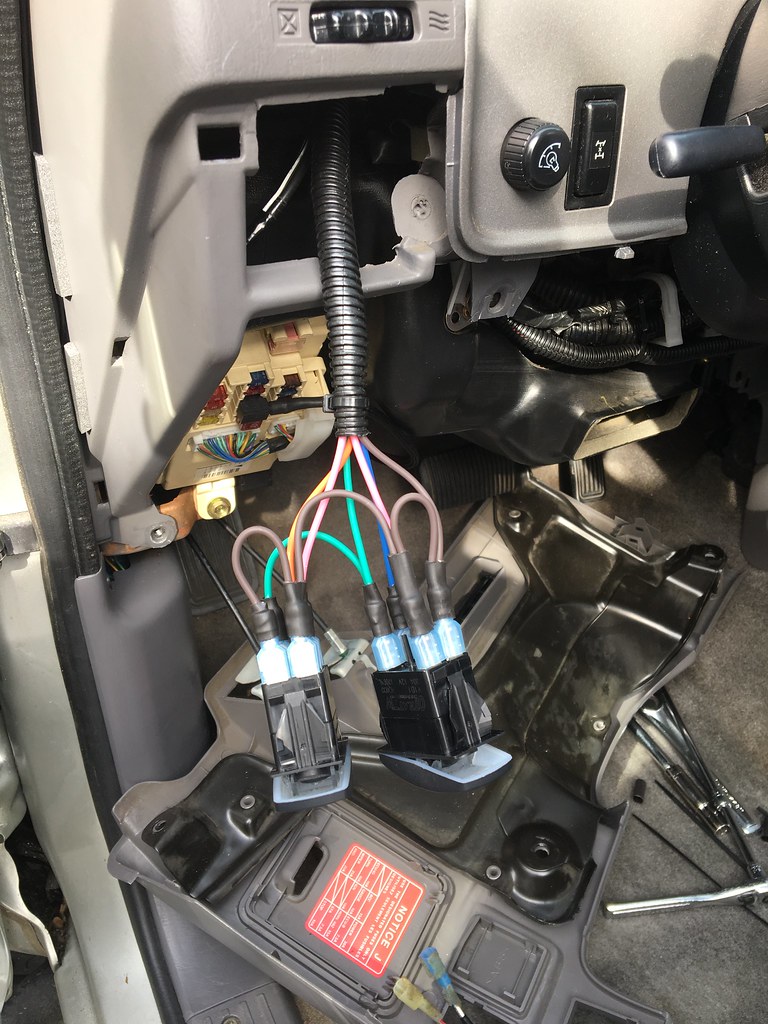
January 15th, 2018
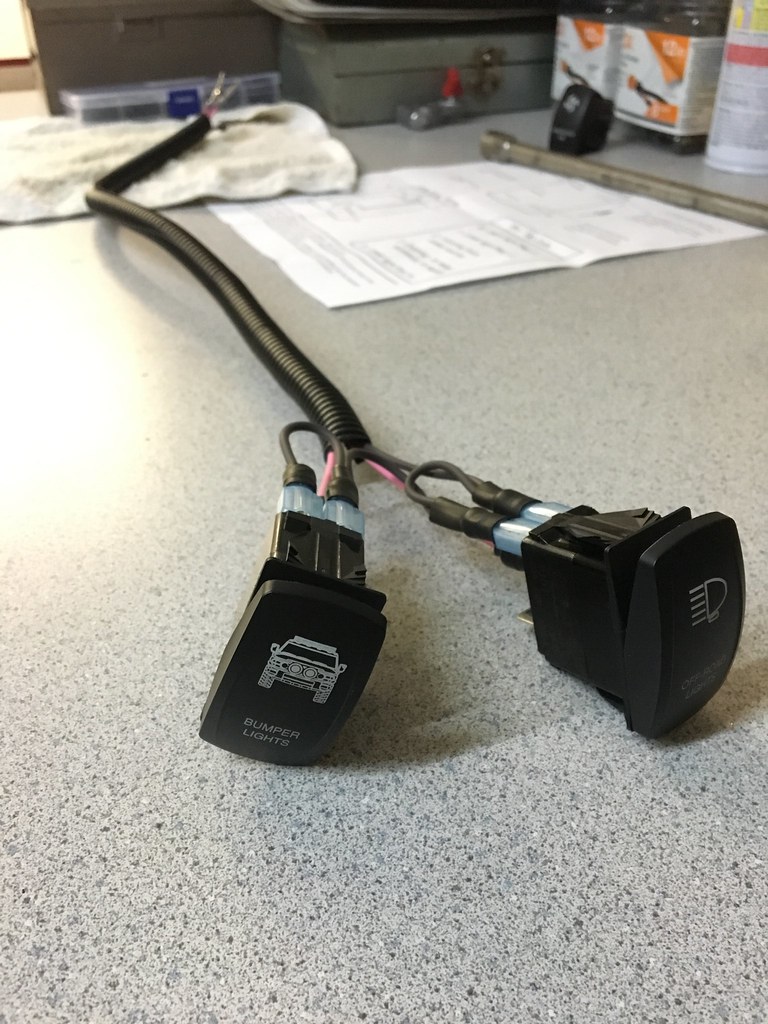
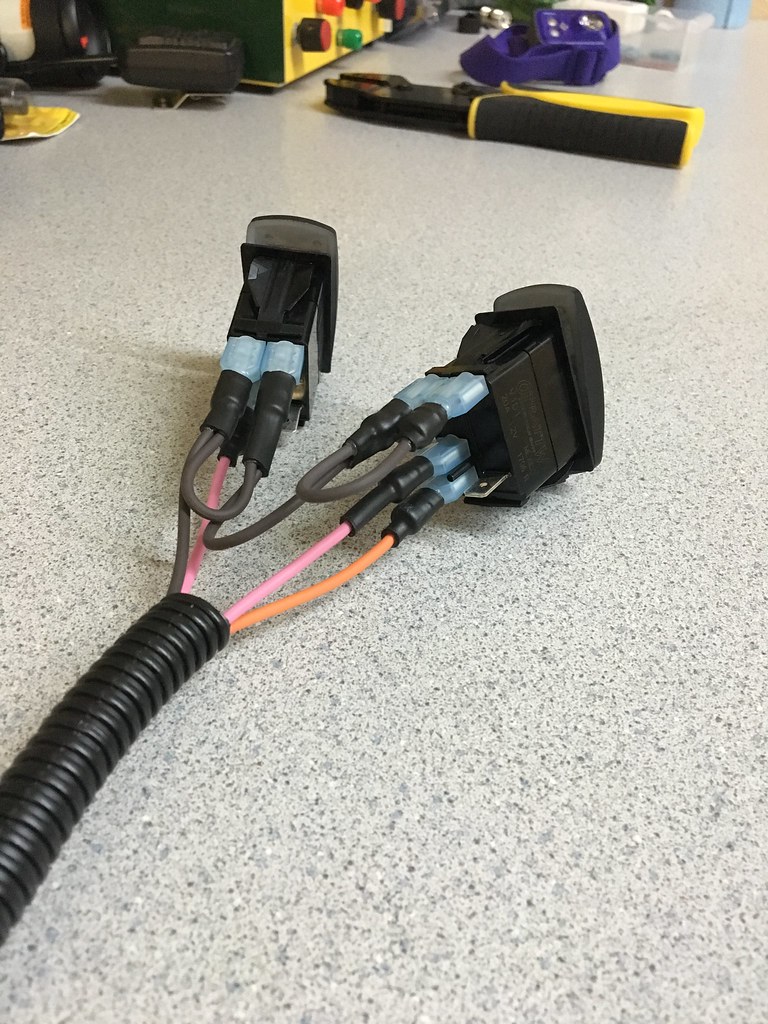
Bumper Lights Switch Install
Parts List:
- 2x OTRATTW Lower Independent SPST Switch
- Bunch of Colorful 16ga GXL Wire
- 3/8" Wire Loom
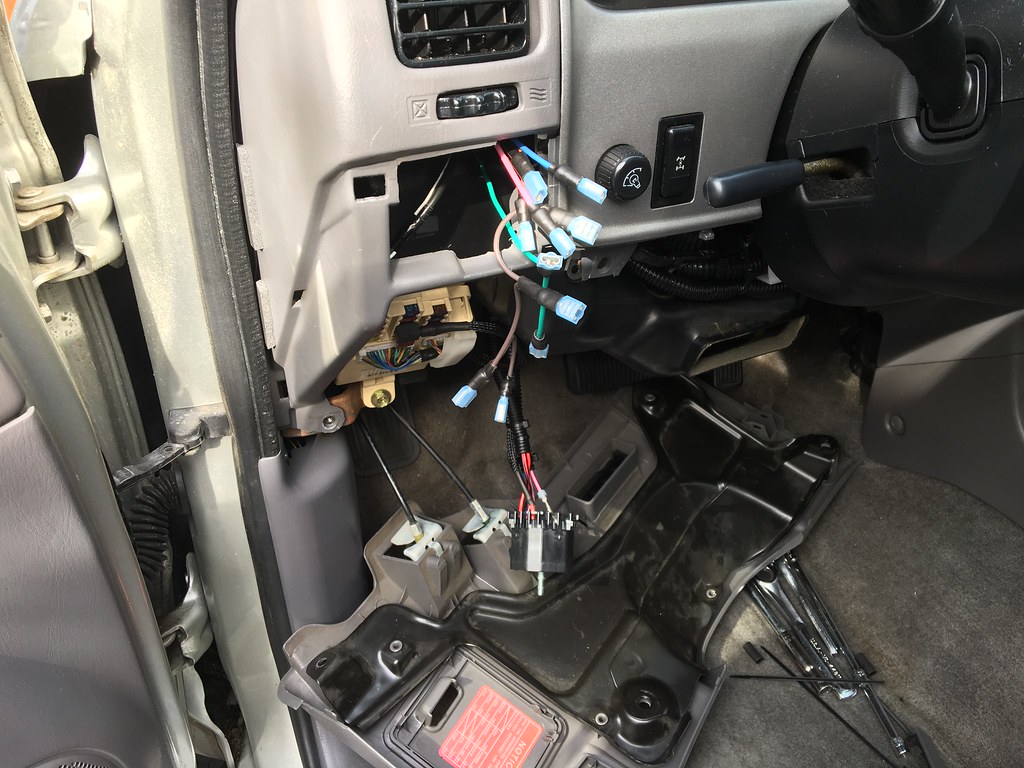
I've had the lights on the truck now for a month or so, but I haven't been able to use them since I didn't have the switches I wanted to use. I planned ahead by wiring the lights up until the firewall, so it made life a bit easier yesterday.
As a common theme to this build, I have been trying to make everything look cleaner and perform better. In order to reduce the number of wires coming through the firewall, I decided to use a common ground and jumper it to both switches, and use the ashtray light's wire in order to power the lower independent light. I made the rest of the harness by very roughly measuring the length of the bulkhead connector to the dash piece beneath the wheel.
I needed a total of 5 wires coming through the firewall and quite a few jumpers which you can see in the pictures coming up. Once that was done, everything was wrapped up using some wire loom to make it look more professional. After connecting the wires to the bulkhead, I routed the loom over the air vent to where the switches would be. Once the lights were tested and I verified that I didn't screw something up, I re-attached the dash!
While there is not a ton more room for switches on that side of the dash, I made the wiring pretty modular if I were to ever add another one over there. Next up to wire is the transmission fan and the rock lights!
On the bench
 Wires through the dash
 Connected to the switch
 All done!

__________________
1999 Black SR5 Highlander 4wd V6 Automatic ( Build Thread)
2001 Millennium Silver SR5 Sport 4wd V6 Automatic (Build Thread V2)
|
|
|
Reply With Quote
|
|
02-16-2018, 06:16 PM
|
#64
|
|
Member
|
|
Join Date: Aug 2014
Location: Bay Area, CA
Age: 30
Posts: 433
Real Name: Drew
|
|
|
Member
Join Date: Aug 2014
Location: Bay Area, CA
Age: 30
Posts: 433
Real Name: Drew
|
__________________
1999 Black SR5 Highlander 4wd V6 Automatic ( Build Thread)
2001 Millennium Silver SR5 Sport 4wd V6 Automatic (Build Thread V2)
Last edited by JerkyDrewster; 02-16-2018 at 06:26 PM.
|
|
|
Reply With Quote
|
|
02-16-2018, 08:00 PM
|
#65
|
|
Member
|
|
Join Date: Dec 2017
Location: Newport, RI
Posts: 280
|
|
|
Member
Join Date: Dec 2017
Location: Newport, RI
Posts: 280
|
Great build! Looks really clean, and I really like the way you laid out this thread.
I'm currently looking for my first 3rd gen, and hopefully I'll be starting a thread like this once I get one.
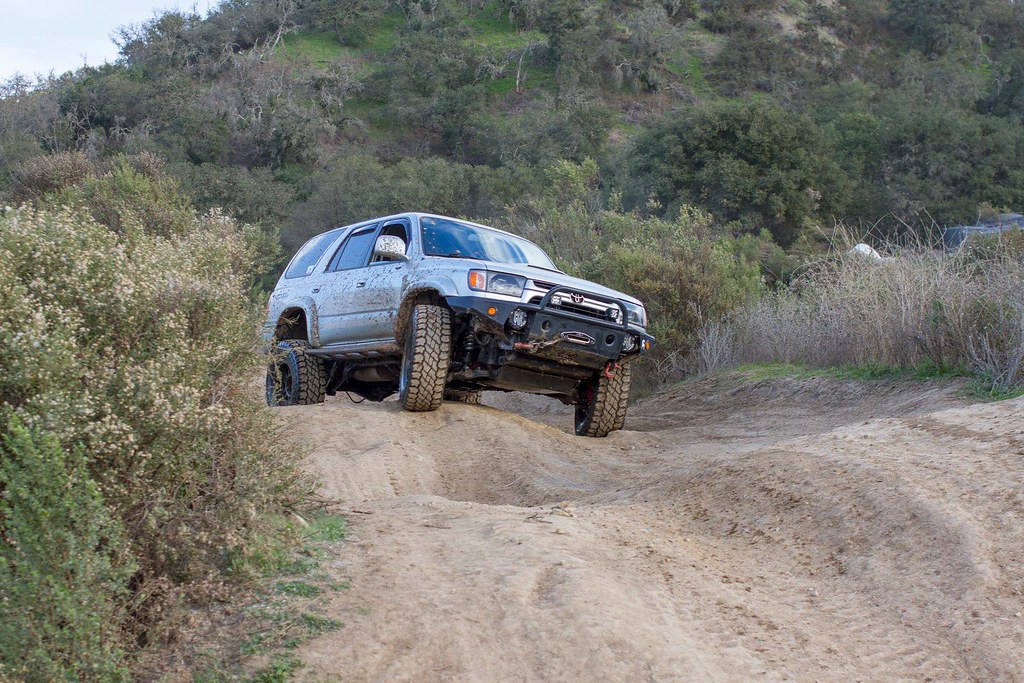
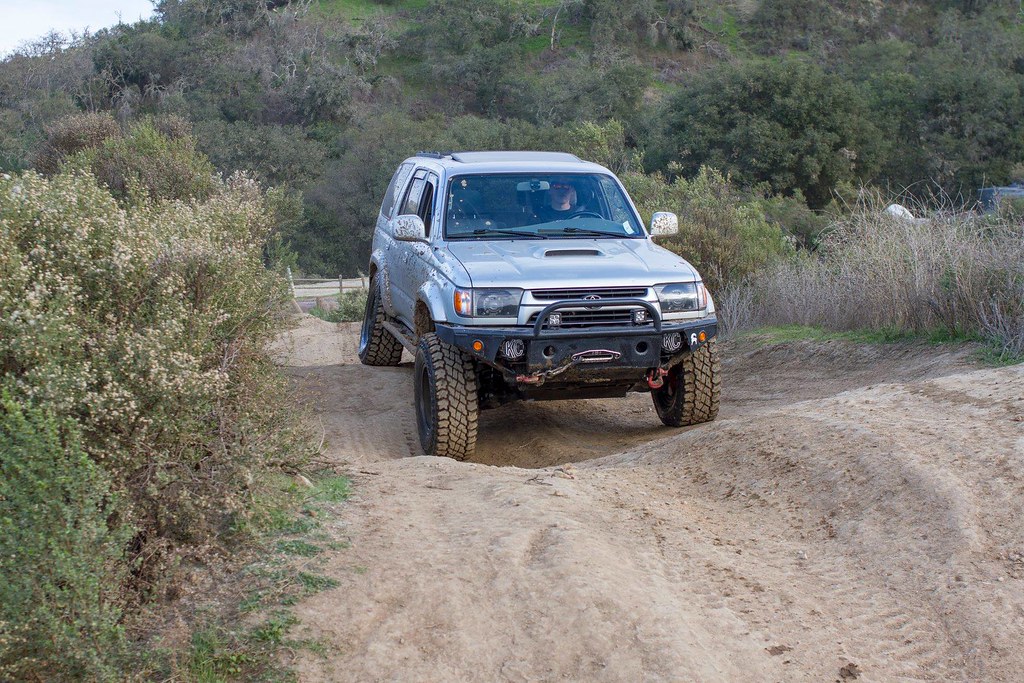
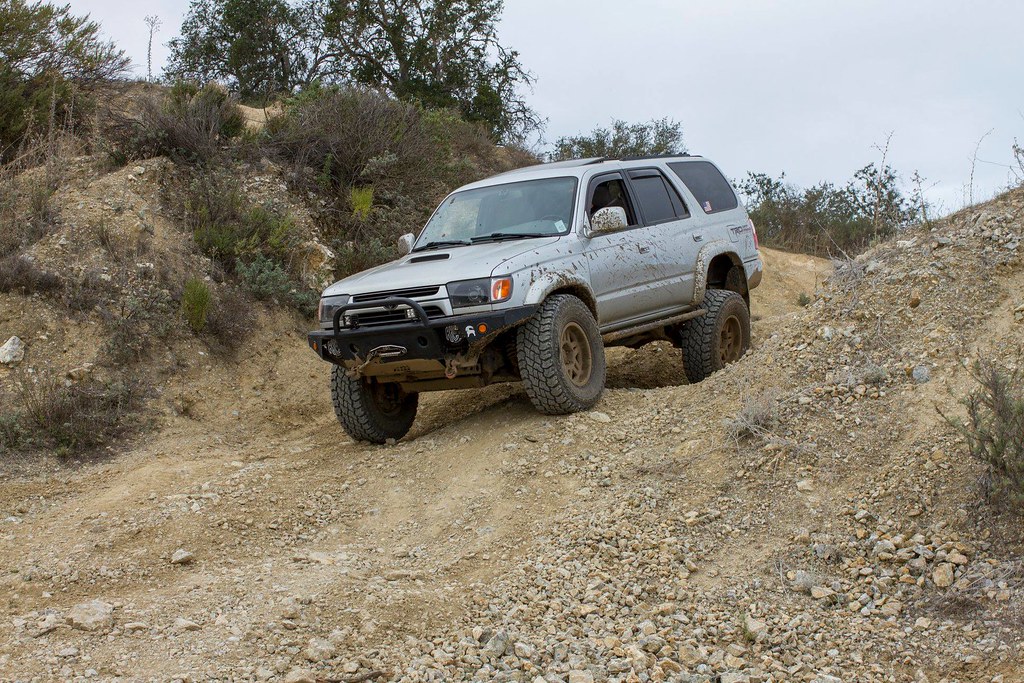
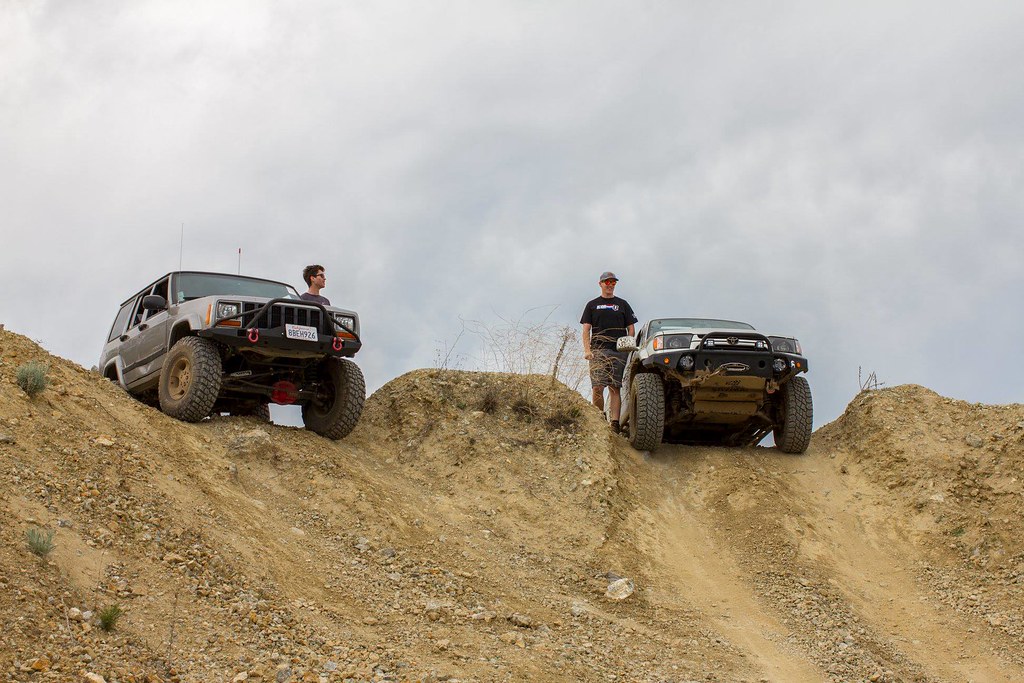
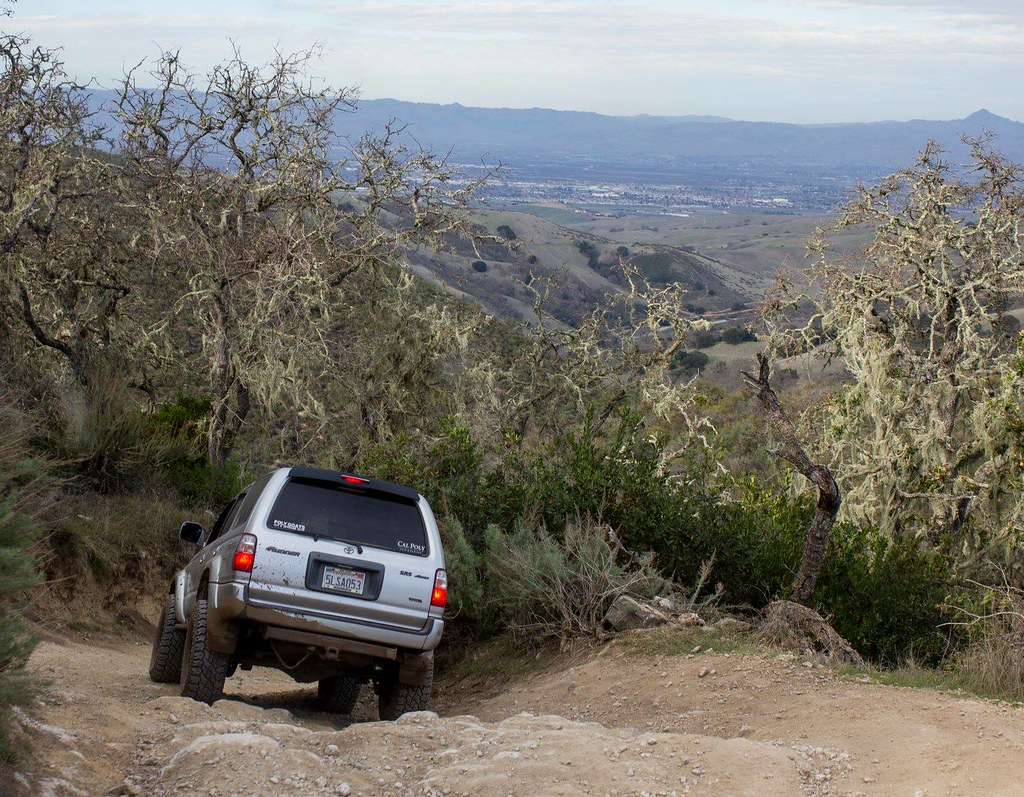
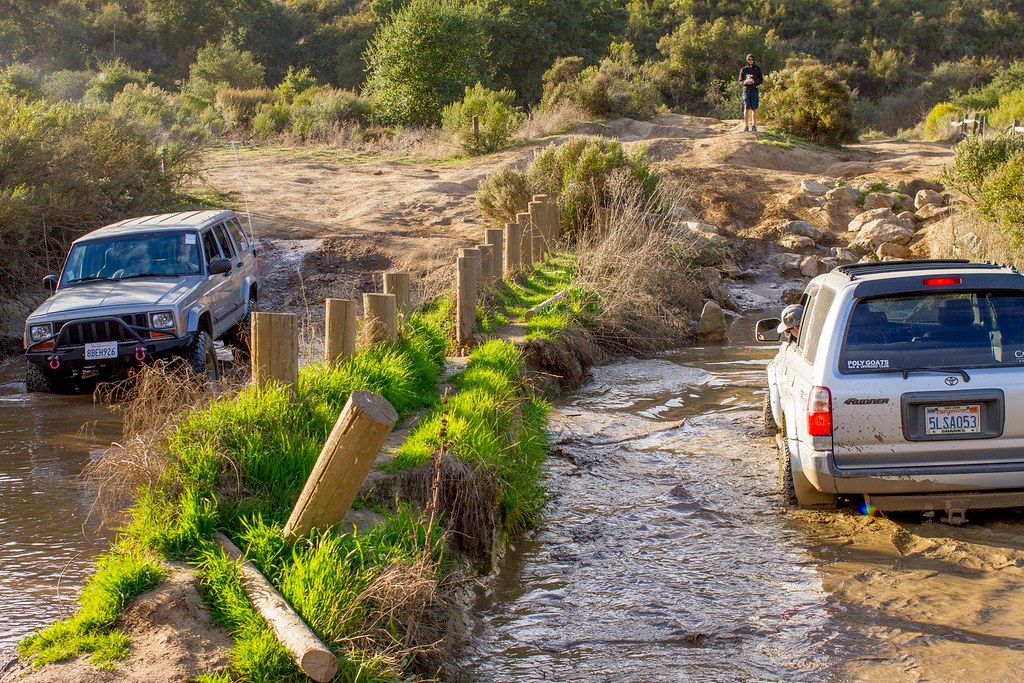
The wheeling pics looks like fun, one of the main reasons I want one is to get back into wheeling. You're buddy has a sweeeet XJ, btw.
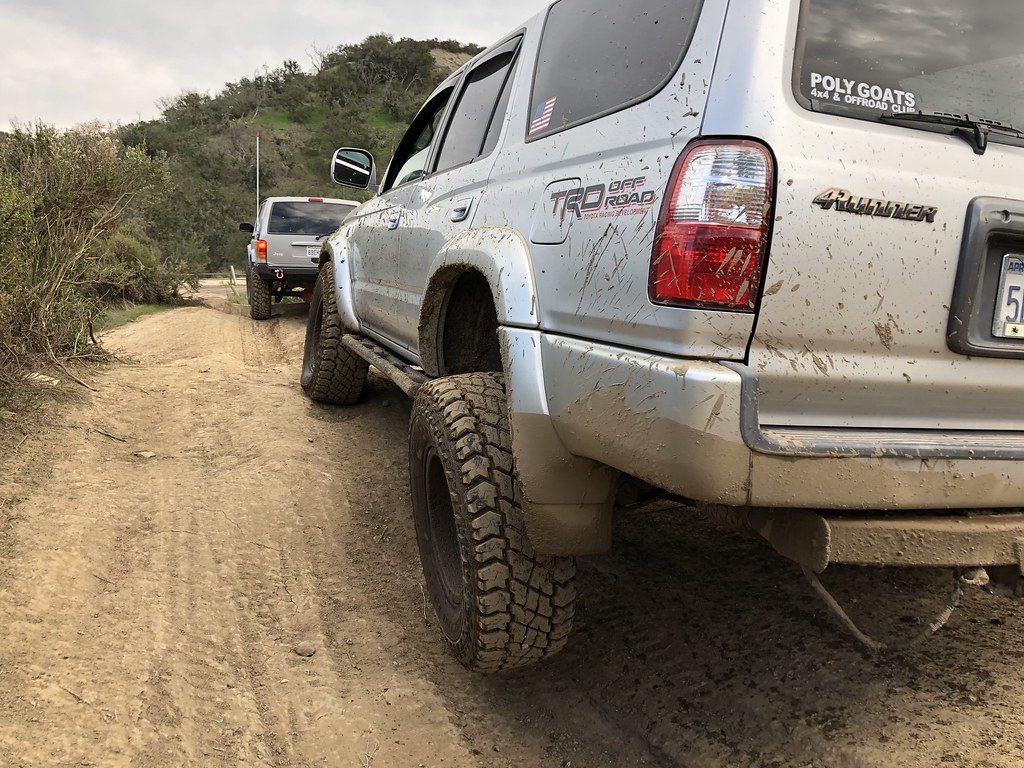
And I saw the Polygoats sticker...I've heard of them, I saw some of you guys on Dirt Every Day!
|
|
|
Reply With Quote
|
|
02-18-2018, 11:51 PM
|
#66
|
|
Member
|
|
Join Date: Aug 2014
Location: Bay Area, CA
Age: 30
Posts: 433
Real Name: Drew
|
|
|
Member
Join Date: Aug 2014
Location: Bay Area, CA
Age: 30
Posts: 433
Real Name: Drew
|
Quote:
Originally Posted by Horsethief
Great build! Looks really clean, and I really like the way you laid out this thread.
I'm currently looking for my first 3rd gen, and hopefully I'll be starting a thread like this once I get one.
The wheeling pics looks like fun, one of the main reasons I want one is to get back into wheeling. You're buddy has a sweeeet XJ, btw.
And I saw the Polygoats sticker...I've heard of them, I saw some of you guys on Dirt Every Day!
|
Good luck on the search; it is definitely a fun part of the process!
And that's too funny about the club! It's crazy someone from across the country has heard of us!
__________________
1999 Black SR5 Highlander 4wd V6 Automatic ( Build Thread)
2001 Millennium Silver SR5 Sport 4wd V6 Automatic (Build Thread V2)
|
|
|
Reply With Quote
|
|
02-19-2018, 12:51 AM
|
#67
|
|
Member
|
|
Join Date: Aug 2014
Location: Bay Area, CA
Age: 30
Posts: 433
Real Name: Drew
|
|
|
Member
Join Date: Aug 2014
Location: Bay Area, CA
Age: 30
Posts: 433
Real Name: Drew
|
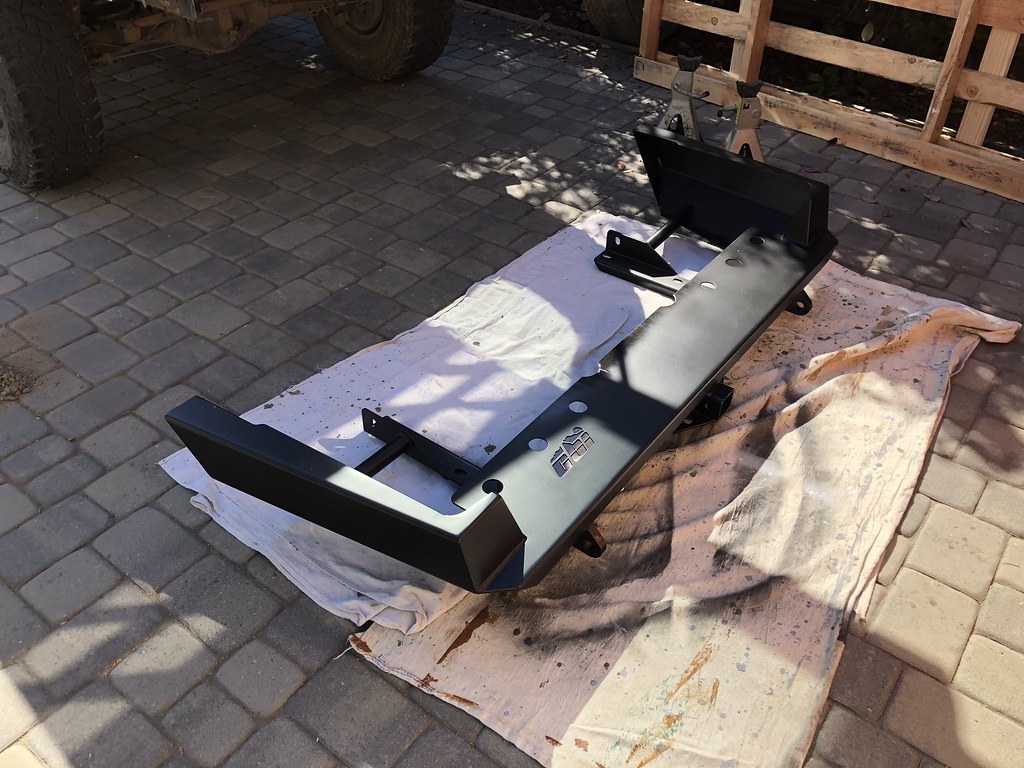
February 17th, 2018
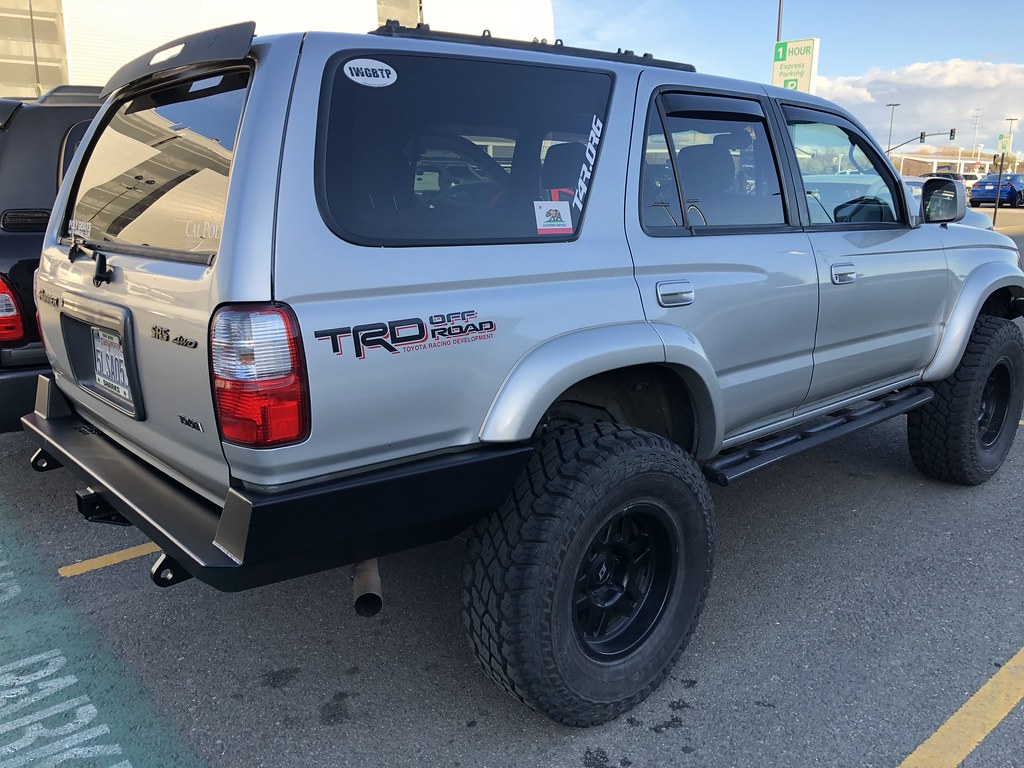
Rear Bumper Installation...Part 1
Parts List:
- CBI Rear Plate Bumper
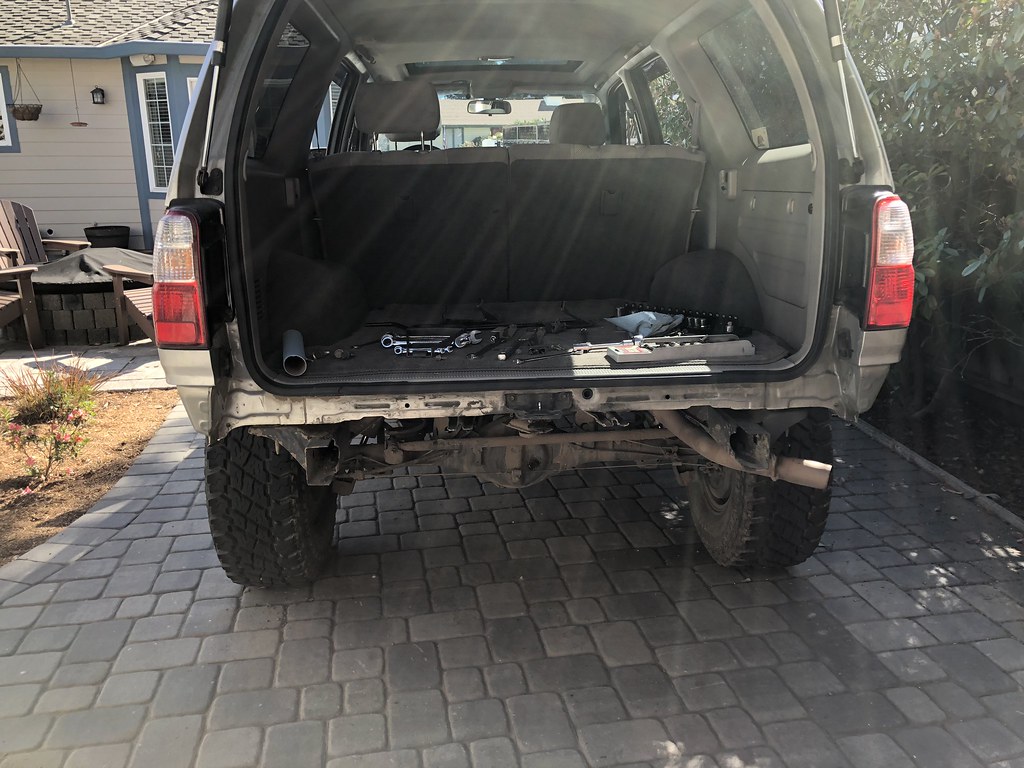
So I received my rear bumper this past Thursday, and I was definitely excited to install it yesterday! Upon unwrapping the pallet, I saw a bit of damage to the powdercoat and bumper itself. It looked like the painter didn't prep the metal properly which caused the powdercoat to chip off. It was mainly apparent on the hitch, so it wasn't a big deal to just repaint it.
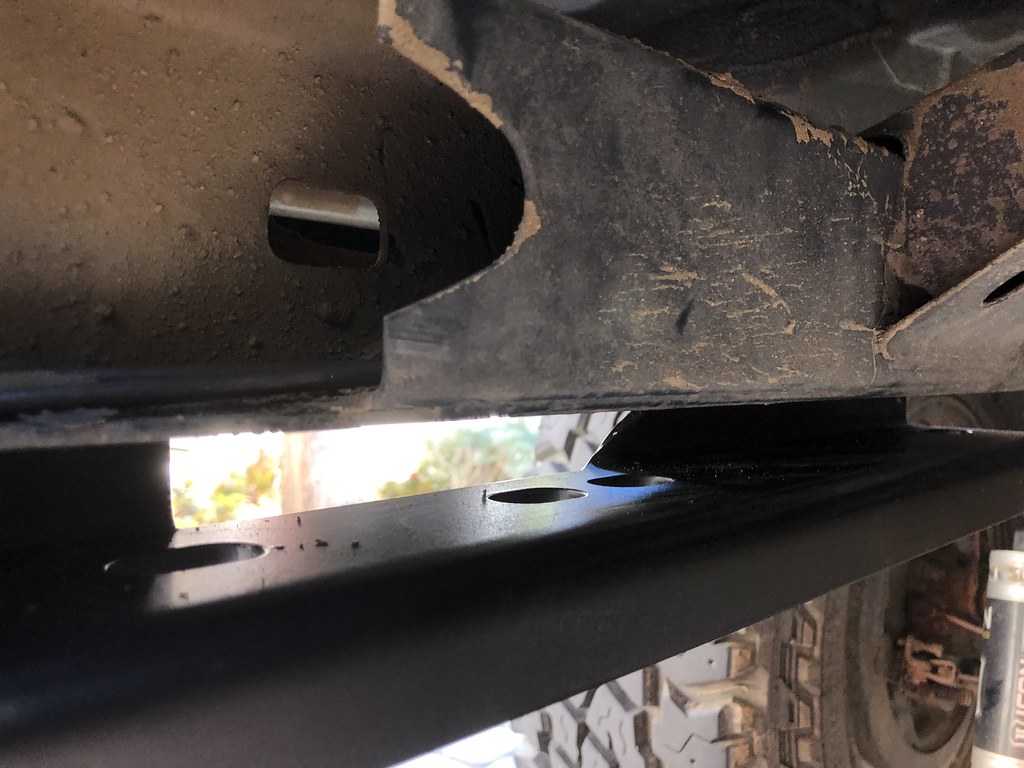
I got started by removing the hitch and the stock bumper. I always forget how many bolts are holding the bumper in place, so it definitely took longer than I expected. Once it was off, I started to prep for the new bumper. Since I was by myself, I used 4 jack stands and a 2x4 in order to get it in position. I let it rest on the frame rails before lifting it up into the final spot.
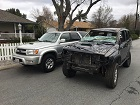
After pushing the bumper up to put the bolts in, it ran into the car's body before the mounting surface touched the frame rail. My best guess is that CBI made the bumper for a 4Runner with a 1-1.5" body lift...BUMMER! I double-checked the order to make sure I selected the correct options.
I'll give them a call either tomorrow or Tuesday if they are closed and go from there. I am hoping to get the correct bumper soon! For now, I will be rocking the no bumper look!
__________________
1999 Black SR5 Highlander 4wd V6 Automatic ( Build Thread)
2001 Millennium Silver SR5 Sport 4wd V6 Automatic (Build Thread V2)
Last edited by JerkyDrewster; 02-20-2018 at 02:44 PM.
|
|
|
Reply With Quote
|
|
02-26-2018, 01:54 PM
|
#68
|
|
Member
|
|
Join Date: Dec 2017
Location: Newport, RI
Posts: 280
|
|
|
Member
Join Date: Dec 2017
Location: Newport, RI
Posts: 280
|
Quote:
Originally Posted by JerkyDrewster
Good luck on the search; it is definitely a fun part of the process!
And that's too funny about the club! It's crazy someone from across the country has heard of us!
|
The new bumper looks great!
And finding one is my least favorite part, haha. I'm over here checking CL 10 times a day like a junkie looking for a fix.
At which point I'll have to deal with sketchy people from CL and hope I don't get murdered, haha.
|
|
|
Reply With Quote
|
|
02-27-2018, 05:11 PM
|
#69
|
|
Member
|
|
Join Date: Aug 2014
Location: Bay Area, CA
Age: 30
Posts: 433
Real Name: Drew
|
|
|
Member
Join Date: Aug 2014
Location: Bay Area, CA
Age: 30
Posts: 433
Real Name: Drew
|
Quote:
Originally Posted by Horsethief
The new bumper looks great!
And finding one is my least favorite part, haha. I'm over here checking CL 10 times a day like a junkie looking for a fix.
At which point I'll have to deal with sketchy people from CL and hope I don't get murdered, haha.
|
Well, it would look better if it fit properly.
@ infamousRNR
got a killer deal out of that though. The new one is on it's way from Idaho, and should be in town on Thursday!
Maybe I'm alone on this, but I like buying and selling on CL. It's fun to meet people from all over the place. I even sold my hitch this morning to some dude!
__________________
1999 Black SR5 Highlander 4wd V6 Automatic ( Build Thread)
2001 Millennium Silver SR5 Sport 4wd V6 Automatic (Build Thread V2)
|
|
|
Reply With Quote
|
|
03-01-2018, 01:11 PM
|
#70
|
|
Member
|
|
Join Date: Dec 2017
Location: Newport, RI
Posts: 280
|
|
|
Member
Join Date: Dec 2017
Location: Newport, RI
Posts: 280
|
Quote:
Originally Posted by JerkyDrewster
Well, it would look better if it fit properly.
@ infamousRNR
got a killer deal out of that though. The new one is on it's way from Idaho, and should be in town on Thursday!
Maybe I'm alone on this, but I like buying and selling on CL. It's fun to meet people from all over the place. I even sold my hitch this morning to some dude! |
I've enjoyed it in the past, but the idea of showing up to some strangers house with 4 or 5k in cash sketches me out. Especially as a lot of the ads I see for these are obvious scams, it's the ones that maybe AREN'T so obvious that worry me.
The older I get. the more antisocial/suspicious I get, apparently.
|
|
|
Reply With Quote
|
|
03-01-2018, 03:08 PM
|
#71
|
|
Member
|
|
Join Date: Aug 2014
Location: Bay Area, CA
Age: 30
Posts: 433
Real Name: Drew
|
|
|
Member
Join Date: Aug 2014
Location: Bay Area, CA
Age: 30
Posts: 433
Real Name: Drew
|
Some fun things are in the works for the next few weeks. I'm excited for a more challenging project to tackle that will take more than a day or two!
More pictures definitely to come on this install.
__________________
1999 Black SR5 Highlander 4wd V6 Automatic ( Build Thread)
2001 Millennium Silver SR5 Sport 4wd V6 Automatic (Build Thread V2)
|
|
|
Reply With Quote
|
|
03-01-2018, 07:12 PM
|
#72
|
 |
Member
|
|
Join Date: Jan 2012
Location: Houston, TX
Age: 35
Posts: 498
Real Name: Jake
|
|
|
Member
Join Date: Jan 2012
Location: Houston, TX
Age: 35
Posts: 498
Real Name: Jake
|
Quote:
Originally Posted by JerkyDrewster
Some fun things are in the works for the next few weeks. I'm excited for a more challenging project to tackle that will take more than a day or two!
More pictures definitely to come on this install.
|
dang, really interested in this install! very cool
__________________
https://i.imgur.com/WQdryKXm.jpg
The Sequel - 1996 4Runner SR5 - Houston, TX
The Original - 2001 4runner SR5 - SOLD
Etsy Page - Custom Pinstriping and Sign Making
@8LinePinstripe: Instagram
|
|
|
Reply With Quote
|
|
03-02-2018, 07:29 PM
|
#73
|
|
Member
|
|
Join Date: Aug 2014
Location: Bay Area, CA
Age: 30
Posts: 433
Real Name: Drew
|
|
|
Member
Join Date: Aug 2014
Location: Bay Area, CA
Age: 30
Posts: 433
Real Name: Drew
|
Quote:
Originally Posted by Lamer
dang, really interested in this install! very cool
|
Hoping to be able to install it in 2 weekends, but might be able to sooner!
__________________
1999 Black SR5 Highlander 4wd V6 Automatic ( Build Thread)
2001 Millennium Silver SR5 Sport 4wd V6 Automatic (Build Thread V2)
|
|
|
Reply With Quote
|
|
03-05-2018, 12:38 PM
|
#74
|
|
Member
|
|
Join Date: Aug 2014
Location: Bay Area, CA
Age: 30
Posts: 433
Real Name: Drew
|
|
|
Member
Join Date: Aug 2014
Location: Bay Area, CA
Age: 30
Posts: 433
Real Name: Drew
|
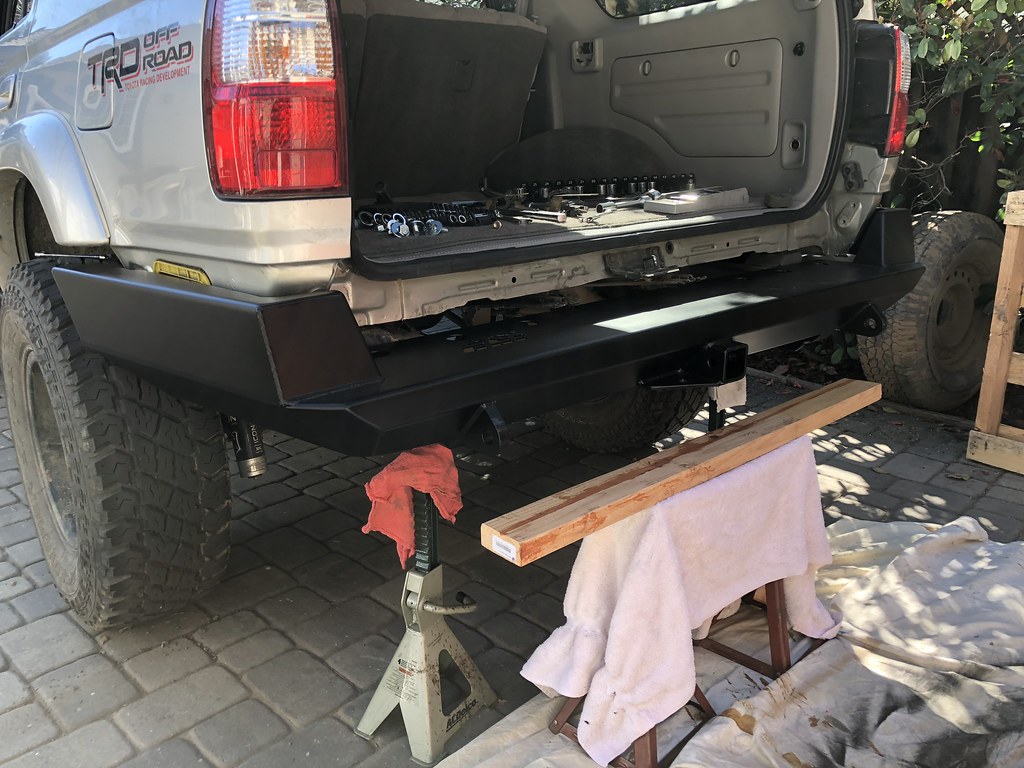
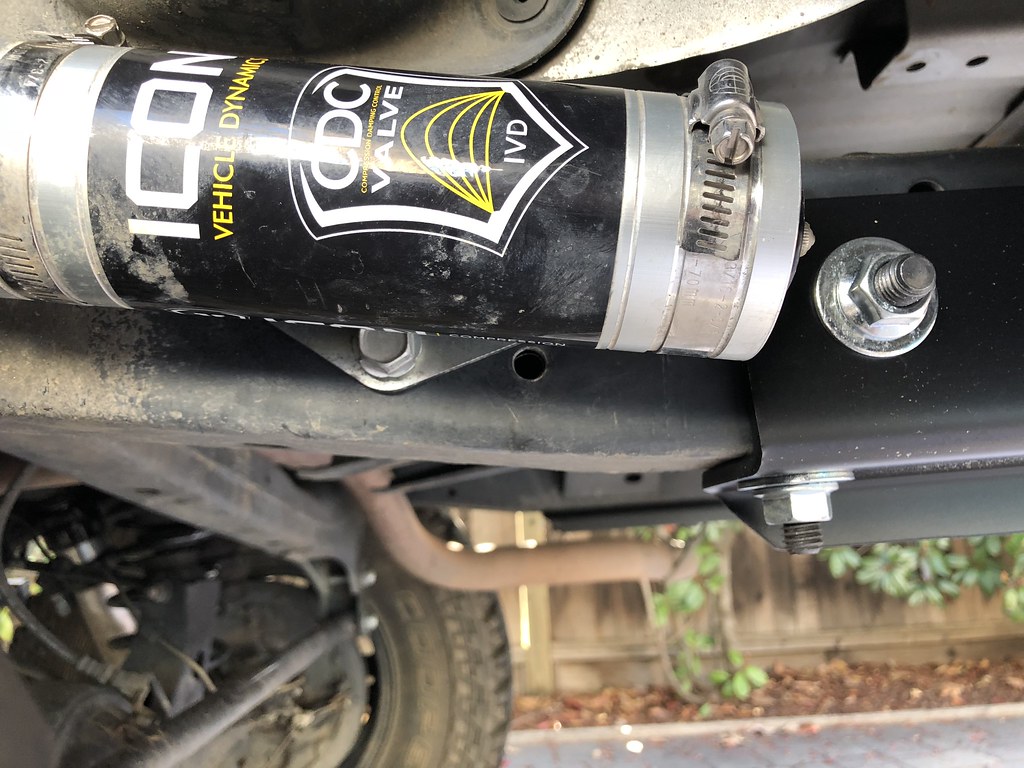
March 4th, 2018
Rear Bumper Installation...Part 2
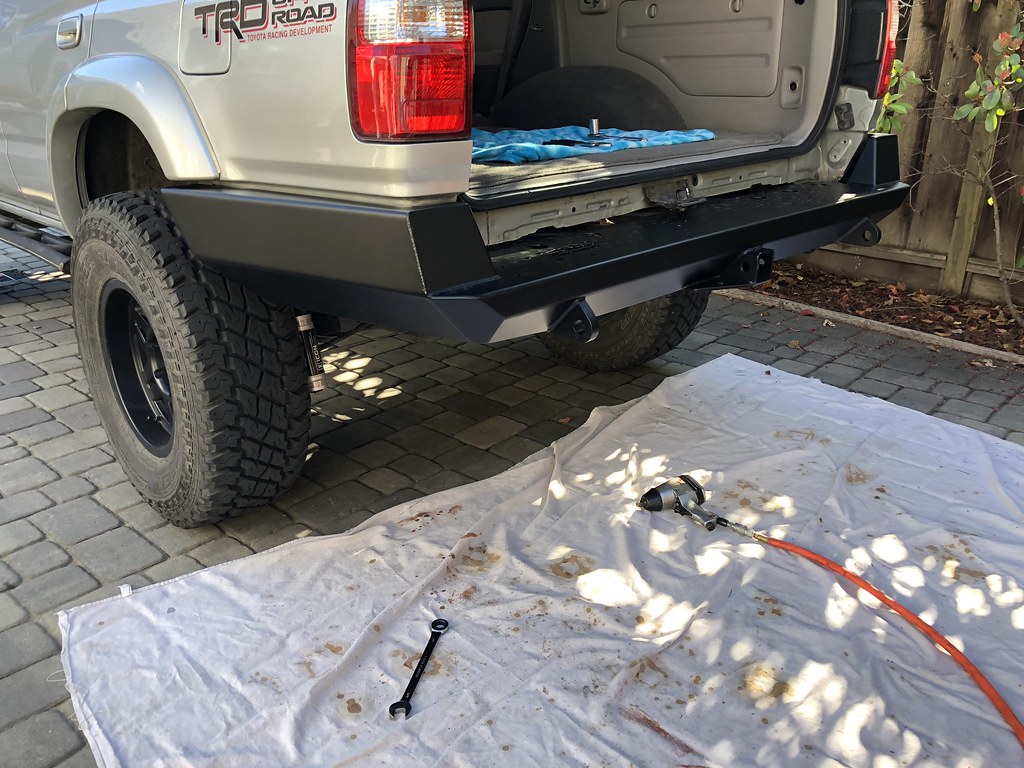
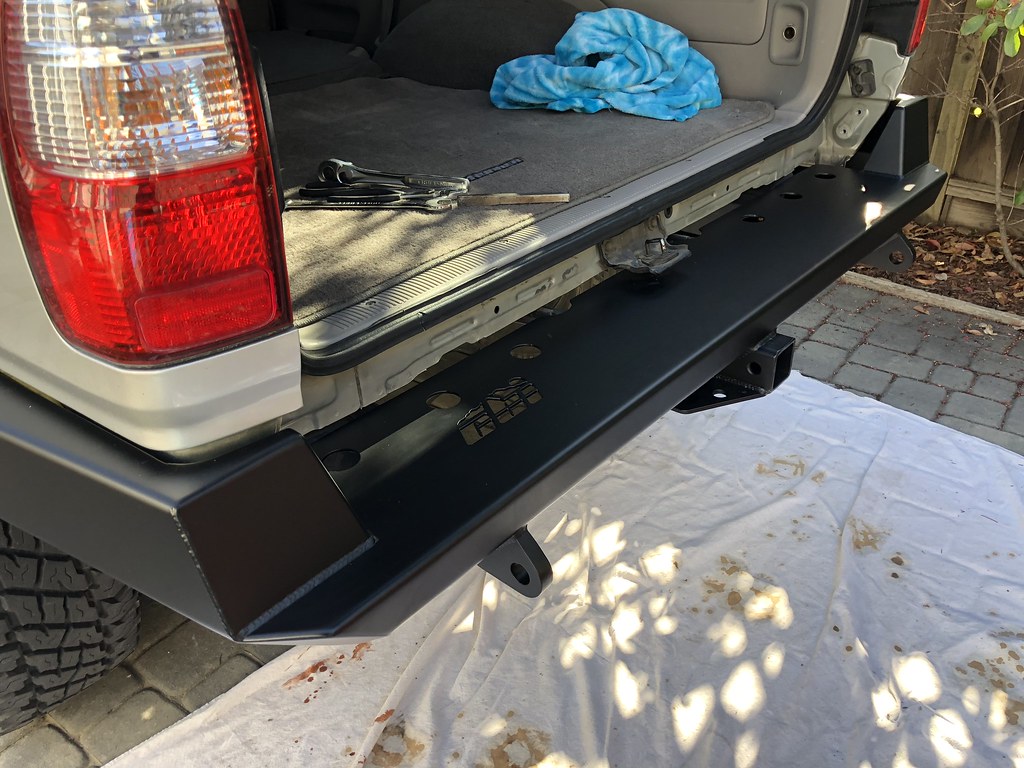
I was able to work it out with CBI, and got the new bumper Saturday morning, making it about a 2 week turnaround. My company had a big party in SF that night, so I definitely wasn't going to be able to get any work done until Sunday. I had already set everything up, so the install was going to be quick.
Once I got back from the city, I started by removing the rear shock reservoir mounts. The place I had them installed overlapped one of the bumper mounts, so I would have to relocate them slightly. I had a couple of my neighbors help me lift it into place while I guided it over the exhaust and put a few screws in. After that, it was just a matter of getting the 2 sets of bolts deep in the frame into place. The first set went in fine, but I had some trouble wiggling the second to fully seat.
With all of the bolts in place (minus the 2 I still need to drill a hole in the frame for), I started working on the reservoir mounts. I liked their current location, so I just drilled a new hole ~1.5" towards the front of the car. This allowed plenty of room for the mount to clear the bumper.
With everything ready to go, I torqued all the bolts down and got to admire the beauty of this bumper!


__________________
1999 Black SR5 Highlander 4wd V6 Automatic ( Build Thread)
2001 Millennium Silver SR5 Sport 4wd V6 Automatic (Build Thread V2)
Last edited by JerkyDrewster; 03-06-2018 at 01:27 AM.
|
|
|
Reply With Quote
|
|
03-05-2018, 08:10 PM
|
#75
|
 |
Junior Member
|
|
Join Date: Mar 2018
Location: San Diego
Age: 30
Posts: 27
Real Name: Jake
|
|
|
Junior Member
Join Date: Mar 2018
Location: San Diego
Age: 30
Posts: 27
Real Name: Jake
|
Looks great!
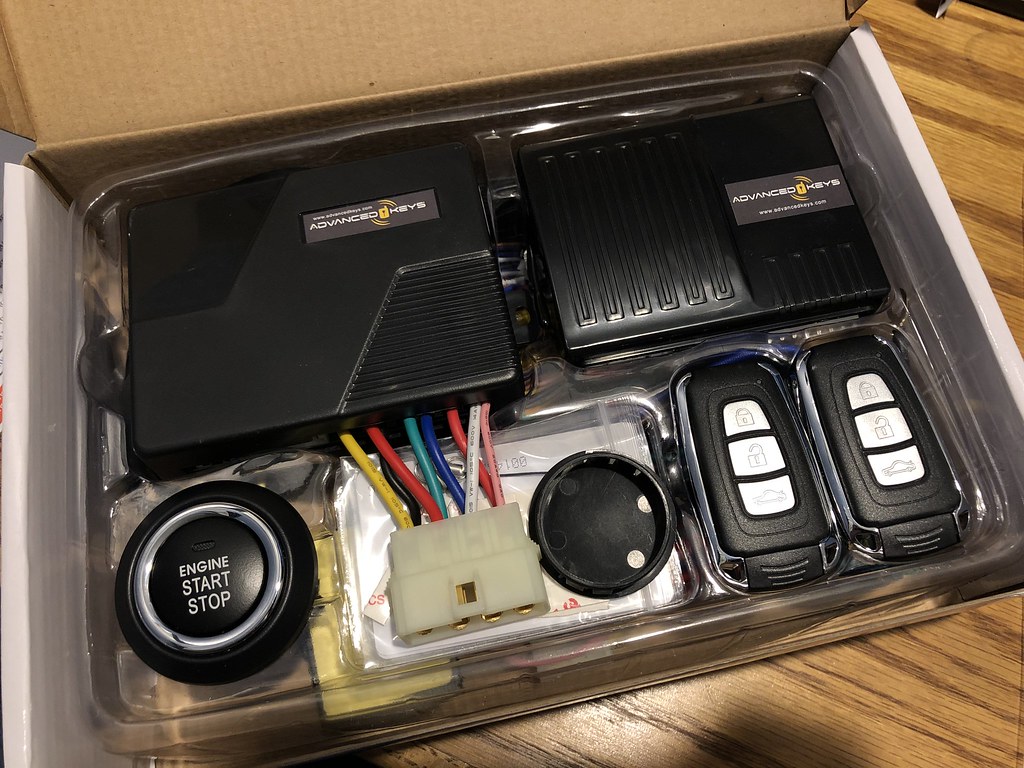
Excited to see how the keyless entry comes along. After just getting out of a 2015 Focus ST thats keyless, i tend to leave my keys in the ignition expecting the car to turn itself off. Hahah. Have walked away a few times forgetting them inside! 
|
|
|
Reply With Quote
|
 Posting Rules
|
You may not post new threads
You may not post replies
You may not post attachments
You may not edit your posts
HTML code is On
|
|
|
|


 Linear Mode


