 06-29-2017, 07:47 PM
|
#31
|
 |
Member
|
|
Join Date: Mar 2017
Location: Saratoga Springs, Utah
Age: 47
Posts: 235
Real Name: Justin
|
|
|
Member
Join Date: Mar 2017
Location: Saratoga Springs, Utah
Age: 47
Posts: 235
Real Name: Justin
|
Looks good. What MPG are you getting on the highway on the long stretches?
__________________
2000 IJM Highlander RR Diff Lock
V6 4WD Auto
Second owner, 300,000+ miles
Grand adventures ahead!
|

|
 Reply With Quote Reply With Quote
|
|
07-01-2017, 11:25 AM
|
#32
|
 |
Member
|
|
Join Date: May 2017
Location: Bay Area, Ca
Posts: 325
Real Name: keith and jenny
|
|
|
Member
Join Date: May 2017
Location: Bay Area, Ca
Posts: 325
Real Name: keith and jenny
|
Quote:
Originally Posted by the walrus

Looks good. What MPG are you getting on the highway on the long stretches?
|
On long pretty flat stretches we are getting a bit over 22 mpg! Even with all the mountain passes, we are still averaging a bit over 21 this trip. Having the current mpg and average mpg numbers on the scanguage make a big difference, because it is a constant reminder to not put my foot in it too bad.
I have no science to back this up, because it's all on different streaches of road, but I think that 87 gets better mpg then 85, and 89 even better then 87. Gas was so cheap in the Midwest, and now Texas, that I spring for better gas too.
|
|
|
Reply With Quote
|
|
07-10-2017, 02:41 AM
|
#33
|
|
Member
|
|
Join Date: May 2017
Location: Bay Area, Ca
Posts: 325
Real Name: keith and jenny
|
|
|
Member
Join Date: May 2017
Location: Bay Area, Ca
Posts: 325
Real Name: keith and jenny
|
We are back from the trip. Put almost 6,000 miles on the 4runner in two and a half weeks. Damage report is;
1) Drivers door power lock works intermittently. Might just need playing with and lube. Started doing this in Kansas City, Mo
2) Hatch lock cylinder retreated into the rear hatch, in Esetes Park, Co.
3) Hatch power lock cylinder works intermittently, some times will not lock, sometimes will not lock. Problem is fixed by pushing in on the door while hitting unlock, or moving the rear window slightly. I suspect it has to do with internal linkage being compromised First happened a little south of Albuquerque, NM
4) Loose/Missing exhaust hardware. Jury rigged with spare hardware until in town where I got proper hardware.
5) The transfer case shifted itself in to neutral, apparently, off and on, had no self movement possible. Got towed to a transmission shop. Worked off the trailer. Possibly something heat related, it was in the mid 90s, and had just gained 5000 feet of elevation in the last 30 miles. Couldn't replicate problem, worked ever since, put another 5,600 miles on it after that. That happened about lunchtime the day we left outside South Lake, CA
Overall a great trip, and the 4runner was good to us.
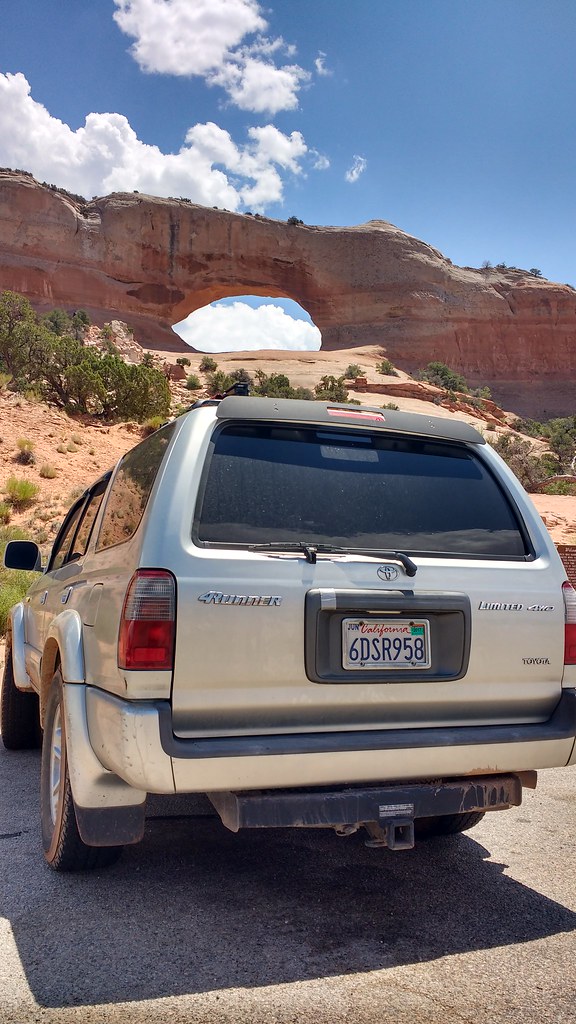
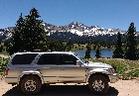
^ I know someone knows where this is, and probably has a picture of their 4runner in front of it as well.
As I have time I will upload pictures and stuff. There are a few pre-trip mods I did before leaving, and lots of 4runner pictures and videos.
|
|
|
Reply With Quote
|
|
07-17-2017, 07:09 PM
|
#34
|
|
Member
|
|
Join Date: May 2017
Location: Bay Area, Ca
Posts: 325
Real Name: keith and jenny
|
|
|
Member
Join Date: May 2017
Location: Bay Area, Ca
Posts: 325
Real Name: keith and jenny
|
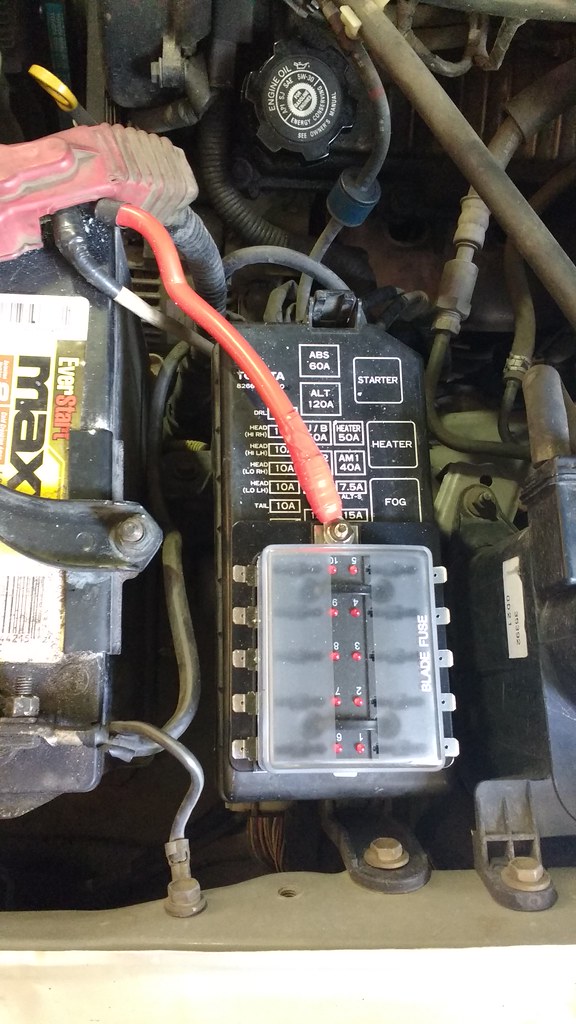
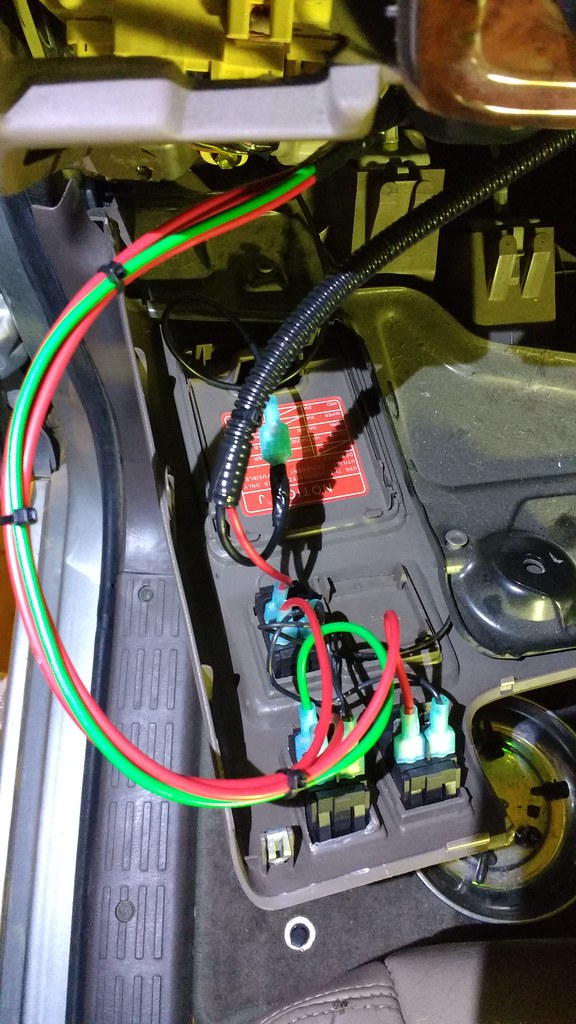
Fuse Box and Power Inverter
Wanting to hook up some electrical accessories, I got a fuse box. I have owned vehicles in the past with inline fuse holders hidden here and there, and wanted to avoid that sort of ghetto wiring practices on the 4runner.
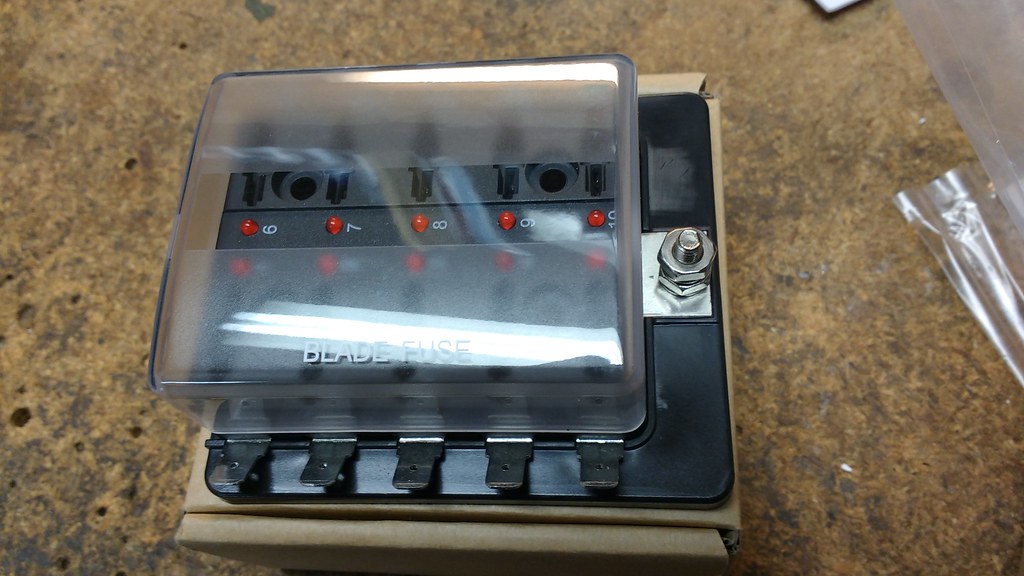
Immediately returning to ghetto wiring practices, I mounted it with zip ties on top of the stock fuse box cover.
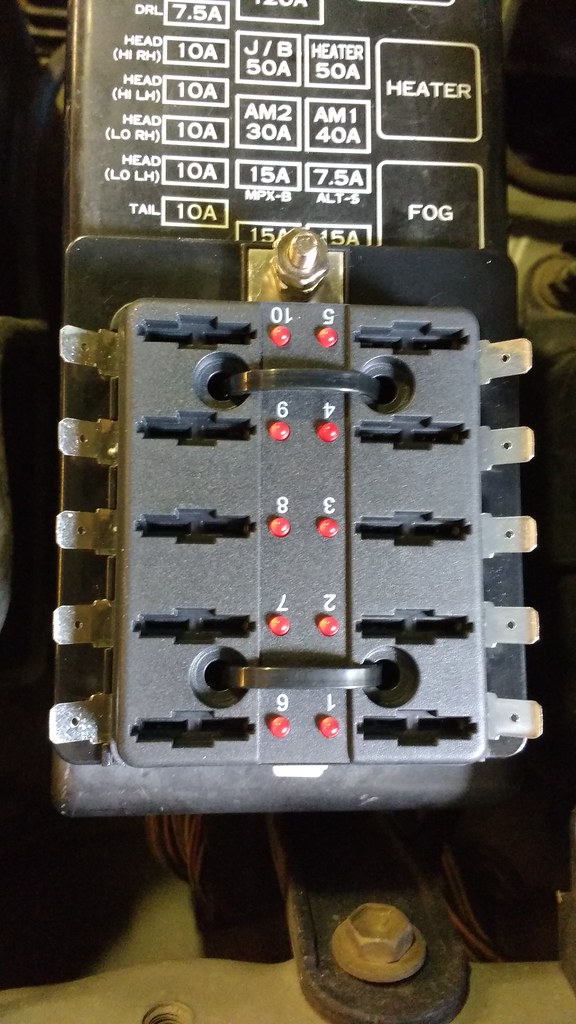
I then wired up the positive with some wire I stole (er, recycled) off of a non-functioning jump start battery kit.
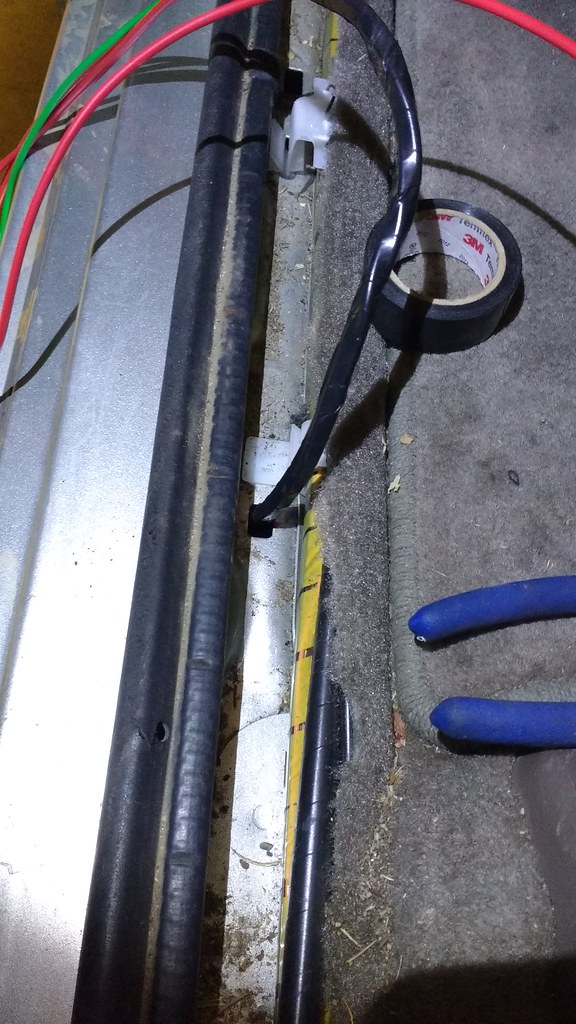
I ran a variety of wires in the cab, through a hole in the rocker then a hole under the door step trim.
I have a power inverter I wanted to hook up, simple right? Things got
complicated
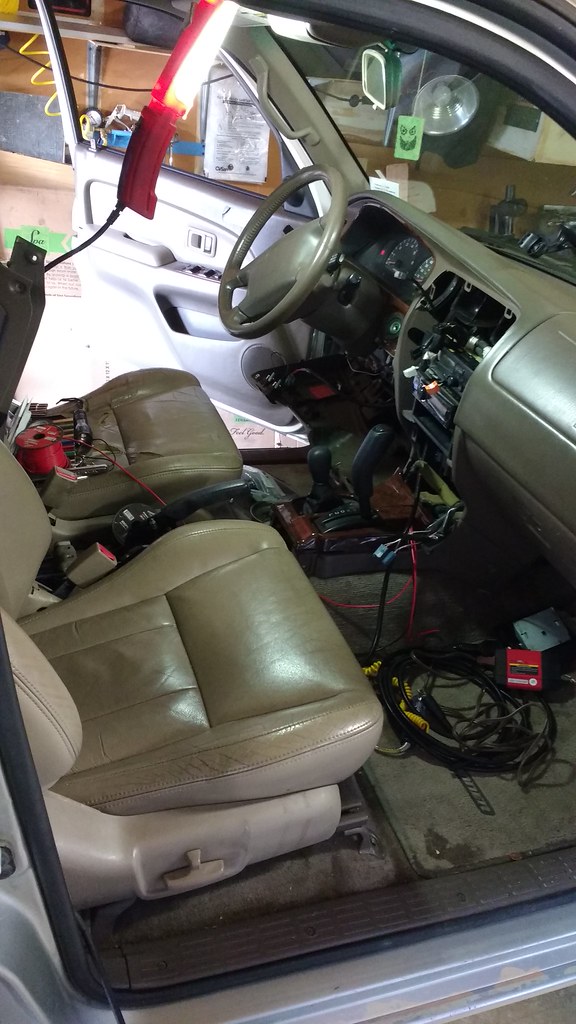
I dont want to have the inverter in the way, and have a whole bunch of wires all over. So naturally I hard wired it from the fuse box, through a switch.
It needs to be pretty though.
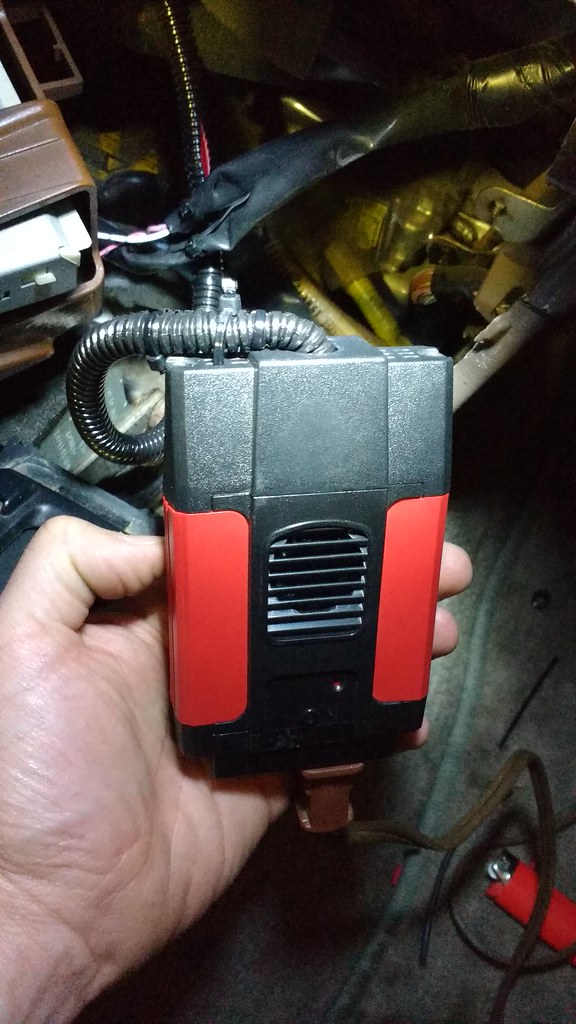
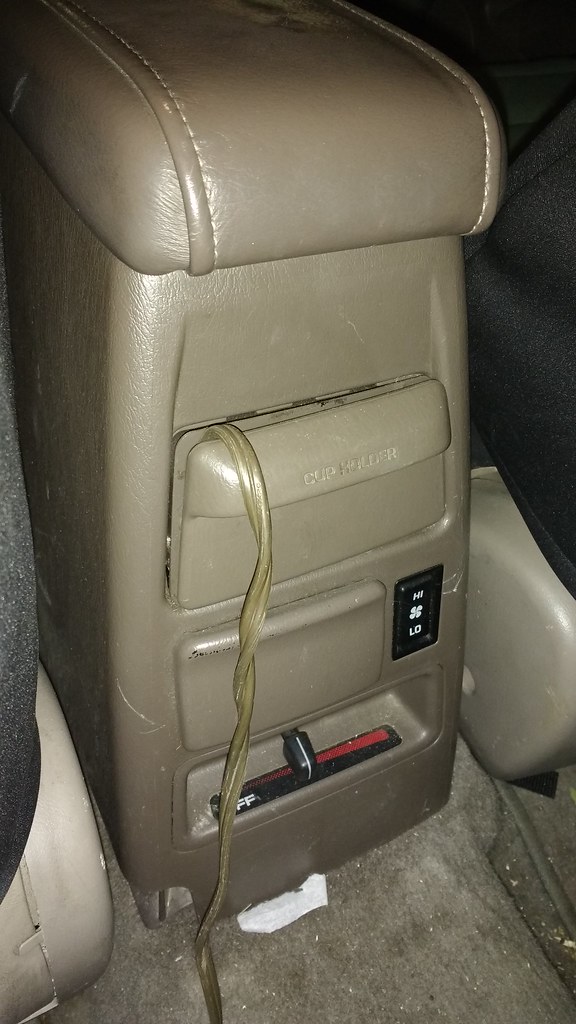
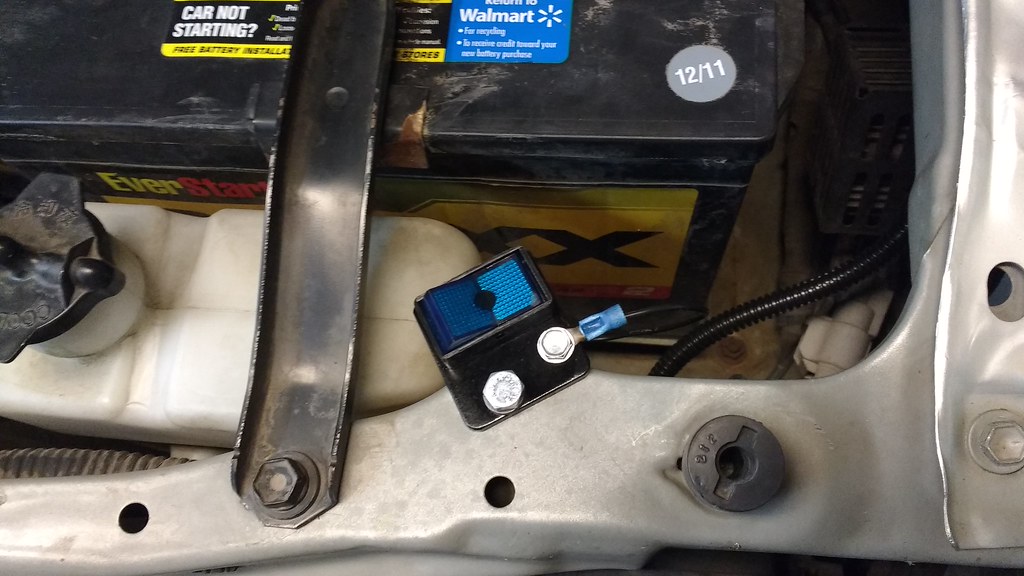
I zip tied it up behind the ash tray area. I put some switches to the lower left of the steering wheel. The one on the bottom turns the inverter on/off. The top left switch is for bumper Leds, the other one is to be decided still. There are lots of fun options.
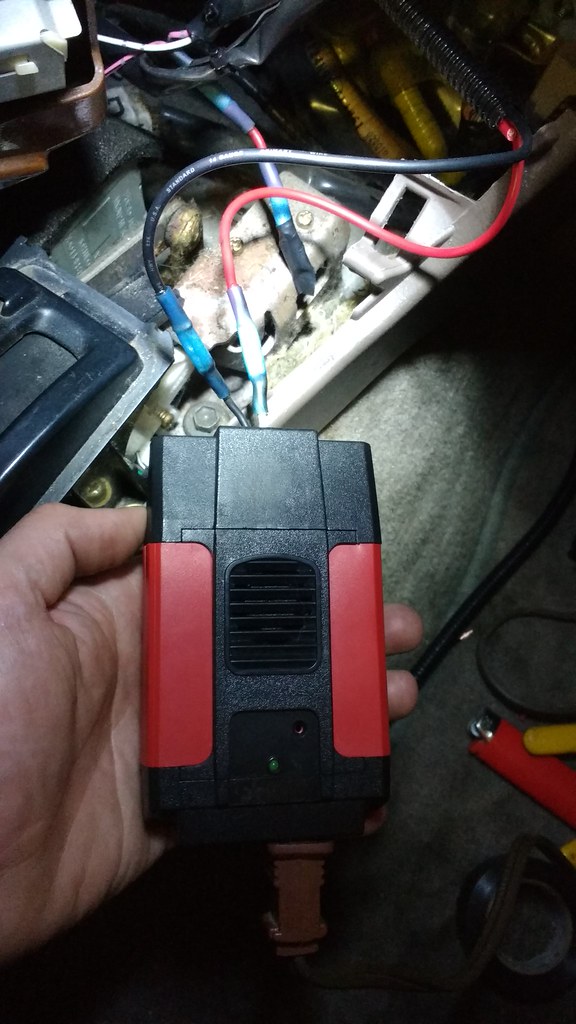
The outlet comes of the little ashtray door. I have about 2 feet of available wire that can be pulled out, or shoved back in. I bet if I took the time I could modify the ash tray and plug end so the plug can fit in the ash tray, but havent really looked into it.
The three outlet plug.
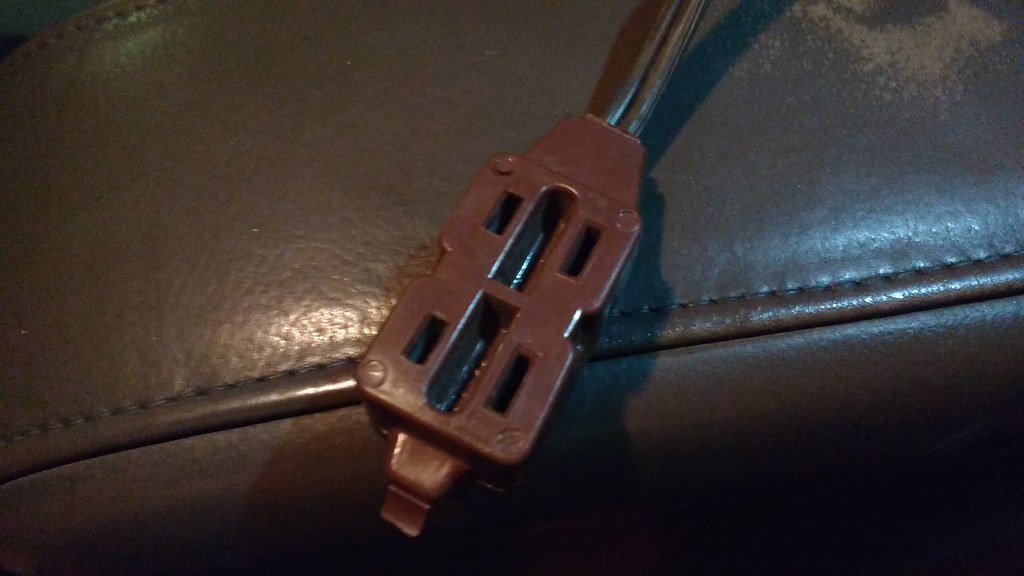
After some good use I can say I am happy how this turned out. There was many a day on our recent trip where between phones and cameras, we had all three outlets busy charging something. This isn't really an exciting, or sexy mod, but it is one of the most used.
|
|
|
Reply With Quote
|
|
07-17-2017, 07:14 PM
|
#35
|
|
Member
|
|
Join Date: May 2017
Location: Bay Area, Ca
Posts: 325
Real Name: keith and jenny
|
|
|
Member
Join Date: May 2017
Location: Bay Area, Ca
Posts: 325
Real Name: keith and jenny
|
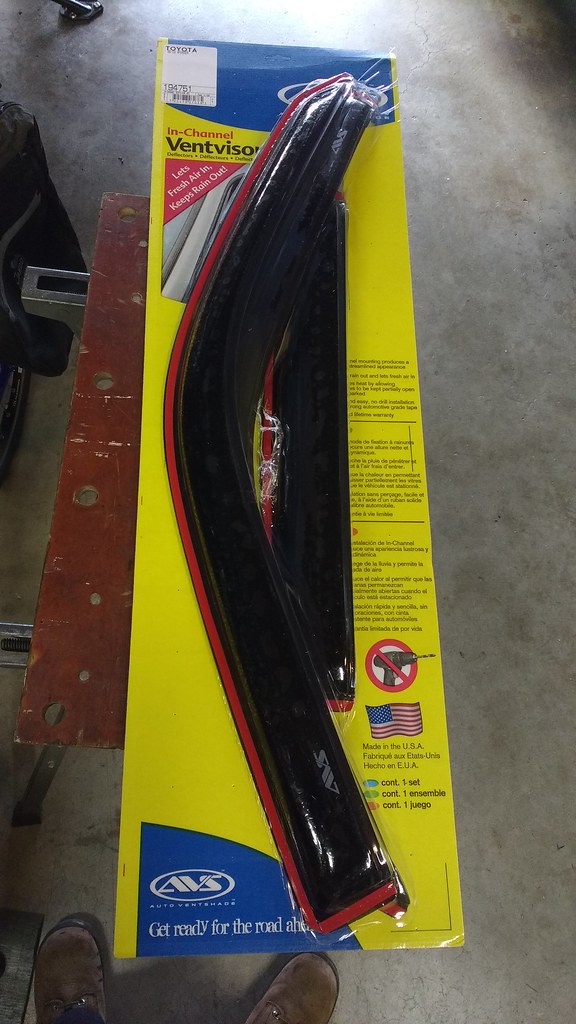
Got these off amazon, I wanted to be able to have a little ventilation, even in the rain. I got the ones that fit in the channel, having heard stories of the outside mount ones falling off at inopportune moments. I dont really care for the look too much. The function is nice though.
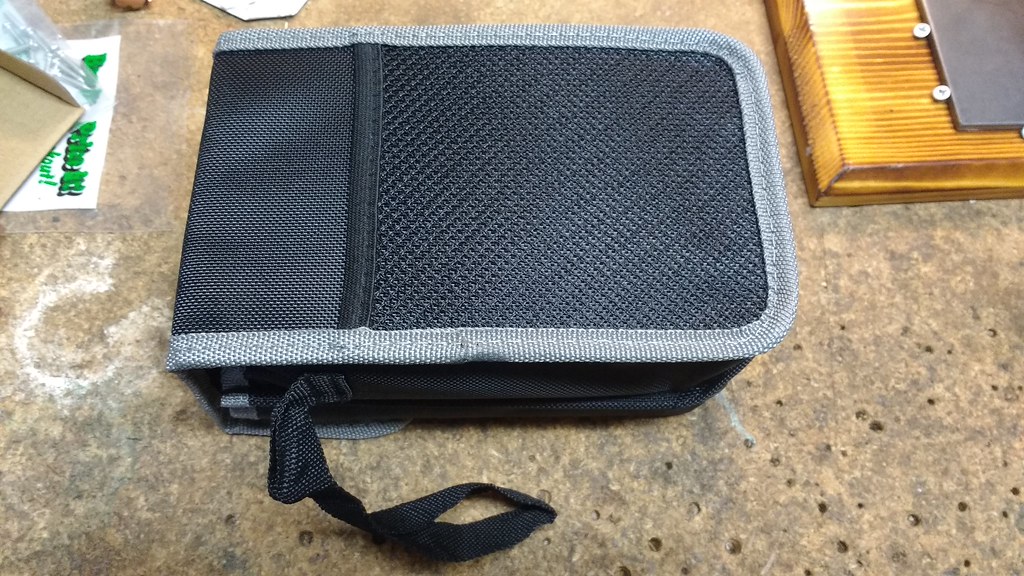
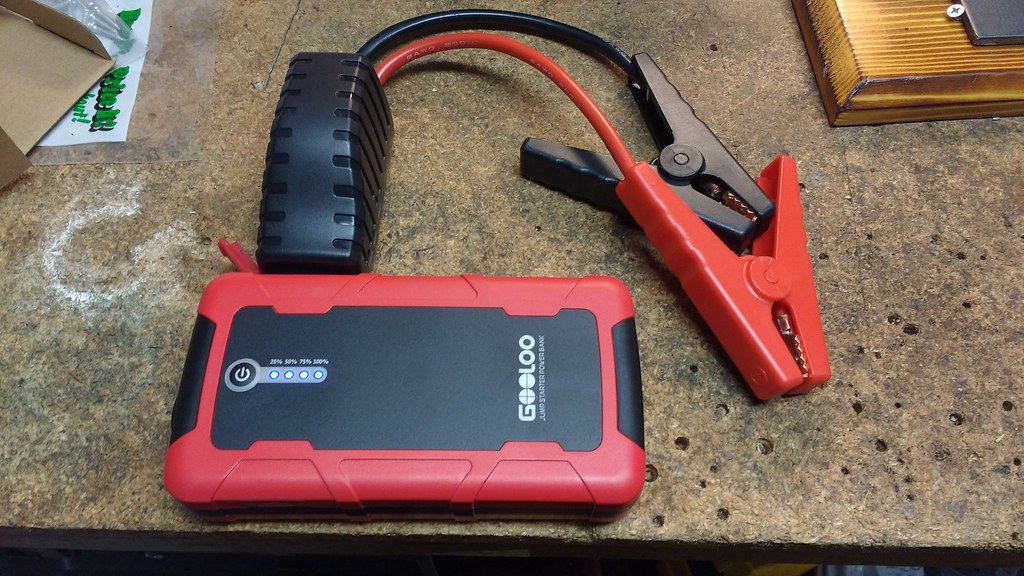
Another amazon purchase, I just think these are the coolest things. It wasnt super expensive, and it is small and easy to store. Just having it is good peace of mind.
|
|
|
Reply With Quote
|
|
07-17-2017, 09:14 PM
|
#36
|
 |
Senior Member
|
|
Join Date: Sep 2016
Location: North Vancouver, BC
Posts: 1,740
Real Name: Just call me the Grease Monkey
|
|
|
Senior Member
Join Date: Sep 2016
Location: North Vancouver, BC
Posts: 1,740
Real Name: Just call me the Grease Monkey
|
There's some serious science goigng on there!!! You are probably aware, but some inverters don't produce a pure sine wave and may harm certain electrical devices. Not sure which ones hurt what, just a thought. For battery chargers, the cheapo inverter is probably OK.
__________________
My Snow and Sand build thread
Mark_BC's 2000 Limited Salvage Build
Determined to keep them from becoming parts trucks. Yes, even the one I just picked up as a parts truck...
|
|
|
Reply With Quote
|
|
07-18-2017, 12:20 AM
|
#37
|
|
Member
|
|
Join Date: May 2017
Location: Bay Area, Ca
Posts: 325
Real Name: keith and jenny
|
|
|
Member
Join Date: May 2017
Location: Bay Area, Ca
Posts: 325
Real Name: keith and jenny
|
Quote:
Originally Posted by Mark_BC
There's some serious science goigng on there!!! You are probably aware, but some inverters don't produce a pure sine wave and may harm certain electrical devices. Not sure which ones hurt what, just a thought. For battery chargers, the cheapo inverter is probably OK.
|
I did some half-assed research on that subject when I bought this power inverter five years ago, and a little more when we got the GoPros. I didn't really learn much. I remember that quality control on the Harbor Freight inverters was supposedly iffy, what a surprise! Apparently some of them don't produce a pure sine wave. I don't know if mine does or not. I saw on the internet somewhere that the GoPros aren't particularly sensitive to irregular sine waves though, and we have been charging the point and shoot camera with this inverter for years. So in a nutshell, I did a minute amount of research, didn't quite understand it, and called it good. 
|
|
|
Reply With Quote
|
|
07-18-2017, 02:00 AM
|
#38
|
|
Member
|
|
Join Date: May 2017
Location: Bay Area, Ca
Posts: 325
Real Name: keith and jenny
|
|
|
Member
Join Date: May 2017
Location: Bay Area, Ca
Posts: 325
Real Name: keith and jenny
|
Before leaving I had some maintenance to do, so I went on amazon and bought these. I bought it all on amazon because of the two day prime shipping. I am sure they can be found cheaper elsewhere, for longer shipping times, but I did all this a few days before leaving so my options were limited.
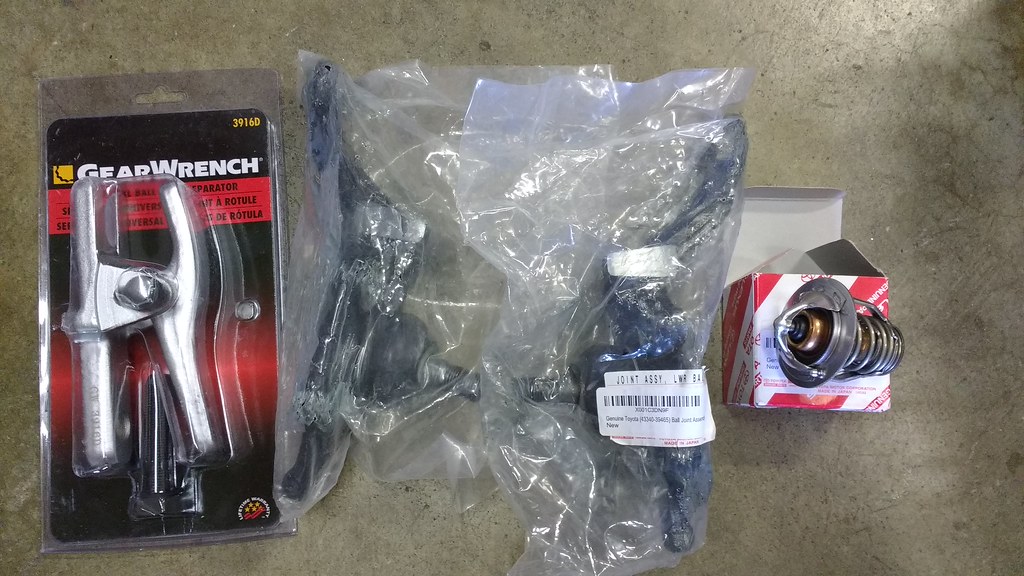
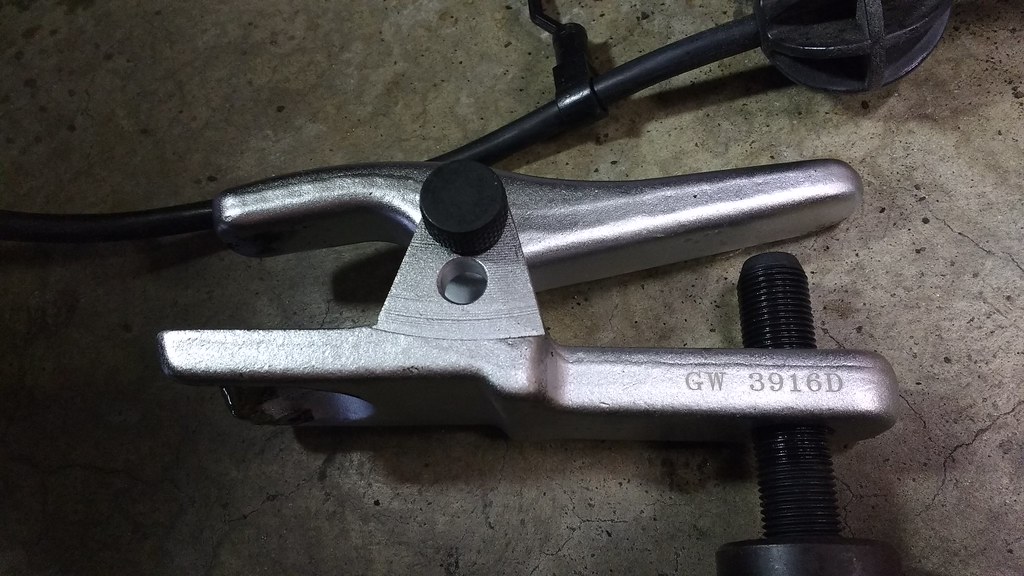
First is a GearWrench 3916D Universal Ball Joint Separator.
https://www.amazon.com/gp/product/B0...?ie=UTF8&psc=1
This thing did its job well, and is a good tool investment. No harm was done to the rubber boot. The ball joints did not pop right out, but I put some preload on them with the separator, and with a few taps with the hammer the tie rods popped right out.
I also got some genuine Toyota lower ball joints. Having no idea how old the old ones were, changing them out was the smart thing to do. I know this because smart people told me, and I listened.
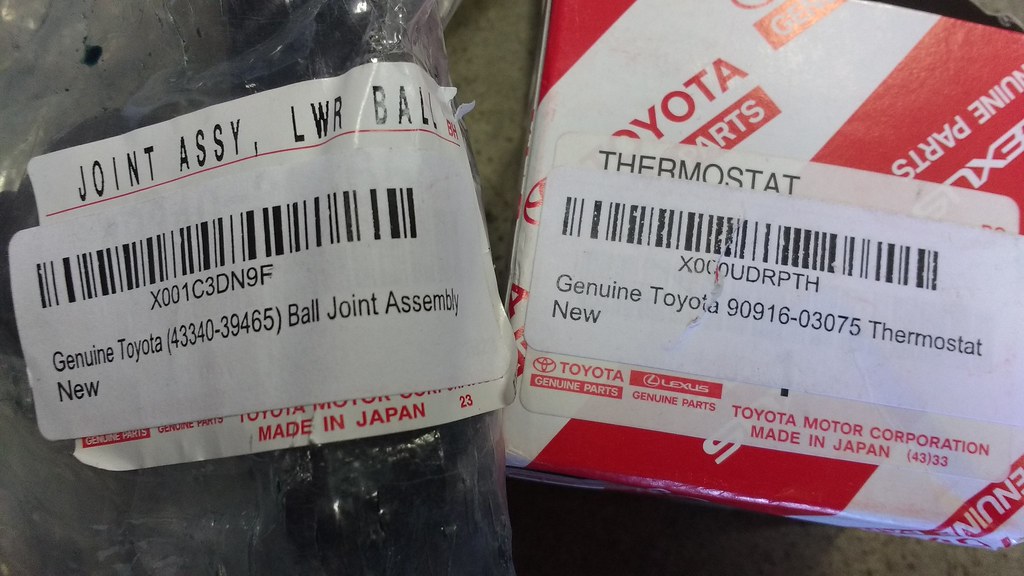
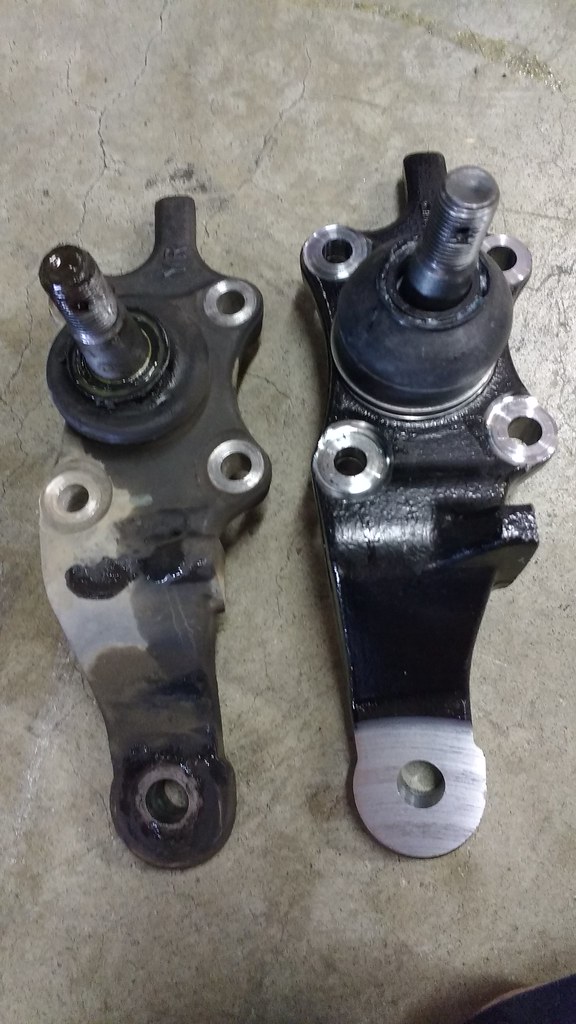
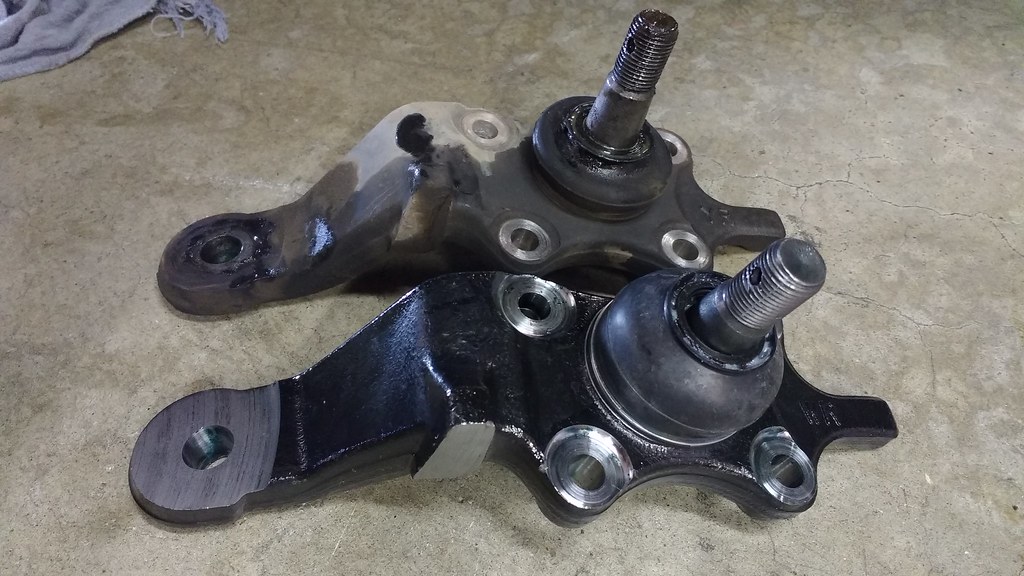
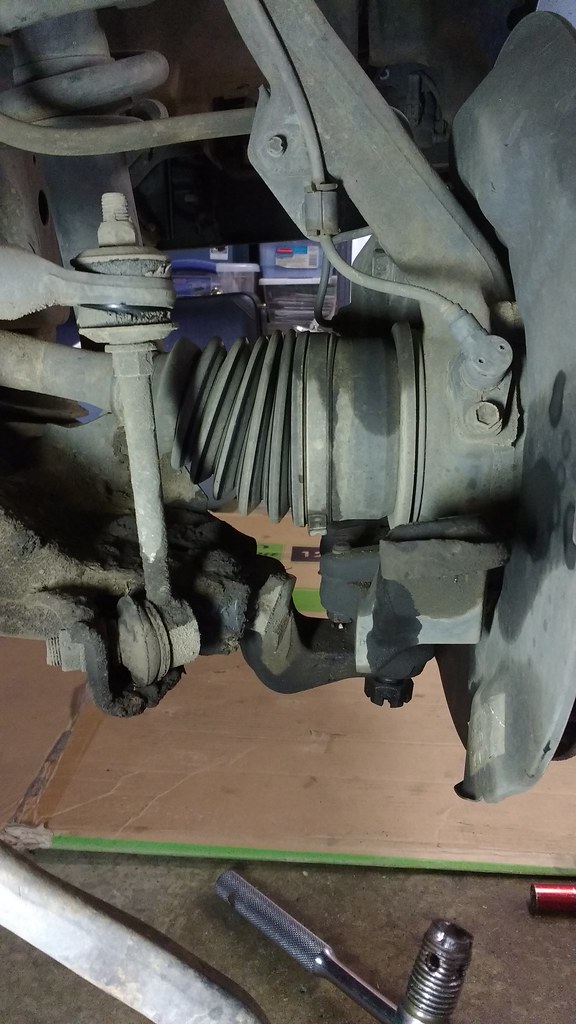
Doing the ball joints was not super difficult or involved. I am glad I did it for two reasons. 1) It is good preventative maintenance. 2) THERE WAS NO COTTER PIN IN THE DRIVERS SIDE CASTLE NUT! After marveling at the lack of a cotter pin for a few moments, I put the ratchet on there and it came off easy, way too easy. With no cotter pin the nut was already spinning off. Apparently the shop I took it to do the halfshaft also forgot it, or failed to bend it over, at the same time they were screwing up the brakes and tie rod. I am so glad people on this board got me to do the LBJs; otherwise my little trip could have gone very bad. I put the 4 bolts in with blue Loctite, torqueing in steps, and torqued all fasteners to spec.
|
|
|
Reply With Quote
|
|
07-19-2017, 11:06 PM
|
#39
|
|
Member
|
|
Join Date: May 2017
Location: Bay Area, Ca
Posts: 325
Real Name: keith and jenny
|
|
|
Member
Join Date: May 2017
Location: Bay Area, Ca
Posts: 325
Real Name: keith and jenny
|
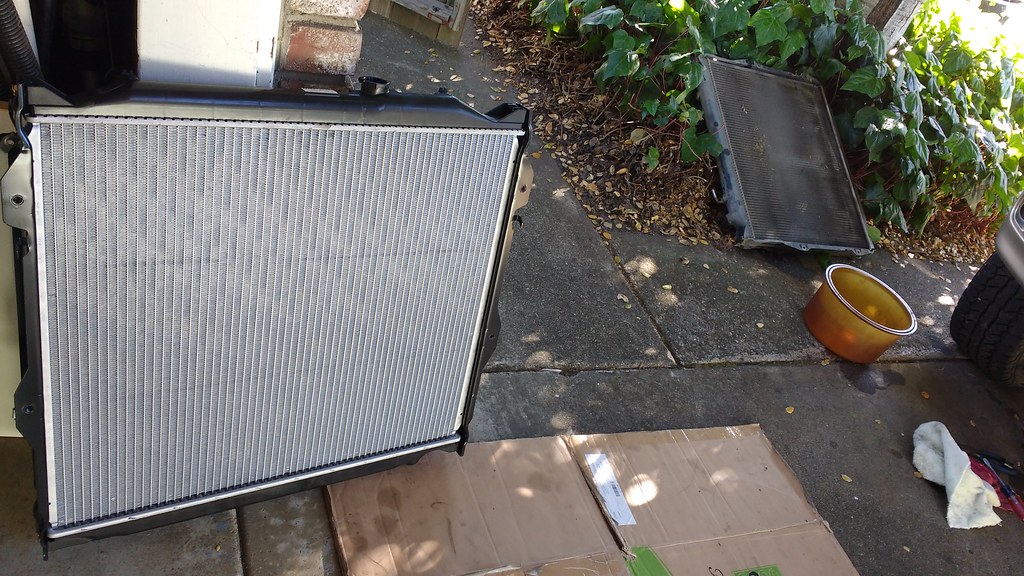
Also new is a Denso radiator. I have heard that the koyo radiators are best. Denso is also an OEM Toyota supplier though so I have confidence in its quality. Changing the radiator out was easy. While it was out I used compressed air to blow out as many of the dead bugs from the ac condenser as I could. The coolant was switched to green at some point in its life so I left it green. I also am using the built in transmission cooler still. I will be bypassing it someday for a large, separate transmission cooler. I am not really worried about pink milkshake, since the radiator is new, but I would like to keep the transmission fluid temps out of the 230s.

Had no idea how old the plugs were, so I took them out.
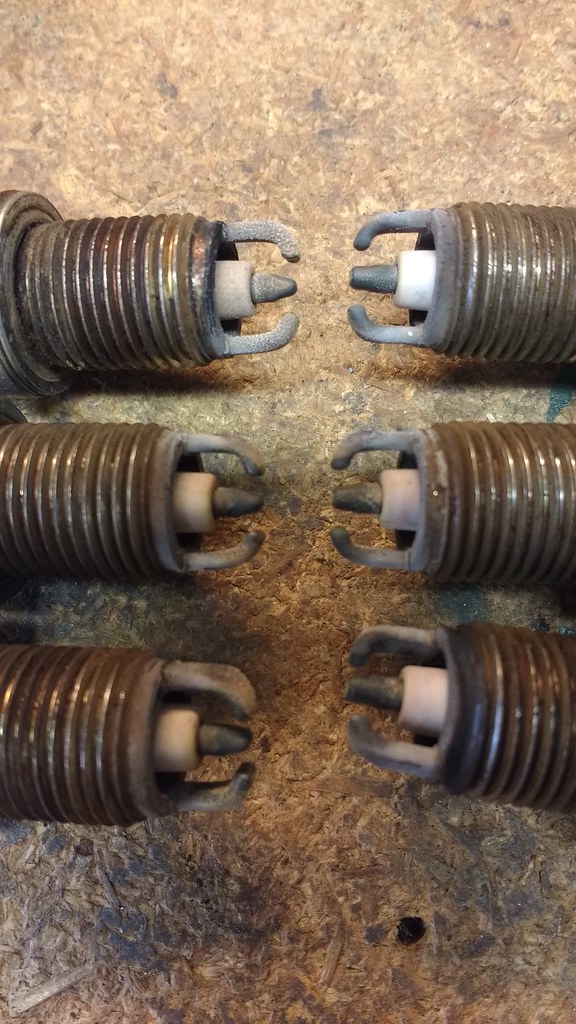
They surprisingly were not totally awful; I retired these plugs and put new ones in.
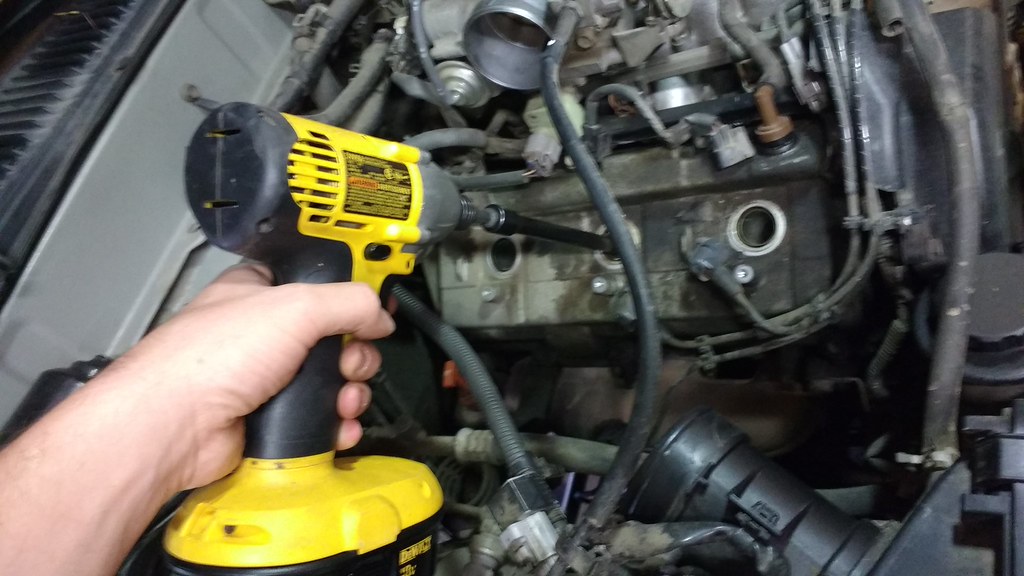
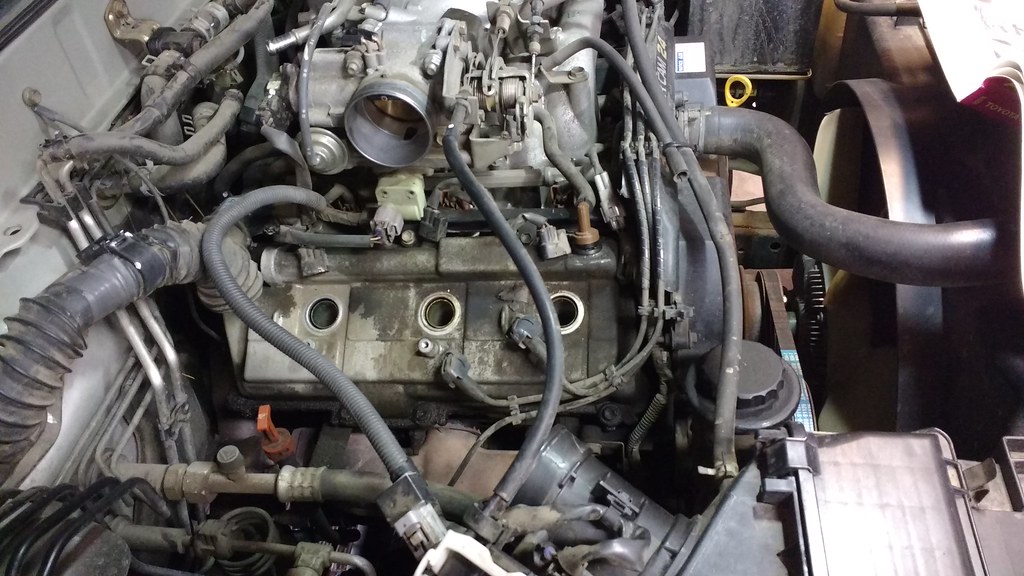
While the intake hoses were disconnected I wiped out all the oil from the throttle body. And there was a ton of it.
 .
I should take it off and give it a thorough cleaning one of these days.
|
|
|
Reply With Quote
|
|
07-29-2017, 12:56 AM
|
#40
|
|
Member
|
|
Join Date: May 2017
Location: Bay Area, Ca
Posts: 325
Real Name: keith and jenny
|
|
|
Member
Join Date: May 2017
Location: Bay Area, Ca
Posts: 325
Real Name: keith and jenny
|
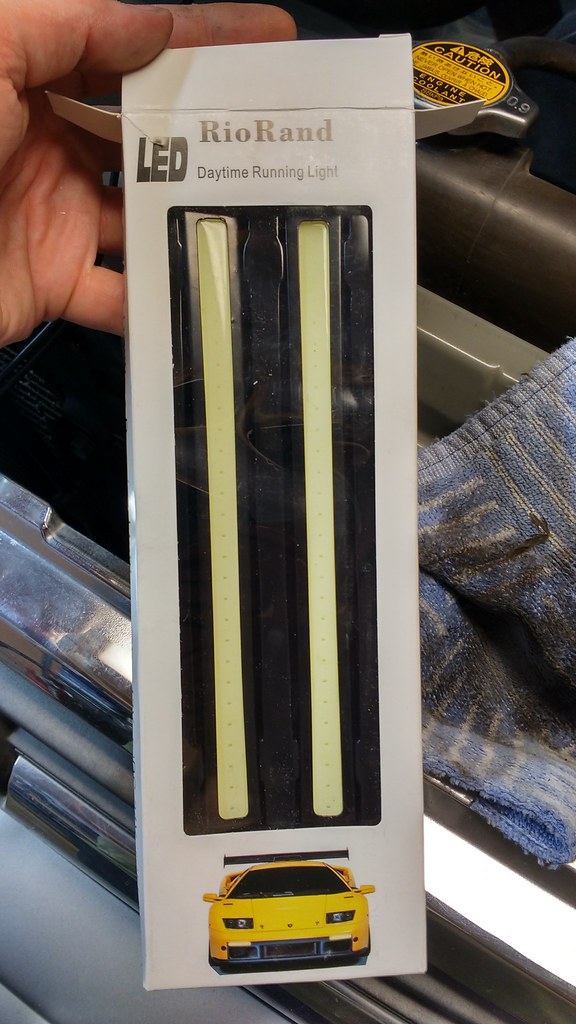
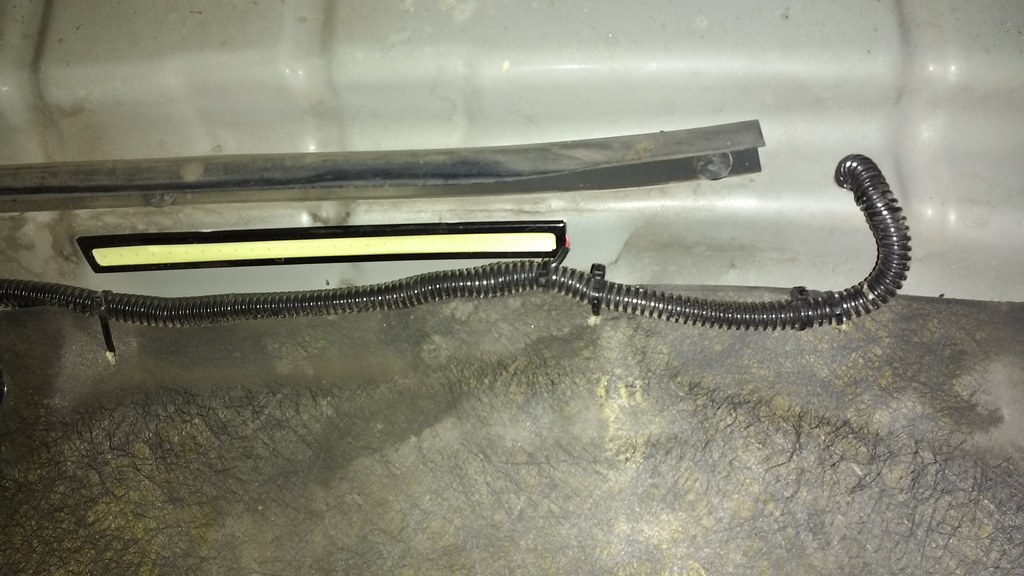
This is one of my favorite mods. It is the same thing I did in the tracker, but with a different switch. I got these LED strips off amazon. They come with 3m adhesive on the back that I used to mount them. The adhesive has lasted for two+ years on the tracker, so I am confident they will last on the 4runner.
There is a face of the lateral hood structural ribbing that is conveniently at about the perfect angle, so I stuck them to that. Some of the hood insulation was hanging in the way, a razor blade fixed it.
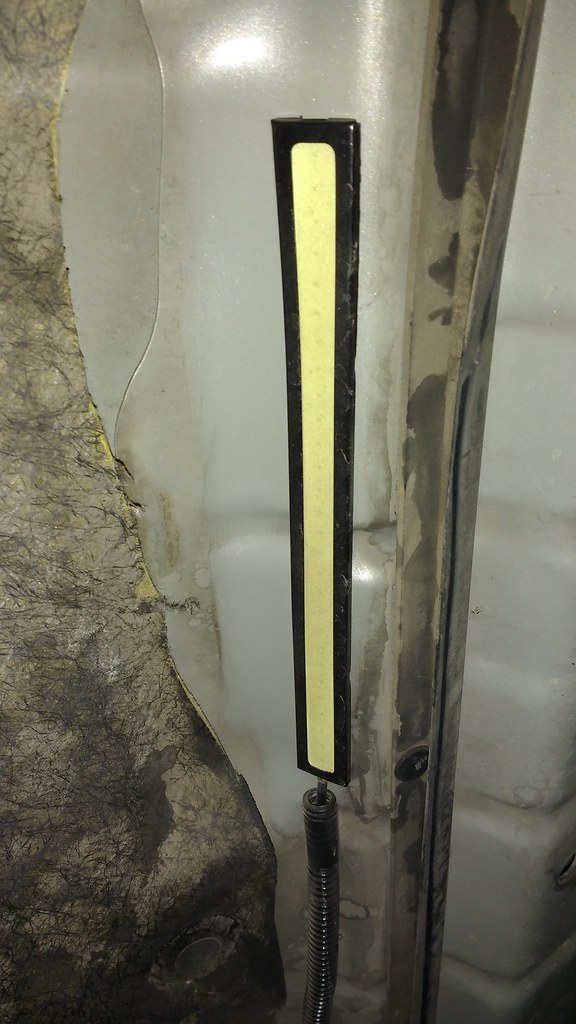
The loom is mounted with zip ties through holes drilled in the inner steel of the hood in some cases, but mostly holes in the insulation.
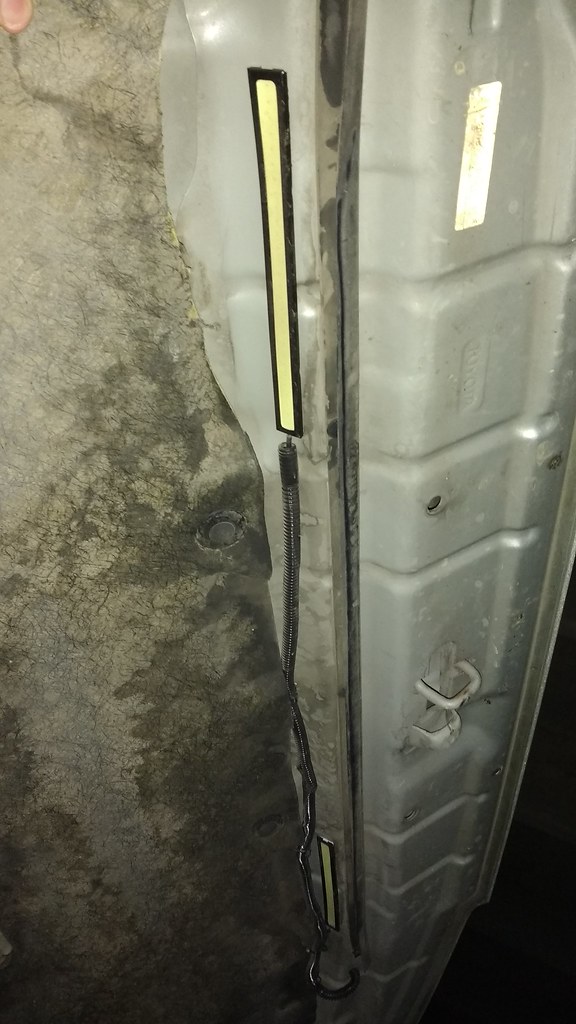
The wire is run down through the hollow bits of the hood, and transitions from hood to body by the drivers side hinge.
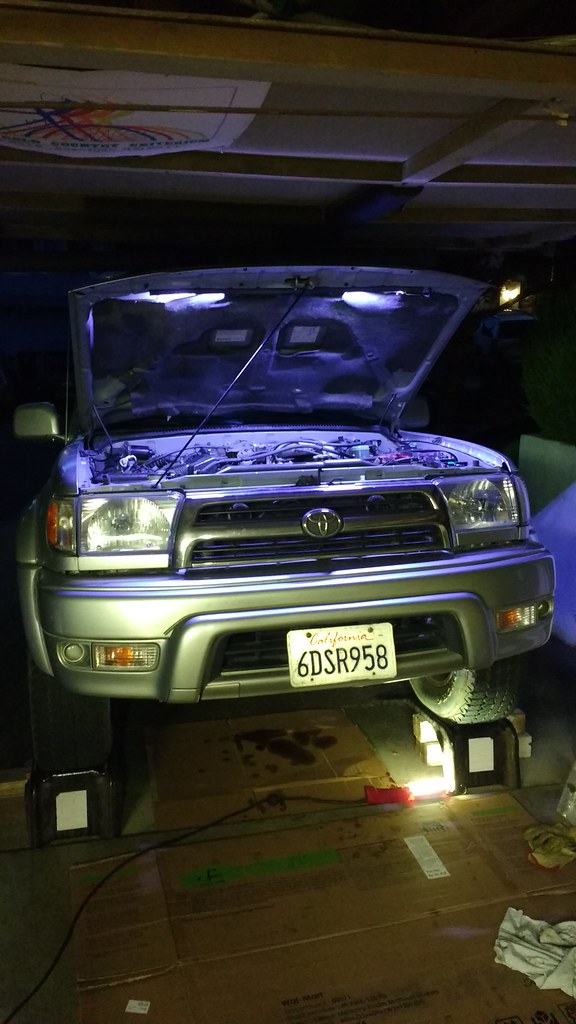
I made a bracket for the switch out of some old flat bar left over from another project.
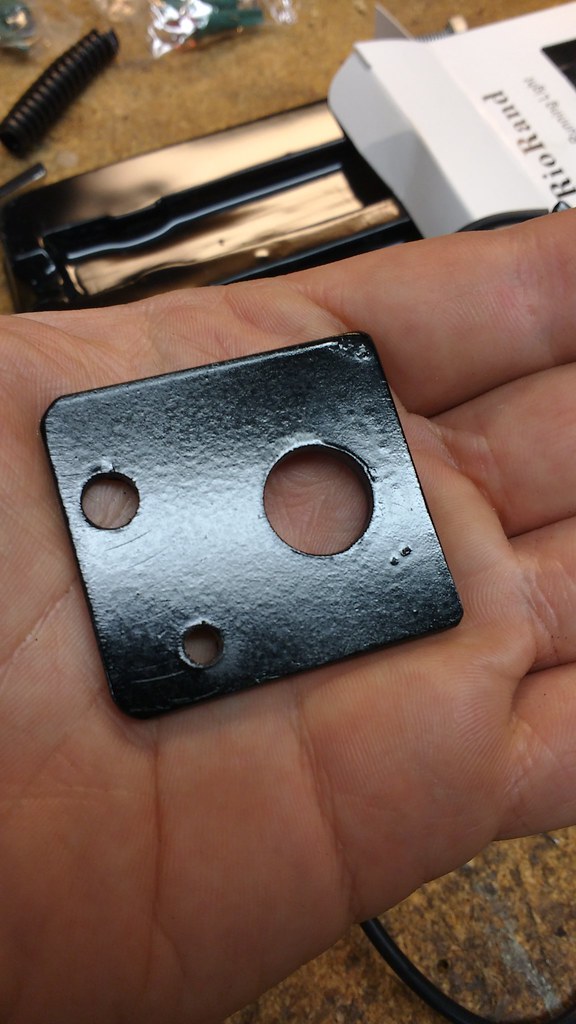
The switch is some aftermarket one from the junkyard, had it for years, knew it would come in handy eventually.
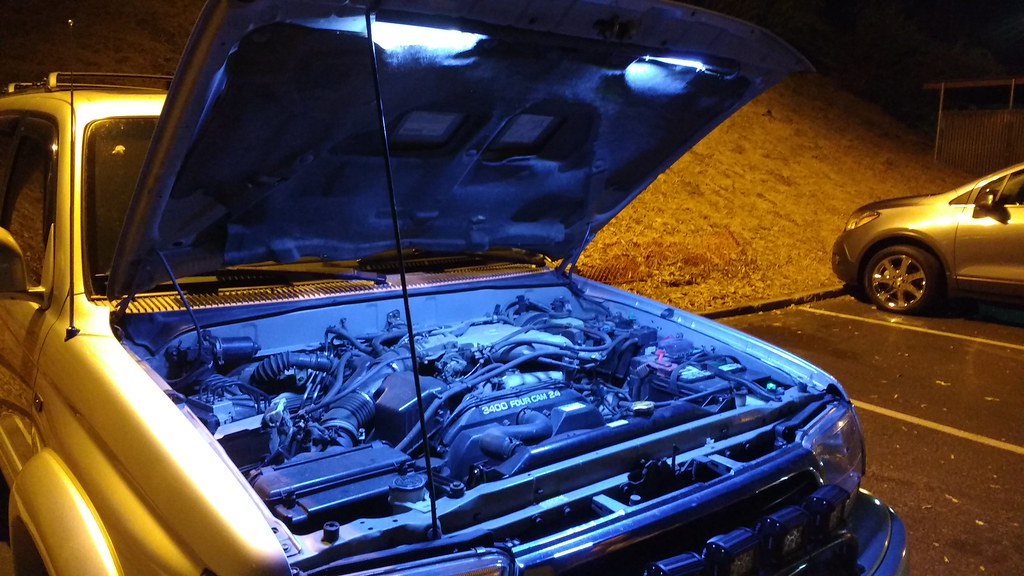
The leds look very blue here, and the color temperature is a bit blue. The street lights are very yellow in this parking lot and the contrast makes it look bluer. You get a good idea of how bright they are though. The lights are bright enough that you could read fine print on a book sitting anywhere in the engine compartment.
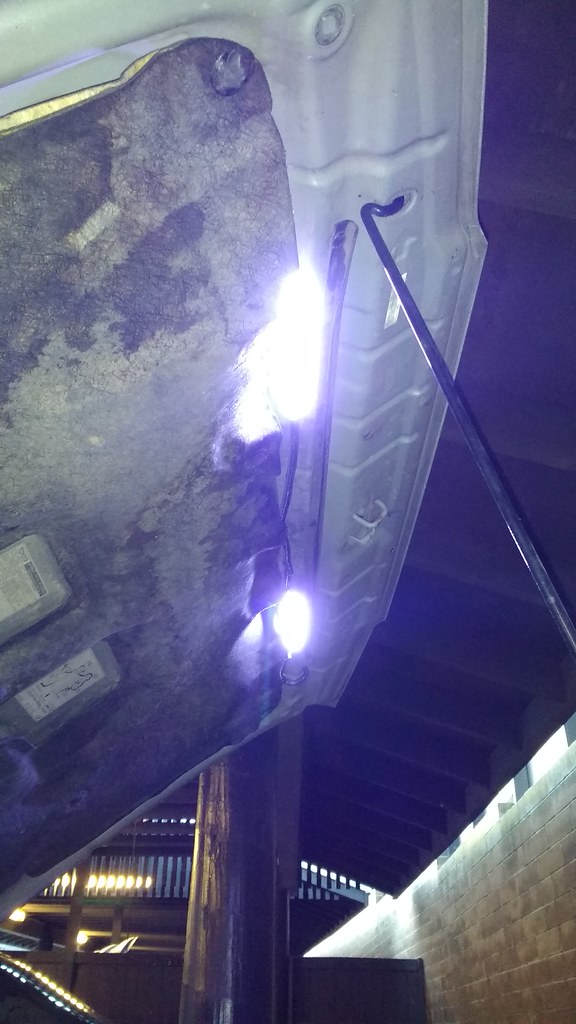
Since I have these lights, It is easy to check fluids or do oil changes at night. The underside needs them now.
|
|
|
Reply With Quote
|
|
08-01-2017, 01:41 AM
|
#41
|
|
Member
|
|
Join Date: May 2017
Location: Bay Area, Ca
Posts: 325
Real Name: keith and jenny
|
|
|
Member
Join Date: May 2017
Location: Bay Area, Ca
Posts: 325
Real Name: keith and jenny
|
Rear Storage/Sleeping Platform, Part 1
One of the main reasons we got a 4runner was so we could bivouac internally if necessary. Since we pack lots of stuff we needed a sleeping platform and storage solution. We as usual, this was a last minute deal. The coolest ones have drawers. I knew I wouldnt have time for that before this trip, so instead I just left the inside of the rear part open in two halves separated by a middle wall. Much of my camping related stuff is in sterilite latching bins, not the giant ones lots of people seem to have, but smaller ones. In packing up the tracker it was very helpful to have smaller puzzle pieces to shoehorn in. Having one huge bin, and having to jam other stuff in around it, in that tiny space would have been unreasonable. This back part fits in three bins in per side.
The material is ¾ (23/32) good both sides pine plywood. I bought one sheet, and used most of it. I started by making the rear part for the cargo area. I did not put a bottom on it, it seemed unnecessary. In this picture I still havent added the middle support. My construction method for this part was staples and gorilla glue, but nails or screws would have been fine. Finish nails would have left a nicer surface.
I wanted all the room possible, so I pulled the rear seats and carpet. I then put the rear cargo floormat part back in under the box for a little deadening and insulation. Our other cars are both 4 seaters, so I can get away with this being a 2 seater.
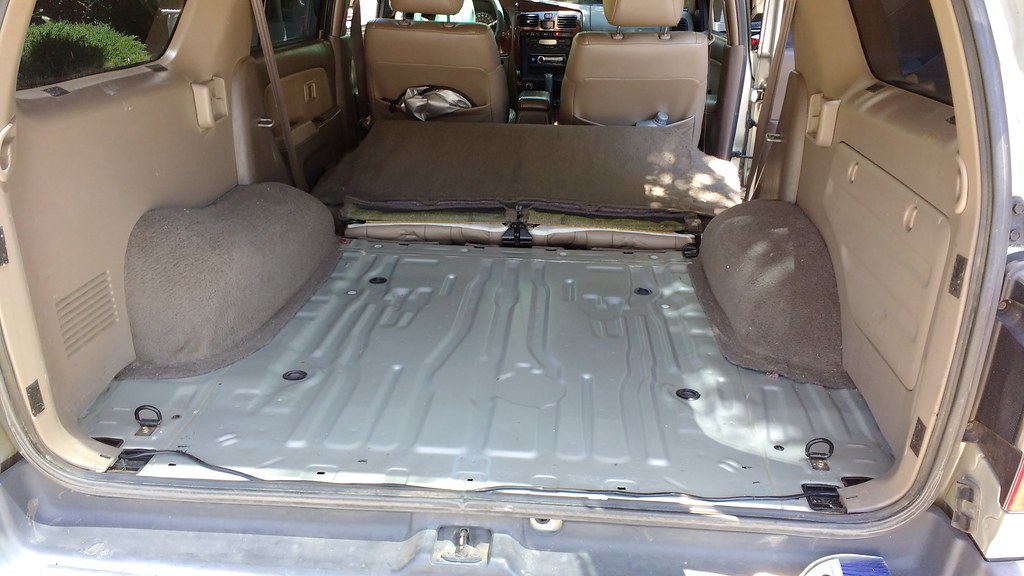
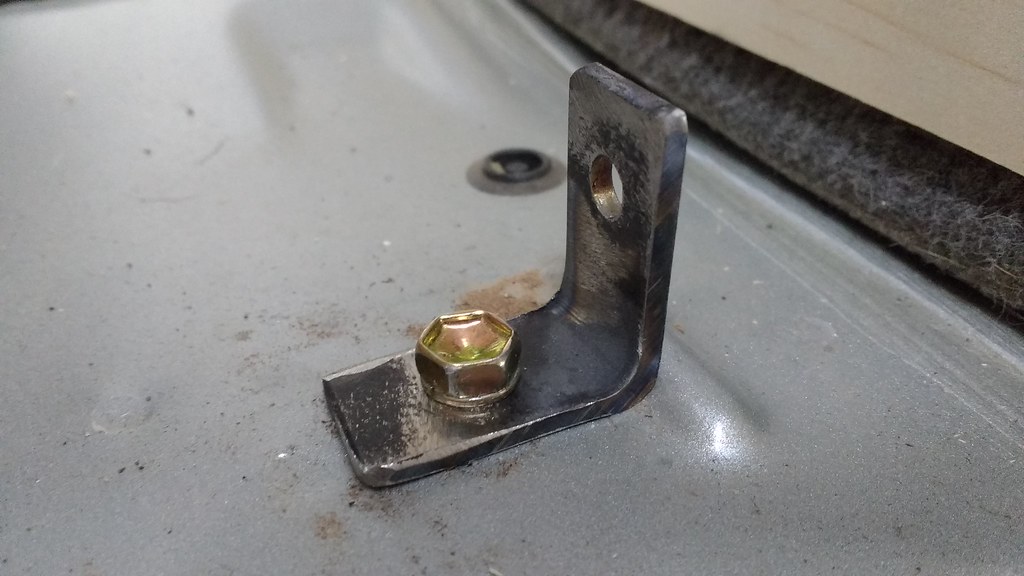
I bought eye bolts and turnbuckles to hold the thing down, the shortest turnbuckles at the hardware store. Naturally, the turnbuckles were too long to be useful. This is probably because I made the bottom of the plywood top the height of the wheel wells, which is shorter than most of the other platforms I have been looking at. My first impulse was to make a bracket that bolts the rear tie down hole and also the side of the box. But this was a time saver. I cut a bit of bed frame, made some holes and deburred it. This is where the turnbuckle mounts on the 4runner now. I reused the tie down loop, reversed, and bolted to the box as the mount for the top of the turnbuckle.
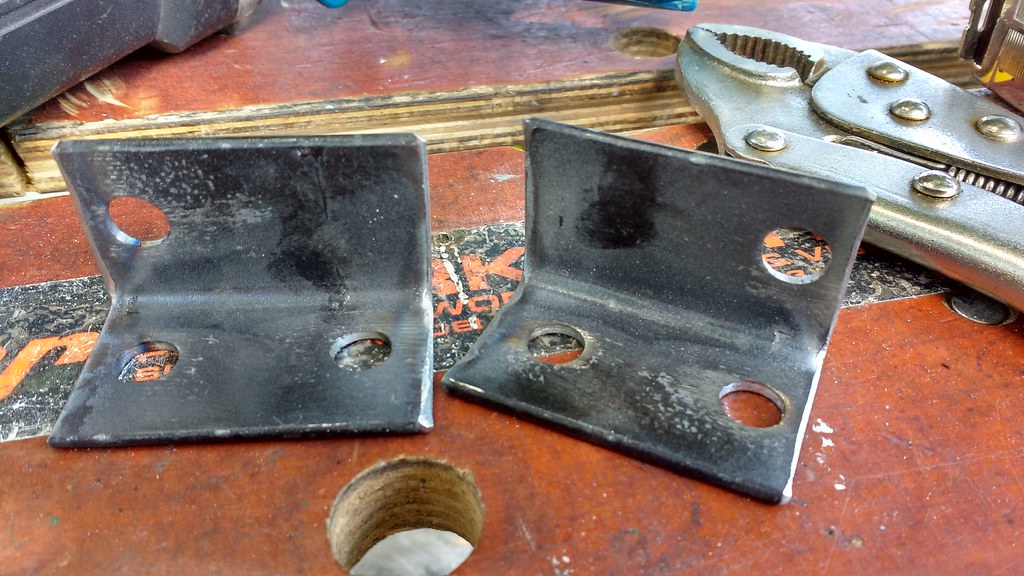
To mount the front I had to get a little creative. The tie down loops by the back seat were in an inconvenient location. One was also missing, having been replaced with a big ground, probably for an amp, by a previous owner. There was also, again the issue of the too long turn buckles. So I made some more bed frame brackets! These holes are seat bracket threaded holes.
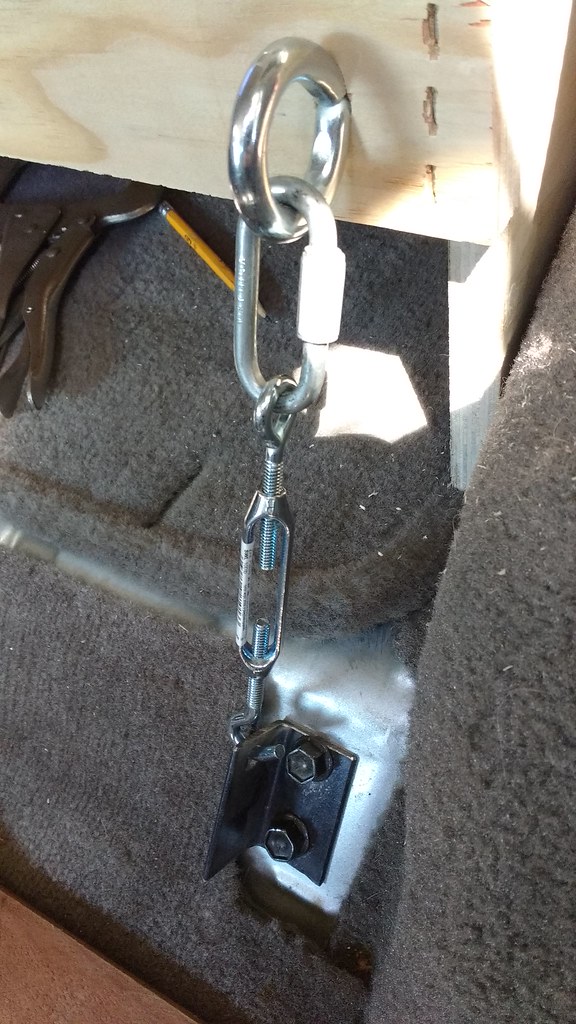
I made all these brackets and installed them with the thought that I would later have the time to make them into sexy curvaceous shapes and paint them nicely. So far no such luck! Hopefully someday. Here you can see how the front of the rear box part gets held down. The front of the box got a strip across it, one plywood width down from the top. That way it can be a ledger to support the rear of the front panels. It doesnt go all the way to the floor, so I can still slide longer items under it the length of the back area, nice for a fishing rod or rifle  you dont want prying eyes to see.
Part 2 Coming when I get the chance!
|
|
|
Reply With Quote
|
|
08-01-2017, 02:36 AM
|
#42
|
|
Senior Member
|
|
Join Date: Sep 2016
Location: North Vancouver, BC
Posts: 1,740
Real Name: Just call me the Grease Monkey
|
|
|
Senior Member
Join Date: Sep 2016
Location: North Vancouver, BC
Posts: 1,740
Real Name: Just call me the Grease Monkey
|
What I did for those attachments by the seat is I got some extra black D rings from a wreck and put those there. The turnbuckles attach to those. I also did this in the back.
__________________
My Snow and Sand build thread
Mark_BC's 2000 Limited Salvage Build
Determined to keep them from becoming parts trucks. Yes, even the one I just picked up as a parts truck...
|
|
|
Reply With Quote
|
|
08-02-2017, 01:49 AM
|
#43
|
|
Member
|
|
Join Date: May 2017
Location: Bay Area, Ca
Posts: 325
Real Name: keith and jenny
|
|
|
Member
Join Date: May 2017
Location: Bay Area, Ca
Posts: 325
Real Name: keith and jenny
|
Quote:
Originally Posted by Mark_BC
What I did for those attachments by the seat is I got some extra black D rings from a wreck and put those there. The turnbuckles attach to those. I also did this in the back.
|
This is a good idea! It has the added cool factor of reusing factory toyota parts. If I had thought of that I probably would have done that. Instead I ended up with bits of a bed frame in my 4runner.
By the way, photobucket is messing up your build thread. Photobucket is ruining many cool old build threads on different forums. It is sad to think that lots of cool threads might be lost forever.
|
|
|
Reply With Quote
|
|
08-02-2017, 02:04 AM
|
#44
|
|
Member
|
|
Join Date: May 2017
Location: Bay Area, Ca
Posts: 325
Real Name: keith and jenny
|
|
|
Member
Join Date: May 2017
Location: Bay Area, Ca
Posts: 325
Real Name: keith and jenny
|
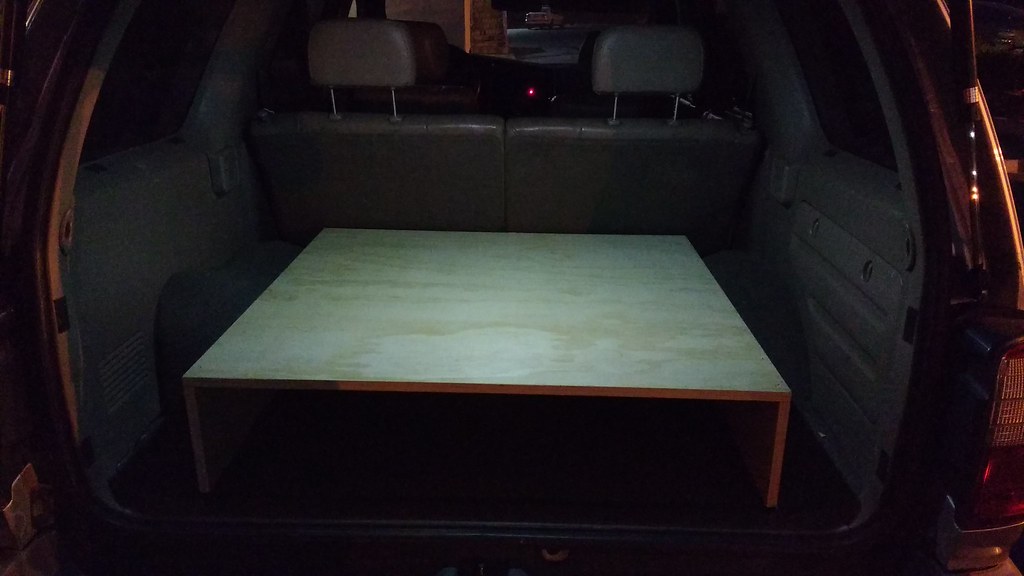
Rear Storage/Sleeping Platform, Part 2
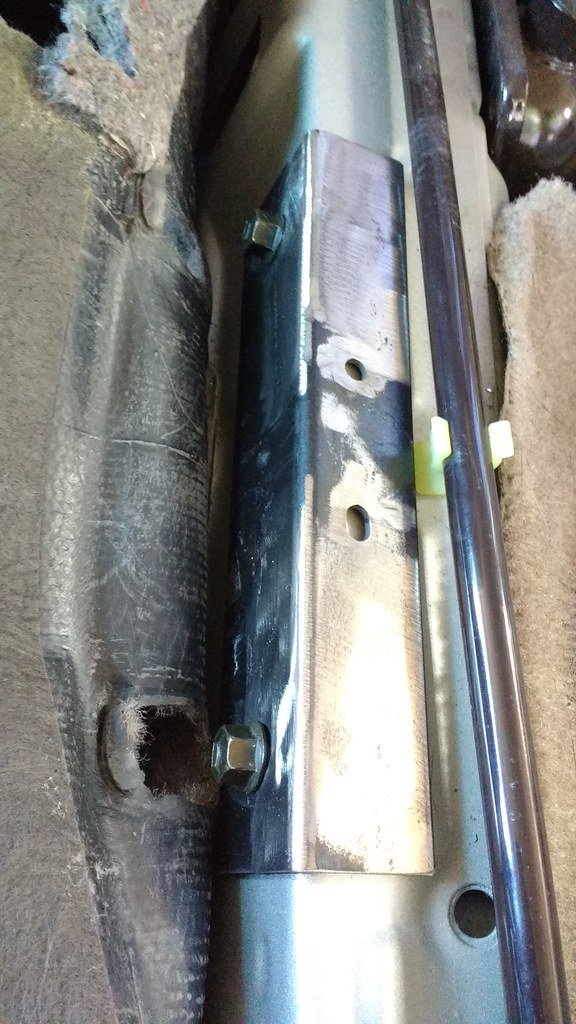
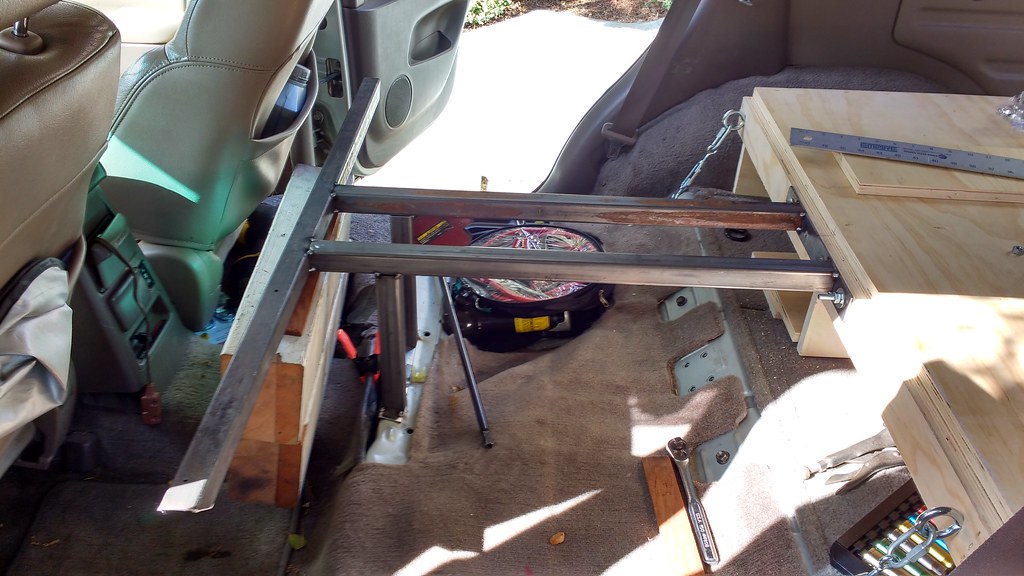
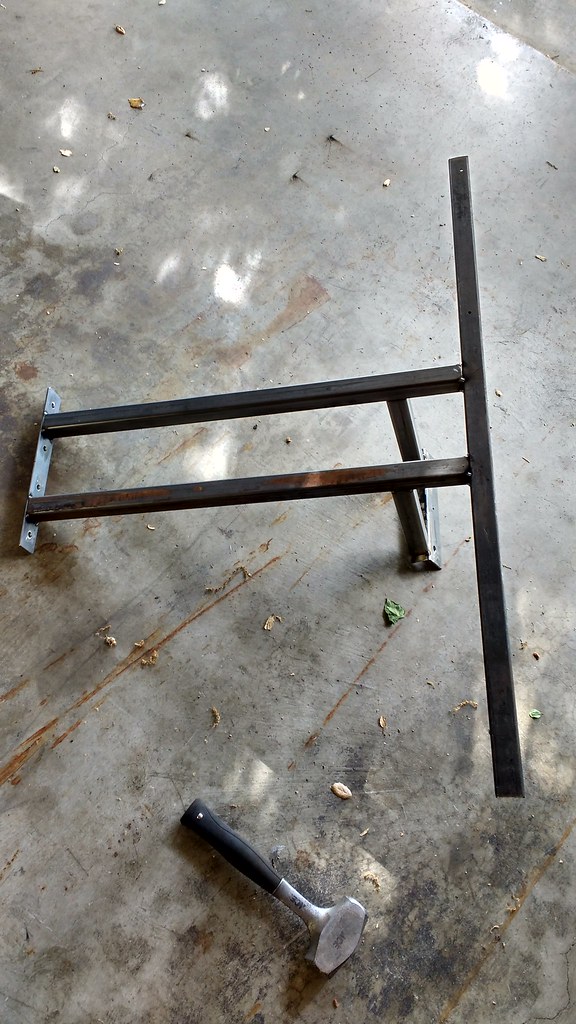
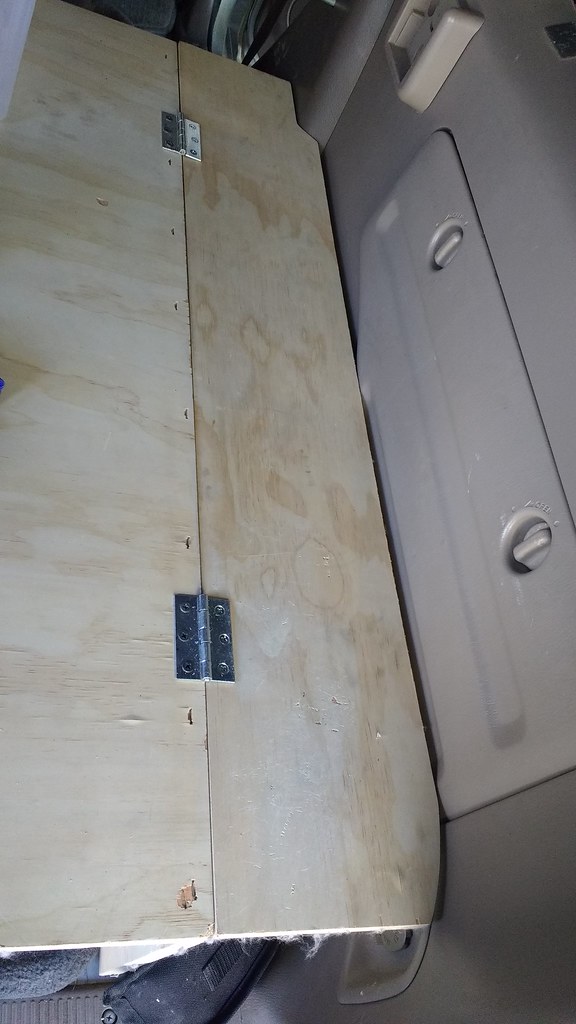
The front part where the rear seats used to be was a little trickier. Most people make it so it can fold back onto the rear box part, but since I did the 2 seater conversion, I dont have to worry about rear seats, which is nice. Many put a leg on each corner of the plywood, but that seemed like it would be too much in the way. I settled on making a steel structure to support the plywood. The 1/8 flat bar bolts to the box with 4x 5/16 carriage bolts, with a 3/8 fender washer on the head of it against the wood. The square part of the carriage bolt still bites into the wood, as it fits through the hole in the washer, but the big washer spreads the load out. The tube is 1 ¼ box, the cross piece is 1/8 wall; the other pieces are 12 gauge. The cross piece is the width of the rear plywood box. It doesnt need to go all the way to the door because there is no serious weight that far out.
In this picture you can see the plywood rip that makes up the center of the front portion. It is screwed with self-tappers to the steel structure. Note that the edge of the wood comes to about the center of the box tube. This gives the side plywood pieces something to sit on, so that there is no weight on the hinge. You can also see the ledger built into the rear plywood box to support the rear of the front panels.

My steel substructure needed vertical support, so I cut this out of bed frame. It bolts to two seat cushion mounting holes. I think I did make a small cut on the carpet so it would fold up conveniently, but nothing that would be noticeable with the seats back in. This is where my support legs will mount.
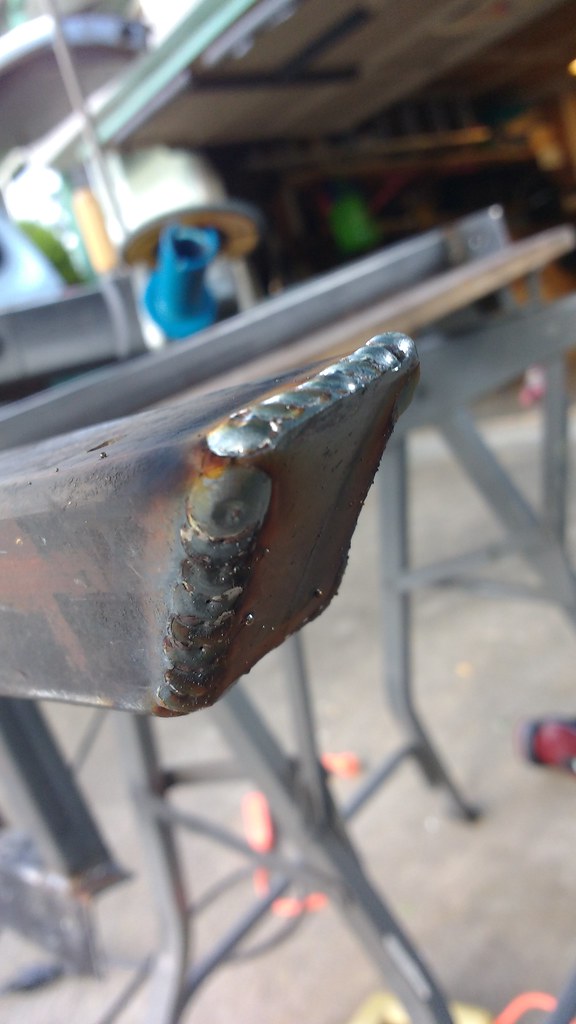
I used various bits of wood to get the horizontals to the right height, and then measured the angles and length of the vertical members. It was a pain to do so because the 4runner was sitting on a driveway that slopes in two directions. I took great care in tacking it all together, as burning the vehicle down would be a step backwards.
Pulled it out for finish welding.
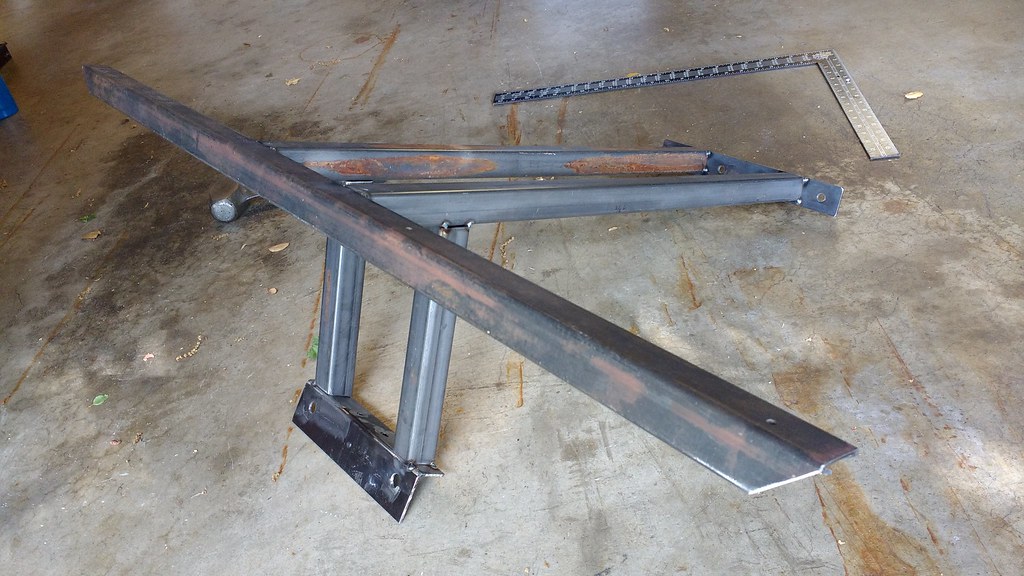
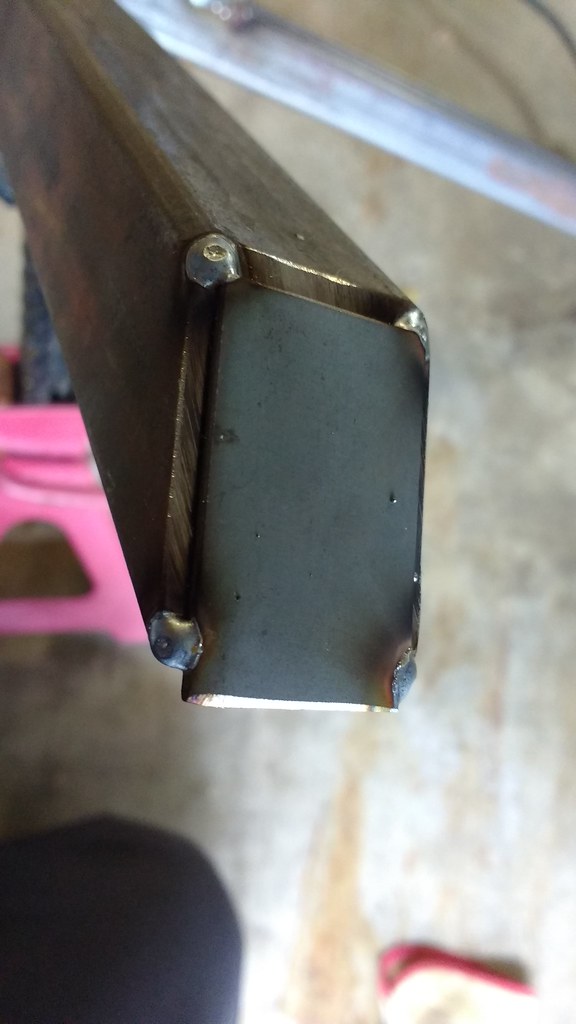
The cross piece has a 45s on the ends, it will make it easier so slide stuff underneath, I can hopefully put a camlock style latch there in the future, and it looks better.
Once bolted in, I could mount the plywood side pieces with some old hinges I had from another project, and that left me with this. Finished length is 5 7 ½. It could be made a bit longer towards the front, but rear seat pocket access would be compromised. The rear box top piece could be made about an inch longer to the rear too if someone wanted. My wife is 5 7 so this length is perfect for us.

At this point I could see the light at the end of the tunnel.
Part 3 coming when I get the chance!
|
|
|
Reply With Quote
|
|
08-15-2017, 01:32 AM
|
#45
|
|
Member
|
|
Join Date: May 2017
Location: Bay Area, Ca
Posts: 325
Real Name: keith and jenny
|
|
|
Member
Join Date: May 2017
Location: Bay Area, Ca
Posts: 325
Real Name: keith and jenny
|
Rear Storage/Sleeping Platform, Part 3
To finish out the rear I made a flap for the right side, this was quick and easy.
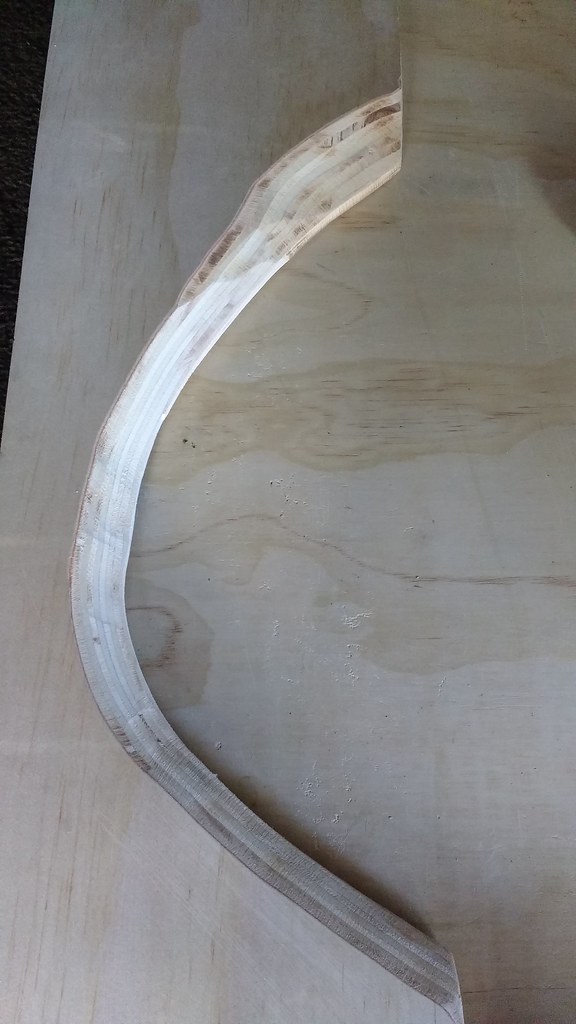
The left side, due to the bulge for the fuel filler hose, was a pain.
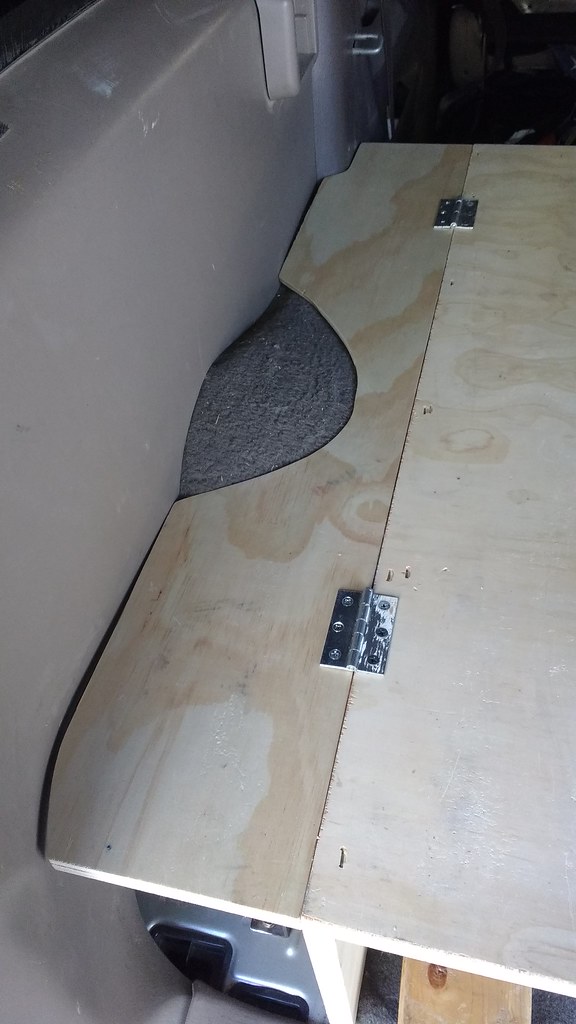
It required some creative clearancing methods.
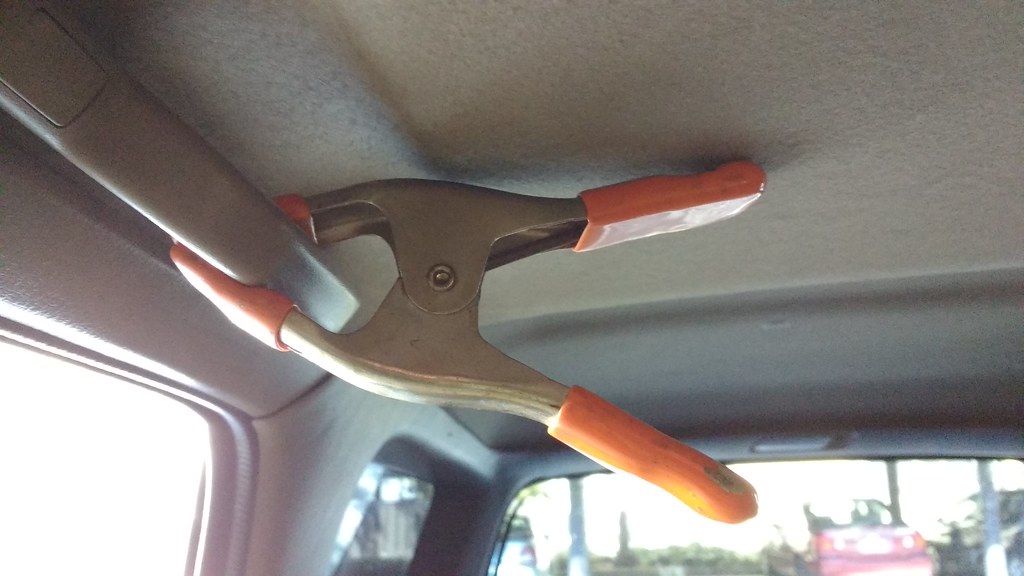
I stumbled onto this spring clamp as a storage platform tool. It clamps on the grab handle on the passenger side rear door for storage, and has never fallen in hours of rough wheeling.
If I fold both the front flaps up I can use it to hold them together nicely.
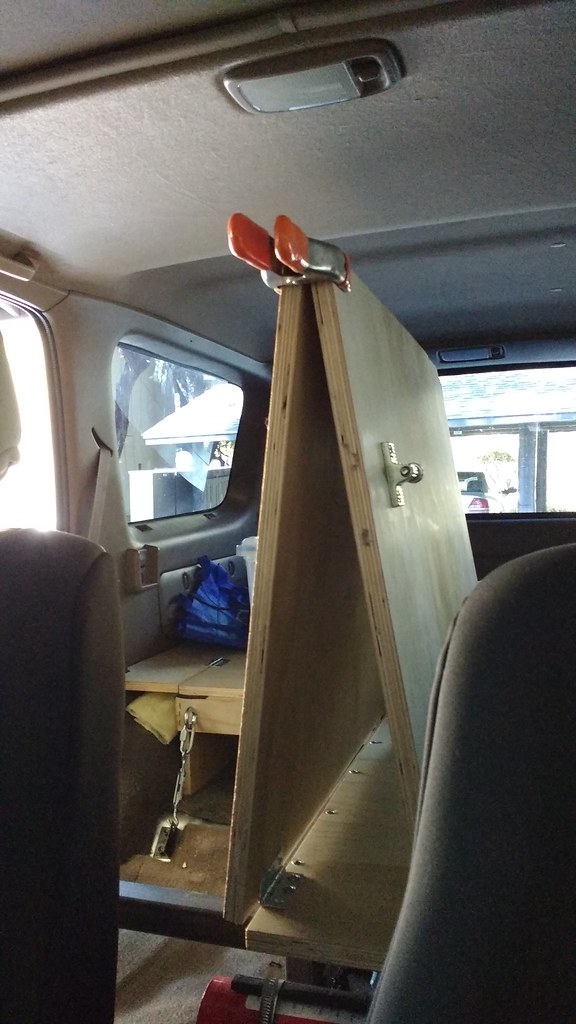
If I only am opening one side, I clamp it on that side piece, and rest it on the applicable seat. Also in this picture you can see the latch for the wood flap. I wanted to put some cool cam lever type latches on the front flaps to latch them down, but I couldnt find some in time. I wandered around home depot asking people if they knew where they were, or if they stocked them there. I had no luck, so I tried asking employees. Still no luck. However I did find some patio door screw type pins.
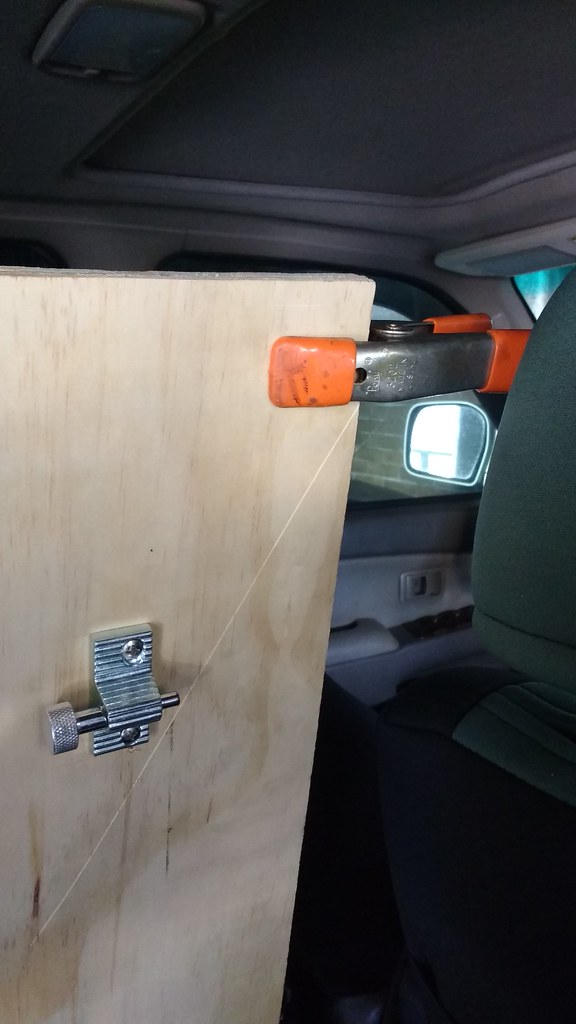
The pin goes into this little hole, and is pretty stout. If its strong enough to keep a tweaker out of your house, it is strong enough for this application. It is ok. I would still like a cam lock type, which would add some preload, or tension the wood down.

The box is actually shockingly quiet. There are little strips of adhesive weather stripping where the front flaps contact their supportive members. So far, about two months later I had to replace the weather stripping, as it started to rattle. Took a few seconds, and is rattle free again.
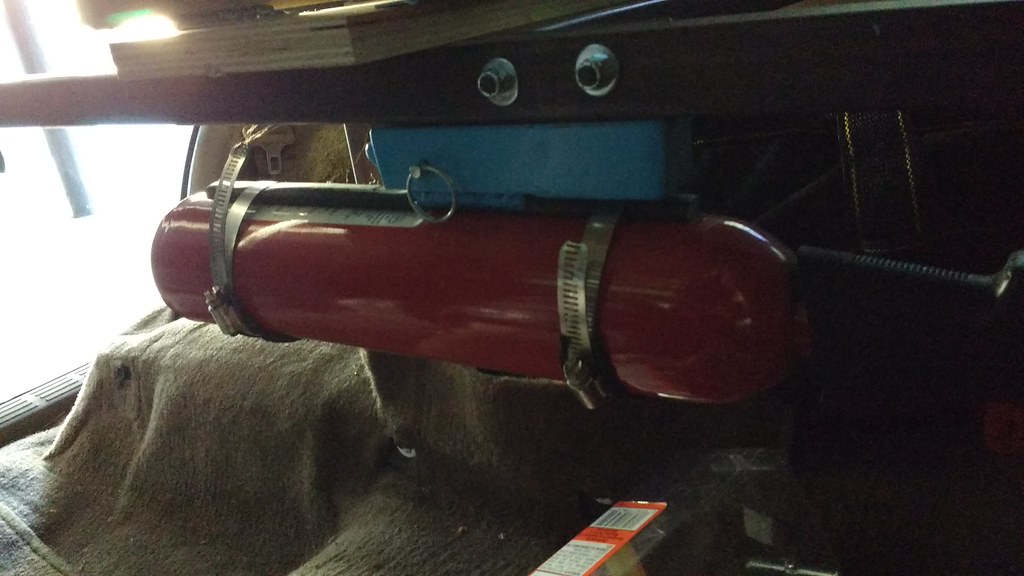
I made this fire extinguisher mount many years ago for my jeep. I was designed to mount vertically, and when you pull the cotterless lynch pin, the fire extinguisher falls free off the mount. Well in the 4runner I mounted sideways. Its a two-step system now, you pull the pin and move it to the right and its free. It can still be accessed from the drivers or passengers seat in seconds. And it was free because it was left over from another vehicle!
The storage box is still not done. I need to seal it. I think I will try to stain it to match the wood trim color. I want to router a curve on the exposed edges too. Just because I like the way it looks. Also, all the steel still needs to be painted, and various brackets need to be prettied up. But the box is a success! We like our tent, but in a massive storm in Palo Duro Canyon we slept comfortably in the back, and I am looking forward to doing it again. If I take the 4runner to work, I eat my lunch fast, and nap the rest of my break away in the back.
|
|
|
Reply With Quote
|
 Posting Rules
|
You may not post new threads
You may not post replies
You may not post attachments
You may not edit your posts
HTML code is On
|
|
|
|


 Linear Mode


