 10-10-2017, 06:30 PM
|
#1
|
 |
Member
|
|
Join Date: Apr 2012
Location: Arizona
Posts: 131
|
|
|
Member
Join Date: Apr 2012
Location: Arizona
Posts: 131
|
Oil dipstick broke off b/c of sheared-off bolt head Suggestions?
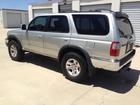
When I went to pull out the dipstick after changing and adding oil, the bracket that attaches the dipstick to the engine block broke off, leading me to pull the entire assembly right out of the engine.
It's pretty clear that there isn't a faster at the bottom of it. There's just a thick o-ring seal at the tip of the dip stick assembly, and it fits snugly into the opening to the reservoir or whatever is at the bottom (what term should I be using here?)
It looked like it would be a quick fix – just put in a new bolt - but it turns out that the head of the previous bolt sheared off. I didn't realize this until a guy at AutoZone pointed this out (it was late... couldn't take it to my usual mechanic). So he had an easy solution: zip-tie it. I attached photos. It seems stable and isn't pulling on the cable that the dip stick assembly is tied to.
I know it's probably expensive to pull the remainder of that screw out and fix this for good. This would normally be a temporary solution, but the guy who tied it up thought it might as well be permanent since there aren't any moving parts associated with it, and the dipstick assembly is bracketed in place to keep it from moving, more than anything. It's not load-bearing.
Let me know what you guys think, and how much it would cost me to pull out that sheared-off bolt!
Last edited by eric_rosenwald; 10-10-2017 at 10:14 PM.
|

|
 Reply With Quote Reply With Quote
|
|
10-10-2017, 06:44 PM
|
#2
|
 |
Member
|
|
Join Date: Jul 2012
Location: canada
Posts: 912
|
|
|
Member
Join Date: Jul 2012
Location: canada
Posts: 912
|
Quote:
Originally Posted by eric_rosenwald

When I went to pull out the dipstick after changing and adding oil, the bracket that attaches the dipstick to the engine block broke off, leading me to pull the entire assembly right out of the engine.
It's pretty clear that there isn't a faster at the bottom of it. There's just a thick o-ring seal at the tip of the dip stick assembly, and it fits snugly into the opening to the reservoir or whatever is at the bottom (what term should I be using here?)
It looked like it would be a quick fix – just put in a new bolt - but it turns out that the head of the previous bolt sheared off. I didn't realize this until a guy at AutoZone pointed this out (it was late... couldn't take it to my usual mechanic). So he had an easy solution: zip-tie it. I attached photos. It seems stable and isn't pulling on the cable that the dip stick assembly is tied to.
I know it's probably expensive to pull the remainder of that screw out and fix this for good. This would normally be a temporary solution, but the guy who tied it up thought it might as well be permanent since there aren't any moving parts associated with it, and the dipstick assembly is bracketed in place to keep it from moving, more than anything. It's not load-bearing.
In the photo, you can see the glob of molten steel that was added to the engine block to create enough space to put a screw in and attach the dipstick to the engine via the bracket. Where it currently rests is only about an inch away from where it would normally be.
Let me know what you guys think, and how much it would cost me to pull out that sheared-off bolt!
|
Looks like the blob is some epoxy was put there and your stick glued to it.
First remove all of that blob so we can see the extent of the damage, and see if maybe you could just drill another hole through and use a bolt and nut, and twist the dipstick retainer to the new hole
__________________
1998 4runner SR5
|
|
|
Reply With Quote
|
|
10-10-2017, 10:02 PM
|
#3
|
 |
Senior Member
|
|
Join Date: Mar 2014
Location: New Jersey
Age: 56
Posts: 1,963
Real Name: John
|
|
|
Senior Member
Join Date: Mar 2014
Location: New Jersey
Age: 56
Posts: 1,963
Real Name: John
|
Quote:
Originally Posted by eric_rosenwald
When I went to pull out the dipstick after changing and adding oil, the bracket that attaches the dipstick to the engine block broke off, leading me to pull the entire assembly right out of the engine.
It's pretty clear that there isn't a faster at the bottom of it. There's just a thick o-ring seal at the tip of the dip stick assembly, and it fits snugly into the opening to the reservoir or whatever is at the bottom (what term should I be using here?)
It looked like it would be a quick fix just put in a new bolt - but it turns out that the head of the previous bolt sheared off. I didn't realize this until a guy at AutoZone pointed this out (it was late... couldn't take it to my usual mechanic). So he had an easy solution: zip-tie it. I attached photos. It seems stable and isn't pulling on the cable that the dip stick assembly is tied to.
I know it's probably expensive to pull the remainder of that screw out and fix this for good. This would normally be a temporary solution, but the guy who tied it up thought it might as well be permanent since there aren't any moving parts associated with it, and the dipstick assembly is bracketed in place to keep it from moving, more than anything. It's not load-bearing.
In the photo, you can see the glob of molten steel that was added to the engine block to create enough space to put a screw in and attach the dipstick to the engine via the bracket. Where it currently rests is only about an inch away from where it would normally be.
Let me know what you guys think, and how much it would cost me to pull out that sheared-off bolt!
|
Instead of messing with that, just replace the bracket. Junkyard, one of the guys on here doing a part out, or new. Here's a link to Camelback Toyota.
https://parts.camelbacktoyota.com/pa...iagram=8414150
__________________
SILVER 2000 4runner Limited TOTALED  WHITE/SILVER 1999 4runner Limited l Rear Locker l Tundra/890 coils | 5100 Bilsteins all around | Sonoran Steel Bumpstops l 199 mm Tundra brake upgrade | SCS Matte Gray Ray10 Rims | 275 70 17 BFG KO2 tires | LR UCAs | EIMKEITH panhard brackets | LED interior upgrade l Rear LED tailights l Pioneer AVH-X5700BHS Alpine Type "R" speakers NVX JAD800.4 Class D Amp Kenwood Under seat Subwoofer l Front window tint 20% l Weathertech window visors and floormats l OutGear Solutions Full Length roofrack l Morimoto 40" LED lightbar
|
|
|
Reply With Quote
|
|
10-10-2017, 10:06 PM
|
#4
|
|
Member
|
|
Join Date: Apr 2012
Location: Arizona
Posts: 131
|
|
|
Member
Join Date: Apr 2012
Location: Arizona
Posts: 131
|
Quote:
Originally Posted by JRZEE2000TR4LTD
|
The bracket is in perfect condition... The problem is that I can't bolt it on when the original bolt head sheared off.
|
|
|
Reply With Quote
|
|
10-10-2017, 10:38 PM
|
#5
|
|
Senior Member
|
|
Join Date: Mar 2014
Location: New Jersey
Age: 56
Posts: 1,963
Real Name: John
|
|
|
Senior Member
Join Date: Mar 2014
Location: New Jersey
Age: 56
Posts: 1,963
Real Name: John
|
Quote:
Originally Posted by eric_rosenwald
The bracket is in perfect condition... The problem is that I can't bolt it on when the original bolt head sheared off.
|
In perfect condition except it has a sheared bolt off in it that will be very difficult (if not impossible) to get out. 
__________________
SILVER 2000 4runner Limited TOTALED
WHITE/SILVER 1999 4runner Limited l Rear Locker l Tundra/890 coils | 5100 Bilsteins all around | Sonoran Steel Bumpstops l 199 mm Tundra brake upgrade | SCS Matte Gray Ray10 Rims | 275 70 17 BFG KO2 tires | LR UCAs | EIMKEITH panhard brackets | LED interior upgrade l Rear LED tailights l Pioneer AVH-X5700BHS Alpine Type "R" speakers NVX JAD800.4 Class D Amp Kenwood Under seat Subwoofer l Front window tint 20% l Weathertech window visors and floormats l OutGear Solutions Full Length roofrack l Morimoto 40" LED lightbar
|
|
|
Reply With Quote
|
|
10-10-2017, 10:40 PM
|
#6
|
|
Member
|
|
Join Date: Apr 2012
Location: Arizona
Posts: 131
|
|
|
Member
Join Date: Apr 2012
Location: Arizona
Posts: 131
|
Quote:
Originally Posted by JRZEE2000TR4LTD
In perfect condition except it has a sheared bolt off in it that will be very difficult (if not impossible) to get out. |
Right after I wrote that, I realized what you were talking about - I thought I had deleted my response though... just did now
|
|
|
Reply With Quote
|
|
10-10-2017, 10:55 PM
|
#7
|
|
Senior Member
|
|
Join Date: Mar 2014
Location: Trying to figure this out
Posts: 1,462
|
|
|
Senior Member
Join Date: Mar 2014
Location: Trying to figure this out
Posts: 1,462
|
I would first take off the bracket, put it on a bench, take off the JB Weld and do a reverse drill bit on sheared screw, or give an easy out a try. From what i can see on the pic the threads looks messed up and the drill bit or easy out may not work.
I would just replace the bracket if the repair didn't work.
|
|
|
Reply With Quote
|
|
10-11-2017, 05:00 PM
|
#8
|
 |
Senior Member
|
|
Join Date: Jun 2013
Location: Florida
Posts: 1,749
Real Name: Ivan
|
|
|
Senior Member
Join Date: Jun 2013
Location: Florida
Posts: 1,749
Real Name: Ivan
|
remove bracket and drill out and re tap. done. or, get one at the yard, 5, 10 bucks.
__________________
2001 SR5,
thundercloud, tundra brake upgrade with 231's, 906's/billies rear, 5100's/stock coils on 4th groove front, ISR/deck plate mod, ford trans cooler mod, 99-00 grille swap, led conversion, 17" 2014 SR5 wheels wrapped with cooper AT3's, 265/70/17
|
|
|
Reply With Quote
|
|
10-11-2017, 06:10 PM
|
#9
|
 |
Elite Member
|
|
Join Date: Nov 2006
Location: Pocono Mountains
Posts: 7,498
|
|
|
Elite Member
Join Date: Nov 2006
Location: Pocono Mountains
Posts: 7,498
|
Quote:
Originally Posted by 01thunder
remove bracket and drill out and re tap. done. or, get one at the yard, 5, 10 bucks.
|
Saved me typing exactly this.
__________________
'99 4Runner SR5 5spd 3.4L V6 4WD(U.S), original '99 Talls in front, OME 906s in back, Hella fogs, Trekmaster shocks in front, Billy in back, no running boards, FIAMM horns, Alpine sound, Michelin LTX M/S2's, owned since new.
'97 HiLux SW4 5spd 4WD(Japan model bought in Brazil assembled in Argentina, very close to a 3.0 4Runner/Surf)
'71 FordWillys Jeep CJ5 (with straight six Ford Maverick 3.0 liter engine--lives in the mountains north of Sao Paulo Brazil)
My Backyard Frame Swap
|
|
|
Reply With Quote
|
|
10-11-2017, 06:58 PM
|
#10
|
 |
Senior Member
|
|
Join Date: Oct 2008
Location: Com Bo Luc Lac
Age: 39
Posts: 1,268
|
|
|
Senior Member
Join Date: Oct 2008
Location: Com Bo Luc Lac
Age: 39
Posts: 1,268
|
i have one sitting if you need it $25.00 shipped to you.
__________________
99 4runner W/01-02 conversion
JDM Headlight Retrofit w/ custom LS460 bi xenon projectors,ODL Bumper,japan spec conversion ,Hella Twin Supertone horns,Kings 2.5" External Resi Compression Valved front and rear, Camburg UCA's,Addcco Sway bars,TRD supercharged,AFE Intake,Custom apexi catback,TRD Trans Cooler,Lots of Jaos Goodies,16x8 Volk Racing TE37X's BFG KO2 265/75/16 Stoptech Big Brake Kit

|
|
|
Reply With Quote
|
 Posting Rules
|
You may not post new threads
You may not post replies
You may not post attachments
You may not edit your posts
HTML code is On
|
|
|
|


 Linear Mode


