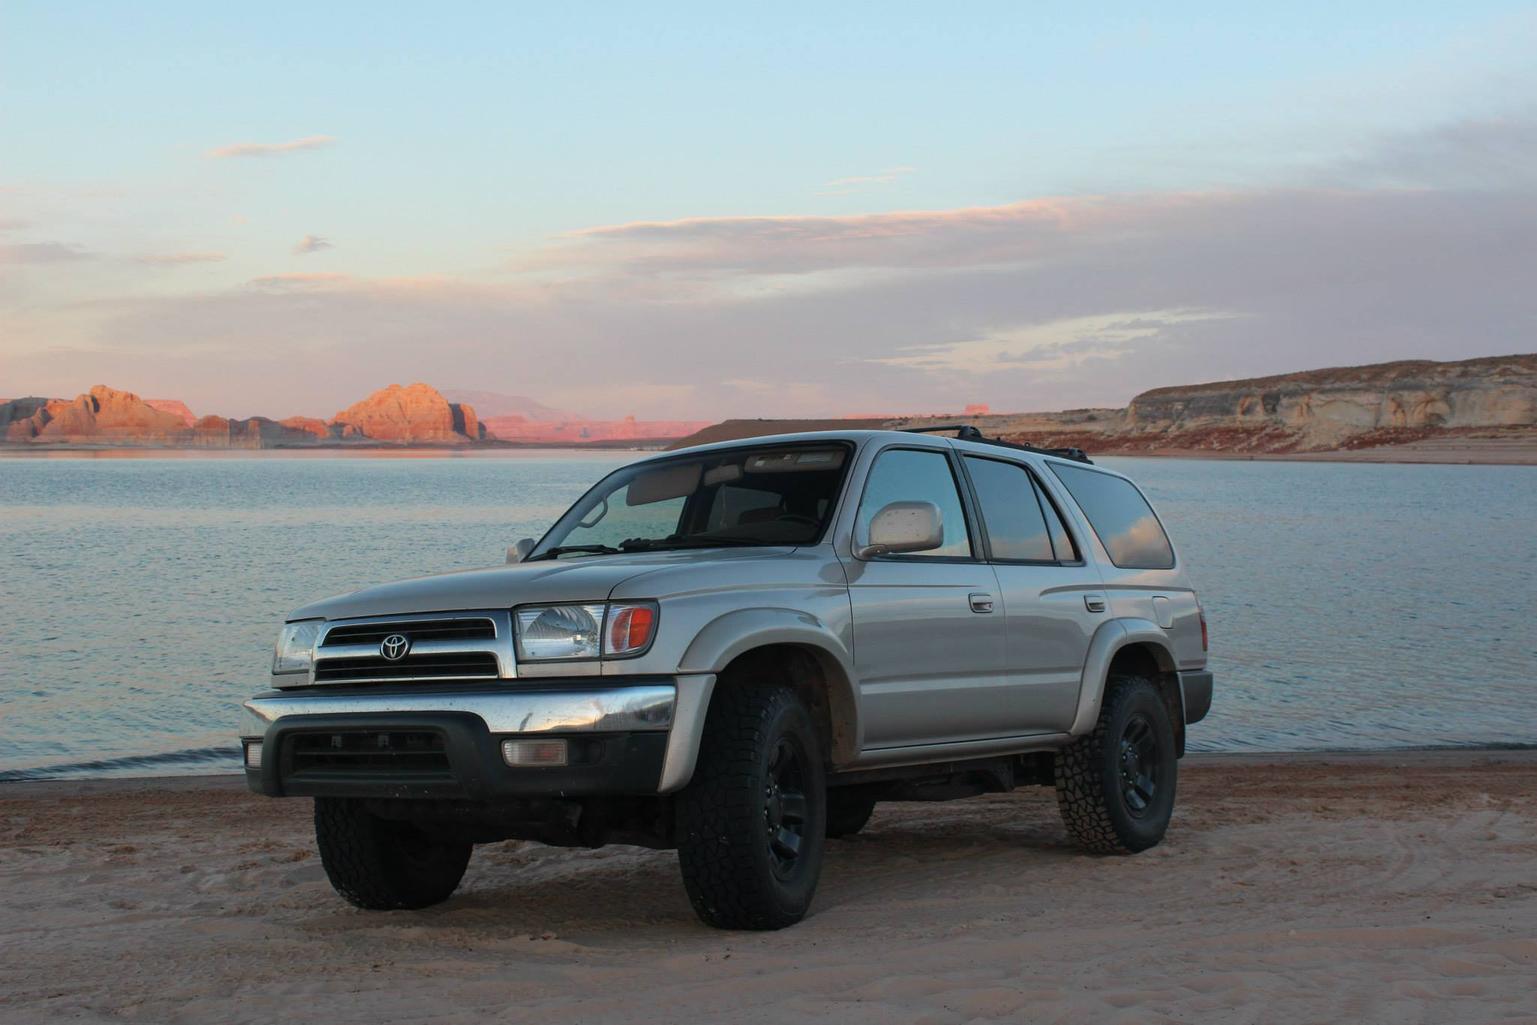
I guess I should start from the beginning. I bought Nikki in February of 2015 from a family friend for $4,500. She had about 174,000 miles and was in pretty good shape other than surface rust on the frame and suspension. Honestly wasn't too bad considering it was a Montanan vehicle. She had 31" Mickey Thompson Baja STZ tires and came with the E-locker in the rear from the factory. It was love at first sight. Of course the very first thing I did was rip off those ugly running boards and I trimmed off the rubber on the rear mud flaps. Over the next few months I replaced the interior lights with led lights, added a 42" light bar to the front bumper, got rid of the old turn signals and wired my own led turn signals just under headlights (I will go into more detail on that later.) I did the deck plate mod and removed the air intake silencer and replaced it with a straight tube. Chopped off the stock muffler and had a shop weld on on a Flowmaster Super 44. After that I didn't have much time or money for doing upgrades so I just enjoyed driving Nikki to work and back on the weekdays and exploring the desert and camping around Page AZ on the weekends. I kept up on all the fluid changes but that was all for the next couple years.
I moved to Phoenix AZ for a job opportunity at Metro Traffic Control in April of 2016 setting up and taking down road closures. The job paid well due to the 30-40 hours of overtime I was getting every week but that didn't leave me with much time for playing out in the desert. Then on September 13th 2016 I was taking down a left lane closure and was hit by a jackass driver that drove into the closure. The bumper of his Ford Ranger broke my left knee in many spots, my elbow shattered his windshield, and my chest broke off his side mirror, narrowly missing my face. Driver stopped down the road and I was able to get his insurance information from the sheriff at the hospital. Needless to say, I got myself a lawyer. Just over a year later after a lot of physical therapy and psychotherapy it was all over and behind me and my lawyer was able to settle with the driver's insurance company for a decent settlement. That gave me enough money to get myself out of debt, get my lady a 1990 Jeep XJ, and treat Nikki to a brand new lift kit from Toytec (I chose the Boss Ultimate lift), tires, a lot of rust removal and paint, a new clutch and flywheel, upper and lower ball joints, front sway bar end links, an adjustable rear lateral control rod, front diff drop kit, new brakes and rotors in the front and new break shoes in the rear, windshield wipers, spark plugs, spark plug wires, and new fluids for the diffs, transfer case, transmission, engine and radiator.... I think that is everything haha.

All of this was done at my friend Steve's house (with the exception of the clutch) with basic tools and jack stands. It took us three weeks of working on it every day after work and every weekend. I could not have done this without Steve's help. With this build thread I will try to go into as much detail as possible on what it takes to put a lift like this on and all the problems you may run into. I have a lot of tips and tricks up my sleeve at this point and I'd like to help some people out. I took a lot of pictures of the process and I will be uploading them in this thread as I write it.
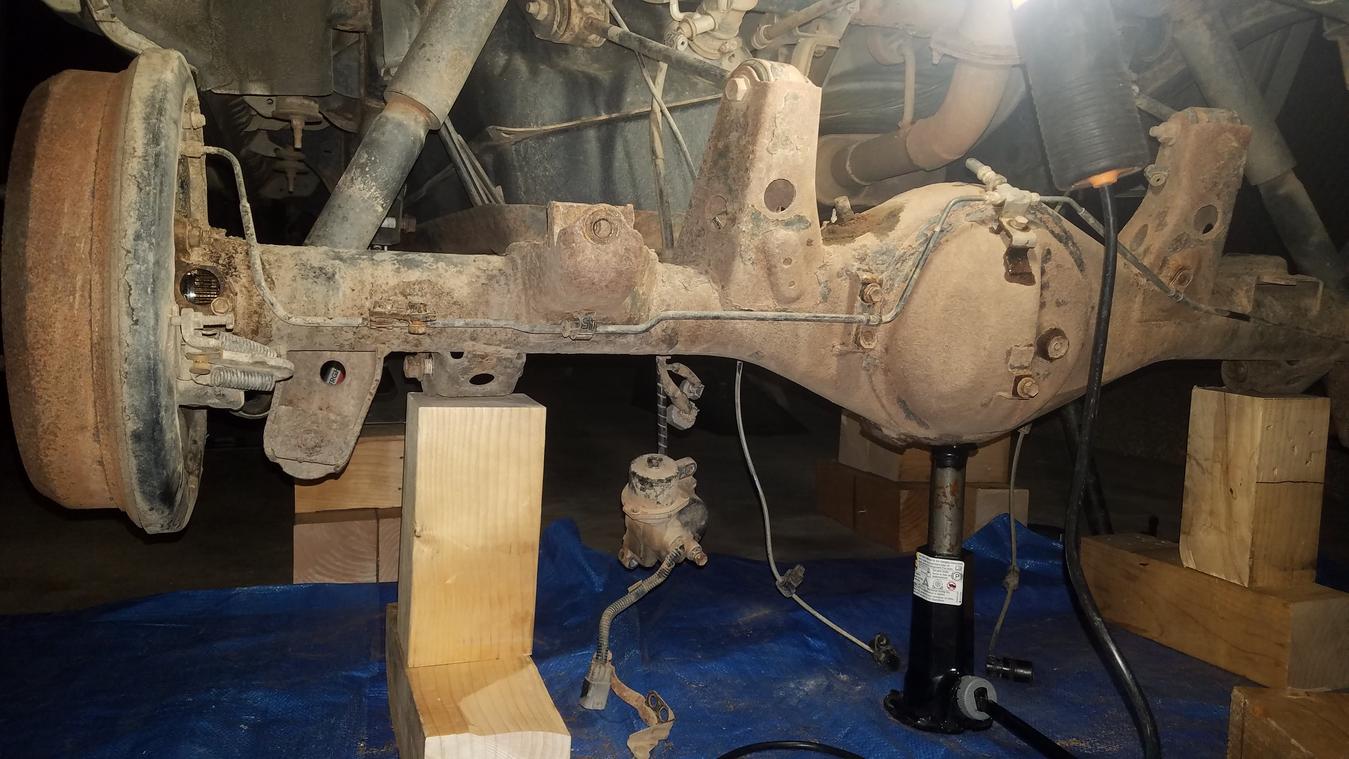
Going into this, I had no intention of dropping the entire rear axle but when you have some time while waiting for front coil overs that were back ordered you might as well clean some stuff up. It really wasn't hard to disconnect everything from the rear axle. You need some sockets and box wrenches ranging in size from 10mm to 24mm, needle nose pliers, and possibly a pry bar.
The first step is to get it on jack stands. We used some ramps to raise the front and then put the rear on jacks just in front of the fender on the frame with 4x4 blocks under the stands. Then remove the tires. After that we drained the rear diff using a socket and a breaker bar. Disconnecting the rear brake line just above the differential and draining all the brake fluid came next. You can use a box wrench to loosen the line and then a flat head screw driver and a hammer to remove the clip. I however was replacing the brake line with the one from Toytec so I just cut it with some side cutters. I shoved the line into a gallon jug and Steve pumped the brakes until all the fluid was gone. Now you can disconnect the solid lines from the axle. most of the bolts are 12mm and can be reached with a wrench or socket. I snapped one of these bolts in the process due to all the rust so if you have any rust, get some PB Blaster from your local auto parts store. That stuff works miracles. The lines attach to the breaks with a 10mm. I used a box wrench for that. Be careful not to strip them!
broken bolt

I then disconnect the emergency brake lines. There is a mounting bracket on the diff that uses a 12mm bolt as well as on the driver and passenger side of the axle. The line is attached at the ends by a pin and a clip. Use some needle nose pliers to remove the clips and the pins should tap right out. In order to keep the lines out of the way i used zip ties to hold the up to the body. Next I disconnected the speed sensors from the axle by removing the 12mm bolt on each side and using a flat head screw driver to carefully tap and pry up the speed sensors. This takes some patience. Don't get too aggressive with it because they are made with plastic. There are multiple plastic clips that hold the wires in place on the axle and on the upper control arms. You can use a small flat head screw driver in the small slot on the side of the clip to open them up and free the wire. However I used some needle nose pliers to remove the whole clip from it's location because at this point we had decided we were going to grind and paint the rear axle.

I zip tied these out of the way as well.
Sorry for the lack of pictures on the removal of the axle.

I promise there are a lot of pictures of installation!

Oh those new coils though!

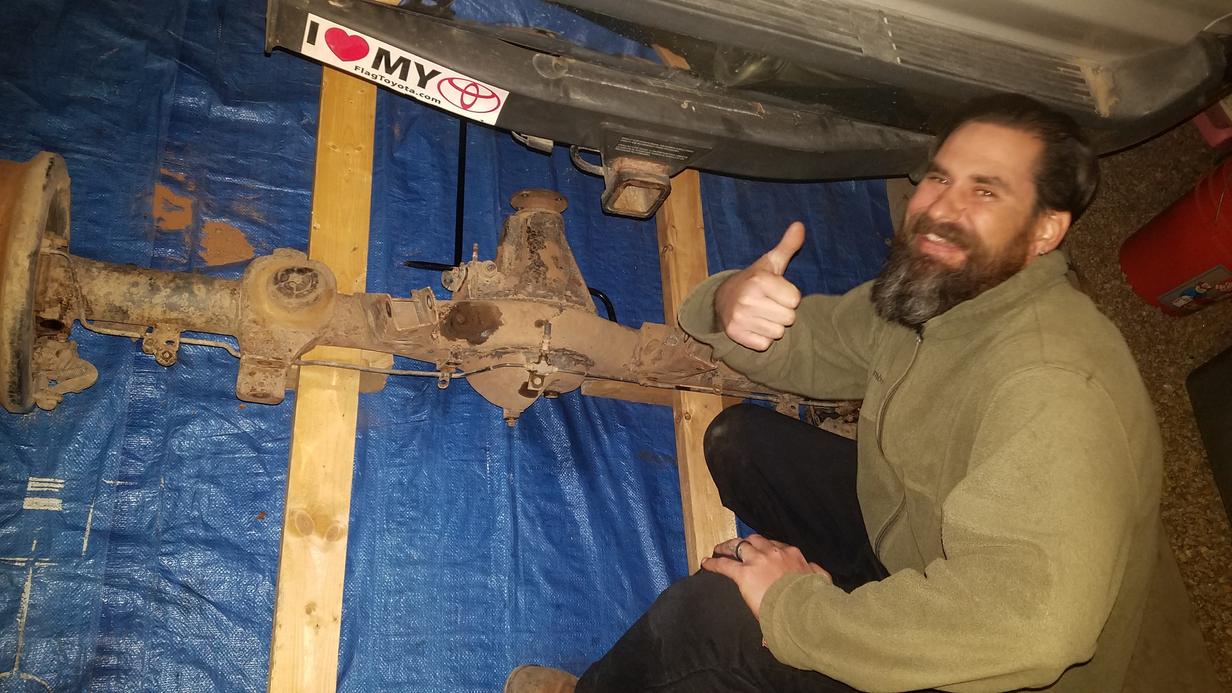
Now we had to support the axle to prepare for the removal of the upper and lower control arms, the lateral control rod, the sway bar, and the shocks.We used 4x4 blocks for this as well. You can make the process of just getting the axle out faster by only disconnecting them from the axle and not the frame. It was getting dark and we knew those could be done later but we found the time to get it all off. First I removed the lateral control rod. It is just one bolt on each end, easy. Then we disconnected the lower shock bolt which i believe was a 17mm, then the lower control arms and the upper control arms which i believe are also 17mm. Maybe 19mm... The sway bar attaches to the axle with a bracket on each side. Just remove the four bolts and it is free from the axle. Next disconnect the sway bar end links from the frame with a deep socket on the nut and an open end wrench on the shaft to keep it from spinning. We could have left the actuator for the rear e-locker attached to the axle and just disconnected the wire harnesses and breather tube but decided to inspect the actuator. We removed the 3 bolts and carefully pried it off and it was a good thing we did because the actuator had a substantial crack in it. I ordered a new one from West Coast Gear Supply and we continued. We set up some 2x4s to use as ramps to help us move the axle out from under the vehicle. This worked perfectly! Now the axle was out and and it was time time to call it a night


This is Steve. He seems more excited than I do haha
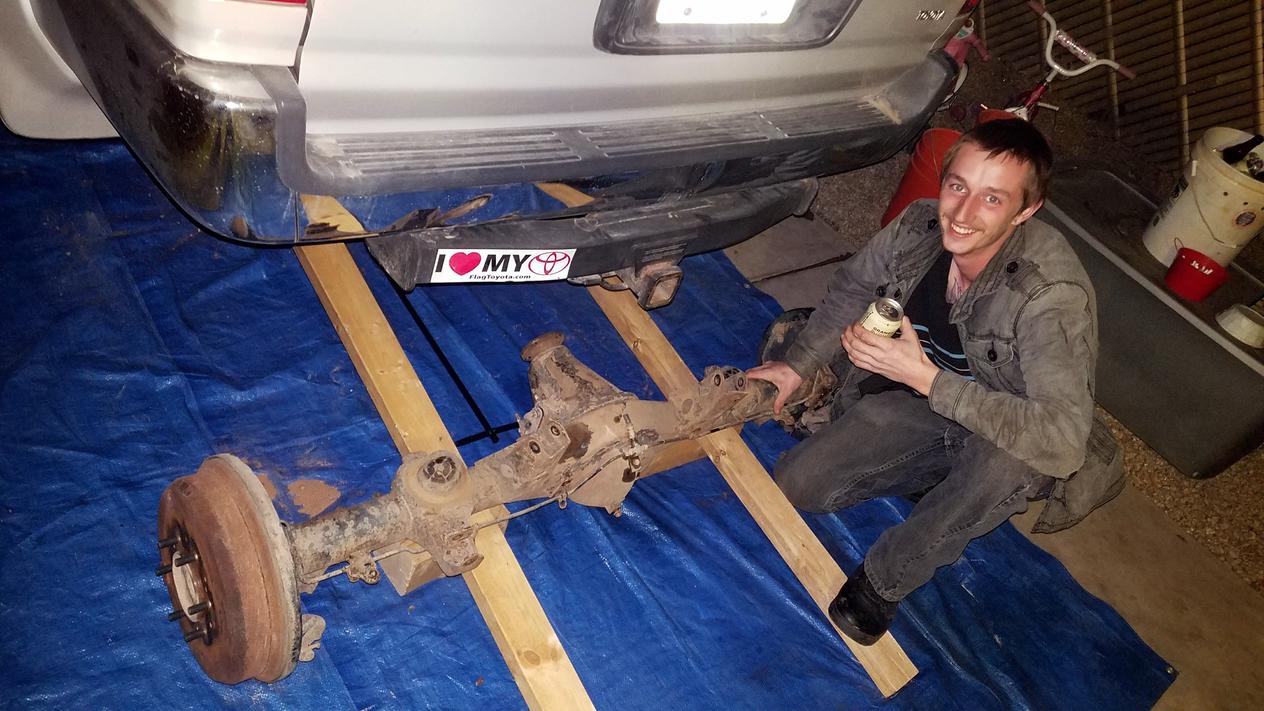
Time for a well deserved beer.
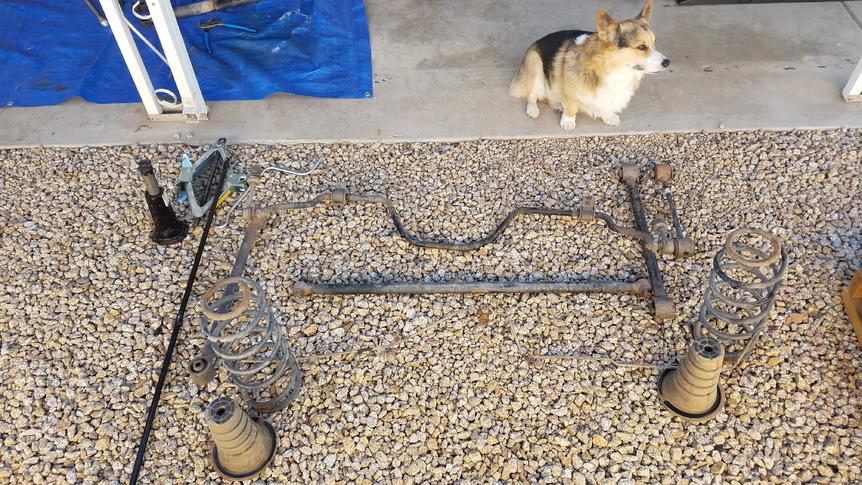
It is important to keep things organized as you are taking all these parts off. This is Zero, he thinks he is helping

To Be Continued...
__________________

2000 Toyota 4Runner 4WD 5 speed manual. Many mods to come.


 Linear Mode


