 04-23-2019, 04:51 PM
|
#1
|
 |
Member
|
|
Join Date: Nov 2017
Location: Williamsburg
Posts: 185
|
|
|
Member
Join Date: Nov 2017
Location: Williamsburg
Posts: 185
|
TRD/Bistein question w/ pics
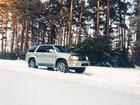
Is my isolator installed wrong? I'm getting a really bad clanking noise and after analyzing and re-torqing everything back down I noticed that my top plates don't look the same. Look at the unevenness and gap I have on my left strut and compare that to the flush fit on the right strut. The noise and movement is coming from my left side of the vehicle. I've already changed out cv axles and inner/outer tie rods to rule them out.


Last edited by jeredcollins; 04-23-2019 at 04:59 PM.
|

|
 Reply With Quote Reply With Quote
|
|
04-23-2019, 05:00 PM
|
#2
|
|
Member
|
|
Join Date: Apr 2014
Location: Chester County, Pa
Posts: 256
|
|
|
Member
Join Date: Apr 2014
Location: Chester County, Pa
Posts: 256
|
I would say that could be causing the clunk. The rubber looks like its squeezing out, and the metal surfaces could be hitting when going over bumps. We are seeing different parts of the coilover though. The left one shows the very end of the spring, while the right one does not. I would see if the right one looks the same where the spring ends. Seems like a possibility to me though.
|
|
|
Reply With Quote
|
|
04-23-2019, 05:07 PM
|
#3
|
|
Member
|
|
Join Date: Nov 2017
Location: Williamsburg
Posts: 185
|
|
|
Member
Join Date: Nov 2017
Location: Williamsburg
Posts: 185
|
Quote:
Originally Posted by Andy in Pa

I would say that could be causing the clunk. The rubber looks like its squeezing out, and the metal surfaces could be hitting when going over bumps. We are seeing different parts of the coilover though. The left one shows the very end of the spring, while the right one does not. I would see if the right one looks the same where the spring ends. Seems like a possibility to me though.
|
I'll have to pull them both out to see. I can't remember if they both looked the same. I'm not sure if the bolt patterns will let me flip the left strut 180* but that way it should look the same as the right strut as far as orientation of the spring.
|
|
|
Reply With Quote
|
|
04-23-2019, 05:29 PM
|
#4
|
|
Member
|
|
Join Date: Jul 2015
Location: SF Bay Area
Posts: 73
|
|
|
Member
Join Date: Jul 2015
Location: SF Bay Area
Posts: 73
|
The instructions say to mount with the bottom coil-end outward on both sides. You rotate the coil and the seat to accomplish this. You have pics of the tops, but obviously the bottoms are not both the same.
This orientation needs to be done while the springs are squeezed with the compressor. You have to have the bottom eye and top bolts oriented to one another correctly, and the spring rotated correctly. Three moving parts to hold in place as you unscrew the spring compressor.
And, of course, the two sides are mirror images.
Get that right first, then see if you still have an issue.
Sent from my iPhone using Tapatalk
__________________
2002 SR5 Sport Edition; Thundercloud; All Stock.
|
|
|
Reply With Quote
|
|
04-23-2019, 06:55 PM
|
#5
|
|
Member
|
|
Join Date: Apr 2017
Location: Brooklyn, NY
Age: 40
Posts: 358
|
|
|
Member
Join Date: Apr 2017
Location: Brooklyn, NY
Age: 40
Posts: 358
|
I had something similar with my last set of coils that were installed by a shop. I thought it was causing a clunk as well, but someone else said it wasn't - turns out it wasn't causing it - it was a loose bolt in my driver's side rear upper control arm.
2nd time it was a slightly loose front sway bar end link bolt where it attaches to the frame.
__________________
1997 Limited 4x4 3.4l 199k E-locker Blue Wire Mod | 255/85 r16 Maxxis Bighorn MT - LX450 9 wrap + Tokico black rear | Front: 2.5" King Coilover set @ 2" lift | True North Fab Front Bumper + Warn m8000 + Baja Designs Squadron Sport | Custom Sliders | NguyenWorks Rear Bumper + Tire Swingout
|
|
|
Reply With Quote
|
|
04-23-2019, 07:34 PM
|
#6
|
|
Member
|
|
Join Date: Nov 2017
Location: Williamsburg
Posts: 185
|
|
|
Member
Join Date: Nov 2017
Location: Williamsburg
Posts: 185
|
Quote:
Originally Posted by westdiablo
The instructions say to mount with the bottom coil-end outward on both sides. You rotate the coil and the seat to accomplish this. You have pics of the tops, but obviously the bottoms are not both the same.
This orientation needs to be done while the springs are squeezed with the compressor. You have to have the bottom eye and top bolts oriented to one another correctly, and the spring rotated correctly. Three moving parts to hold in place as you unscrew the spring compressor.
And, of course, the two sides are mirror images.
Get that right first, then see if you still have an issue.
Sent from my iPhone using Tapatalk
|
Thanks for the help. Im almost wondering if I just turned the strut 180* if I would be good or not?
|
|
|
Reply With Quote
|
|
04-23-2019, 07:37 PM
|
#7
|
|
Member
|
|
Join Date: Nov 2017
Location: Williamsburg
Posts: 185
|
|
|
Member
Join Date: Nov 2017
Location: Williamsburg
Posts: 185
|
Quote:
Originally Posted by JohnOfTheJungle
I had something similar with my last set of coils that were installed by a shop. I thought it was causing a clunk as well, but someone else said it wasn't - turns out it wasn't causing it - it was a loose bolt in my driver's side rear upper control arm.
2nd time it was a slightly loose front sway bar end link bolt where it attaches to the frame.
|
When you heard the clunking noise did you feel something shift as well? Mine feels like something is in a bind and eventually it lets go.
|
|
|
Reply With Quote
|
|
04-23-2019, 09:31 PM
|
#8
|
 |
Senior Member
|
|
Join Date: Dec 2013
Location: Yukon
Posts: 1,317
|
|
|
Senior Member
Join Date: Dec 2013
Location: Yukon
Posts: 1,317
|
Those are strange looking top plates with those super long bolts. What brand are they?
In a car type macpherson strut, spring orientation can cause clunking. Not sure if it could in the 4runner coil over setup. It wouldn't hurt to get them clocked properly.
__________________
-1996 4Runner. 3RZ 5-Spd. 4x4 Base model. OME2906/Toyota OEM rears with 2004 Tacoma Dual Rate Fronts on Bilstien 4600s.
-1993 Corolla Wagon 7AFE
-2001 Echo D.D.
Last edited by Kanoe; 04-23-2019 at 09:36 PM.
|
|
|
Reply With Quote
|
|
04-23-2019, 09:59 PM
|
#9
|
|
Member
|
|
Join Date: Nov 2017
Location: Williamsburg
Posts: 185
|
|
|
Member
Join Date: Nov 2017
Location: Williamsburg
Posts: 185
|
Quote:
Originally Posted by Kanoe
Those are strange looking top plates with those super long bolts. What brand are they?
In a car type macpherson strut, spring orientation can cause clunking. Not sure if it could in the 4runner coil over setup. It wouldn't hurt to get them clocked properly.
|
They are TRD Tundra front springs with Tundra 5100 Bilsteins. I added the 10mm top plate spacer too. Im going to cut down those bolts soon. No need for all that bolt length there.
|
|
|
Reply With Quote
|
|
04-23-2019, 11:12 PM
|
#10
|
|
Member
|
|
Join Date: Apr 2017
Location: Brooklyn, NY
Age: 40
Posts: 358
|
|
|
Member
Join Date: Apr 2017
Location: Brooklyn, NY
Age: 40
Posts: 358
|
TRD/Bistein question w/ pics
Quote:
Originally Posted by jeredcollins
When you heard the clunking noise did you feel something shift as well? Mine feels like something is in a bind and eventually it lets go.
|
Yes definitely - heres a video I made, it would usually happen when going off camber and turning, like up a driveway. When it would happen once it usually wouldnt happen again for a while unless I turned in the opposite direction and went off camber:
YouTube
Here is my thread on troubleshooting it:
Front end clunking sound/bind feel while turning and going over bumps
The sway bar clunk felt sort of similar, but not as pronounced m, and not with the same action of turning and going off camber. I was also able to more easily isolate it to the front passenger side by sound alone. Whereas the rear control arm clunk was tricky.
Sent from my iPhone using Tapatalk
__________________
1997 Limited 4x4 3.4l 199k E-locker Blue Wire Mod | 255/85 r16 Maxxis Bighorn MT - LX450 9 wrap + Tokico black rear | Front: 2.5" King Coilover set @ 2" lift | True North Fab Front Bumper + Warn m8000 + Baja Designs Squadron Sport | Custom Sliders | NguyenWorks Rear Bumper + Tire Swingout
|
|
|
Reply With Quote
|
|
04-24-2019, 02:40 AM
|
#11
|
|
Member
|
|
Join Date: Jul 2015
Location: SF Bay Area
Posts: 73
|
|
|
Member
Join Date: Jul 2015
Location: SF Bay Area
Posts: 73
|
Quote:
Originally Posted by jeredcollins
Thanks for the help. Im almost wondering if I just turned the strut 180* if I would be good or not?
|
You can't. The top bolts won't line up. Turning the bottom eye alone won't do the trick.
You have to squeeze the springs to get all three elements lined up.
Ask me how I know this...on and off the truck a couple times till I got my head around doing it right. Clunk went away.
As others have said...check that other stuff too.
Sent from my iPhone using Tapatalk
__________________
2002 SR5 Sport Edition; Thundercloud; All Stock.
|
|
|
Reply With Quote
|
|
04-27-2019, 09:31 PM
|
#12
|
|
Member
|
|
Join Date: Nov 2017
Location: Williamsburg
Posts: 185
|
|
|
Member
Join Date: Nov 2017
Location: Williamsburg
Posts: 185
|
Quote:
Originally Posted by westdiablo
The instructions say to mount with the bottom coil-end outward on both sides. You rotate the coil and the seat to accomplish this. You have pics of the tops, but obviously the bottoms are not both the same.
This orientation needs to be done while the springs are squeezed with the compressor. You have to have the bottom eye and top bolts oriented to one another correctly, and the spring rotated correctly. Three moving parts to hold in place as you unscrew the spring compressor.
And, of course, the two sides are mirror images.
Get that right first, then see if you still have an issue.
Sent from my iPhone using Tapatalk
|
What instructions are you referring towards? Sonoran Steel says the beginning of the coil should be faced towards the frame, which is opposite of what you’re saying to do?
Checked my orientation for both springs and they are facing different directions. Oddly enough, according to Sonoran Steel’s install directions it looks like my driver side was assembled correctly. My drivers side is the side causing issues. Wheelers off-road assembled one of them wrong and after addressing the issue they won’t return my phone calls or return my emails. Pretty frustrating that I paid for them for assemble the shock and then find out it was assembled wrong. They claim they have a warranty but I’ve had no success with them honoring it so far. This lift has been a nightmare so far.
Last edited by jeredcollins; 04-27-2019 at 09:34 PM.
|
|
|
Reply With Quote
|
|
04-27-2019, 09:40 PM
|
#13
|
|
Member
|
|
Join Date: Nov 2017
Location: Williamsburg
Posts: 185
|
|
|
Member
Join Date: Nov 2017
Location: Williamsburg
Posts: 185
|
Quote:
Originally Posted by westdiablo
The instructions say to mount with the bottom coil-end outward on both sides. You rotate the coil and the seat to accomplish this. You have pics of the tops, but obviously the bottoms are not both the same.
This orientation needs to be done while the springs are squeezed with the compressor. You have to have the bottom eye and top bolts oriented to one another correctly, and the spring rotated correctly. Three moving parts to hold in place as you unscrew the spring compressor.
And, of course, the two sides are mirror images.
Get that right first, then see if you still have an issue.
Sent from my iPhone using Tapatalk
|
Here's a pic of both lower springs. The first pic is my driver's side. Notice the start of the coil is facing the frame. The 2nd pic the start of the passenger coil is facing my tire.
Driver Strut:

Passenger Strut:

|
|
|
Reply With Quote
|
|
04-27-2019, 10:15 PM
|
#14
|
|
Member
|
|
Join Date: Nov 2017
Location: Williamsburg
Posts: 185
|
|
|
Member
Join Date: Nov 2017
Location: Williamsburg
Posts: 185
|
Quote:
Originally Posted by westdiablo
You can't. The top bolts won't line up. Turning the bottom eye alone won't do the trick.
You have to squeeze the springs to get all three elements lined up.
Ask me how I know this...on and off the truck a couple times till I got my head around doing it right. Clunk went away.
As others have said...check that other stuff too.
Sent from my iPhone using Tapatalk
|
So, after watching Speedy Garage's build with the exact same setup he has the coil ends facing out like you mentioned. This makes sense because if you look at the end of my driver coil, it appears it's laying flush against the frame. I suspect that's what is causing the bind and pop I'm getting. I'm going to rent a coil compressor and turn the spring 180* and see if that does the trick.
Link to Speedy's build.
YouTube
|
|
|
Reply With Quote
|
|
04-28-2019, 01:44 AM
|
#15
|
 |
Member
|
|
Join Date: Jun 2018
Location: Oceanside, CA
Posts: 70
Real Name: Blair
|
|
|
Member
Join Date: Jun 2018
Location: Oceanside, CA
Posts: 70
Real Name: Blair
|
Quote:
Originally Posted by jeredcollins
So, after watching Speedy Garage's build with the exact same setup he has the coil ends facing out like you mentioned. This makes sense because if you look at the end of my driver coil, it appears it's laying flush against the frame. I suspect that's what is causing the bind and pop I'm getting. I'm going to rent a coil compressor and turn the spring 180* and see if that does the trick.
Link to Speedy's build.
YouTube |
All wrong info above! No need to do anything but rotate the shock. All the top bolts are equal distance apart and can be installed/clocked in any way you want to get the spring in the correct position. Once the top is bolted in put a screwdriver through the bottom eyelet and rotate to fit in the lower mount. Super easy
__________________
2001 SR5 - ProComp 69 series wheels, 285/75/16 Pro Comp Xtreme MT2 Tires, King extended travel front coilovers, 890 rear coils, King remote reservoir with CD adjuster in rear, Total Chaos UCAs, 4x Innovation sliders, Gobi Stealth rack, Savage rear bumper and skids, ARB onboard air, ARB rear locker, EIMKieth PCK, Pioneer head unit
|
|
|
Reply With Quote
|
 Posting Rules
|
You may not post new threads
You may not post replies
You may not post attachments
You may not edit your posts
HTML code is On
|
|
|
|


 Linear Mode


