 12-02-2017, 01:01 PM
|
#1
|
 |
Junior Member
|
|
Join Date: Aug 2013
Location: peoria, il
Posts: 13
|
|
|
Junior Member
Join Date: Aug 2013
Location: peoria, il
Posts: 13
|
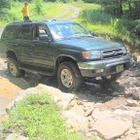
3rd gen upper rear shock mount rusted
Hello all, I was hearing a clunk in the rear of my 97 4Runner. I found the upper right side to be gone !!
Any ideas on what I can do ?
Thanks


|

|
 Reply With Quote Reply With Quote
|
|
12-02-2017, 01:04 PM
|
#2
|
 |
Senior Member
|
|
Join Date: Mar 2016
Location: West Bend, WI
Posts: 2,339
Real Name: Mike
|
|
|
Senior Member
Join Date: Mar 2016
Location: West Bend, WI
Posts: 2,339
Real Name: Mike
|
It's happened to a few others before. I believe you have to cut the old mount out and weld in a new one. I believe Toyota does sell the mount.
Plan on it being a total pain in the ass as there is no room to work. Sorry for the bad news but it can be fixed.
__________________
1997 SR5 4x4 Auto, 99' tall coils up front, OME 906's, Truetrac LSD, Airaid MIT
1999 SR5 4x4 Auto for parts
2011 Camry SE V6
2011 Highlander Limited
|
|
|
Reply With Quote
|
|
12-02-2017, 01:07 PM
|
#3
|
|
Senior Member
|
|
Join Date: Sep 2013
Location: new jersey
Posts: 4,830
|
|
|
Senior Member
Join Date: Sep 2013
Location: new jersey
Posts: 4,830
|
Yes. I fixed mine. Toyota sells a replacement OEM Part. I went through the same issue. It's a lot of work to fix it. But it's doable. Ofcourse do both sides. If one side pushed through then the other will probably do the same. When you go to put in he new ones. Tap the drain hole bigger and slightly pitch it so it drains better. But you will need to clean if occasionally after wheeling. Dirt clogs it up.
I'm not uploading photos. Go through my build thread and you'll find plenty of info and photos. Page 12 or 13 I think.
koltlt 97 sr5 build thread
__________________
97 3.4 JDM/5 Speed swap/eLocker Swap/ICON CDC all around/+more.....
Last edited by kolelt; 12-02-2017 at 01:10 PM.
|
|
|
Reply With Quote
|
|
12-02-2017, 01:07 PM
|
#4
|
|
Junior Member
|
|
Join Date: Aug 2013
Location: peoria, il
Posts: 13
|
|
|
Junior Member
Join Date: Aug 2013
Location: peoria, il
Posts: 13
|
I'm not so sure yet if there is anything solid to weld or mount anything to it. I cant find this part online either. Was thinking of welding a mount to the frame if its solid.
|
|
|
Reply With Quote
|
|
12-02-2017, 02:02 PM
|
#5
|
 |
Elite Member
|
|
Join Date: Mar 2006
Location: Monroe, NY
Posts: 5,706
Real Name: Scramble
|
|
|
Elite Member
Join Date: Mar 2006
Location: Monroe, NY
Posts: 5,706
Real Name: Scramble
|
Quote:
Originally Posted by jimiv

I'm not so sure yet if there is anything solid to weld or mount anything to it. I cant find this part online either. Was thinking of welding a mount to the frame if its solid.
|
The whole piece is about 10"wX18"l & it welds to the frame & cross members.
I sanded mine down, drilled the drain hole larger, added a second drain hole, added 2 coat's of Eastwood rust converter & 2 coats of VHT Chassis paint. Mine wasnt rusted through yet. This pic is just one coat of Eastwood, the final product is still on my camera. Good Luck!
__________________
____________
'99 4Runner - 2.7L 3RZ, 5 Speed, 4.56 Gears - Lifted, Locked & Loaded - 166k Original owner - http://www.toyota-4runner.org/3rd-ge...ld-thread.html
'99 Limited - E-Locker- Stock (for now) - 233k 2nd Owner http://www.toyota-4runner.org/3rd-ge...ted-build.html
Last edited by Scramble; 12-02-2017 at 02:05 PM.
|
|
|
Reply With Quote
|
|
12-02-2017, 06:51 PM
|
#6
|
|
Senior Member
|
|
Join Date: Sep 2013
Location: new jersey
Posts: 4,830
|
|
|
Senior Member
Join Date: Sep 2013
Location: new jersey
Posts: 4,830
|
Quote:
Originally Posted by jimiv
I'm not so sure yet if there is anything solid to weld or mount anything to it. I cant find this part online either. Was thinking of welding a mount to the frame if its solid.
|
I don't remember the part #.
@ TheDurk
helped me with those.
Believe me. You will have plenty of meat to weld on. Factory is welded through the top before the body is on. Now you'll have to do exactly like mine. Which is strong. After it got welded. I smeared fluid film in the tight cracks.
__________________
97 3.4 JDM/5 Speed swap/eLocker Swap/ICON CDC all around/+more.....
|
|
|
Reply With Quote
|
|
12-02-2017, 09:33 PM
|
#7
|
|
Member
|
|
Join Date: Jan 2014
Location: Middle River, MD
Posts: 141
|
|
|
Member
Join Date: Jan 2014
Location: Middle River, MD
Posts: 141
|
I had this issue too. I ended up getting a local shop to fab up some angle iron on the outside of the frame to mount the top of the shock for ~$100. It seems to work without any issues but I don't wheel the truck. I'll get some pictures on Monday. The truck is at the alignment shop at the moment.
|
|
|
Reply With Quote
|
|
12-02-2017, 10:16 PM
|
#8
|
|
Senior Member
|
|
Join Date: Sep 2013
Location: new jersey
Posts: 4,830
|
|
|
Senior Member
Join Date: Sep 2013
Location: new jersey
Posts: 4,830
|
I should have mentioned. I wheel the piss out of my Truck after the fix. And 0 issues.
__________________
97 3.4 JDM/5 Speed swap/eLocker Swap/ICON CDC all around/+more.....
|
|
|
Reply With Quote
|
|
12-03-2017, 11:32 AM
|
#9
|
 |
Elite Member
|
|
Join Date: Nov 2006
Location: Pocono Mountains
Posts: 7,496
|
|
|
Elite Member
Join Date: Nov 2006
Location: Pocono Mountains
Posts: 7,496
|
Quote:
Originally Posted by kolelt
I don't remember the part #.
@ TheDurk
helped me with those.
Believe me. You will have plenty of meat to weld on. Factory is welded through the top before the body is on. Now you'll have to do exactly like mine. Which is strong. After it got welded. I smeared fluid film in the tight cracks. |
https://parts.conicellitoyotaofconsh...ZyPWxheWVyXzI4
__________________
'99 4Runner SR5 5spd 3.4L V6 4WD(U.S), original '99 Talls in front, OME 906s in back, Hella fogs, Trekmaster shocks in front, Billy in back, no running boards, FIAMM horns, Alpine sound, Michelin LTX M/S2's, owned since new.
'97 HiLux SW4 5spd 4WD(Japan model bought in Brazil assembled in Argentina, very close to a 3.0 4Runner/Surf)
'71 FordWillys Jeep CJ5 (with straight six Ford Maverick 3.0 liter engine--lives in the mountains north of Sao Paulo Brazil)
My Backyard Frame Swap
Last edited by TheDurk; 12-03-2017 at 11:38 AM.
|
|
|
Reply With Quote
|
|
12-03-2017, 11:39 AM
|
#10
|
|
Senior Member
|
|
Join Date: Sep 2013
Location: new jersey
Posts: 4,830
|
|
|
Senior Member
Join Date: Sep 2013
Location: new jersey
Posts: 4,830
|
Quote:
Originally Posted by TheDurk
|
What about rear right ? And i remember that one side was more expensive than the other side. And also, both brackets are slightly different. They are not identical!
__________________
97 3.4 JDM/5 Speed swap/eLocker Swap/ICON CDC all around/+more.....
|
|
|
Reply With Quote
|
|
12-03-2017, 12:38 PM
|
#11
|
 |
Member
|
|
Join Date: Nov 2017
Posts: 284
|
|
|
Member
Join Date: Nov 2017
Posts: 284
|
Quote:
Originally Posted by kolelt
Yes. I fixed mine. Toyota sells a replacement OEM Part. I went through the same issue. It's a lot of work to fix it. But it's doable. Ofcourse do both sides. If one side pushed through then the other will probably do the same. When you go to put in he new ones. Tap the drain hole bigger and slightly pitch it so it drains better. But you will need to clean if occasionally after wheeling. Dirt clogs it up.
I'm not uploading photos. Go through my build thread and you'll find plenty of info and photos. Page 12 or 13 I think.
koltlt 97 sr5 build thread |
Very nicely done. This will be an interesting thread to follow. If the OP has the skills and friends you do, it shouldn't be a problem. I'm retired from the auto body business now, but did it for 20 years. My first thought when I saw his pictures was, that's going to be a pain..it can obviously be done, just going to be a lot of work. Good luck Sir.
Sent from my iPhone using Tapatalk
|
|
|
Reply With Quote
|
|
12-03-2017, 01:40 PM
|
#12
|
|
Senior Member
|
|
Join Date: Sep 2013
Location: new jersey
Posts: 4,830
|
|
|
Senior Member
Join Date: Sep 2013
Location: new jersey
Posts: 4,830
|
Quote:
Originally Posted by Ifirefight
Very nicely done. This will be an interesting thread to follow. If the OP has the skills and friends you do, it shouldn't be a problem. I'm retired from the auto body business now, but did it for 20 years. My first thought when I saw his pictures was, that's going to be a pain..it can obviously be done, just going to be a lot of work. Good luck Sir.
Sent from my iPhone using Tapatalk
|
Yes sir. Good friends, and some beer. Advice on grinding of the old welds. Cut into the weld with a cut of wheel carefully. Then use a air chisel to peel the weld bead of.
__________________
97 3.4 JDM/5 Speed swap/eLocker Swap/ICON CDC all around/+more.....
|
|
|
Reply With Quote
|
|
12-03-2017, 01:47 PM
|
#13
|
|
Junior Member
|
|
Join Date: Aug 2013
Location: peoria, il
Posts: 13
|
|
|
Junior Member
Join Date: Aug 2013
Location: peoria, il
Posts: 13
|
Thanks everyone for all the great info !!! Ill keep you all posted
|
|
|
Reply With Quote
|
|
12-03-2017, 01:53 PM
|
#14
|
|
Elite Member
|
|
Join Date: Nov 2006
Location: Pocono Mountains
Posts: 7,496
|
|
|
Elite Member
Join Date: Nov 2006
Location: Pocono Mountains
Posts: 7,496
|
Quote:
Originally Posted by kolelt
What about rear right ? And i remember that one side was more expensive than the other side. And also, both brackets are slightly different. They are not identical!
|
I know. I had it wrong for a few minutes. No one would ever know if you hadn't quoted me right away. Thanks.
Left is more expensive. Only Toyota knows why. Here is left:
https://parts.conicellitoyotaofconsh...ZyPWxheWVyXzI4
__________________
'99 4Runner SR5 5spd 3.4L V6 4WD(U.S), original '99 Talls in front, OME 906s in back, Hella fogs, Trekmaster shocks in front, Billy in back, no running boards, FIAMM horns, Alpine sound, Michelin LTX M/S2's, owned since new.
'97 HiLux SW4 5spd 4WD(Japan model bought in Brazil assembled in Argentina, very close to a 3.0 4Runner/Surf)
'71 FordWillys Jeep CJ5 (with straight six Ford Maverick 3.0 liter engine--lives in the mountains north of Sao Paulo Brazil)
My Backyard Frame Swap
Last edited by TheDurk; 12-03-2017 at 02:01 PM.
|
|
|
Reply With Quote
|
|
12-03-2017, 02:15 PM
|
#15
|
|
Member
|
|
Join Date: Nov 2017
Posts: 284
|
|
|
Member
Join Date: Nov 2017
Posts: 284
|
Quote:
Originally Posted by Scramble
The whole piece is about 10"wX18"l & it welds to the frame & cross members.
I sanded mine down, drilled the drain hole larger, added a second drain hole, added 2 coat's of Eastwood rust converter & 2 coats of VHT Chassis paint. Mine wasnt rusted through yet. This pic is just one coat of Eastwood, the final product is still on my camera. Good Luck!
|
Did you also pull the body off the frame to do the repair? Seems like the best way to do it..albeit a crap load more work. Looking at the OP pictures, it looks pretty rusty even in the surrounding areas. Hopefully he will have good metal to weld to. Again, good luck and keep us posted. I will be following this thread because I know personally how much work this kind of repair will take to do it right.
Sent from my iPhone using Tapatalk
|
|
|
Reply With Quote
|
| Thread Tools |
|
|
| Display Modes |
Rate This Thread |
 Linear Mode Linear Mode
|
|
 Posting Rules
|
You may not post new threads
You may not post replies
You may not post attachments
You may not edit your posts
HTML code is On
|
|
|
|


