 02-20-2022, 12:46 AM
|
#1
|
 |
Member
|
|
Join Date: Aug 2018
Location: SF Bay Area
Posts: 274
|
|
|
Member
Join Date: Aug 2018
Location: SF Bay Area
Posts: 274
|
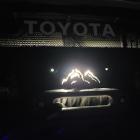
Auxbeam electrical install help :)
I suck at electrical wiring. Now that I got that out of the way, this is what I need help with 
I bought a 6-gang Auxbeam setup. All of it is installed with no issues. Now I want to wire up my two ditch lights and light bar - all part of a set. This would be pretty easy if I installed it the way it is set up out of the box. However, I want to use the Auxbeam setup so that I am without all the crazy wiring on my battery.
You can see that in the POD, you unscrew the screw, slide in the wiring and screw the screw back in. Only one way terminals there - doesnt seem to be a positive / negative separation.
In the picture with the numbers, 1 & 2 go to the ditch lights, 3 goes to the light bar. I can understand that - easy enough. 4 goes to the switch in the cabin (I will come back to this later). 5 I just screw into the side of the fender. 4 & 6 is where I need help.
6 normally would just go to the battery. 4 would just normally go to the switch inside the cabin and has 3 wires. Trying to get these installed into the POD is where I am confused. I do understand the wires going into the POD need to match the related fuse, but not really sure what wires should be put in the POD.
If more pictures are needed, let me know. I hope I made this as clear as possible
__________________
2002 4Runner Sport Edition - 4WD auto / 3 lift / 33 tires
|

|
 Reply With Quote Reply With Quote
|
|
02-20-2022, 02:44 AM
|
#2
|
 |
Senior Member
|
|
Join Date: Sep 2011
Location: Austin, Texas
Posts: 3,151
|
|
|
Senior Member
Join Date: Sep 2011
Location: Austin, Texas
Posts: 3,151
|
The junction box should have instructions but in the first pic, why is there a Red wire going to a ground point?
Are any lights/items running off this box now?
__________________
2001 Limited 4WD - 346+K - SunfireRed\Thunder Cloud; - 265/75/16 Michelin A/T2s - Fat Pat's 1.5" BL - StopTech ANGLED rotors - In series 699 trans cooler, New Yota1 transmission, All new OEM suspension front to rear.

|
|
|
Reply With Quote
|
|
02-20-2022, 04:56 AM
|
#3
|
|
Member
|
|
Join Date: Aug 2018
Location: SF Bay Area
Posts: 274
|
|
|
Member
Join Date: Aug 2018
Location: SF Bay Area
Posts: 274
|
Unfortunately, the junction box didn’t really have great instructions. Mostly just mounting and what the wiring was about. Nothing on how to wire.
The large red wire mounts to the battery. The small thin red wire is running into the firewall into the cab, where it’s mounted into the fuse panel. Probably just the angle making it seem it’s mounted to a ground point.
Only one cable mounted so far - black cable on the far left. However, nothing to do with the ditch lights / lightbar.
__________________
2002 4Runner Sport Edition - 4WD auto / 3 lift / 33 tires
|
|
|
Reply With Quote
|
|
02-20-2022, 11:18 AM
|
#4
|
|
Member
|
|
Join Date: Jan 2020
Location: Seattle, WA
Posts: 29
|
|
|
Member
Join Date: Jan 2020
Location: Seattle, WA
Posts: 29
|
Quote:
Originally Posted by 4x3Lander

Unfortunately, the junction box didnt really have great instructions. Mostly just mounting and what the wiring was about. Nothing on how to wire.
The large red wire mounts to the battery. The small thin red wire is running into the firewall into the cab, where its mounted into the fuse panel. Probably just the angle making it seem its mounted to a ground point.
Only one cable mounted so far - black cable on the far left. However, nothing to do with the ditch lights / lightbar.
|
Got a link to the actual product?
That wiring harness almost looks like a standalone harness that comes with sets of lights. The auxbeam setup I had didn't come with a harness that had a relay built into it either.
|
|
|
Reply With Quote
|
|
02-20-2022, 12:07 PM
|
#5
|
|
Member
|
|
Join Date: Aug 2018
Location: SF Bay Area
Posts: 274
|
|
|
Member
Join Date: Aug 2018
Location: SF Bay Area
Posts: 274
|
Quote:
Originally Posted by chen5108
Got a link to the actual product?
That wiring harness almost looks like a standalone harness that comes with sets of lights. The auxbeam setup I had didn't come with a harness that had a relay built into it either.
|
Correct - the wiring harness in the picture with the numbers is for a lightbar set seen here. Nilight 20-Inch 126W Combo LED Light Bar & 2 Pcs 4-Inch 18W Spot LED &
– Nilight Led Light
As Ive been thinking about this, maybe cutting out the relay and fuse and just straight wiring the lights to the Auxbeam is what Im supposed to do.
__________________
2002 4Runner Sport Edition - 4WD auto / 3 lift / 33 tires
|
|
|
Reply With Quote
|
|
02-20-2022, 01:02 PM
|
#6
|
|
Member
|
|
Join Date: Jan 2020
Location: Seattle, WA
Posts: 29
|
|
|
Member
Join Date: Jan 2020
Location: Seattle, WA
Posts: 29
|
Quote:
Originally Posted by 4x3Lander
|
Well, if that's the case you don't even need that wiring harness. Just wire the lights directly up to the box. the box you are wiring up to already has the relays and the fuses.
|
|
|
Reply With Quote
|
|
02-21-2022, 04:07 PM
|
#7
|
|
Member
|
|
Join Date: Aug 2018
Location: SF Bay Area
Posts: 274
|
|
|
Member
Join Date: Aug 2018
Location: SF Bay Area
Posts: 274
|
Quote:
Originally Posted by chen5108
Well, if that's the case you don't even need that wiring harness. Just wire the lights directly up to the box. the box you are wiring up to already has the relays and the fuses.
|
Thanks for your assistance
OK, so I have tried a straight wire from a single ditch light to the 20A and 10A port in the junction box. The ditch light has a red and black cable. I only ran the red cable into the junction box because it doesnt have a positive / negative separation.
Light doesnt work. Im assuming its due to the black cable having no connectivity, but if thats the case, where would it be connected into the junction box? I figured since the junction box is already connected to the negative battery terminal, thats all it would need.
__________________
2002 4Runner Sport Edition - 4WD auto / 3 lift / 33 tires
|
|
|
Reply With Quote
|
|
02-21-2022, 04:28 PM
|
#8
|
|
Member
|
|
Join Date: Aug 2018
Location: SF Bay Area
Posts: 274
|
|
|
Member
Join Date: Aug 2018
Location: SF Bay Area
Posts: 274
|
OK, just tried the ground wire and as expected, the light works, which makes sense.
What doesnt make sense is - where does the ground wire go into the junction box? Or is this version of the junction box the cheaper version and with that, didnt come with the negative connection ports I see in more expensive versions?
The whole point was to clean up the wiring, but if Im having to ground the black cables for three lights all separately, kind of pointless to have the Auxbeam system.
__________________
2002 4Runner Sport Edition - 4WD auto / 3 lift / 33 tires
|
|
|
Reply With Quote
|
|
02-21-2022, 05:26 PM
|
#9
|
|
Senior Member
|
|
Join Date: Sep 2011
Location: Austin, Texas
Posts: 3,151
|
|
|
Senior Member
Join Date: Sep 2011
Location: Austin, Texas
Posts: 3,151
|
Quote:
Originally Posted by 4x3Lander
OK, just tried the ground wire and as expected, the light works, which makes sense.
What doesnt make sense is - where does the ground wire go into the junction box? ...
|
Ground wire does not go in junction box, only the hot side.
The ground serves as the Switch wire. This goes to your switch in dash. Only the red (+ hot) goes to auxbeam, ground goes to switch and if a 3rd wire that is for lights on dash switch, hook that up to ignition switch power, like radio circuit (lights don't use much power). Make sense?
__________________
2001 Limited 4WD - 346+K - SunfireRed\Thunder Cloud; - 265/75/16 Michelin A/T2s - Fat Pat's 1.5" BL - StopTech ANGLED rotors - In series 699 trans cooler, New Yota1 transmission, All new OEM suspension front to rear.
|
|
|
Reply With Quote
|
|
02-21-2022, 05:34 PM
|
#10
|
 |
Senior Member
|
|
Join Date: Apr 2020
Location: Monroe, WA
Posts: 2,197
Real Name: Devan
|
|
|
Senior Member
Join Date: Apr 2020
Location: Monroe, WA
Posts: 2,197
Real Name: Devan
|
FYI, you would only have two wires going to your battery if you hooked it up as intended. Not exactly what I would call "crazy", but I get trying to utilize what you already have.
__________________
Y2K Highlander Millennium Silver 3.4L auto @ 320k and climbing 
Toytecs + 5100s / 7.5 wrap + OME spacers + Tokicos / JBA UCAs / Anonymous Fab. LBJs / Total Chaos Gussets / EimKeith PCK + LCAR / Extended Bump Stops; Brake Lines; Rear Diff Breather / True North Fab. Hybrid Bumper / CBI Hybrid Bumper + Tire Carrier / 4xInnovations Hybrid Sliders / Opt Offroad Trailing Arms / Lil Skip Gas Skid / BudBuilt Front Skid / ARB Rear Locker
Last edited by Devbot; 02-21-2022 at 05:40 PM.
|
|
|
Reply With Quote
|
|
02-21-2022, 07:49 PM
|
#11
|
|
Member
|
|
Join Date: Aug 2018
Location: SF Bay Area
Posts: 274
|
|
|
Member
Join Date: Aug 2018
Location: SF Bay Area
Posts: 274
|
Thanks everyone for the assistance with this. Got it all figured out and installed. Seems much easier now that I’m not looking at everything sitting all together on a bench. Overwhelming for me since I’m not an electrical person.
Anyway, learned from a Jeep forum that since this particular junction box doesn’t have the ground ports, you can simply ground the black wire(s) anywhere, as I had kind of suspected and tested before I ran all the wiring. So, that’s what I did. Grounded the black wires to the side of the fenders. Everything works now!
__________________
2002 4Runner Sport Edition - 4WD auto / 3 lift / 33 tires
|
|
|
Reply With Quote
|
|
02-23-2022, 01:10 PM
|
#12
|
|
Member
|
|
Join Date: Jan 2020
Location: Seattle, WA
Posts: 29
|
|
|
Member
Join Date: Jan 2020
Location: Seattle, WA
Posts: 29
|
Quote:
Originally Posted by 4x3Lander
Thanks everyone for the assistance with this. Got it all figured out and installed. Seems much easier now that Im not looking at everything sitting all together on a bench. Overwhelming for me since Im not an electrical person.
Anyway, learned from a Jeep forum that since this particular junction box doesnt have the ground ports, you can simply ground the black wire(s) anywhere, as I had kind of suspected and tested before I ran all the wiring. So, thats what I did. Grounded the black wires to the side of the fenders. Everything works now!
|
I'm glad you figured it out, when you posted the photo of the box, it looked very different from the more recent versions out there. Was this a older model by any chance? All the new ones have hot and ground connections in the control box.
|
|
|
Reply With Quote
|
|
02-23-2022, 11:20 PM
|
#13
|
|
Member
|
|
Join Date: Aug 2018
Location: SF Bay Area
Posts: 274
|
|
|
Member
Join Date: Aug 2018
Location: SF Bay Area
Posts: 274
|
Quote:
Originally Posted by chen5108
I'm glad you figured it out, when you posted the photo of the box, it looked very different from the more recent versions out there. Was this a older model by any chance? All the new ones have hot and ground connections in the control box.
|
Thanks for your help with it too!
Not sure about the model. I bought it months ago, but not sure if this is an old model or not. I am wondering if maybe they have this option so that the junction box is smaller and maybe easier to install in a tight area for some people. If I had some of the larger sized junction boxes, it would have been tough. I made two brackets and mounted it right above the wiring harness / hood release cable area next to the brake reservoir.
__________________
2002 4Runner Sport Edition - 4WD auto / 3 lift / 33 tires
|
|
|
Reply With Quote
|
|
02-26-2022, 04:31 AM
|
#14
|
 |
Senior Member
|
|
Join Date: Oct 2011
Location: Stationed in Camp LeJeune, home is Conover, NC
Posts: 2,691
|
|
|
Senior Member
Join Date: Oct 2011
Location: Stationed in Camp LeJeune, home is Conover, NC
Posts: 2,691
|
Has anyone ever taken one of these apart?
Id love to see the internals of the switch/relay box.
(Might just buy a cheap ass one off Amazon to scope it out.)
If someone would make one with the amount of switches Im planning on that would be nice. 
Sent from my iPhone using Tapatalk
__________________
"We are experts in the application of violence."
-LtCol Christian Cabannis, Camp Letherneck, Afghanistan, 2009. The "Summer of Decision."

|
|
|
Reply With Quote
|
|
02-26-2022, 05:30 AM
|
#15
|
 |
Senior Member
|
|
Join Date: May 2019
Location: Northern California
Posts: 1,684
Real Name: Blair
|
|
|
Senior Member
Join Date: May 2019
Location: Northern California
Posts: 1,684
Real Name: Blair
|
Quote:
Originally Posted by Doc2012
Has anyone ever taken one of these apart?
Id love to see the internals of the switch/relay box.
(Might just buy a cheap ass one off Amazon to scope it out.)
If someone would make one with the amount of switches Im planning on that would be nice.
Sent from my iPhone using Tapatalk |
I wonder what's going on in the world of Blue Sea boxes? I'm sure we have some users here and I could benefit from some guidance/best practices/hell....gimme a model number that fits. Going to be lighting up/running switches for a few things pretty soon....
__________________
260K - Y2K/E - Clock still works
|
|
|
Reply With Quote
|
 Posting Rules
|
You may not post new threads
You may not post replies
You may not post attachments
You may not edit your posts
HTML code is On
|
|
|
|


 Linear Mode


