User Tag List

Reply
 
Thread Tools Rate Thread Display Modes
Old 03-11-2023, 12:29 PM #1
97_Runner 97_Runner is offline
Junior Member
 
Join Date: Jan 2015
Location: AR
Posts: 8
97_Runner is on a distinguished road
97_Runner 97_Runner is offline
Junior Member
 
Join Date: Jan 2015
Location: AR
Posts: 8
97_Runner is on a distinguished road
Analog'ish stereo in a digital world

TLDR:

Analog'ish in a digital world...


---

Obviously car audio is a massive rabbit hole. There are a thousand different ways one could go, and up until I guess last week, I was content to leave the system in this 4runner that I've had for over twenty years, basically the same as it's been for fifteen of those years.

Essentially this simple (sorry for the dust), and admittedly reliable deck that I got at a circuit city pre 09' bankruptcy fire sale has done its job, using only that 1/8 jack for most of that time. But since no phone really has a headphone jack anymore, and for some reason I couldn't bring myself to spend $9 on an adapter - down the rabbit hole we go


Trying to find a simple single din stereo that doesn't look like crap is pretty difficult these days. Although every car manufacturer's idea of breathtaking design is just to slap iPads all over new car interiors as well, so I can't really fault the third party manufacture's alone.

I had narrowed it down to either the Alpine ute-73bt or the Sony DSX-GS80. These looked fine, and I appreciated the internal amp with the Sony, but if you look into the specs - it's crazy that in 2023 they are using Bluetooth 3 which came out in freaking 2009.

And if you have any memory of bluetooth in 2009 - it wasn't great.

So yeah, I guess they've both given up.

Somehow I ended up on a miata forum during my search and I was struck by this guy's setup:

[NA] Looking for single din "retro looking" headunit recommendations - MX-5 Miata Forum

Obviously those speedhut gauges are gorgeous, but I was more interested in the idea of just moving past the oem's for a stereo and into something more minimalistic and that actually has what I want, without any of the superfluous crap. Sorry, but I'm not burning a jump drive with mp3's or listening to AM radio in 2023 - I just want generally reliable bluetooth and some decent power - plus points if it's not rocking that strip mall laser tag aesthetic most of the replacement stereos are going for.

So I probably would have ignored his post as he's using a cheap chi-fi board, but I have a little experience with the class D amps on these boards and they are way better than you'd expect.

I bought one on a lark once to power some old speakers in my shop that a buddy had given me. Not expecting much for I guess the $20 I paid at the time, I stripped an old laptop psu and hooked it up and was stunned how much better it sounded than the ab amp I was using in the house.

I ended up buying another one for the office and, paired with a literal $10 usb dac into my computer, I was again stunned at how well these worked.

I bought a third (this time from a proper maker, smsl, and dumped the AB amp I was using - and have been much happier since. So I thought I'd give it a try for a fourth.

I didn't want to just forsake the rear speakers, so I went looking for a 4 channel amp - and found two options from Dayton:

Dayton Audio KABD-430 4 x 30W All-in-one Amplifier Board with DSP and Bluetooth 5.0 aptX HD

Dayton Audio KABD-4100 4 x 100W All-in-one Amplifier Board with DSP and Bluetooth 5.0 aptX HD

Both of them very reasonable.

I decided to go for the 430 as I wanted everything to be solid state without any fans. And judging by my other little boards like this, they've all been plenty loud. Thankfully these boards have modern bluetooth 5.0.


And since I was going to be digging into the stereo anyway, I decided to go ahead and pick up some new components as well.


After some fiddling, I tested the stereo with a little 1 amp 12 volt wall wart and it worked fine.


I also ordered a handful of different toggles to make sure I found one that had the best feeling "click" - ended up being this one: SPST Mini Toggle Switch with Tapered Knob


I soldered it onto the leads that comes with the necessary parts kit for the 430 board and everything worked fine.


At about this time I started to follow the brief instructions the miata guy had outlined and made a simple mount out of some aluminum stock I had lying around to attach the 12 to 24 volt converter.


Then I tucked it into this little corner.


At about this moment I realized I had no clue how I was going to mount everything into the dash. I called around a couple of car audio shops to see if they had any blank din plates or something that would work. None of them were remotely helpful.

I searched the internet quickly for something that might work, but didn't really want to wait around so I decided I'd see if I could cannibalize the old Pioneer.


Once I gutted everything I thought, this might work - but I had no idea how to make a proper face plate.


I went to the hardware store and they didn't really have much. I had a piece of black plate steel, probably a good 1/4 thick - which I figured would be way too heavy for this application. Then I remembered I had the old AB amp that I was going to toss, and decided to cannibalize that as well just for aluminum. It was the right thickness and was already painted - so it would save me some time. It might seem wasteful, but one channel was already gone on this amp and honestly, after having much better luck with the class D amps - I figured its time had come and gone.


I marked out the dimensions and got to work with a hacksaw.


Some niggling corners, etc. that I "fixed" with a nice whap of a chisel.


And then I test fit it to the gutted Pioneer and it seemed promising.

97_Runner is offline   Reply With QuoteReply With Quote
Old 03-11-2023, 12:31 PM #2
97_Runner 97_Runner is offline
Junior Member
 
Join Date: Jan 2015
Location: AR
Posts: 8
97_Runner is on a distinguished road
97_Runner 97_Runner is offline
Junior Member
 
Join Date: Jan 2015
Location: AR
Posts: 8
97_Runner is on a distinguished road
Part 2..

There was this annoying little gap that I hadn't noticed - basically the plastic blank below was warped, I assume from the factory.


So I took a block plane and just jointed that top edge to eliminate the gap.


Then off to markup. Probably the main reason I wanted to go this route was to have actual proper knobs. These guys are heavy bronze guitar knobs and actually feel great when using - a far cry from the chintzy plastic that is on, well, basically everything in modern life.


Then I carefully drilled out the mount holes.


One annoying issue with the potentiometers is this gap, which when you're setting the set screw for the knobs, just collapses so that the knobs skew.


I tried a couple of different options to fill that void until I found just the right thickness in some packaging I had lying around.


Then I just super glued it in. Worked pretty well.


Then off to lop off the top of the face plate. Aluminum is pretty soft, and I've got some saws that could probably cut this. But I didn't want to risk mangling the only face plate I had at this point so I just took my time with a multimaster and the cut was very clean.


Then off to just attach everything which went pretty easily. The accessory kit that you can (and honestly have to) buy for the 430 has a little 1/8 jack for analog input as well. I had intended to put that in one of the smaller holes next to the toggle - but I noticed some feedback and decided not to bother with it. So I installed an extra red led that I had bought that indicates when the bluetooth is on, as well as the momentary switch that is supposed to reset the bluetooth. It did not work - but who cares, use the toggle if you need to reset the bluetooth.


The inside of the old Pioneer husk as built.


Then it came time to run the cable from the battery through the firewall. I read about this a lot, and most people recommend going through the gasket on the drivers side next to the brake peddle. But I read a lot about how much water that area gets, and all the issues that can arise with leaking - so I looked for another option and decided on this other small gasket basically in the center of the firewall.


I snaked a drill bit to it.


Then used an awl to push the wires through.


It was at this point that I wired everything up to the adapter that was there from the last stereo install. Proud of myself, I turned the key, the bluetooth connected perfectly - and no sound


So yeah, the previous installer had installed it into the factory amp. All these years with the awesome factory power of 10 watts a channel. I didn't realize it until, well, no sound - so I pulled the factory amp and sat there defeated until this $5 harness arrived from Amazon.

97_Runner is offline   Reply With QuoteReply With Quote
Old 03-11-2023, 12:32 PM #3
97_Runner 97_Runner is offline
Junior Member
 
Join Date: Jan 2015
Location: AR
Posts: 8
97_Runner is on a distinguished road
97_Runner 97_Runner is offline
Junior Member
 
Join Date: Jan 2015
Location: AR
Posts: 8
97_Runner is on a distinguished road
Part 3...

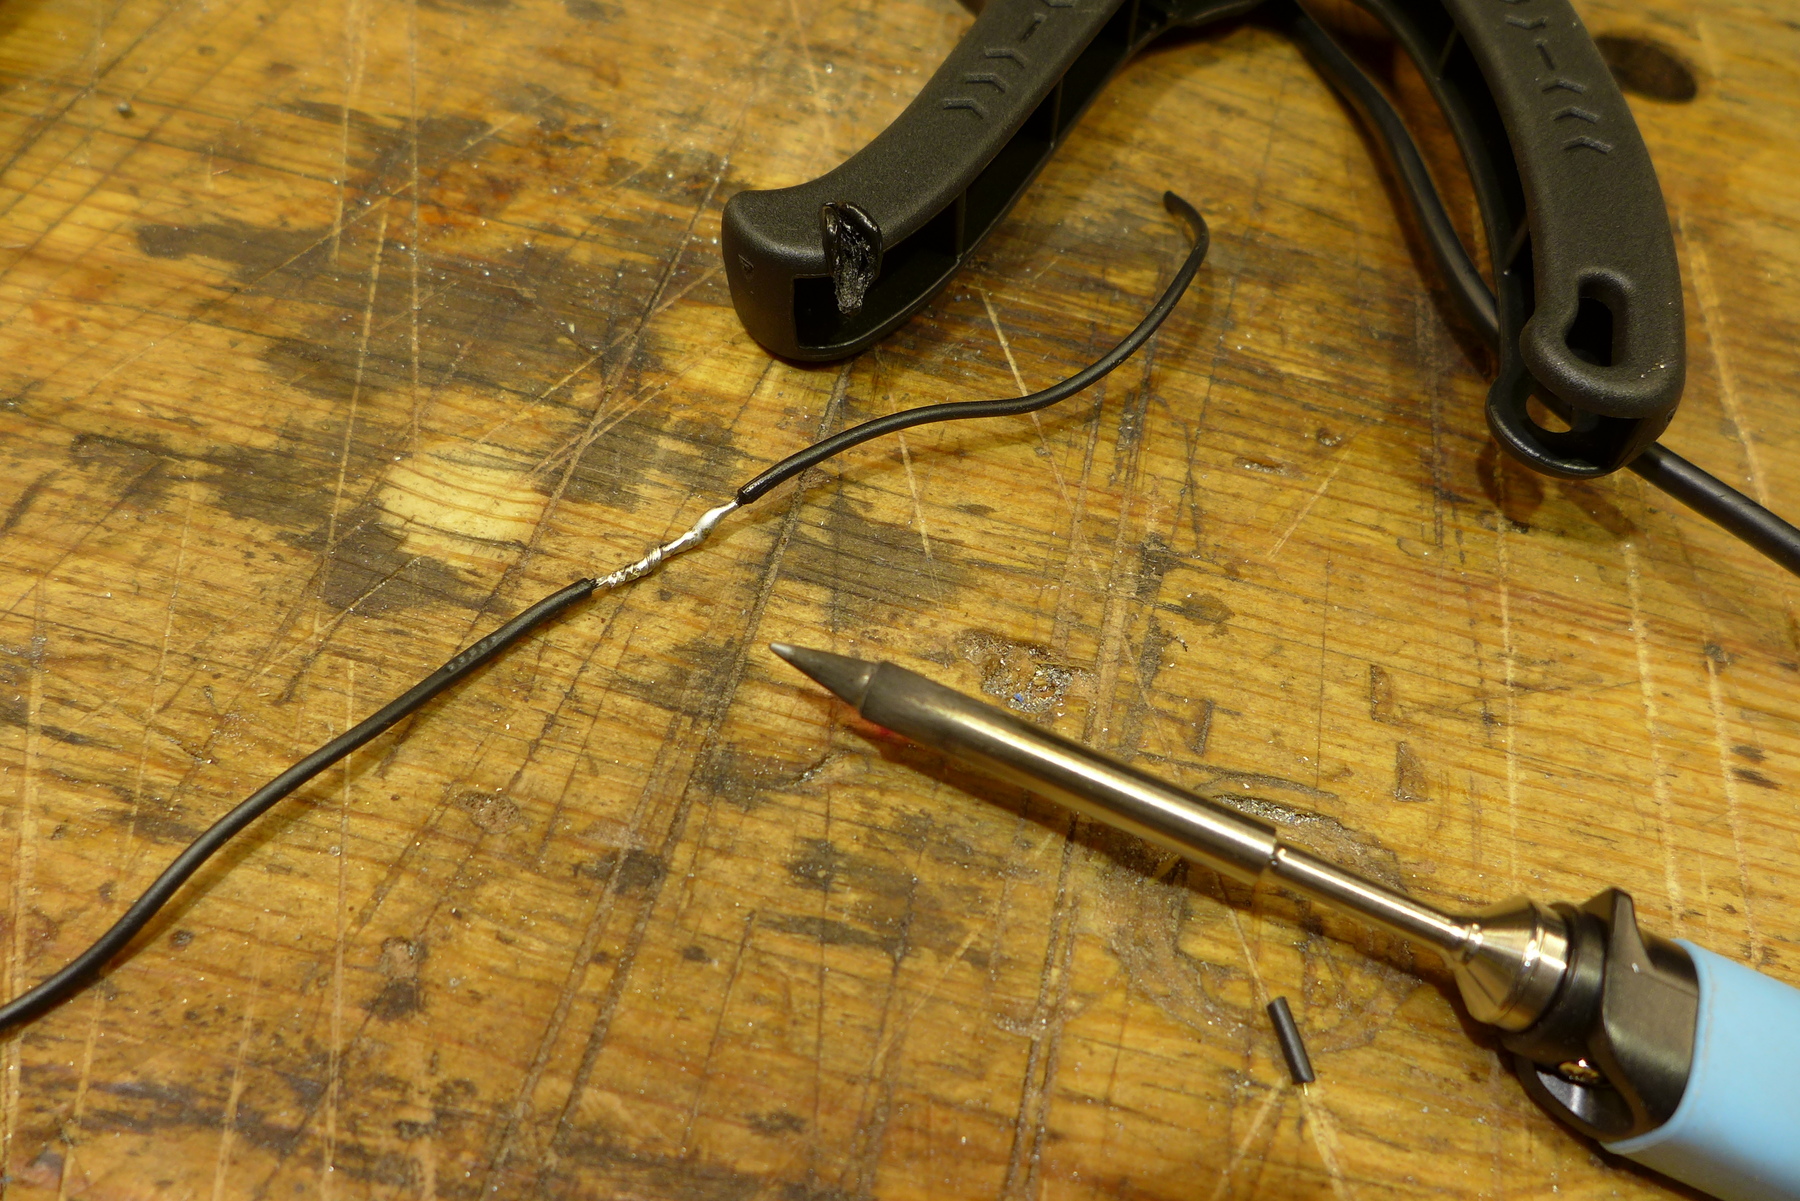
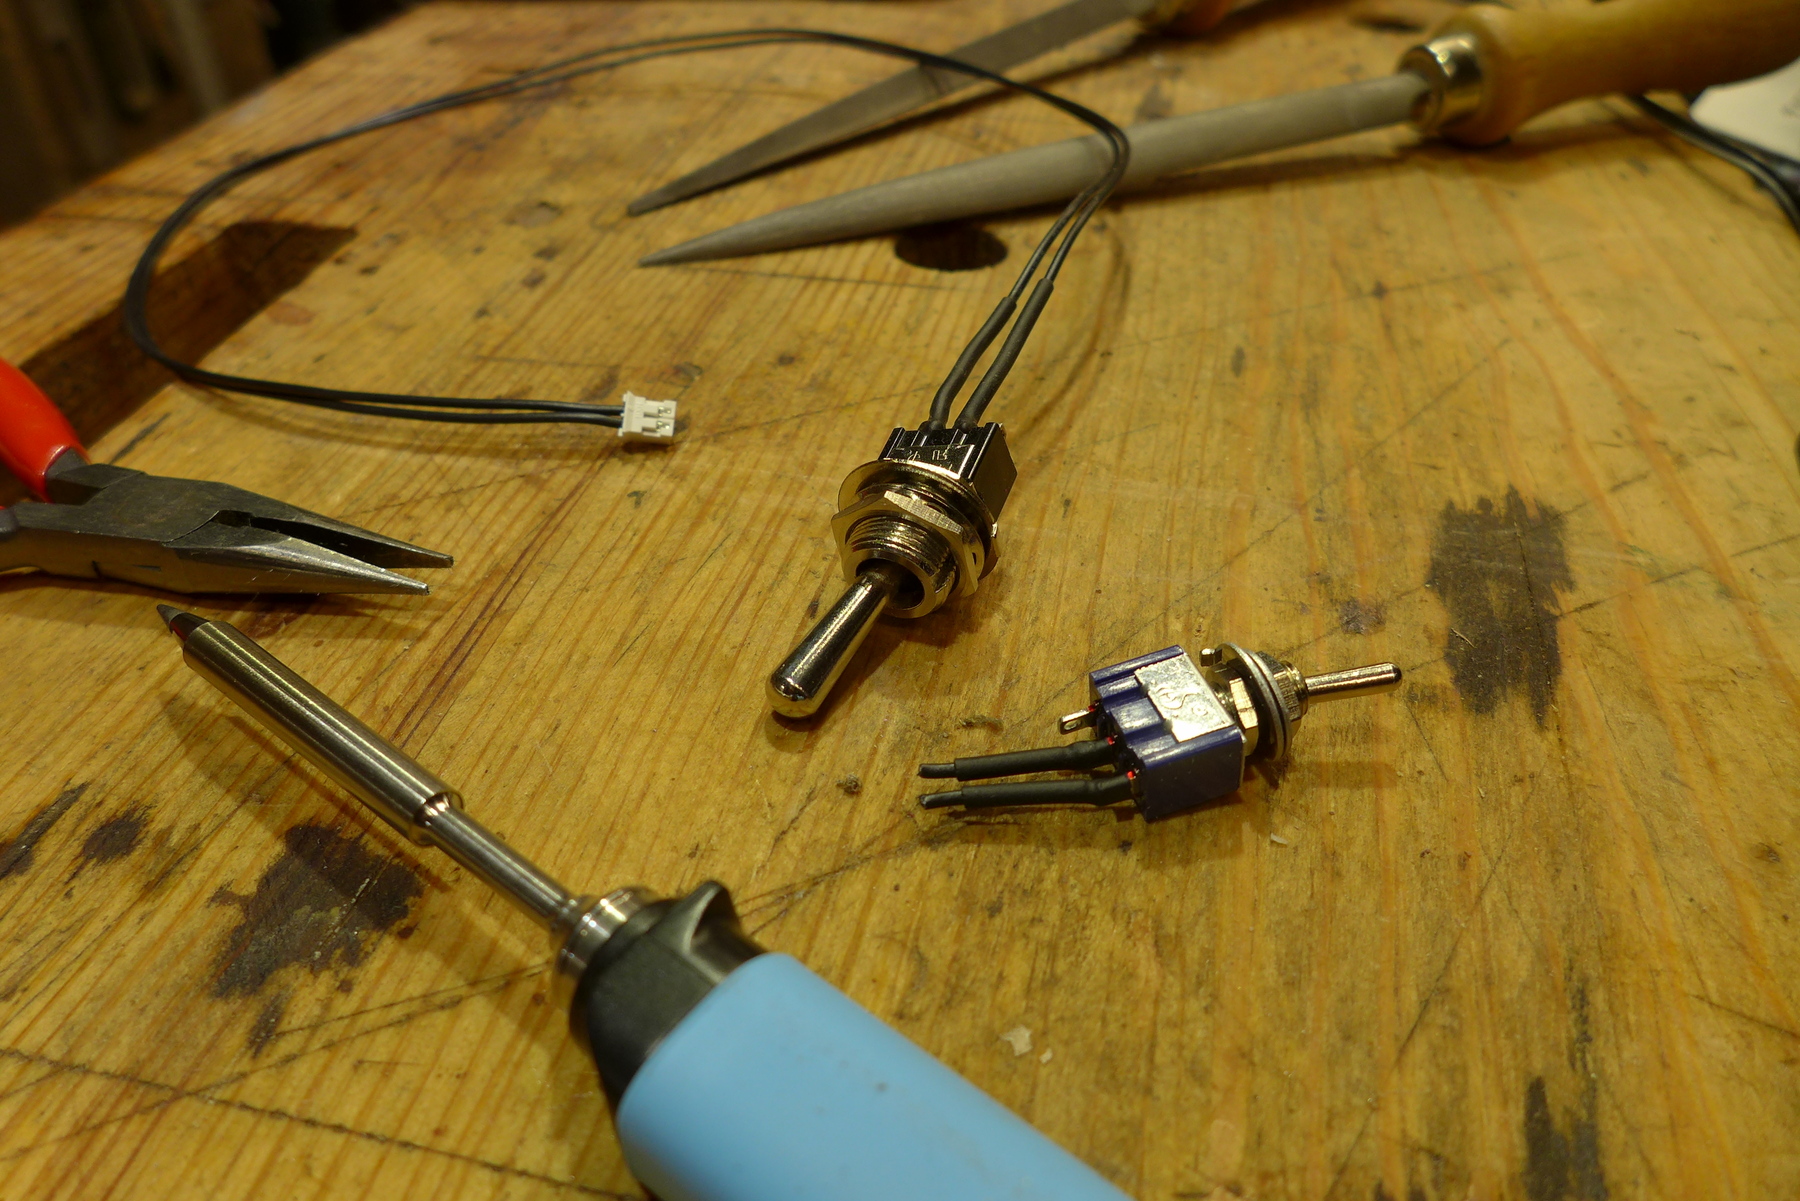
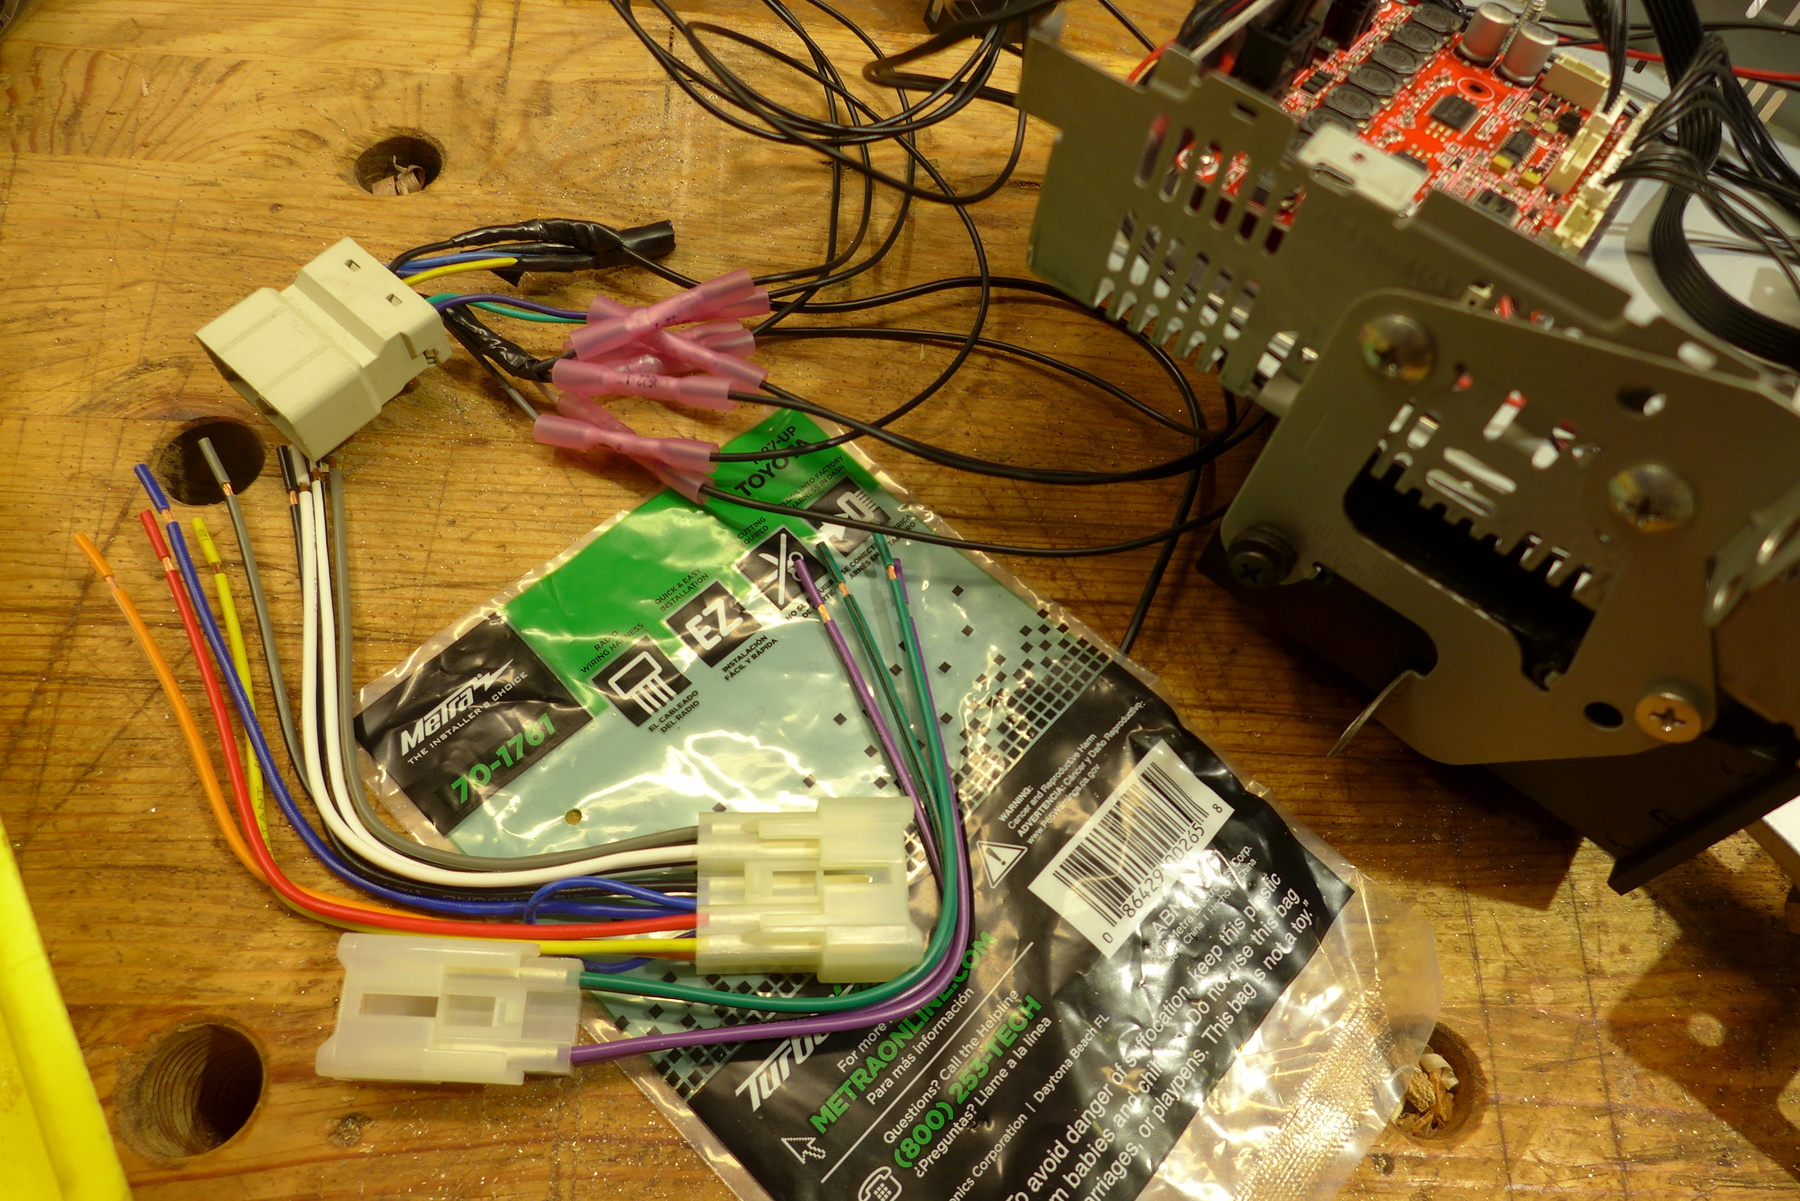
Sweet, let's solder it up... And I immediately set my soldering iron down into the plastic wire strippers - destroying the tip. I fiddled with it for about an hour trying to get it to work, until I just tossed it and crimped the wires instead.


So for anyone who says speakers installs on these 3rd gens takes an hour, I don't believe you.


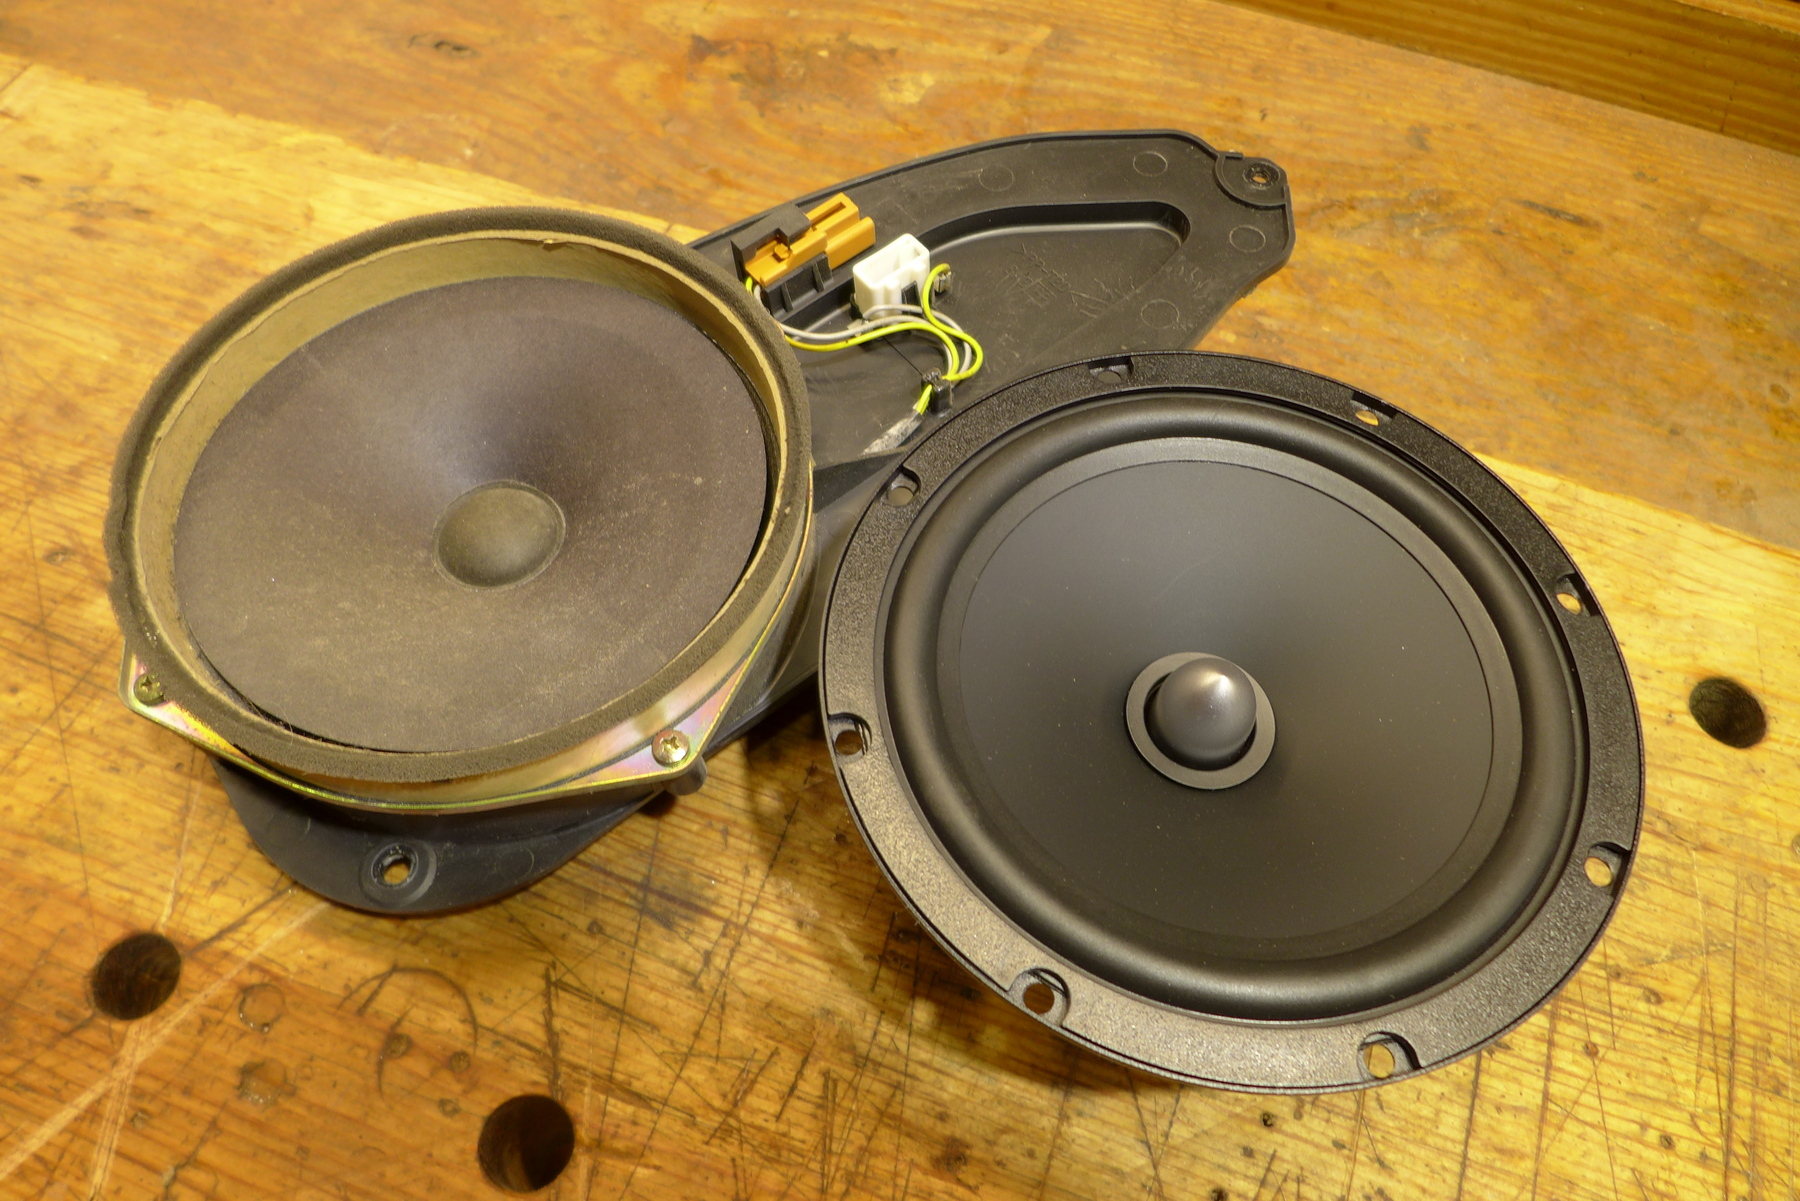
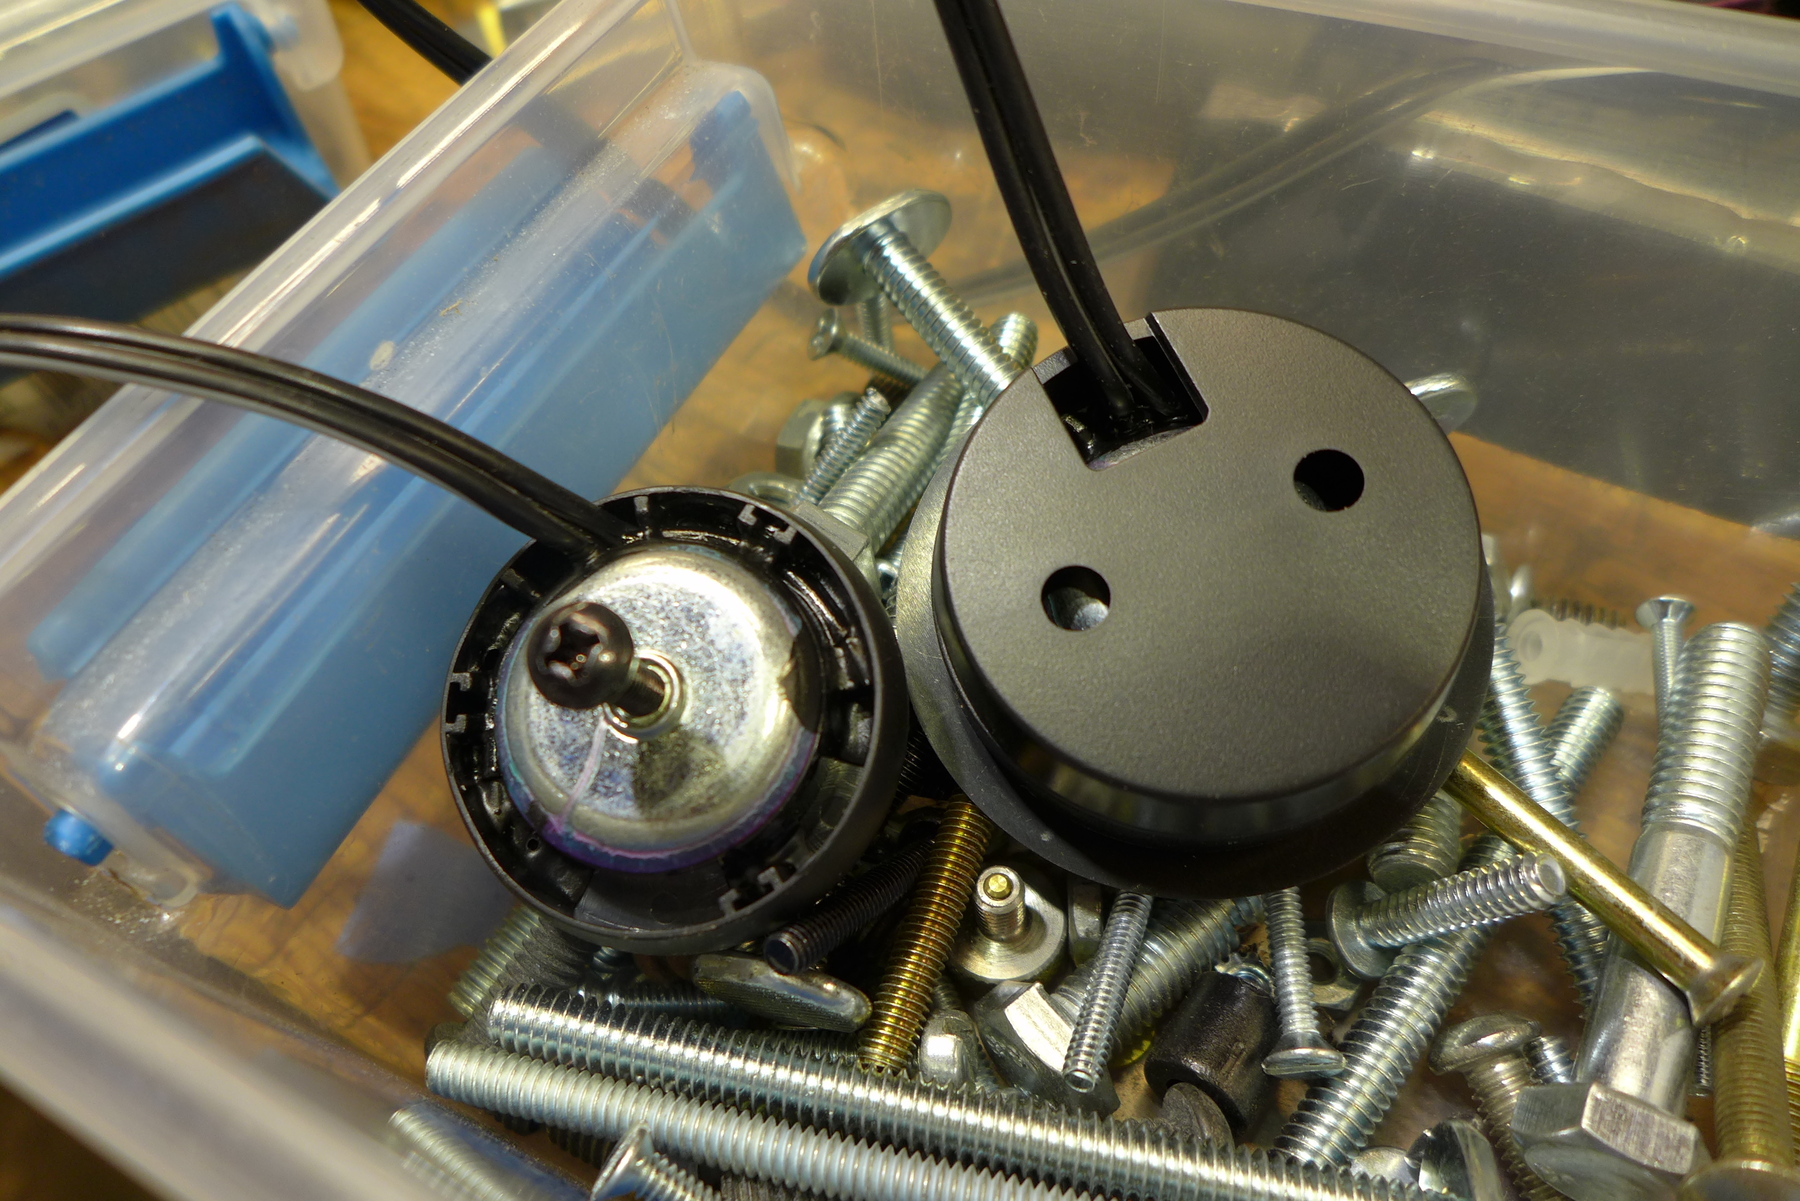
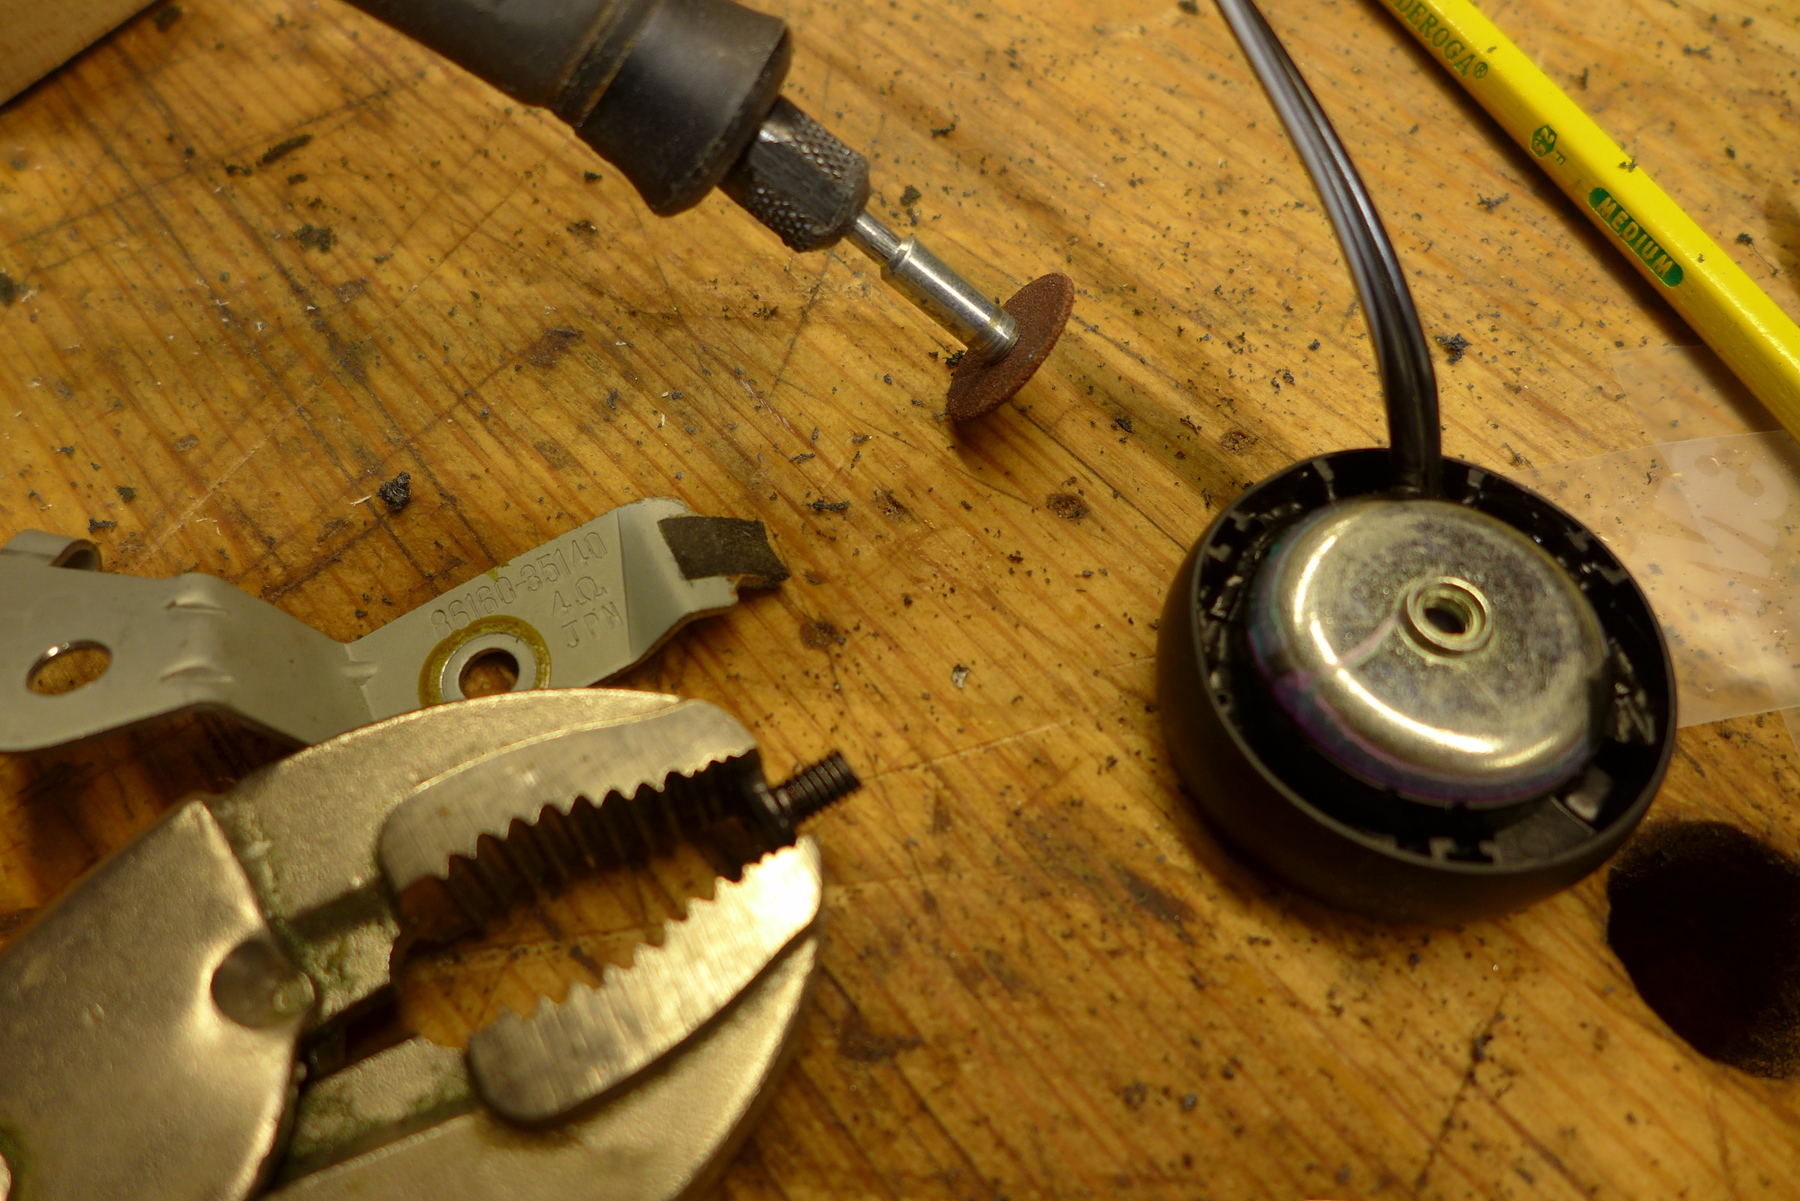
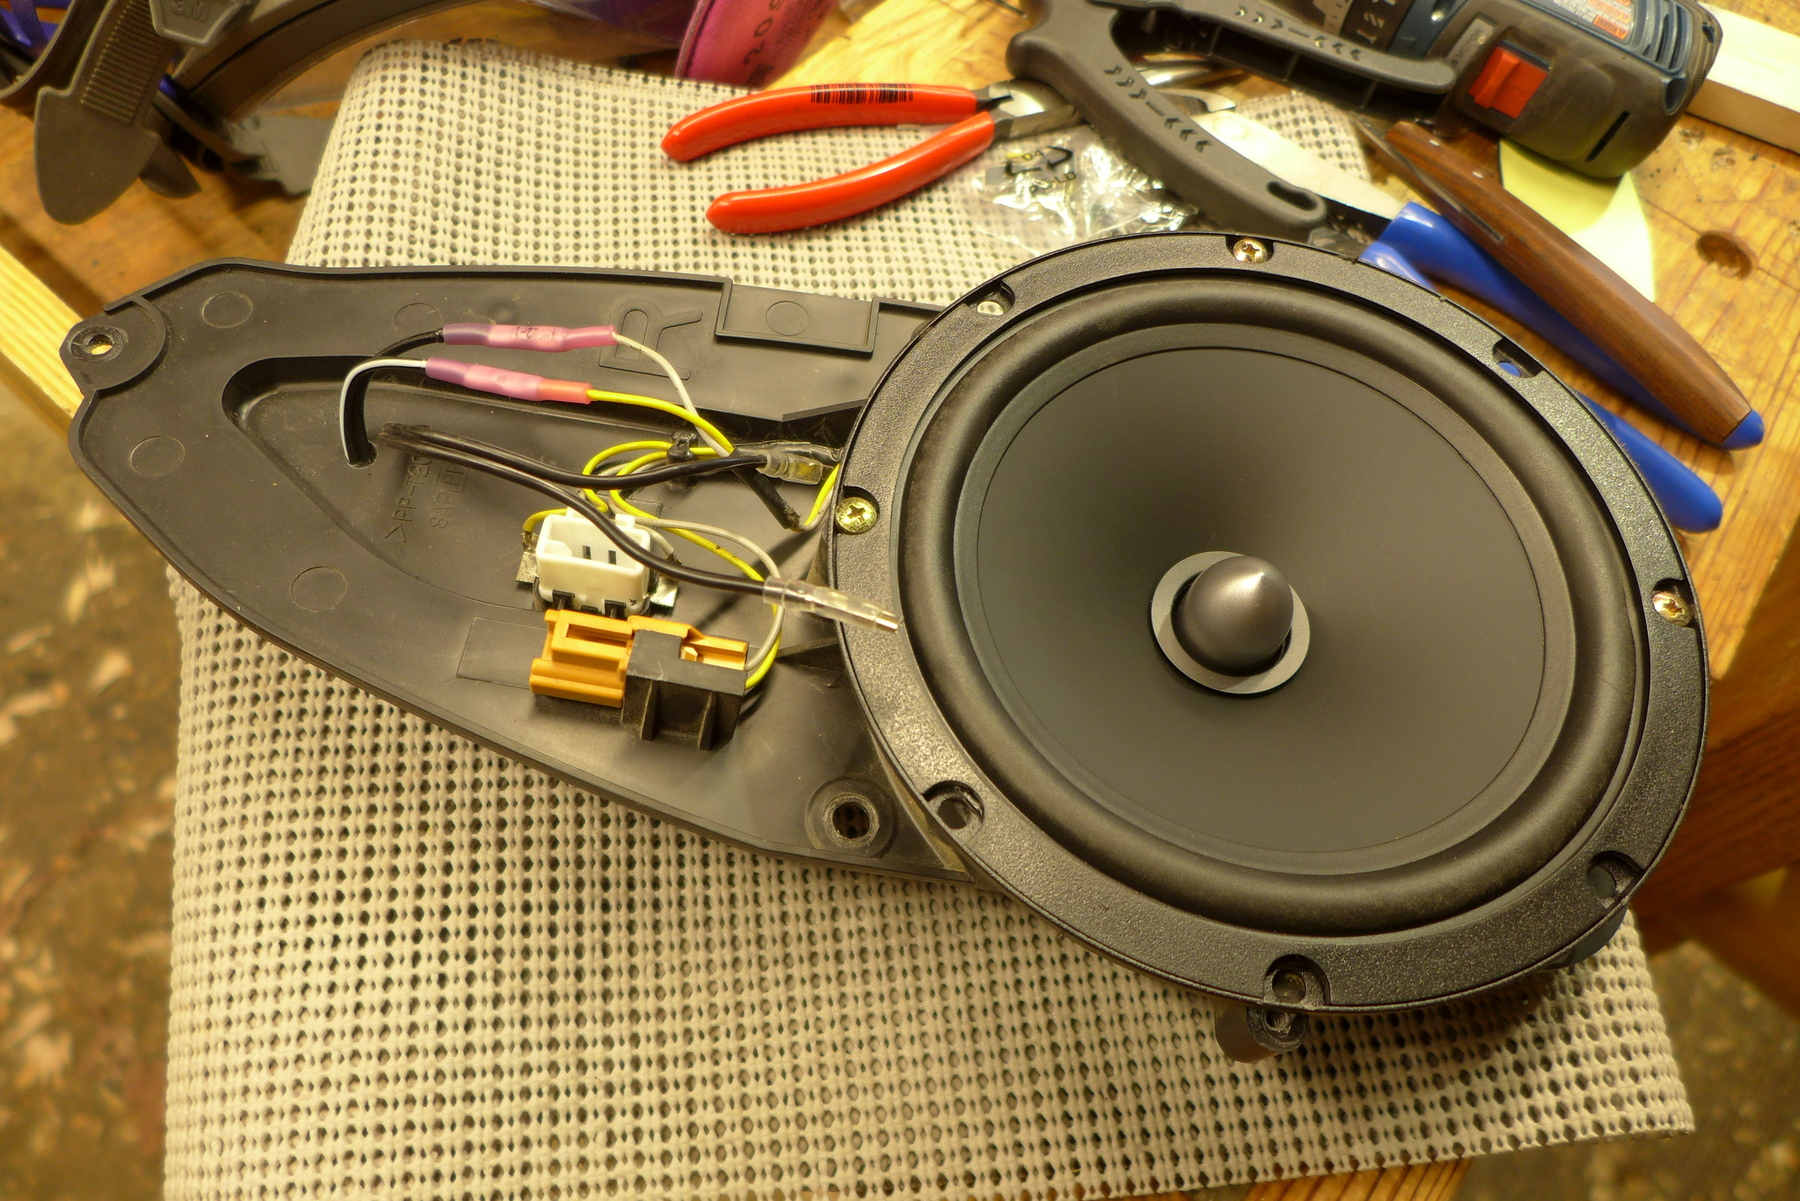
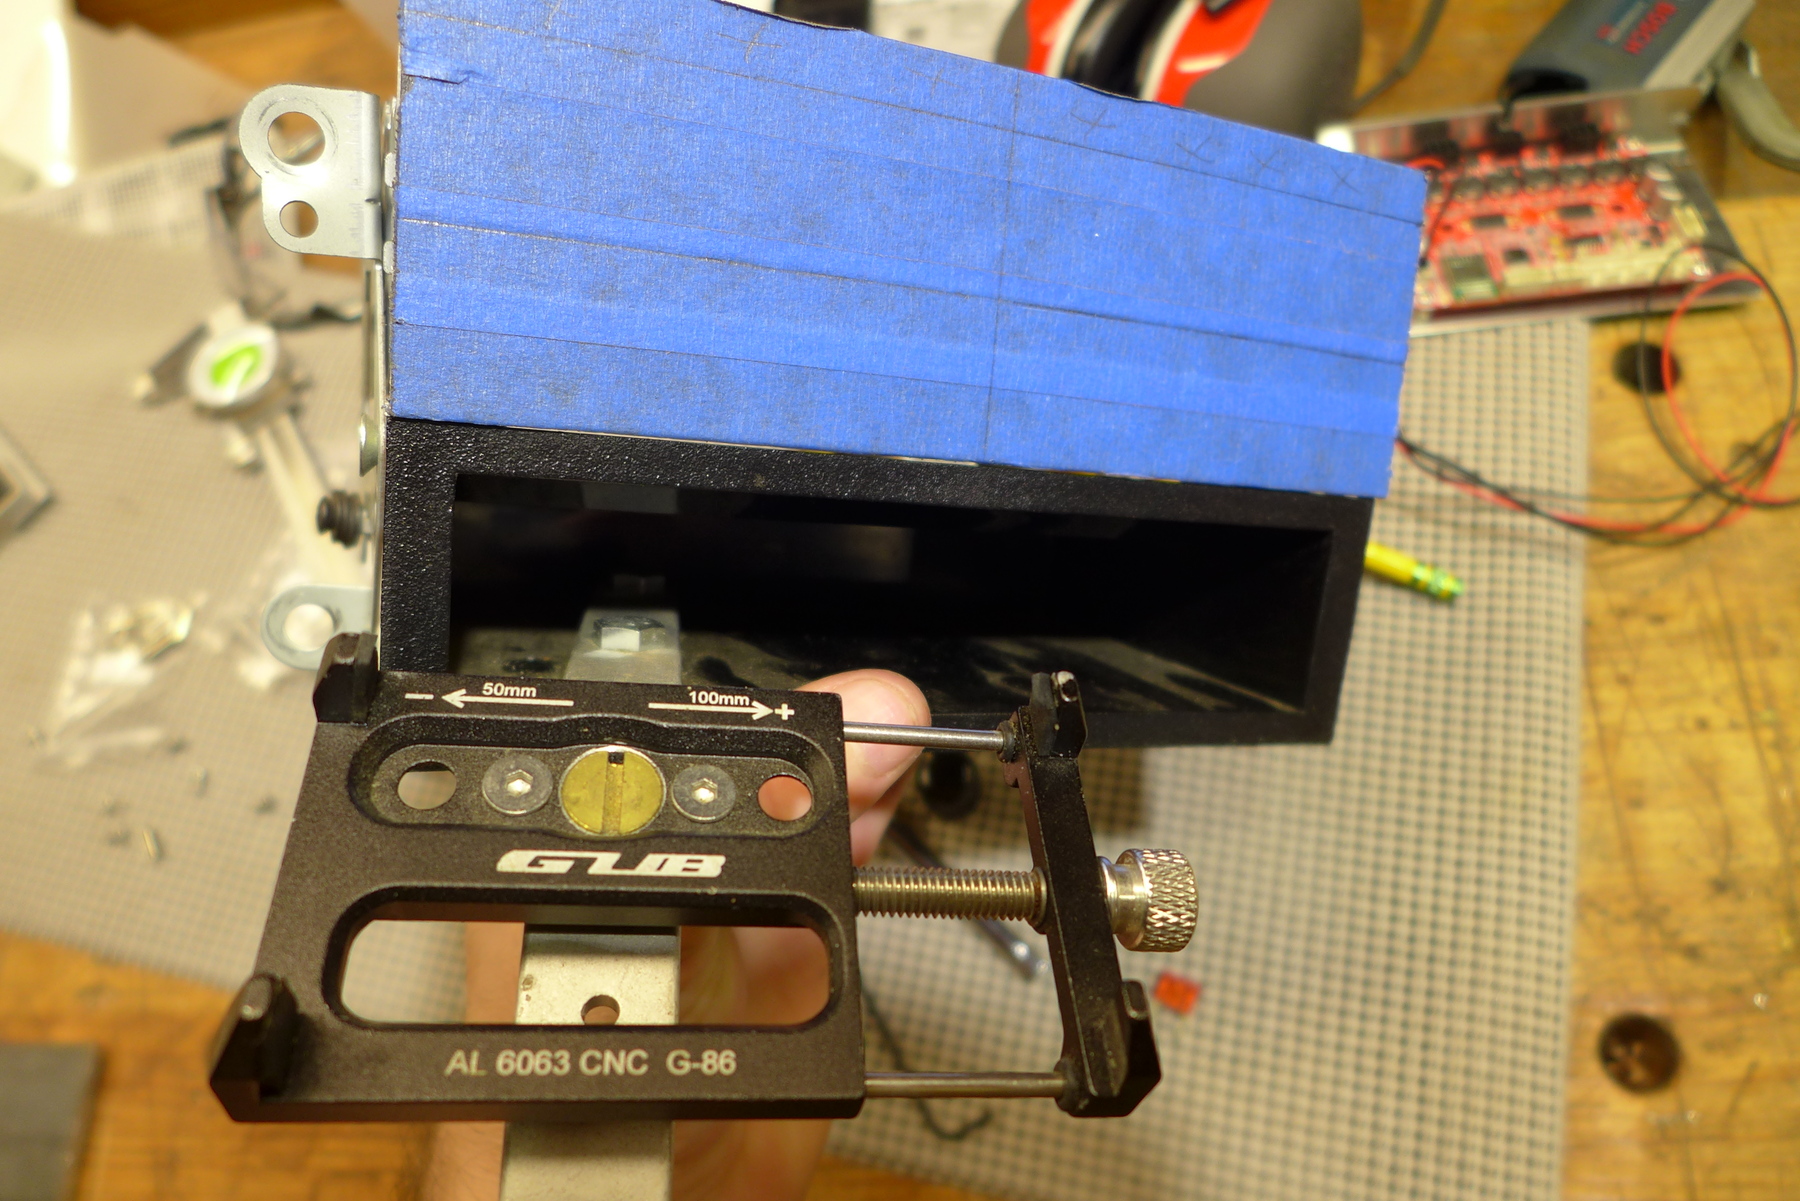
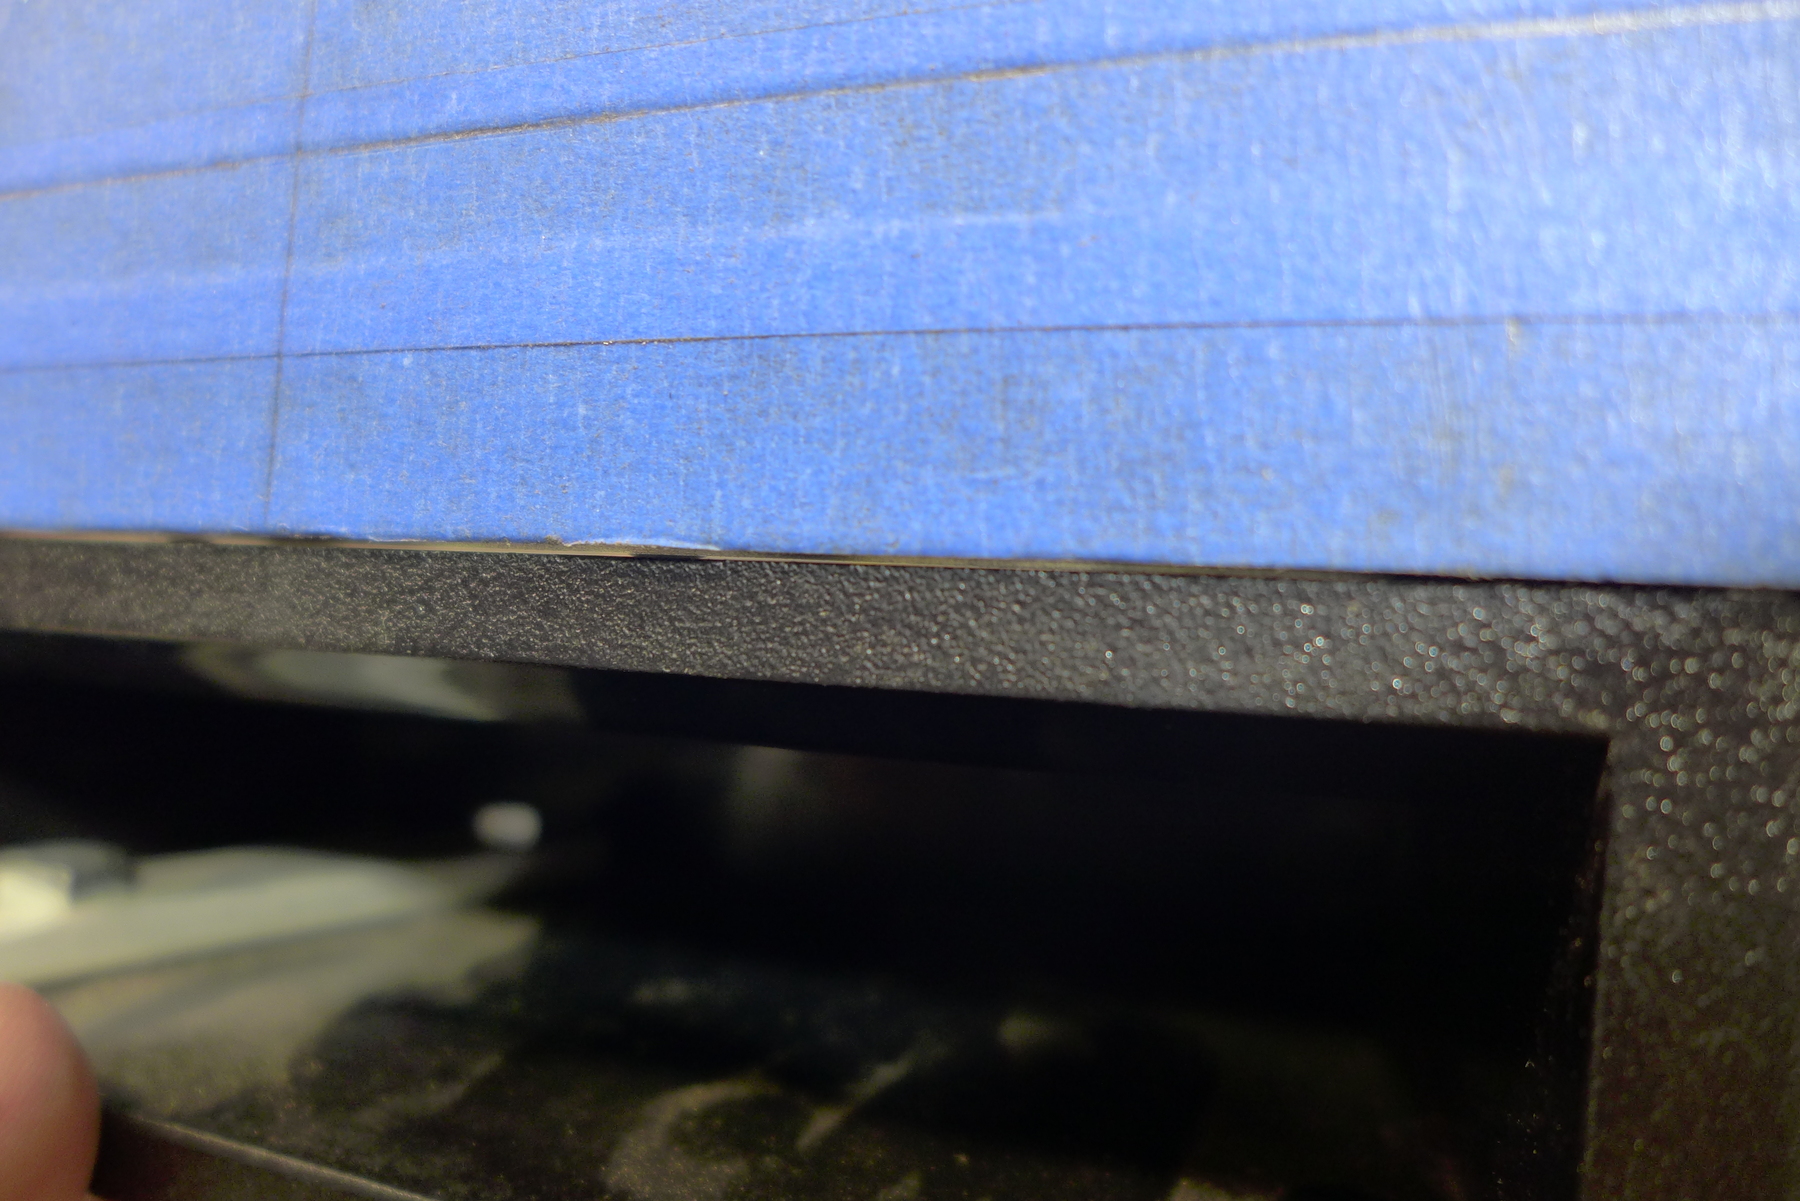
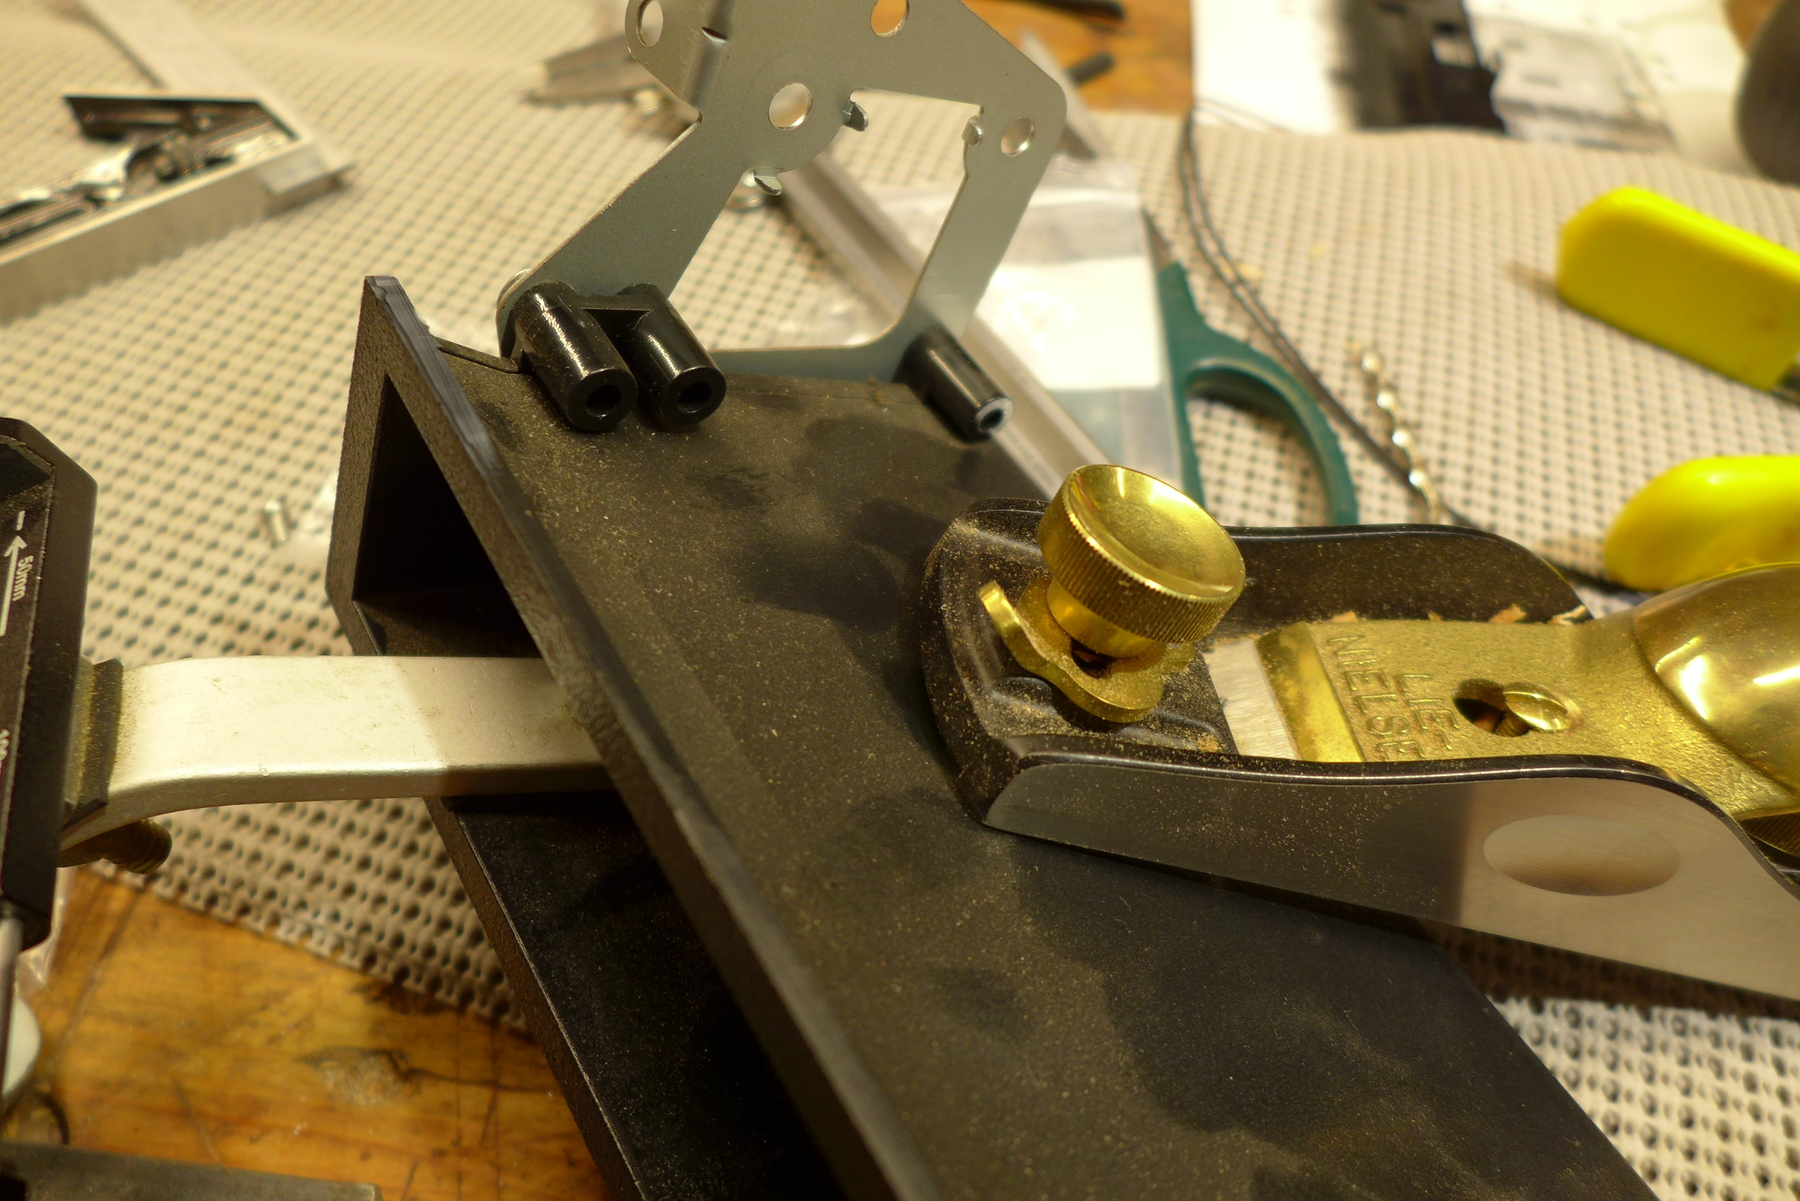
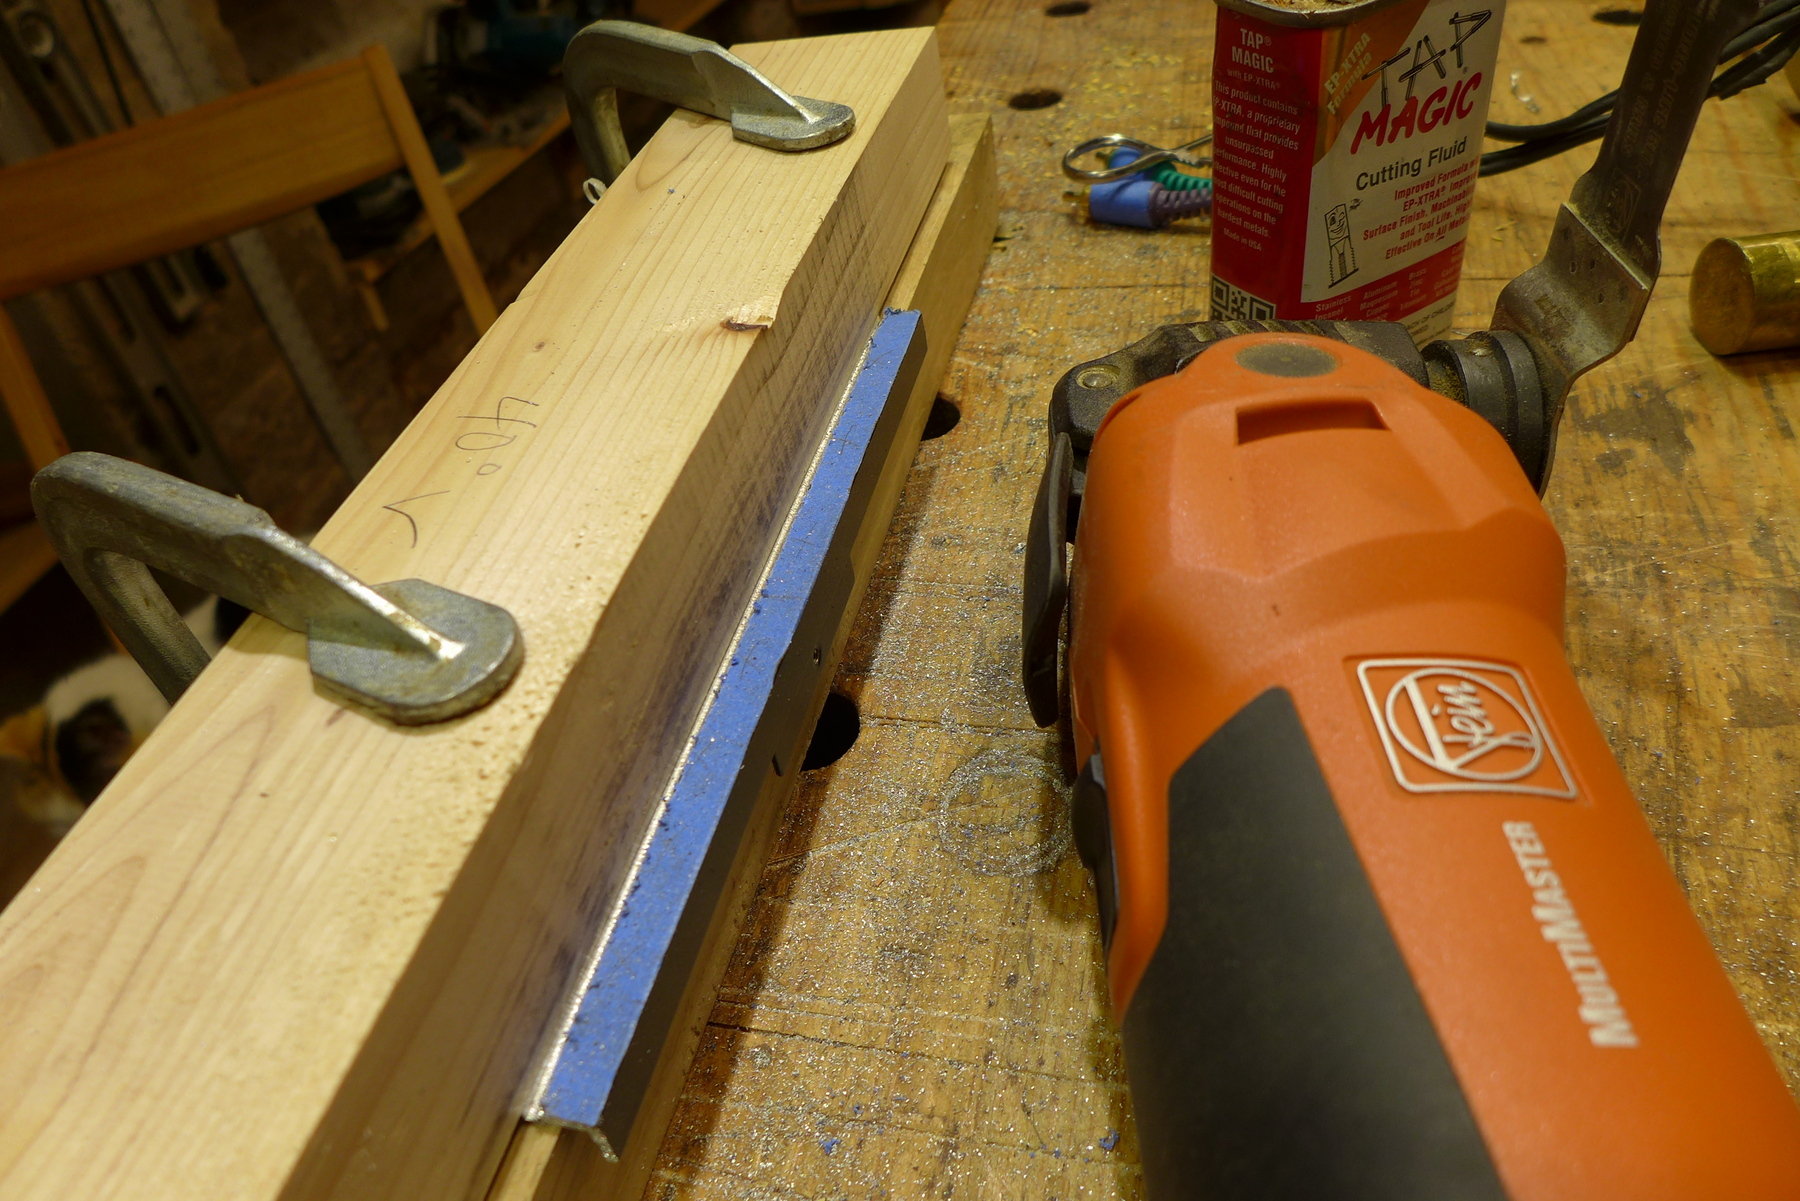
And the reasons I don't believe you is that these didn't fit at all, but I appreciated this guy's instructions with grinding them down, and got my dremel out to do the same. https://www.youtube.com/watch?v=djYJeMu3InU It was not fun.


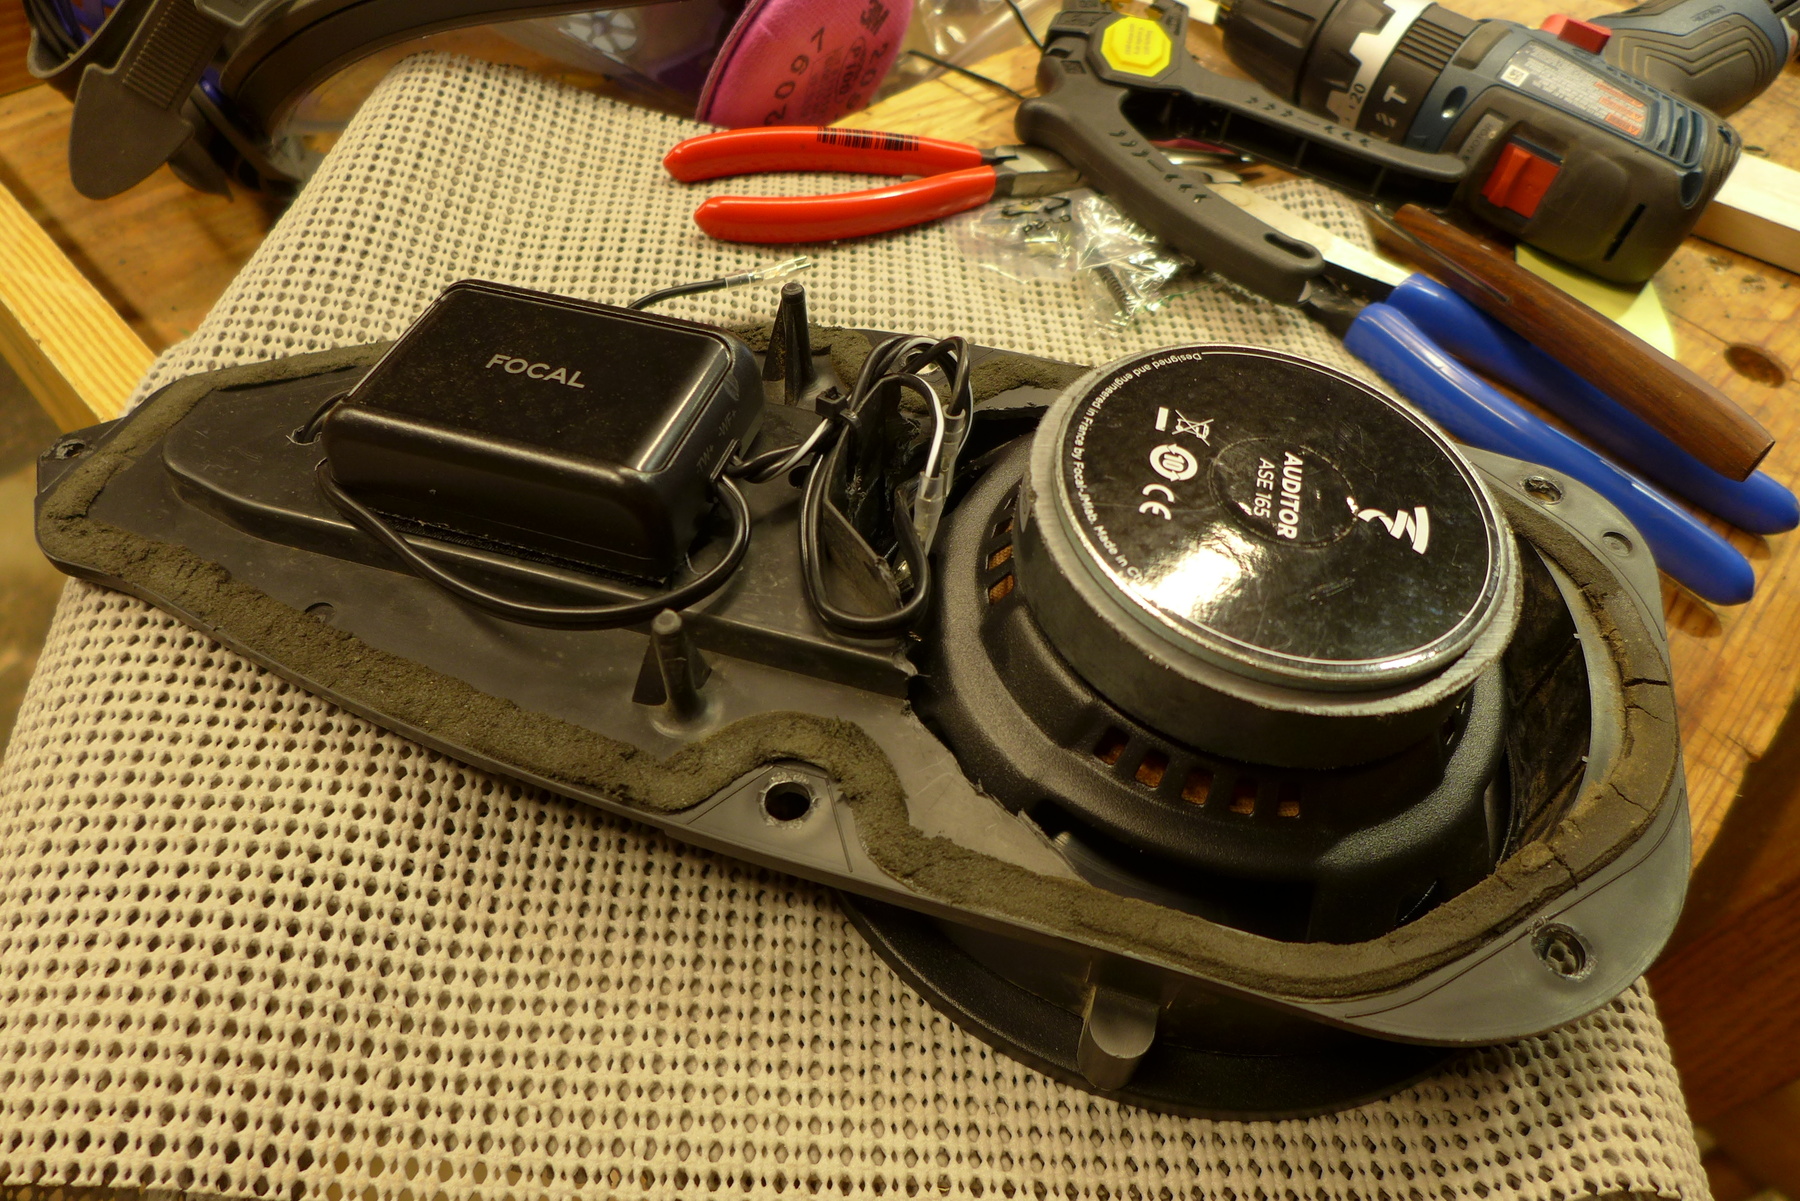
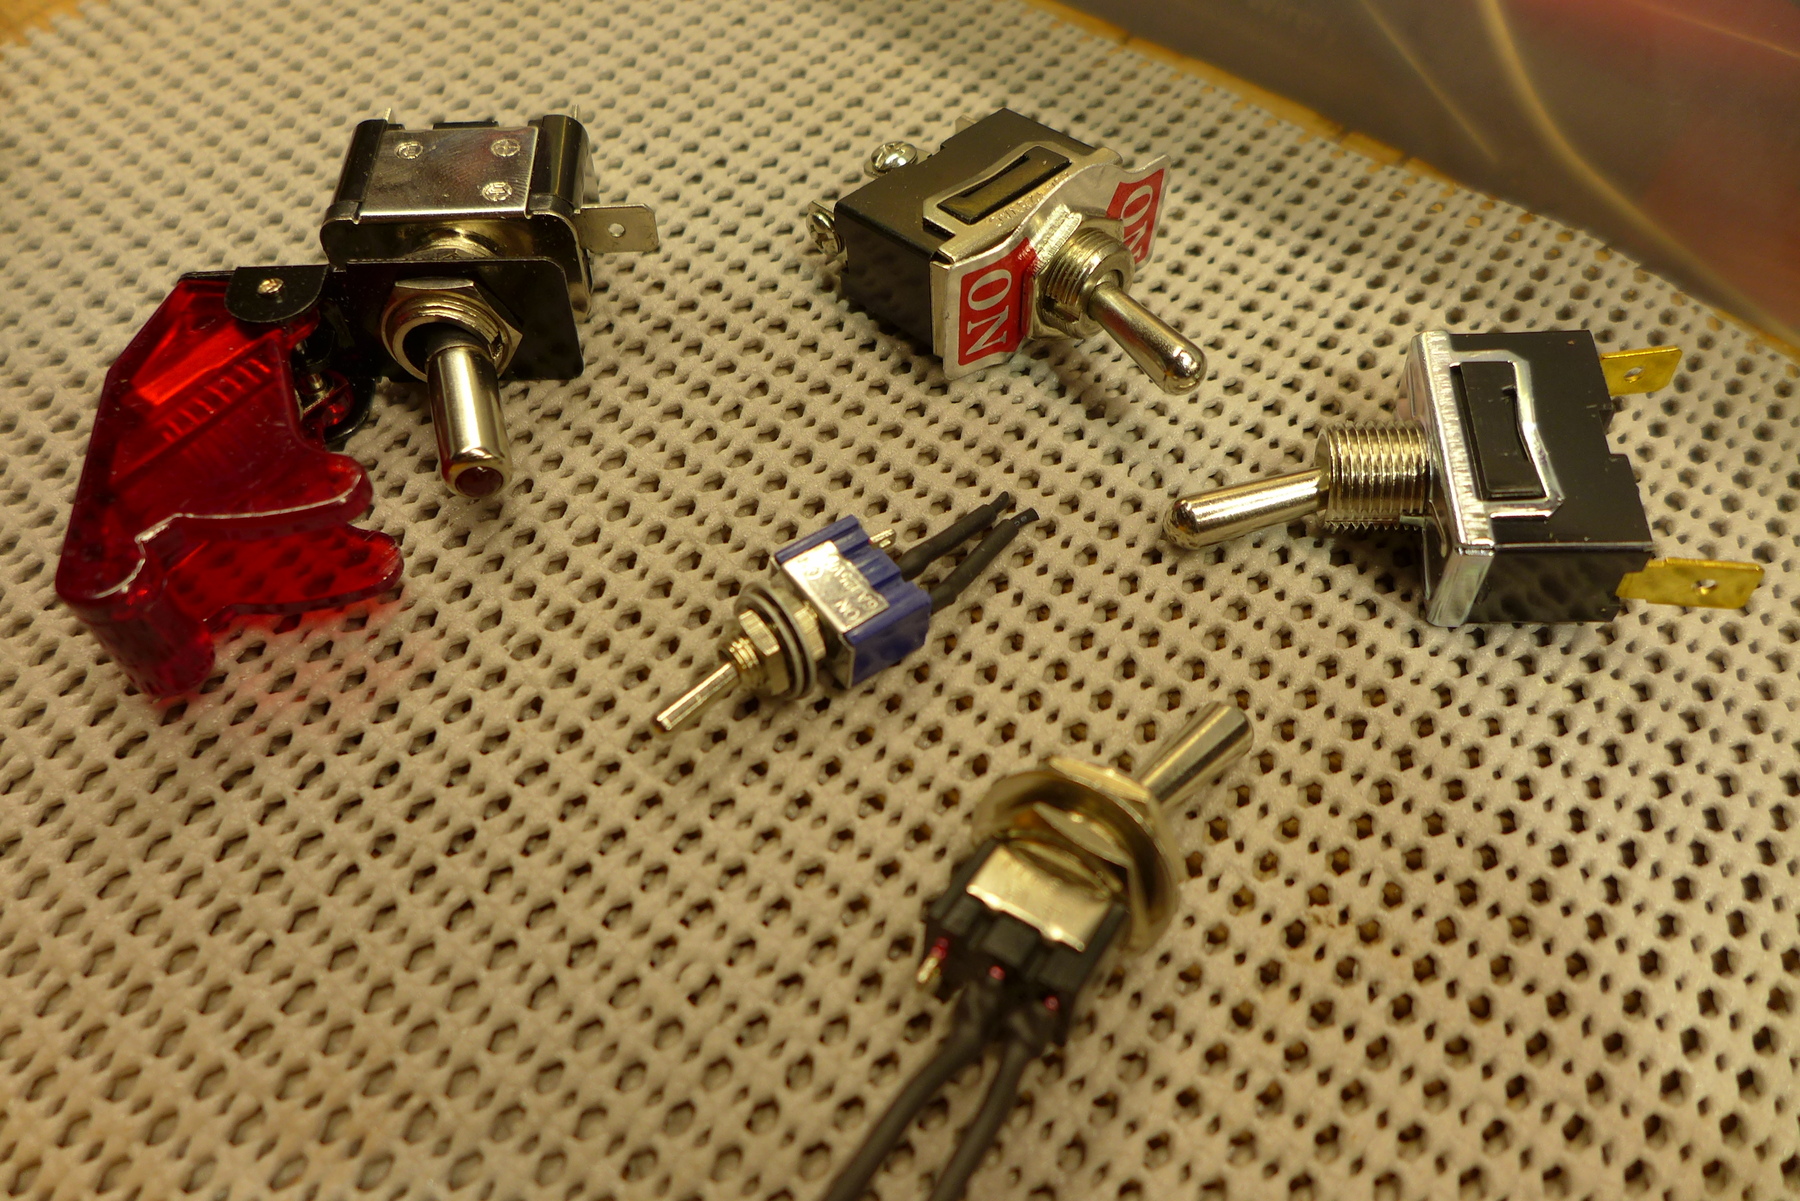
There's also been some debate about installing the tweeters. A lot of guys just glue or tape them in which I'm sure works fine.


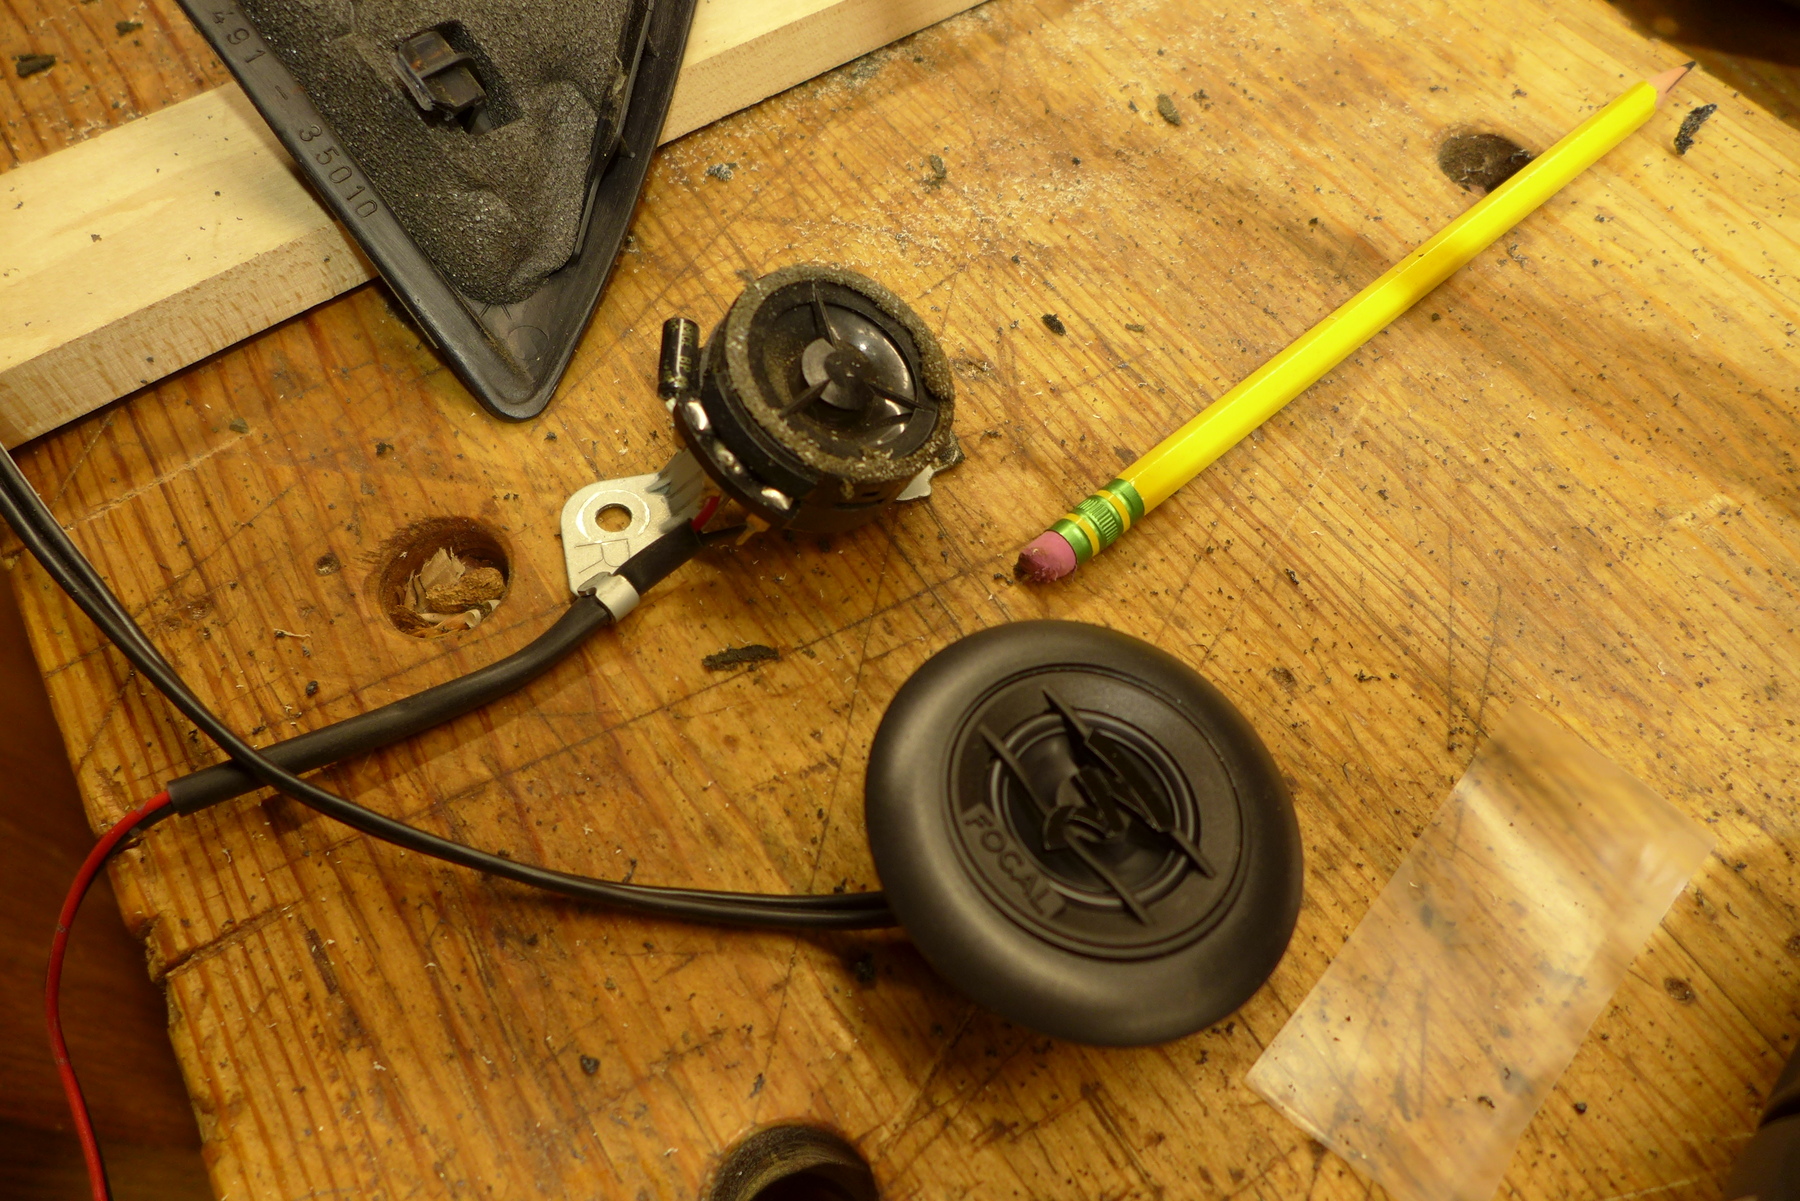
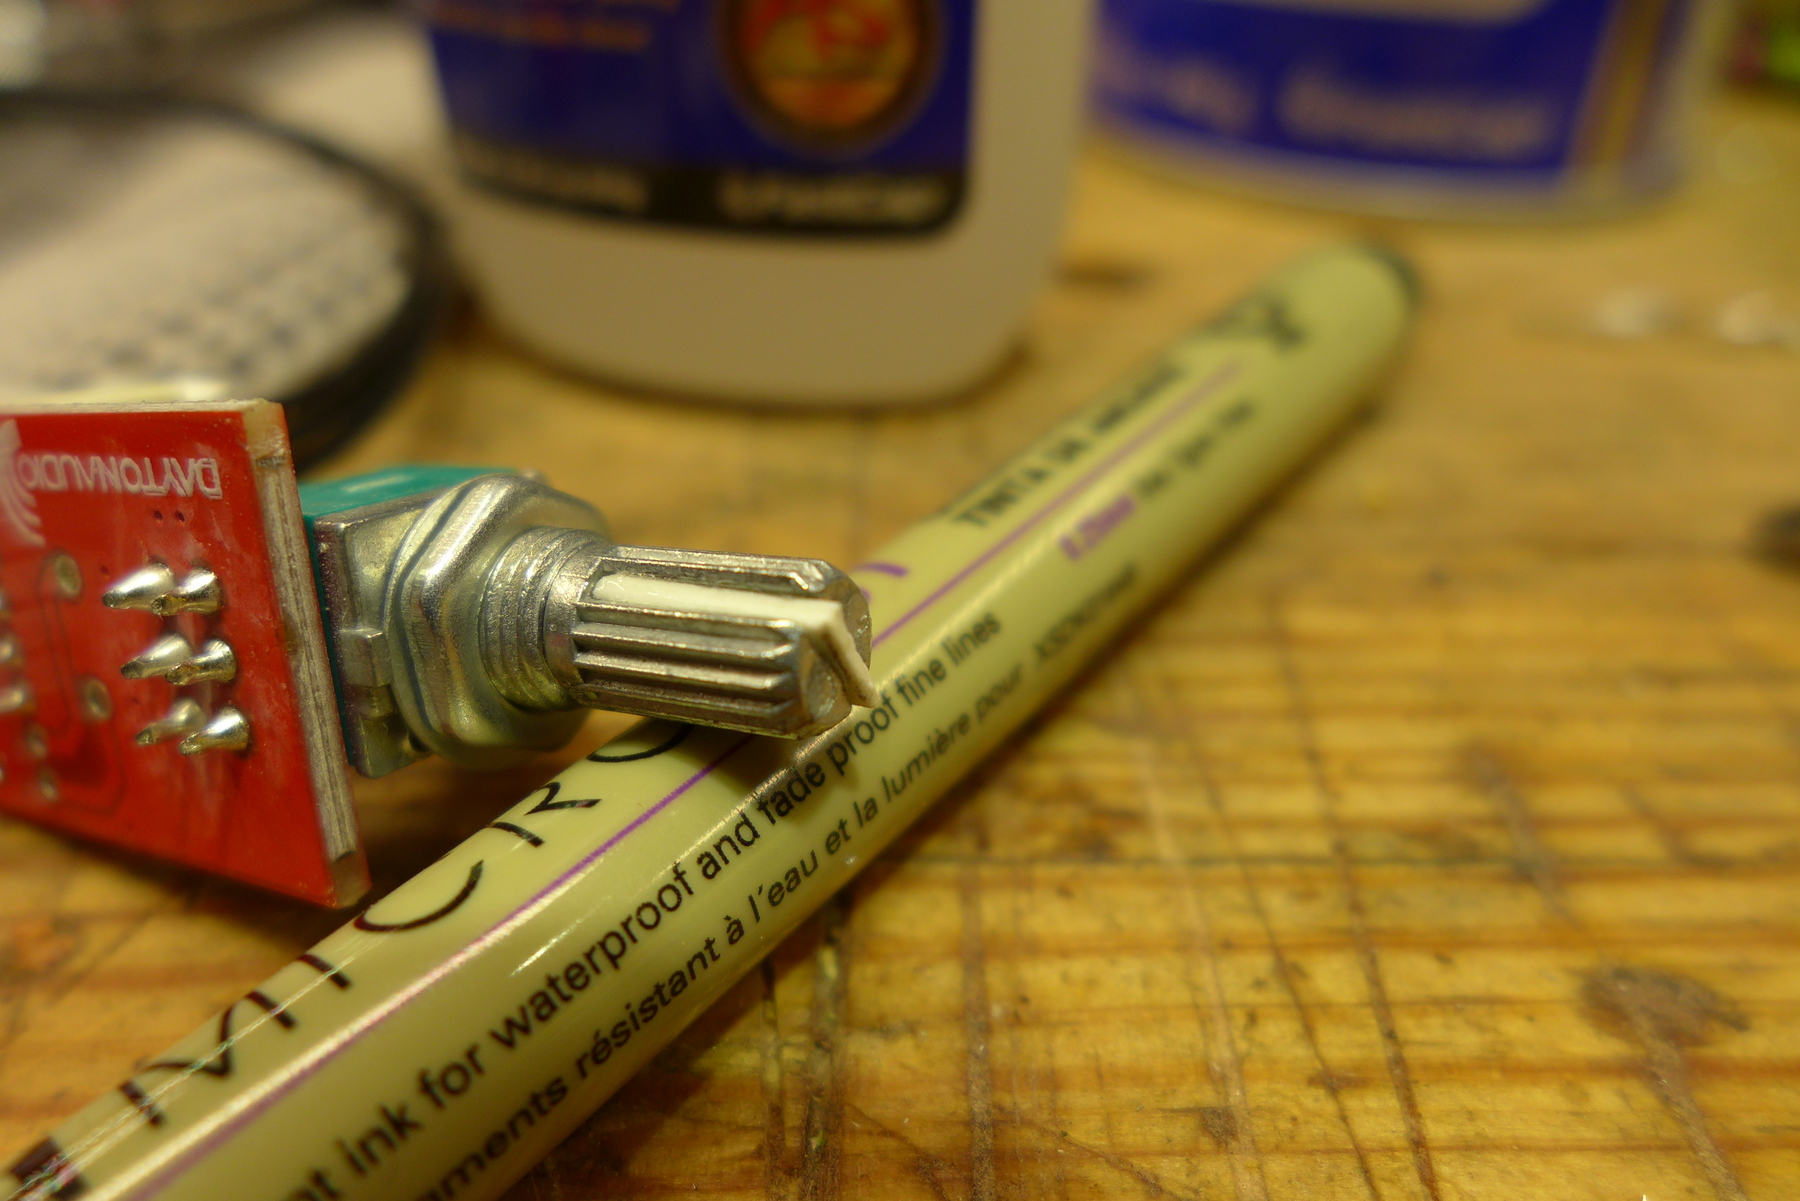
But mine had this little screw from the factory.


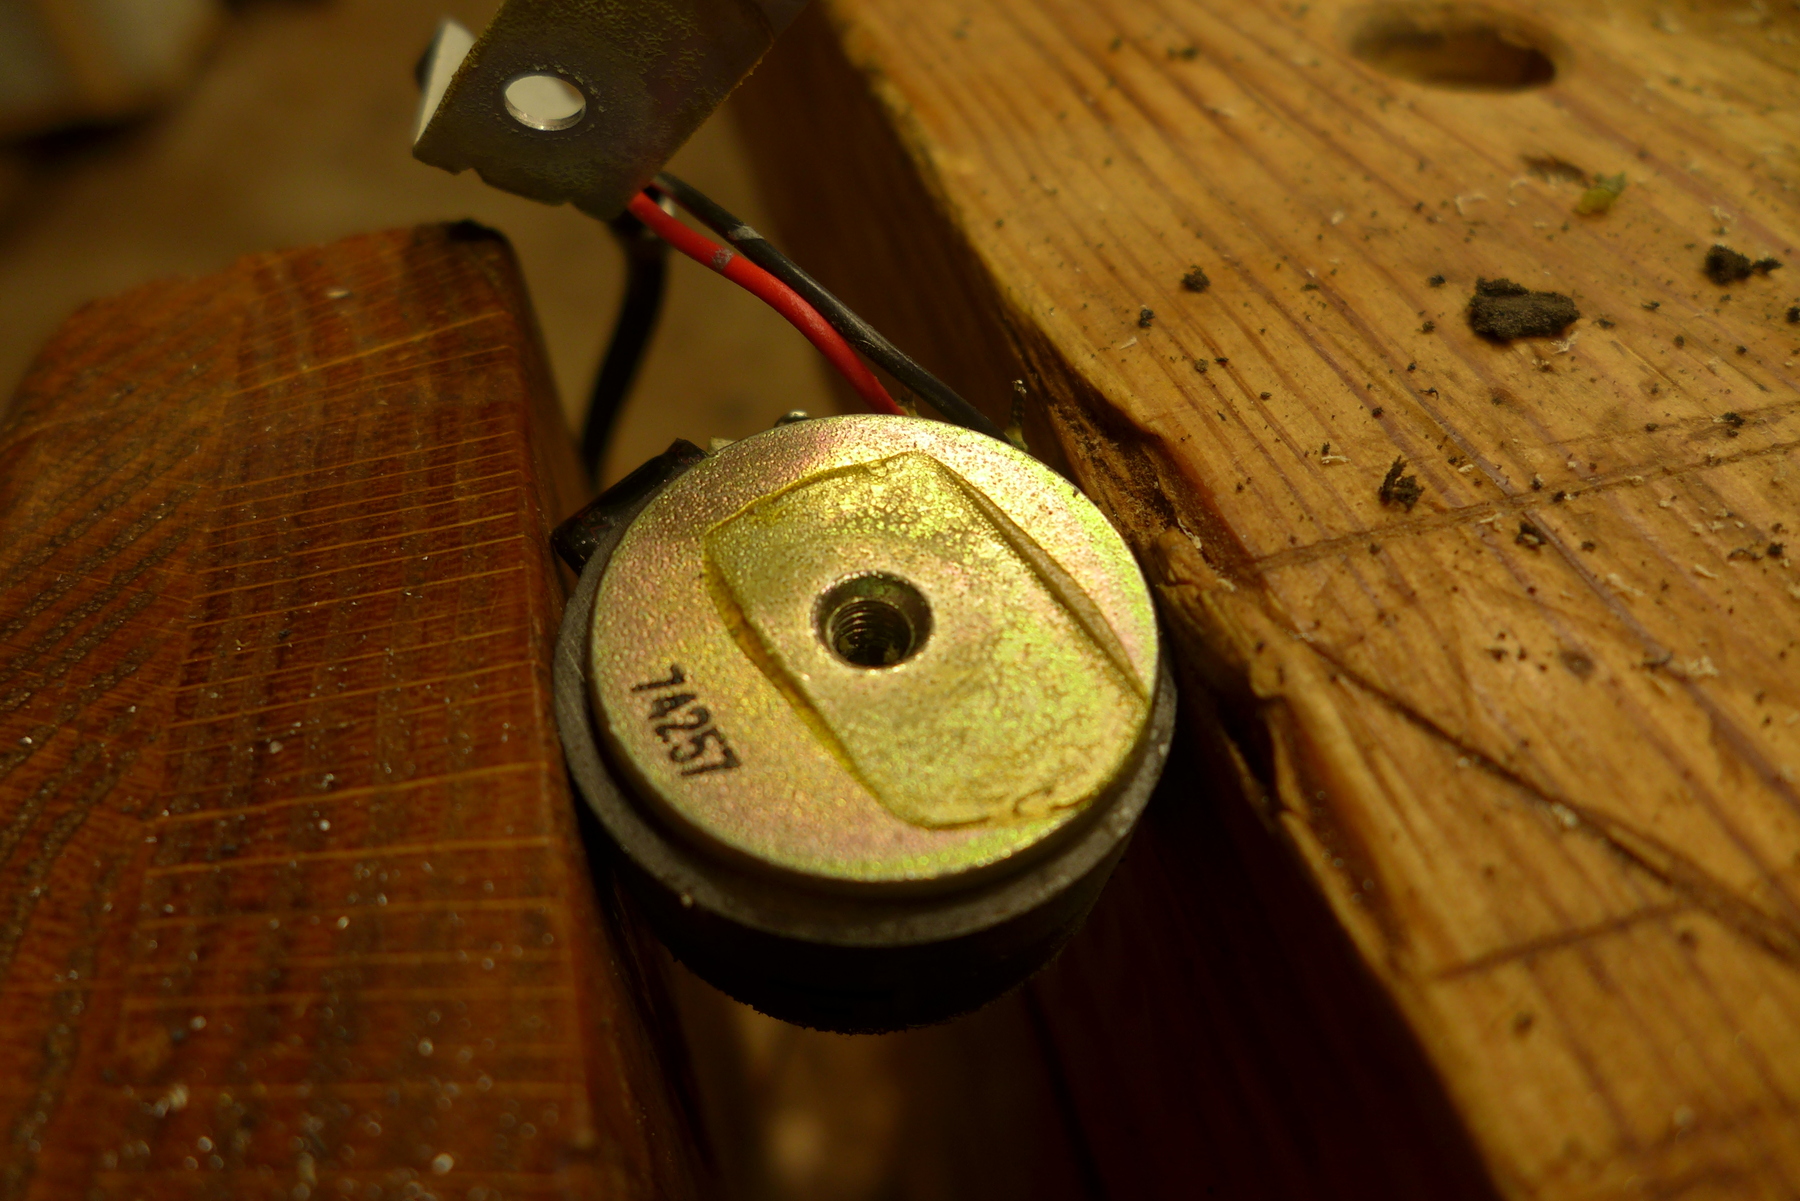
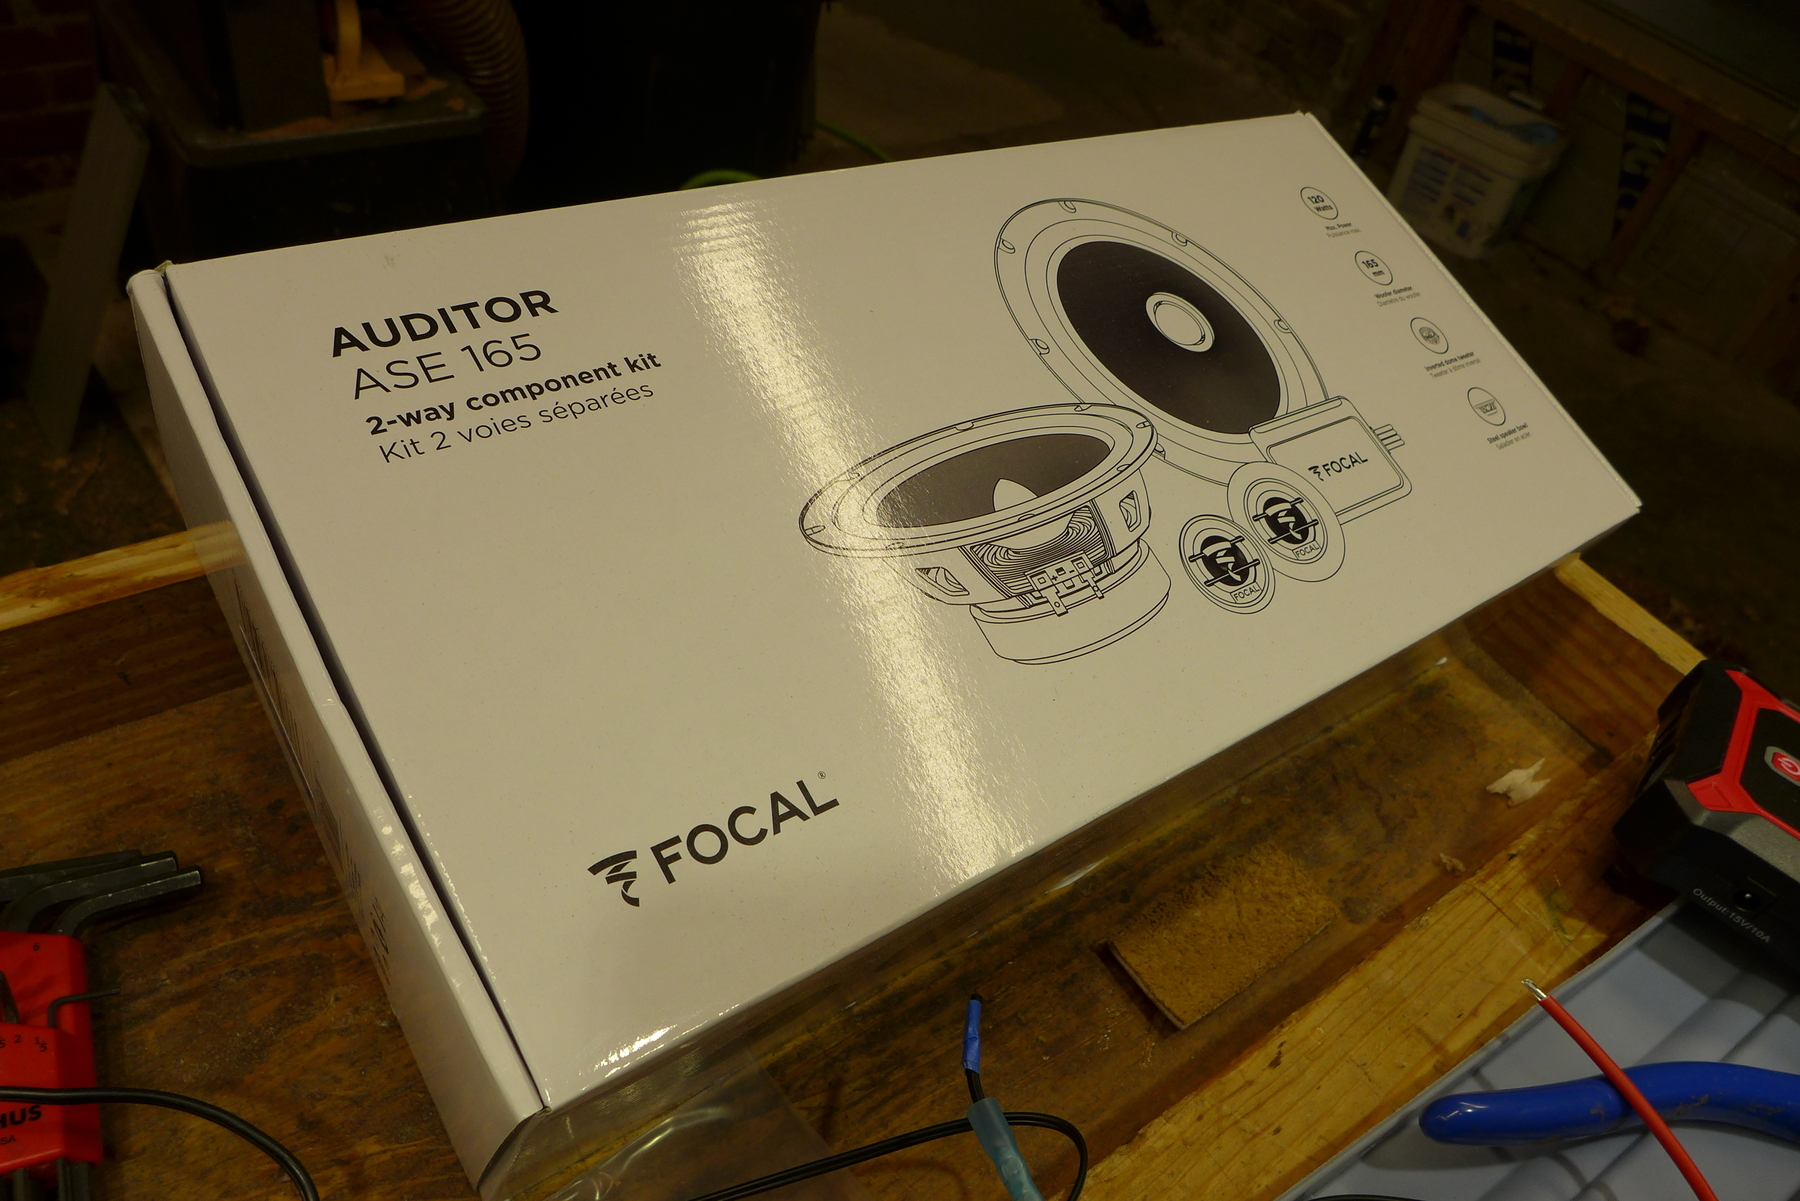
And luckily, the focal's that I bought, once I ripped off the housing (guess these aren't going back) - had a similar hole. Just needed to dig through one of the many boxes of random bolts that I have to find something that would work and cut it to length.


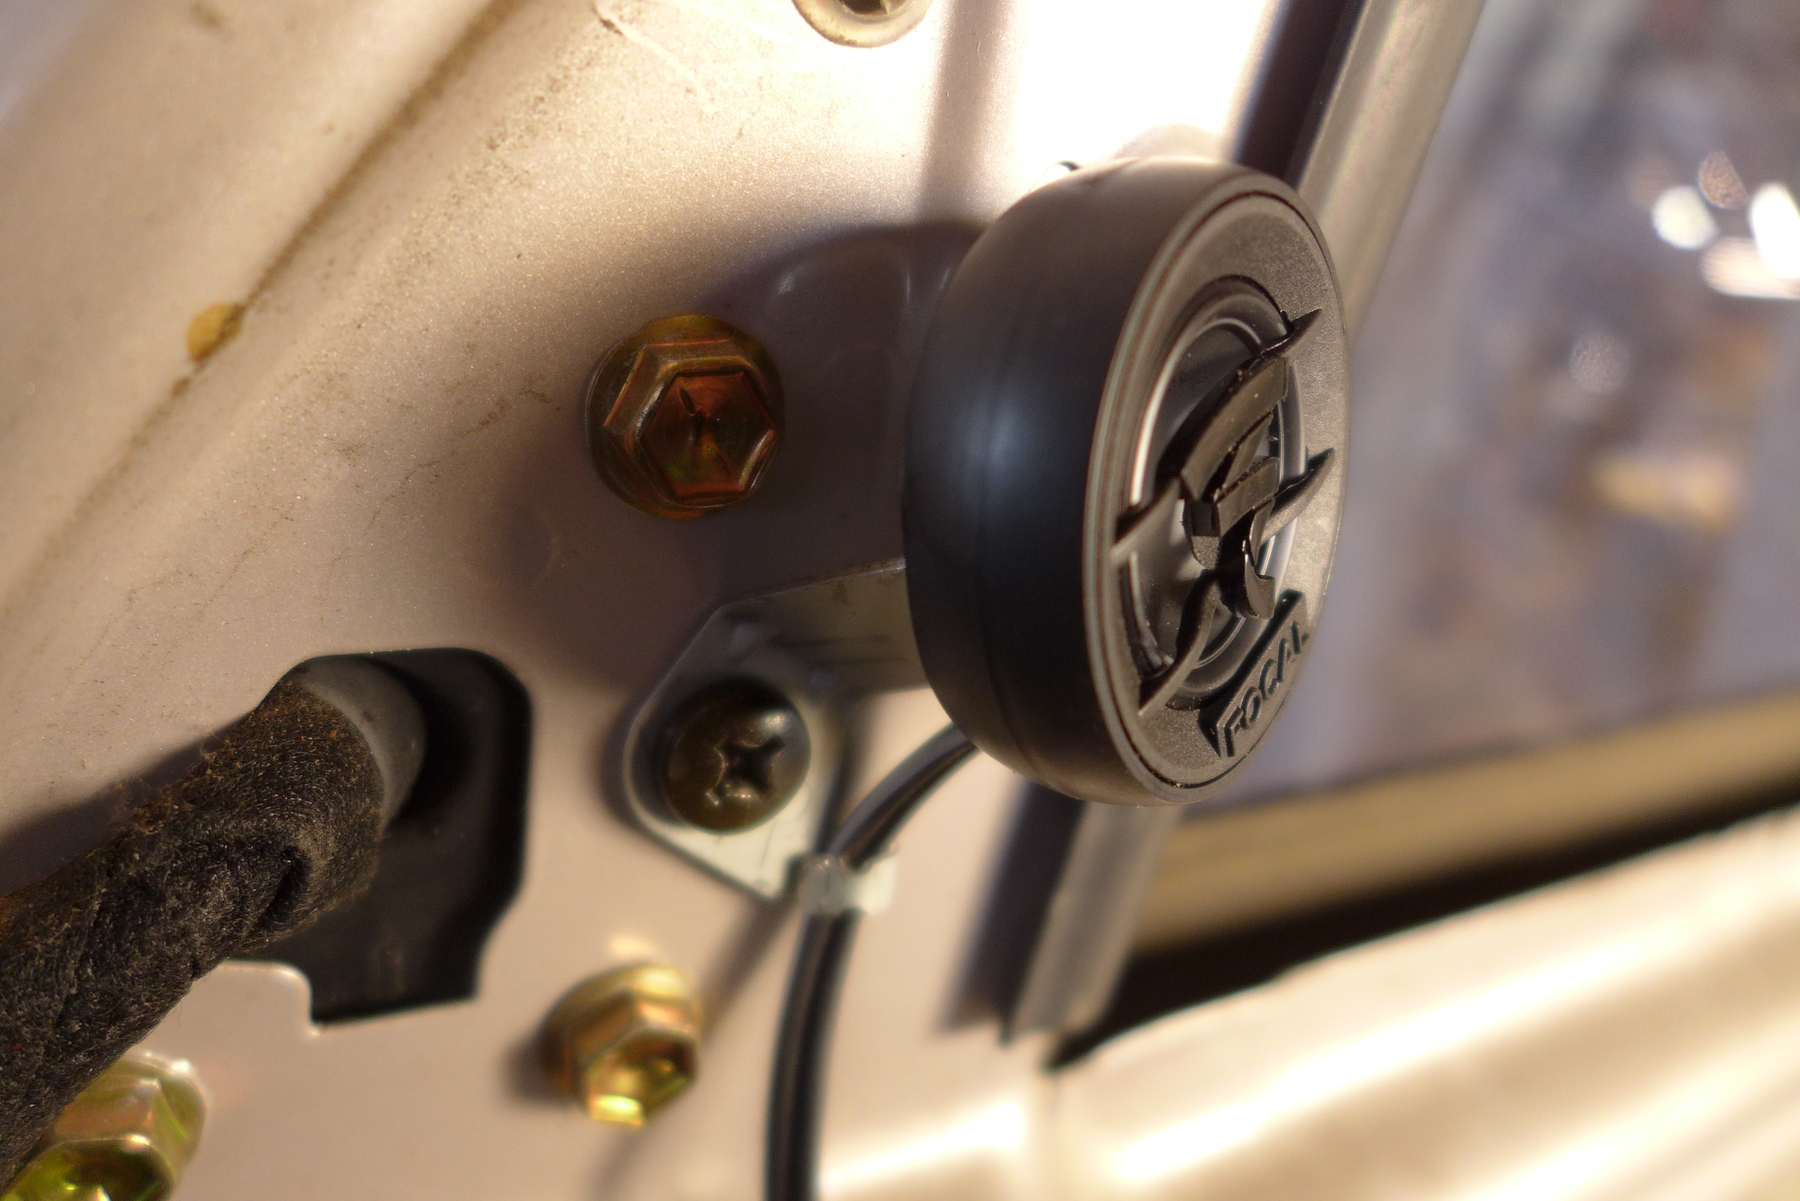
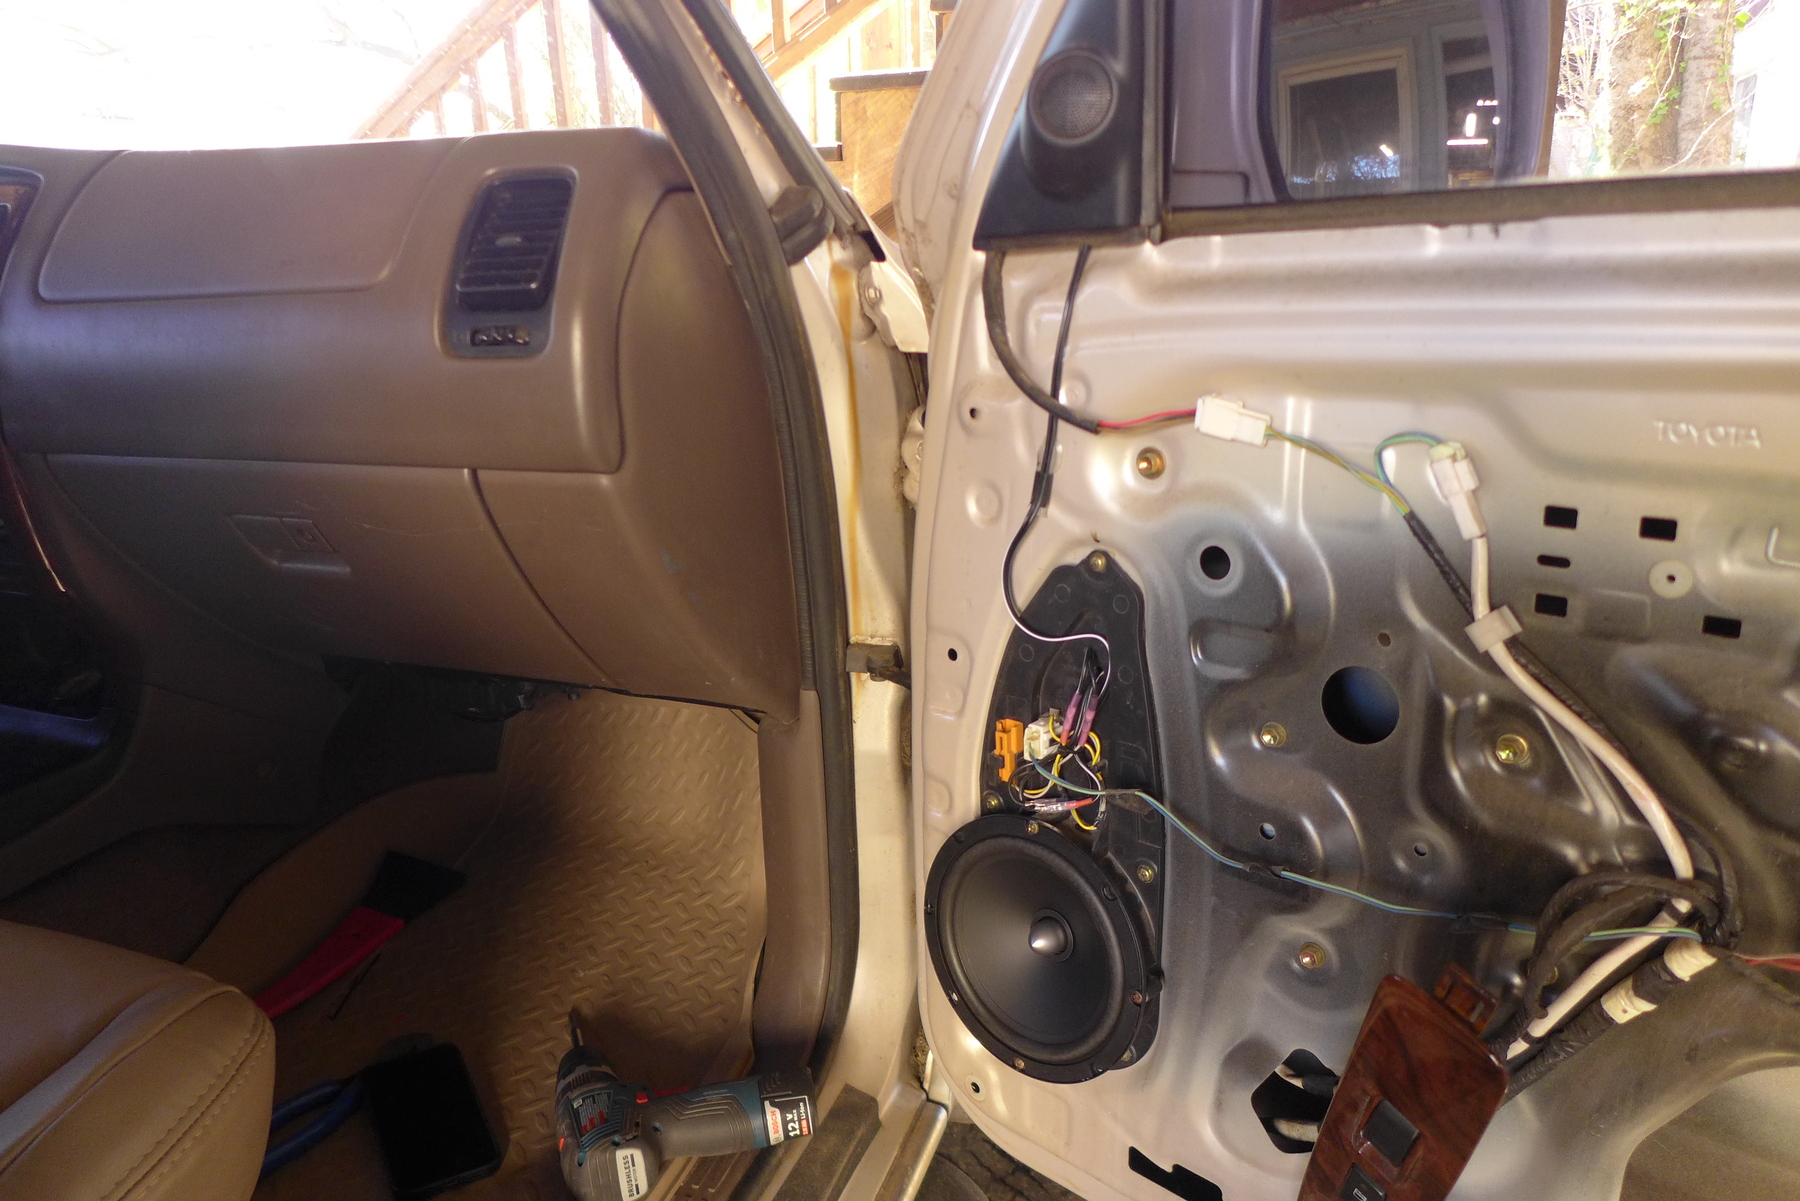
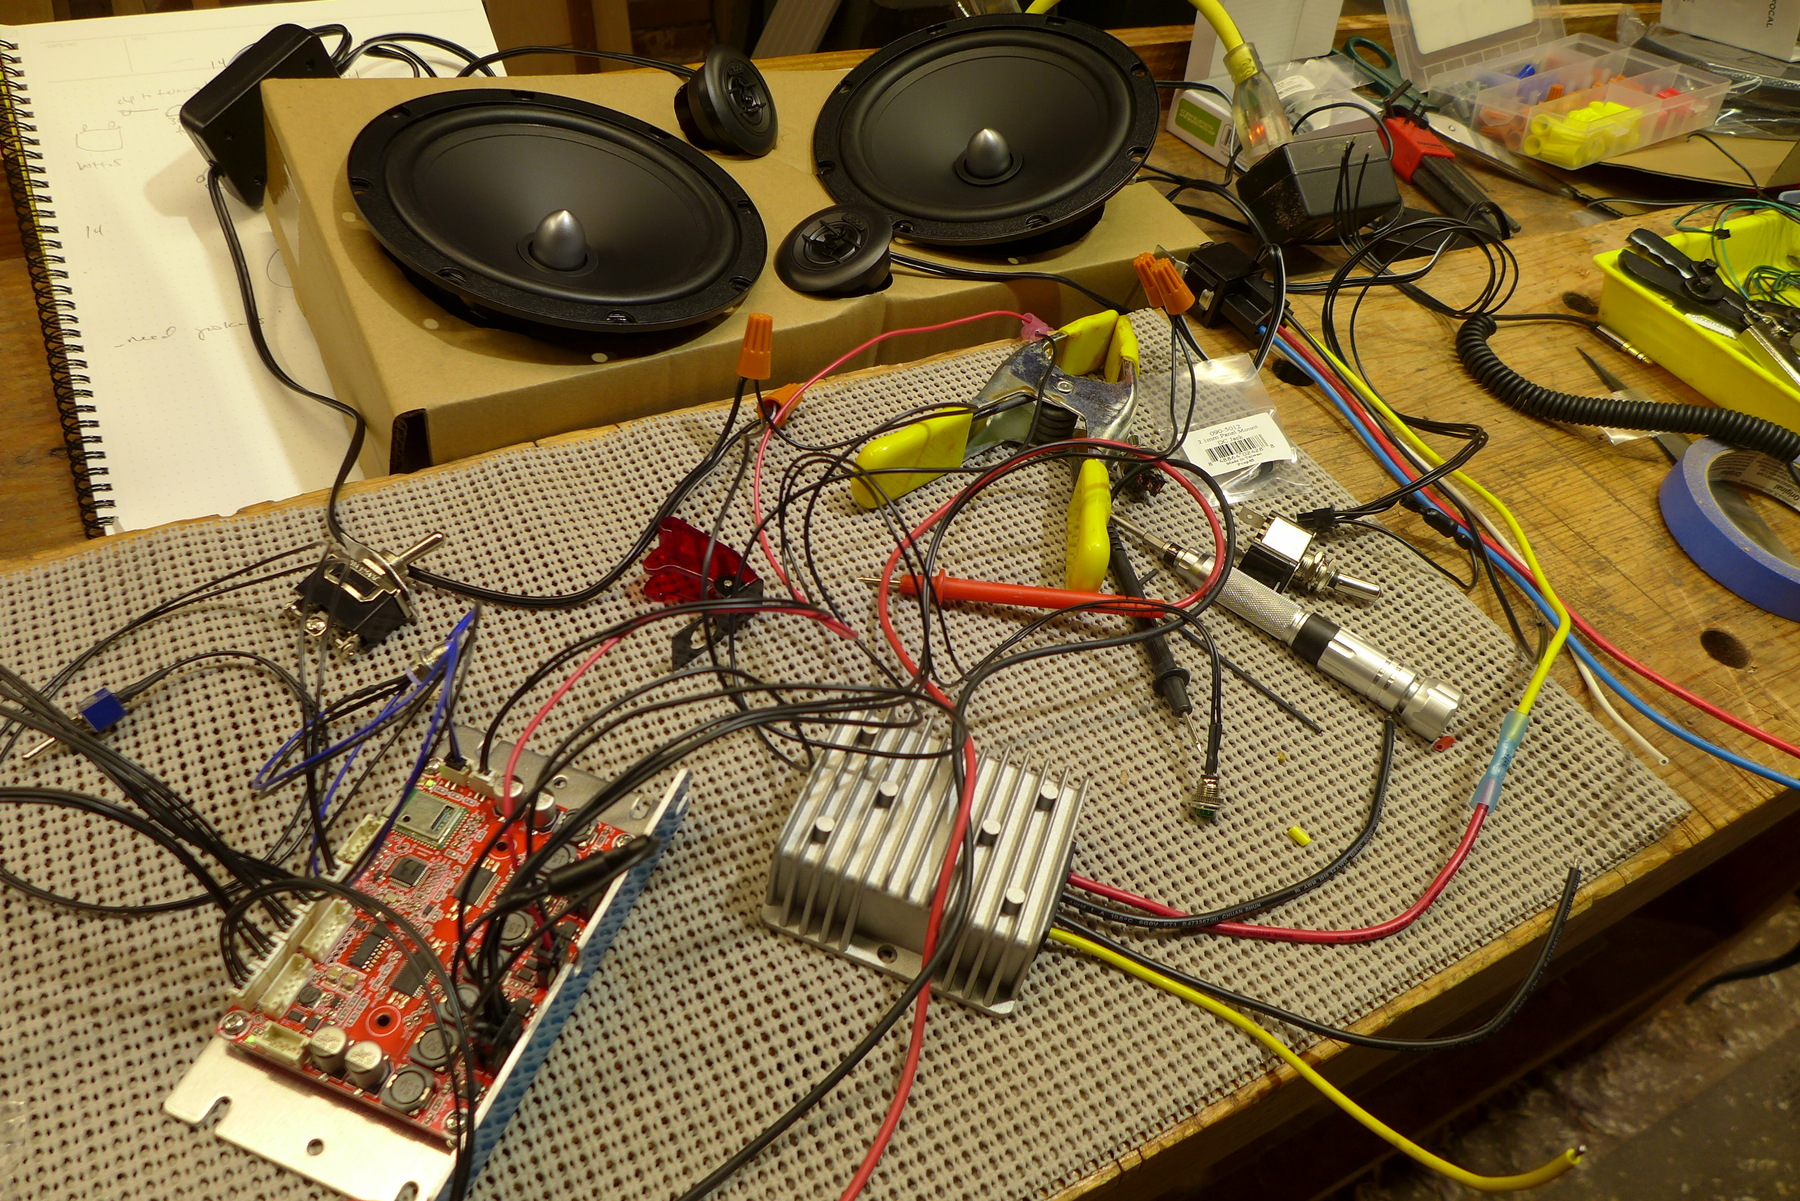
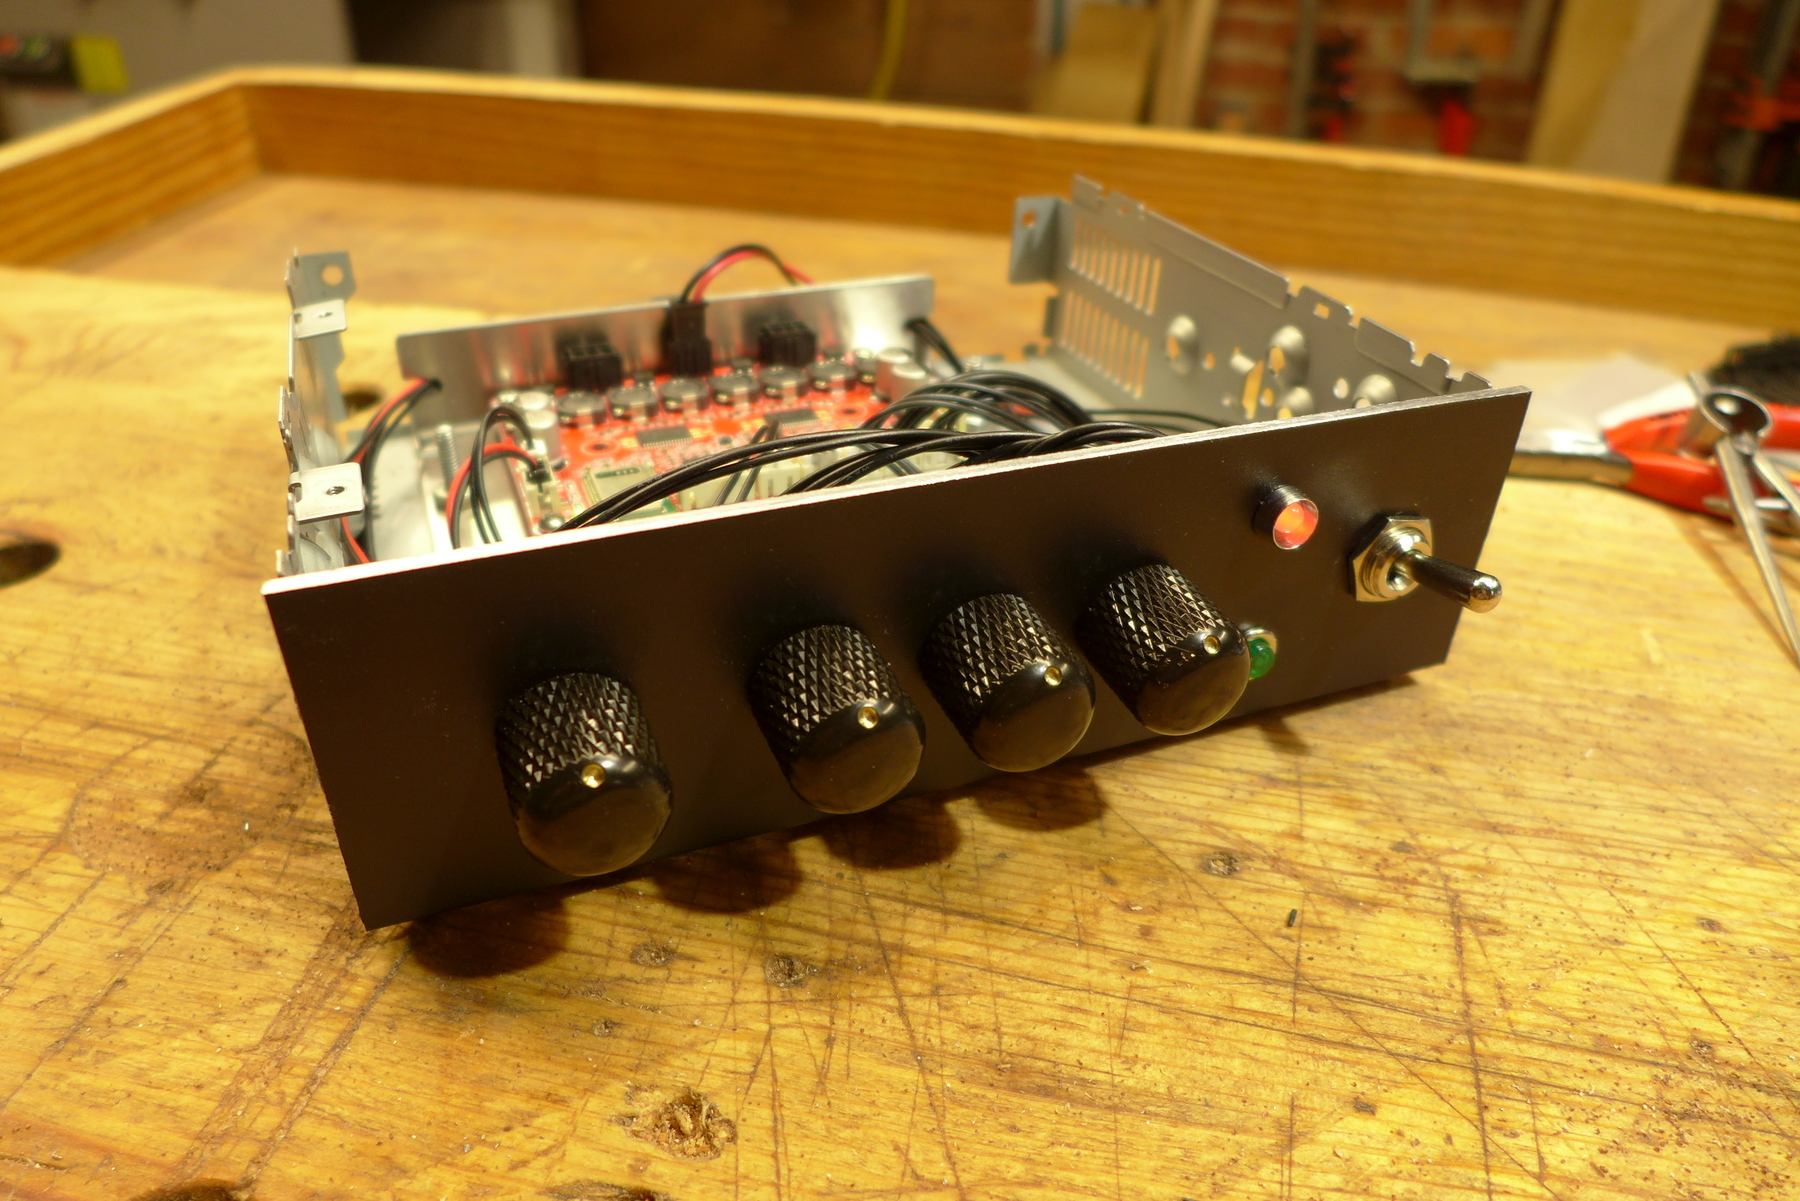
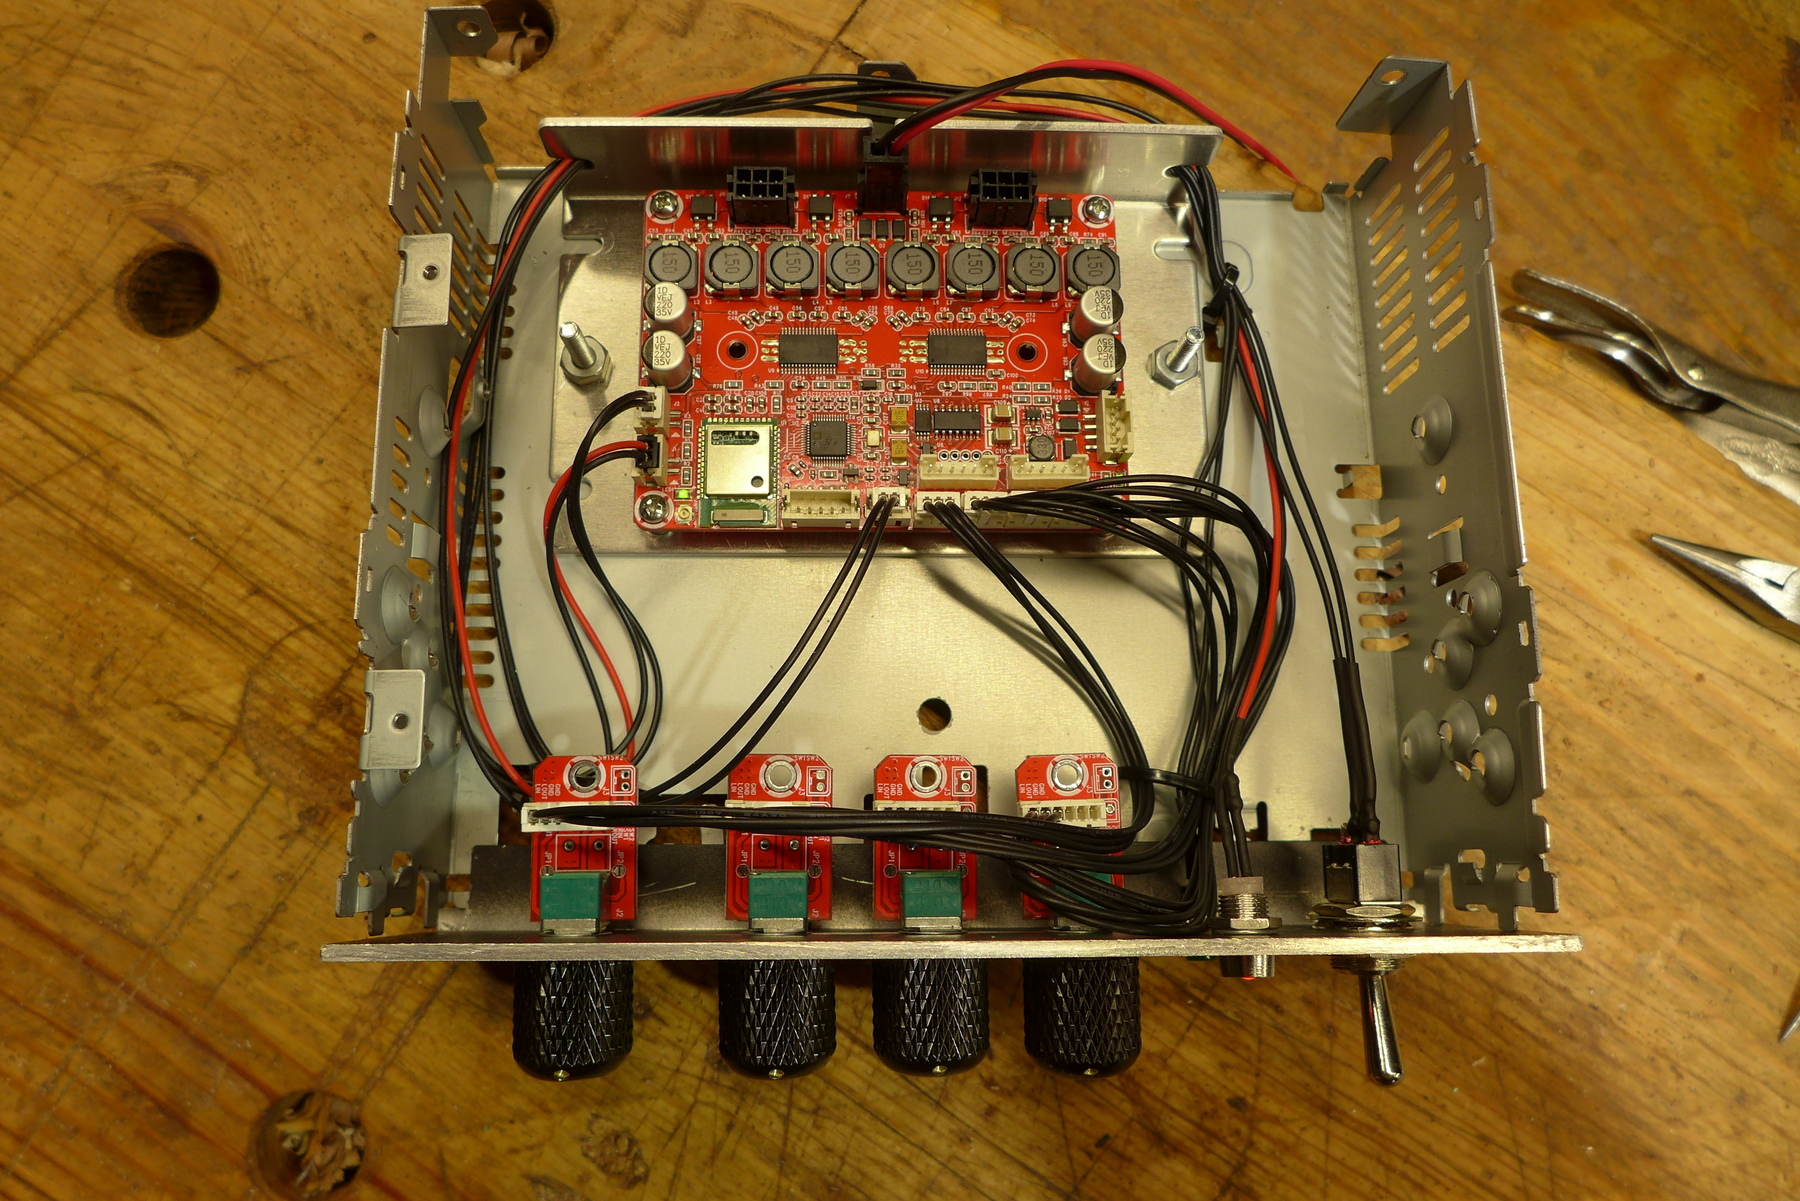
All rigged up and ready to go.


These were about a hair from hitting the window - but thankfully cleared.


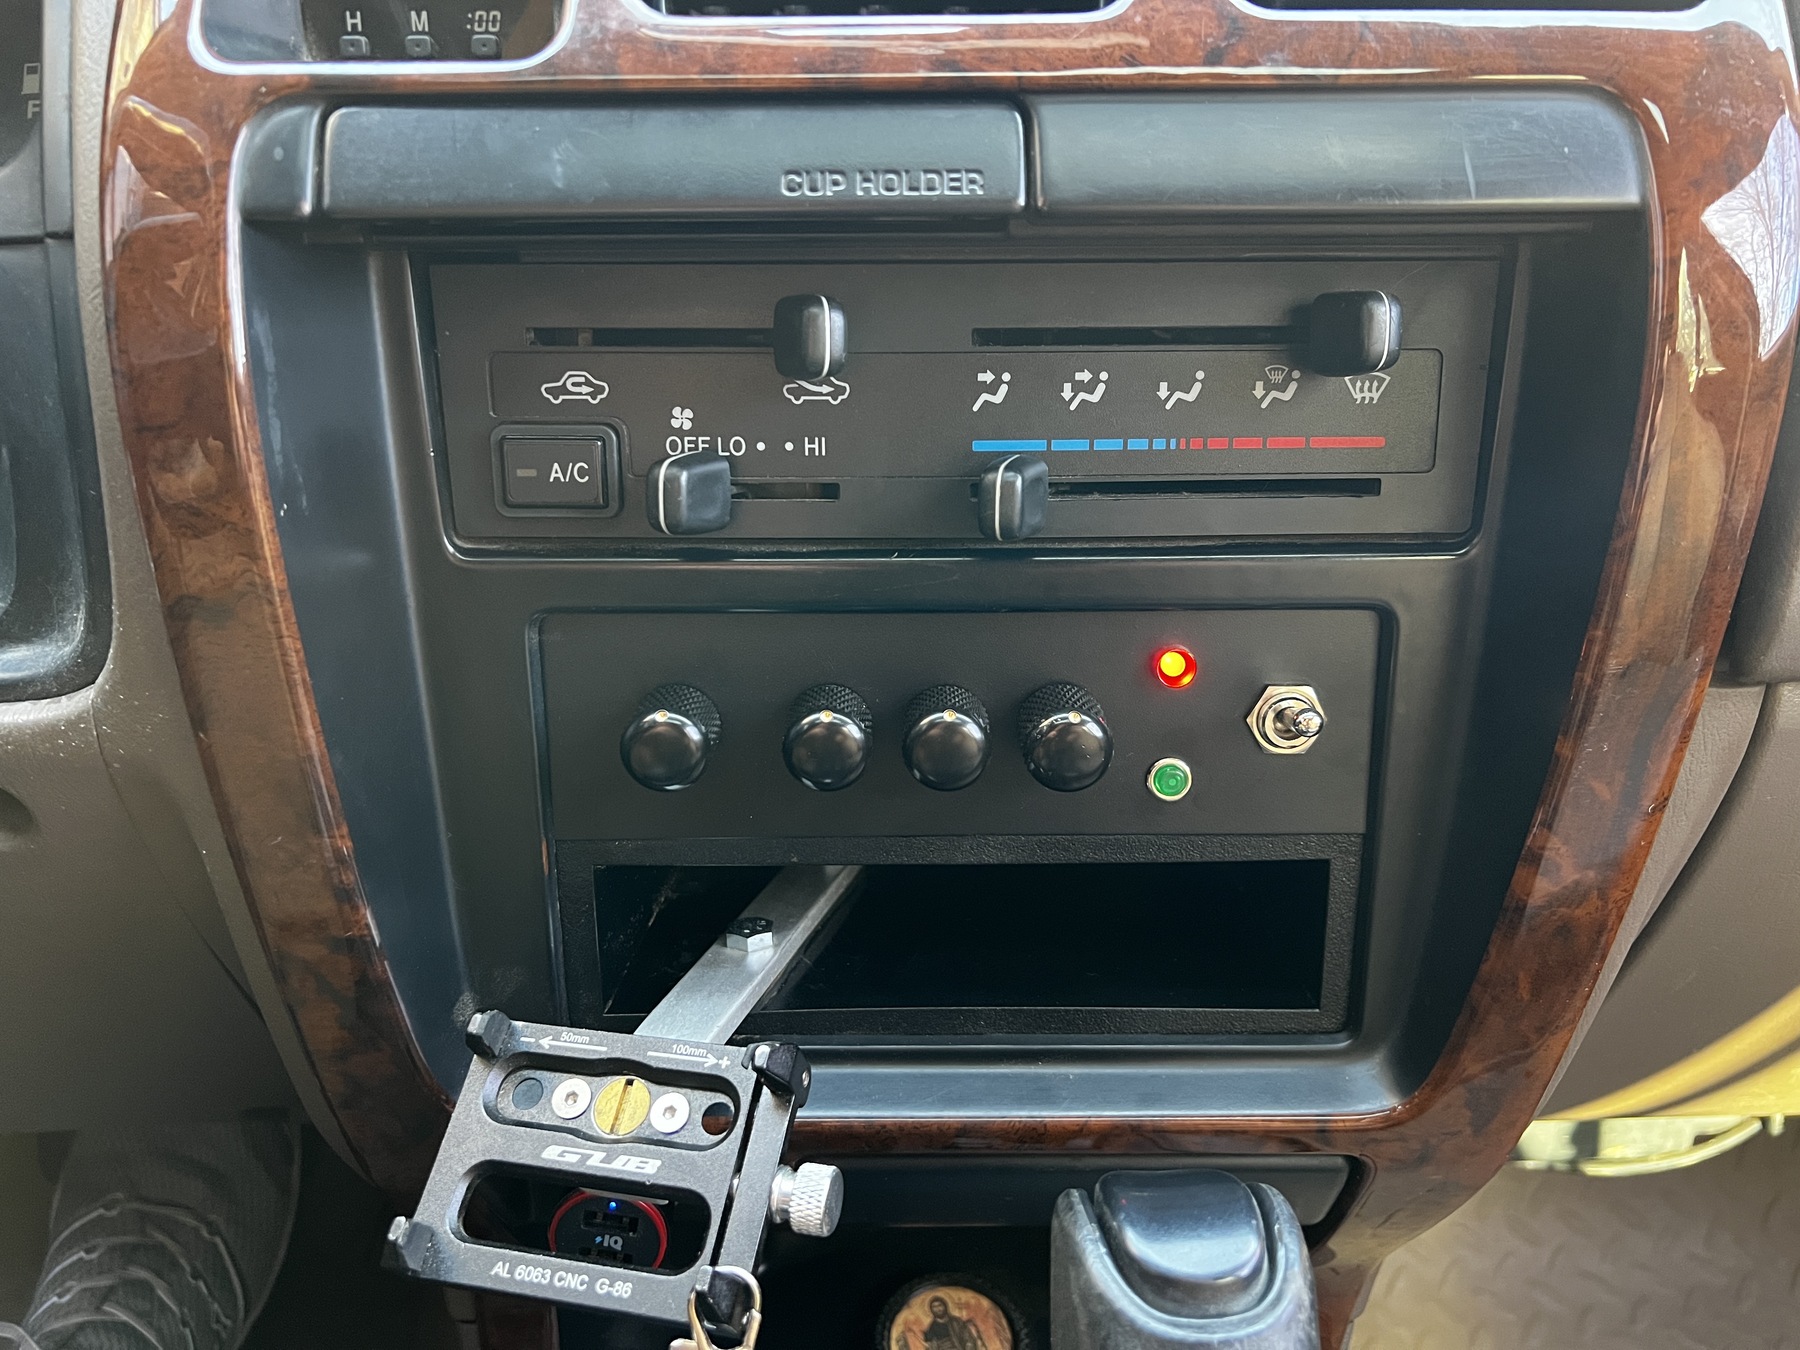
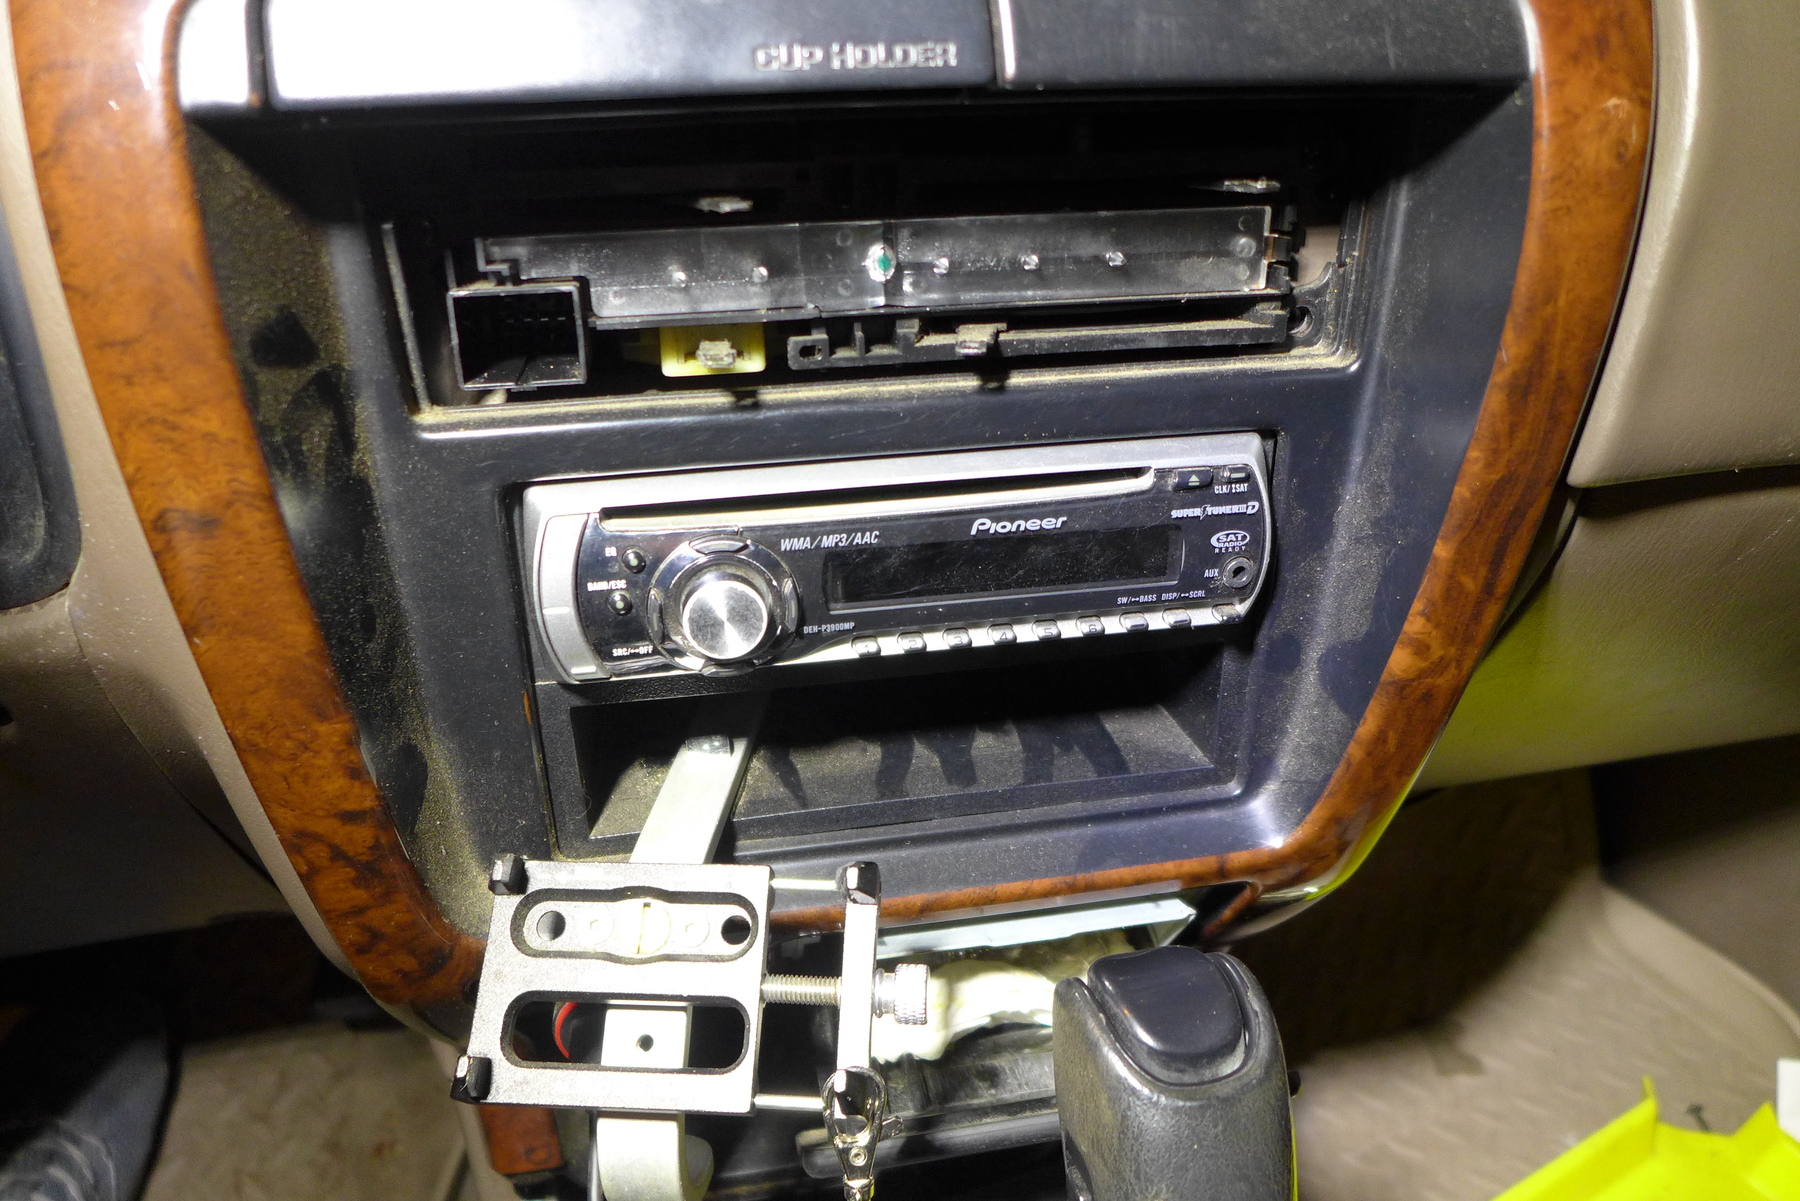
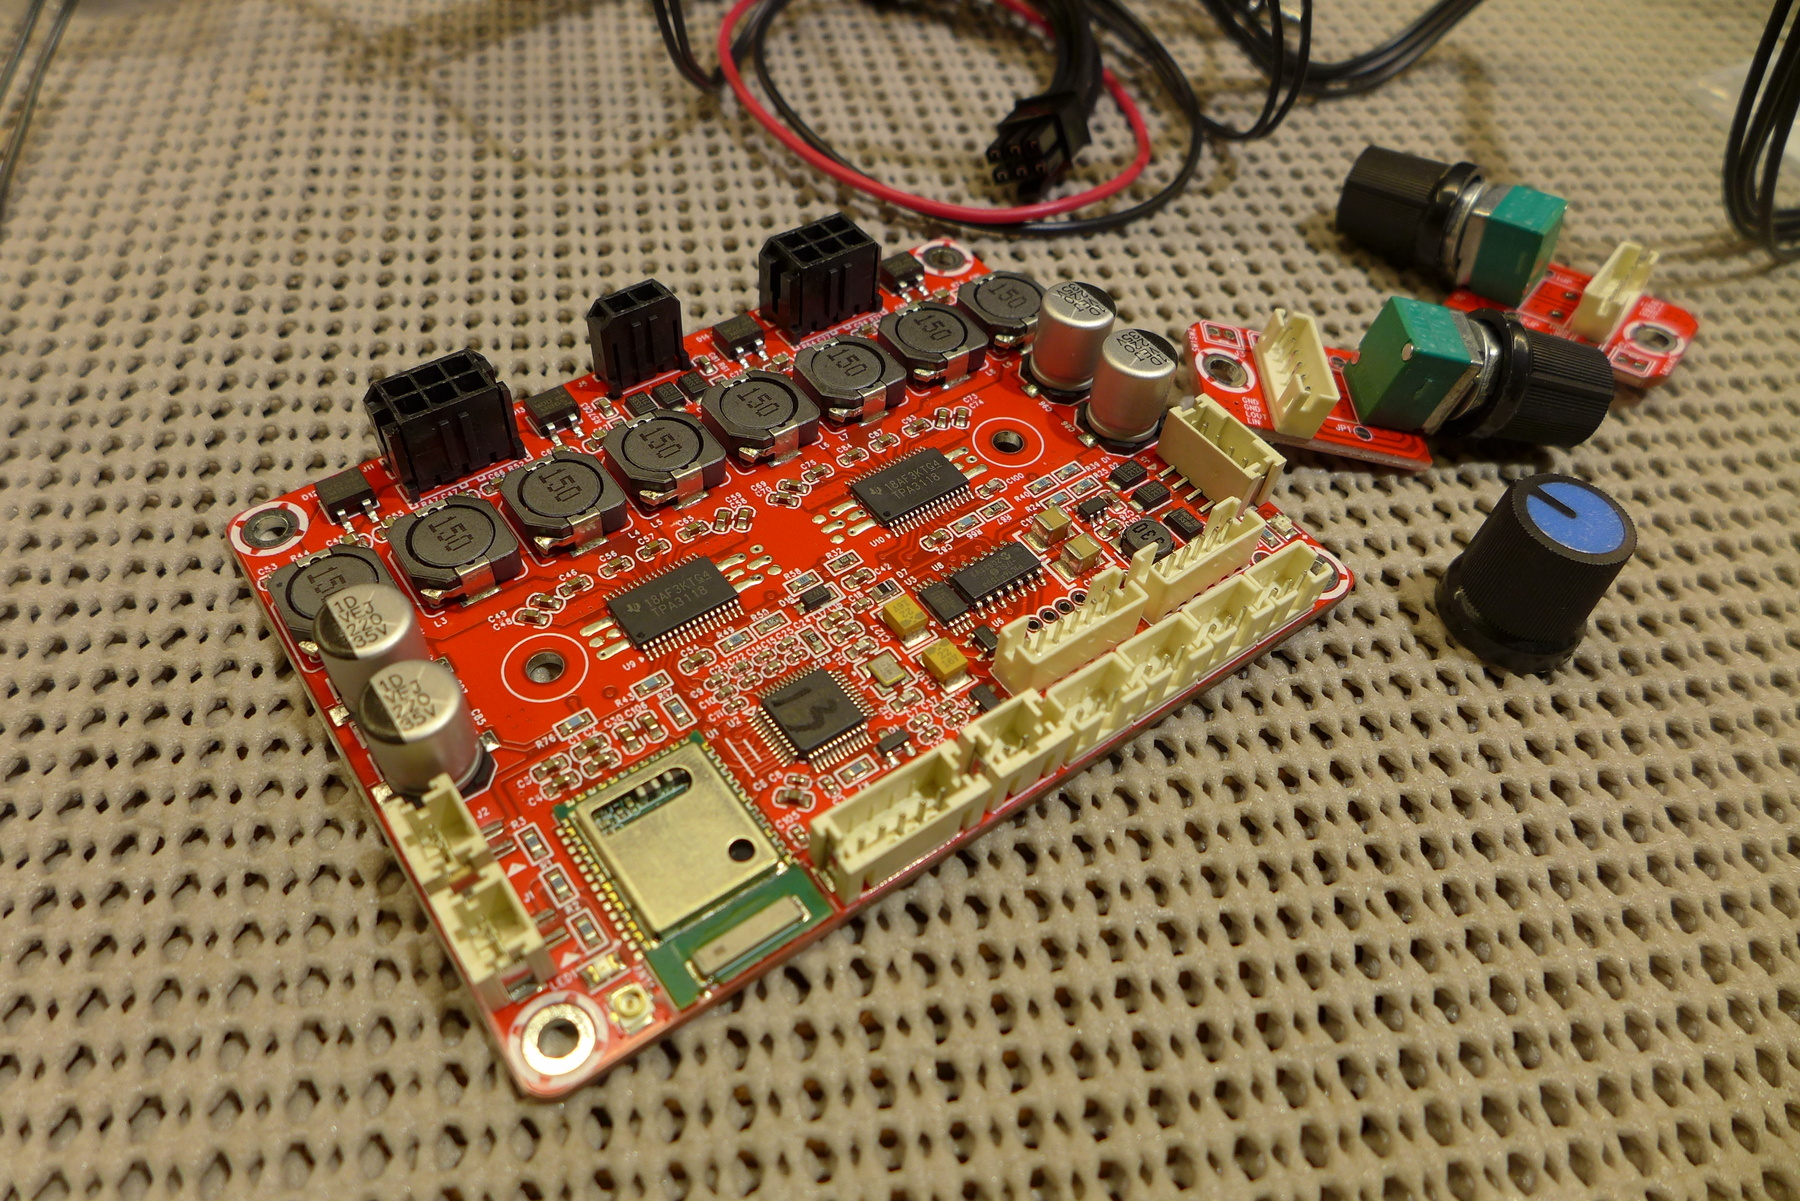
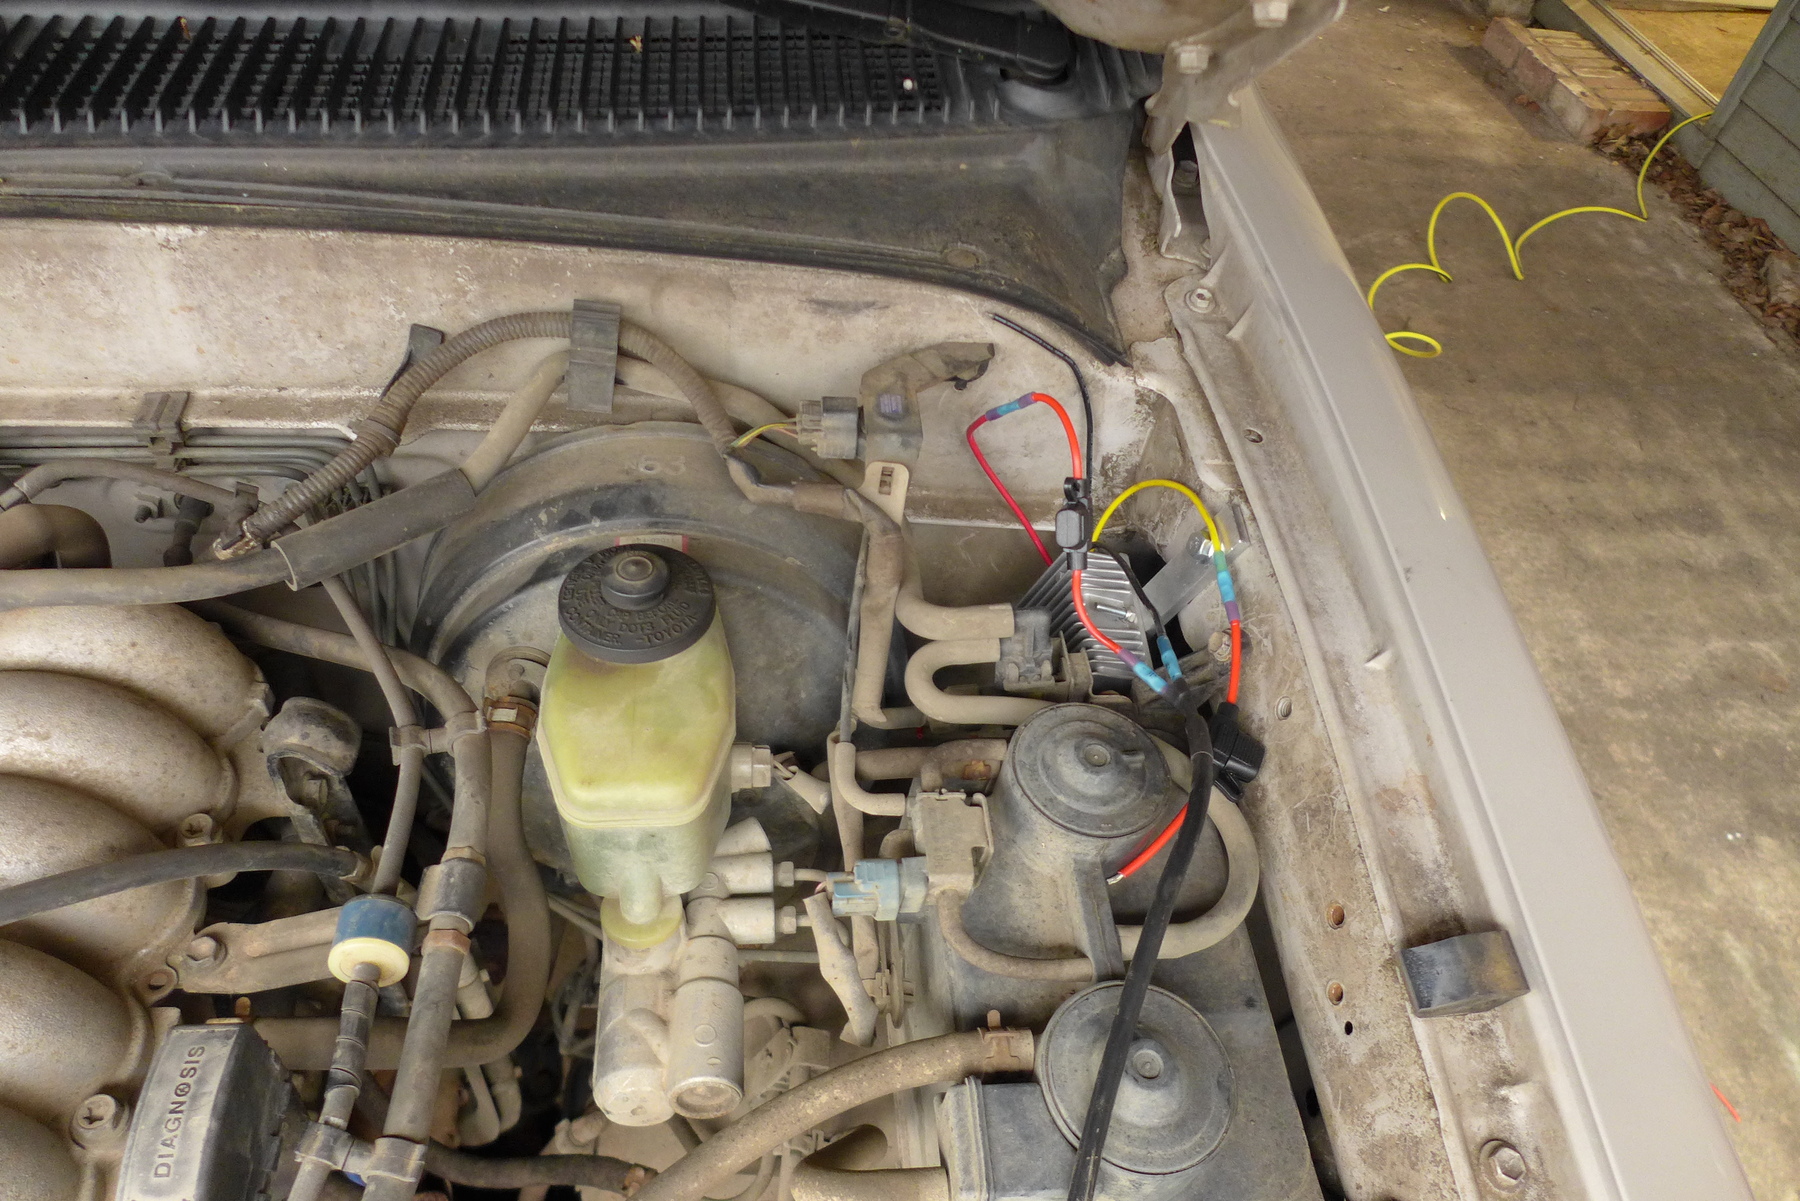
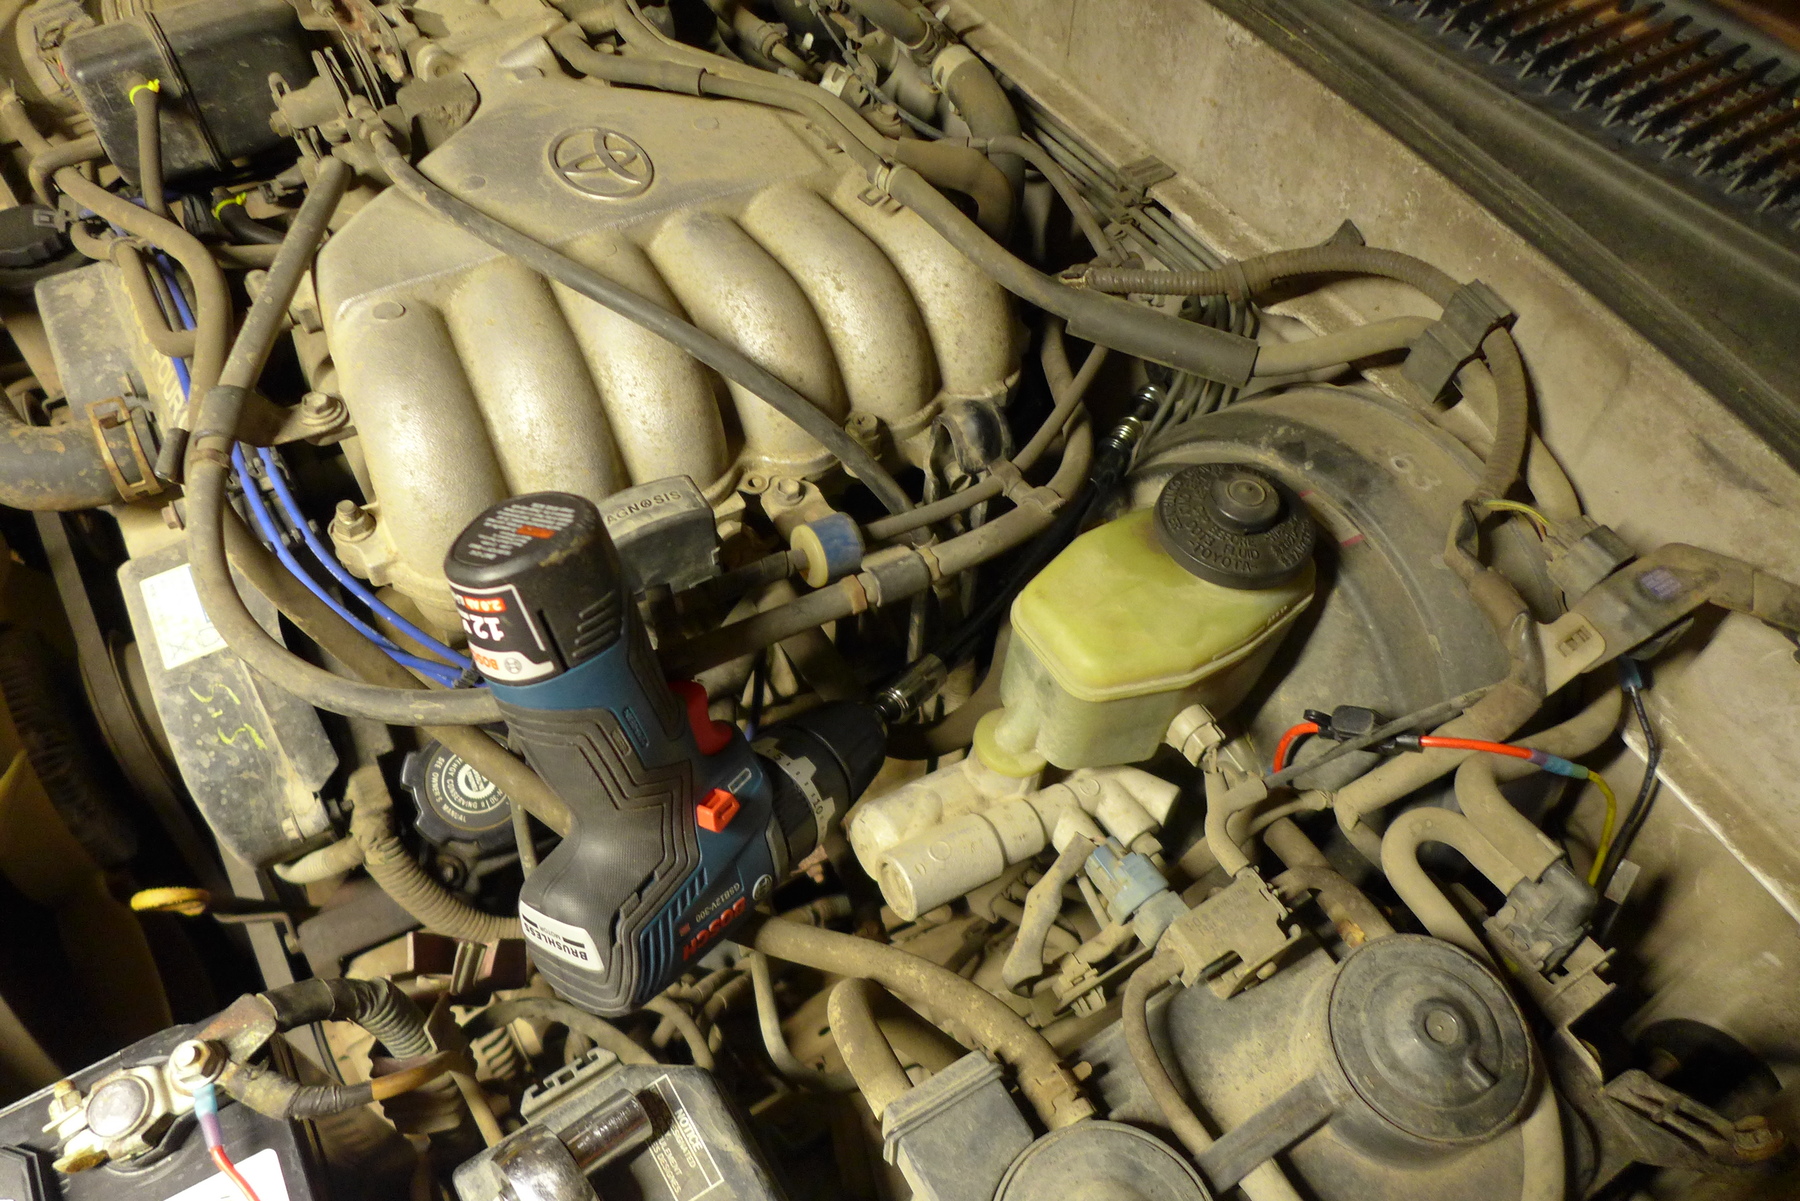
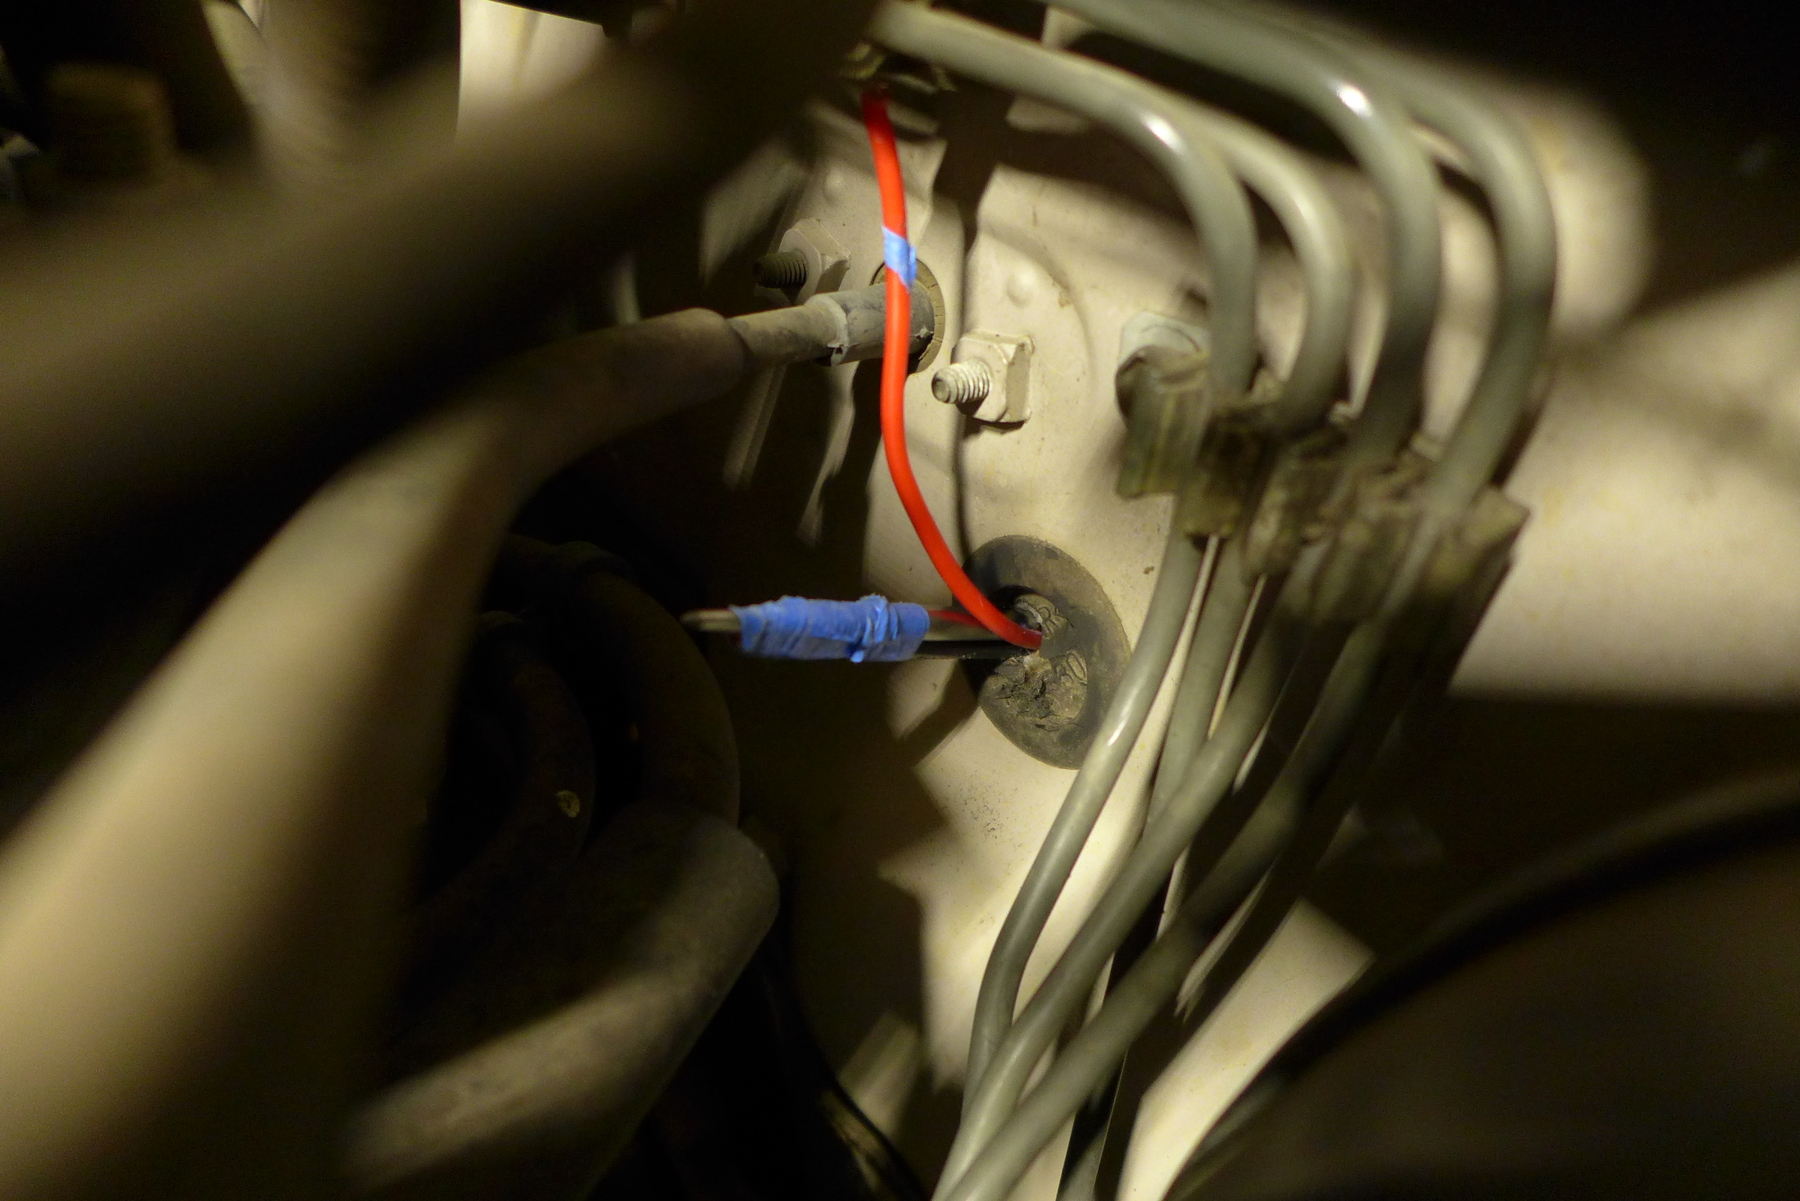
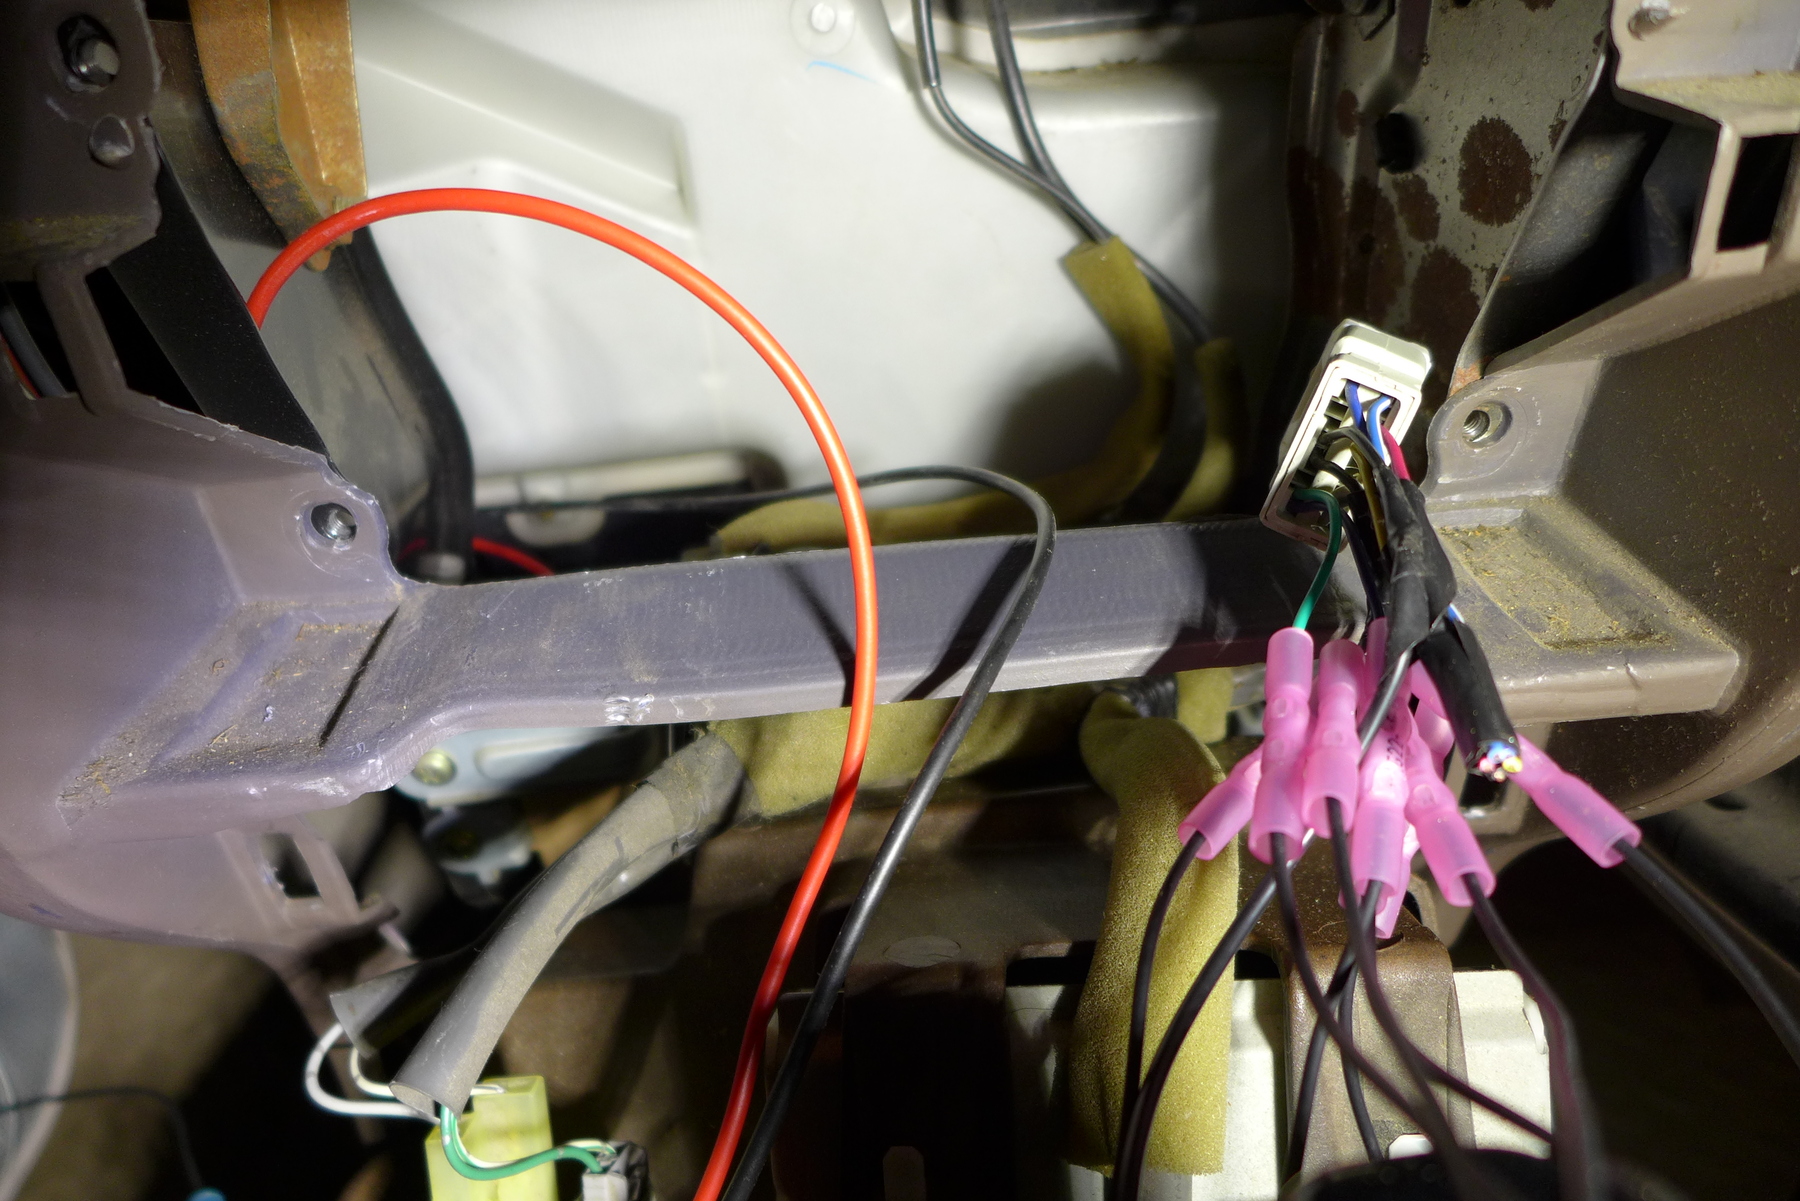
Then, when I hooked up the stereo, everything worked as it should. It was about this time that I realized I didn't really like the stereo being hotwired. The toggle worked to turn it on and off, but I didn't like the idea of perhaps forgetting to switch the toggle and maybe drain the battery. I ordered a little 12v relay that I was going to trip with the 12v acc wire or the amp turn on wire, but after thinking about it for a bit - 12v at 10 amp is plenty for this board and I decided to pull the 24v converter from the battery and just run this board off the factory wiring.

So yeah, kind of got carried away with the miata guy's instructions emphasizing the step up converter (which made sense since he was running 200 watts. But the 430 pulls 120 watts max - so I just ran a little 10amp inline fuse to the 12v acc wire, and of course the stereo turned on and off with the car, so I wouldn't have to worry about draining the battery or futzing with a relay.

So I've lived with this install for about a week now and I've got to say I like it.

The new focal's aren't really impressive in the low end, and I initially thought they were harsh. But I used the "small speaker" eq in the phone, and that made a big difference. They are definitely much clearer - and I think after twenty years of using the stock speakers, I'm just getting used to what detail sounds like

If you want to get slick, you can program the board itself too - it has dsp that you can use to adjust basically everything. I might still do that - but for the meantime - the eq on the phone is ok. I also want the speakers to break in a bit. I know people either do or don't believe in that. I've found it to be true personally - so I'll let these settle in for a month and maybe tune them then with the programming board later.

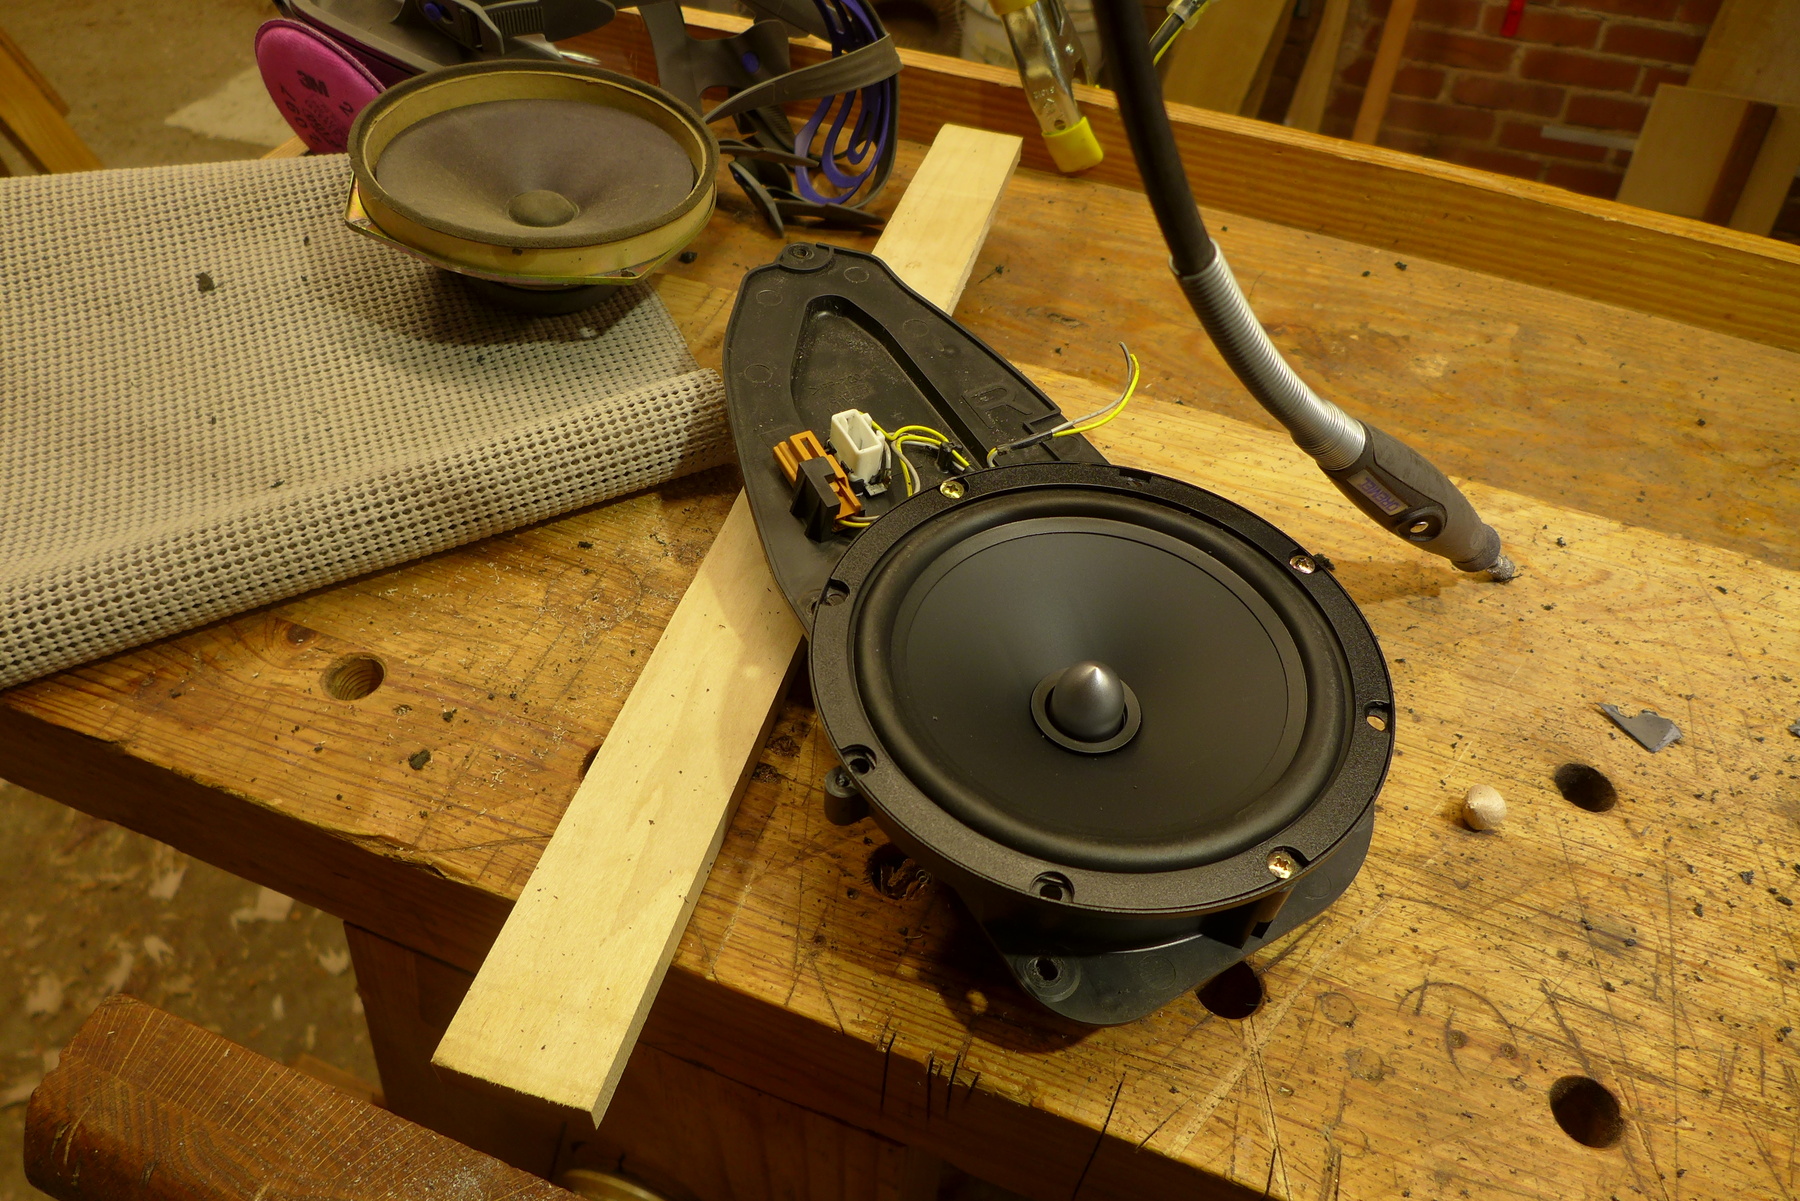
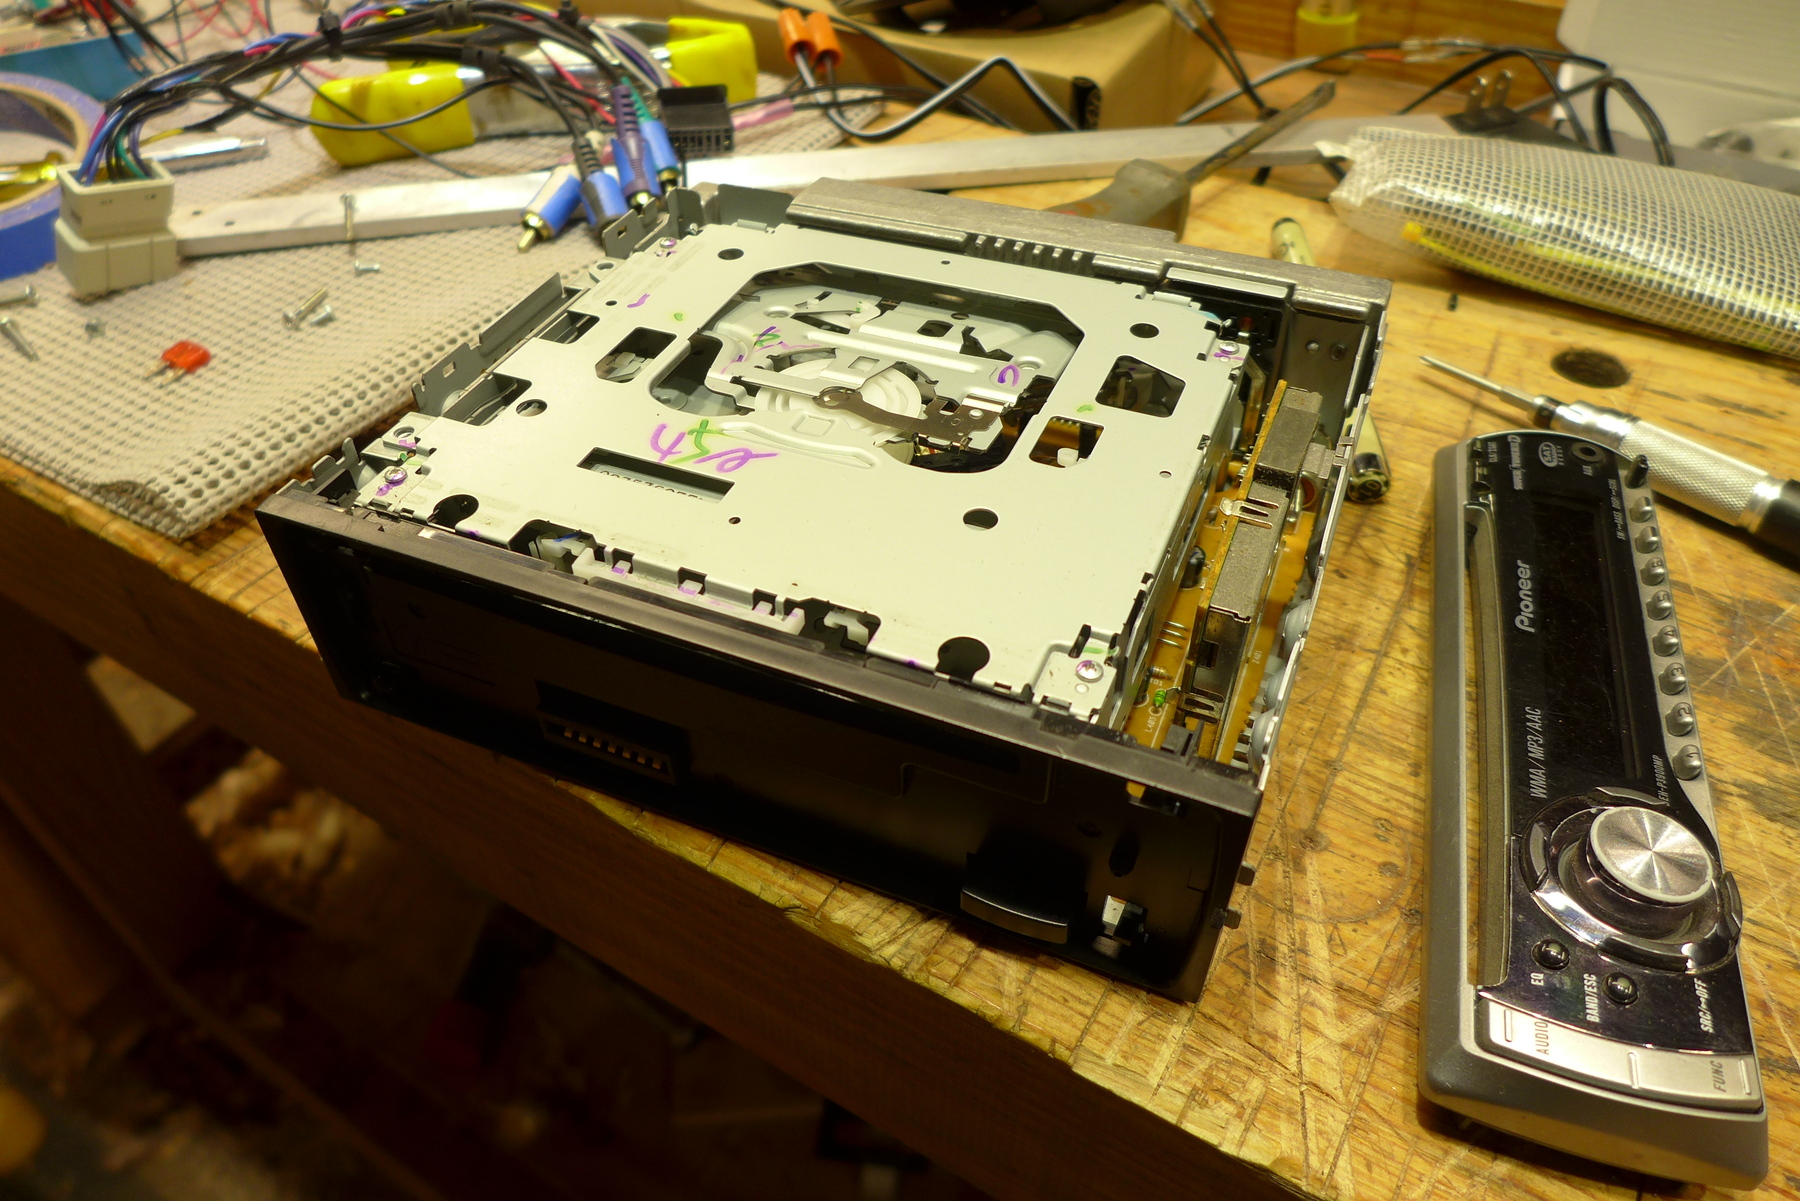
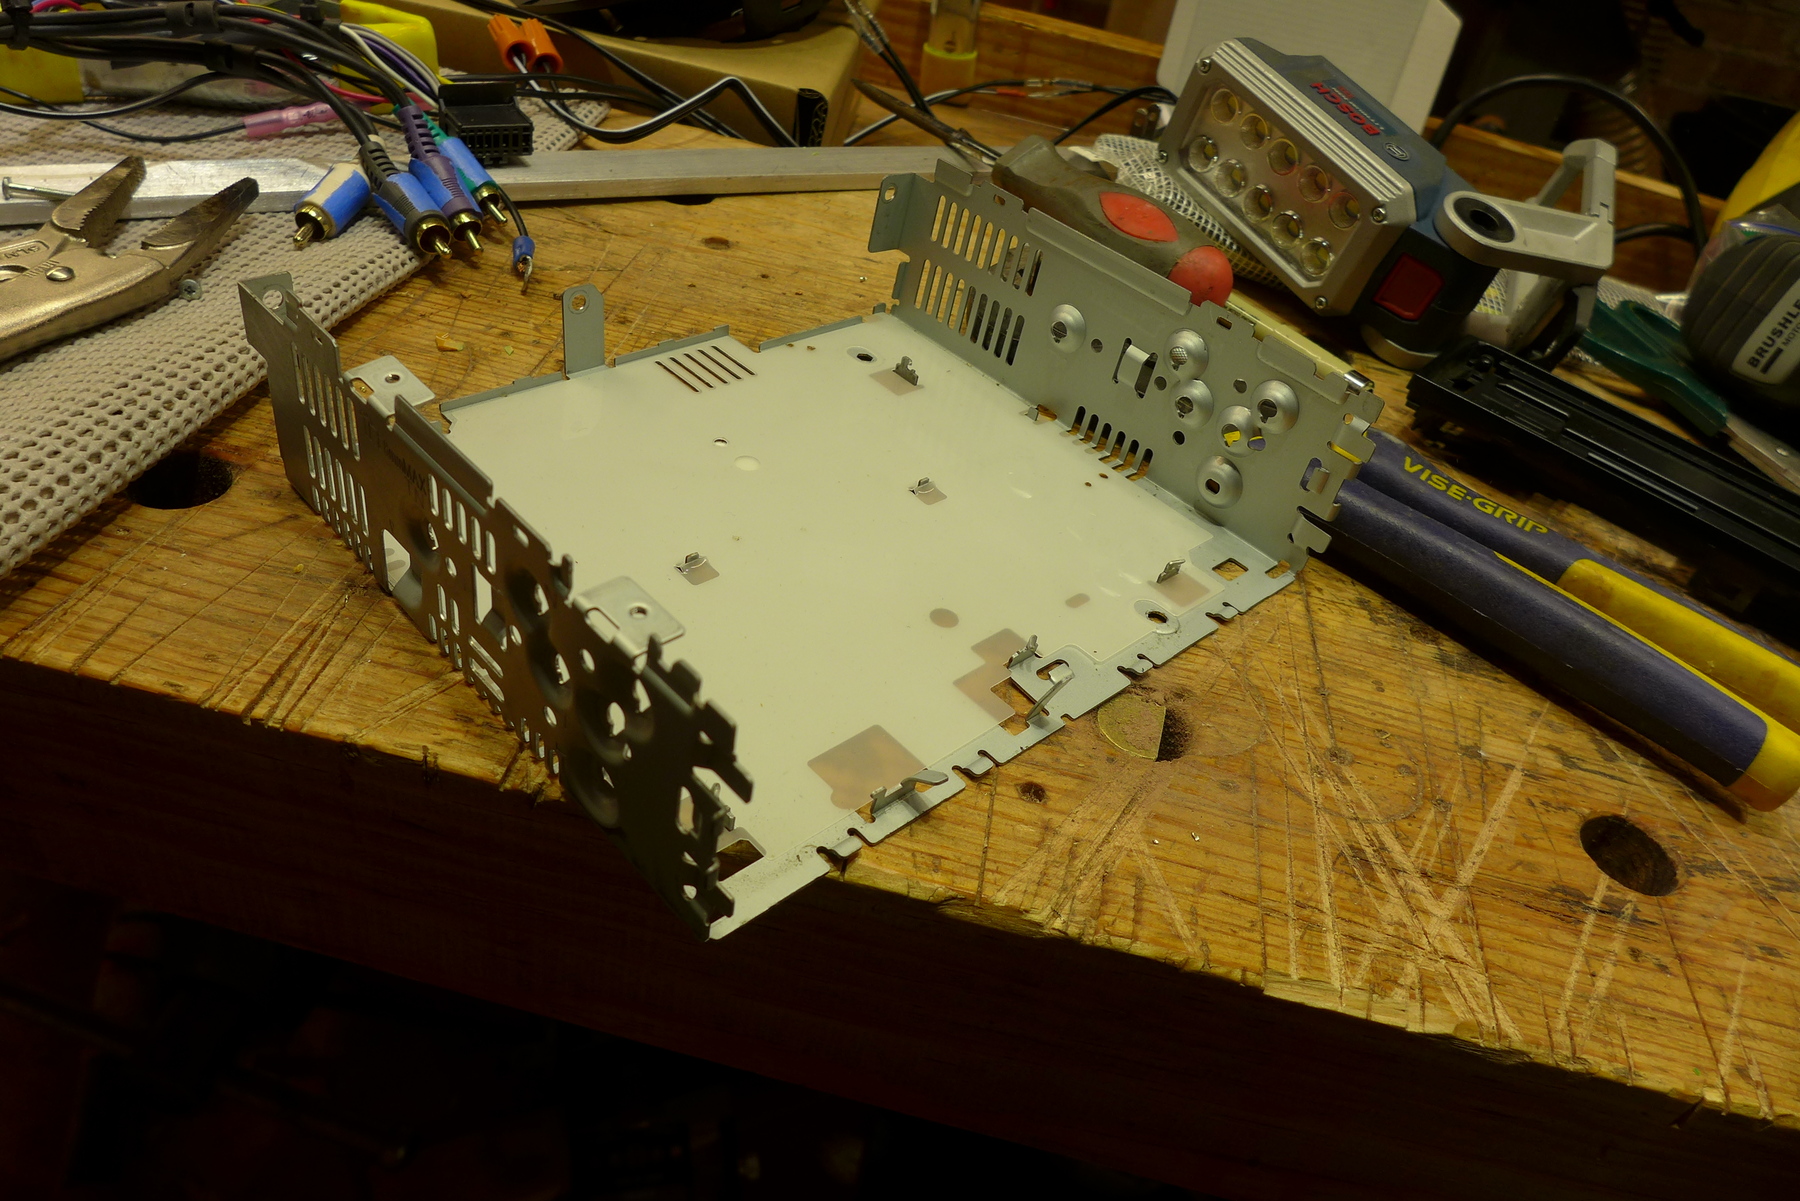
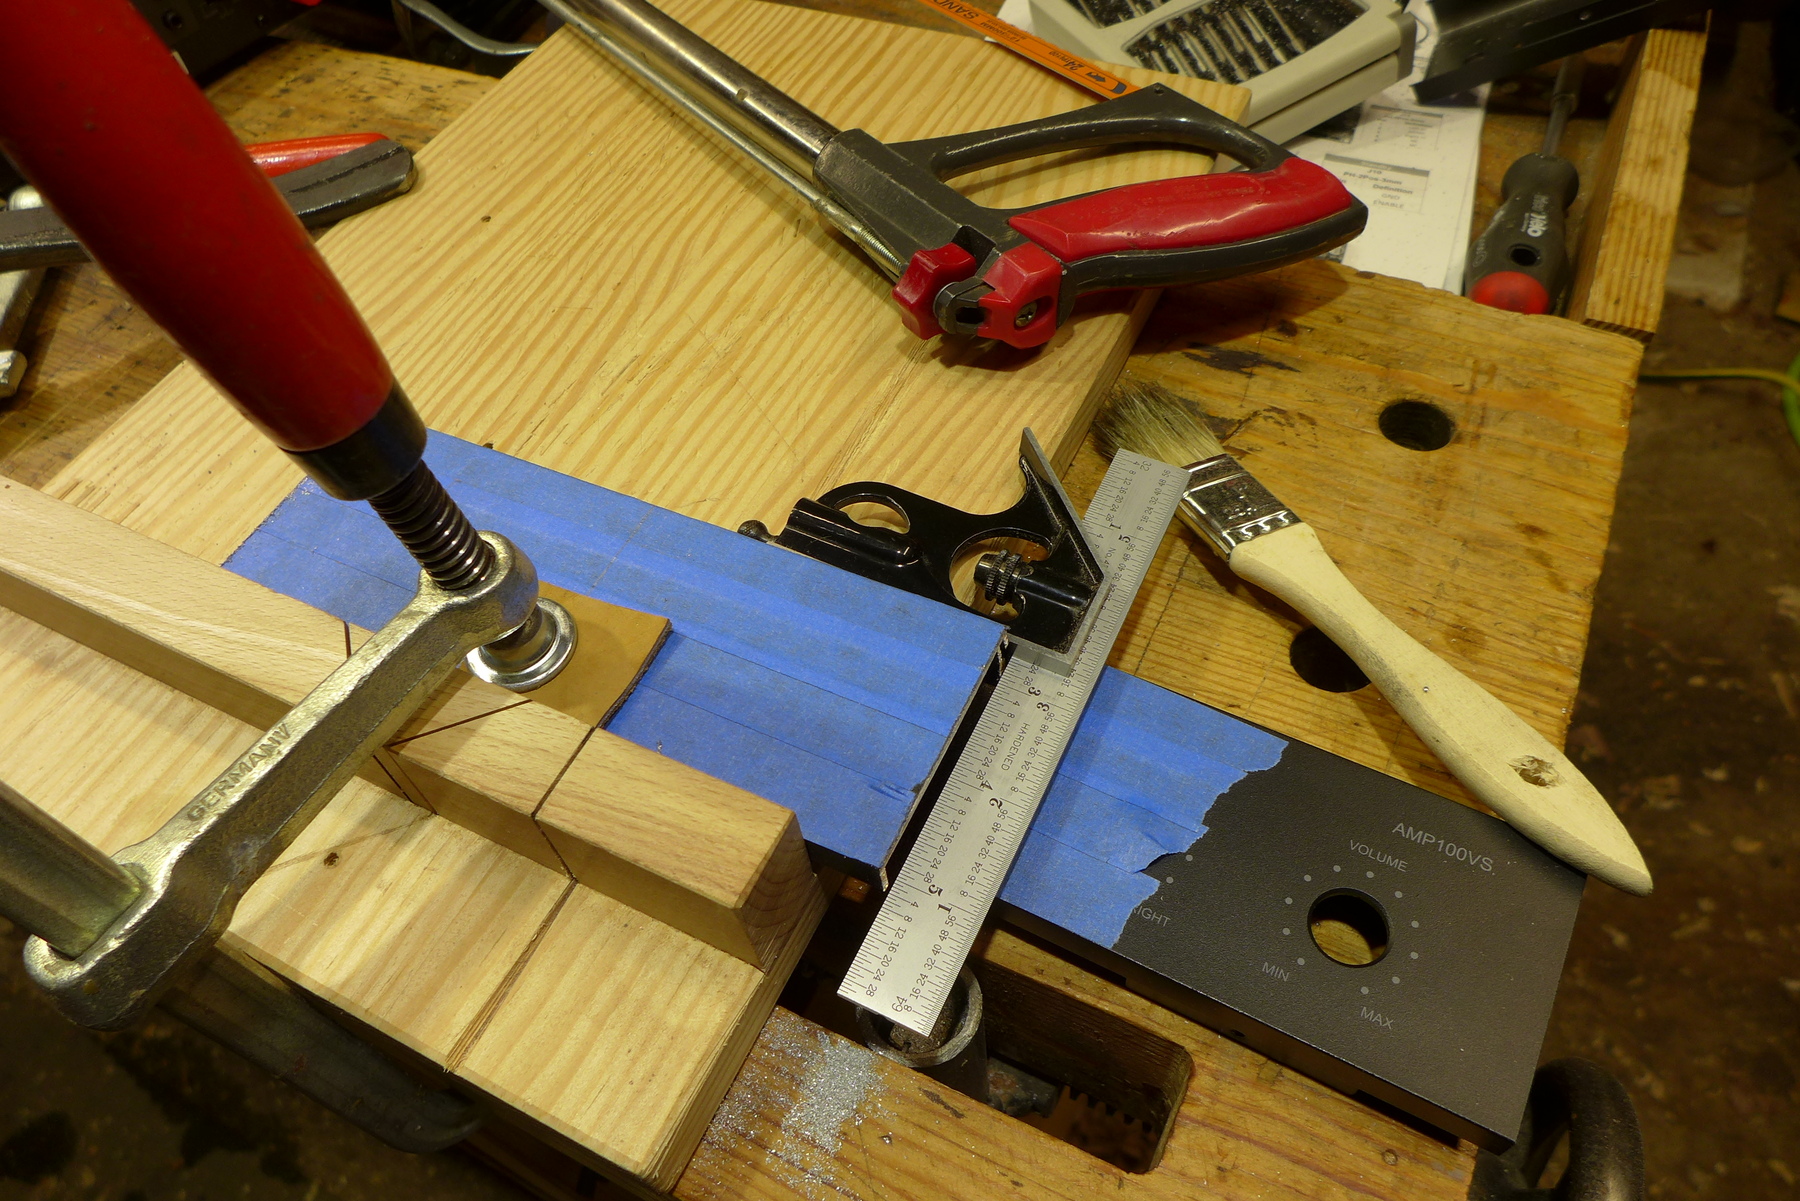
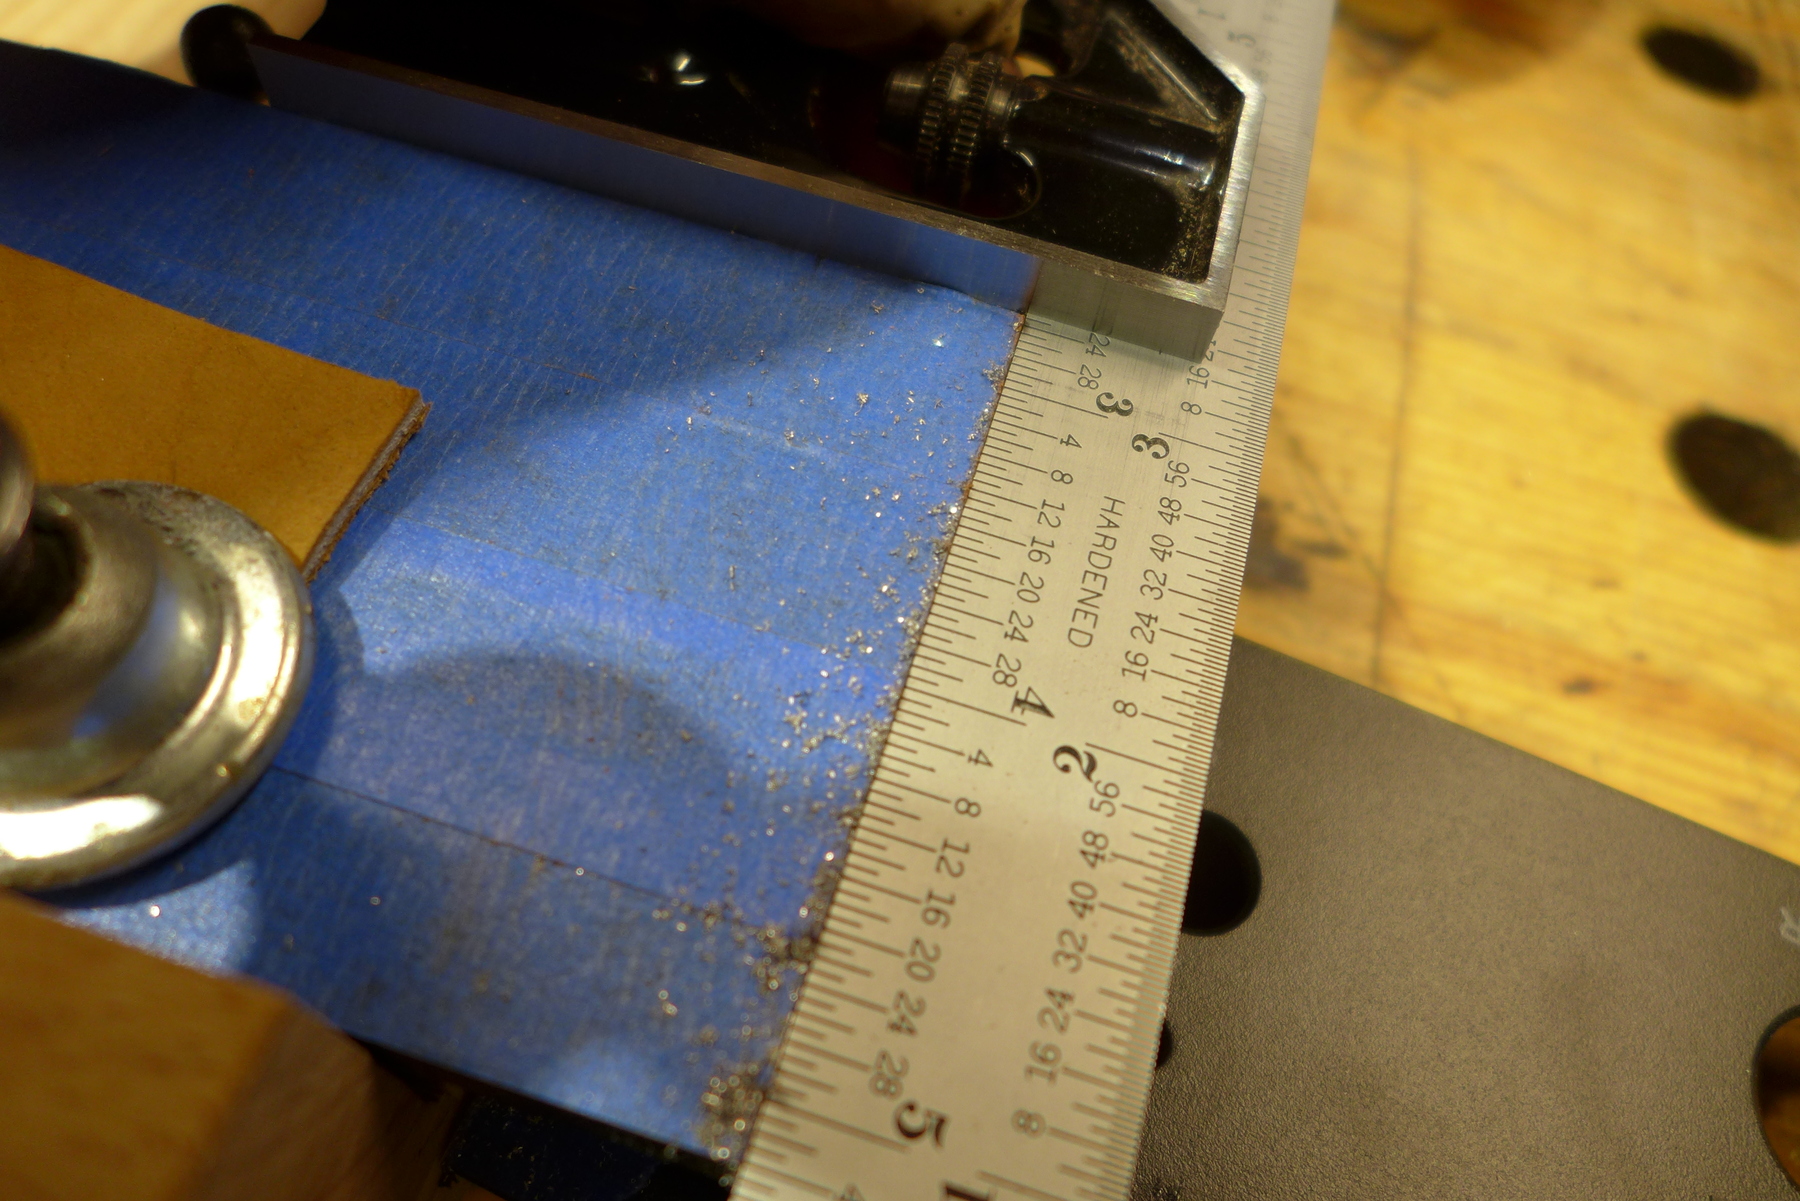
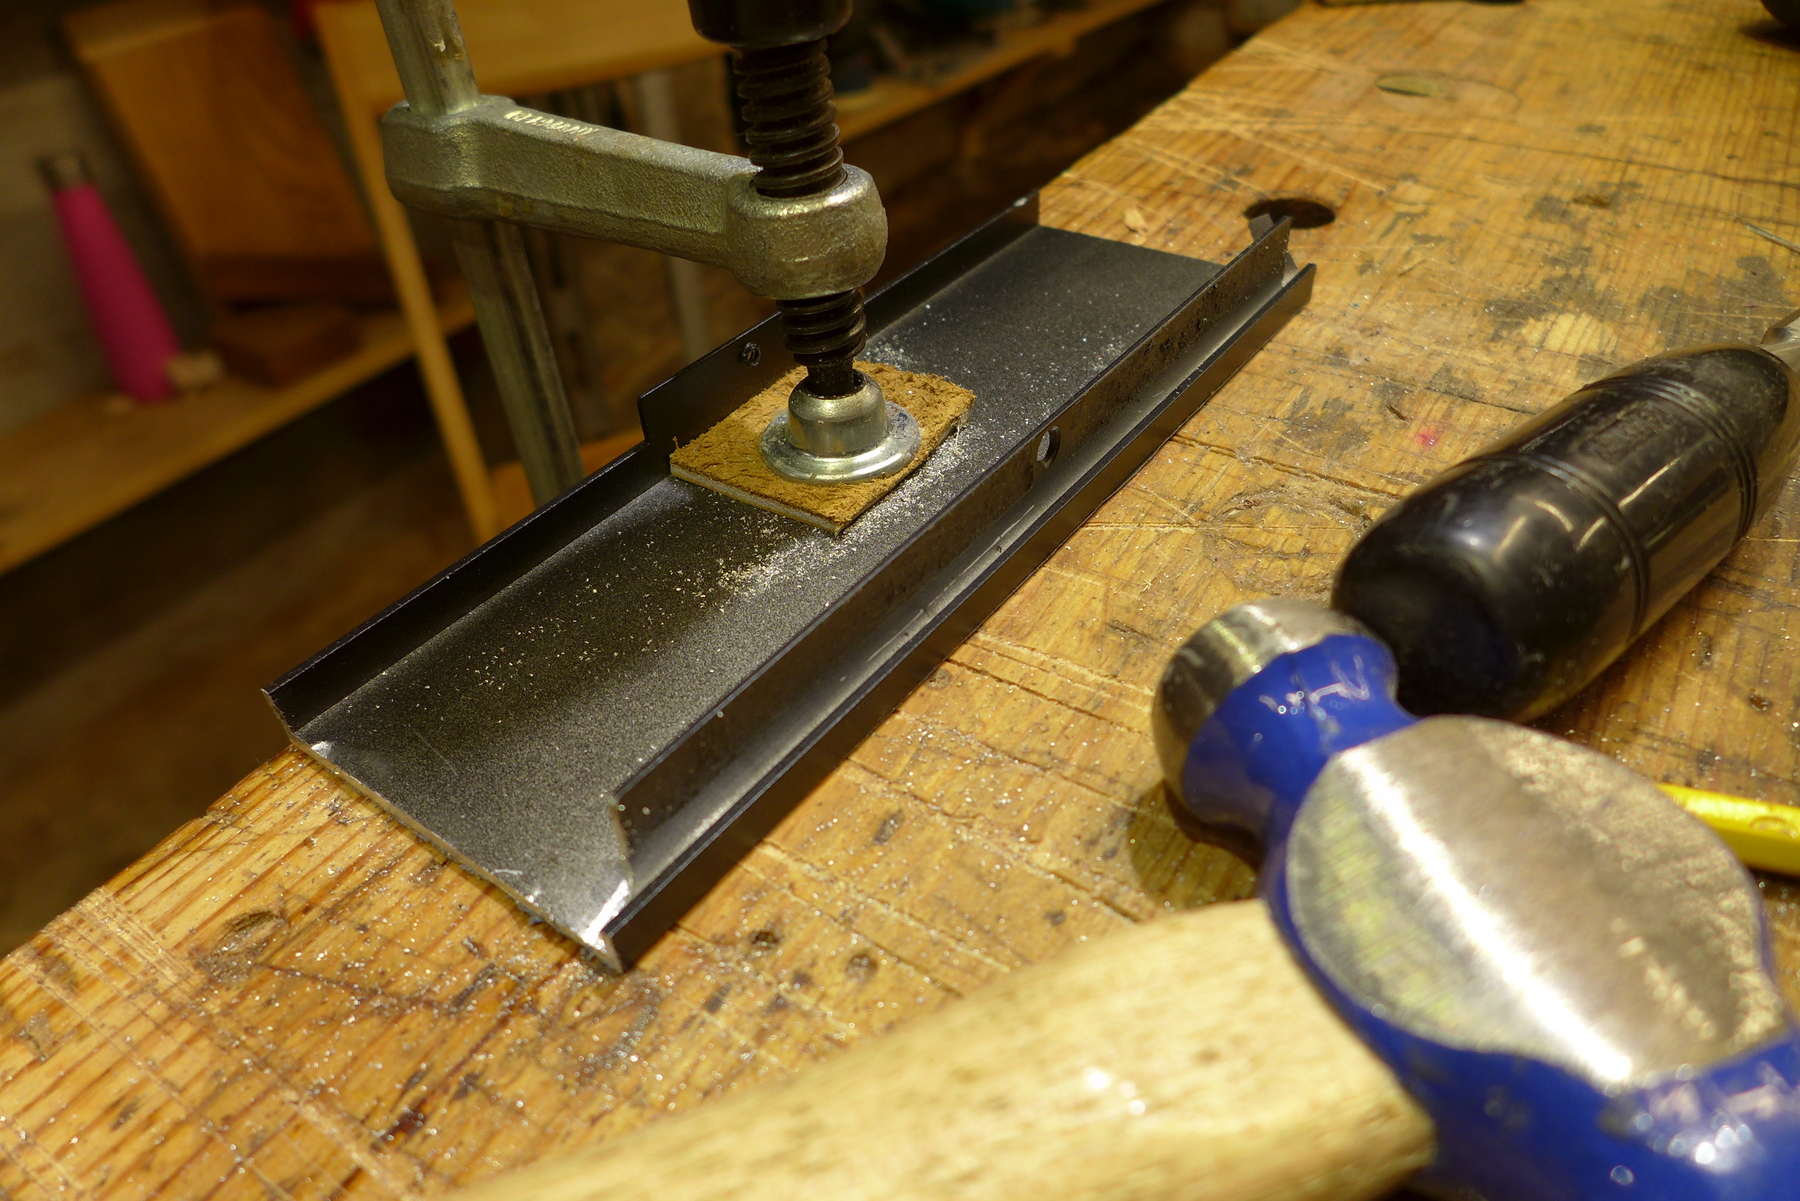
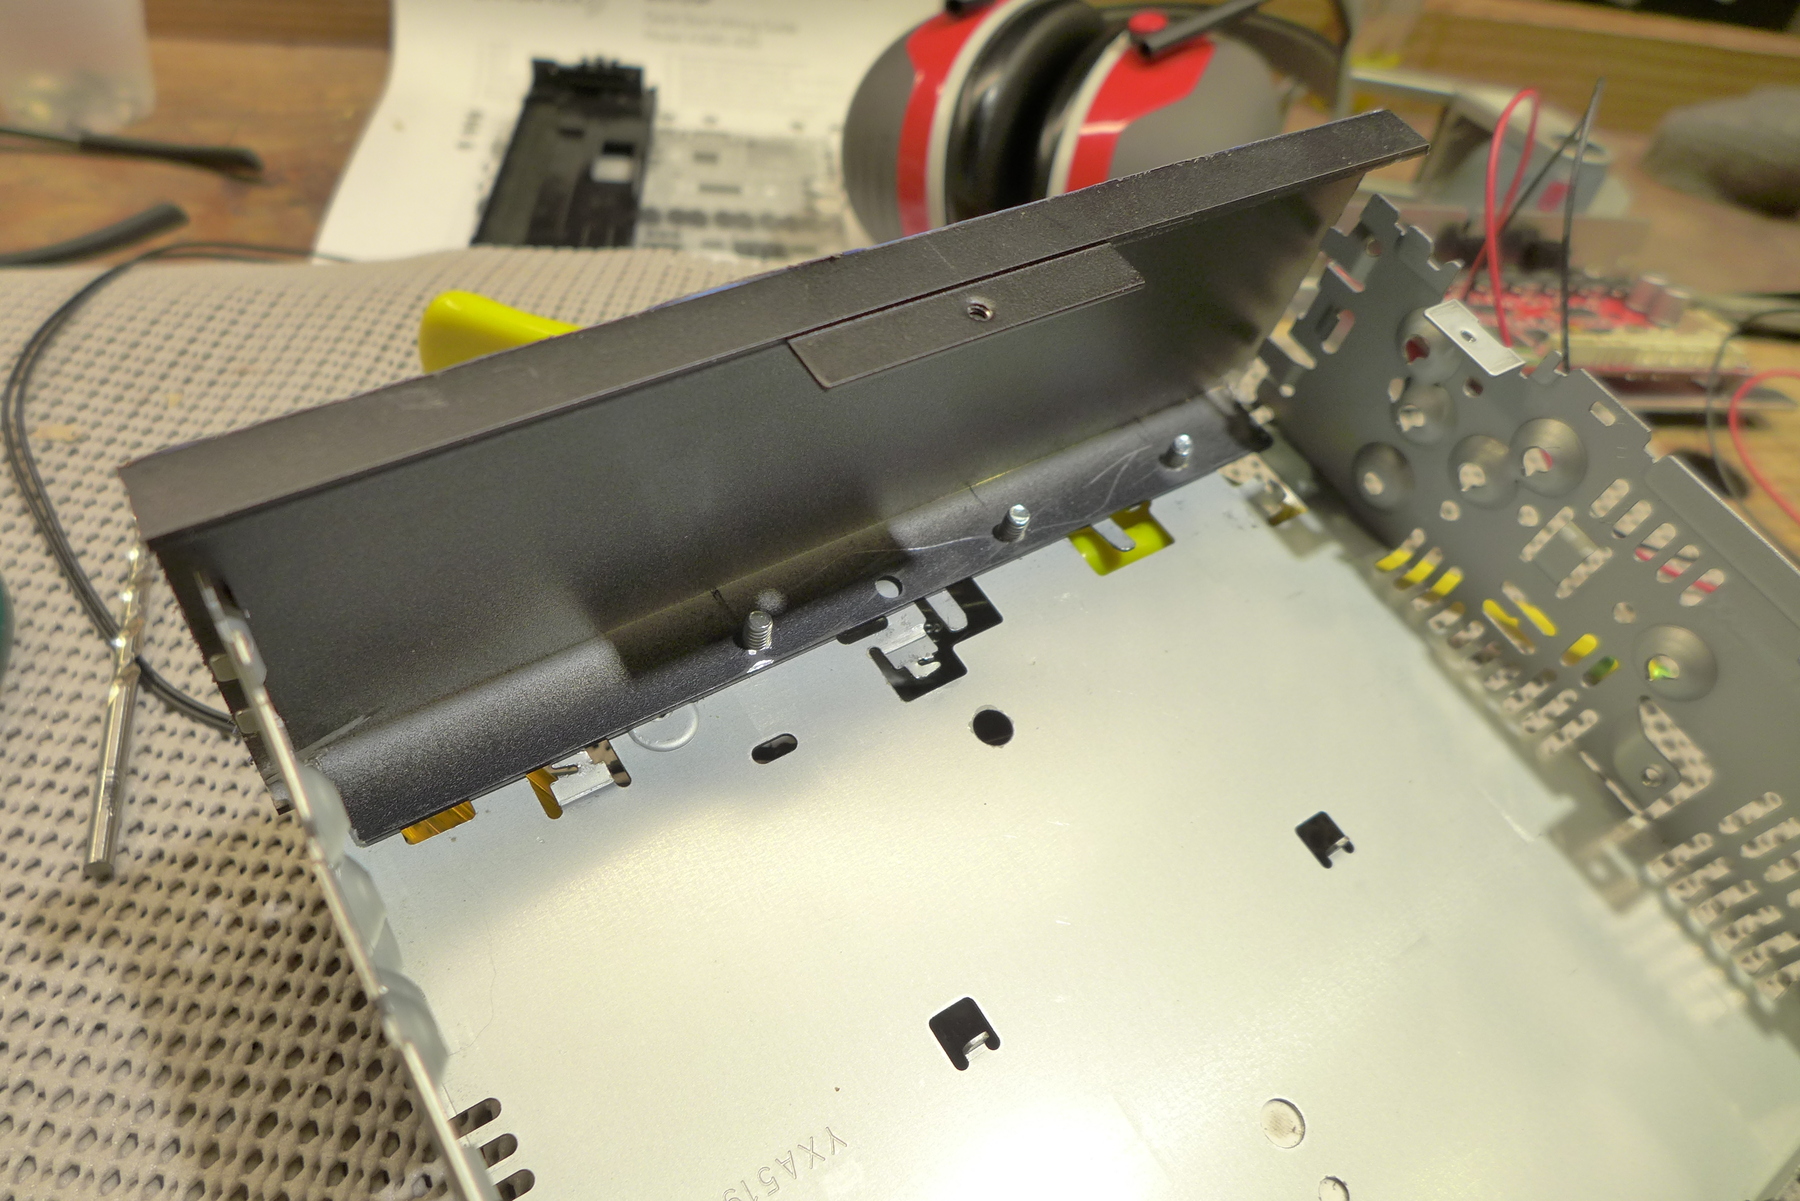
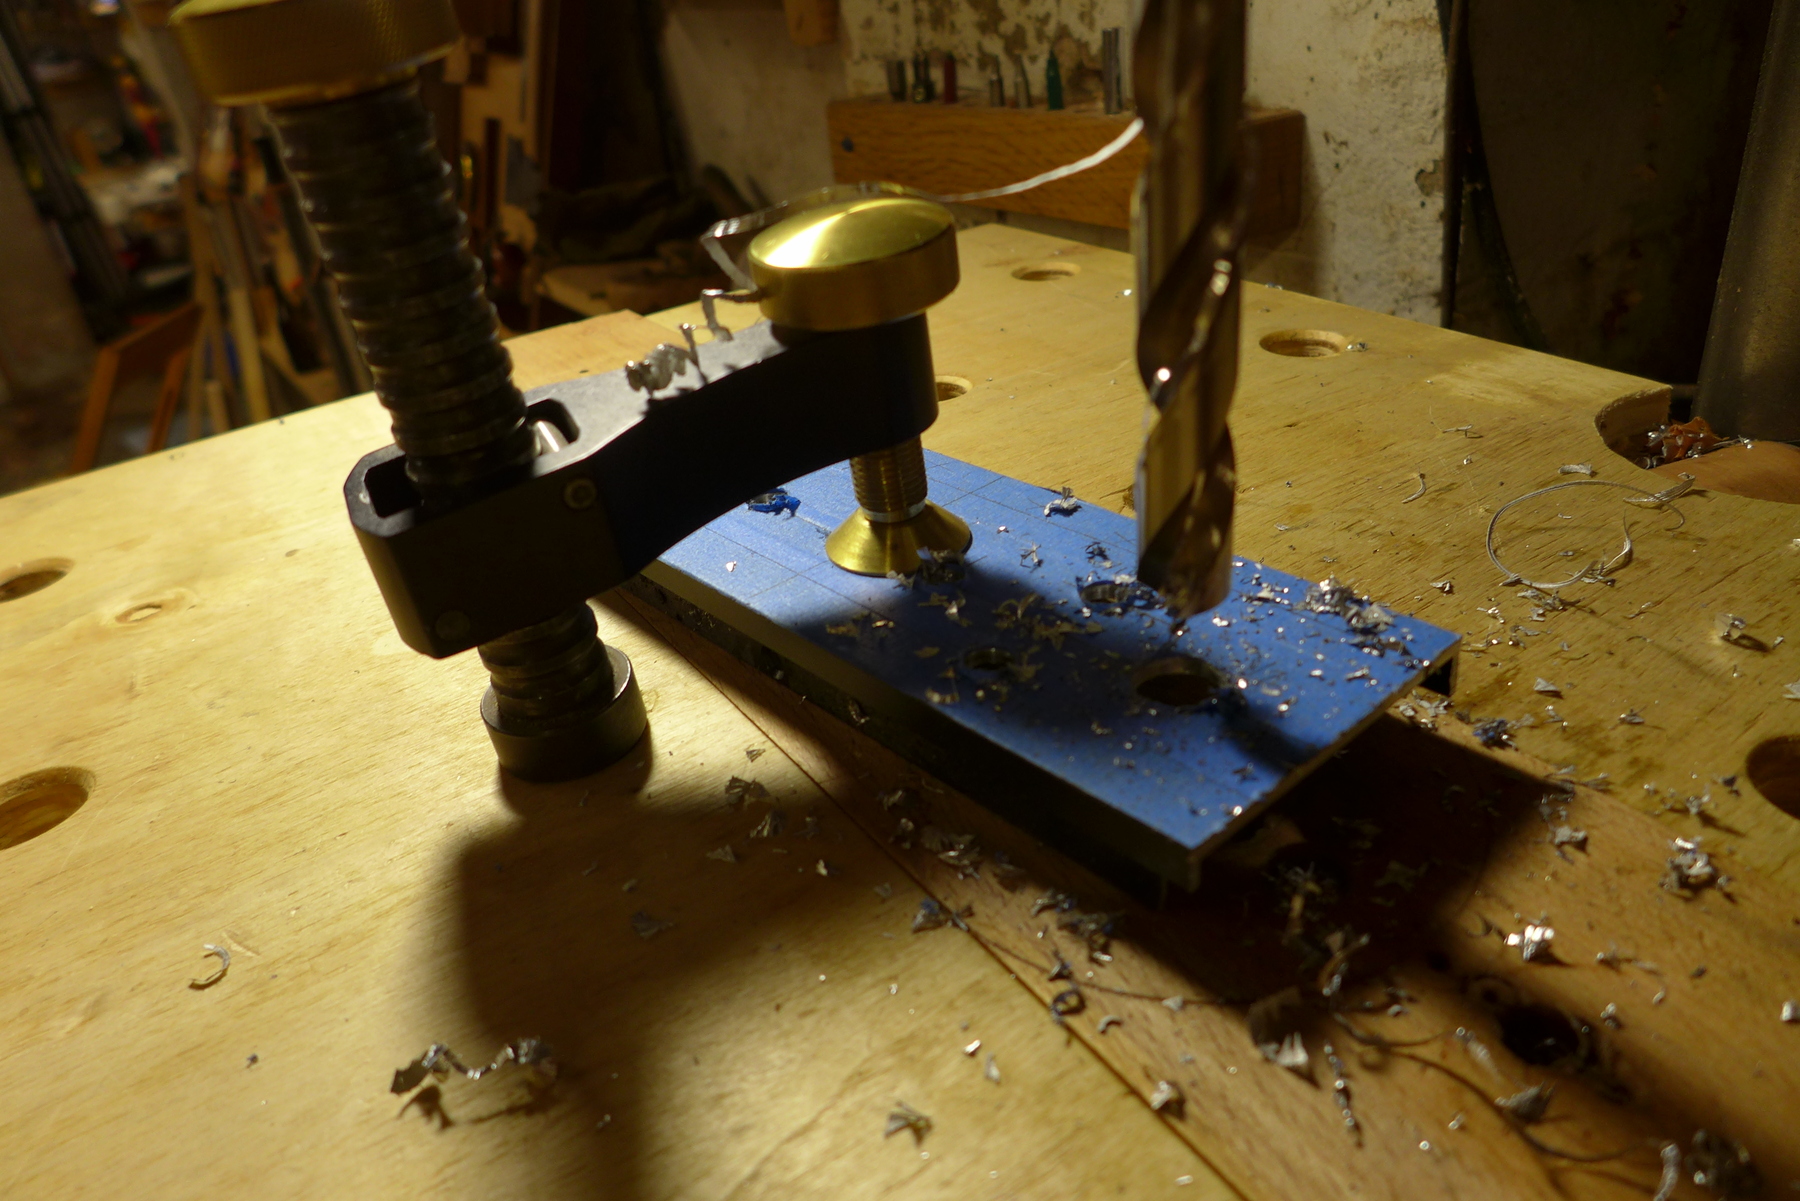
Basically most of the work in this install is in fabricating the face plate/mount.

Detouring to run the board at 24v cost some time and effort, but in the end wasn't necessary and honestly, I had never even installed a car stereo so I had to catch up on some specifics, but everything else is pretty straightforward.

So just wanted to post this in case it might inspire you to experiment with your own method. The main downside here is there's no analog out for a sub if you wanted - you'd have to steal the channels from the rear speakers (probably worth it, honestly).

That said, you could go really far with a pair of the 4100 boards instead if you have some serious car audio needs. Those boards can be daisy chained, so you could have 8 channels to play with, with full dsp. So for example, two channels for tweeters, two for fronts, two for rears and bridge the last two to power a sub with 200 watts, 800 watts total - for less than $200 - which is bonkers.

If I was more into car audio, I might just give it a shot - but I'm content for the time being with just having nice, reliable bluetooth and admittedly much nicer speakers than stock - along with controls that are dead simple, and have some weight to them.

I would say I probably wouldn't get passive crossovers again. Those tweeters would be perfect if I could knock them down about 3db. I was even about to wrap an old tshirt around them until the phone eq came to the rescue. But it's weird, those 4100 boards are about the same price as an active crossover, and obviously they're an entire amp/receiver/dsp/4 channel board - so yeah, the times are changing...

As it stands, with the 430 board I used, besides the couple of hundred bucks for the speakers and of course, some electrical tools I needed and parts I ended up not using so won't include them, the build of materials is ludicrously cheap:

- $65 for the board
- $5 for the harness
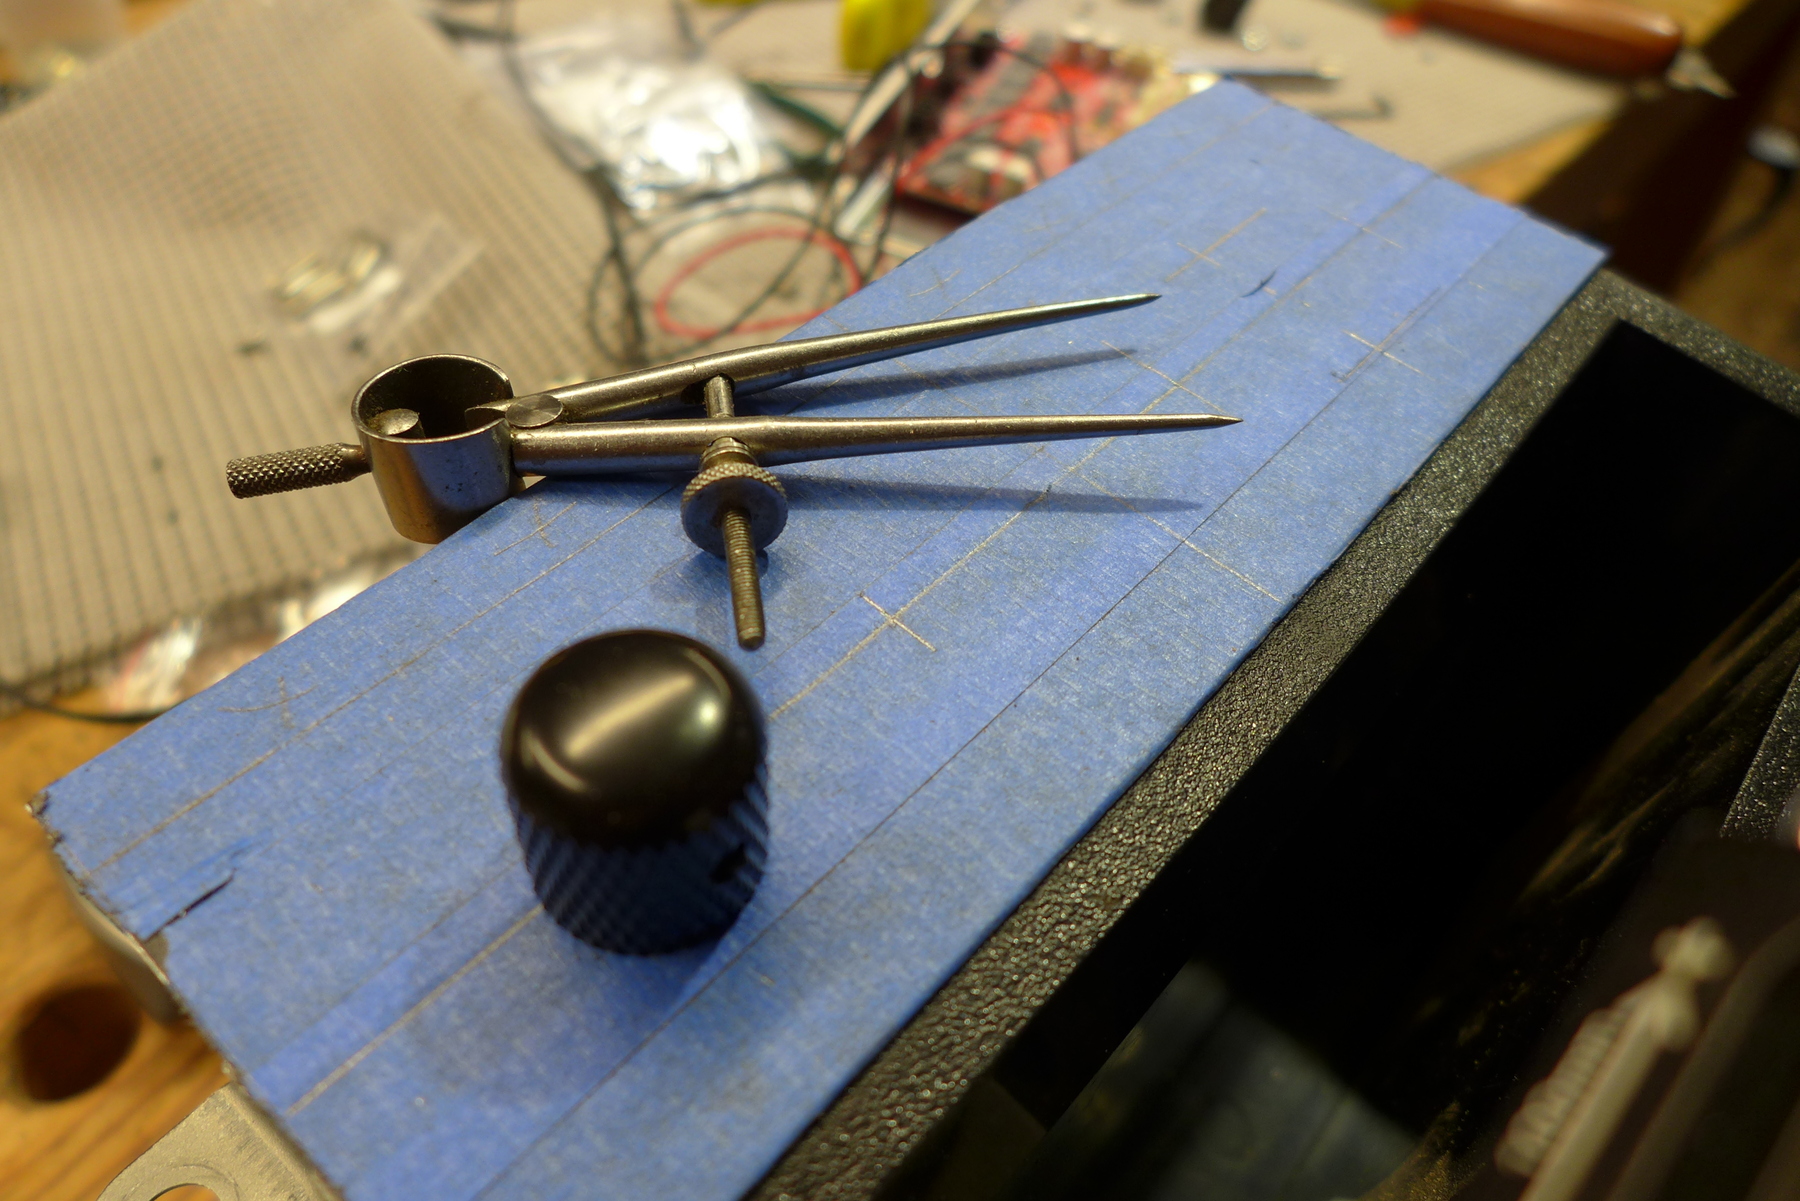
- $20 for the bronze knobs
- $10 for cables, etc.
- $5 for plate mount
- $3 for inline fuse
- $3 for red led
- $?? for making the old amp and stereo watch as they were cannibalized for parts

Anyway, have always found this forum to be a great resource for these wonderful vehicles - and thought this might spur some creativity in your builds.
97_Runner is offline   Reply With QuoteReply With Quote
Reply

Tags
amp , decided , stereo , time , work

Thread Tools
Display Modes Rate This Thread
Rate This Thread:

Posting Rules
You may not post new threads
You may not post replies
You may not post attachments
You may not edit your posts

BB code is On
Smilies are On
[IMG] code is On
HTML code is On

Forum Jump

Similar Threads
Thread Thread Starter Forum Replies Last Post
Need Analog Clock Urbanite 4th Gen T4Rs 19 05-01-2022 07:08 PM
Anyone running Fifteen52 Analog HD wheels? FLYNAVY53 3rd gen T4Rs 3 11-27-2021 08:35 PM
98 analog trip odometer broken fastolds 3rd gen T4Rs 1 04-21-2018 02:11 PM
analog boost gauge to digital gauge matthinnant 3rd gen T4Rs 1 02-24-2012 08:43 AM
URD FTC Analog inputs? A.Wilson013 3rd gen T4Rs 0 05-28-2011 04:39 PM

Powered by vBadvanced CMPS v3.2.2

All times are GMT -4. The time now is 02:07 PM.

Powered by vBulletin® Version 3.8.11
Copyright ©2000 - 2024, vBulletin Solutions Inc.
Search Engine Optimisation provided by DragonByte SEO (Pro) - vBulletin Mods & Addons Copyright © 2024 DragonByte Technologies Ltd.
Feedback Buttons provided by Advanced Post Thanks / Like (Lite) - vBulletin Mods & Addons Copyright © 2024 DragonByte Technologies Ltd.
User Alert System provided by Advanced User Tagging (Lite) - vBulletin Mods & Addons Copyright © 2024 DragonByte Technologies Ltd.
***This site is an unofficial Toyota site, and is not officially endorsed, supported, authorized by or affiliated with Toyota. All company, product, or service names references in this web site are used for identification purposes only and may be trademarks of their respective owners. The Toyota name, marks, designs and logos, as well as Toyota model names, are registered trademarks of Toyota Motor Corporation***Ad Management plugin by RedTyger
 
Copyright © 2020