 01-31-2013, 05:23 PM
|
#31
|
 |
Senior Member
|
|
Join Date: Jul 2009
Posts: 4,984
|
|
|
Senior Member
Join Date: Jul 2009
Posts: 4,984
|
Quote:
Originally Posted by mds4752

I'm thinking about doing this mod also....but not until after the temp's get above 9*F. 
What year is your 4Runner? Mine's a 97.
What model 2001 truck did you get the parts from -- Tacoma, I assume?
Thanks,
MDS |
Taco's have a different interior, any 1999 until 2002 4runner will have the correct console, just make sure the interior color is the same.
|

|
 Reply With Quote Reply With Quote
|
|
01-31-2013, 09:07 PM
|
#32
|
 |
Junior Member
|
|
Join Date: Dec 2012
Location: Central Iowa
Posts: 9
|
|
|
Junior Member
Join Date: Dec 2012
Location: Central Iowa
Posts: 9
|
Thanks for the clarification John!
I'm looking at using the website partshotlines.com to source the console; I'm sure they'll have several to choose from.
I'm also going to give a shot at changing the fender flares. I've got the real skinny black ones with the thin chrome trim on them. Want something wider and will paint them flat black. Problem in buying those online is I'm not 100% sure which model years' flares will match up to mine, nor do I know what each of them looks like!! I cringe at the thought of buying a set from the dealership or thru ebay.....all complete sets have been WELL over $400....for plastic! Ugh!
__________________
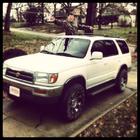
'97 SR5
|
|
|
Reply With Quote
|
|
01-31-2013, 09:26 PM
|
#33
|
 |
Senior Member
|
|
Join Date: Feb 2012
Location: DFW, TX
Posts: 2,059
|
|
|
Senior Member
Join Date: Feb 2012
Location: DFW, TX
Posts: 2,059
|
The only flares that you can bolt on without making permanent mods are the Bushwacker flares or the SR5 "Skinny" flares. The Limited flares/SR5 Wide flares will require drilling holes in the outer sheet metal, which makes it tough to go back to stock if you don't like it. The SR5 Skinny flares can be found on forums for around 200-250 a set if you are patient. They will probably be faded and need to be be painted, but you can use some SEM trim paint or Krylon Fusion, to make them almost any color you want. They could also be taken to a body shop and painted to match your truck if that is the look you are going for.
I have the SR5 "skinny" flares and plan to paint mine with Krylon Fusion. I am leaning towards going black or grey, but haven't made a final decision. I've got 2 cans of Rustoleum "hammered" grey laying around too, so I may do a test spray and see what that looks like. I had good results using the Krylon Fusion to paint the radio bezel and door handle bezels on my Chevy Colorado. I did it in 2009 and when I traded the truck in 2011 they still looked as good as the day I painted them. I cleaned them with windex and never had a problem with them flaking or fading.
__________________
 The 4Runner Show
|
|
|
Reply With Quote
|
|
11-21-2013, 12:34 PM
|
#34
|
|
Junior Member
|
|
Join Date: Nov 2013
Location: Northern Nevada
Posts: 1
|
|
|
Junior Member
Join Date: Nov 2013
Location: Northern Nevada
Posts: 1
|
 Thank you! Center Console Mod.
I would like to thank all who posted to this thread and made the job of completing the center console mod on my 98 T4R so well guided and easy to follow. I chose the left side of the dash for my switches. I separated the wires back to where they merge with the stereo and heater wires, and it was like Toyota provided just enough wire to get the rear window and ECT switch's to make it and the icing on the cake is that the switches just pop right in to the factory cutouts! The biggest challenge was getting the Toyota security connectors apart. I just gave up and cut them apart, they wouldn't come loose no matter how hard I pressed with a mini flathead driver. I still have to get the console in but have the e-brake and bucket bracket to the console on their way to me. I look forward to having cup holders that arent so fragile and in the way, not to mention, broken. So a big thank you to Asmara, JohnsD90, and remac! You have all been a big help.
Howard
|
|
|
Reply With Quote
|
|
11-21-2013, 03:33 PM
|
#35
|
|
Senior Member
|
|
Join Date: Sep 2011
Location: Dallas, TX
Age: 53
Posts: 1,807
|
|
|
Senior Member
Join Date: Sep 2011
Location: Dallas, TX
Age: 53
Posts: 1,807
|
I had no trouble getting my Toyota security connectors pried apart
|
|
|
Reply With Quote
|
|
01-29-2016, 10:40 PM
|
#36
|
|
Junior Member
|
|
Join Date: Jan 2016
Location: Portland, OR
Posts: 7
|
|
|
Junior Member
Join Date: Jan 2016
Location: Portland, OR
Posts: 7
|

$5 Wedge cup holder chopped in half and bolted on
|
|
|
Reply With Quote
|
|
05-04-2016, 07:44 AM
|
#37
|
|
Junior Member
|
|
Join Date: Feb 2016
Location: Connecticut
Posts: 16
Real Name: Matt
|
|
|
Junior Member
Join Date: Feb 2016
Location: Connecticut
Posts: 16
Real Name: Matt
|
Digging up an old thread.... does anyone know what the plate looks like for the swap? I'm having trouble understanding the bending part... maybe makes sense when you open it up and look at it? If I can find the replacement plate, I'd go that route... just don't know what I'm looking for, and that picture link is not working.
Thanks in advance!
Matt
__________________
To enjoy the full flavors of life, take big bites. Moderation is for monks.
|
|
|
Reply With Quote
|
|
05-04-2016, 07:45 AM
|
#38
|
|
Junior Member
|
|
Join Date: Feb 2016
Location: Connecticut
Posts: 16
Real Name: Matt
|
|
|
Junior Member
Join Date: Feb 2016
Location: Connecticut
Posts: 16
Real Name: Matt
|
Quote:
Originally Posted by mattgold
To take this one step further... If you're getting the eBrake, get the mount the center console bolts to at the same time (it also houses a few sensors, depending on model).
Then, it's 100% bolt on. No bending, no fuss.
That said, thanks again for the tips.
-M
|
This is the one i'm referring to....
__________________
To enjoy the full flavors of life, take big bites. Moderation is for monks.
|
|
|
Reply With Quote
|
|
05-04-2016, 08:16 AM
|
#39
|
 |
Member
|
|
Join Date: Mar 2016
Location: Henley on Thames, UK
Posts: 408
Real Name: Charlie
|
|
|
Member
Join Date: Mar 2016
Location: Henley on Thames, UK
Posts: 408
Real Name: Charlie
|
Was there a version of the later centre console that had switches mounted in it?
I've seen one on a build, but wasn't sure if it was a REALLY neat custom retrofit, or factory switches.
The one I bought has a weird and uselessly shaped hole there.
I also found out that they greys appeared to come in different shades (that might be a JDM thing)  mine is has a blueish tone to it.
|
|
|
Reply With Quote
|
|
05-04-2016, 09:53 AM
|
#40
|
 |
Member
|
|
Join Date: May 2013
Location: Missouri
Posts: 116
|
|
|
Member
Join Date: May 2013
Location: Missouri
Posts: 116
|
Quote:
Originally Posted by TorqueOfTheDevil
Was there a version of the later centre console that had switches mounted in it?
|
Not that I am aware of, But I just did the console swap on mine, and if you cut back the harness to the console switches there is plenty of wire to move the ect, rear window and security switches to the blank just to the side of the steering column on the dash. No wiring necessary, just cut the loom and rewrap it if you want it clean, pop out the blanks and put your switches in.
|
|
|
Reply With Quote
|
|
04-25-2017, 05:56 PM
|
#41
|
|
Junior Member
|
|
Join Date: Sep 2014
Location: PA
Posts: 8
|
|
|
Junior Member
Join Date: Sep 2014
Location: PA
Posts: 8
|
Not moving switches... console instal
I know this is an old thread, and...
I really appreciate all of the time and energy that you all put into helping others with repairs and mods!
I didn't really want to move my switches when changing to the newer center console, so I didn't.
I made a little panel from a piece of aluminum. I cut out the switch holes with my scroll saw (was a pain!), cut out the little hole/space/dirt collector spot on the newer console, and then used pop rivets to hold it there.
There is one empty space, and the middle one is for my antenna... since I rarely listen to the radio I mostly leave it down, and I can use the switch to put it up when I want.
Far from perfect, and at least my switches are still right there at my fingertips.
Steve
|
|
|
Reply With Quote
|
|
02-07-2018, 02:19 PM
|
#42
|
|
Member
|
|
Join Date: Jan 2018
Location: CALIFORNIA
Posts: 30
Real Name: Angel
|
|
|
Member
Join Date: Jan 2018
Location: CALIFORNIA
Posts: 30
Real Name: Angel
|
I looked everywhere but couldnt find my answer, what exactly do I need from the donor vehicle to make this mod work?
|
|
|
Reply With Quote
|
|
08-15-2018, 09:10 AM
|
#43
|
|
Member
|
|
Join Date: Aug 2018
Location: Oklahoma
Posts: 35
|
|
|
Member
Join Date: Aug 2018
Location: Oklahoma
Posts: 35
|
Thank you to all that posted. Great information! Now to source parts for mine.
|
|
|
Reply With Quote
|
|
08-15-2018, 10:09 AM
|
#44
|
 |
Senior Member
|
|
Join Date: Nov 2017
Location: Palos Verdes, CA
Posts: 1,973
Real Name: Leon
|
|
|
Senior Member
Join Date: Nov 2017
Location: Palos Verdes, CA
Posts: 1,973
Real Name: Leon
|
Quote:
Originally Posted by 3dkustoms
I looked everywhere but couldnt find my answer, what exactly do I need from the donor vehicle to make this mod work?
|
From my thread on this topic:
What parts to get - I got the console from a '99 donor. As one of the references above recommends, when you get the console, try to get the following parts from the same year donor. If you get all these parts, you won't have to do any redrilling of mounting holes or modifying of brackets that many of the references above did. Keep in mind that 99-00 brackets are different from 01-02, and there may be other differences year to year. So try to get all these parts from same year vehicle.
- console - try to get one that matches your vehicle, i.e. with or without rear heat. You can add the heat control cutout if you have rear heat but buy a console without it, but why do the extra work?
- rear mounting bracket this really helps ensure that all the holes line up, and will help you avoid having to drill the floor, modify brackets, or trim the bottom of the console, like I saw in the YouTube video. There is no need for that if you use the brackets that come with the console. This thread describes this really well - center console swap/cupholder mod - plug'n'play
- e-brake people have made their 97 e-brake work with the '99 console, but it requires either bending or drilling new holes. If you get the 99+ e-brake, itll bolt right up and point in the right direction.
- e-brake tub - this one is debatable in my mind. The newer e-brake tub positions the e-brake cable towards the passenger side by about 15 deg, and is located a bit closer to the passenger side, to shift the e-brake handle to the right and make room for the cupholders on the left. The problem is that the 99+ tub does not fit into the '97 floor cutout, so you have to widen the floor cutout by about 1/4". I hate cutting into nicely painted OEM metal. On the flipside, if you retain the older tub, there is no cutting or drilling, but the e-brake cable comes in straight instead of at an angle, and has to make a bit of a jog to line up with the e-brake handle. I don't think it's very much of a jog, and I think it would have been fine - but when I considered the choice of a one-time cutting operation vs. every-day strain on the angled cable, I decided to go with the enlarged cutout. But I think the other way would have been fine too.
__________________
1997 4Runner Limited 4WD E-Locker ~200k | Falken Wildpeak A/T3W 265/75/16 | Pro Comp 69 16x8 | OME 2906 | B&M 70264
Addicted Offroad Front Bumper | Spiker Engineering High-Lift Hood Struts and Ultragauge Mount
|
|
|
Reply With Quote
|
|
08-15-2018, 11:32 AM
|
#45
|
|
Member
|
|
Join Date: Apr 2018
Location: Montmagny, Québec
Age: 36
Posts: 62
|
|
|
Member
Join Date: Apr 2018
Location: Montmagny, Québec
Age: 36
Posts: 62
|
Well. I picked-up parts to do the full 99 conversion.
From the donor, I removed:
Console (it's in much better shape than my 97 too)
Rear bracket (silver bracket mounted near the rear heater controls)
e-brake lever
Console cover/cup holder
I also wanted to upgrade to 99 dash (I really hate them cupholders).
Dash bezel with both air vents
In-dash air duct (a single screw holds it, but you have to wiggle it to get it out without removing all the A/C controls).
The only difference I see right now is the A/C control cover plate is clipped over the bezel on my 97, and it was under the bezel on the 99. Probably will fit anyways.
For 12v outlets, I plan on using a relay and tap to a 12v source at the fuse box (preferably some direct/unfused), and ignition at the same place (probably on the stock lighterplug circuit). Obviously fuse all that with in-line ATO holders behind the bezel.
Will try to snap some pictures and post them here for full write-up and button/switch conversion.
|
|
|
Reply With Quote
|
 Posting Rules
|
You may not post new threads
You may not post replies
You may not post attachments
You may not edit your posts
HTML code is On
|
|
|
|


 Linear Mode


