I'm a functional newb as far as mechanics go. Before I started this project, I found as many installation tips as I could, but couldn't find any fully-illustrated instructions, so I figured I'd post this. Hope it's useful....
Tools:
Wheel Chocks
Lug wrench
4Runner's provided bottle jack
2 Jack stands
17mm wrench
19mm wrench
Wrecking bar
Rubber mallet
1. Chock front wheels, apply parking brake and loosen lug nuts on both rear tires. Raise both sides of the rear as high as the 4Runner's bottle jack will take it, resting each side on jack stands.
2. Remove tires.
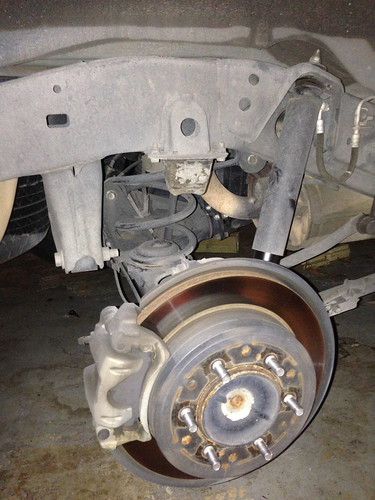
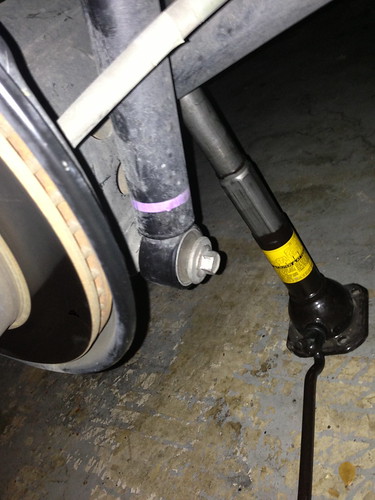
3. Loosen the top strut nut about 5 quarter turns, then remove the lower strut bolt completely. Use a wrecking bar to pry the strut off the axle.
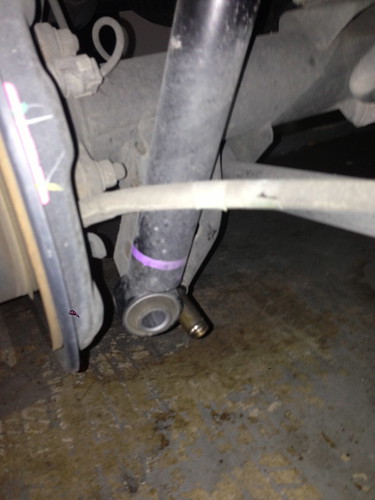
NOTE: The Daystar instructions say to remove the front end of the pan hard bar (pictured below), but it was a hassle for one person to get it back in place, and it's simply not a necessary step. I bypassed this step on my other side and had no problems.
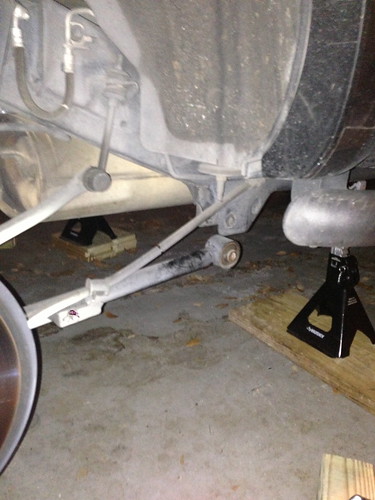
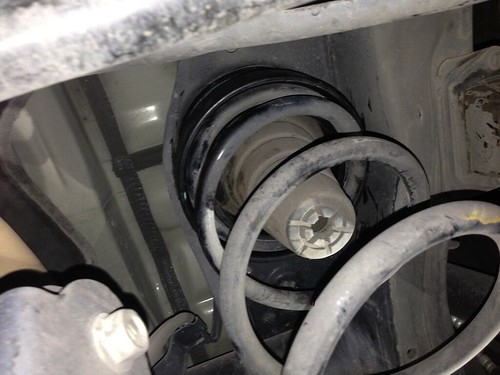
4. As pictured, (and brilliantly suggested by bulldog) place the 4Runner's bottle jack on top of the axle, pressing up against the rubber bump stop. Extend the jack until you can remove the spring by hand.

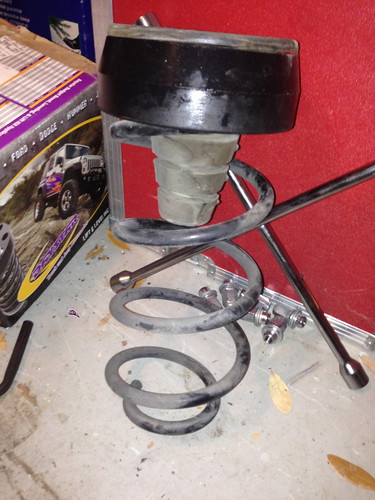
5. The Daystar spacer lift goes in between the top of the spring (which fits into the spacer's groove) and the original cone-shaped bump stop.
6. Put the spring back in place, leading with the top. You may need to extend the bottle jack a little more due to the added height of the spring, but you shouldn't have to pry the spring into place as the Daystar instructions suggest.
7. Remove the bottle jack from the axle, then place it on the floor under the axle and start to lift the axle until the strut can be reattached to it. Use a rubber mallet to hammer the bottom of the strut back into place. If that doesn't work within a few hits, raise the axle a little more and try again. Reattach the lower strut bolt, and tighten the upper nut.
8. Get under there so you can see the top of the spring. Make sure it's seated properly.
9. Repeat steps 3-8 on the other side.
10. Put the tires back on, lower the 4Runner, tighten the lugs, remove the chocks, take after pics, then drive to, and over, the nearest rock.
11. Recheck the tightness of the strut bolts after 500 miles.


 Linear Mode


