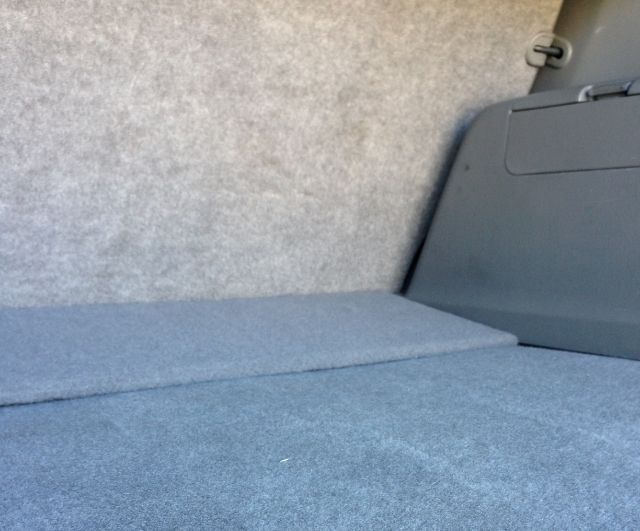
I recently purchased a 2007 4Runner, Limited V8 with the double decker cargo shelf. I thought the shelf was a neat idea, until my stuff started sliding around on it and falling off on to the floor below and out the back on to the ground when I opened the rear hatch. I read several threads on how to remove it and found the part numbers to replace the double decker trim with non double decker trim. The only problem is the price. Toyota loves their parts and charges accordingly.
I figured I would try to live without the trim piece and just remove the double decker shelf. That only lasted so long as it looks like crap with the big gap behind the seat where the trim piece was removed.
I found images on the web of what the non double decker cargo area looked like and attempted to build my own trim piece. Here is the finished product.
Here is how I did it and the materials needed.
2'x4' 1/4" plywood sheet
4"x1/2" x 36" board
short piece of 2x4 wood for wedges
2 each 6 x 1.00 machine screws with wood screw head
9 or 10 each small wood screws about 3/4" long
spray adhesive
Kraco ECOessential - Replacement Carpet
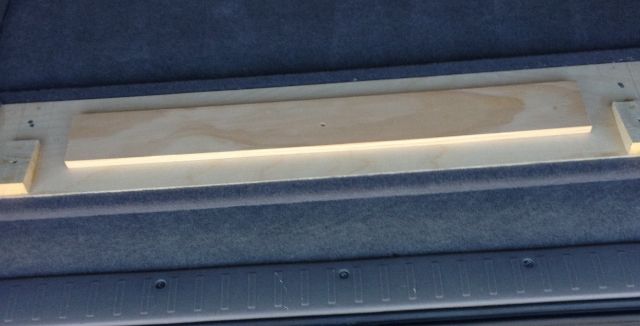
I used 1/4" plywood cut to a 9" deep by about 1/2" shy of the inside width of where the panel would go wide. Glued to this is another piece from the same plywood cut about 6 1/2" deep and an additional 4" x 1/2" piece of wood glued and screwed to make it stiff enough. You can see the two extra pieces in this pic along with the wedges needed to create the proper angle and height of the panel.
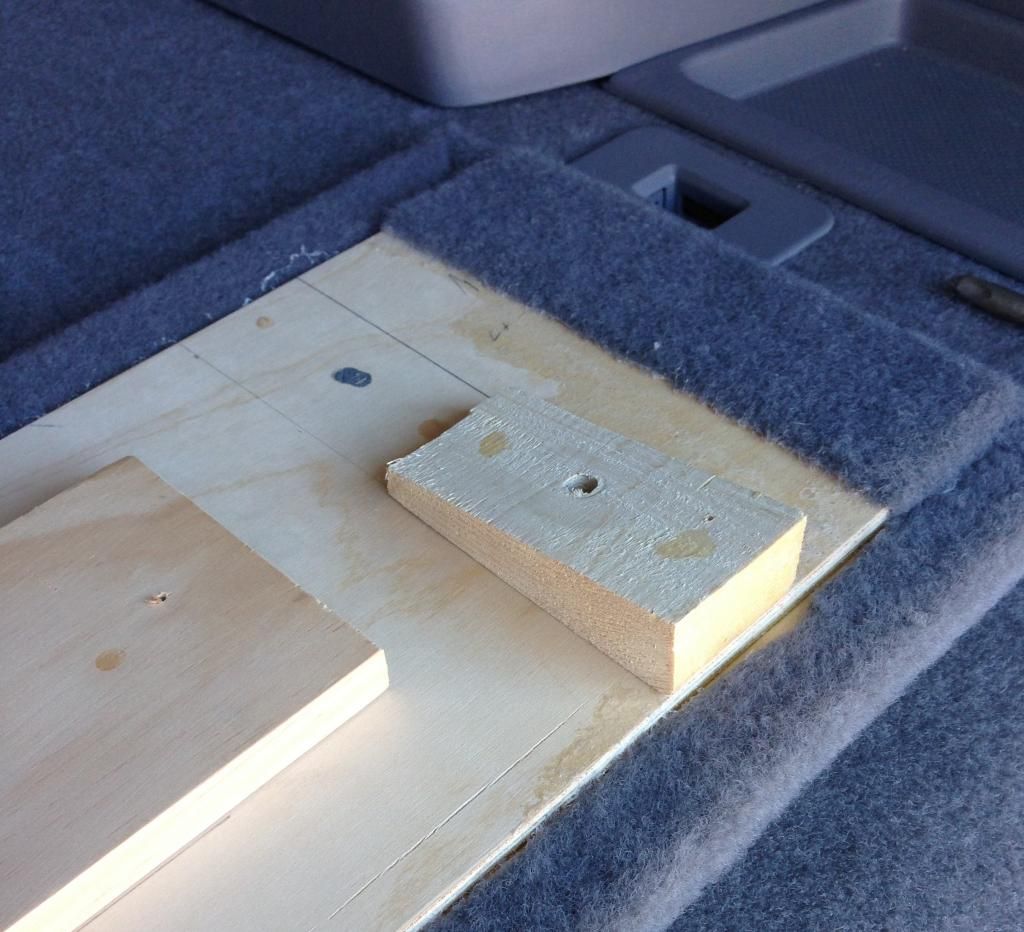
There is a little ledge on the back of the seats when folded down that I wanted the panel to rest on. To make the custom wedges you see in the picture, I used wadded up aluminum foil on top of the mounts where the bolts go to recreate the angle. The foil compresses down and stays in the shape that is needed. It took me a couple of tries to get the foil ball the correct size to be able to get a good profile.
I then cut two angled pieces from a 2x4. To check for fit I used double sided tape and stuck the wedges to the mounts and placed the panel on top. I did have to use a belt sander on the wedges to get it all to sit just right, but it didn't take long.
I then drilled a hole in each wedge at the correct angle and screwed the wedges into the mounts with 6 x 1.00 machine screws with a wood screw head. I then positioned the board on top to check fit again and screwed two small wood screws into the wedges once I was happy with the fit.
Here is a close up of the wedge.
I then unscrewed it all from the mounts and glued the wedges in place using the two small screws holes and screws as a guide. Next I drilled the hole for the 6 x 1.00 screw into the plywood from the backside using the wedge holes as a guide.
After this was done I covered the panel with carpet from O'Reilly's using spray adhesive. The carpet is ECOesential Replacement Carpet by Kraco. They have black, grey and tan. The grey matched pretty darn close.
To install the finished panel I cut little X's into the carpet for the mounting screws and screwed it into place.
I did eliminate the d-rings that were there previously but I will eventually purchase the Weathertech cargo liner and it would have covered them anyway. Also, I hope the liner has the same slope to the back as the panel that I made. If not, it should be close enough. All in all, I might have spent $30 to make what Toyota wants to sell for a whole lot more.
I hope this makes sense to anyone that wants to remove the double decker and fill the space with something that looks almost factory.


 Linear Mode


