 04-09-2018, 04:27 PM
|
#16
|
 |
Senior Member
|
|
Join Date: Sep 2014
Location: San Diego, CA
Posts: 1,218
Real Name: Scott
|
|
|
Senior Member
Join Date: Sep 2014
Location: San Diego, CA
Posts: 1,218
Real Name: Scott
|
Quote:
Originally Posted by rickashay

Stoked to see the pics!
|
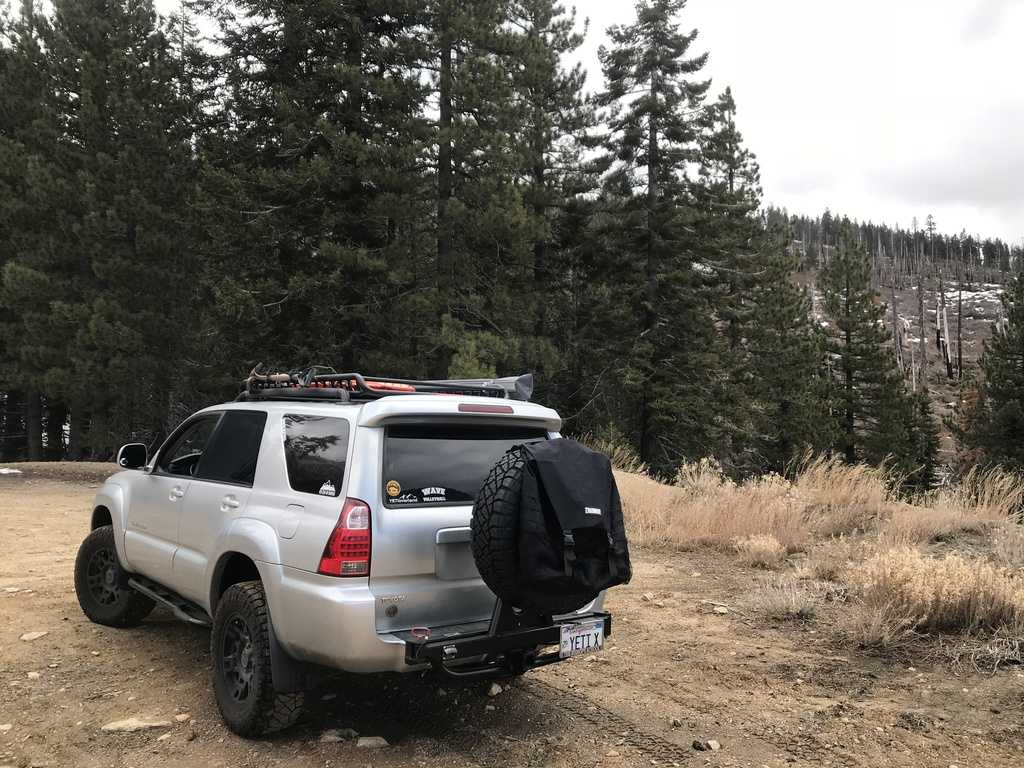
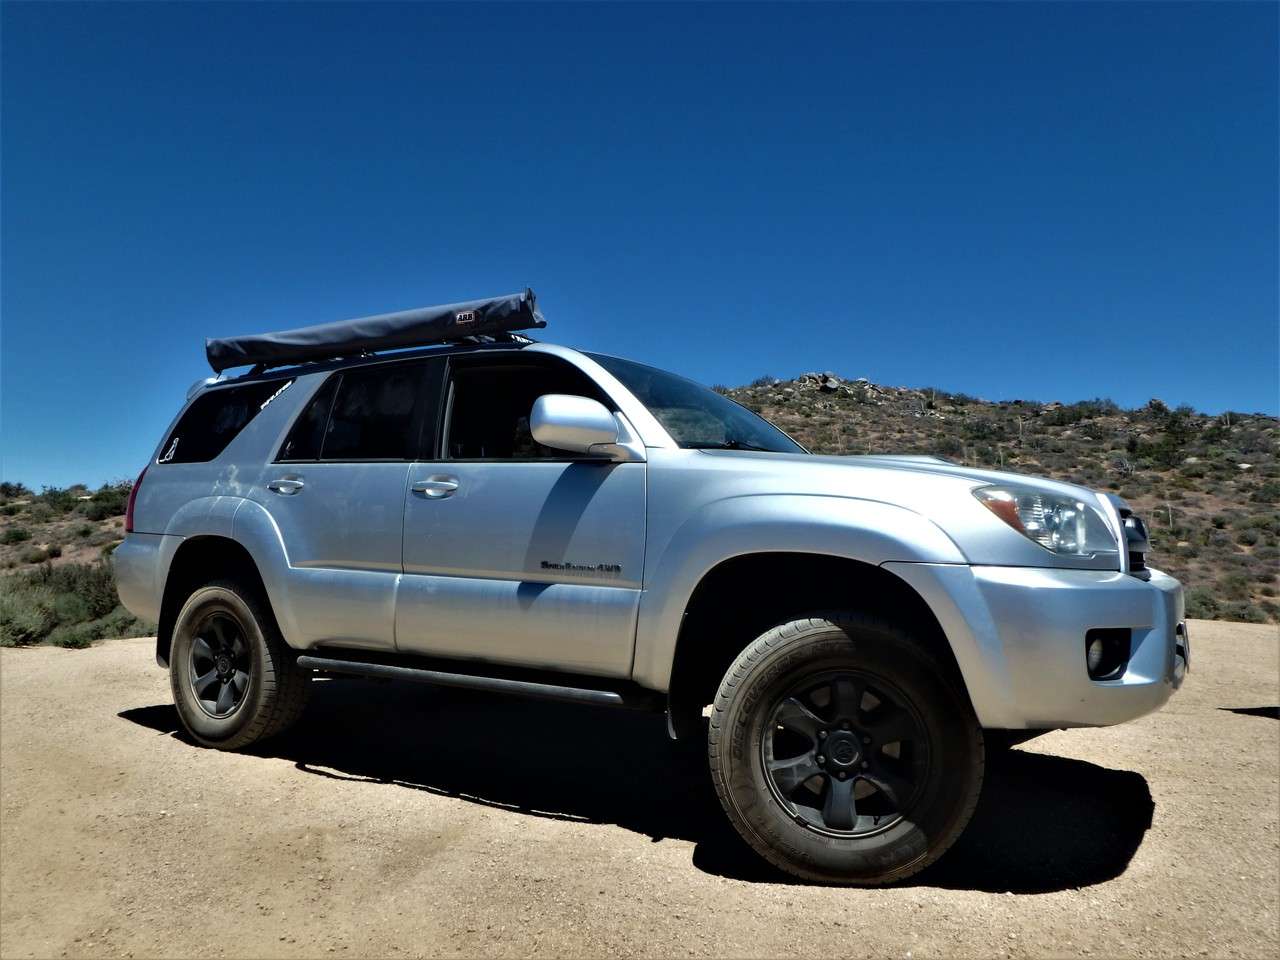
Just a quick teaser shot from close to the top of Sherman Pass. It was a great weekend with a lot of relaxing.
__________________
-Semper Fi-
2006 4Runner Sport Edition 4WD V6/Suspension/Armor/Lights/Wheels and tires/Drawers/Camping things/Surfboards/Rhodesian Ridgebacks . . .
BUILD AND ADVENTURE THREAD

|

|
 Reply With Quote Reply With Quote
|
|
04-10-2018, 04:18 PM
|
#17
|
|
Senior Member
|
|
Join Date: Sep 2014
Location: San Diego, CA
Posts: 1,218
Real Name: Scott
|
|
|
Senior Member
Join Date: Sep 2014
Location: San Diego, CA
Posts: 1,218
Real Name: Scott
|
Sliders and Awning
I did a ton of research and spoke with some knowledgeable people about armor. Just about everyone agreed that the most-important armor was a set of sliders. They not only protect the bottom of the rig from rocks, but also the doors from the side.
The next question was whether to go with bolt-on or weld-on. At first I was a bit concerned that bolt-on sliders would not be strong enough, but did not want to deal with weld-on sliders since I have not yet learned to weld so I would have to pay someone, and take the time, to get it done. After some research I was convinced that bolt-on sliders were more than adequate for anything but hardcore rockcrawling (which I have zero intention of doing).
The next, and last decision, was which brand to go with? The 4th Gen Armor Thread LINK was a huge help. (There's now a v.2 version). In the end, I went with White Knuckle Off Road sliders because they got great reviews and were available locally, saving me $150 in shipping costs. I elected to go with the DOM tubing since it was only $40 more and at that point, why not? I also have White Knuckle powder coat them for me. When I was talking with John, I also found out they give a military discount. Score!!! LINK
A few weeks later they were ready so I shot up to Apple Valley to pick them up and then back to my friend's house to install them. The driver's side was a bit of a pain in the ass to install because of the brake lines needing to be moved a bit and we had to grind the end of one of the u-bolts down a few mm to get it to fit. It took about an hour, maybe a little longer. (We should have had beer, in retrospect) The passenger side took about 20 minutes. The end results:
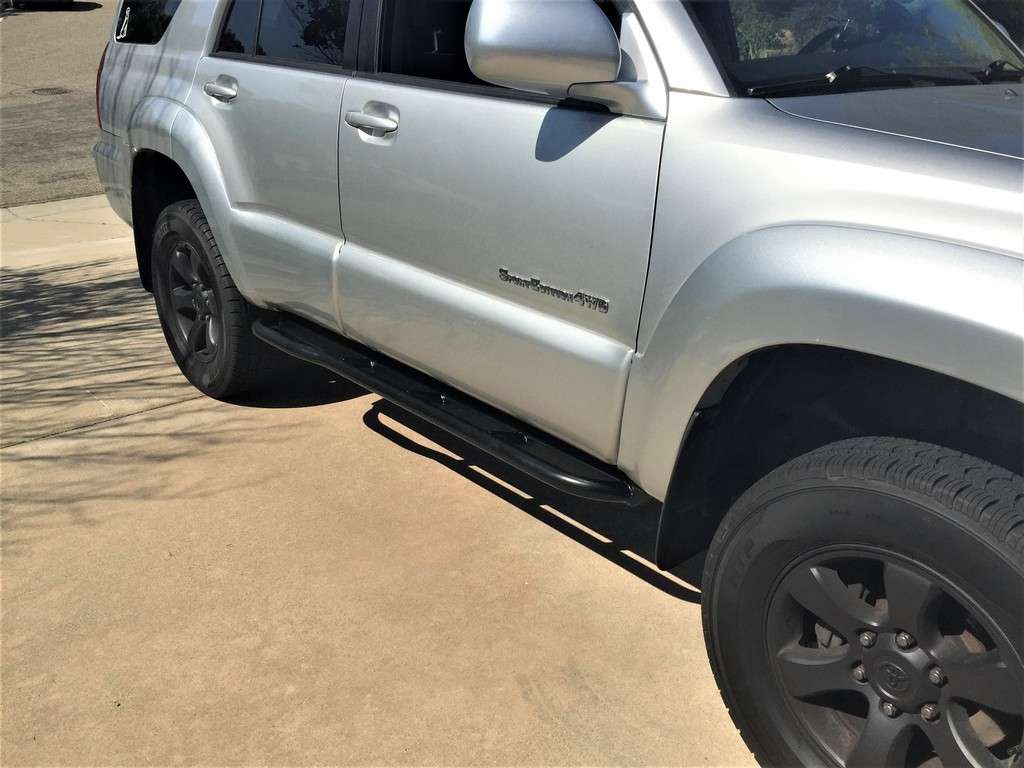
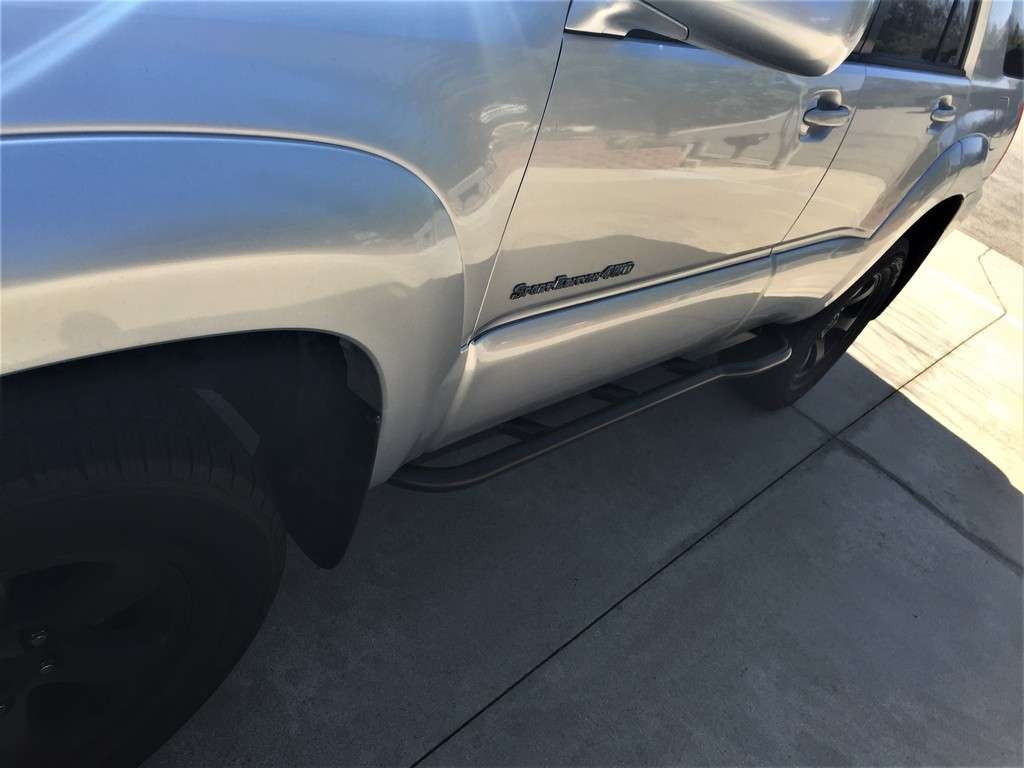
I later added some grip tape cut into ovals where people step on the sliders because they are slippery as F when they get wet. I am very, very happy with them and they have certainly done their job over the past year or so.
A few days later, I was looking at Craiglist as I do every morning and saw an ARB 2000 awning available for $125. I called and talked him down to $100 and went and picked it up at lunch. Score. I wish I could say there was some thought involved in choosing this awning over any other, but it was a simple case of me knowing I wanted an awning at some point and this one coming available locally for such a good deal. It has been really nice to have over the past year, especially last weekend when it poured all day Saturday. I just sat under the awning and drank beer and stayed dry. 
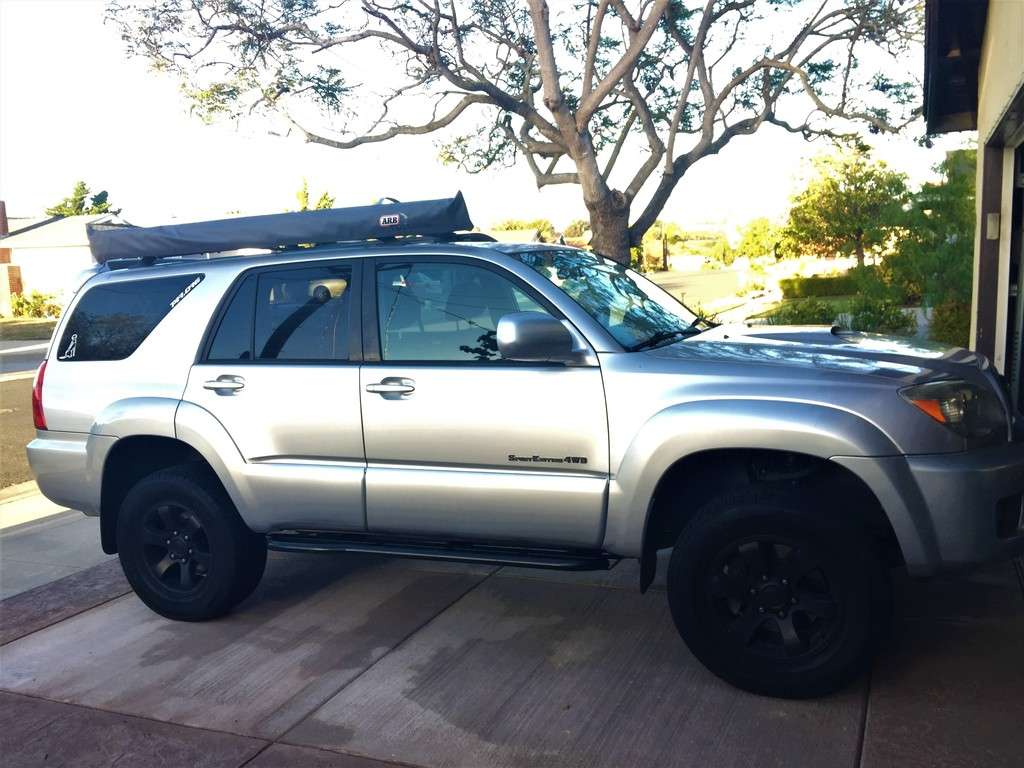
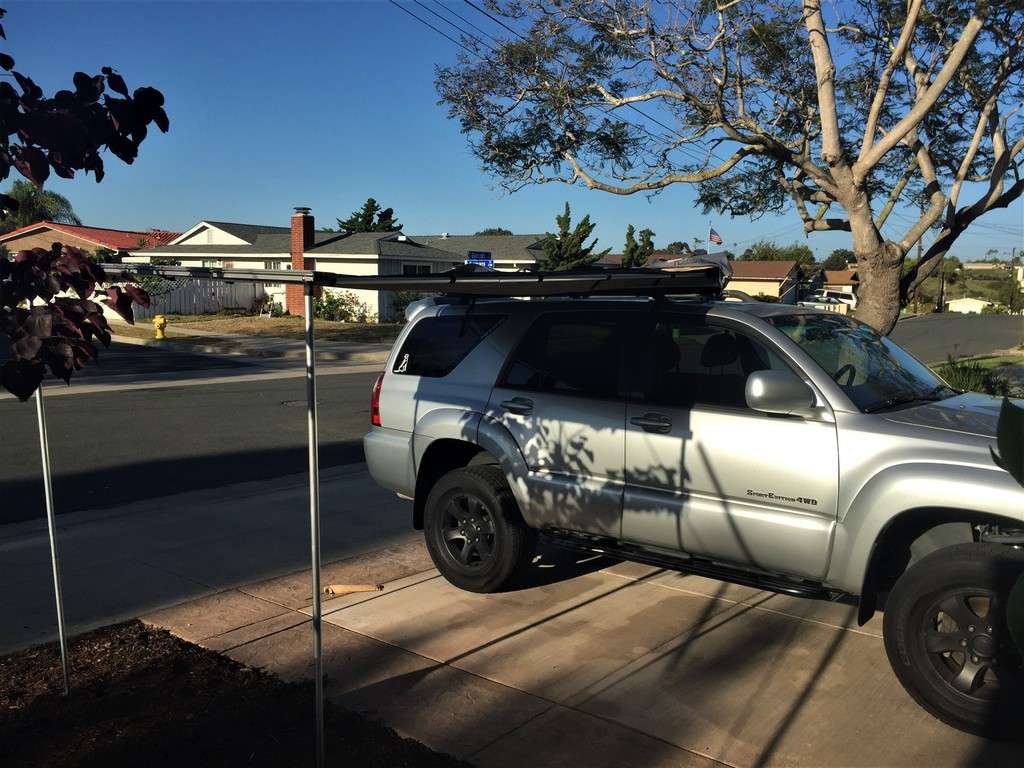
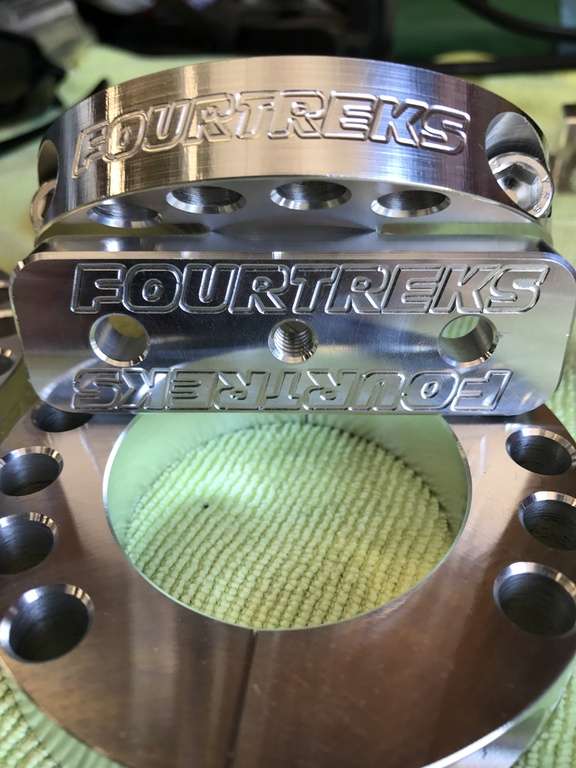
At first I installed it with ghetto mounts made from angle brackets and u-bolts. That was a bit sketchy to me and in my search for better brackets I came across Four Treks Precision Off-Road Products. Their brackets are machined from 6061-T6 billet aluminum and are works of art. While they're not cheap, they are incredibly high quality, made in USA, products. LINKY
The roof rack bars on the Sport Edition are 2" so I ordered up a set of their ARB awning mounts for 2" bars. Look how pretty they are!!
I went a bit overkill and ordered three mounts, although they only recommend two for the 2000 awning. Here's the awning mounted with the Four Treks mounts.
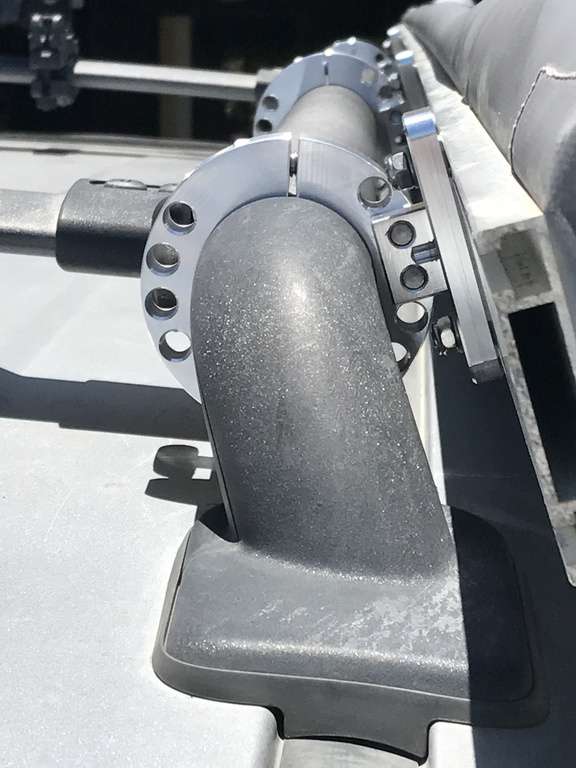
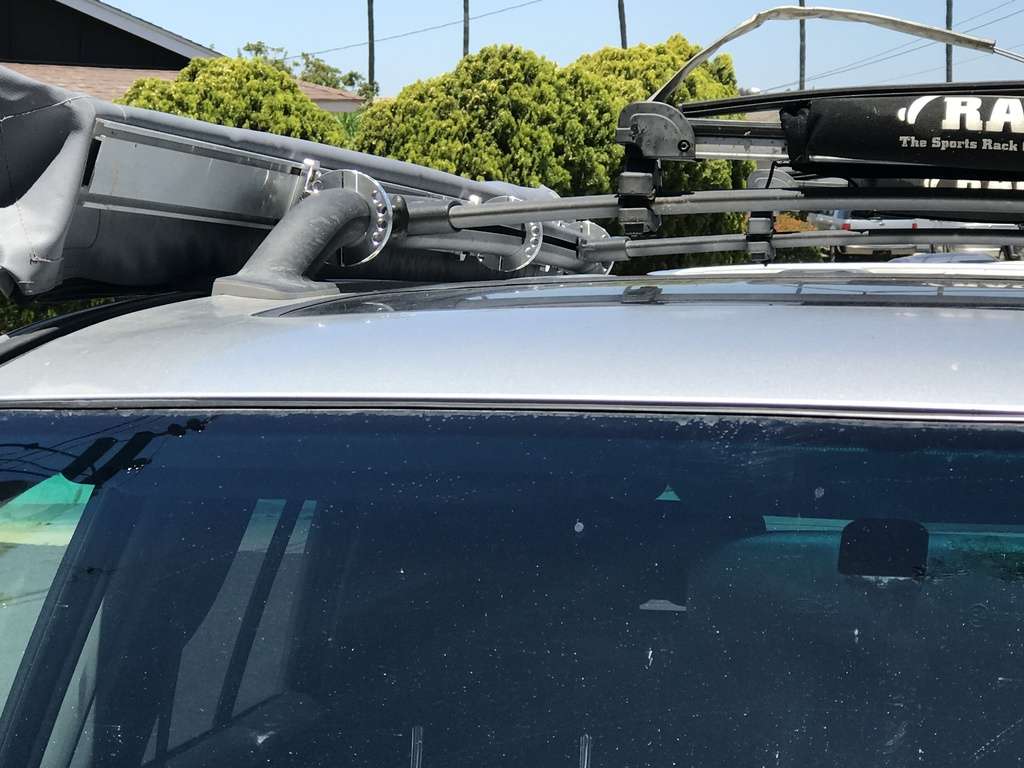
(These are for sale now since I had to go with a different size when I installed the Rola Rack.)
__________________
-Semper Fi-
2006 4Runner Sport Edition 4WD V6/Suspension/Armor/Lights/Wheels and tires/Drawers/Camping things/Surfboards/Rhodesian Ridgebacks . . .
BUILD AND ADVENTURE THREAD
Last edited by YetiX; 04-10-2018 at 04:21 PM.
|
|
|
Reply With Quote
|
|
04-11-2018, 06:52 PM
|
#18
|
|
Senior Member
|
|
Join Date: Sep 2014
Location: San Diego, CA
Posts: 1,218
Real Name: Scott
|
|
|
Senior Member
Join Date: Sep 2014
Location: San Diego, CA
Posts: 1,218
Real Name: Scott
|
Big Bear 5/20/17
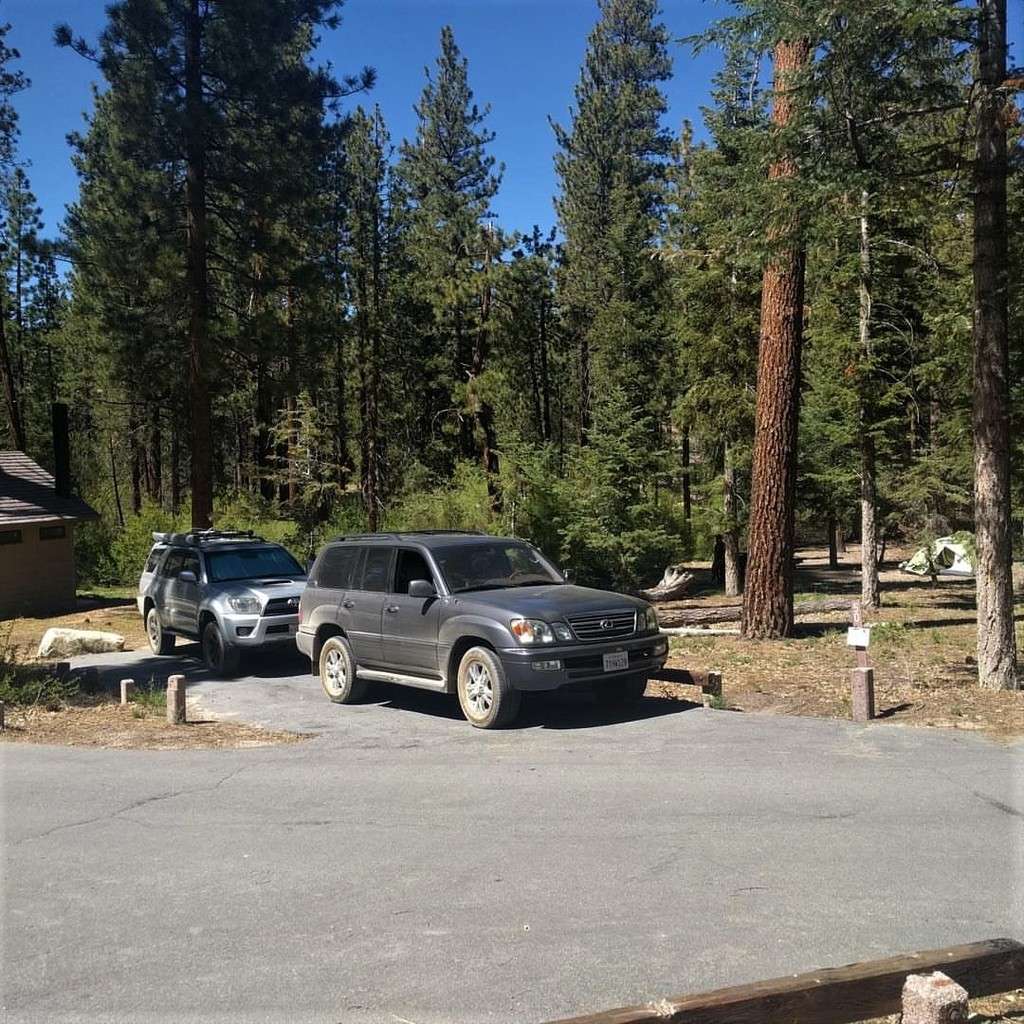
So, remember Devin from my first off-road trip? He who was driving his dad's Jeep Wrangler. Well that trip reminded Devin how much he enjoyed off-roading, so after a discussion with his household CFO, a decision was made to purchase a LX450 to replace his Excursion tow vehicle. (He races BMW's) Once the Lexus Land Cruiser had been procured, we naturally had to go on an overnighter to test it out. The weather was perfect up in the mountains at Big Bear, so the plan was set in stone. Or so we thought . . .
A few days before we were going to go, I took my 4Runner in to Miles's shop to have him replace the water pump which was seeping. A couple of hours later I got the call . . . "Dude, are you sitting down?" Turns out, I had a head gasket leak. A bit of quick research and I found out I had all the classic symptoms: rough idle on cold start, waterfall sound behind the dash on cold start up, and slowly disappearing coolant. The only thing missing was a Check Engine Light.
Well, I wasn't missing out on an overnight trip and the leak was early, so we threw some K Seal in it and off I went with Devin and his wife . . .
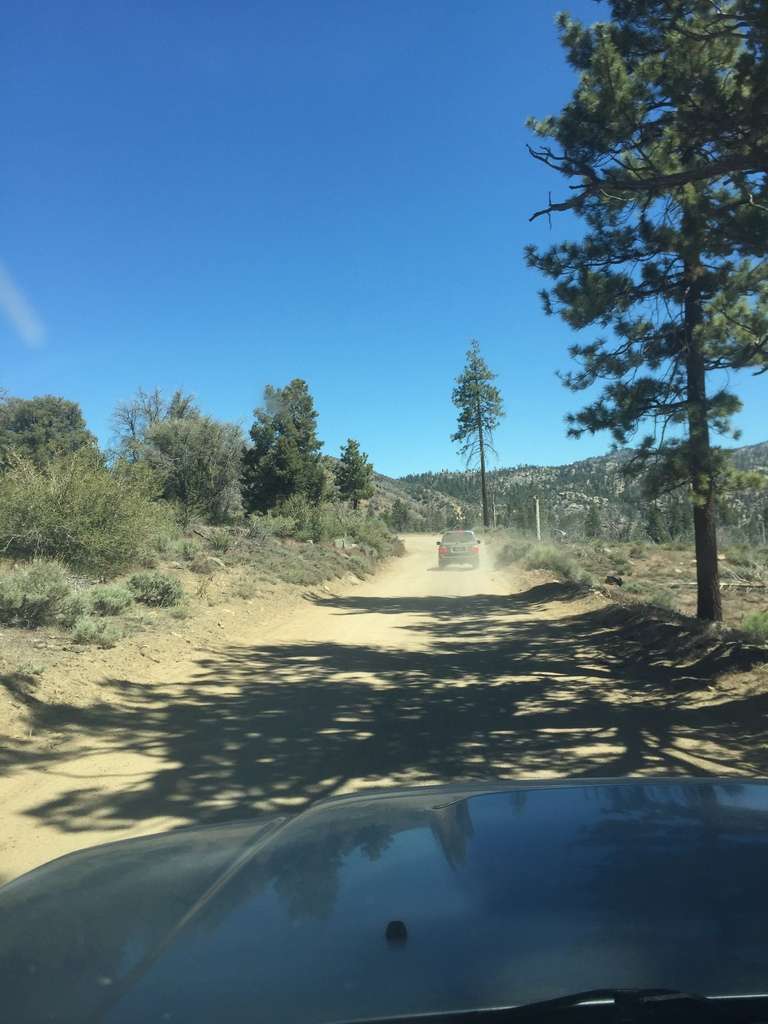
We met Saturday morning after breakfast and headed up the 15 towards Apple Valley. The plan was to take a long dirt road/trail, Coxey Road, from Hesperia to our campground in Big Bear.
At first it was a pretty easy, if rough, dirt road
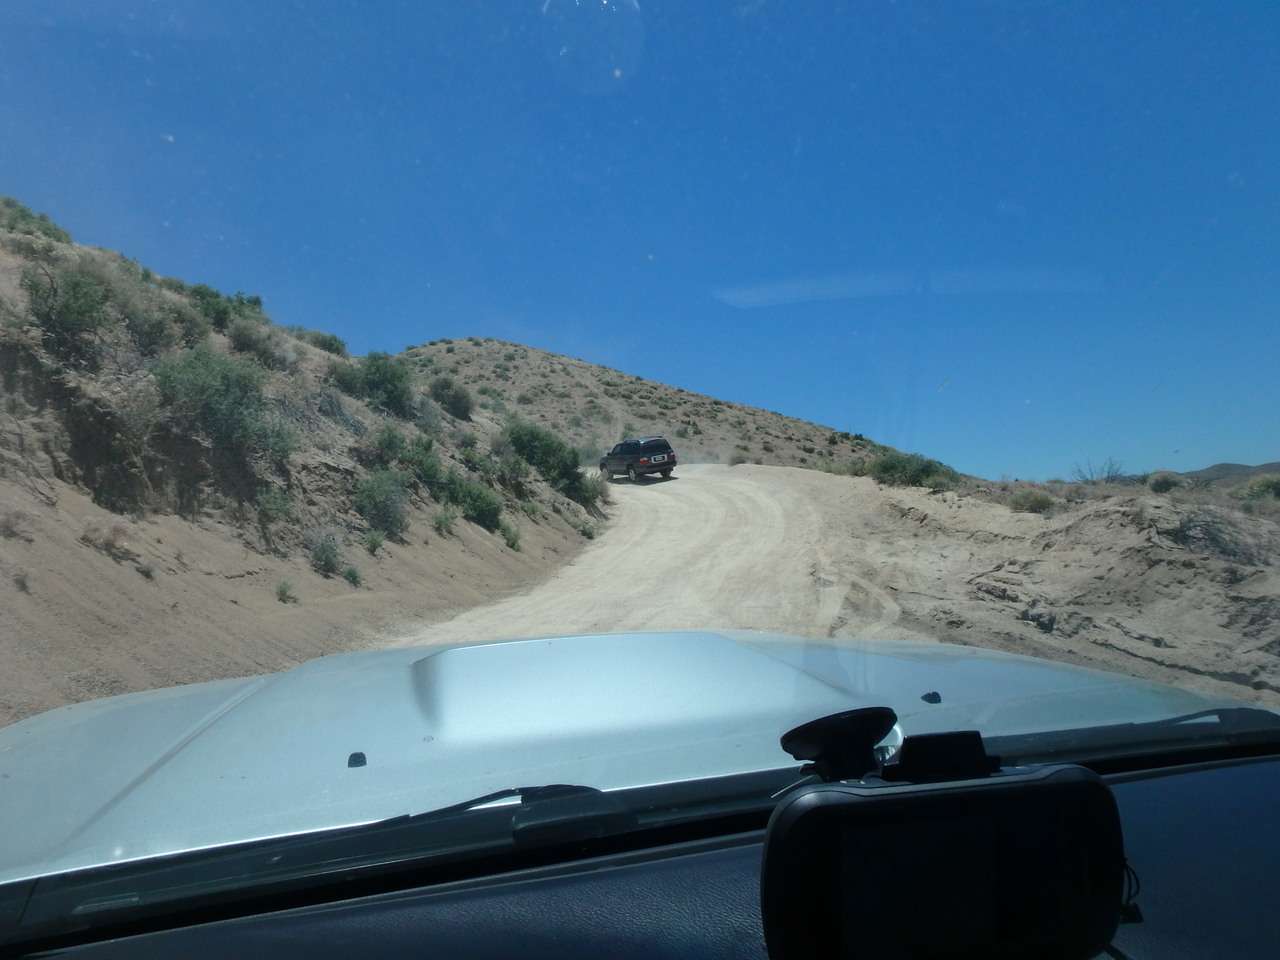
We wound up higher and higher . . .
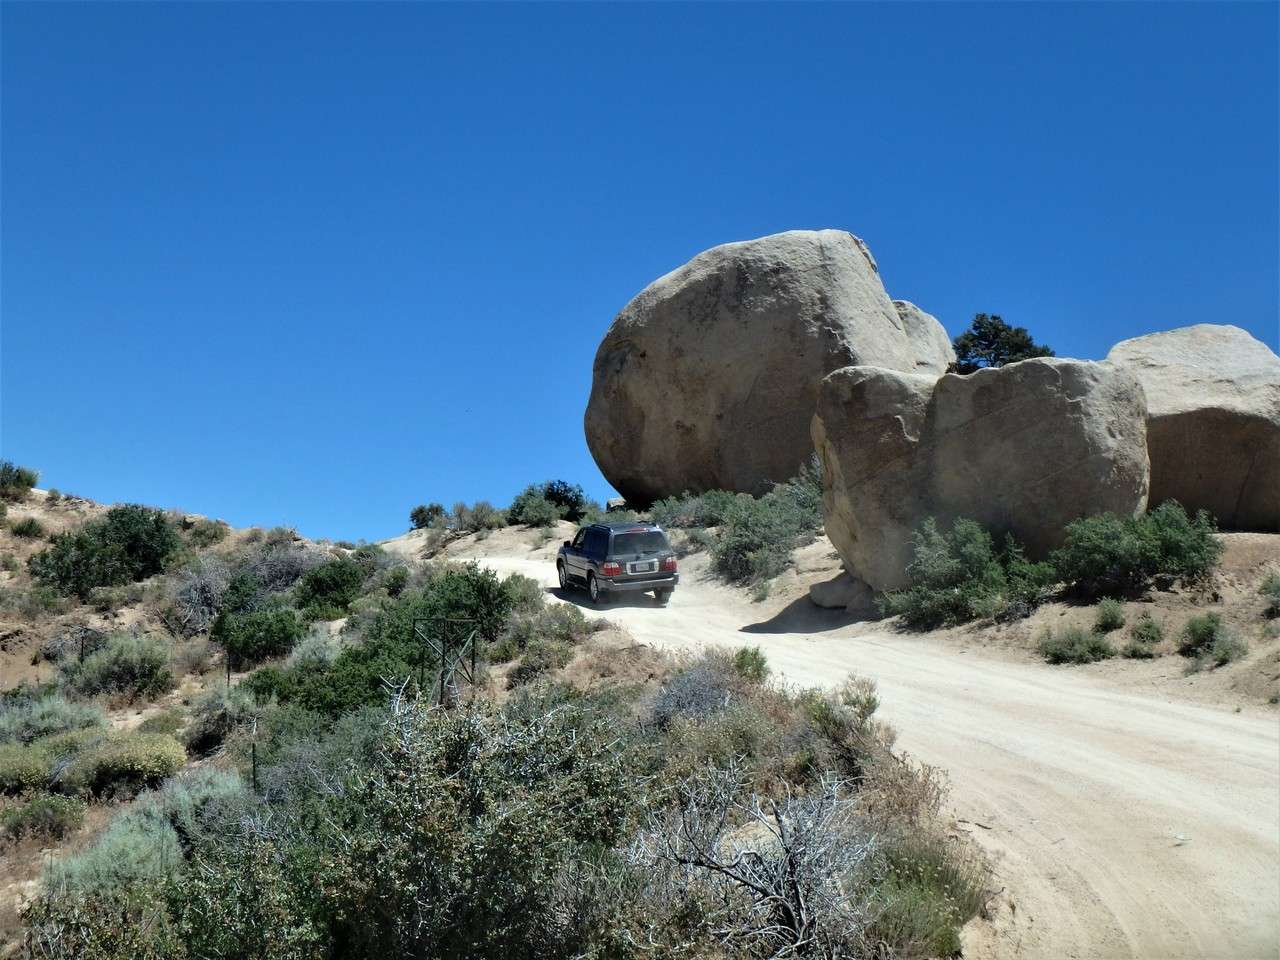
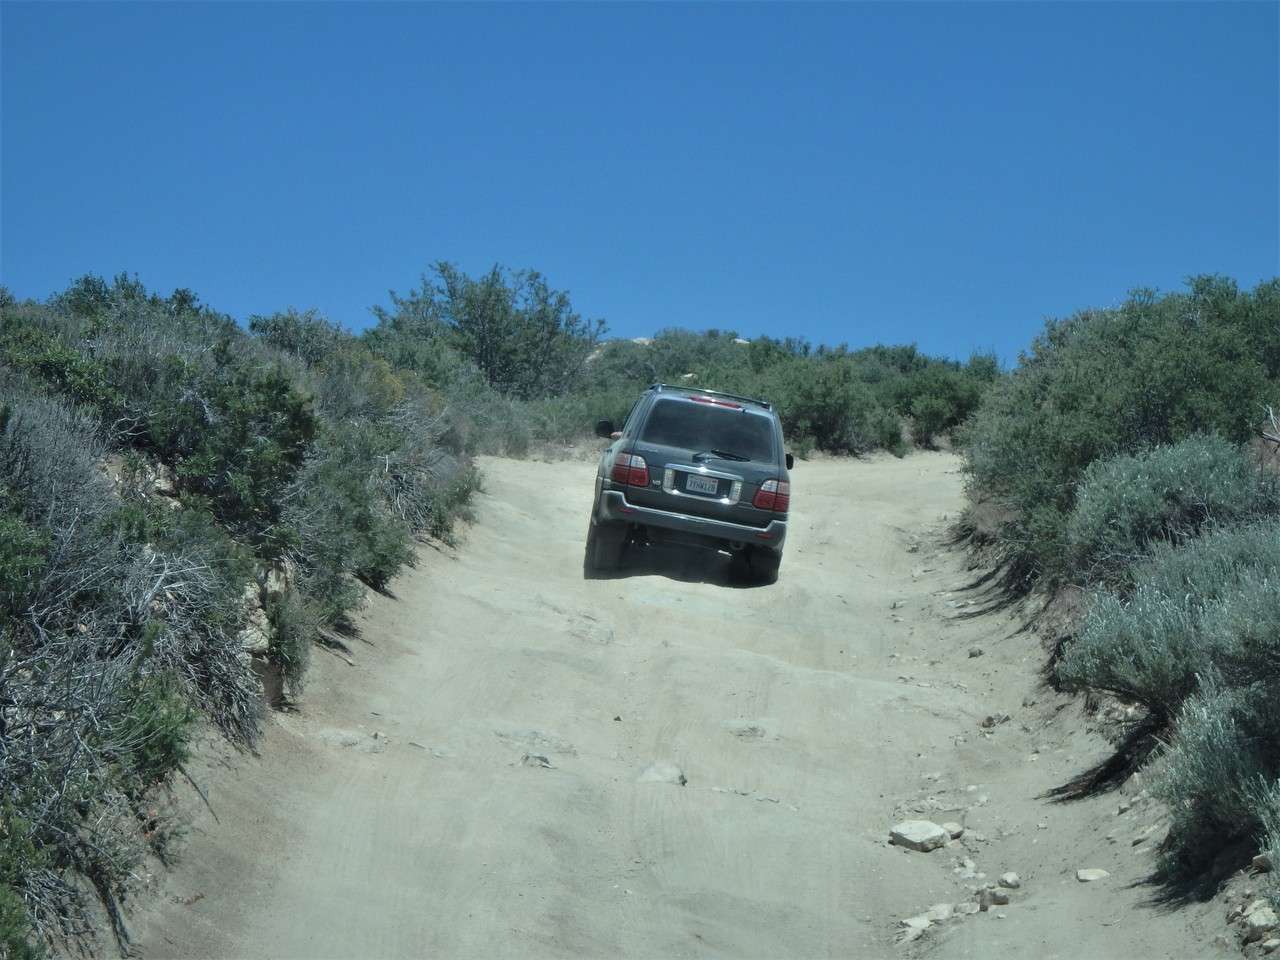
Where things got a little steeper . . .
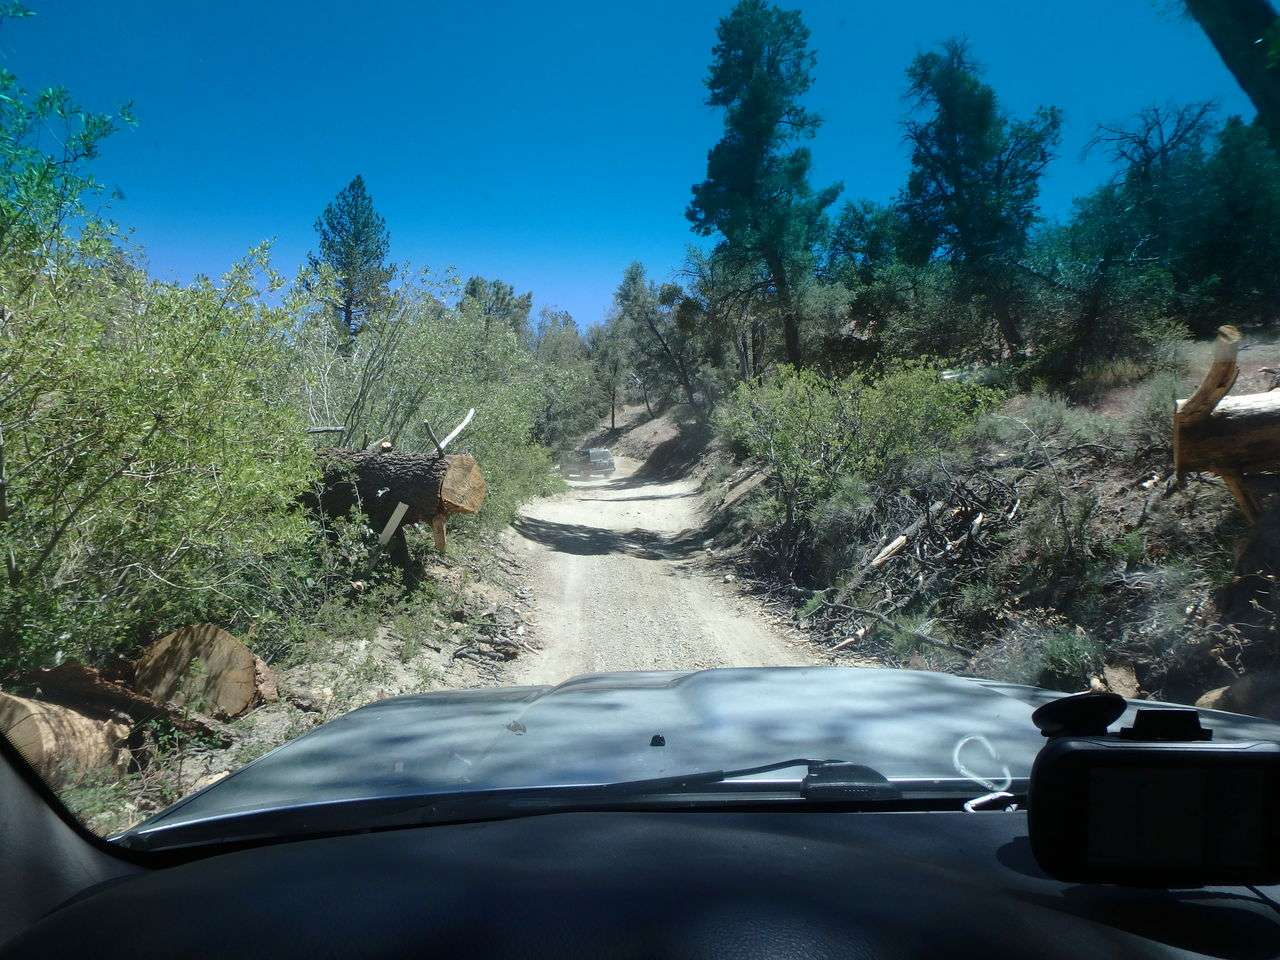
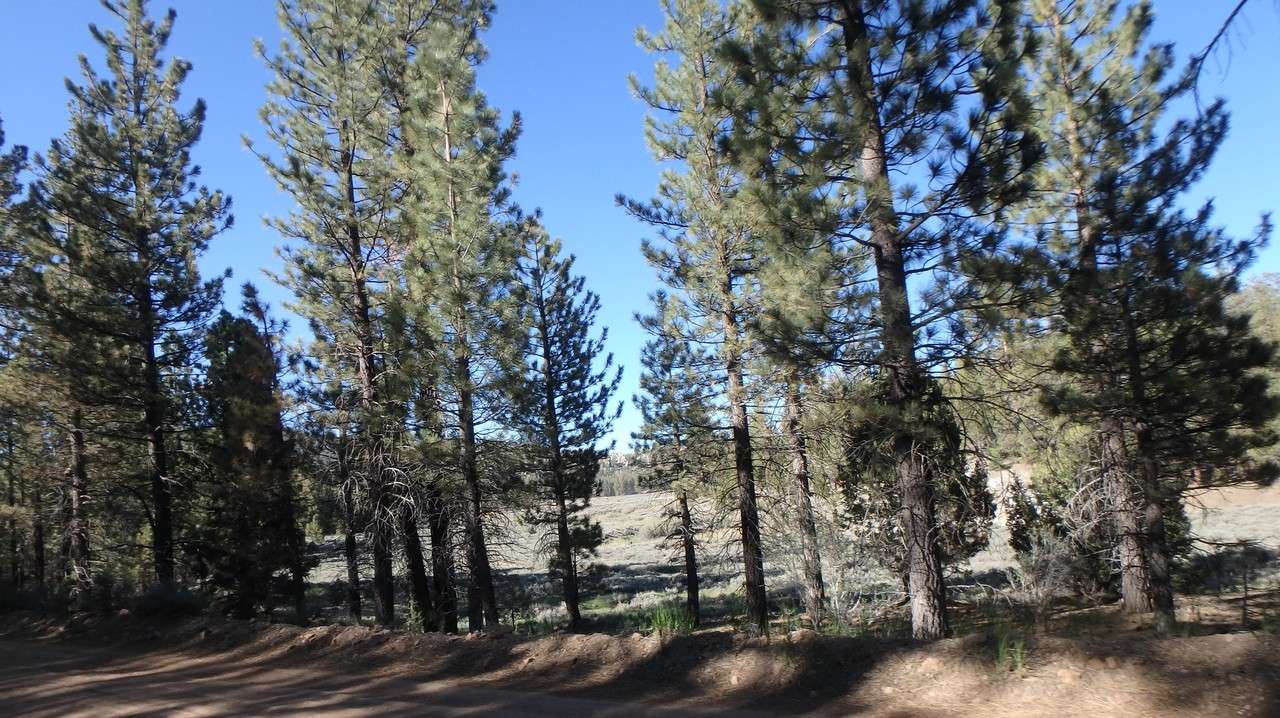
And eventually made it up into the forests . . .
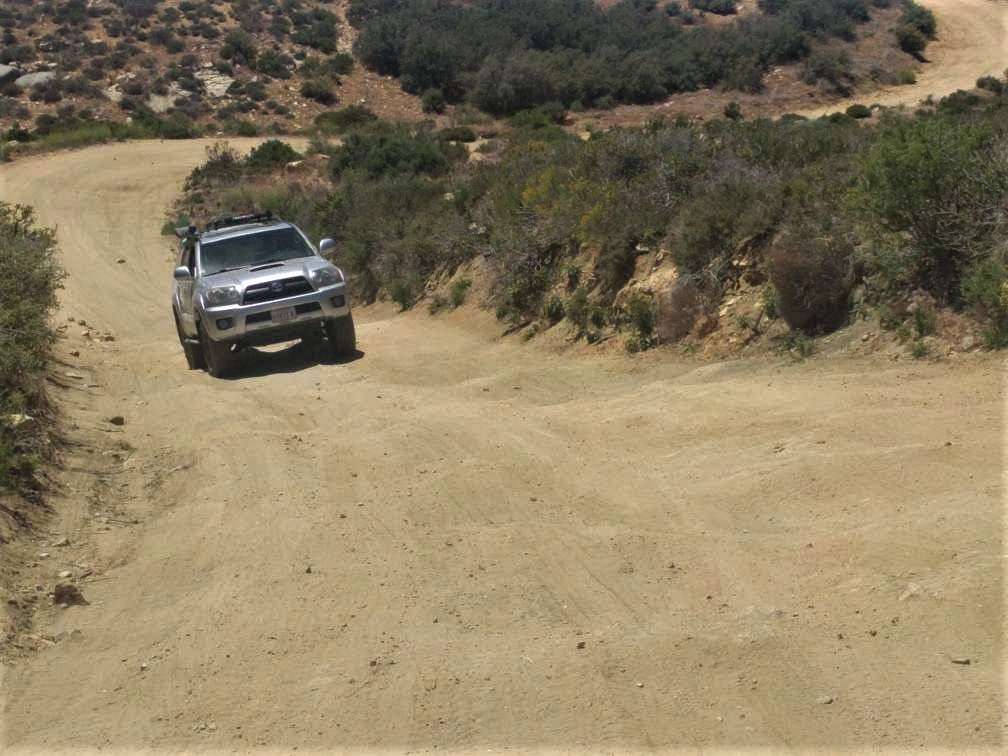
Obligatory shot to show off the new sliders and awning:
And then to camp at Hanna Flat campground. I wanted to find a dispersed camping spot on BLM land, but Devin's wife really wanted a proper campground with a real bathroom. Well, you know how that decisions ended up . . . 
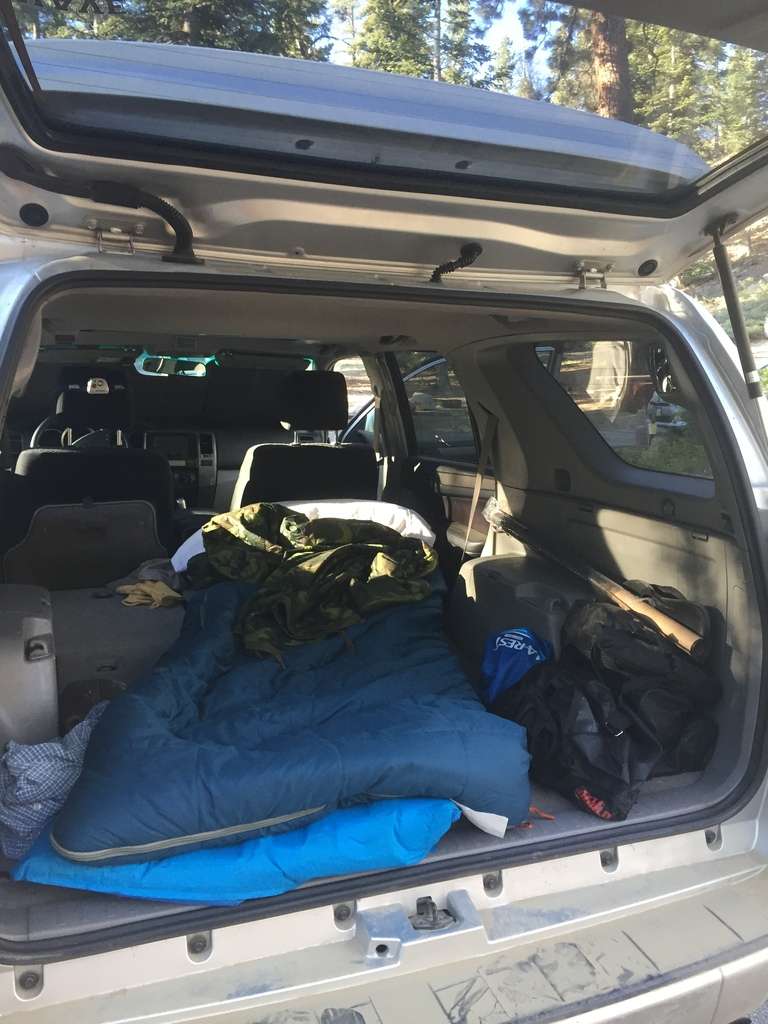
And my home for the night
After checking into our campsite and dropping off some stuff, we went to go explore some of the better trails and see how the "Land Cruiser" did. Turns out, it did very, very well.
It's hard to see from the (poor quality) photo, but this actually a really rutted hill and Devin's wheels are fully articulated:
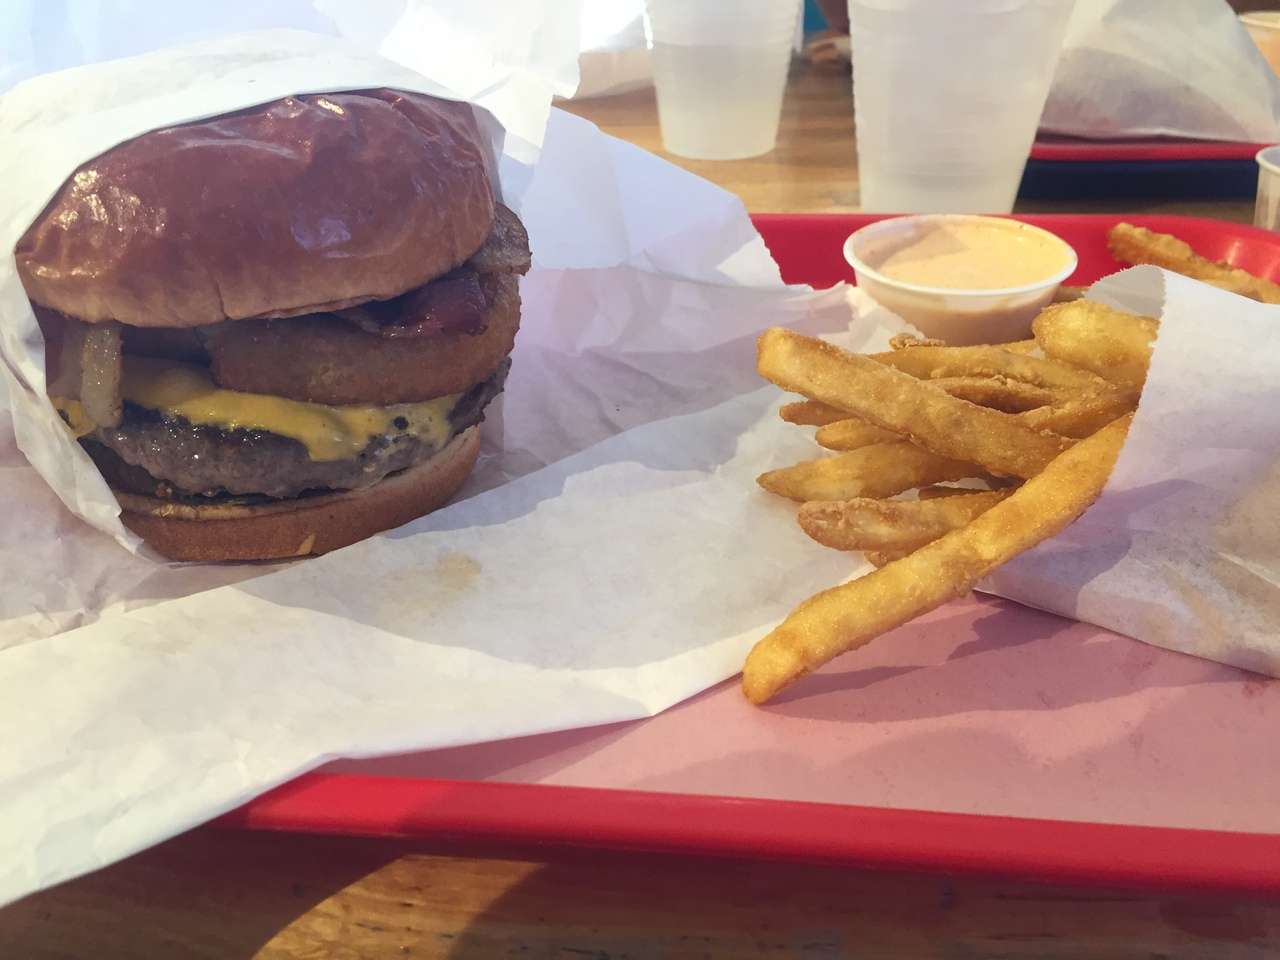
We found our way via back trails over to Big Bear Lake for an early dinner:
Big Bear Pro Tip: If you like burgers and are in Big Bear, you must go to Get The Burger. It's a little shack on the main drag that serves up amazing burgers, fries and onion rings. The fry sauce is amazing!
After dinner we went back to camp and chilled around a campfire, BS'd and had some great beers.
The next morning I had to get back home to take my daughter to a volleyball thing, so I bailed right after breakfast and took the main highway back to San Diego.
And then dropped my 4Runner off on Monday to have the head gasket replaced along with some other stuff . . .
__________________
-Semper Fi-
2006 4Runner Sport Edition 4WD V6/Suspension/Armor/Lights/Wheels and tires/Drawers/Camping things/Surfboards/Rhodesian Ridgebacks . . .
BUILD AND ADVENTURE THREAD
Last edited by YetiX; 06-06-2018 at 04:02 PM.
|
|
|
Reply With Quote
|
|
04-12-2018, 07:10 PM
|
#19
|
|
Junior Member
|
|
Join Date: Apr 2018
Location: Denver, CO
Posts: 15
Real Name: Josh
|
|
|
Junior Member
Join Date: Apr 2018
Location: Denver, CO
Posts: 15
Real Name: Josh
|
How are you liking those Baja Design fogs? Think they better than just HIDs in there for the price?
|
|
|
Reply With Quote
|
|
04-12-2018, 07:35 PM
|
#20
|
|
Senior Member
|
|
Join Date: Sep 2014
Location: San Diego, CA
Posts: 1,218
Real Name: Scott
|
|
|
Senior Member
Join Date: Sep 2014
Location: San Diego, CA
Posts: 1,218
Real Name: Scott
|
Quote:
Originally Posted by jdm11
How are you liking those Baja Design fogs? Think they better than just HIDs in there for the price?
|
The Baja Desgins fog lights are, in my opinion, much better as fog lights than HID's. Primarily, they're a lot tougher waterproof and fogs get submerged on even the most basic stream crossing.
Baja Designs makes three levels of Squadron lights, which are what I have. They start with the Sport, then Pro, then Race. The Race lights are insanely bright and I couldn't justify those for fog lights. I went with the Pros and they are very, very bright. I wouldn't run them on the street unless there were no other cars around. They're really an off-road light. One of the guys at BD has a 4Runner and he runs the Sports in his fogs. He keeps them on all the time and has never had any issues. (He probably has them aimed low too.)
I'll be doing a write-up soon of the install since there is no kit actually made for the 4th Gen 4Runner.
Check back soon . . .
__________________
-Semper Fi-
2006 4Runner Sport Edition 4WD V6/Suspension/Armor/Lights/Wheels and tires/Drawers/Camping things/Surfboards/Rhodesian Ridgebacks . . .
BUILD AND ADVENTURE THREAD
|
|
|
Reply With Quote
|
|
04-13-2018, 12:14 AM
|
#21
|
|
Junior Member
|
|
Join Date: Apr 2018
Location: Denver, CO
Posts: 15
Real Name: Josh
|
|
|
Junior Member
Join Date: Apr 2018
Location: Denver, CO
Posts: 15
Real Name: Josh
|
Quote:
Originally Posted by YetiX
The Baja Desgins fog lights are, in my opinion, much better as fog lights than HID's. Primarily, they're a lot tougher waterproof and fogs get submerged on even the most basic stream crossing.
Baja Designs makes three levels of Squadron lights, which are what I have. They start with the Sport, then Pro, then Race. The Race lights are insanely bright and I couldn't justify those for fog lights. I went with the Pros and they are very, very bright. I wouldn't run them on the street unless there were no other cars around. They're really an off-road light. One of the guys at BD has a 4Runner and he runs the Sports in his fogs. He keeps them on all the time and has never had any issues. (He probably has them aimed low too.)
I'll be doing a write-up soon of the install since there is no kit actually made for the 4th Gen 4Runner.
Check back soon . . . |
Awesome, thanks for the info. I'll have to start looking for a good deal on a pair.
Looking forward to that write up too
|
|
|
Reply With Quote
|
|
04-13-2018, 04:19 PM
|
#22
|
|
Senior Member
|
|
Join Date: Sep 2014
Location: San Diego, CA
Posts: 1,218
Real Name: Scott
|
|
|
Senior Member
Join Date: Sep 2014
Location: San Diego, CA
Posts: 1,218
Real Name: Scott
|
Head Gasket Replacement
So, as I mentioned before, it turned out my 4Runner had a head gasket leak. After I found out about my leaking gasket, I did a ton of research on the subject, starting with the ***V6 Head Gasket Action Request*** thread here on T4R. I also contacted a few people I know who work on Toyotas and lastly a work contact who is pretty high up with Toyota USA.
From my research, I have learned that the head gaskets on the 4.0 Liter V6 engines were re-designed and that implementation of the new gaskets appears to have started with December 2005 production. Of course, mine was built in November of 2005. 
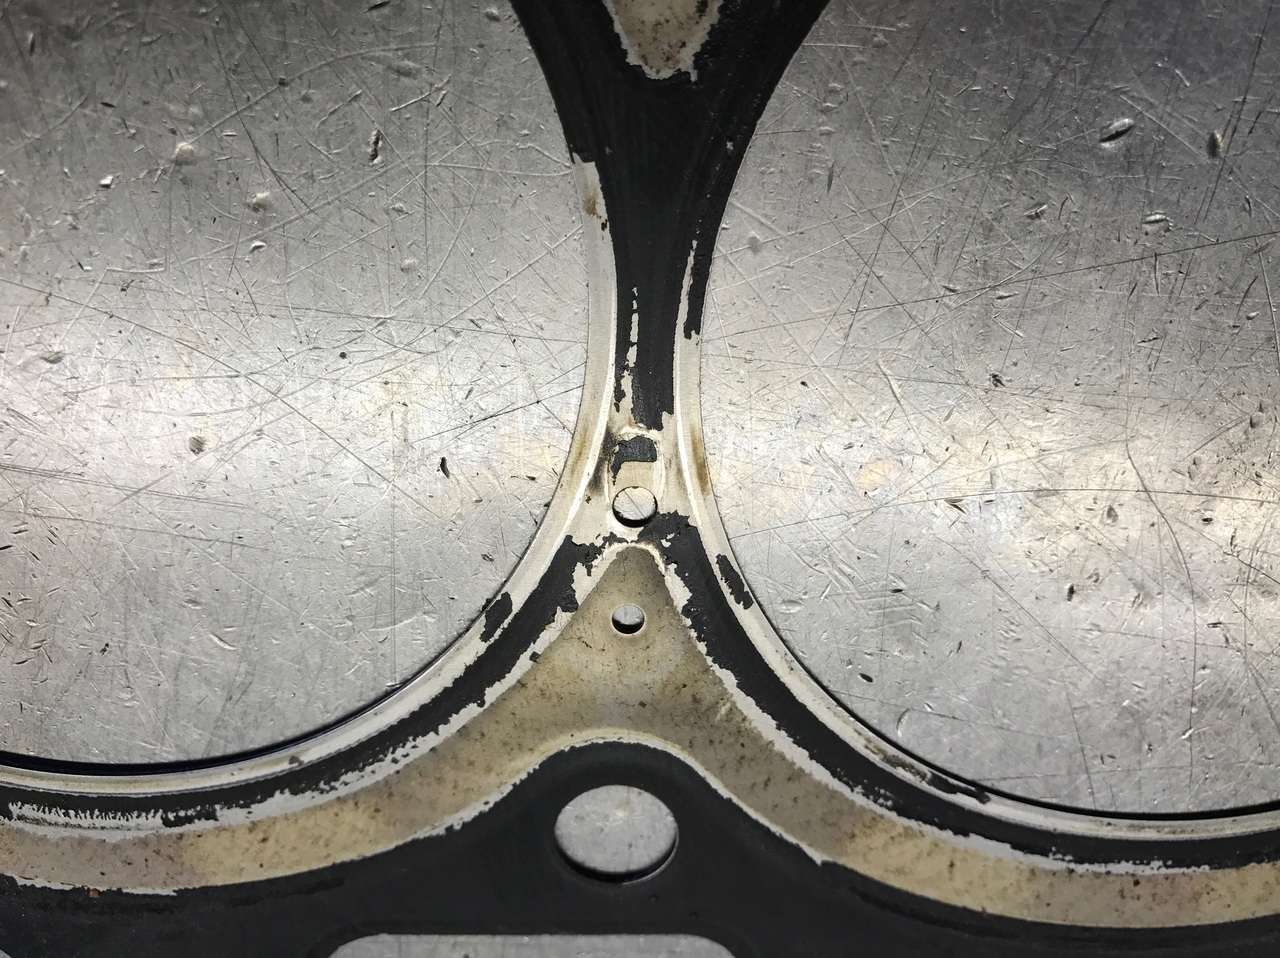
The most common location for the leak is between cylinders 4 and 6. No one I have spoken with has been able to come up with a reason why that location is so prevalent versus any other location.
Symptoms - Rough idle on cold start-up. Went away after about 30 seconds.
- "Waterfall sound" on cold start. It sounded like someone turned on a water hose behind the dash.
- Slowly dropping coolant level.
- As it gets worse, you'll get a CEL with a P0306 code (most common code).
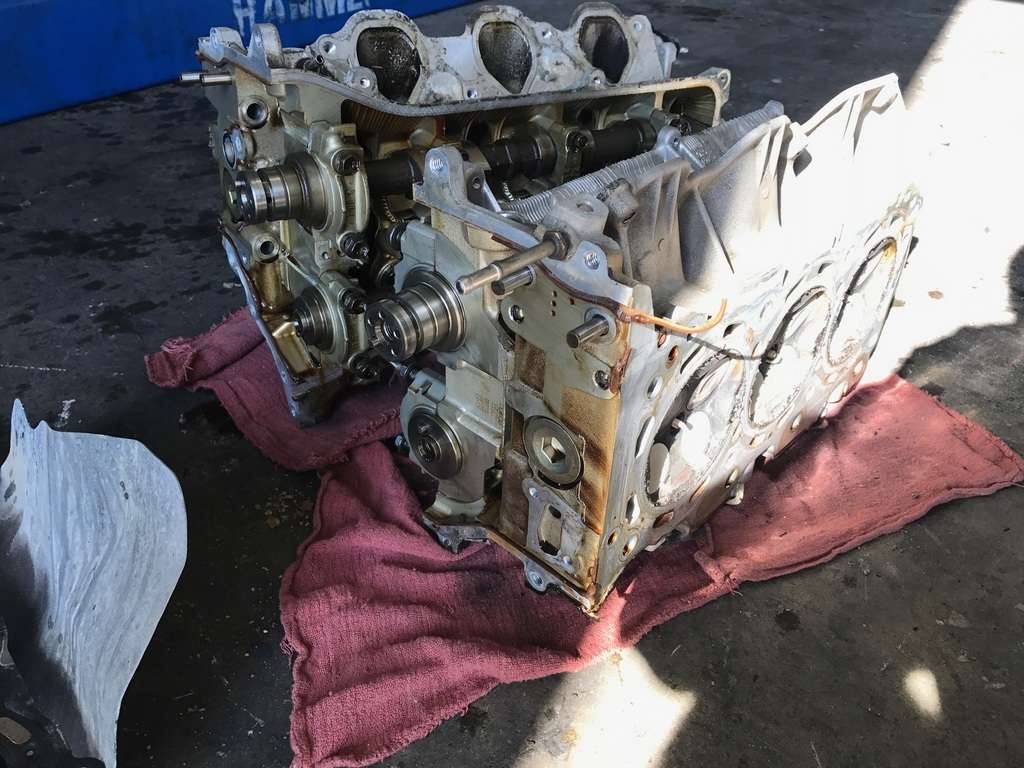
So, after my trip to Big Bear it was time to have Miles replace the head gaskets. We decided to have the heads cleaned and the valves adjusted, to replace the water pump (it had a weep anyways), and basically everything that could be replaced on the front of the engine. Just for good measure, because it had been repaired once before, we decided to replace the radiator too. Lastly, since it was going to be down for a few days, I asked Miles to cut the exhaust at the resonator and turn it to exhaust to the right behind the wheel so that I can drive around with the rear window down when I have the pups in the back.
The machine shop said the heads were straight with no warping at all, so they were just cleaned up and the valves done. Phew!!
A week and about $3,500 later and I had my truck back.
So onto the pictures:
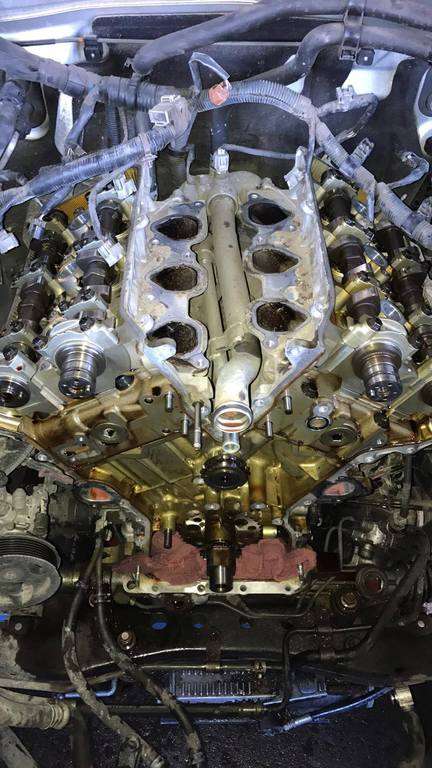
The engine with the heads removed
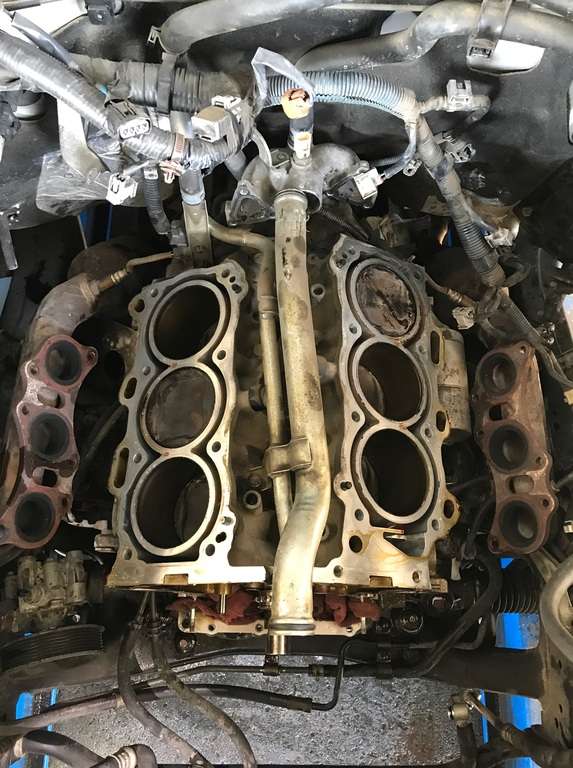
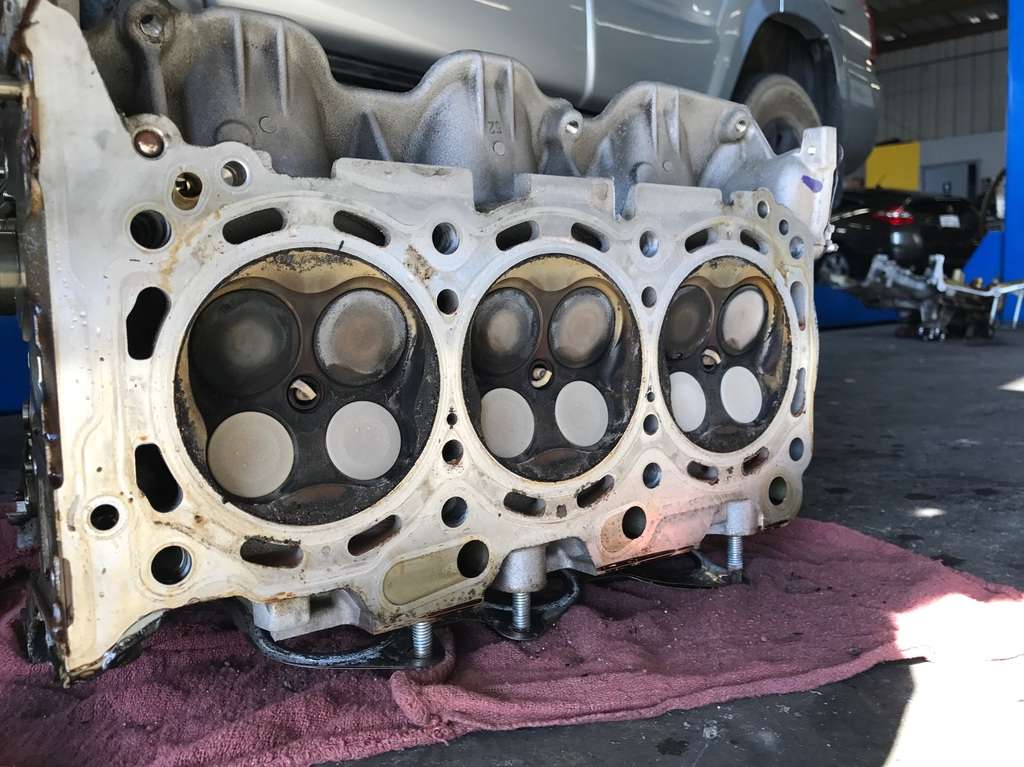
The heads

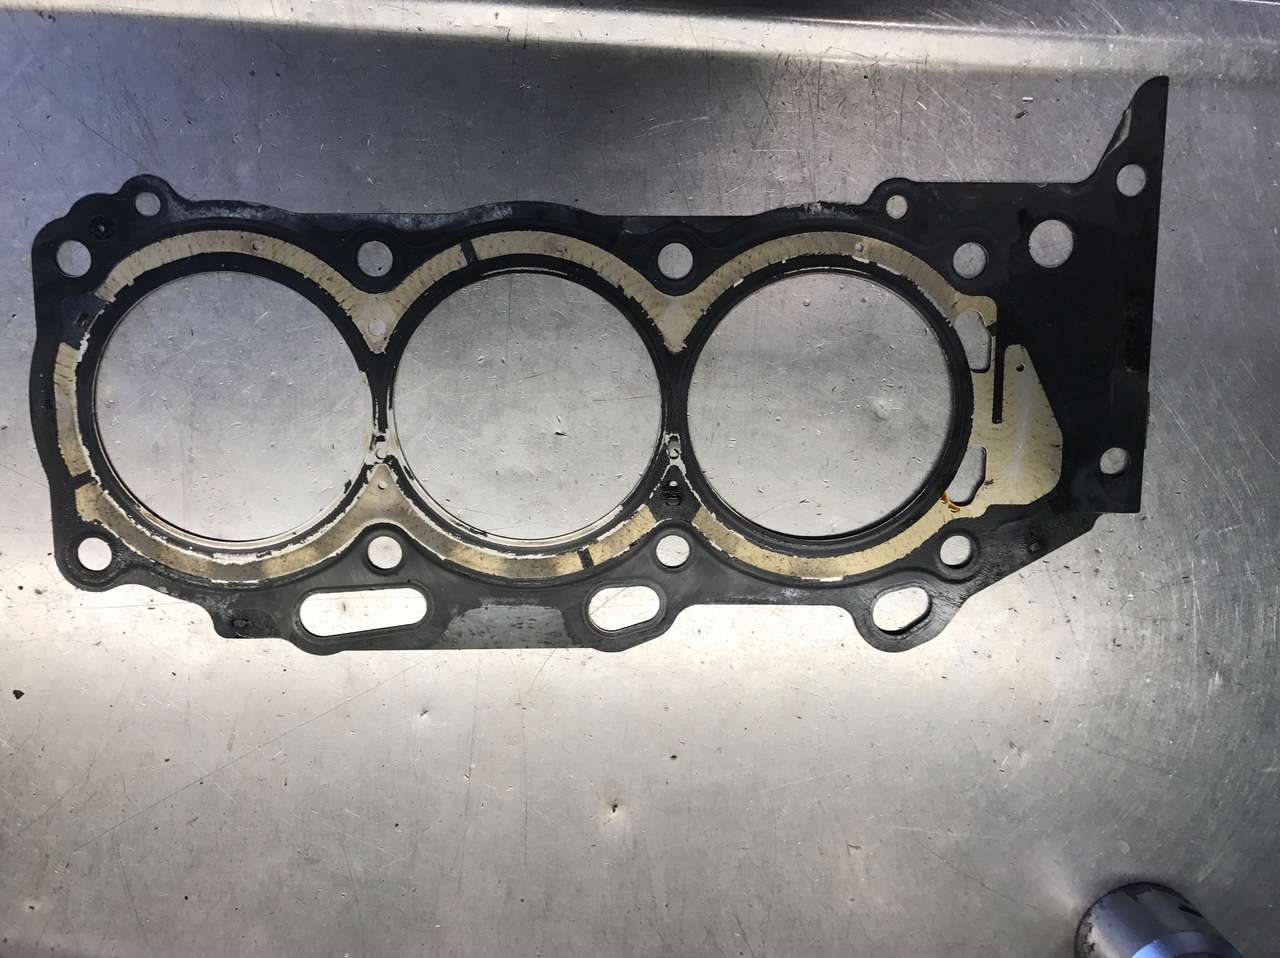
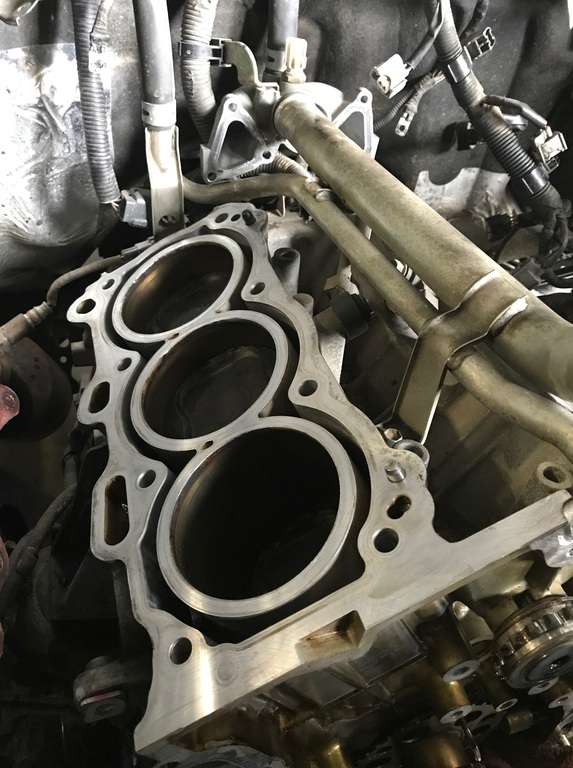
The old gaskets. You can clearly see where the black sealing material is gone from around one of the coolant jackets.

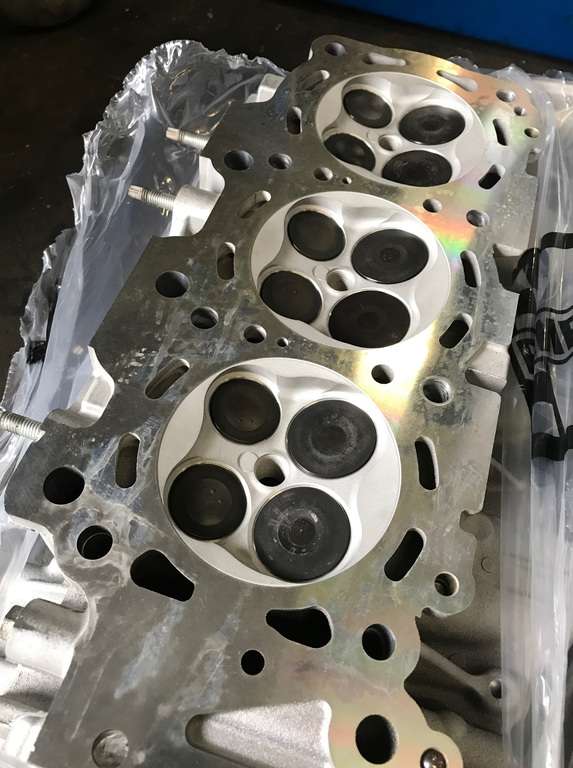
The heads after their spa day at the machine shop
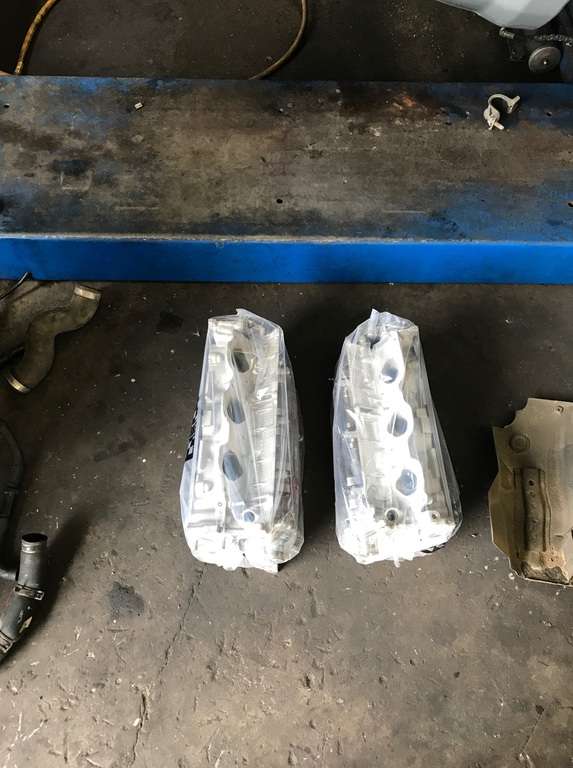
So clean and pretty!!
And the block all cleaned up
And then reassembly
After getting everything done, my 4Runner ran much more quietly with almost no "tapping" from the valvetrain. It had a slightly rough idle for the first few thousand miles (we think it just needed to break back in) but now runs perfectly with zero coolant leaks or issues.
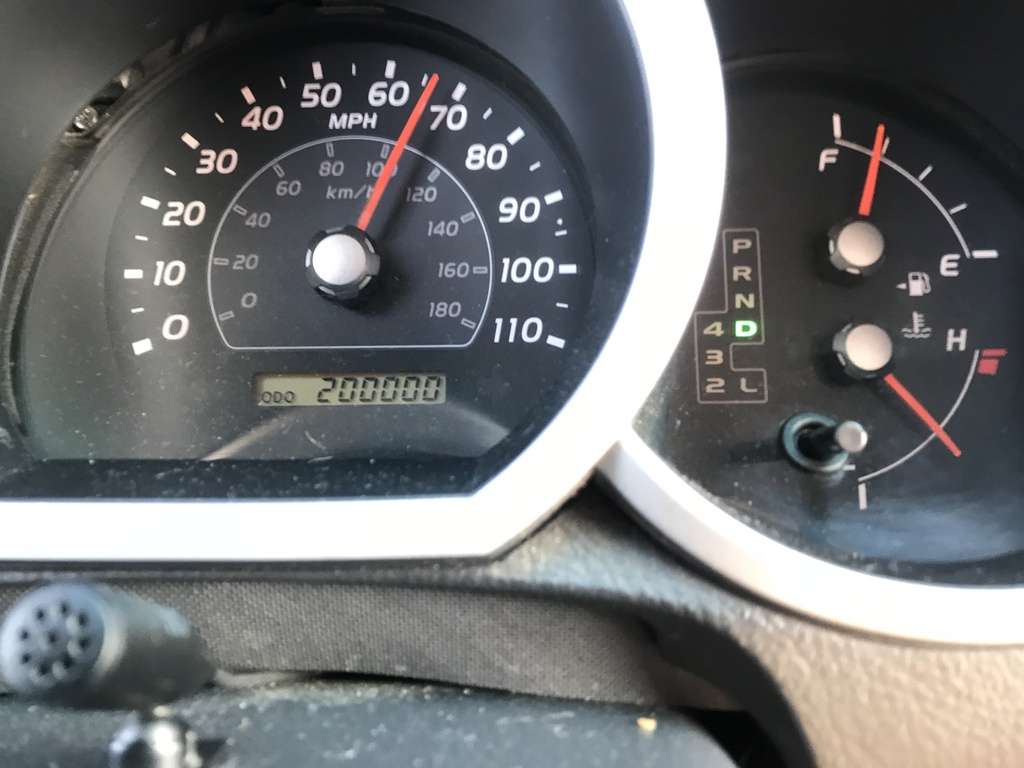
My hope is that with all the work we did, my 4Runner should be good for another 2-300,000 miles. In fact, it'll hit 200,000 miles later this month! 
** Up next, building a cargo deck with tool drawers . .
__________________
-Semper Fi-
2006 4Runner Sport Edition 4WD V6/Suspension/Armor/Lights/Wheels and tires/Drawers/Camping things/Surfboards/Rhodesian Ridgebacks . . .
BUILD AND ADVENTURE THREAD
|
|
|
Reply With Quote
|
|
04-14-2018, 09:32 AM
|
#23
|
 |
Senior Member
|
|
Join Date: Jul 2012
Location: Iowa
Posts: 3,146
|
|
|
Senior Member
Join Date: Jul 2012
Location: Iowa
Posts: 3,146
|
Awesome to see the transformation of your vehicle. Even cooler to see you still getting out on the trails just on 4 wheels instead of 2. Excited about your white knuckles, as mine have been sitting in the garage all winter staring at me.
Can I what cargo/drawer system you will be going with?
Keep the thread going. Love it!
__________________
-2013 T4R SR5-MYSALSA-KO2's
-(SOLD)2006 T4R SR5. Nautical Blue Metallic. 255/70/17 General AT2. LED Interior Swap. Toytec Ultimate 3inch lift/Icon 2.0s Rear, SHROCKWORKS Front Bumper, OEM FJ wheels, WM Roofrack, slowly working it up. My Build thread HERE
-(SOLD)2005 Subaru Impreza WRX STi. BMW Mica Blue paint job. Cobb stage 2 tuning. Other modifications.

|
|
|
Reply With Quote
|
|
04-14-2018, 11:53 AM
|
#24
|
 |
Senior Member
|
|
Join Date: May 2010
Location: Nor Cal
Posts: 1,630
|
|
|
Senior Member
Join Date: May 2010
Location: Nor Cal
Posts: 1,630
|
Did you replace
the timing chain as well? since you had the valves adjusted and the heads blasted...i may have to do this as well down the line..
|
|
|
Reply With Quote
|
|
04-14-2018, 05:05 PM
|
#25
|
|
Senior Member
|
|
Join Date: Sep 2014
Location: San Diego, CA
Posts: 1,218
Real Name: Scott
|
|
|
Senior Member
Join Date: Sep 2014
Location: San Diego, CA
Posts: 1,218
Real Name: Scott
|
Quote:
Originally Posted by wadle5
Awesome to see the transformation of your vehicle. Even cooler to see you still getting out on the trails just on 4 wheels instead of 2. Excited about your white knuckles, as mine have been sitting in the garage all winter staring at me.
Can I what cargo/drawer system you will be going with?
Keep the thread going. Love it!
|
Thanks! The cargo/drawer system is custom made. I could not go too tall because we have Rhodesian Ridgebacks who need their headroom. I'll post that up Monday or Tuesday.
Quote:
Originally Posted by jrm
the timing chain as well? since you had the valves adjusted and the heads blasted...i may have to do this as well down the line..
|
We debated it, but it measured the same as a new one and these things routinely go 300,000 miles without the timing chain being replaced. I was already getting weak from the amount I was spending (which came at a horrible time financially), so we decided it was good to go.
__________________
-Semper Fi-
2006 4Runner Sport Edition 4WD V6/Suspension/Armor/Lights/Wheels and tires/Drawers/Camping things/Surfboards/Rhodesian Ridgebacks . . .
BUILD AND ADVENTURE THREAD
Last edited by YetiX; 06-06-2018 at 04:07 PM.
|
|
|
Reply With Quote
|
|
04-18-2018, 01:59 PM
|
#26
|
|
Senior Member
|
|
Join Date: Sep 2014
Location: San Diego, CA
Posts: 1,218
Real Name: Scott
|
|
|
Senior Member
Join Date: Sep 2014
Location: San Diego, CA
Posts: 1,218
Real Name: Scott
|
So first request for input on the build. I now have a Wilco Hitchgate Classic tire carrier on the rear. I want to either carry two Jerry cans or two Rotopax on there, but can't decide which to get.
The Jerry cans are cheaper, more available, and carry more fuel or water. On the other hand, the Rotopax seem a bit nicer and are a bit more low-profile. With the Rotopax being narrower, I might even be able to move the Hitchgate in a little closer to the rear bumper.
Thoughts?
__________________
-Semper Fi-
2006 4Runner Sport Edition 4WD V6/Suspension/Armor/Lights/Wheels and tires/Drawers/Camping things/Surfboards/Rhodesian Ridgebacks . . .
BUILD AND ADVENTURE THREAD
|
|
|
Reply With Quote
|
|
04-18-2018, 03:58 PM
|
#27
|
 |
Senior Member
|
|
Join Date: Sep 2015
Location: Kansas
Age: 28
Posts: 4,304
|
|
|
Senior Member
Join Date: Sep 2015
Location: Kansas
Age: 28
Posts: 4,304
|
Quote:
Originally Posted by YetiX
So first request for input on the build. I now have a Wilco Hitchgate Classic tire carrier on the rear. I want to either carry two Jerry cans or two Rotopax on there, but can't decide which to get.
The Jerry cans are cheaper, more available, and carry more fuel or water. On the other hand, the Rotopax seem a bit nicer and are a bit more low-profile. With the Rotopax being narrower, I might even be able to move the Hitchgate in a little closer to the rear bumper.
Thoughts?
|
I think a quality jerry can would last longer than the Rotopax. I bought a Rotopax for a trip last year but never got to use it. I've heard the Rotopax can bulge after a while in the heat, but not sure if that was with proper ventilation intervals. I'm likely to swap over to jerry cans for my rear bumper build.
__________________
2005 4R Sport 4WD "The last of the V8s!" - Custom TIG'd SS Dual Exhaust - King 2.5" +2 LT. - ARB Front & Rear - 37's - Dana 60 - Build Thread
2005 Tundra 2WD Regular Cab V8 - Chopped Frame - Short Bed Swap
1977 Celica Liftback - LFX Swap - Build Thread

|
|
|
Reply With Quote
|
|
04-18-2018, 05:21 PM
|
#28
|
|
Senior Member
|
|
Join Date: Sep 2014
Location: San Diego, CA
Posts: 1,218
Real Name: Scott
|
|
|
Senior Member
Join Date: Sep 2014
Location: San Diego, CA
Posts: 1,218
Real Name: Scott
|
Quote:
Originally Posted by Inv4drZm
I think a quality jerry can would last longer than the Rotopax. I bought a Rotopax for a trip last year but never got to use it. I've heard the Rotopax can bulge after a while in the heat, but not sure if that was with proper ventilation intervals. I'm likely to swap over to jerry cans for my rear bumper build.
|
Good to know. I think if I go with Jerry cans, I'll go with a steel one for fuel and a plastic one for water.
Anyone with experience with the Rotopax?
__________________
-Semper Fi-
2006 4Runner Sport Edition 4WD V6/Suspension/Armor/Lights/Wheels and tires/Drawers/Camping things/Surfboards/Rhodesian Ridgebacks . . .
BUILD AND ADVENTURE THREAD
|
|
|
Reply With Quote
|
|
04-27-2018, 01:47 PM
|
#29
|
|
Senior Member
|
|
Join Date: Sep 2014
Location: San Diego, CA
Posts: 1,218
Real Name: Scott
|
|
|
Senior Member
Join Date: Sep 2014
Location: San Diego, CA
Posts: 1,218
Real Name: Scott
|
So this happened yesterday on the drive to Reno . . .
__________________
-Semper Fi-
2006 4Runner Sport Edition 4WD V6/Suspension/Armor/Lights/Wheels and tires/Drawers/Camping things/Surfboards/Rhodesian Ridgebacks . . .
BUILD AND ADVENTURE THREAD
|
|
|
Reply With Quote
|
|
04-30-2018, 05:23 PM
|
#30
|
|
Senior Member
|
|
Join Date: Sep 2014
Location: San Diego, CA
Posts: 1,218
Real Name: Scott
|
|
|
Senior Member
Join Date: Sep 2014
Location: San Diego, CA
Posts: 1,218
Real Name: Scott
|
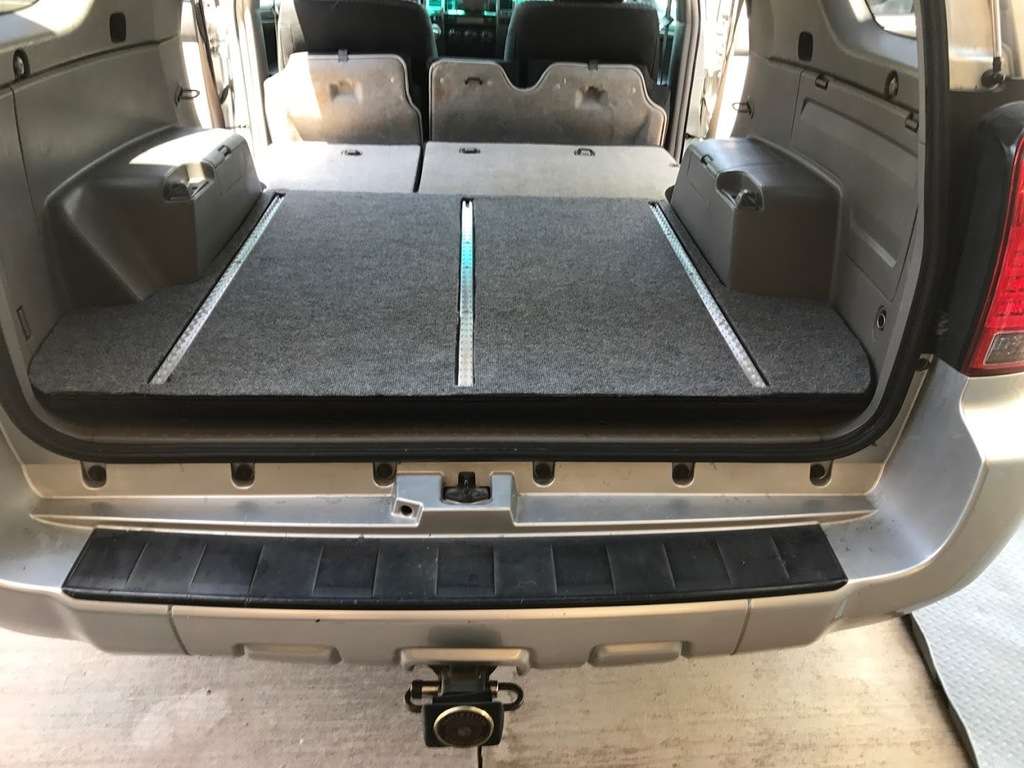
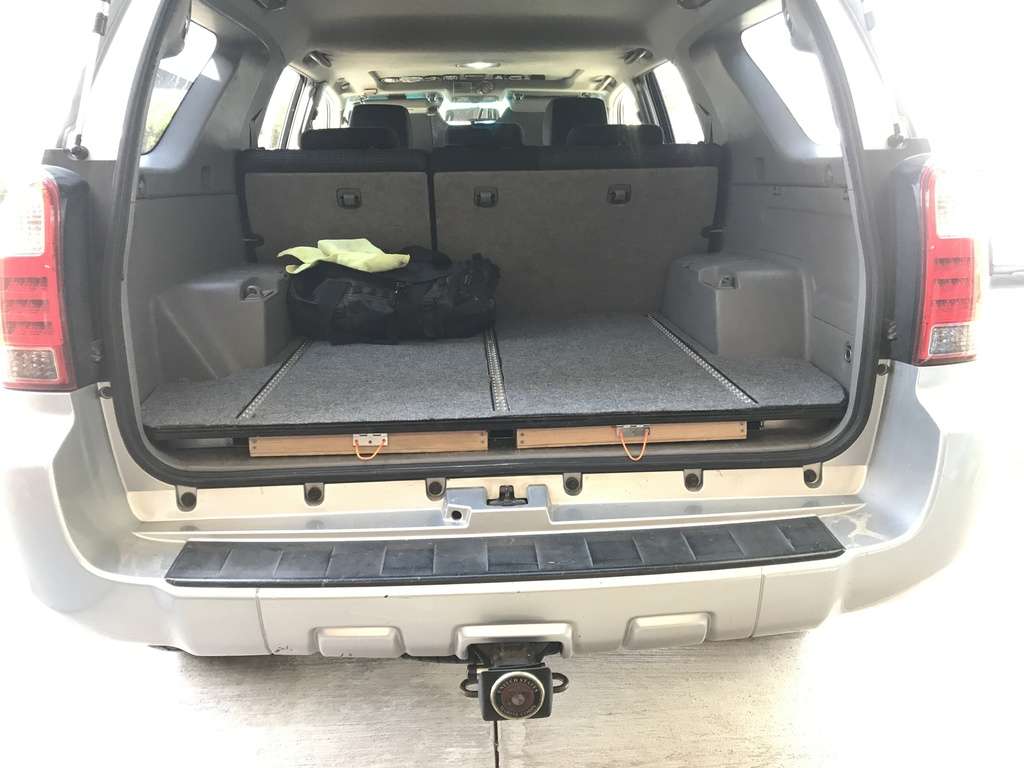
Sleeping/Cargo Platform
One of the features of my 4Runner I find the most useful is the cargo/sleeping platform I made with the help of a friend. I wish I could build nice deep drawers like so many people do, but I have two reasons why I can't.
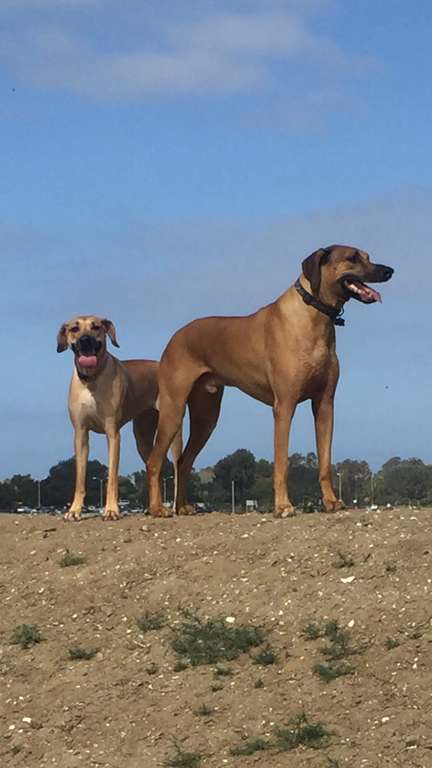
We have two large Rhodesian Ridgebacks who travel with us, so I had certain design limitations/criteria. Meet Emmett and Freya, aka the Notorious A$$-Clowns. I love them like they're my children, but they definitely have more size than brains.
So the criteria for my platform were as follows:
1. It could not be tall because I didn't want it to be more difficult for them to get in the back of the 4Runner and I wanted them to have plenty of room to be comfortable on long drives;
2. I wanted a flat sleeping platform for when I sleep in my rig;
3. I wanted tie downs so I could secure my gear in the back;
4. I wanted at least a little bit of additional storage space; and
5. I wanted it mounted in the rig without any permanent modifications to my 4Runner.
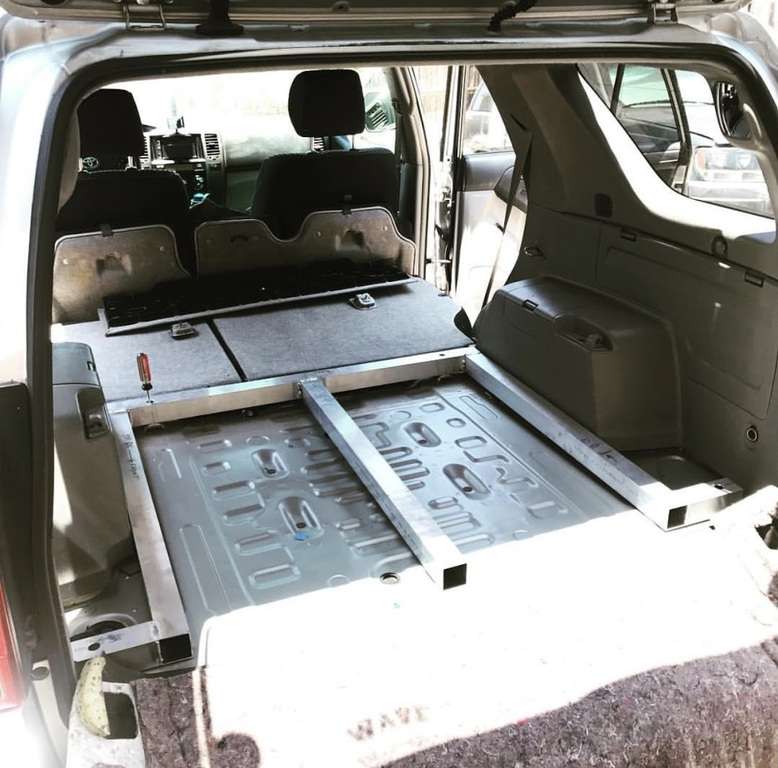
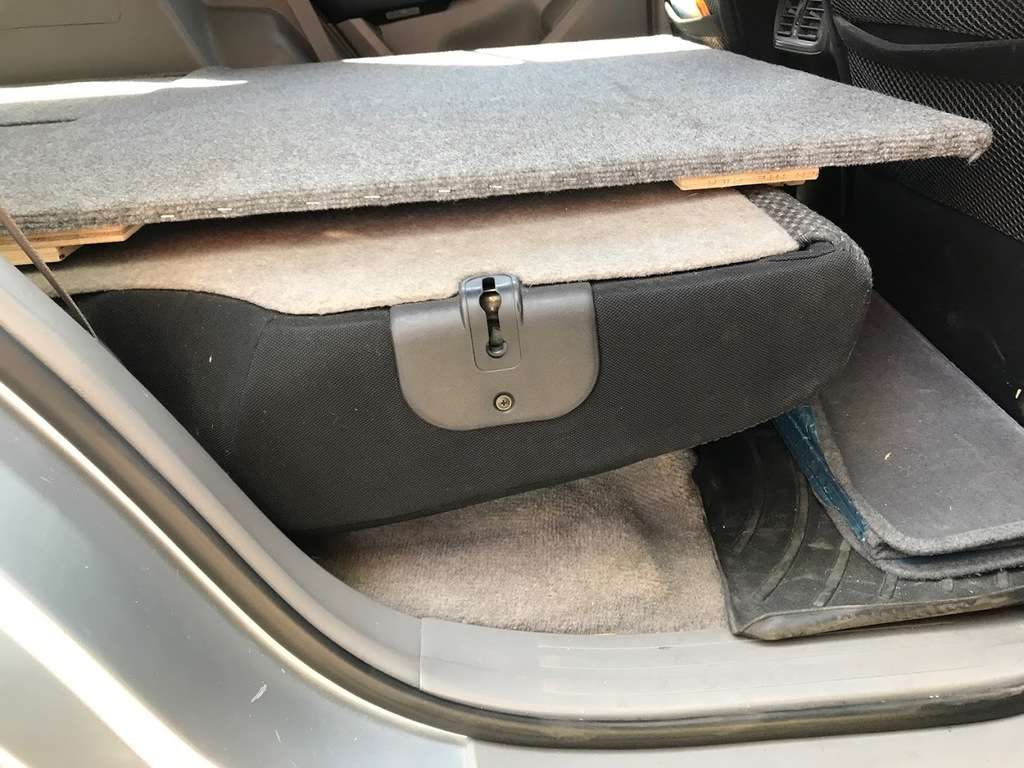
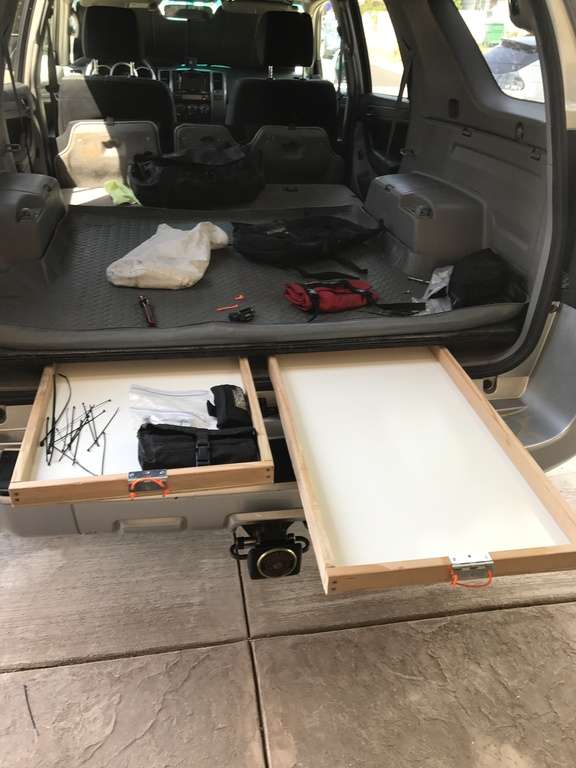
What I figured out is that if I remove the two rear seat bottoms (4 x 14 mm bolts) and then fold the rear seatbacks forward, there was a 2 1/2" step between the rear cargo area and the seat backs. I slept on that a few times and it was long enough for me (6'3"), but the step was noticeable and uncomfortable. My plan was to build a platform for the rear cargo area that was 2 1/2" tall that would bolt in place using the existing tie-down points. Using 2x2 framing would give me 2" tall drawers underneath as a bonus. I use the drawers to hold a full set of tools for working on the rig which are kept on board at all times.
There would be a second, forward half of the platform that would be removed during daily use, but easily installed for trips. I saw the platform
@ MTN4RNR
built for his 4Runner and it was very close to what I wanted, so thanks for the inspiration Max!!
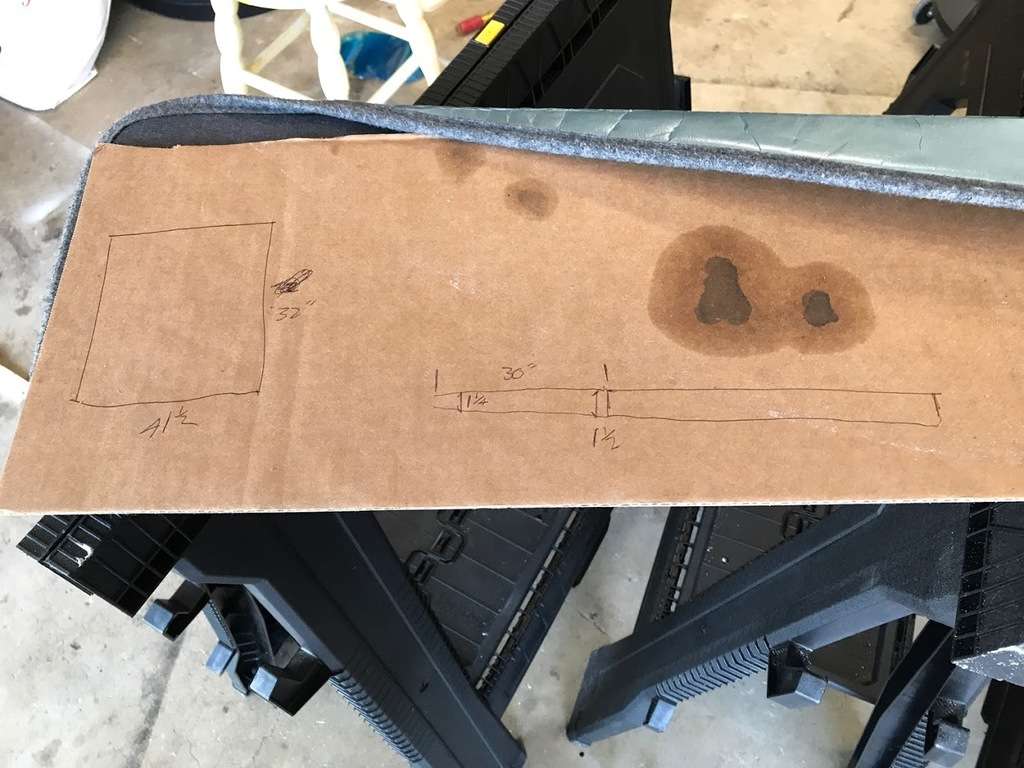
I started by building a frame out of 2x2 aluminum stock a friend had lying around. We carefully measured where the stock tie down points were and then designed the frame to fit. This was the rough diagram we came up with:
Then we built the frame:
That was the first day.
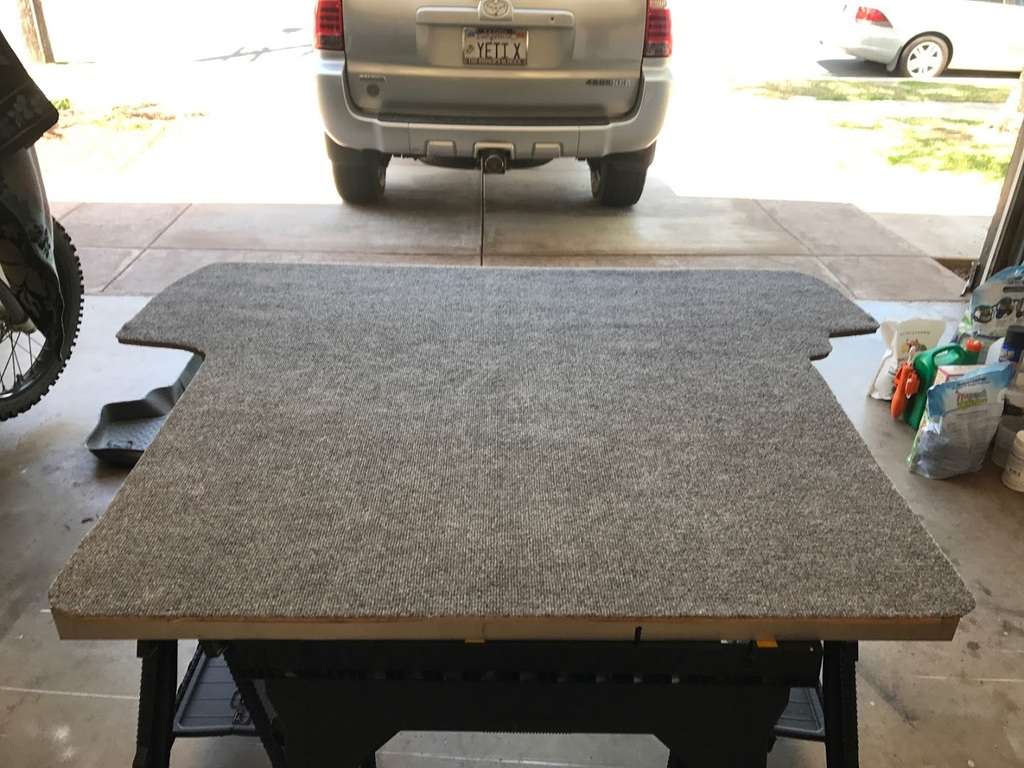
I took the platform home with me and built the wood platform using high grade plywood the next day. If I recall correctly, the plywood is 3/8" thick.
I cracked a nice cold beer and traced the pattern of my cargo liner onto the sheet of plywood and then cut it out using a jigsaw. (Of course I had to buy a new jigsaw since my brother had borrowed mine and I didn't want to wait until the following weekend to get it back from him. New tool, yay.) After test fitting it and doing a little trimming, I then cut a piece of outdoor carpeting I found at Home Depot to size. The carpet very closely matches the color of my interior, bonus. I then cut a second sheet of plywood to match the first. You'll see why in a second here.
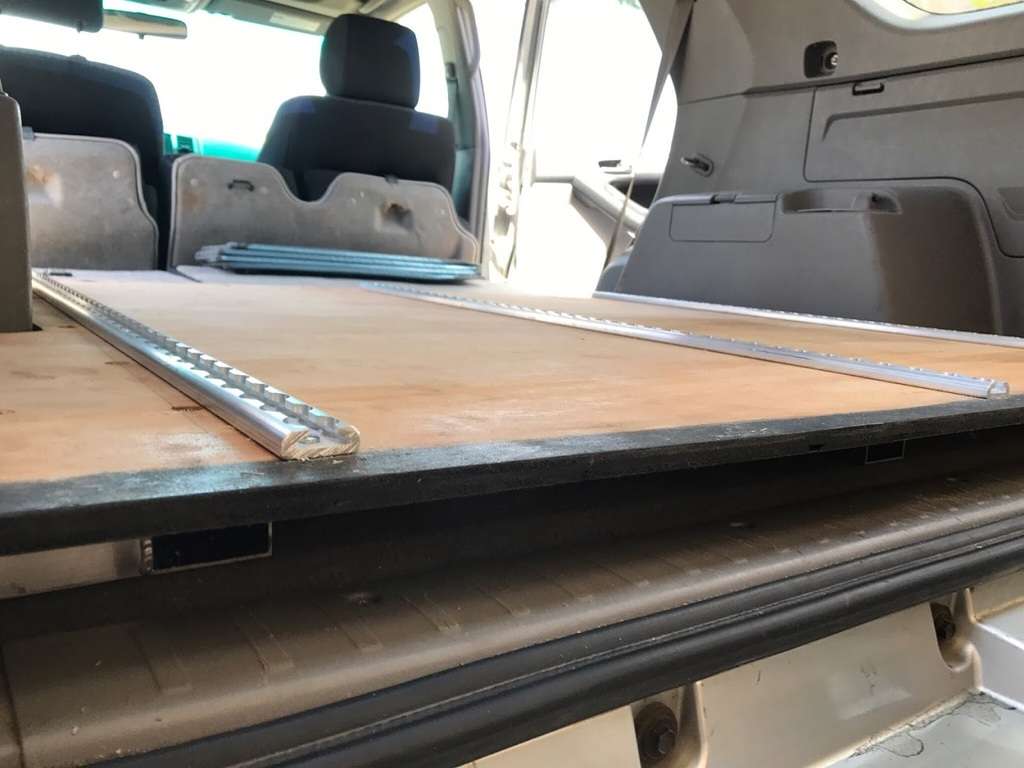
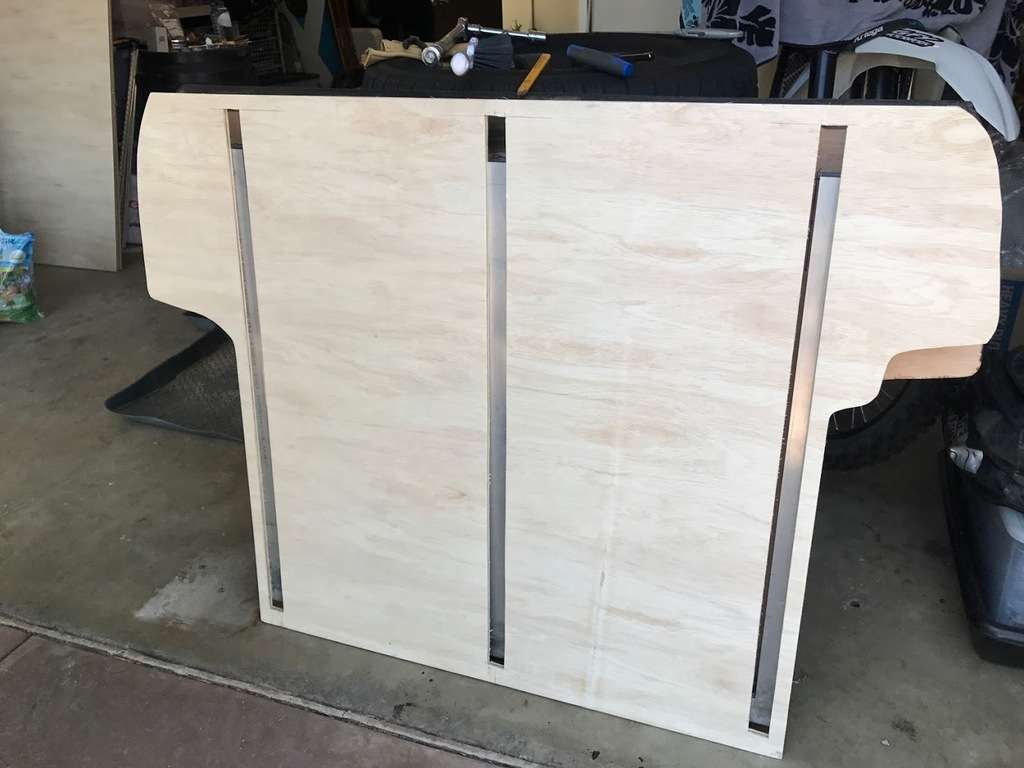
Then it was time to add the tie-down tracks. I used Mac's VersaTie tracks for this. I cut the tracks to length, and then drew around them on one of the sheets of plywood. I cut out where tracks were and then sandwiched the two pieces of plywood together using glue and short screws. Then I screwed the tracks in the holes I had cut out and glued the carpet on using spray upholstery adhesive. This made it so the tracks are flush and do not stand proud of the platform, making for a very comfortable sleeping deck.
I then bolted the aluminum frame in place after removing the four factory tie down points. Max had suggested mounting the platform over the existing carpet because it had noise deadener in it. Without the carpet it would be very, very loud. Then I screwed the wood platform to the aluminum frame and the back half was done!
One IMPORTANT note: I was lucky I positioned the tie-down tracks over the aluminum frame. When I screwed the wood down, I also put screws through the tie-down tracks and into the aluminum frame. At first, I only screwed the tracks into the wood. When I tried to tie my stuff down with ratchet straps, the tracks pulled up from the wood. Not good!! With screws through the tracks and into the frame, everything is solid. Nice!
The next step was to build the removable front section. First, I drew a high-tech rendering using CAD/CAM technology. (Is that a thing?)
It's basically a rectangle of plywood with carpet glued on and plywood stringers screwed to the bottom to level it out. It is secured to the rear platorm using a couple of Simpson Strong-Tie Strap Ties. There is a flap of carpet that covers the "joint" between the two platforms and I just screwed that into the back half of the platform.
The last step was to build the 2" tall drawers. I used 1 x 2 framing strips for the frame and pressboard for the drawer bottoms. The nice part is that I found pressboard with a white side which makes things easier to see in the drawers. I used hinges with paracord strung through them as drawer pulls. Here are the drawers (please ignore the zipties strewn everywhere, their bag broke open):
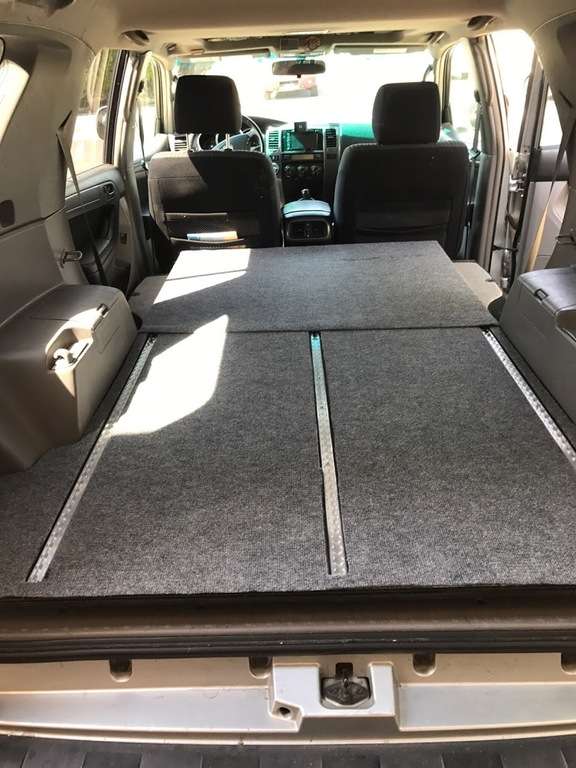
So, how does it work? Perfectly!! With the front section in place, I have a 6'4" long platform which is just long enough for me to stretch out and sleep comfortably. When not in use, I just put the cargo cover over the platform to protect it from the sand and water from my surfboards and wetsuits.
Here's a picture from a recent trip, all set up for sleeping at night:
Next up, finishing out the drawers . . .
__________________
-Semper Fi-
2006 4Runner Sport Edition 4WD V6/Suspension/Armor/Lights/Wheels and tires/Drawers/Camping things/Surfboards/Rhodesian Ridgebacks . . .
BUILD AND ADVENTURE THREAD
|
|
|
Reply With Quote
|
 Posting Rules
|
You may not post new threads
You may not post replies
You may not post attachments
You may not edit your posts
HTML code is On
|
|
|
|


 Linear Mode


