 05-05-2020, 09:33 AM
|
#166
|
 |
Member
|
|
Join Date: Nov 2018
Location: Cincinnati, OH
Posts: 487
Real Name: John
|
|
|
Member
Join Date: Nov 2018
Location: Cincinnati, OH
Posts: 487
Real Name: John
|
Well, I've been getting busy with small projects while couped up at home. So here's yesterdays project!
The first speaker took about 1.5hrs to trim the adapter and figure everything out, but the rear doors were quick, and the passenger front was quick once I knew what I had to do.
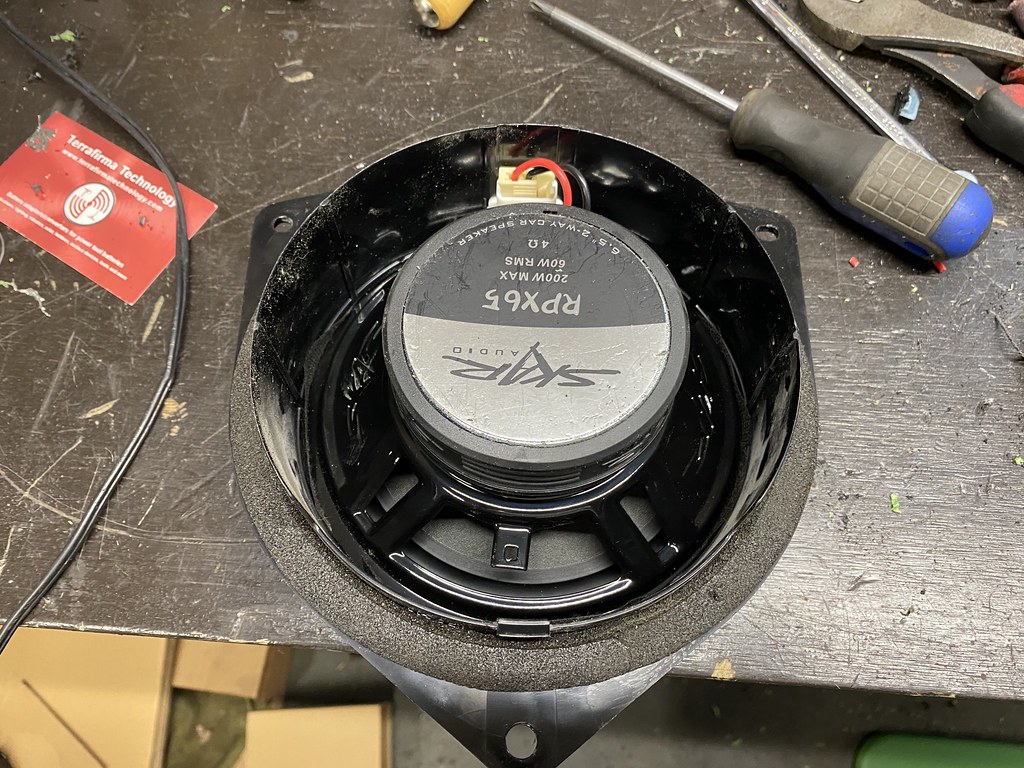
Bought some 6.5" Components for the front doors, and 6.5 2 ways for the rear. I used the Skar 8" woofer to replace my JBL unit so I figured I'd give their door speakers a try. Pricing is pretty good on these and overall I'm happy with the upgrade.


Took the front door speakers out, it looks like the JBL setup has a resistor/filter built in to the housing/wiring. I decided to bypass this which seems like it worked alright.

Prepared the Scoche adapters I bought, these are listed as 5.25 and 6.5 adapters, but I ended up having to do some trimming to make the 6.5 work. In a perfect world, I would have returned these and bought different ones had I known, but instead I went at it with a dremel.
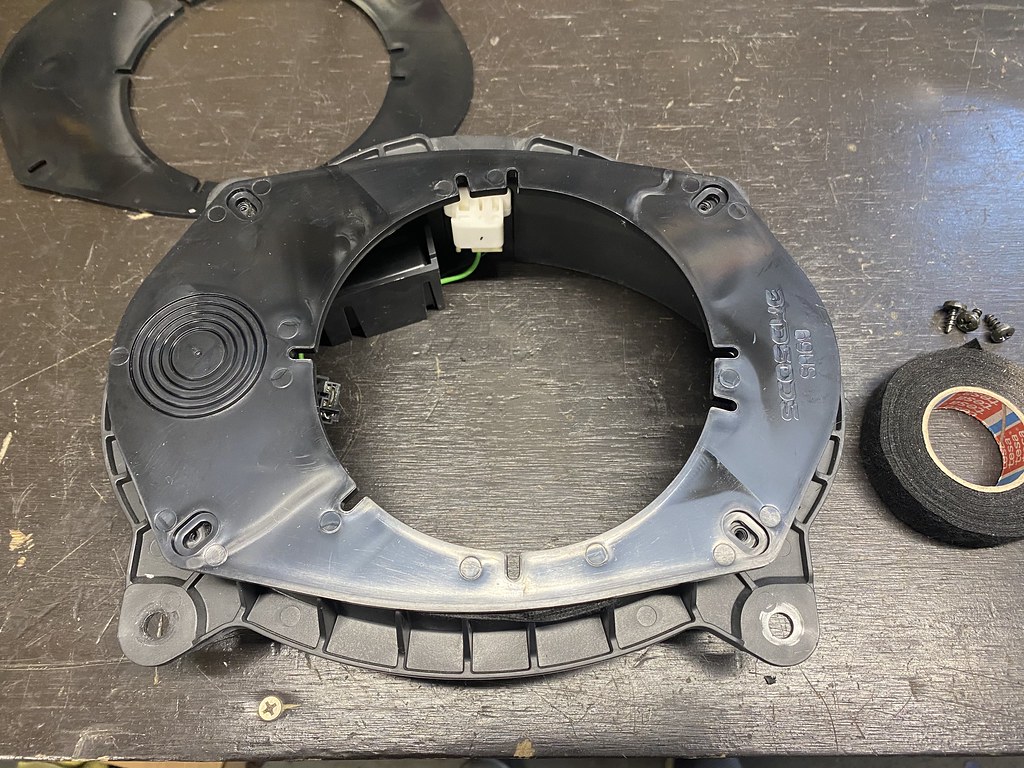
Used this to mark how much extra I had to cut out of the opening to keep it consistent.

And installed in the bracket. I used some leftover torx bits I had in my hardware boxes (mostly from Volvos over the years)

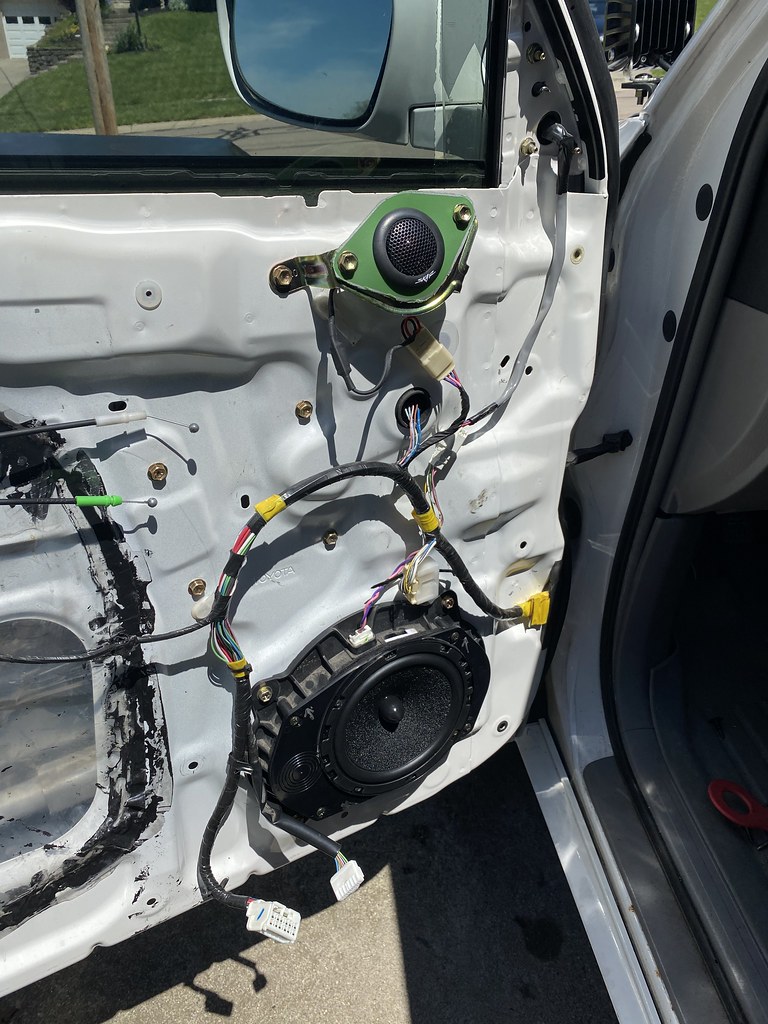
I made a little extension to the harness and soldered the connections.

and installed into the door


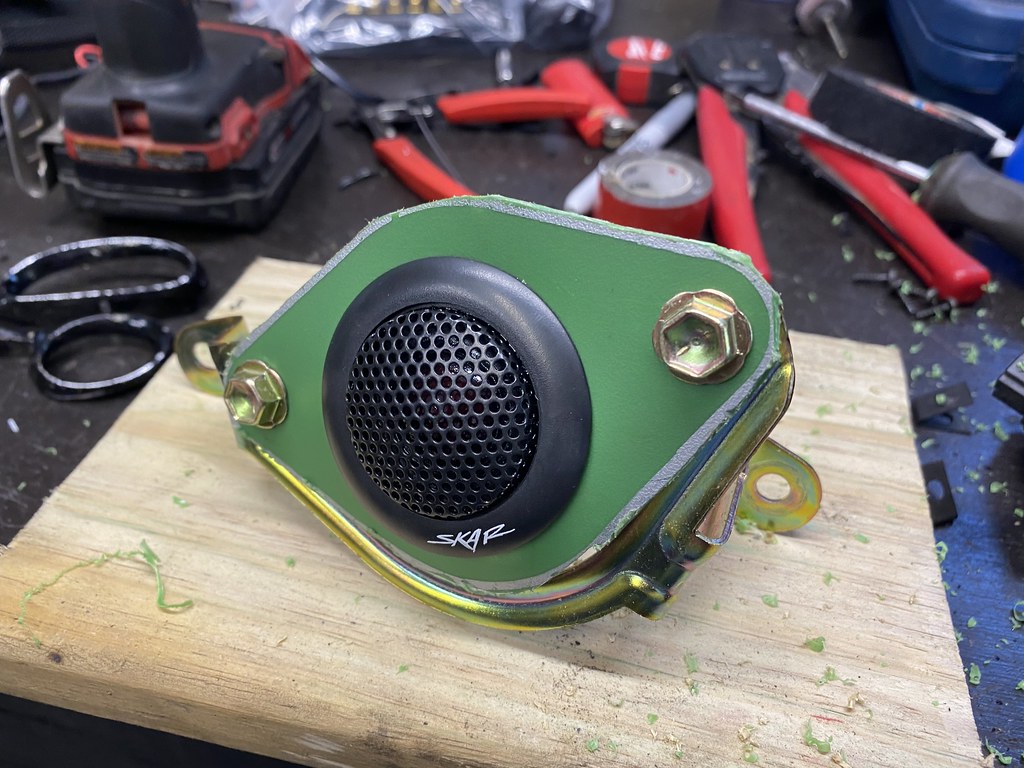
Moving on to the tweeters, I used an old storage tote lid to cut out some plates to mount the tweeters into the factory brackets. I did the same with the wiring and just spliced these into the factory wiring instead of using the crossovers, this worked out well and although it might not be the best way to do it, I've done this in other cars with decent success

Moved onto the passenger front door and laid in some Noico sound deadening. I had already done the drivers front door when I swapped it after the wreck a few posts back.


Moved onto the rear doors, these were much easier overall.

Same process for adapting the wiring to retain the factory connections so I can easily remove the speaker. I found out that there is a harness you can buy to do this, but I have no intentions of putting the factory stuff back in so I had no issue deciding to cut the factory wiring.

Sound deadening in the rear doors. I used approximately 4sq ft per door, maybe a little more on the fronts.


Overall these are a great upgrade! For about $130 for all 4 doors I cant be happier. I chose to do 6.5" in front instead of the 6x9's and initially I was worried they wouldn't be as bassy, but after making some adjustments on the EQ on my headunit, these can handle a lot more before sounding crappy so I was able to get easily as much bass as the 6x9's used to produce out of these 6.5". Also, if anyone needs JBL stock speakers, these are for sale before I throw them out. Yes, I have cut some of the wiring, but it all can be soldered back together with what you have existing should yours be totally toast. I have the front door tweeters, 6x9's, and the rear speakers. Would love to sell them off rather than throw them away.
__________________
2004 4Runner V8 Limited - TRD Exhaust, LED Interior Swap, Pioneer HU, Tacoma TRD Front Suspension, FJ Rear Springs, 10" + 32" Light Bars, Prius Shift Knob, 275/65R18 Falken Wildpeak, 18x9 Level 8 MK6 Et0, GOBI Ladder, 06-09 Headlight Swap, TOTALED NOV 2019, RESURRECTED APR 2020 Build Thread
1998 Volvo S70 T5 - Custom Airlift Suspension, BBS Nebula Wheels, Brada Seats, Engine Bolt Ons - StanceWorks Build Thread
2010 Subaru Forester 2.5X - Wifes Car
|

|
 Reply With Quote Reply With Quote
|
|
05-15-2020, 02:44 PM
|
#167
|
|
Member
|
|
Join Date: Nov 2018
Location: Cincinnati, OH
Posts: 487
Real Name: John
|
|
|
Member
Join Date: Nov 2018
Location: Cincinnati, OH
Posts: 487
Real Name: John
|
A little something arrived today after quite a bit of waiting, there's a long story behind it, but lets just say, I'm glad this showed up for the price I paid after the fiasco I went through (5+ hrs on customer support/hold).
If it wasn't going to rain this weekend I'd start mapping out where to put everything. If you've got on board air and have ideas of where to mount everything I'm open to suggestions!


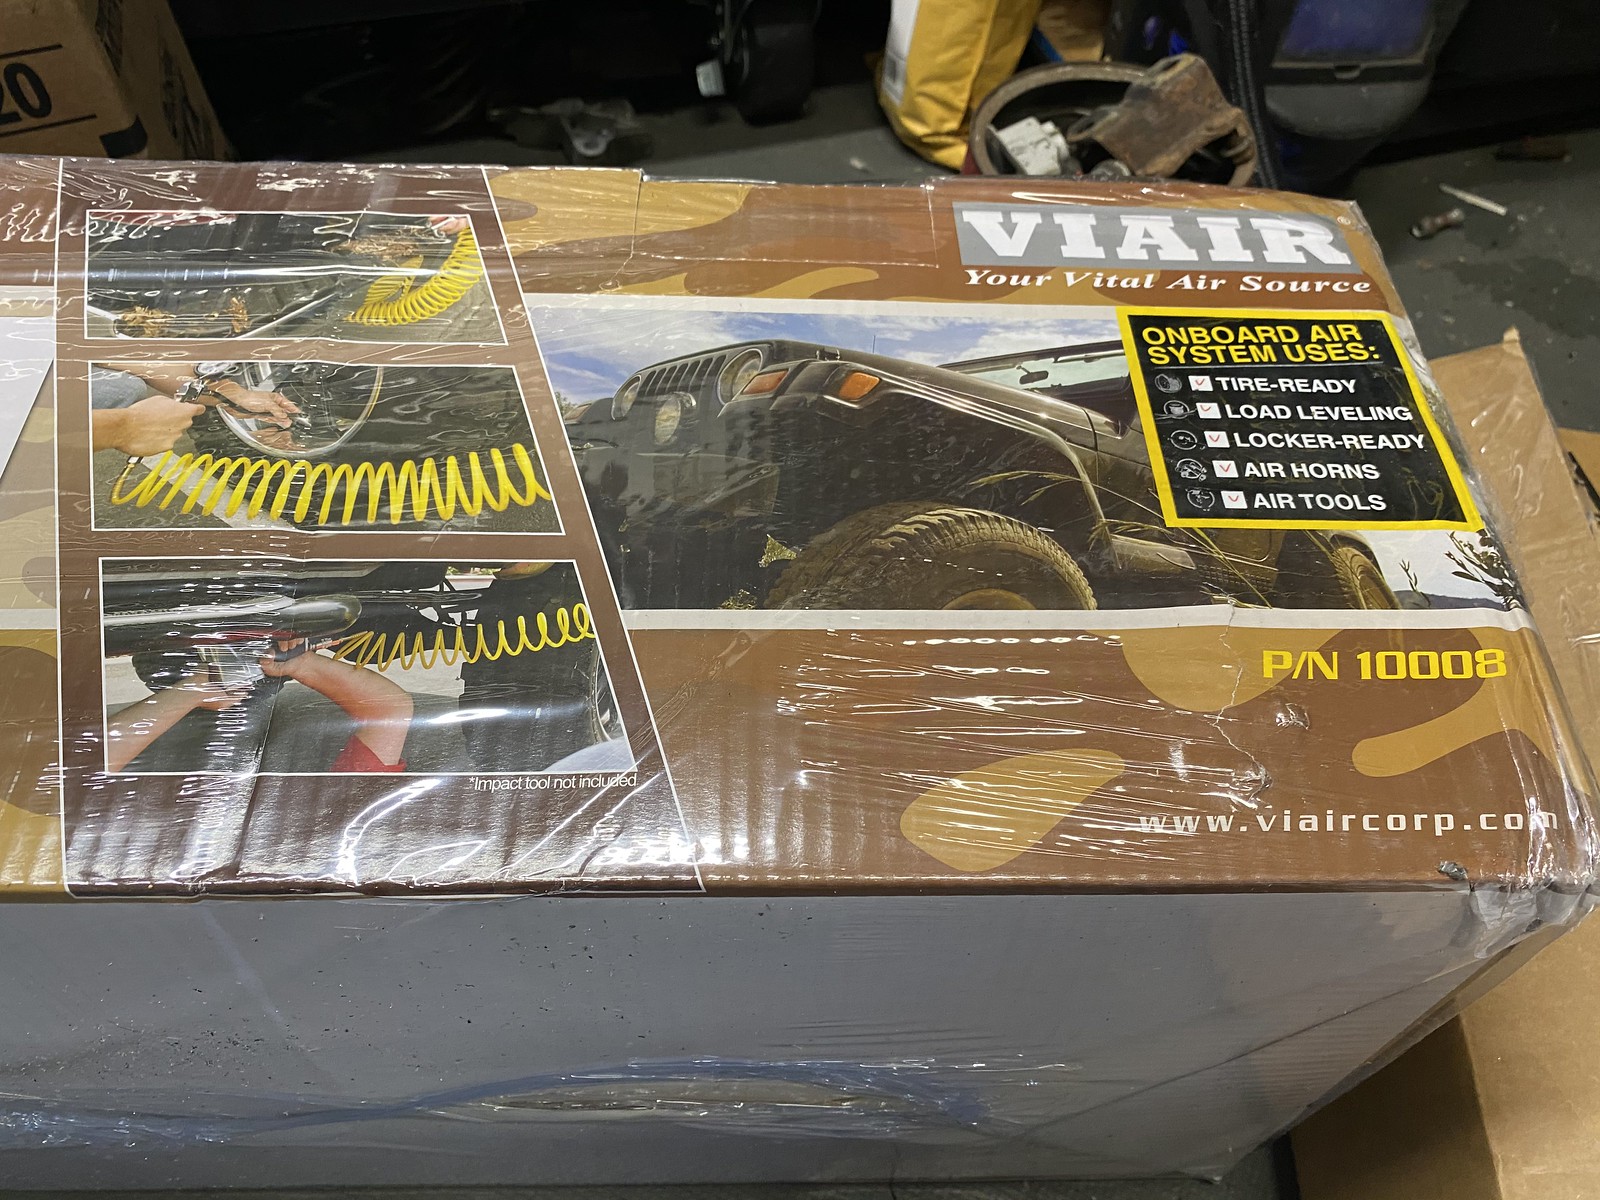
I'm familiar with this type of plumbing and routing from installing air ride on my Volvo so it shouldn't be too bad. More-so just have to figure out where to mount everything and run the wiring/plumbing!
__________________
2004 4Runner V8 Limited - TRD Exhaust, LED Interior Swap, Pioneer HU, Tacoma TRD Front Suspension, FJ Rear Springs, 10" + 32" Light Bars, Prius Shift Knob, 275/65R18 Falken Wildpeak, 18x9 Level 8 MK6 Et0, GOBI Ladder, 06-09 Headlight Swap, TOTALED NOV 2019, RESURRECTED APR 2020 Build Thread
1998 Volvo S70 T5 - Custom Airlift Suspension, BBS Nebula Wheels, Brada Seats, Engine Bolt Ons - StanceWorks Build Thread
2010 Subaru Forester 2.5X - Wifes Car
|
|
|
Reply With Quote
|
|
10-22-2020, 02:35 PM
|
#168
|
|
Member
|
|
Join Date: Nov 2018
Location: Cincinnati, OH
Posts: 487
Real Name: John
|
|
|
Member
Join Date: Nov 2018
Location: Cincinnati, OH
Posts: 487
Real Name: John
|
Just a few pics from this summer and a few pictures of my recent interior clean up project. I've been having fun with my Mopeds while its been warm so not much time has been spent on the 4Runner.
 Untitled Untitled by John Van Cleave, on Flickr
 Untitled Untitled by John Van Cleave, on Flickr
 Untitled Untitled by John Van Cleave, on Flickr
 Untitled Untitled by John Van Cleave, on Flickr
 Untitled Untitled by John Van Cleave, on Flickr
 Untitled Untitled by John Van Cleave, on Flickr
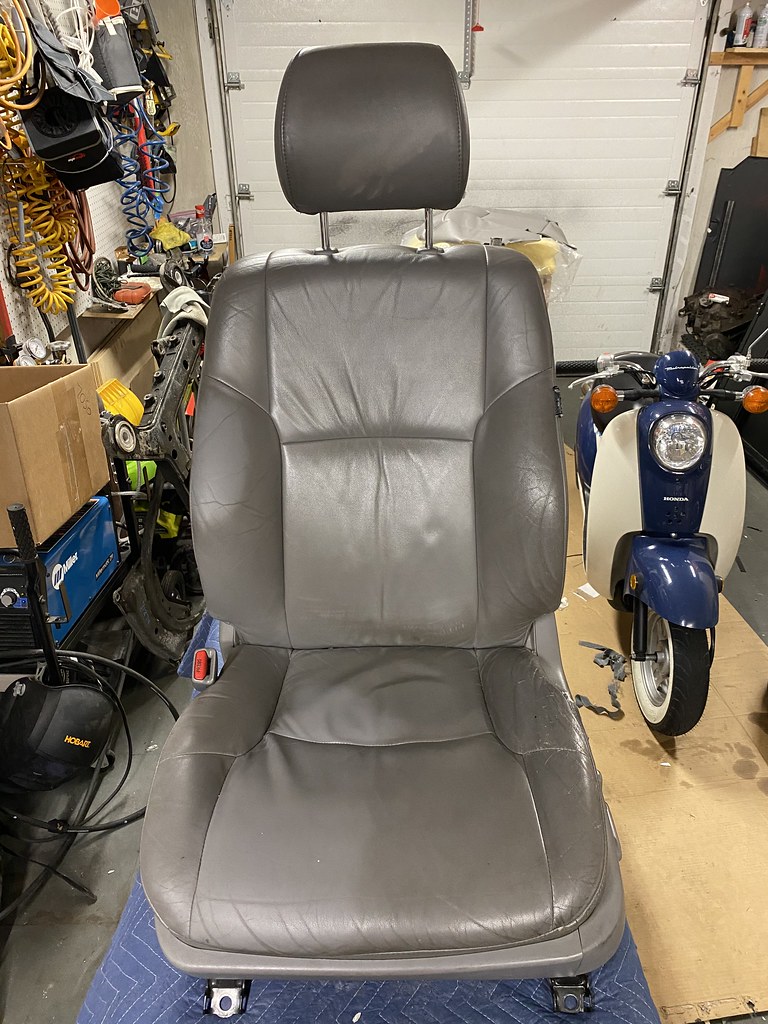
Now onto my interior renovation project.
Initially the replacement seat cushion didn't seem to match.
 Untitled Untitled by John Van Cleave, on Flickr
After some time with a magic eraser...
 Untitled Untitled by John Van Cleave, on Flickr
 Untitled Untitled by John Van Cleave, on Flickr
After and Before (have only done the passenger side)
 Untitled Untitled by John Van Cleave, on Flickr
Much better!
 Untitled Untitled by John Van Cleave, on Flickr
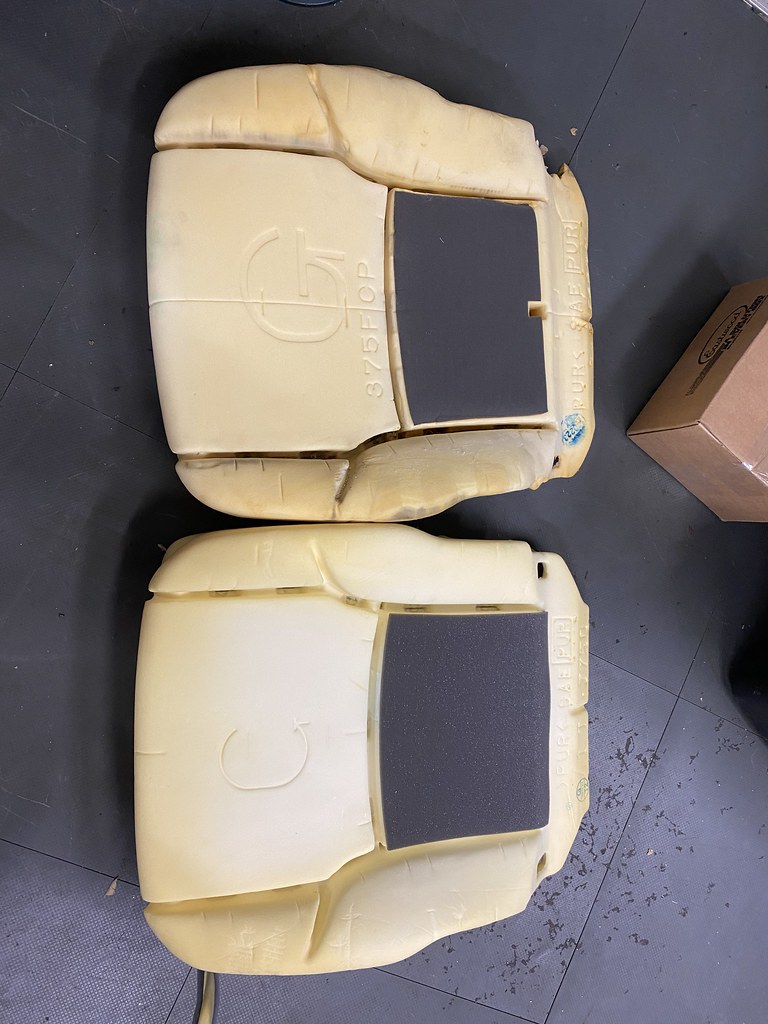
Now just waiting on the replacement seat foam from Toyota for the drivers seat so I can get it all up to snuff!
__________________
2004 4Runner V8 Limited - TRD Exhaust, LED Interior Swap, Pioneer HU, Tacoma TRD Front Suspension, FJ Rear Springs, 10" + 32" Light Bars, Prius Shift Knob, 275/65R18 Falken Wildpeak, 18x9 Level 8 MK6 Et0, GOBI Ladder, 06-09 Headlight Swap, TOTALED NOV 2019, RESURRECTED APR 2020 Build Thread
1998 Volvo S70 T5 - Custom Airlift Suspension, BBS Nebula Wheels, Brada Seats, Engine Bolt Ons - StanceWorks Build Thread
2010 Subaru Forester 2.5X - Wifes Car
|
|
|
Reply With Quote
|
|
10-28-2020, 02:50 PM
|
#169
|
|
Member
|
|
Join Date: Nov 2018
Location: Cincinnati, OH
Posts: 487
Real Name: John
|
|
|
Member
Join Date: Nov 2018
Location: Cincinnati, OH
Posts: 487
Real Name: John
|
Got around to doing the drivers side seat cover last night. All in all, it wasn't too bad of a job, I think I could have done a slightly better job if I did it over again and got the seat cover tighter. Anyway, here are some more pictures.
Removed from the truck and on the table in the garage.
 Untitled Untitled by John Van Cleave, on Flickr
Took a few pictures to make sure that I knew where everything goes when I put it back together.
 Untitled Untitled by John Van Cleave, on Flickr
Old foam on top, new on bottom
 Untitled Untitled by John Van Cleave, on Flickr
It was at this point I realized I really had no idea what I was doing...
 Untitled Untitled by John Van Cleave, on Flickr
Scrubbed the seat back while I had it all apart, this is just magic eraser.
 Untitled Untitled by John Van Cleave, on Flickr
Had to remove the old heated seat element from the old skin and put it on the new one. I used a little it of spray glue to hold it in place on the inside of the new skin.
 Untitled Untitled by John Van Cleave, on Flickr
I used small zipties in place of hogrings. I saw someone do this once and it seemed easier than buying hogring pliers and doing it that way. We'll see how it lasts!
 Untitled Untitled by John Van Cleave, on Flickr
I think I might have over tightened a few zipties causing some of the ripples. I'm going to give it a week or two of use and try steaming it a bit to see if I can tighten up the material.
 Untitled Untitled by John Van Cleave, on Flickr
Partially re-assembled.
 Untitled Untitled by John Van Cleave, on Flickr
And back in the truck about 2.5 hrs later!
 Untitled Untitled by John Van Cleave, on Flickr
Not too shabby for an eBay seat cover! Match is pretty close, it might be a bit baggier, but that also might be because I don't know what I'm doing with re-upholstering.
 Untitled Untitled by John Van Cleave, on Flickr
All in all, the seat feels like a new truck. I wish I had done this sooner!
__________________
2004 4Runner V8 Limited - TRD Exhaust, LED Interior Swap, Pioneer HU, Tacoma TRD Front Suspension, FJ Rear Springs, 10" + 32" Light Bars, Prius Shift Knob, 275/65R18 Falken Wildpeak, 18x9 Level 8 MK6 Et0, GOBI Ladder, 06-09 Headlight Swap, TOTALED NOV 2019, RESURRECTED APR 2020 Build Thread
1998 Volvo S70 T5 - Custom Airlift Suspension, BBS Nebula Wheels, Brada Seats, Engine Bolt Ons - StanceWorks Build Thread
2010 Subaru Forester 2.5X - Wifes Car
|
|
|
Reply With Quote
|
|
11-19-2020, 01:29 AM
|
#170
|
|
Junior Member
|
|
Join Date: Feb 2020
Posts: 1
Real Name: Al
|
|
|
Junior Member
Join Date: Feb 2020
Posts: 1
Real Name: Al
|
Spent the last hr reading this thread. What a rollercoaster, Love your ingenuity behind some of these new welding forays. An excellent collection of pics and stories!
Purchasing my interior LEDs from SuperBright as we speak. Install and map-light mod coming up next for me!
__________________
2004 4Runner V6 Sport Galactic Grey Mica - Gunmetal SCS Ray10s, Falken At3W's, Pioneer Double DIN, De-Chromed...build thread coming soon!
|
|
|
Reply With Quote
|
|
11-20-2020, 10:08 AM
|
#171
|
|
Member
|
|
Join Date: Nov 2018
Location: Cincinnati, OH
Posts: 487
Real Name: John
|
|
|
Member
Join Date: Nov 2018
Location: Cincinnati, OH
Posts: 487
Real Name: John
|
Quote:
Originally Posted by Promethean

Spent the last hr reading this thread. What a rollercoaster, Love your ingenuity behind some of these new welding forays. An excellent collection of pics and stories!
Purchasing my interior LEDs from SuperBright as we speak. Install and map-light mod coming up next for me!
|
Thanks for the kind words! I've always had interest in trying to learn to do things myself or thinking outside the box. You'll love the super bright led's! I'd recommend doing the Map light mod (which I haven't done yet) so the map lights come on when you open the front doors.
__________________
2004 4Runner V8 Limited - TRD Exhaust, LED Interior Swap, Pioneer HU, Tacoma TRD Front Suspension, FJ Rear Springs, 10" + 32" Light Bars, Prius Shift Knob, 275/65R18 Falken Wildpeak, 18x9 Level 8 MK6 Et0, GOBI Ladder, 06-09 Headlight Swap, TOTALED NOV 2019, RESURRECTED APR 2020 Build Thread
1998 Volvo S70 T5 - Custom Airlift Suspension, BBS Nebula Wheels, Brada Seats, Engine Bolt Ons - StanceWorks Build Thread
2010 Subaru Forester 2.5X - Wifes Car
|
|
|
Reply With Quote
|
|
01-27-2021, 09:58 AM
|
#172
|
|
Member
|
|
Join Date: Nov 2018
Location: Cincinnati, OH
Posts: 487
Real Name: John
|
|
|
Member
Join Date: Nov 2018
Location: Cincinnati, OH
Posts: 487
Real Name: John
|
Update!
The fall/early winter has been exciting for us. We've moved to a new house with a slightly bigger garage and naturally that has taken a bunch of my focus. But here are some pictures for those who like visuals over words!
Got a nice car wash and had it all looking good! (for now)


Started moving some of my toys to the new house!


While moving, it was quite cold and my rear trim came free. Hard to tell exactly what happened, I'll open up the tailgate and see how I can fix it once it warms up a little. In the meantime, I can release the trunk from the latch and use the ladder to pull it open.

Starting to get situated in the new garage!

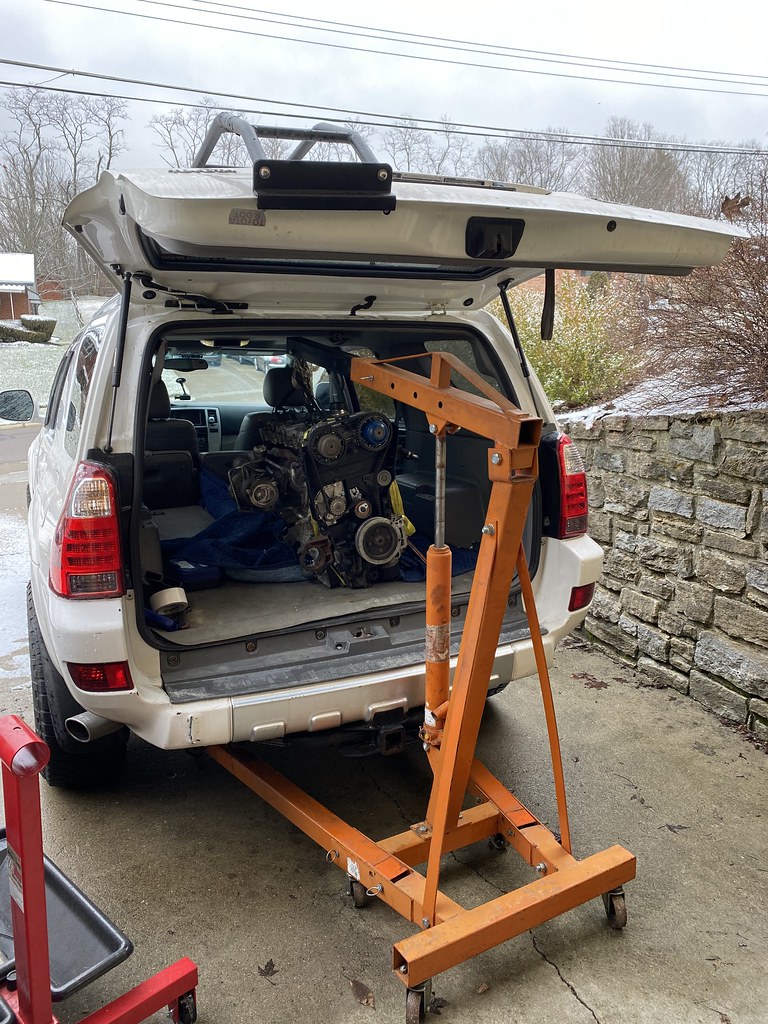
Had to move the engine for my S70 build from the old house to new.

At this time, the 4Runner was doing okay, but a slight brake leak at the rear center soft lines was starting to drip a little more. I managed to move literally the last load of stuff from the old house and woke up the next morning to this.


Knowing I own a midwest truck with some minor rust issues, I will be going through and replacing all of the brake lines. I did the outermost soft lines last year when doing the brake calipers but now it's time to just tear it all apart and do all the hardlines and be done with it. I'm going to try to get it up on the new QuickJacks that just arrived yesterday in the garage this weekend to look over it and create a "shopping" list of all the things I need to replace all the brake lines. I already have the flaring tool and some fittings but will likely need more.
Any advice on replacing all of the brake lines is welcome from those who have done it! I'm sure there are some tips and tricks I do not know.
__________________
2004 4Runner V8 Limited - TRD Exhaust, LED Interior Swap, Pioneer HU, Tacoma TRD Front Suspension, FJ Rear Springs, 10" + 32" Light Bars, Prius Shift Knob, 275/65R18 Falken Wildpeak, 18x9 Level 8 MK6 Et0, GOBI Ladder, 06-09 Headlight Swap, TOTALED NOV 2019, RESURRECTED APR 2020 Build Thread
1998 Volvo S70 T5 - Custom Airlift Suspension, BBS Nebula Wheels, Brada Seats, Engine Bolt Ons - StanceWorks Build Thread
2010 Subaru Forester 2.5X - Wifes Car
|
|
|
Reply With Quote
|
 Posting Rules
|
You may not post new threads
You may not post replies
You may not post attachments
You may not edit your posts
HTML code is On
|
|
|
|


 Linear Mode


