***EDIT***
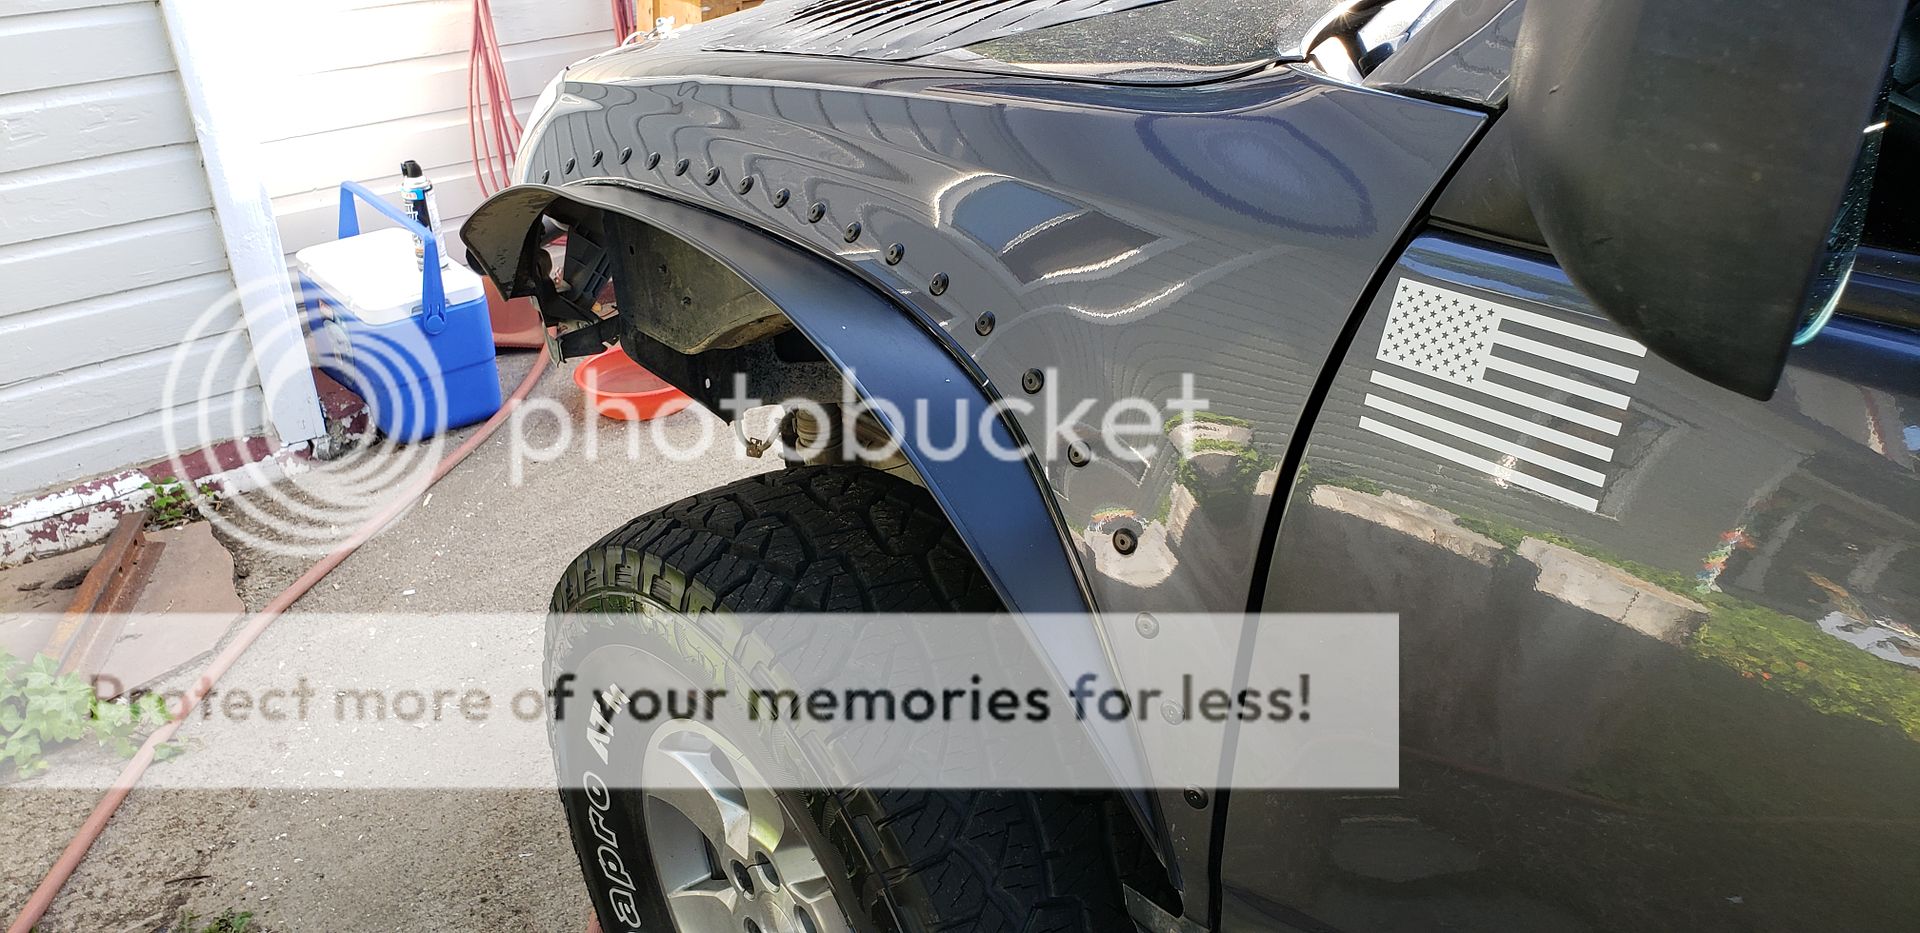
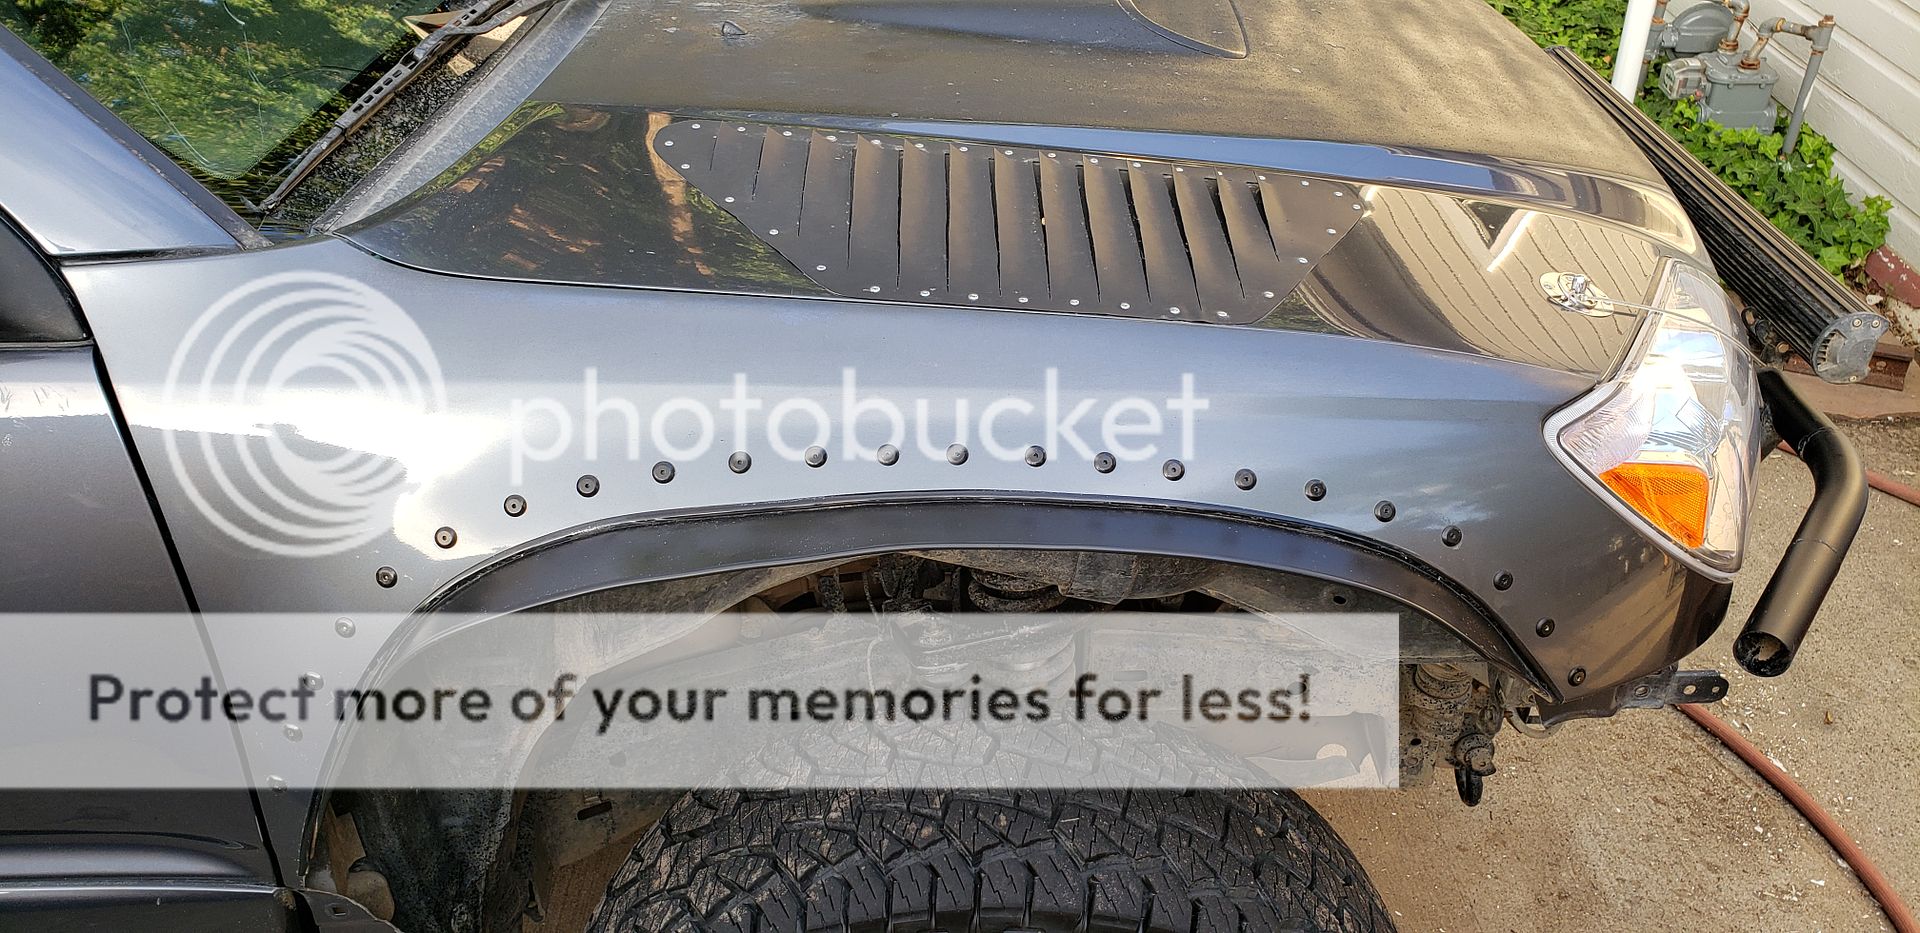
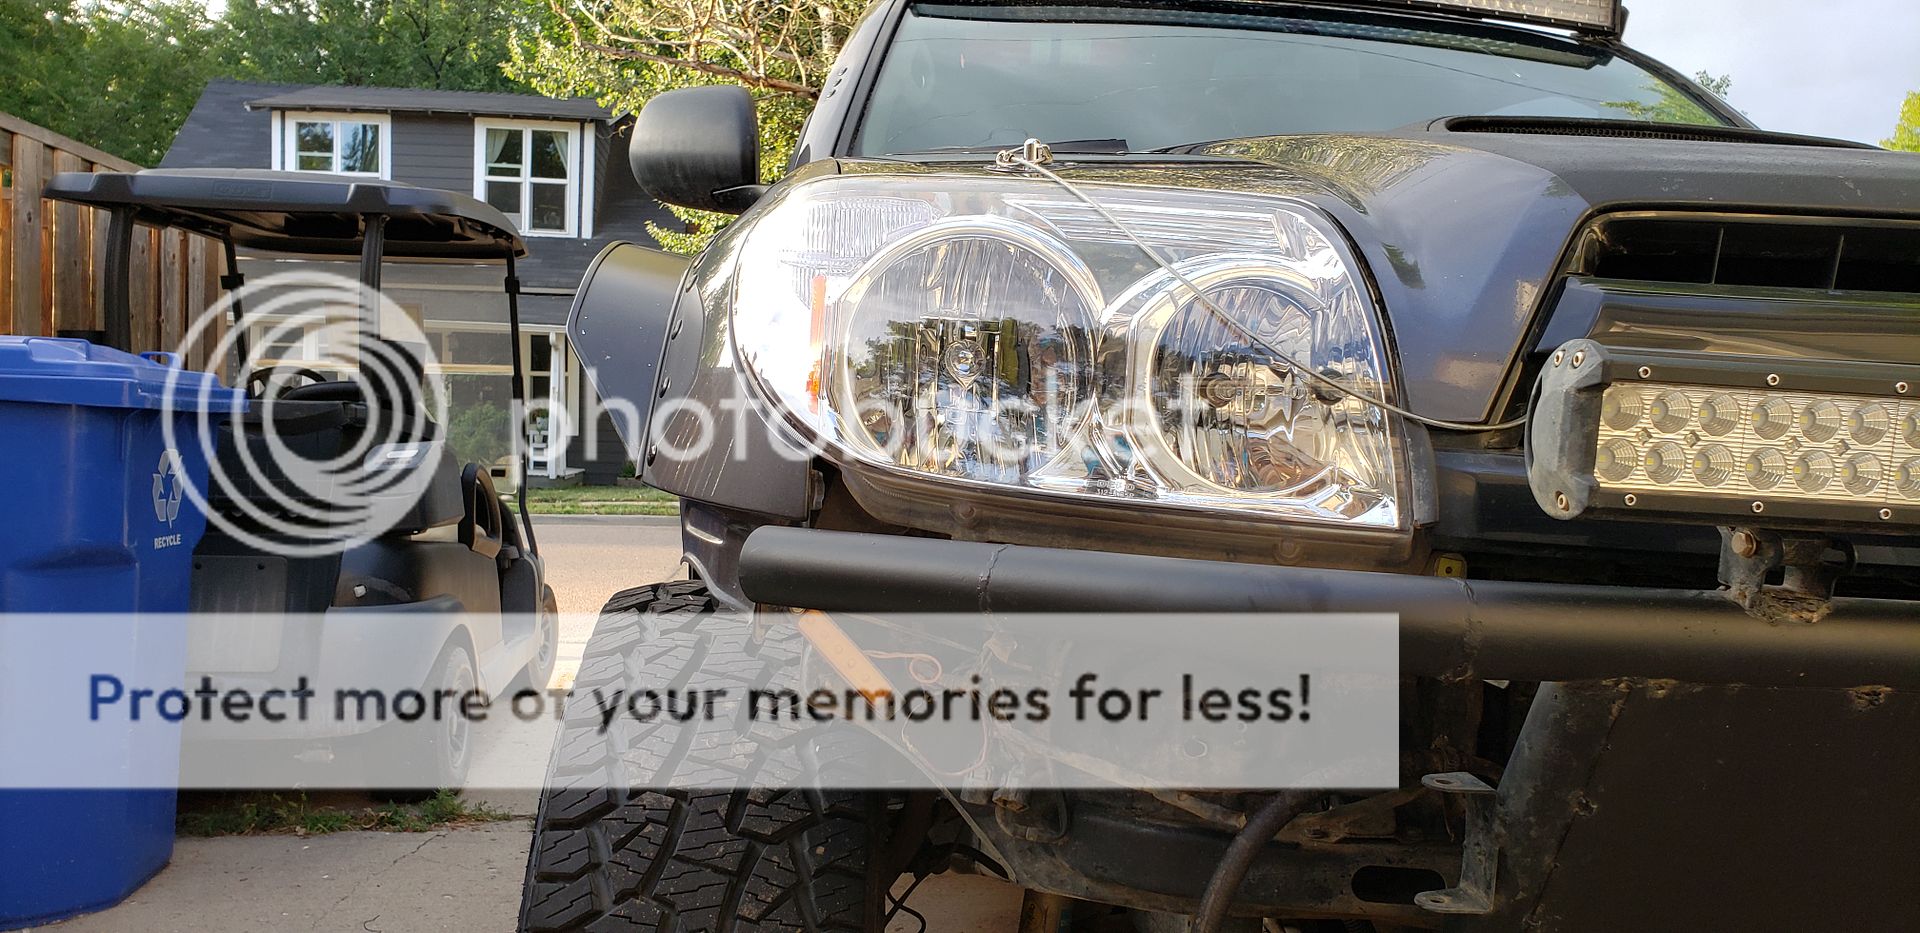
Fender have been completed and are holding up nicely! The only issues I have are that rocks flung at high speeds dent the flares and need tapped out every now and again. I believe that a hard bed-liner type product will prevent this from happening. See added photos for examples!
--------------
Hey folks!
Just thought i'd give you a sneak peak at what I'm working on right now while there is still massive amounts of snow on the ground from our snow cyclone thingy.
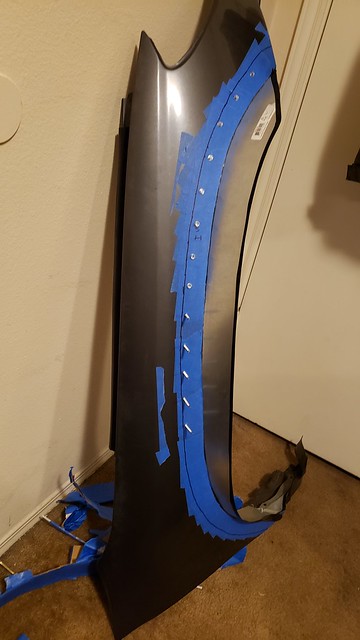
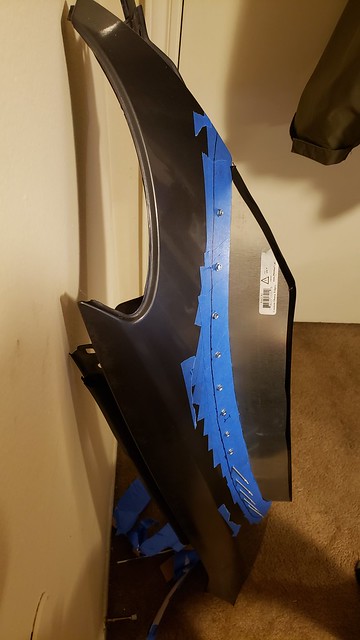
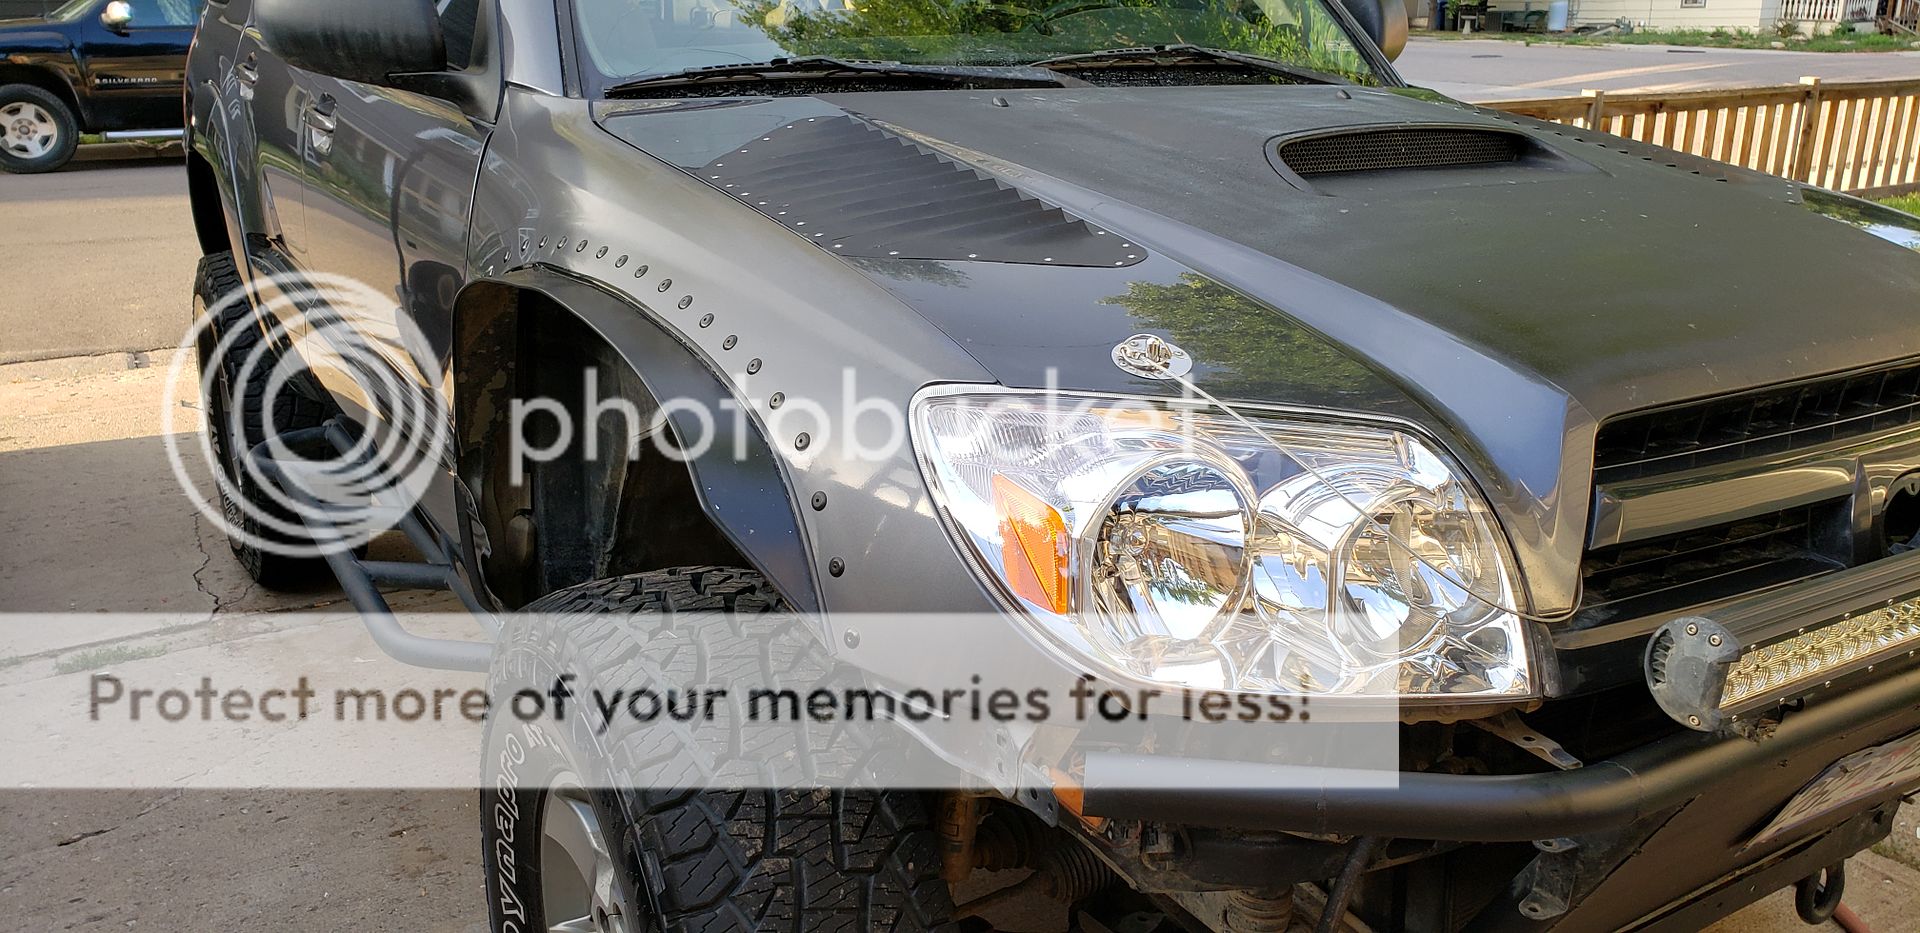
Some of you know, a few years ago, my 35's ripped off the plastic fender flares I had on my 4Runner and bent up where the clips go, so I ended up cutting the fender at the body line above the old square holes. Ever since then, I've been slinging stuff up on my windscreen and doors. I haven't been able to find any good aftermarket solutions for fender flares that match the body lines, and I don't really want to spend $400 on fiberglass fenders, so this is my solution.
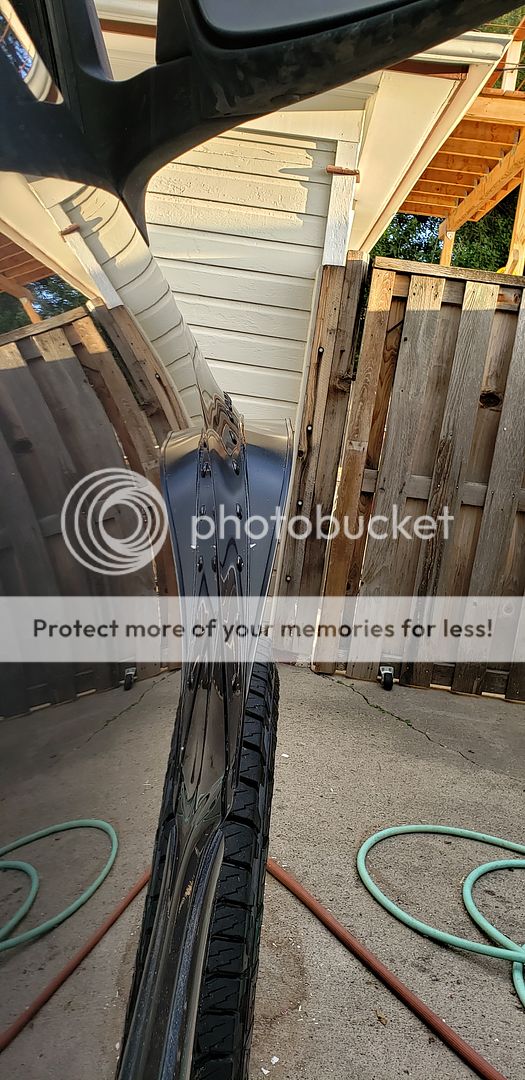
It's a work in progress, the screws will be replaced by black rivets, and the metal will most likely be wrapped with some sort of vinyl (paint would chip I think on this thin metal). This is also done on one of my "throw away" fenders, so if it doesn't work, I'm out a whopping $10.
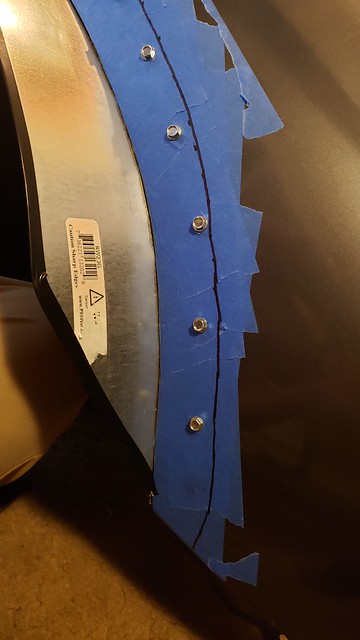
***don't mind the black line, it is not a reference point for the screws. It was from a previous mock up for fiberglass and was a ballpark estimate***
MATERIALS:
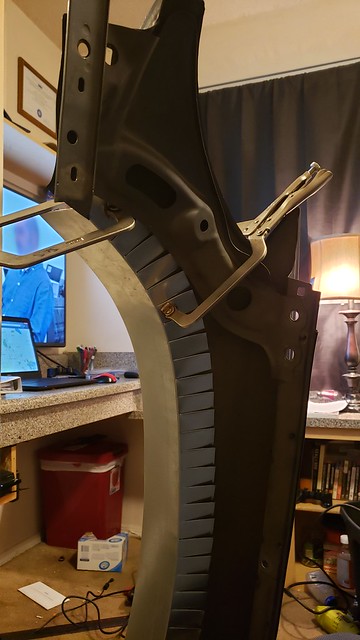
1. Eave/Gutter flashing, 4.5"x10'
2. Black aluminum automotive rivets
3. Rivet gun
4. Drill bit for rivet
5. Drill
6. Sheet metal shears
8. Door edge liner/guard with 3m adhesive
9. Multiple welding clamps
DIRECTIONS:
This is a mod that was done in order to give me somewhat of a fender liner after hi-lining my current fenders. The hi-line cut is a cut achieved by tracing around the outside of your current fender plastics, and cutting the line effectively removing the plastic and creating a smooth line.
1. Perform the hi-line cut.
2. File the rough edges in order to protect your hands and make the cut somewhat equal/smooth along the radius.
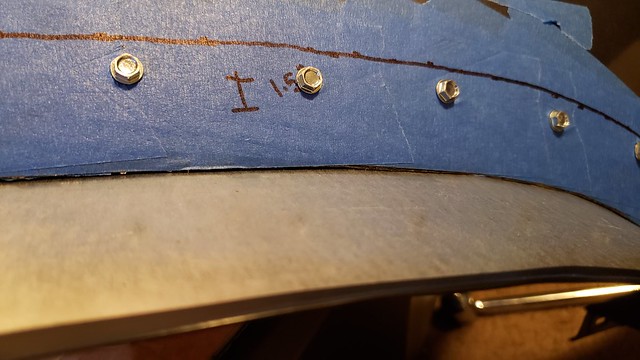
3. Take your eave flashing and make 1" wide vertical marks on one side the entire way down the piece.
4. Measure up 1.5" from the base of the same side you just marked and make a horizontal mark all the way down the piece. Where they intersect is where you will drill for your rivets.
5. Cut each mark you just made, all the way down that side (these are basically radius cuts to allow us to bend the metal to match our hi-line cut and attach the flare.
6. Take blue tape and put it on your fender in order to protect the paint from the clamps.
7. Start at the front of the fender and place the metal to where its flush to your fender at the cut area at a 90 degree angle.
8. Use the welding clamps to hold the piece to the fender as you work your way back making sure that the new piece you are making sits flush to the fender.
9. Drill through both your new flare and your fender, making sure that the piece isnt moving. Rivet each hole you just drilled before drilling the next to ensure zero movement in the pieces.
10. Repeat each step along the fender until you have the entire piece secured!
11. Take your tin snips to create the start and termination angles as desired, mine are somewhat sharp, but you can make them however you'd like.
12. Cover your rivets and fender with tape and paper, then paint.
13. Add the door edge protector to the edge of the fender you just made.
 20190314_232150
 20190314_232206
 20190314_231328
 20190314_231312
 20190314_213540
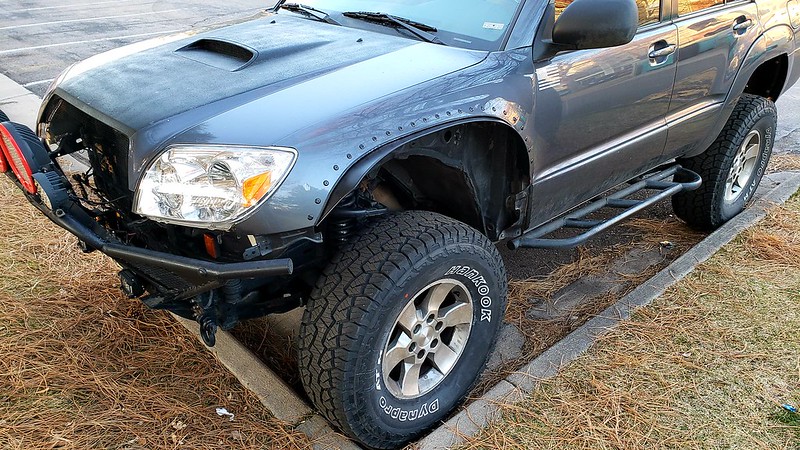
UPDATED PHOTOS! 8/14/2019
Just a little thing I'm working on in the bedroom workshop of my small, shared apartment

Safe travels, happy wheeling!
-Seth
__________________
2006 Shadow Mica SR5 v6
1" BL, Fox Racing UCA's, RC 3" N3 Lift, Rock Trix RT110 -12 Wheels, 315/70R17 Goodyear Territory MT, Tacoma Front Bumper, 5th Gen 4R Tire Carrier, Big Lion LED's


 Linear Mode


