 02-04-2020, 06:23 PM
|
#16
|
|
Member
|
|
Join Date: Sep 2018
Location: Pittsburgh
Posts: 212
|
|
|
Member
Join Date: Sep 2018
Location: Pittsburgh
Posts: 212
|
Quote:
Originally Posted by gfxcruncher

Hey man! I haven't been out since I met you over the holidays... I'm way overdue for a trip!
I like the idea of having a pull out table... sleeping at the wheel well height gives me just enough headroom to move around pretty comfortably and didn't want to sacrifice the drawer height.
Yeah, since you're doing your own wrenching and are handy, you should get a welder, really opens up the possibilities of what you can put together. I've been using this Vucan Welder from Harbor Freight. Works better using 220 and honestly, I've only been using the presets instead of manually dialing it in.
Sorry, already promised the winch mount to another buddy... |
That's one of the ones I've been eyeing up - but of course one project leads to another and I'll have to run a 220 line into the garage. Not a huge deal, just something else to do!
No worries about the winch mount, just another good excuse for me to roll me own...though, Liv is pushing for a full bumper, sooo....
Did make some good progress on the drawer setup today, got the carcass built along with the drawers - slides got delivered, so next is getting them mounted up and painting everything.
We've just done some fire roads and stuff since, but itching to get back out, might be starting a new job in a week or 2, so might try to get a few day trip in down to WV/VA before then....
__________________
2003 Galactic Gray Mica Limited V8
Inside: Pioneer AVH-2300NEX w/ backup cam | Dometic CFX3 55im | Custom floor w/ table & drawers
Outside: Hefty Fab Bumper | Warn ZR 10-S | RCI skids & sliders
Electrical: 150w solar panel | Victron MPPT controller | BlueSea breakers and panels
Suspension & Tires: Bilstein 5100's w/ Dobinson c59-314 & c59-329 | 5th Gen Trail wheels & Wildpeak A/T3W 275/70/17
|

|
 Reply With Quote Reply With Quote
|
|
02-05-2020, 12:16 AM
|
#17
|
 |
Member
|
|
Join Date: Sep 2017
Location: Northern Virginia
Posts: 259
|
|
|
Member
Join Date: Sep 2017
Location: Northern Virginia
Posts: 259
|
Quote:
Originally Posted by jcaino
That's one of the ones I've been eyeing up - but of course one project leads to another and I'll have to run a 220 line into the garage. Not a huge deal, just something else to do!
No worries about the winch mount, just another good excuse for me to roll me own...though, Liv is pushing for a full bumper, sooo....
Did make some good progress on the drawer setup today, got the carcass built along with the drawers - slides got delivered, so next is getting them mounted up and painting everything.
We've just done some fire roads and stuff since, but itching to get back out, might be starting a new job in a week or 2, so might try to get a few day trip in down to WV/VA before then....
|
Good deal. Looking forward to seeing what you did with your setup next time we meet up, that chuck box you got is sweet.
And good luck with the new job 
Sent from my iPhone using Tapatalk
__________________
2007 SR5 4WD Nautical Blue -- Build Thread
|
|
|
Reply With Quote
|
|
02-06-2020, 12:42 AM
|
#18
|
|
Member
|
|
Join Date: Sep 2017
Location: Northern Virginia
Posts: 259
|
|
|
Member
Join Date: Sep 2017
Location: Northern Virginia
Posts: 259
|
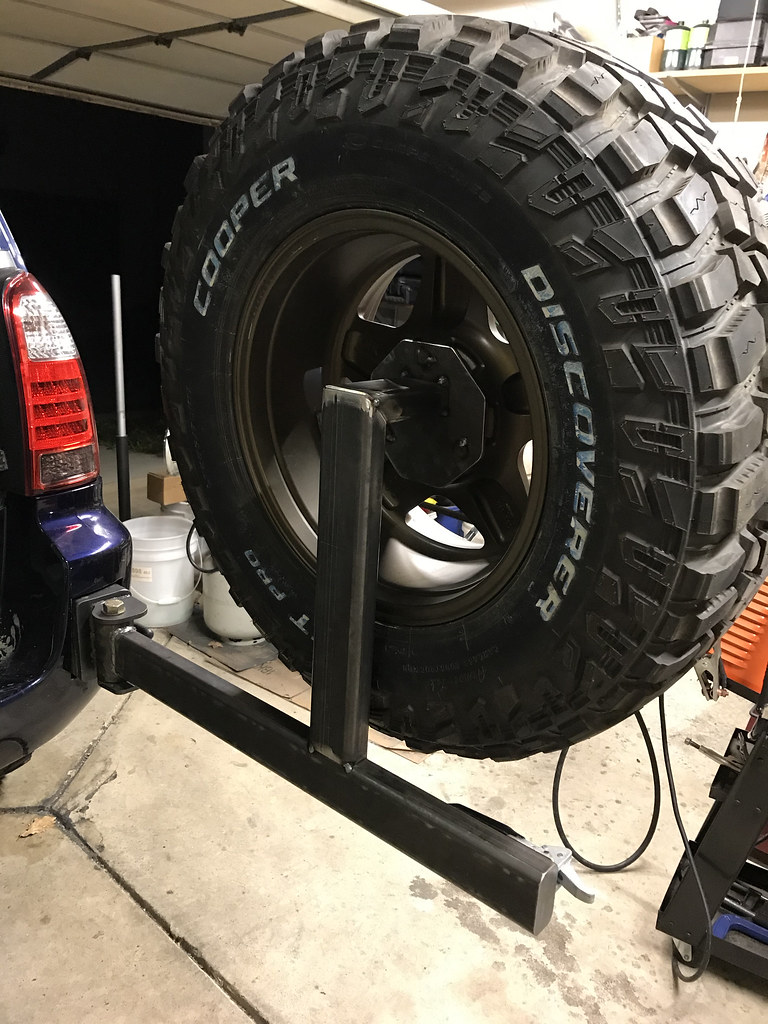
DIY Rear Swingouts
A few people have asked for a writeup on this... Ive said Im not a photographer and Im seeing now that Im not much of a writer either, lol.
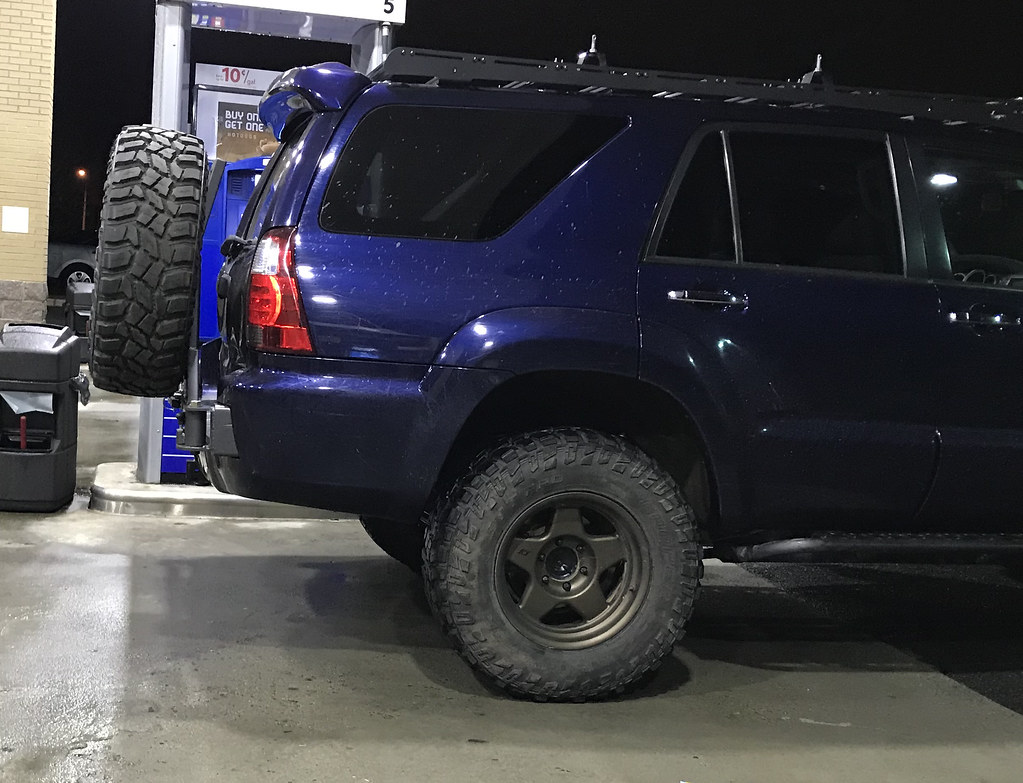
Project Background: I looked around at rear bumpers and hitch mount carriers and wasnt all that crazy about any of the options available but was tired of not running with a spare around town and having to hoist it up on the roof rack for trips. I actually like the lines of the factory cover and looking under the bumper cover, figured I could make my own swing outs.
I didnt plan on doing a writeup on this, but I think I got enough pics to explain it pretty good should anyone decide to do the same.
(insert do at your own risk disclaimer blah, blah, blah
)
Finished project:

 Incomplete list of things needed
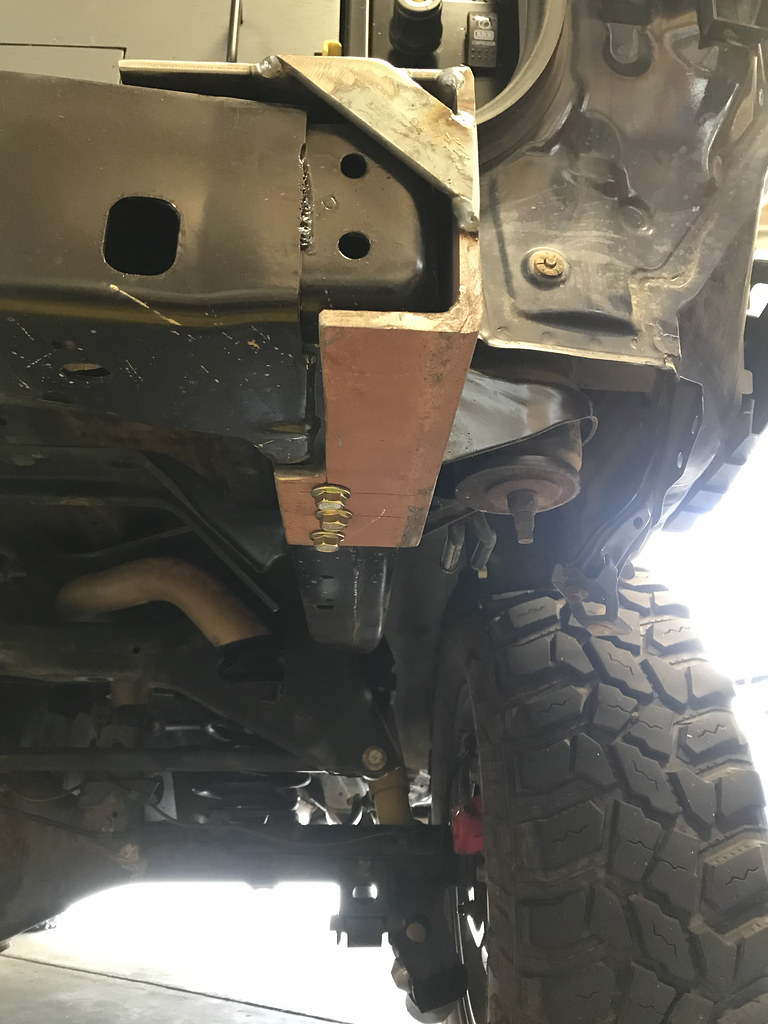
Started off getting some angle iron to bolt to the frame rail, I was after 3 x 4 x 1/4 but the yard had 3 1/2 x 5 x 5/16. To order what I wanted would have been a lot more expensive than using what they had lying around. Although I didnt need 5/16 thick stock, having the additional height worked out for the better. (sometimes its good not to have a plan) Its cut so that the factory tow loop mounting holes could be used, doesnt interfere with the rear body mount and sits just proud of the rear crossmember. On my truck the factory nuts in the frame wound up breaking off so I drilled them out and used M10 weld nuts, I also added a third one. You can see the holes for the factory tie down points on the right piece in the pic.

The cutout that was made to clear the body mount got reused to make a tab securing the top of the bracket to the crossmember. Nice hands lol.

The notched out section on the bottom is so the bracket doesnt interfere with the crossmember. I also added a diagonal brace tying the tab to the angle.
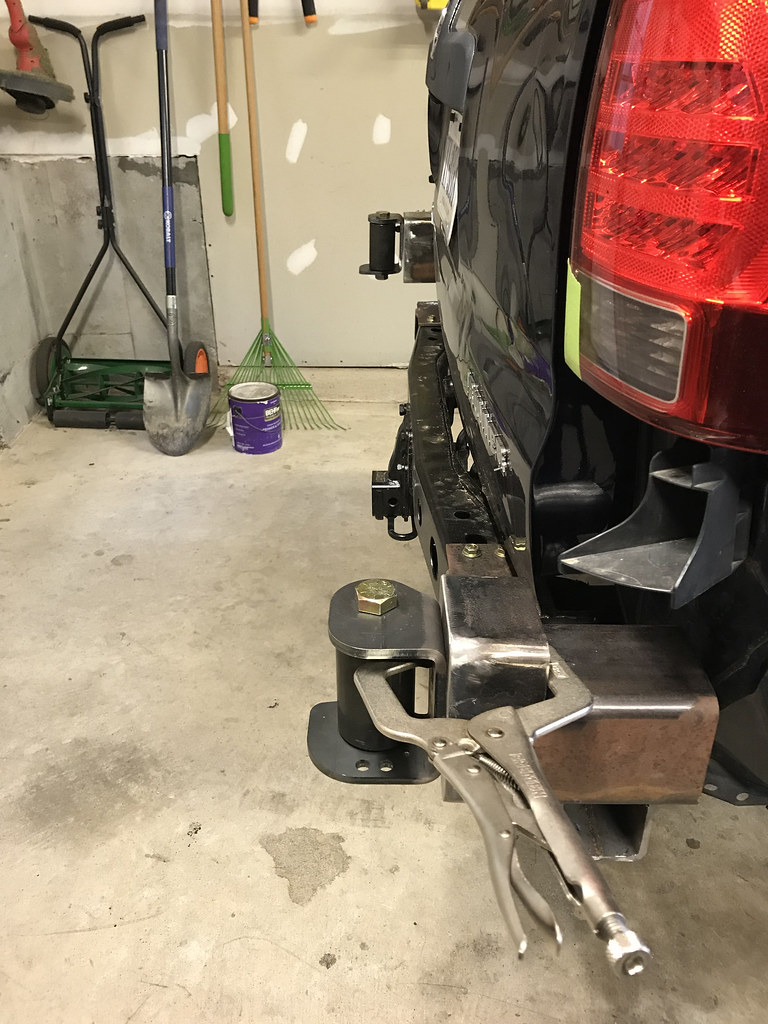
The next few steps were preformed with the truck frame leveled and on blocks so I could ensure the parts being welded to the brackets were square to each other.
Tacked a 3 x 3 x 1/4 piece of square tube flush with the top of the angle, this worked out great because it lines up the bottom of the next piece (that the hinge mounts to) to right about where the foot step is on the bumper. This piece is about 8 3/4 inches long, and the bottom is rounded slightly, it gets really close to the bottom of the bumper cover at that point. (pic doesn't show the 3 x 3 rounded off)

The piece on top of the 3 x 3 that the hinge is welded to is 4 x 6 x 1/4. with a 1/4 thick end cap. My local steel yard had 4 x 4 x 1/4 and ordering 4 x 6 would have been a lot (this is a recurring theme throughout this project). Made 4 x 6 out of 4 x 4 and saved some cash.

__________________
2007 SR5 4WD Nautical Blue -- Build Thread
|
|
|
Reply With Quote
|
|
02-06-2020, 12:43 AM
|
#19
|
|
Member
|
|
Join Date: Sep 2017
Location: Northern Virginia
Posts: 259
|
|
|
Member
Join Date: Sep 2017
Location: Northern Virginia
Posts: 259
|
DIY Rear Swingouts (Continued)
The big struggle I had was locating these pieces with the cover off so I could weld them up. Im sure someone has a better way to do it, I wound up taking the bumper cover on and off a lot.
Important: truck is leveled on blocks/jack stands at this point.
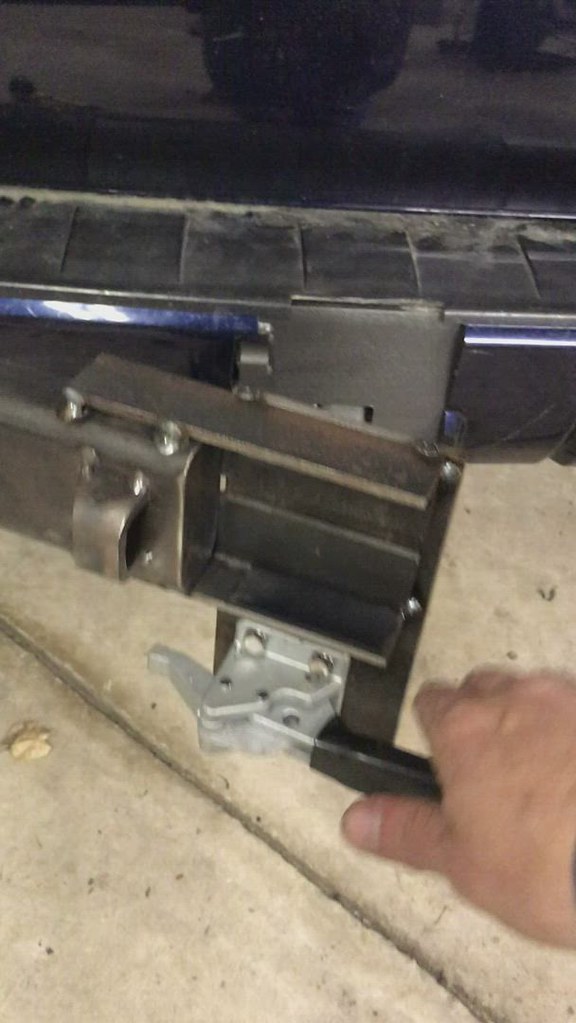
With the bumper cover on, set up a laser level to establish the vertical line of the bracket coming through the cover and mark it on the brake light (I made marks on painters tape in the pic), repeat on the other side. Remove the bumper cover and line the 4x6 piece up with the laser, do both sides at the same time and ensure they are square to each other. (I cut a 2 x 4 to length making sure my end cuts were square) Then tacked them together.

Figuring out how far the faces of the 4 x 6 should protrude from the cover, that was a pain. With the cover on I did my best to take a measurement from a point I could reference when the cover is off, like at the corner of the tail light, or at a body line in the lift gate.
In hindsight, it might have been easer to locate the strike plate for the latches (later step) and work backwards off that measurement, but at that point I only had a vague idea of how the latches were going to work.
Since I was doing double swing arms, I was pretty worried about the arms not lining up, so I used a long level spanning the hinges to ensure the hinges were lined up. After endless hammer tapping to get everything just right, I tacked everything up.
I did make one modification to the hinges, drilled two 1/2 holes on the backs for a couple of plug welds.

At this point I removed the brackets, finished the welds and added more supports. Yeah, I could have cut gussets out and they would have worked fine, I was being lazy. Are those welds ugly? Why yes, yes they are

Reinstalled the brackets, installed the sleeve in the hinge and took a measurement for the arms, there's a 1/4" gap between the arms where they meet, cut and notched the arms, mocked it all up with the arm catch and latch.

I found it easier at this point to take the arm off and to the bench to weld them on, it was just easier to keep everything square.
After cutting the arms to length I made the arm catch on the ladder arm with angle, its spaced away from the arm by 1/8" on the top and bottom so I could put some hard polyurethane strips in there to keep it from squeaking and provide some vibration dampening. Tapped holes for 1/4-20 threads and installed the latch on the tire arm. The latch catch is a leftover cutoff from the 1 1/2 x 3 tube, I made the latch catch the same height as the one that comes with the latch.

The strike plate is some leftover angle from the brackets mounted to the crossmember with weld nuts. I lucked out here, there was just enough room to slide some 1/4 plate between the strike plate and the backside of the arm. Surprisingly even though its metal to metal contact theres no squeaking or movement, probably due to the 4xinnovations hinges having no play and the latch drawing the arm pretty tight, I was originally going to use some rubber spacers or something in there. If I were to do it over again, I would mount the strike plate and use that as a reference point to locate the 4x6 pieces of the bracket front to back. (sorry if this doesnt make sense)

The catch for the ladder arm latch is another 1 1/2 x 3 cutoff welded to the strike plate and the latch mounts to the 1/4 plate that hangs down.
Probably easier to see it working in a video. (this is a video)
__________________
2007 SR5 4WD Nautical Blue -- Build Thread
|
|
|
Reply With Quote
|
|
02-06-2020, 12:44 AM
|
#20
|
|
Member
|
|
Join Date: Sep 2017
Location: Northern Virginia
Posts: 259
|
|
|
Member
Join Date: Sep 2017
Location: Northern Virginia
Posts: 259
|
DIY Rear Swingouts (Continued)
At some point after the arms and latches were on I was testing it by swinging the arms out and pushing down on them to see if they would flex, they did. The bracket was flexing away from the truck frame at the top... I added an extension to the top of the bracket, covering more of the rail and added another weld nut, still had flexing and it was flexing the side rail. (after looking closely, it looks like the side rails are made of thinner material than the crossmember) Since I wasn't using the foam insert on top of the crossmember there was just enough room to add a tab on each bracket and then tie them together with some threaded rod, that fixed the flex problem.
(Didn't get a pic. next time I have the cover off, I'll update here with one)
The tire support is some of the 1 1/2 x 3 tube the angled supports are 1 1/2 x 1 1/2 x 3/16 tube. I made the mounting plate out of 1/4 I had lying around and pressed a few old wheel studs in 1/2 holes (I could have made the holes slightly larger, it was a tight fit) wound up using a washer on the studs to space the wheel out slightly, the lug nuts were bottoming out. The mounting plate is tilted 5deg.
The ladder is 1 1/2 x 1 1/2 x 3/16 square tube and has a 10 deg slant to match the rear body line. On the sides of the ladder I put some M8 weld nuts so that I could attach a bracket to hold a jerry can and hi-lift, this is my daily, so I made it removable to keep a cleaner look around town. Man, that's a clean truck...
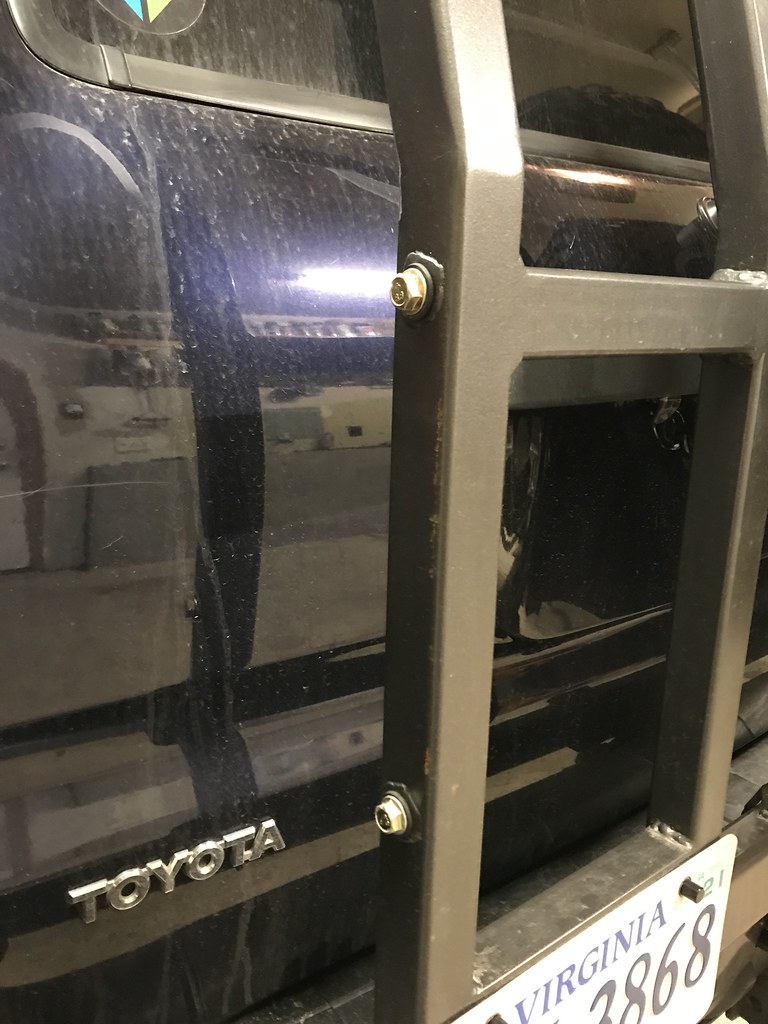
Used some angle for the bottom rung and mounted the license plate to that with side view LED bolts from Oznium. The lights arent the brightest, I dont really care, theyre just there so I dont get pulled over.

Used another 1 1/2 x 3 cutoff to make a backup camera relocation mount, some rod spaced off by 1/8 and welded on provides for zip ties to keep the wires neat.


Once the ladder was on I could then weld the hinge catches on, I wanted to make sure the lift gate would clear the ladder.
I finished it with etch primer and Rustoleum hammered finish black matte paint which looks more like a gunmetal to me. Yeah, bad idea, that stuff doesnt hold up very good at all, but at this point I was ready to be done with the project. Maybe Ill wire wheel it all off and finish it properly if I ever get bored. ha.
And the real reason anyone does swing outs
overlander level 100 unlocked!

Thats about it, feel free to ask questions if theres anything thats not clear.
__________________
2007 SR5 4WD Nautical Blue -- Build Thread
|
|
|
Reply With Quote
|
|
02-06-2020, 01:47 AM
|
#21
|
 |
Member
|
|
Join Date: Aug 2017
Location: Tampa, FL
Posts: 610
|
|
|
Member
Join Date: Aug 2017
Location: Tampa, FL
Posts: 610
|
This is so damn creative!! I tip my hat to you sir, well done. Also, that drawer setup is DOPE.
|
|
|
Reply With Quote
|
|
02-06-2020, 12:02 PM
|
#22
|
|
Member
|
|
Join Date: Sep 2017
Location: Northern Virginia
Posts: 259
|
|
|
Member
Join Date: Sep 2017
Location: Northern Virginia
Posts: 259
|
Quote:
Originally Posted by SHagood
This is so damn creative!! I tip my hat to you sir, well done. Also, that drawer setup is DOPE.
|
Thanks man! It's kinda like therapy for me, I'm on the computer all day.
__________________
2007 SR5 4WD Nautical Blue -- Build Thread
|
|
|
Reply With Quote
|
|
02-06-2020, 05:07 PM
|
#23
|
|
Senior Member
|
|
Join Date: Aug 2018
Location: MA
Posts: 1,141
|
|
|
Senior Member
Join Date: Aug 2018
Location: MA
Posts: 1,141
|
Quote:
Originally Posted by gfxcruncher
Thanks man! It's kinda like therapy for me, I'm on the computer all day.
|
same, surf/wheeling/outdoors counter the current burning of my eyes from living the accounting life
|
|
|
Reply With Quote
|
|
02-09-2020, 09:38 PM
|
#24
|
|
Member
|
|
Join Date: Sep 2017
Location: Northern Virginia
Posts: 259
|
|
|
Member
Join Date: Sep 2017
Location: Northern Virginia
Posts: 259
|
So this happened
Mid way through making the swing outs I was headed out for some camping and wheeling with friends. It was the first cold snap, twilight, perfect time to meet up with a deer 10 minutes from camp
Perfect.

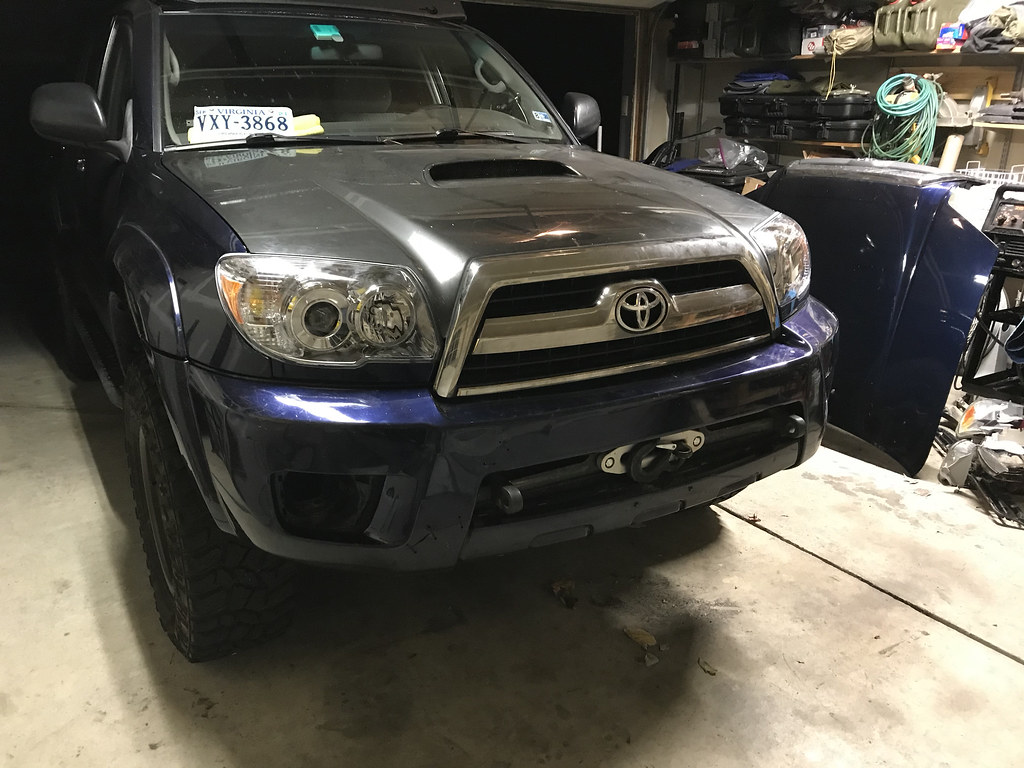
I think the winch mount saved the truck from more damage to the rad support and inner fender skirt, walked away with 1,200 after my deductible. Found a sport hood in gray, (blends in ok until I get around to getting the hood painted) took a heat gun to the bumper cover and got it back together with some zip ties for now and put an order in for a Coastal Offroad front bumper.
Had to bang the rad support around some as well as the latch assembly, but got everything lined back up.
__________________
2007 SR5 4WD Nautical Blue -- Build Thread
|
|
|
Reply With Quote
|
|
02-09-2020, 10:19 PM
|
#25
|
|
Member
|
|
Join Date: Sep 2017
Location: Northern Virginia
Posts: 259
|
|
|
Member
Join Date: Sep 2017
Location: Northern Virginia
Posts: 259
|
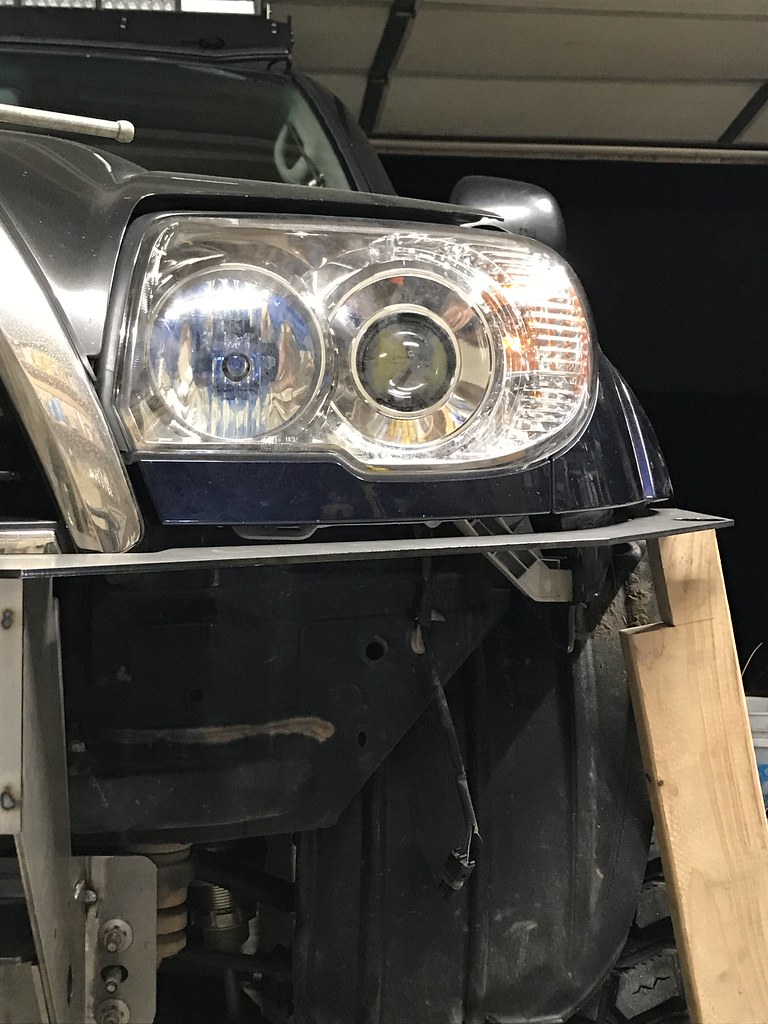
Coastal Offroad Front Bumper
Been working on this lately
Pretty happy with it, I like that you can get customizations to make it your own. Got circular light cutouts for the BD Squadrons I already have, omitted the other light cutouts and had custom tubes bent. Brandon was really helpful with all my questions and generally being a pain in his ass.
The laser cutting is really nice..

So after tacking the initial pieces in place I didnt have any gap at the headlight, seems like the consensus is to space the mounting plate at the top with washers. which also helps lining the ends up at the fenders. I tried it but wasnt really a fan, it wound up opening a gap when looking down from the top where I could see the ground below.
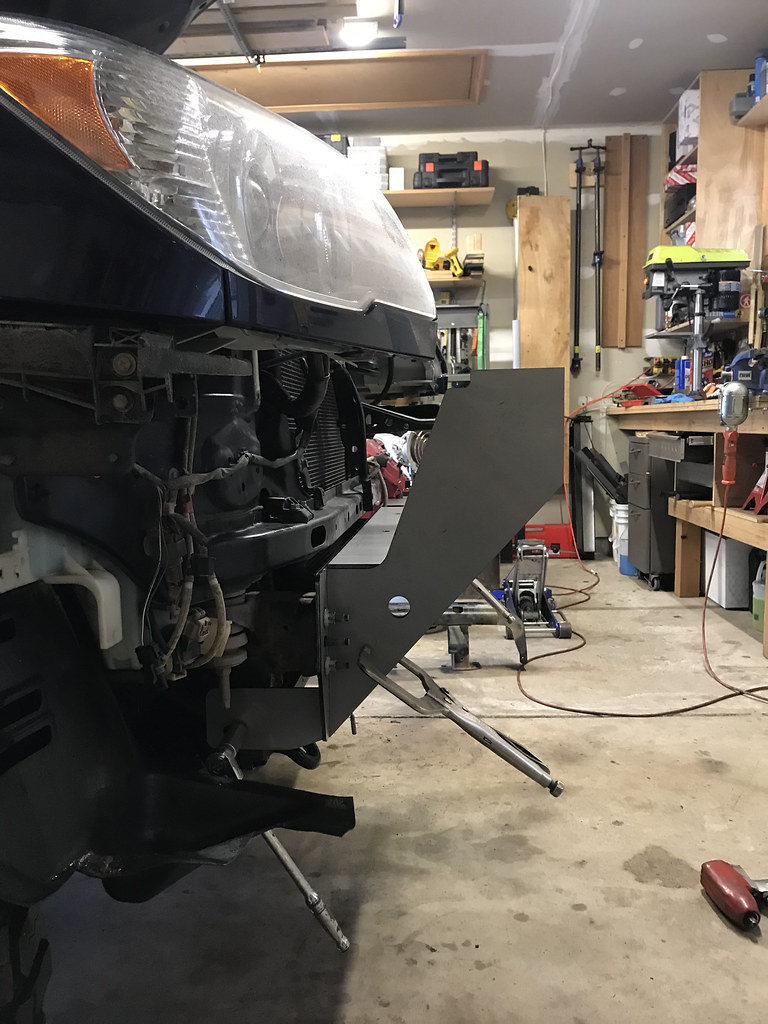
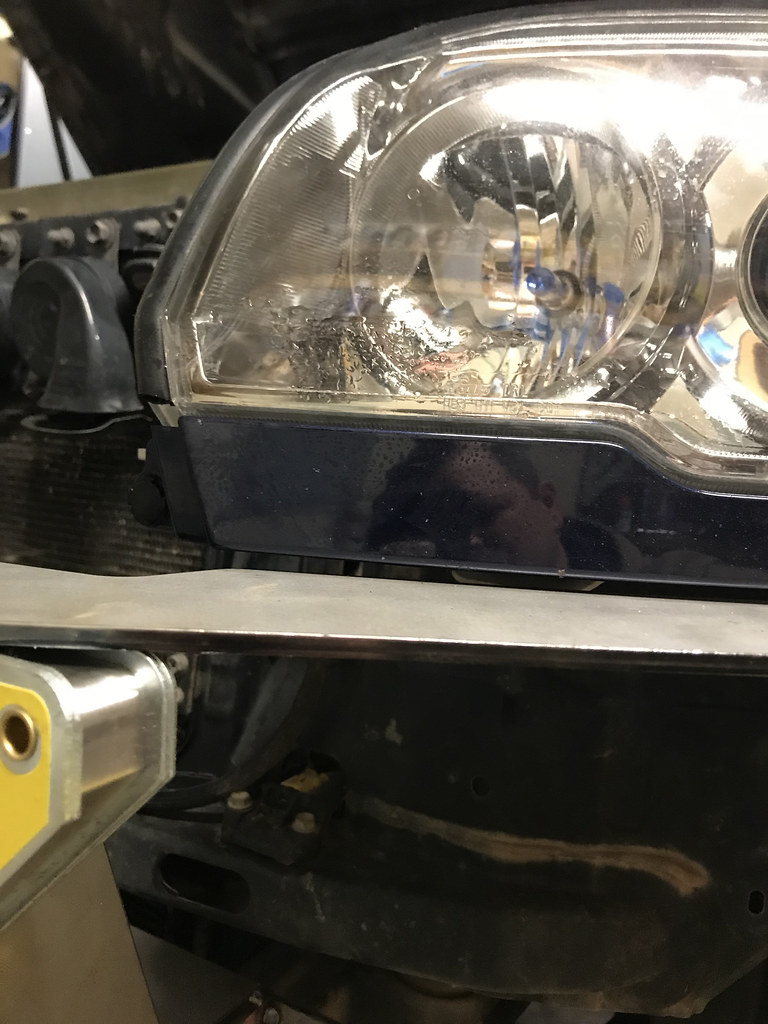
I wound up slotting the holes for the rad support vertically and then dropping the vertical supports down on the mounting plate to get a pretty consistent gap.


__________________
2007 SR5 4WD Nautical Blue -- Build Thread
|
|
|
Reply With Quote
|
|
02-09-2020, 10:27 PM
|
#26
|
|
Member
|
|
Join Date: Sep 2017
Location: Northern Virginia
Posts: 259
|
|
|
Member
Join Date: Sep 2017
Location: Northern Virginia
Posts: 259
|
Coastal Offroad Front Bumper (continued)
__________________
2007 SR5 4WD Nautical Blue -- Build Thread
|
|
|
Reply With Quote
|
|
02-09-2020, 11:31 PM
|
#27
|
 |
Member
|
|
Join Date: Nov 2019
Location: Tucson, AZ
Posts: 816
Real Name: Todd
|
|
|
Member
Join Date: Nov 2019
Location: Tucson, AZ
Posts: 816
Real Name: Todd
|
Quote:
Originally Posted by gfxcruncher
|
Bumper is coming out very nice, good work! I remember doing mine for the Tacoma. Lots of work welding and then grinding to get it looking good but so wort it in the end. I've also got the rear bumper on the Tacoma and plan on doing front and rear on the 4runner eventually.
|
|
|
Reply With Quote
|
|
02-09-2020, 11:39 PM
|
#28
|
|
Member
|
|
Join Date: Sep 2017
Location: Northern Virginia
Posts: 259
|
|
|
Member
Join Date: Sep 2017
Location: Northern Virginia
Posts: 259
|
Quote:
Originally Posted by xtremewlr
Bumper is coming out very nice, good work! I remember doing mine for the Tacoma. Lots of work welding and then grinding to get it looking good but so wort it in the end. I've also got the rear bumper on the Tacoma and plan on doing front and rear on the 4runner eventually.
|
Thanks man! 
Yeah, it's a lot of work, but I've been enjoying it (so far).
Looking forward to seeing yours done up!
__________________
2007 SR5 4WD Nautical Blue -- Build Thread
|
|
|
Reply With Quote
|
|
02-09-2020, 11:40 PM
|
#29
|
|
Member
|
|
Join Date: Nov 2019
Location: Tucson, AZ
Posts: 816
Real Name: Todd
|
|
|
Member
Join Date: Nov 2019
Location: Tucson, AZ
Posts: 816
Real Name: Todd
|
Quote:
Originally Posted by gfxcruncher
Thanks man!
Yeah, it's a lot of work, but I've been enjoying it (so far).
Looking forward to seeing yours done up! |
Gunna be a minute still but it will happen!
|
|
|
Reply With Quote
|
|
02-16-2020, 10:59 AM
|
#30
|
 |
Member
|
|
Join Date: May 2015
Location: Wisco
Posts: 937
Real Name: The Native Explorer
|
|
|
Member
Join Date: May 2015
Location: Wisco
Posts: 937
Real Name: The Native Explorer
|
Awesome build thread, thanks for the quality rear bumper write up man. Looks killer, and props to you for such a nice latch design... Dang
__________________
"Bumble" '17 Lim w/ 35k, IVD Stage 7, CBI/Prinsu metal, Morimoto lighting, ARB Linx : Build thread in progress...
The AventuRunner Build '07 V8 Sport w/ DO armor, Fox squish, Falken rubber, IVD UCAs, BD lights, Sherpa rack -- gonna miss the V8
The "Iceberg" Build... Natty White 3rd Gen ----gone, but not forgotten...
IG @apohl17
From ye fellow @Konkordmusk... "The 4Runner does not drive. It simply rotates the Earth to your desired position."
|

|
Reply With Quote
|
 Posting Rules
|
You may not post new threads
You may not post replies
You may not post attachments
You may not edit your posts
HTML code is On
|
|
|
|


 Linear Mode


