Step Three (continued):
Attach the bottom frame from the stock grill.
A method we used with the grill was to curl the ends. This kept the sharp edges from being too dangerous not only to skin but to your paint!
We had the benefit of a vise, but we also employed the use of needle nosed pliers to get a really tight curl. The vise worked fantastic for a very straight fold and curl.
At this point you should have accomplished the following;
1. removed stock grill
2. made a template of the opening where stock grill used to be
3. transfered template shape to perforated metal
4. cut your new grill out of perforated metal
5 (optional but suggested). fold and curled the flaps that touch the light housings, and the bottom of the new grill.
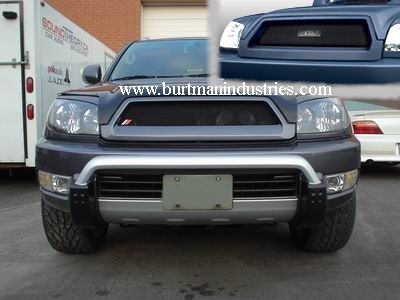
Step Four:
Prepare the hood for the new grill.
Place your new grill where it will be mounted. Mark where you will have to tin-snip or drill holes for your mounting screws. We opted to
not use the mounting holes on the top corners because they were recessed too much. I felt they would create a really distracting hump if used, IMO.
Mask the following:
Hood (above and below!), Fenders, Bumper, Engine Bay.
The stock grill is mounted to a lip beneath the hood.
Because the perforated metal is fairly transparent, we painted the lip the same semi-gloss black that the new grill is painted.
Remove the bottom frame from the stock grill. Paint this frame with the same paint as the lip of the hood and the new grill.
Paint your new grill. This is pretty straight forward. If you made it this far with the mod I trust that you can spray paint without a visual :P
Just remember that there are flat surfaces from nearly every angle. I spray painted and re-spray painted about 6 different times. Spray from above, below, left, right, straight ahead and most importantly from behind!
I will continue with the final steps after i watch tonight's Heroes episode


 Linear Mode


