 07-07-2011, 12:51 PM
|
#1
|
 |
Member
|
|
Join Date: Dec 2010
Location: Rochester, MN
Posts: 195
Real Name: Jeff
|
|
|
Member
Join Date: Dec 2010
Location: Rochester, MN
Posts: 195
Real Name: Jeff
|
Backup Camera Install
Hey guys,
I am getting a kenwood CMOS-200 backup camera to hook up to my DNX6160 this weekend. Anyone have a good, step by step approach to installing it in the recommended factory location, just adjacent to the gate-door-handle? I am particularly concerned with how to appropriately disassemble the rear gate panel to run the wiring. Any comments would be appreciated, any pics would be even better. Thanks!
|

|
 Reply With Quote Reply With Quote
|
|
07-07-2011, 12:53 PM
|
#2
|
 |
Member
|
|
Join Date: Jul 2008
Location: TX
Posts: 643
|
|
|
Member
Join Date: Jul 2008
Location: TX
Posts: 643
|
Quote:
Originally Posted by MNT4R

Hey guys,
I am getting a kenwood CMOS-200 backup camera to hook up to my DNX6160 this weekend. Anyone have a good, step by step approach to installing it in the recommended factory location, just adjacent to the gate-door-handle? I am particularly concerned with how to appropriately disassemble the rear gate panel to run the wiring. Any comments would be appreciated, any pics would be even better. Thanks!
|
i can walk you through it if you want, I will pm you my Cell#.
__________________
2008 SE 4.0 4WD 5100's
|
|
|
Reply With Quote
|
|
07-07-2011, 03:40 PM
|
#3
|
|
Member
|
|
Join Date: Jan 2008
Location: Ankara, Turkey
Posts: 493
|
|
|
Member
Join Date: Jan 2008
Location: Ankara, Turkey
Posts: 493
|
Quote:
Originally Posted by MNT4R
Hey guys,
I am getting a kenwood CMOS-200 backup camera to hook up to my DNX6160 this weekend. Anyone have a good, step by step approach to installing it in the recommended factory location, just adjacent to the gate-door-handle? I am particularly concerned with how to appropriately disassemble the rear gate panel to run the wiring. Any comments would be appreciated, any pics would be even better. Thanks!
|
I put mine there but didn't get any good pictures. The biggest mistake I made was trying to get the camera wiring through the factory wire housing between the body and the gate with the connectors still attached. They will almost make it but it's a nightmare and in the end, mine ripped off the wire. Save yourself some time and just cut them off so you're only fishing the wire through.
I used a brand new spade bit to cut the plastic at the factory mounting location. Then I use a tiny bit to get the corners, followed by a file to square the hole. It went pretty fast.
The license holder ( garnish in Toyota speak) comes off easily. Once you pop off the rear gate interior cover, it's 4 nuts (I think - can't remember if you have to remove the lock) and then pops off (there are a couple of plastic clips that still hold it after you remove the nuts).
I was going to do a write-up but got interrupted on the install (winter came). I have a couple of pictures though that might help. I fed the wiring from the HU along the drivers side up to the gate.
__________________
2004 4Runner SR5 SR5 - V6, 4X4, Moonroof , JBL, Leather, Stratosphere Mica
Installed Mods: Spoiler, HIR bulbs, Kenwood DNX6960 Nav, Back Window Up with Remote Mod, Rear Camera, LED Tails, Key Reminder Disable, OEM Automatic Headlights, Rear USB Ports, Seat Heaters, Aftermarket Third Row, Heated Side View Mirror
Locations: VA
|
|
|
Reply With Quote
|
|
07-07-2011, 03:49 PM
|
#4
|
 |
Senior Member
|
|
Join Date: Mar 2010
Location: Chester County, PA
Age: 48
Posts: 3,803
Real Name: Ed
|
|
|
Senior Member
Join Date: Mar 2010
Location: Chester County, PA
Age: 48
Posts: 3,803
Real Name: Ed
|
OEM camera.......... wires???
A few months back, I got a Toyota OEM rear camera (could be Lexus, I can't remember) on ebay. Trouble is, I have no idea how to wire it. BEFORE I go tearing into the tailgate, I need to know what wires go to where. This could be my next mod to work on after I'm done with my retros.............. thanks for any replies!
Don't mean to hijack, but it is related......................
__________________
Current: 2005 V6 Limited 4x4. SOLD: 2000 HiLux Surf SSR-G, 1997 HiLux Surf SSR-X Limited

|
|
|
Reply With Quote
|
|
07-07-2011, 09:35 PM
|
#6
|
 |
Elite Member
|
|
Join Date: Feb 2011
Location: Bend, OR
Posts: 9,902
|
|
|
Elite Member
Join Date: Feb 2011
Location: Bend, OR
Posts: 9,902
|
Quote:
Originally Posted by CookieRoe
A few months back, I got a Toyota OEM rear camera (could be Lexus, I can't remember) on ebay. Trouble is, I have no idea how to wire it. BEFORE I go tearing into the tailgate, I need to know what wires go to where. This could be my next mod to work on after I'm done with my retros.............. thanks for any replies!
Don't mean to hijack, but it is related......................
|
Can you provide a picture of the OEM unit with the wiring harness as well as the part number for it? I will look and see if I can post up some wiring diagrams for an earlier model 4Runner with a back-up camera if the part number ends up being a Lexus I will try to get both diagrams so you can match them up.
|
|
|
Reply With Quote
|
|
07-09-2011, 12:41 AM
|
#7
|
|
Senior Member
|
|
Join Date: Mar 2010
Location: Chester County, PA
Age: 48
Posts: 3,803
Real Name: Ed
|
|
|
Senior Member
Join Date: Mar 2010
Location: Chester County, PA
Age: 48
Posts: 3,803
Real Name: Ed
|
AGAIN, this is related to the post..............sorry to hijack
Quote:
Originally Posted by BlackWorksInc
Can you provide a picture of the OEM unit with the wiring harness as well as the part number for it? I will look and see if I can post up some wiring diagrams for an earlier model 4Runner with a back-up camera if the part number ends up being a Lexus I will try to get both diagrams so you can match them up.
|
I sure can!! Thanks for your help!
 Genuine Toyota/Lexus rear view camera. Hope this works.......
 On one side, 2 black wires
 On the other side of the plug, yellow and red wires.
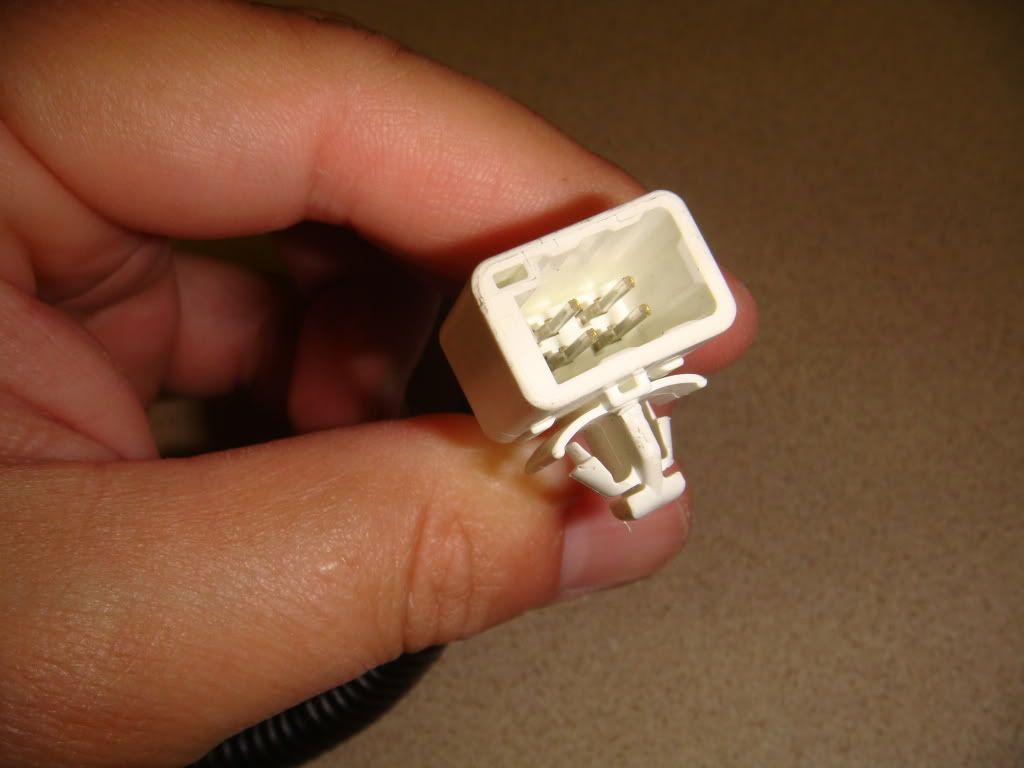 4 pin connector. B/C my runner didn't have this assesory installed at the factory, I'm sure I'll have to cut this plug off, solder the wires and run them to.....................???
EDIT:
Black wire: ground (which one?)
Black wire: ground (which one?)
Red wire: Power wire (wire to ?)
Yellow wire: (wire to Reverse Signal?)
Thanks for any help!
__________________
Current: 2005 V6 Limited 4x4. SOLD: 2000 HiLux Surf SSR-G, 1997 HiLux Surf SSR-X Limited
Last edited by CookieRoe; 07-09-2011 at 12:45 AM.
|
|
|
Reply With Quote
|
|
07-09-2011, 01:29 PM
|
#8
|
|
Senior Member
|
|
Join Date: Nov 2008
Location: San Francisco, CA
Age: 44
Posts: 2,549
|
|
|
Senior Member
Join Date: Nov 2008
Location: San Francisco, CA
Age: 44
Posts: 2,549
|
PM darkie3495
Electronics:
Kenwood DNX8120
Kenwood Backup camera
Hella Supertones
Scanguage II
(2) Blue Sea Fuse Blocks (12 fuse - Engine, 6 fuse - Rear)
Kevin (darkie3495) Build Thread
Dec 09 / Jan 10 / Feb 10 T4ROTM - darkie3495
__________________
. -Kenny- (formerly icantsee) .
**SOLD** 2007 Toyota 4Runner V6 SR5 4WD - Titanium Metallic
Daystar Spacer Lift 2.5/1.5 (Preload/Topout)|P265/70R17 Bridgestone Dueler A/T Revos|XenonDepot H11 4300k Xtreme HID Kit|Weathertech Floor & Cargo Liners|Rear Axle Diff Breather Extension|Color Matching Grill|Debadged Emblems|FatCat6|Soon/Wishlist|CB Radio|BL 1"|Demello Bolt On Sliders|Icons or Radflo|BajaRack or Rola Rack
|
|
|
Reply With Quote
|
|
07-10-2011, 04:23 PM
|
#9
|
|
Member
|
|
Join Date: Dec 2010
Location: Rochester, MN
Posts: 195
Real Name: Jeff
|
|
|
Member
Join Date: Dec 2010
Location: Rochester, MN
Posts: 195
Real Name: Jeff
|
Thanks for the help
Hey guys,
Thanks for the help! This thread TREVLOC's Thread was clutch for getting the camera into the cabin! And thanks too for your comments Asmara, they were helpful.
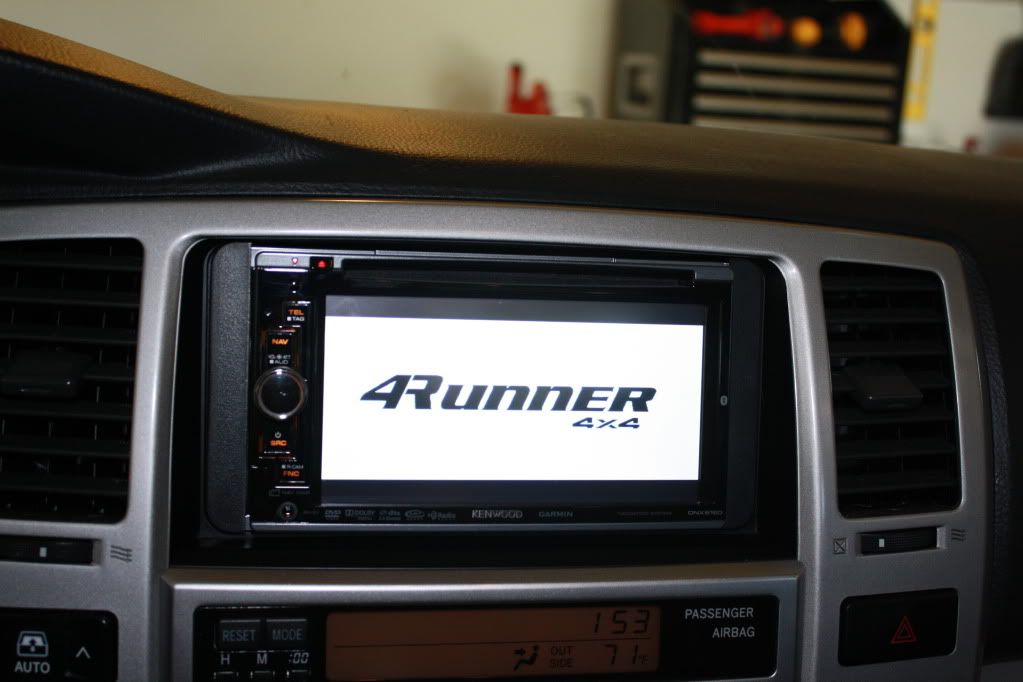
Here is the install, plus a couple of other developments for my truck inthe last 6months.
Here is what I started with:

After using this thread How to Remove the Navigation Head Unit from a 2003 Toyota 4Runner
then wiring in the wiring harness, sirius, ipod adapter, and garmin equipment; I had this
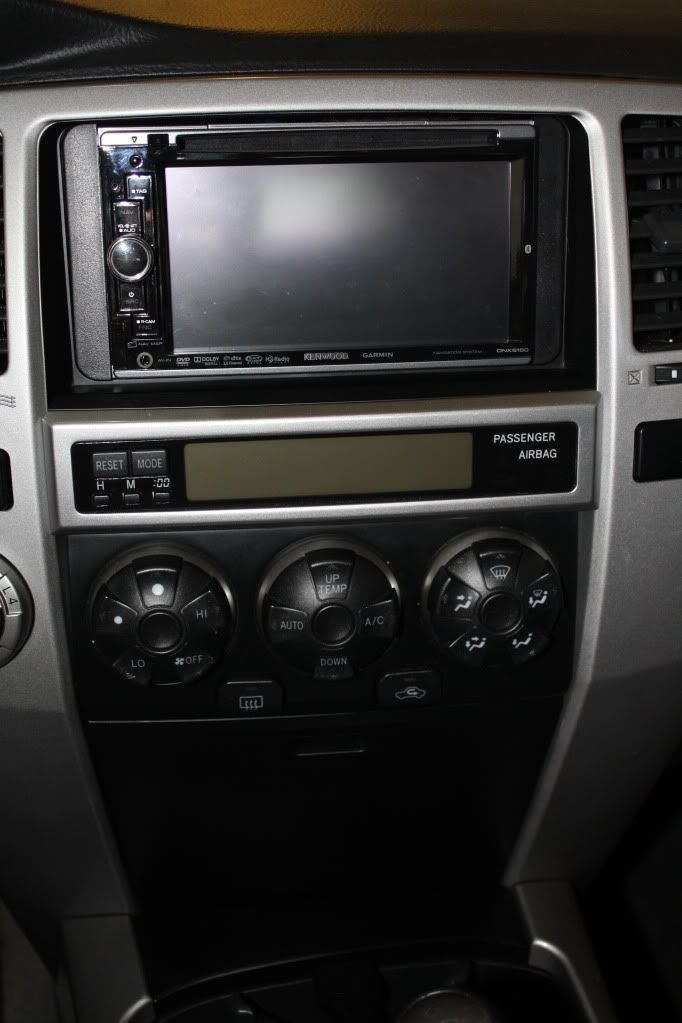
Using some simple photoshop I stuck this startup screen
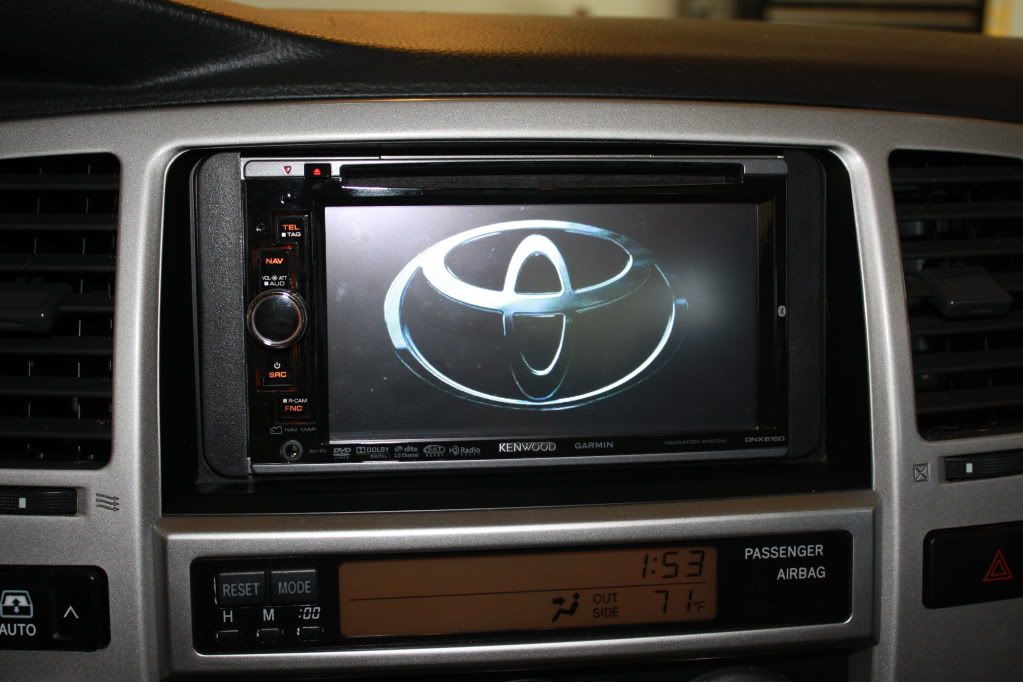
And this background
Using this thread I disassembled the rear gate
TREVLOC's Thread
Then I pulled the camera wiring through the rubber grommet surrounding the lock and license plate lighting wiring, then around the window frame and through the rubber grommet on the left hand side between the gate and the cabin. Interestingly, the Kenwood CMOS 200 is exactly the right size to fit underneath the rear gate dressing, being easily screwed into the pre-existing, pre-drilled, pre-threaded holds used to keep the license plate lights in place (see below)
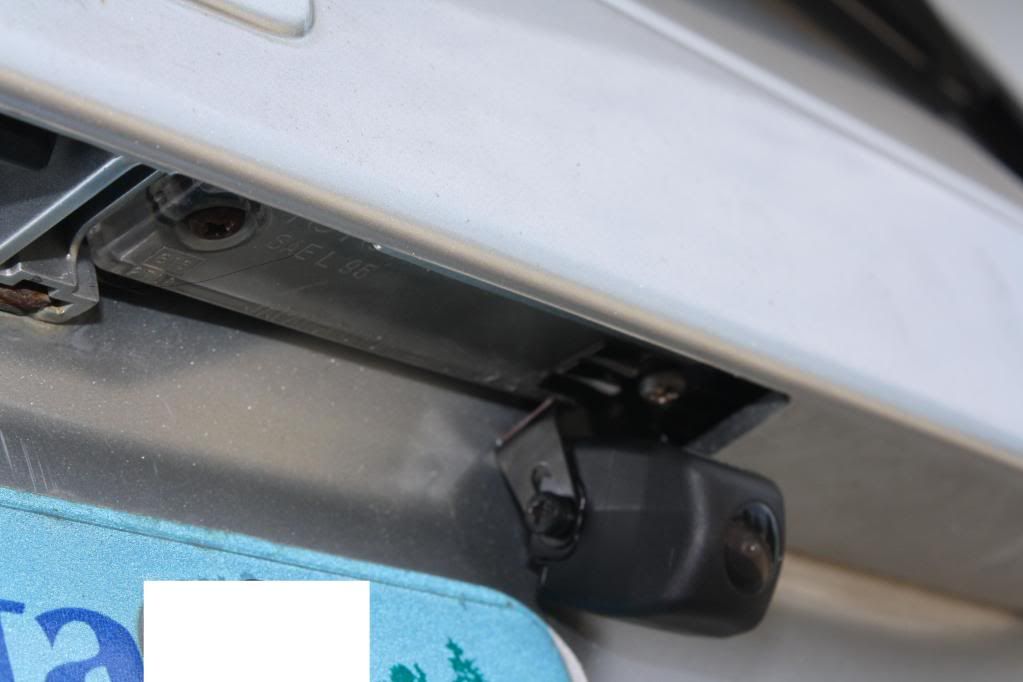
Low profile at a distance

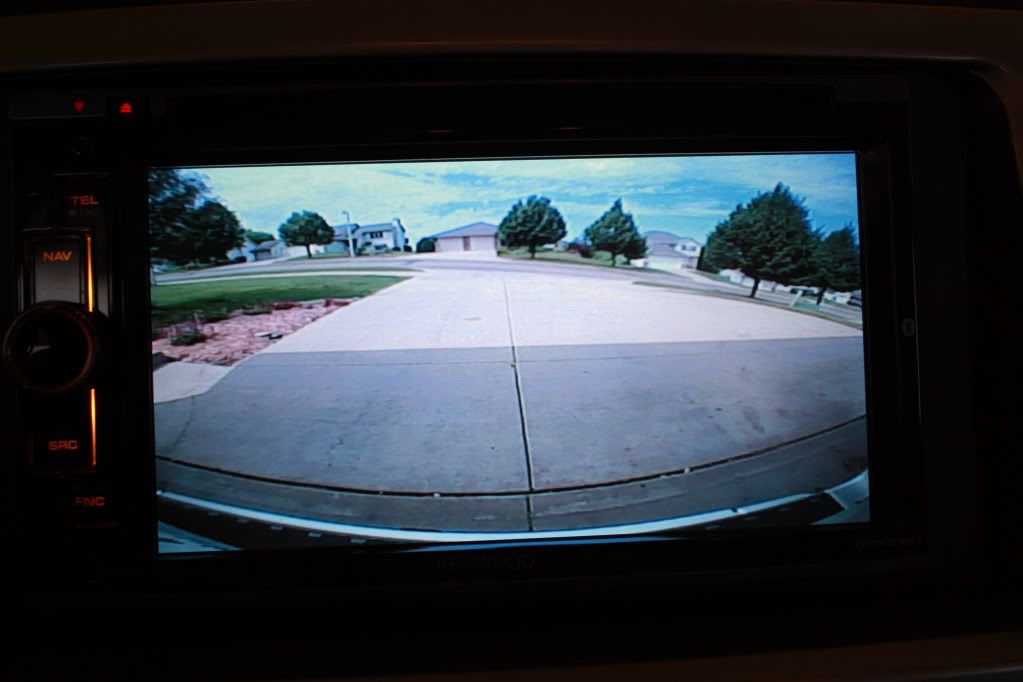
Then I ran it behind the plastic panel on the left side (driver side), and under the molding to the left of the driver's foot. The reverse wiring I spliced into using the wire provided with the stereo at the back of the truck, near the actual wiring harness for the driver's side tail-light and then I spliced the ground, power, and reverse wires that came with the camera to their exact same counterparts directly behind the stereo. After getting everything set back into place, here's what we're left with.
Install time:
KENWOOD DNX 6160 - roughly six hours
KENWOOD CMOS 200 - 2 hours to get into the cabin, 2 to get into the headunit (done at a different time than the headunit)
Thanks again for your help, please let me know if you have any questions.
-J
Now to get some HIDs on this puppy
|
|
|
Reply With Quote
|
|
07-10-2011, 05:22 PM
|
#10
|
 |
Member
|
|
Join Date: Apr 2011
Location: North Texas
Posts: 364
|
|
|
Member
Join Date: Apr 2011
Location: North Texas
Posts: 364
|
MNT4R-that's a very nice setup you got there. I have the pioneer 3300bt head unit and if i get a back up cam i would do it the way you did. BTW is it night vision too?
__________________
2004 Toyota 4Runner SR5 2WD V6
MY BUILD THREAD: http://www.toyota-4runner.org/4th-ge...p-warrior.html

|
|
|
Reply With Quote
|
|
07-10-2011, 07:06 PM
|
#11
|
|
Member
|
|
Join Date: Dec 2010
Location: Rochester, MN
Posts: 195
Real Name: Jeff
|
|
|
Member
Join Date: Dec 2010
Location: Rochester, MN
Posts: 195
Real Name: Jeff
|
Thanks man! While I am unsure that the camera has a specific "night vision" feature I know that it works well at night (it had good reviews for this and seems to be working well for me). Let me know if you have questions with the install.
|
|
|
Reply With Quote
|
|
07-11-2011, 10:06 AM
|
#12
|
 |
Member
|
|
Join Date: Jun 2011
Location: Auburn, AL
Posts: 55
|
|
|
Member
Join Date: Jun 2011
Location: Auburn, AL
Posts: 55
|
what is your set-up on the front? (grill guard and lights)
|
|
|
Reply With Quote
|
|
07-12-2011, 12:03 AM
|
#13
|
|
Member
|
|
Join Date: Dec 2010
Location: Rochester, MN
Posts: 195
Real Name: Jeff
|
|
|
Member
Join Date: Dec 2010
Location: Rochester, MN
Posts: 195
Real Name: Jeff
|
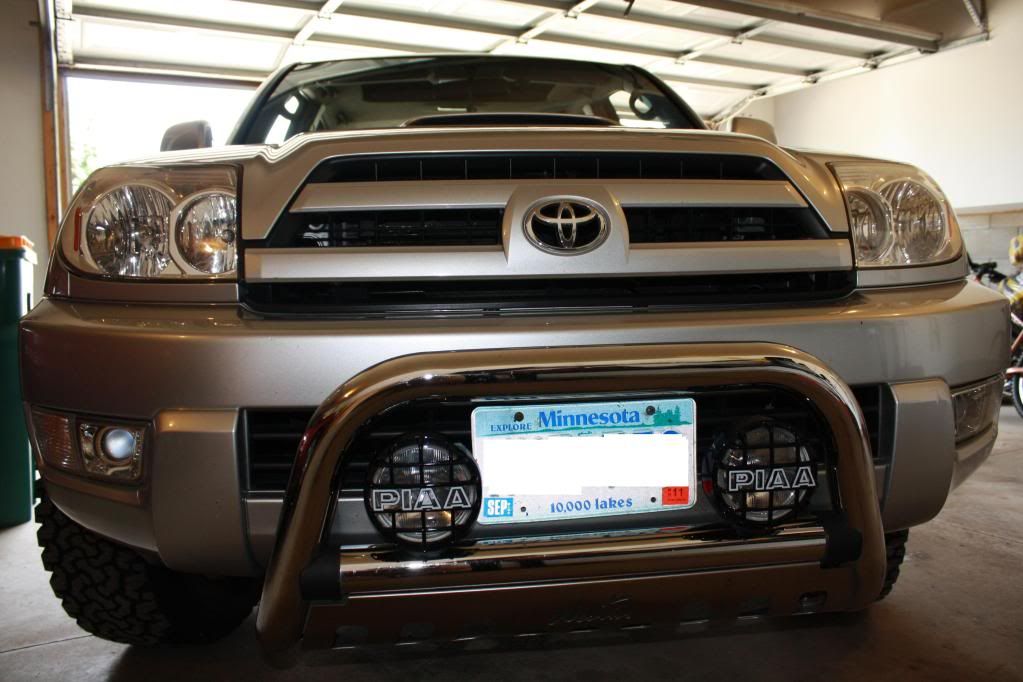
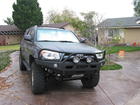
Front Grill and Fogs
So, here is what I started with:
[IMG]  ~original[/IMG]
[IMG] 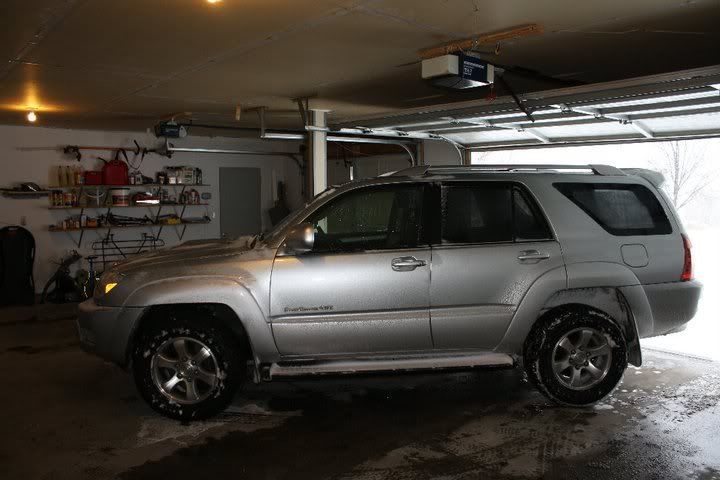 ~original[/IMG]
And here is the install equipment (PIAA 540 driving lamps, Westin bull bar in chrome, FJ cruiser fog lamp switch and FJ cruiser wiring harness)
[IMG] 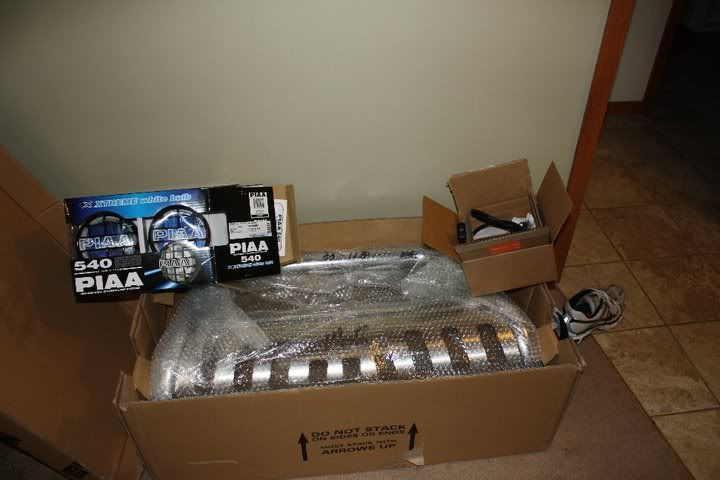 ~original[/IMG]
I used this wiring diagram (thank you to the omnipotent darkie3495)
[IMG]  ~original[/IMG]
Then did the install (30min for the bullbar, max; about 3-4 hours for the lights and FJ switch) I placed the FJ switch into the center console for that stock look and am extremely happy with it. Here's what I've got:
Front end
[IMG] ~original[/IMG]
Lighting it up
[IMG] 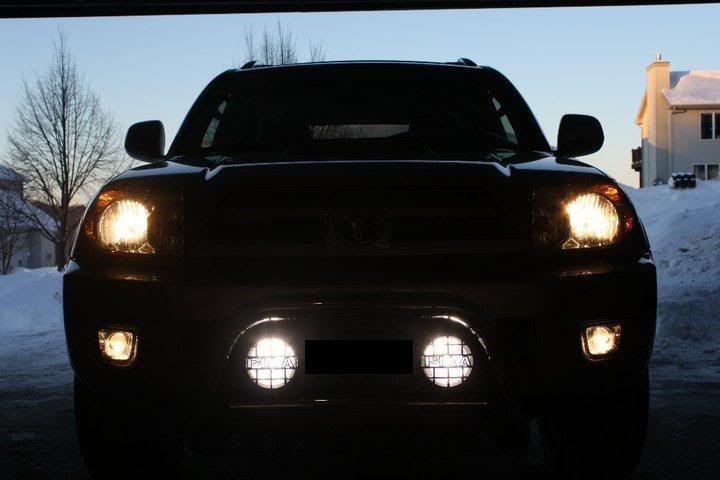 ~original[/IMG]
Here's the switch
[IMG] 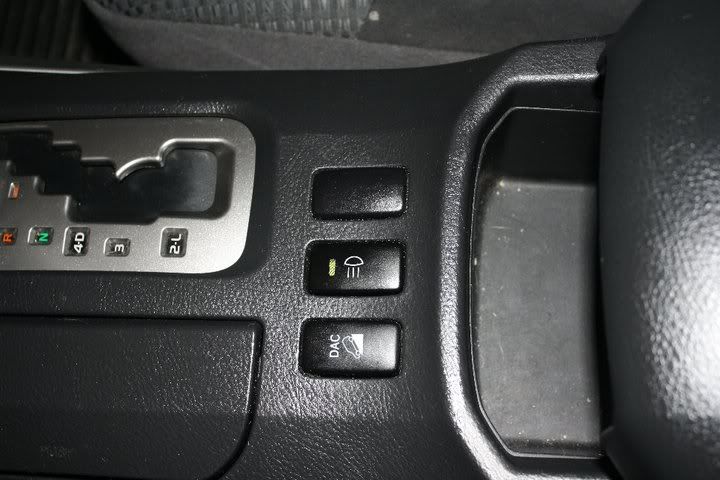 ~original[/IMG]
And with the simple addition of some new BF Goodrich All-Terrains, here is the new side profile
[IMG] 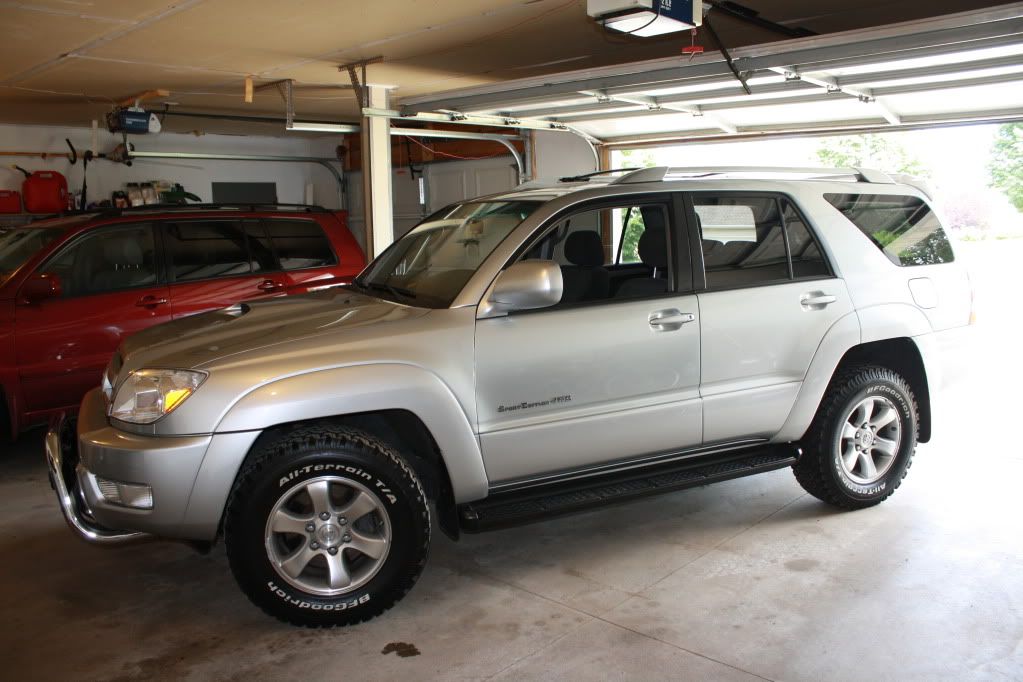 ~original[/IMG]
Let me know if you have any questions.
-J
Last edited by MNT4R; 07-12-2011 at 12:06 AM.
|
|
|
Reply With Quote
|
|
07-12-2011, 12:59 AM
|
#14
|
 |
Moderator
|
|
Join Date: Oct 2007
Location: Got the hell out of Seattle
Posts: 1,053
|
|
|
Moderator
Join Date: Oct 2007
Location: Got the hell out of Seattle
Posts: 1,053
|
Nice work  Your truck is coming along nicely! Glad I could help.
__________________
Kevin's 2008 4x4 Build Thread
Perkins Performance | Shrockworks | Demello | BudBuilt | ICON | Warn | Overland Warehouse | Goodyear | Lightforce | Spidertrax | Powertank | Complete LED Conversion
|
|
|
Reply With Quote
|
|
09-28-2011, 02:48 AM
|
#15
|
 |
Junior Member
|
|
Join Date: Aug 2011
Location: Southern California
Posts: 27
|
|
|
Junior Member
Join Date: Aug 2011
Location: Southern California
Posts: 27
|
I just picked up a CMOS-200, as well, and will be hooking it up to display through my Pioneer AVIC-X920BT. My question is:
Did you hook up using the purple trigger wire to turn on the camera? I'd like to have the option of turning the camera on anytime, while retaining the auto-on for Reverse.
My thought was to add an ON-ON switch -- on one side of the switch, I would connect to an ACC/ON powered 12v source; the other side would be connected to the Reverse-activated 12v source (Red/Yellow wire). The center connection (COMMON) of the switch would go to the trigger wire on the Nav unit/monitor.
The CMOS-200 manual states that if your Nav unit has a dedicated input, you don't need to use the purple wire. Does this mean that I don't need to hook up the purple wire, and it will somehow sense the input being active on the Nav unit and turn the camera on??
I've drawn below what I had in mind.
If the camera doesn't automatically turn on when the Nav unit switches to Reverse view, I guess my other option would be to also hook up the purple wire to the center connection of the switch, and turn it on at the same time as the Nav unit reverse view...
Thanks in advance for any help you can provide regarding how this unit works!
Last edited by RanchoRunner; 09-28-2011 at 04:41 PM.
|
|
|
Reply With Quote
|
 Posting Rules
|
You may not post new threads
You may not post replies
You may not post attachments
You may not edit your posts
HTML code is On
|
|
|
|


 Linear Mode


