Home Menu

Site Navigation


User Tag List

Reply
 
Thread Tools Rate Thread Display Modes
Old 06-01-2012, 05:14 PM #1
Hbryanlopez's Avatar
Hbryanlopez Hbryanlopez is offline
Member
 
Join Date: Jul 2011
Location: texas
Posts: 322
Hbryanlopez is on a distinguished road
Hbryanlopez Hbryanlopez is offline
Member
Hbryanlopez's Avatar
 
Join Date: Jul 2011
Location: texas
Posts: 322
Hbryanlopez is on a distinguished road
FX-R projector retrofit DIY

this is my first write up and I hope many can benefit from it, this is a quick one and I will be adding things as I remember them.

tools needed:
flat head
screw driver
dremel
metal cutting tool for dremel
grinding tool for dremel
JB weld
tape (marking headlight beam)
silicone sealant
80-32x2 screws
1/4 flat washers
marker


Phisey's link on headlight removal: 5th Gen HID / Projector retrofit installation (pics).
Philsey's link on wiring projector harness: 5th Gen HID / Projector retrofit installation (pics).
The Retro fit source:The place to purchase retrofit kits. http://www.theretrofitsource.com/
Plenty of information about HID, projectors and retrofits on here: HIDplanet


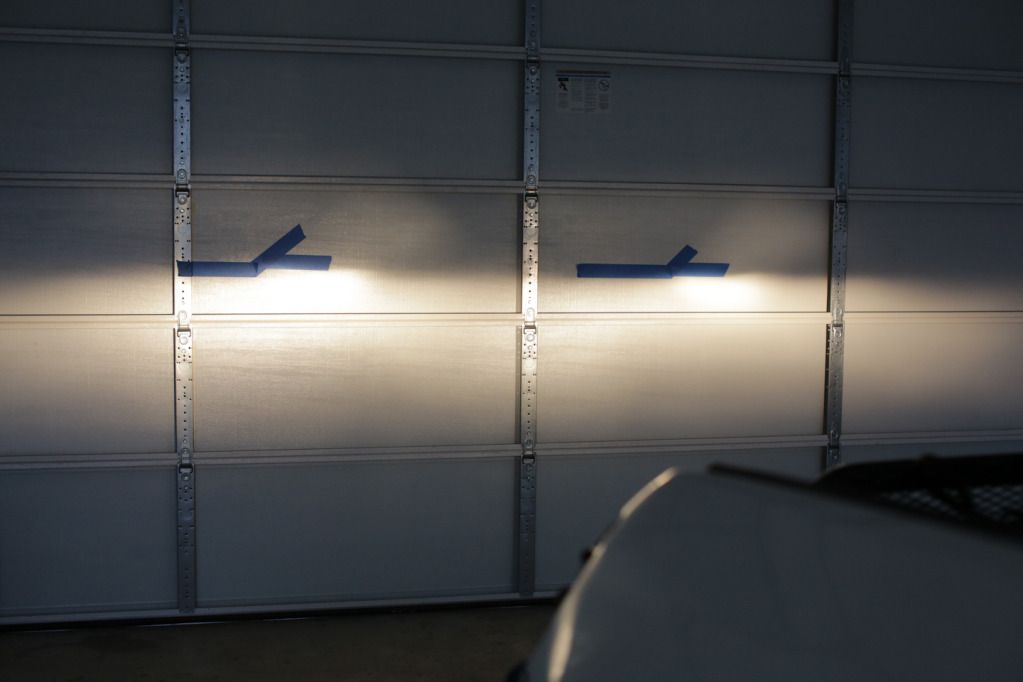
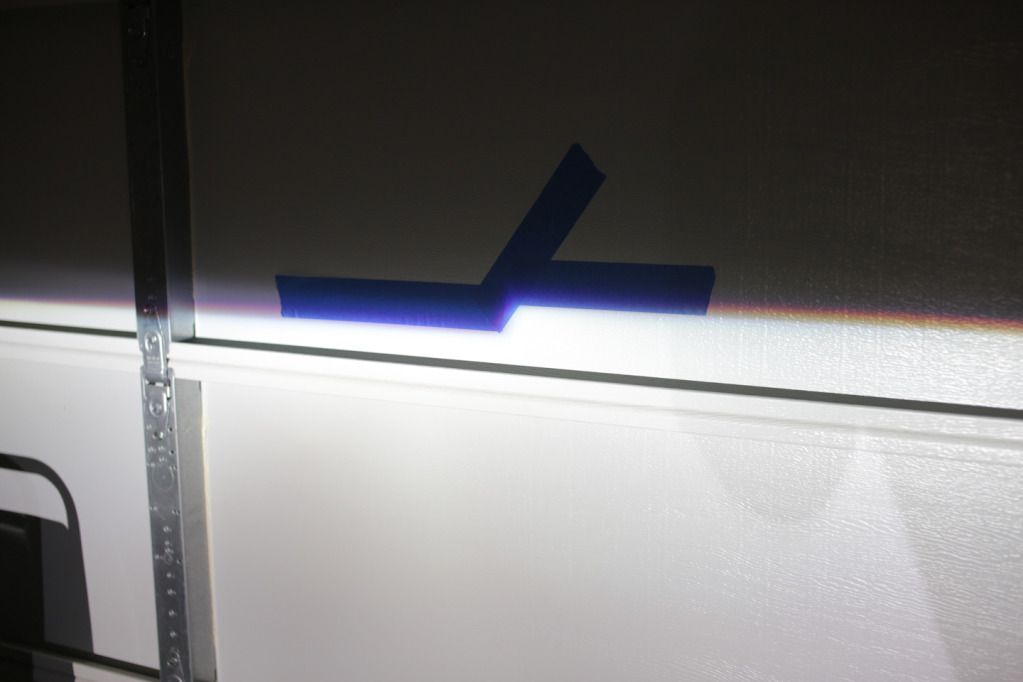
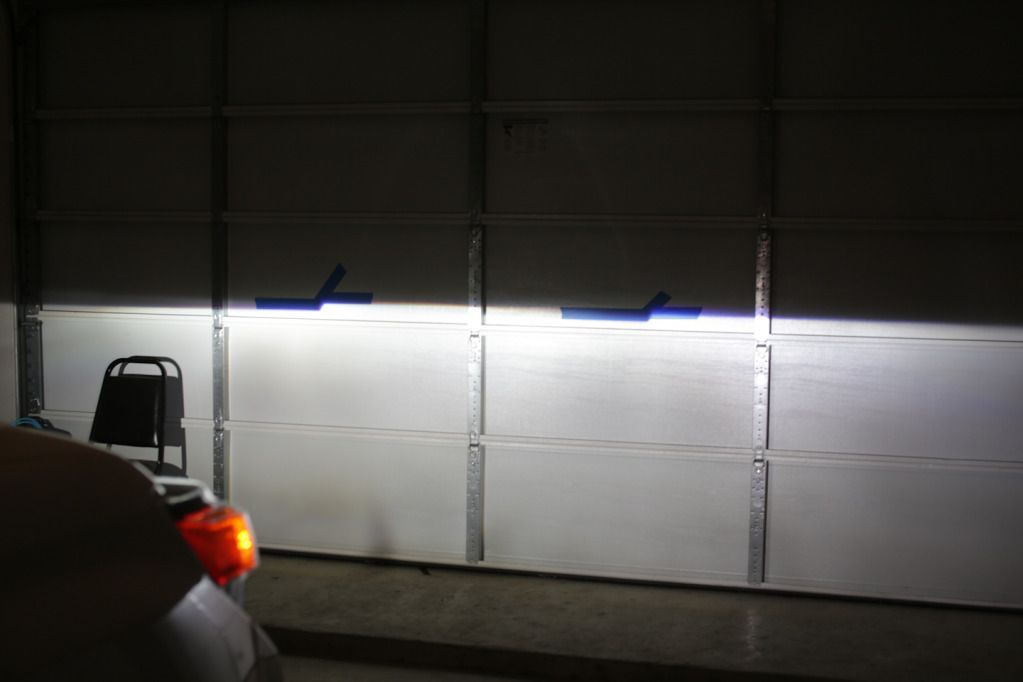
before taking out the headlihgts park atleast 10 feet from a wall and mark your lights like the photo bellow. keep in mind once you do this you will not be moving the vehicle until everything is finished. this is also a good time to wire up the harness and check everything.
to prevent things from getting scratched buy some masking tape and tape around the area that could possibly get scratched from installation and removal of headlights.
your tape should have this pattern _______/-----


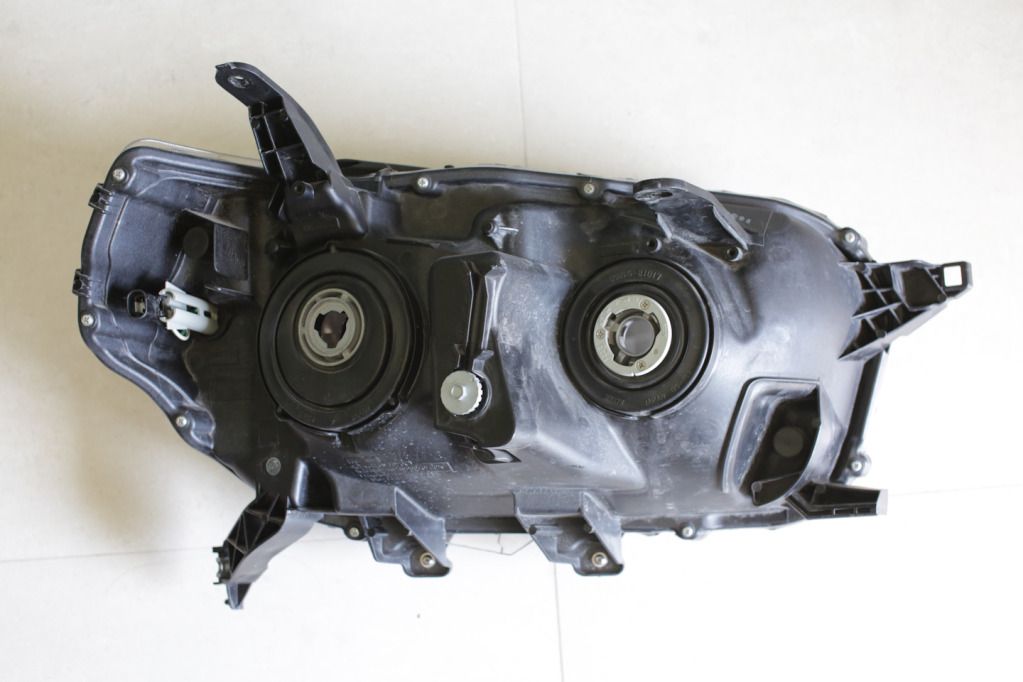
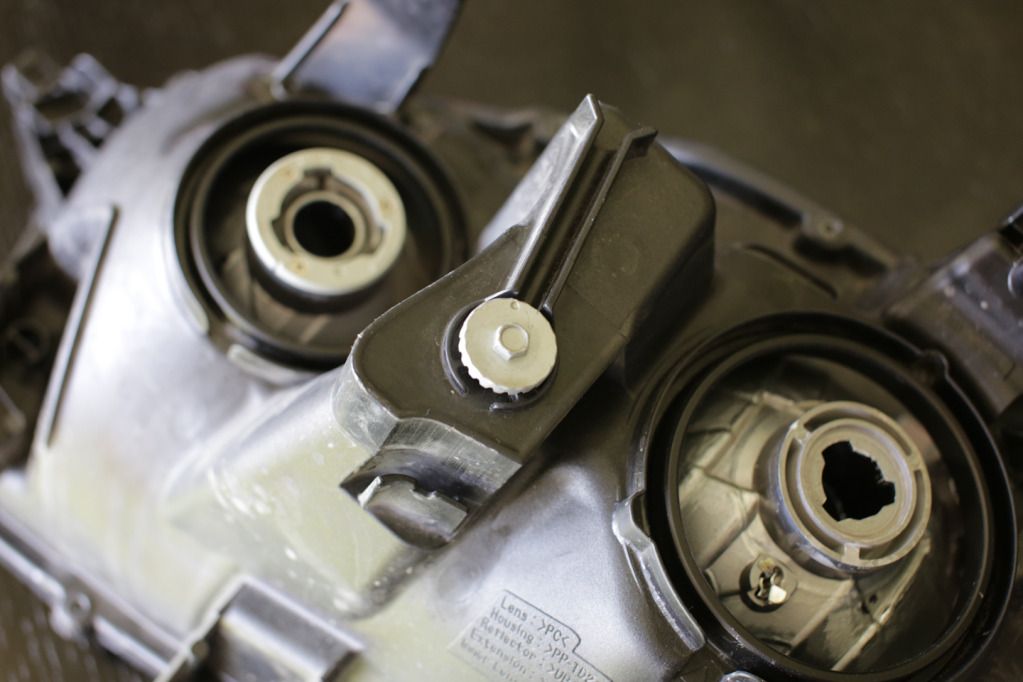
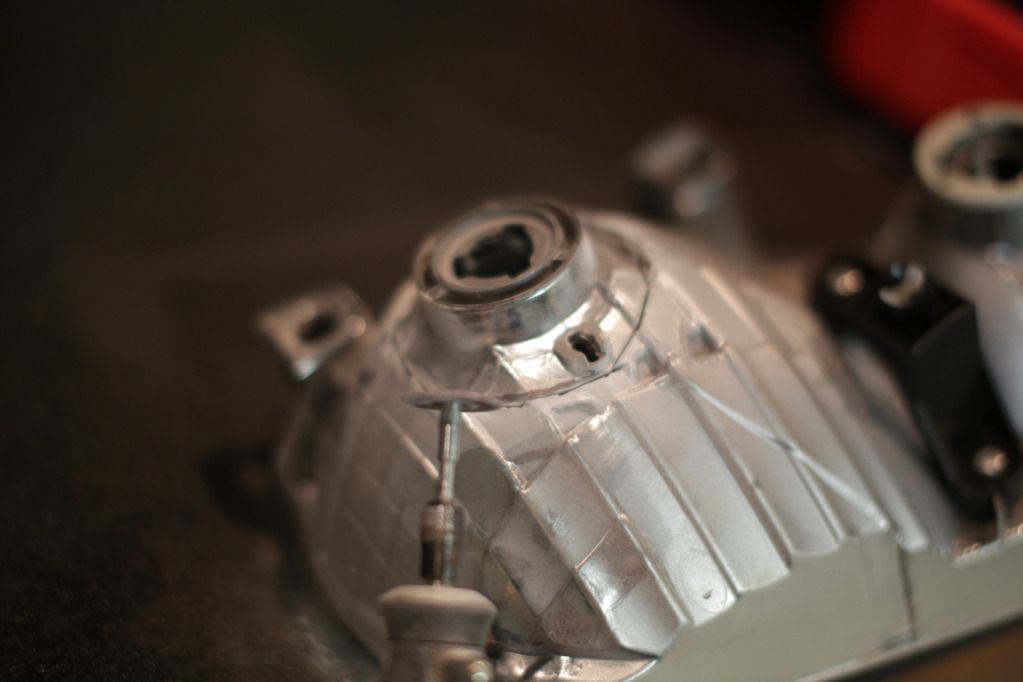
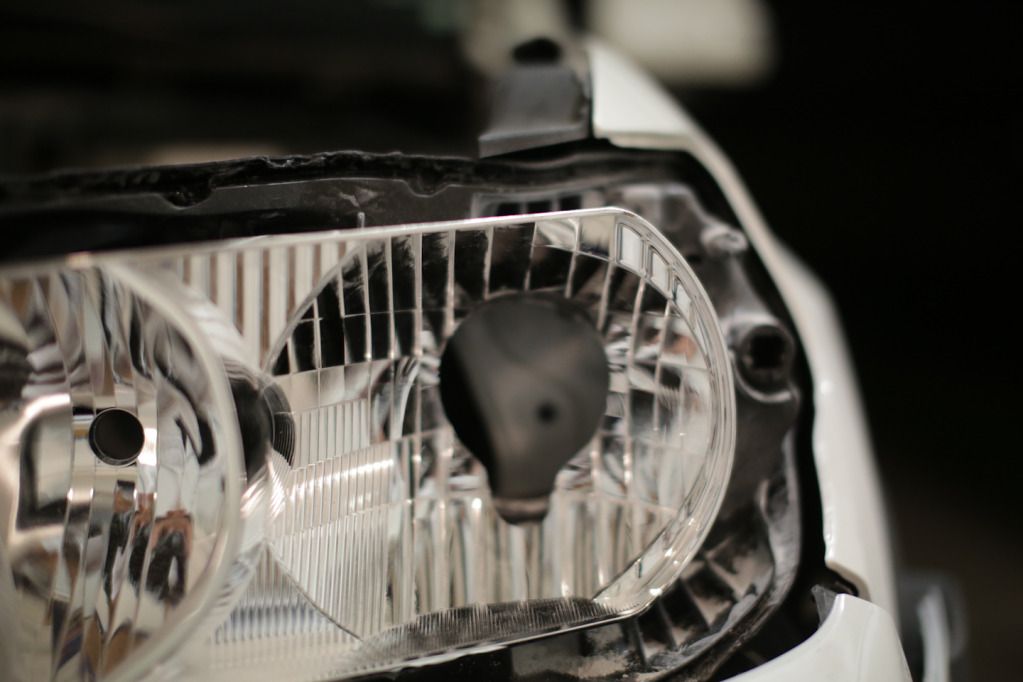
once your lights are off bring them inside and flip them over you will see this photo bellow: remove all the screws that you see in the back with the exeption of the headlight adjusment screws, also remove all the rubbers sealants.


now preheat the oven to 250 degress, there is a ton of ways to do this and if you have one that has worked for you then stick to that one. put the lights in and time it for 3 minutes, once timer is done, pry the headlights open.


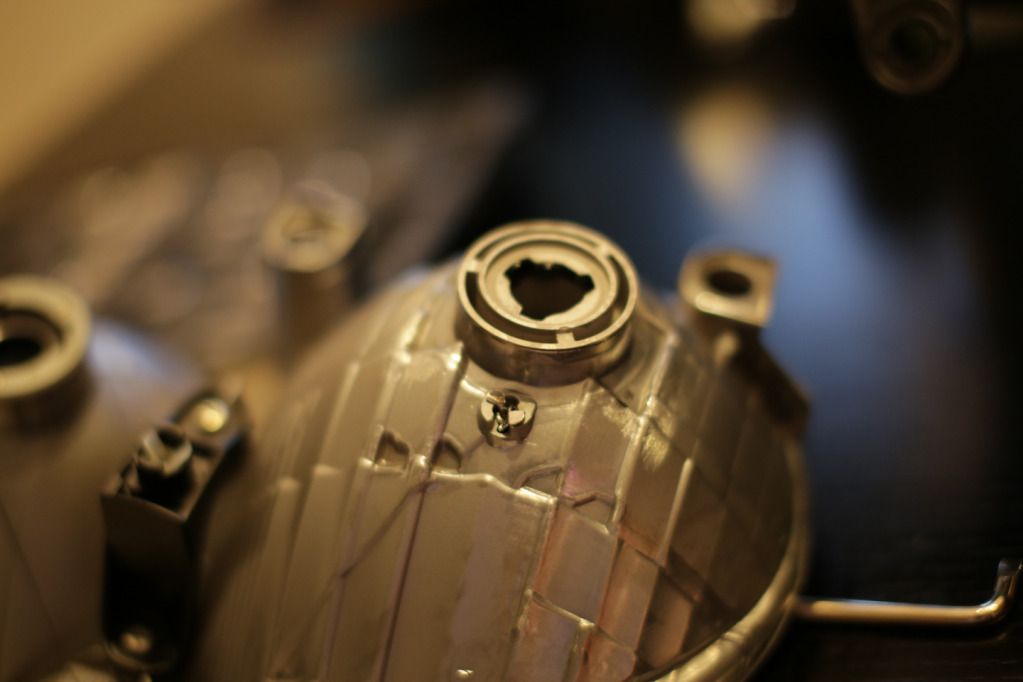
bowl removal: there are 2 of these plastic tabs pictured bellow and one screw holding the bowl. the plastic tabs have little hook looking plastic that can be pushed in by a flathead. release these two plastic and unscrew the adjuster and the bowl should come off.
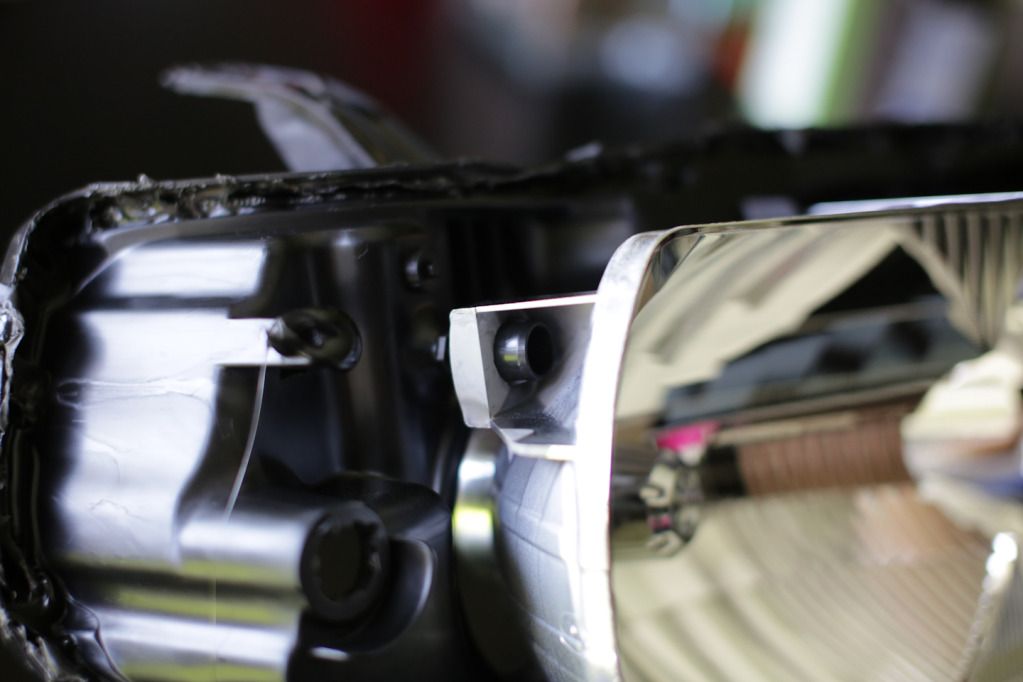
photo of the screw


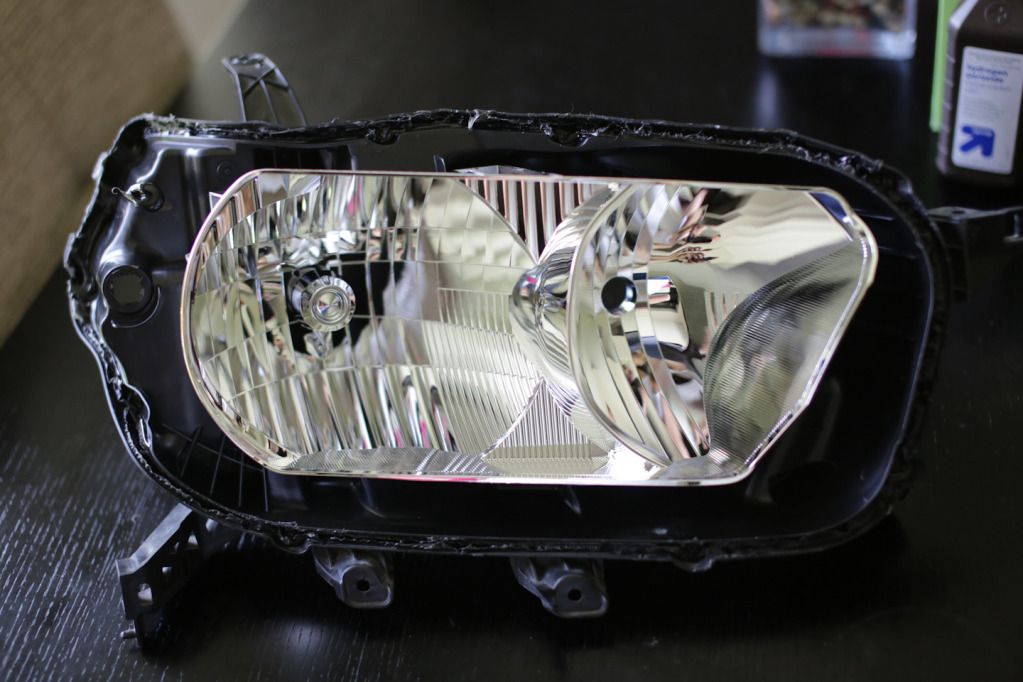
once the bowl is of flip it over to remove the low beam reflector, you will need pliers to remove them.


now your bowl is ready to be dremelled. mark your bowl with a marker. take a look at the lines and use it as a reference. this hole was too small and I had to make it larger.


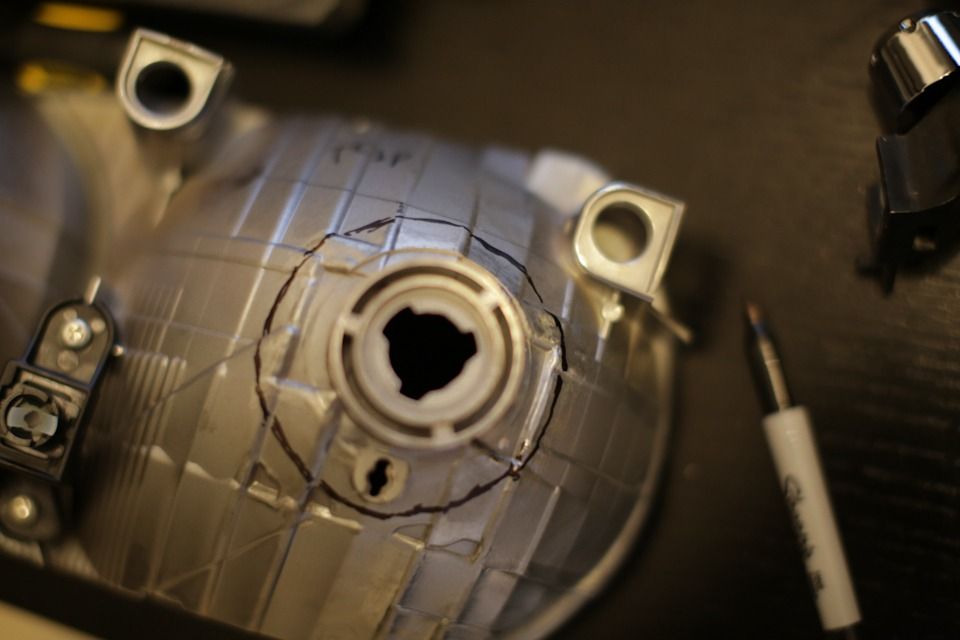
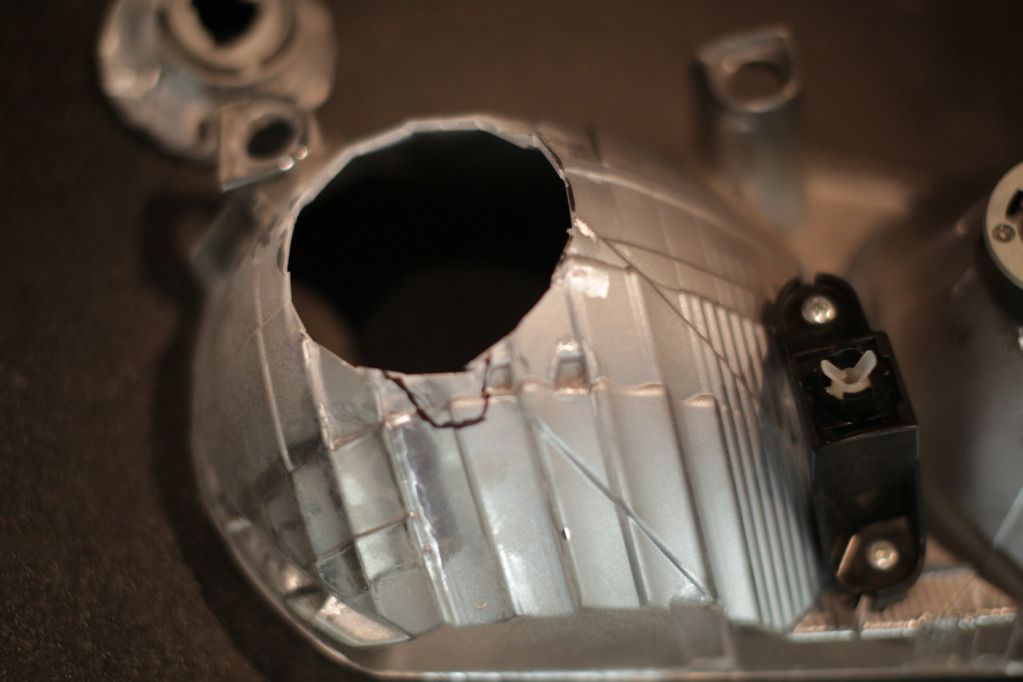
the hole doesnt have to be perfect.

here's jesse1983's cut(photo bellow), this is more like what you want, use the lines on his bowl as a reference guide to cutting your bowl. I made mine too large and ended up with tons of unwanted space around the projector that didn't fit flush. this unwanted space made it harder for me to mount and aim the light, I believe the hole you want is 2inches in diameter. jesse's photo bellow is exactly what you want.
here's a link to jesse1983's thread: jesse1983's projector retrofit link


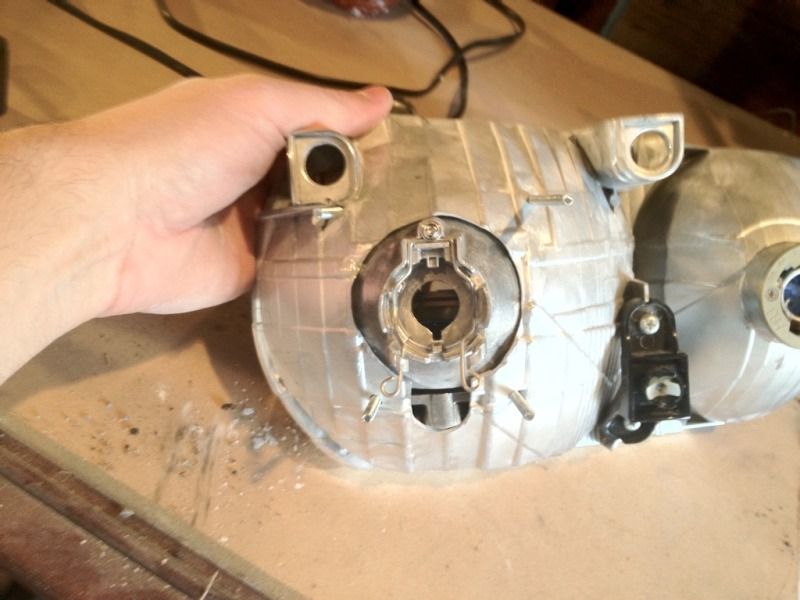
mount the bowl back to the rear headlight assembly and install it back to the front end.


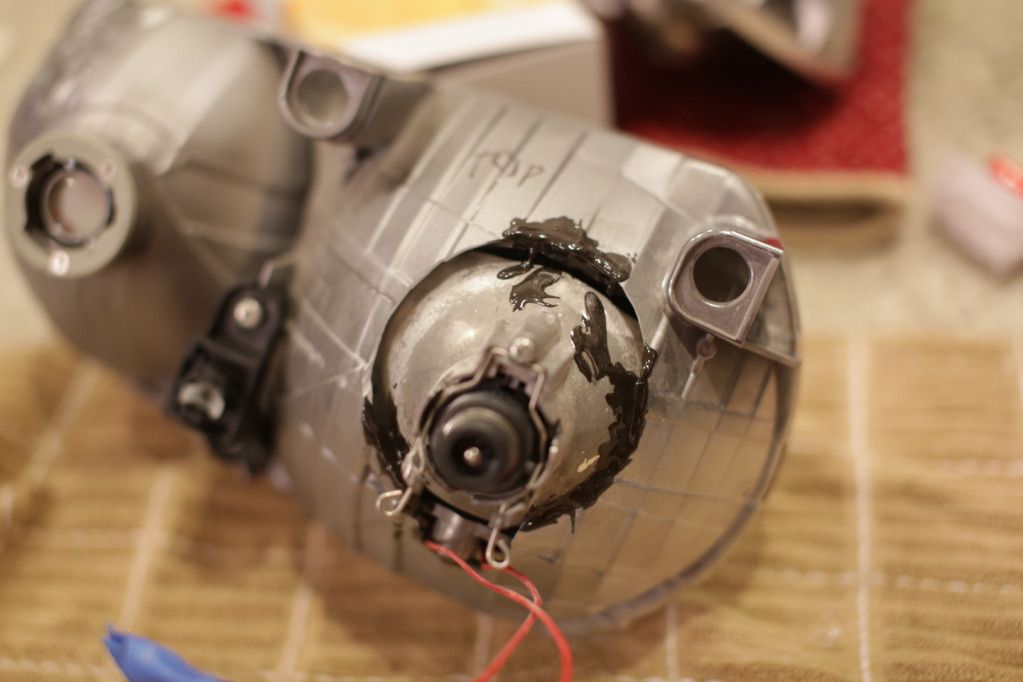
this is by far the hardest step to do, i used JB welled glue for this step. you will need to aim your projectors to the marks you made on the wall in the very beginning and glue it in place using your prefered glue. (i used jb weld) you will need gloves, it will be hot and you will need to hold it in place until the glue sets. hook everything up and turn on your lights aim your projector to match the marking on the wall, matching the cutoff and line _____/-------


once you have made sure the glue has set, you can now remove the headlight assembly and take it inside to apply more glue around the projector.
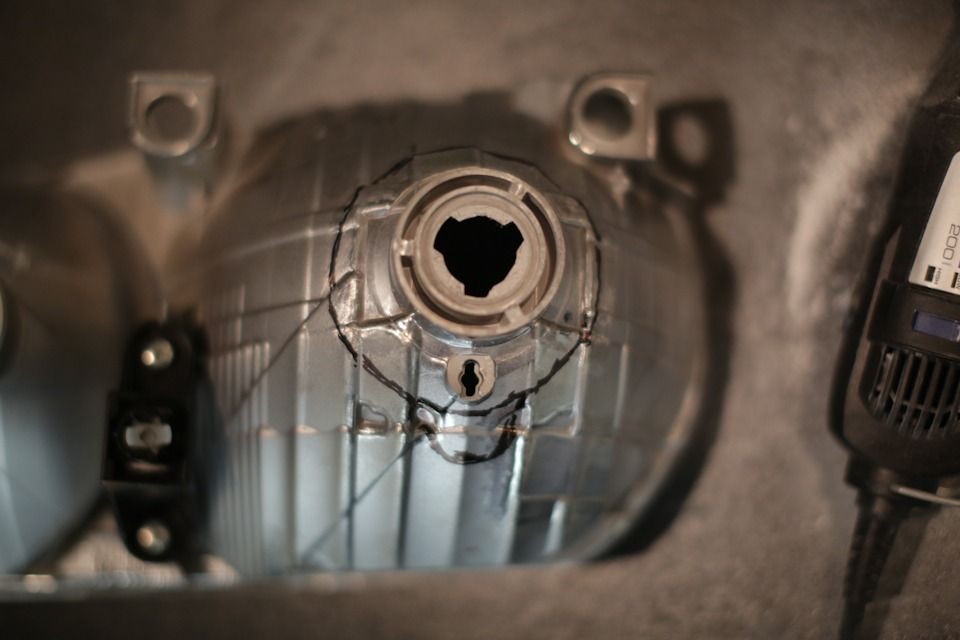
notice the unwanted space around the projector which is not sitting flush due to the cut being too open.


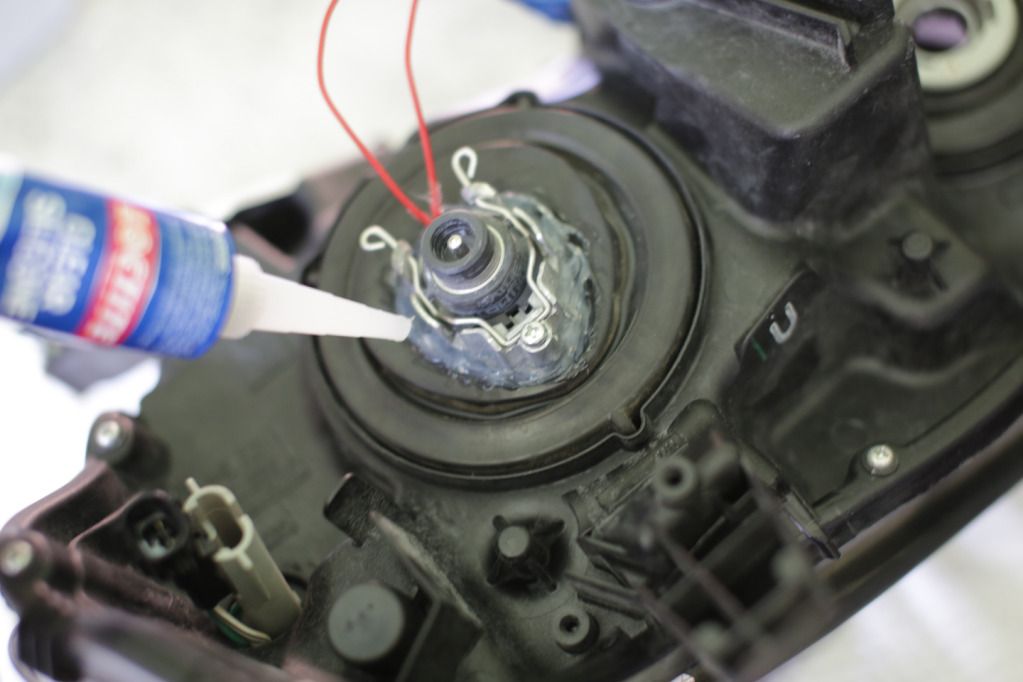
let the glue dry. I wasn't 100% satisfied with only glue holding my projectors so I drilled a whole on my bowl to match up the holes in the projector and used 80-32x2 screws with a 1/4 flat washer to secure it in place and dremelled the excess screws off.


let the whole thing cure overnight and in the morning assemble everything together and bake the headlights once again. this is also a good time to mount the shrouds, i used JB welled and applied the glue around the area of the projector that will be touching the shroud so that I wont make a mess.

once you have assembled the headlights, put all the rubber seals back, your low beam rubber seal will not fit correctly due to the projectors so you will need to stretch the seal around the projector and apply silicone sealant around that to ensure proper seal. do not seal the bulb or anything near that just the area around the projector. if you need to you might have to push the rubber seal down.


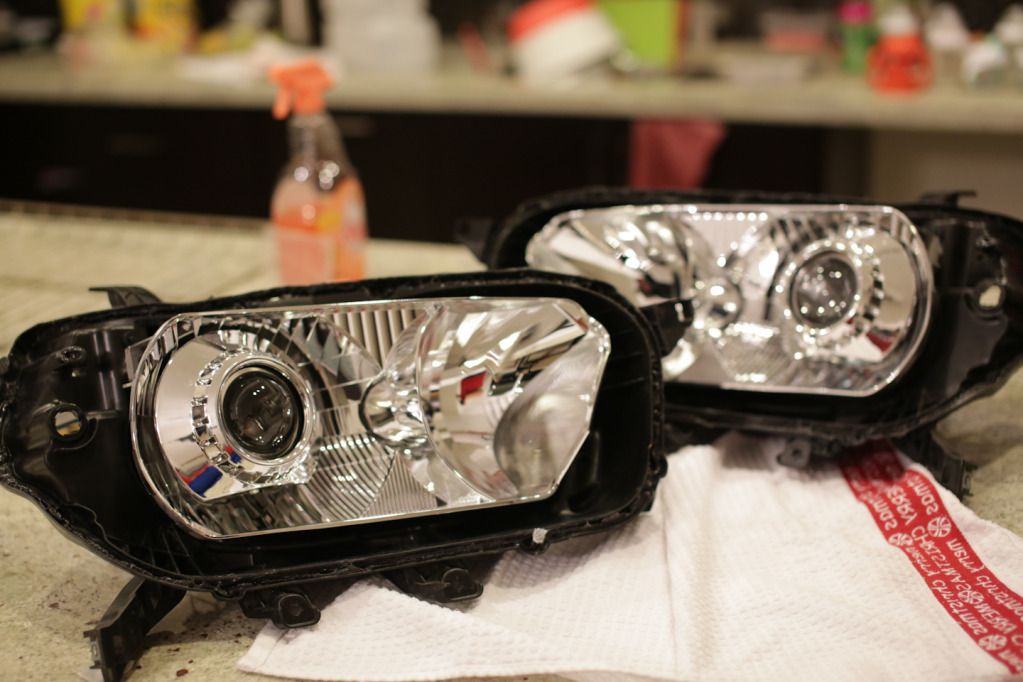
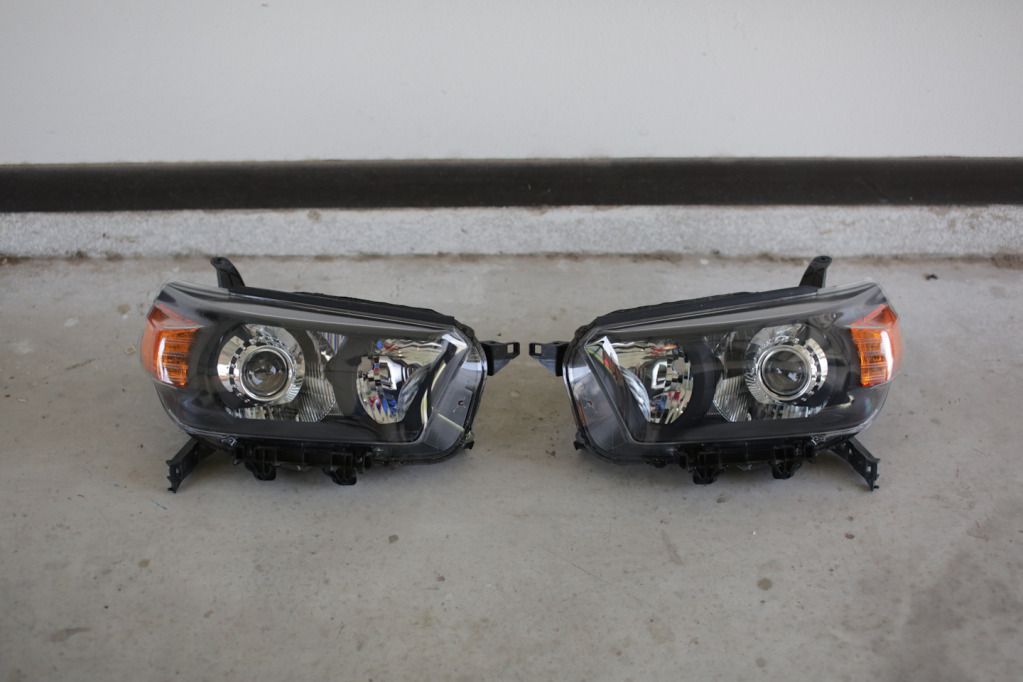
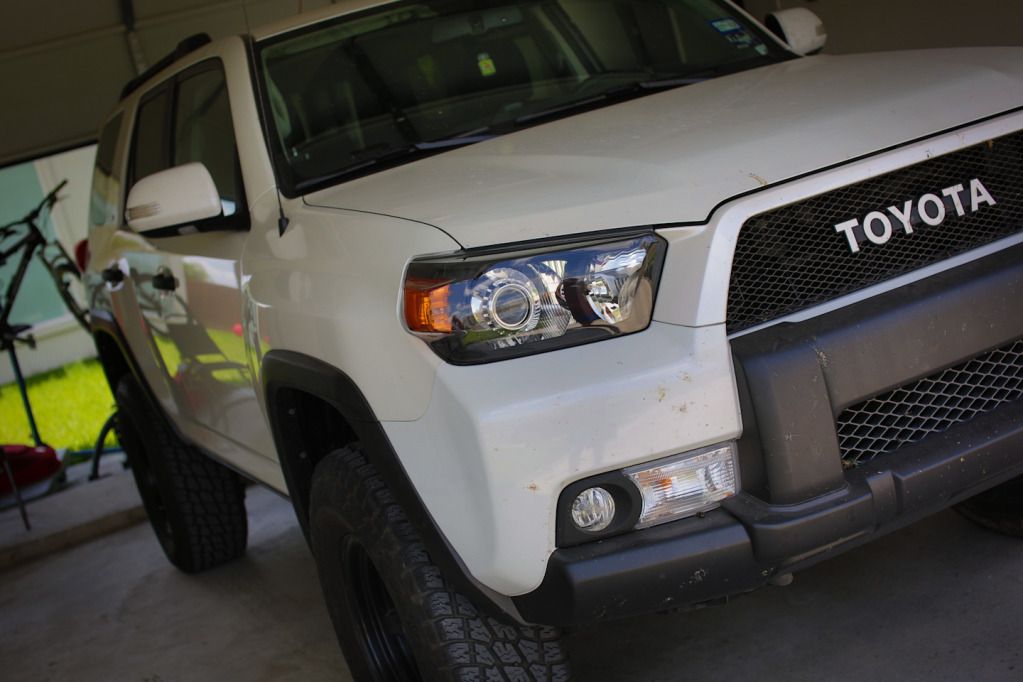
after this cures, sit back and give yourself a pat on the back and look at those sexy lights.


__________________
___________________________
2011 blizzard pearl white TE 4x4 http://www.toyota-4runner.org/5th-ge...onversion.html
travel photographer follow my travel photos on IG: Herby_lo
follow me on IG: _seek.adventure_

Last edited by Hbryanlopez; 06-05-2012 at 08:57 PM.
Hbryanlopez is offline   Reply With QuoteReply With Quote
Old 06-05-2012, 11:42 AM #2
Skeletor03 Skeletor03 is offline
Member
 
Join Date: Sep 2011
Location: Maryland
Posts: 171
Skeletor03 is on a distinguished road
Skeletor03 Skeletor03 is offline
Member
 
Join Date: Sep 2011
Location: Maryland
Posts: 171
Skeletor03 is on a distinguished road
Look Amazing!
__________________
2012 T4R 4WD Limited Magnetic Grey w/ Black Leather

JBL Nav, Rhino TuffGrip Auto Running Boards, Satoshi Grille Mod, 3rd Row seat, all weather mats, Fog anytime mod, Magnowalk stubby
Skeletor03 is offline   Reply With QuoteReply With Quote
Old 06-05-2012, 12:45 PM #3
adio3x's Avatar
adio3x adio3x is offline
Senior Member
 
Join Date: Mar 2010
Location: STL, MO
Age: 35
Posts: 1,981
adio3x will become famous soon enough
adio3x adio3x is offline
Senior Member
adio3x's Avatar
 
Join Date: Mar 2010
Location: STL, MO
Age: 35
Posts: 1,981
adio3x will become famous soon enough
thank you thank you thank you!

Which FXR kit did you get? Also will all the shrouds fit or are there certain ones that won't?
__________________
Andrew
2010 Battleship Grey SR5 4x4
Sweet mod list.

Last edited by adio3x; 06-05-2012 at 12:51 PM.
adio3x is offline   Reply With QuoteReply With Quote
Old 06-05-2012, 12:57 PM #4
Hbryanlopez's Avatar
Hbryanlopez Hbryanlopez is offline
Member
 
Join Date: Jul 2011
Location: texas
Posts: 322
Hbryanlopez is on a distinguished road
Hbryanlopez Hbryanlopez is offline
Member
Hbryanlopez's Avatar
 
Join Date: Jul 2011
Location: texas
Posts: 322
Hbryanlopez is on a distinguished road
Quote:
Originally Posted by adio3x View Post
thank you thank you thank you!

Which FXR kit did you get? Also will all the shrouds fit or are there certain ones that won't?
stage III clear lens with e46extended shroud. I don't believe all shrouds will fit without modification but so far i've seen on the 5th gen the following shrouds: e46extended, iris and the orbit, from what i've heard gatling shrouds will fit with some modification(grinding).
__________________
___________________________
2011 blizzard pearl white TE 4x4 http://www.toyota-4runner.org/5th-ge...onversion.html
travel photographer follow my travel photos on IG: Herby_lo
follow me on IG: _seek.adventure_
Hbryanlopez is offline   Reply With QuoteReply With Quote
Old 06-05-2012, 01:07 PM #5
SOcalTRAIL's Avatar
SOcalTRAIL SOcalTRAIL is offline
Senior Member
 
Join Date: Sep 2011
Location: So Cal
Posts: 1,076
SOcalTRAIL is on a distinguished road
SOcalTRAIL SOcalTRAIL is offline
Senior Member
SOcalTRAIL's Avatar
 
Join Date: Sep 2011
Location: So Cal
Posts: 1,076
SOcalTRAIL is on a distinguished road
Those look great, nice write up!

PS - You have any night shots of it?
__________________
~~~2011 4Runner Trail Edition w/KDSS~~~

Icon - Vision-X - Rigid - Gobi - Hi Lift - V-Leds - Bud Built - Shrockworks - Husky Liner - Viair - Odyssey - Total Chaos - Cobra - Hankook - Firestick - Contura - Intelligent Battery System - CDT - AFE - Yaesu - Line-X - ARB - MY BUILD THREAD!
SOcalTRAIL is offline   Reply With QuoteReply With Quote
Old 06-05-2012, 04:58 PM #6
Hbryanlopez's Avatar
Hbryanlopez Hbryanlopez is offline
Member
 
Join Date: Jul 2011
Location: texas
Posts: 322
Hbryanlopez is on a distinguished road
Hbryanlopez Hbryanlopez is offline
Member
Hbryanlopez's Avatar
 
Join Date: Jul 2011
Location: texas
Posts: 322
Hbryanlopez is on a distinguished road
Quote:
Originally Posted by SOcalTRAIL View Post
Those look great, nice write up!

PS - You have any night shots of it?
my only night shot so far. ill get some more later.

__________________
___________________________
2011 blizzard pearl white TE 4x4 http://www.toyota-4runner.org/5th-ge...onversion.html
travel photographer follow my travel photos on IG: Herby_lo
follow me on IG: _seek.adventure_
Hbryanlopez is offline   Reply With QuoteReply With Quote
Old 06-05-2012, 05:26 PM #7
terra4r's Avatar
terra4r terra4r is offline
Member
 
Join Date: Jul 2011
Location: Hampton, VA
Posts: 286
terra4r is on a distinguished road
terra4r terra4r is offline
Member
terra4r's Avatar
 
Join Date: Jul 2011
Location: Hampton, VA
Posts: 286
terra4r is on a distinguished road
looks nice. good job
__________________
-Jim

'11 Mag Grey SR5 4WD Premium Pkg.
OEM door handle LED's, Mud and hood protectors, Infinity 32.9cf's
terra4r is offline   Reply With QuoteReply With Quote
Old 06-05-2012, 07:48 PM #8
philsey's Avatar
philsey philsey is offline
Elite Member
 
Join Date: Mar 2010
Location: Illinois
Posts: 6,046
Real Name: Um, Phil?
philsey has a spectacular aura about philsey has a spectacular aura about
philsey philsey is offline
Elite Member
philsey's Avatar
 
Join Date: Mar 2010
Location: Illinois
Posts: 6,046
Real Name: Um, Phil?
philsey has a spectacular aura about philsey has a spectacular aura about
Quote:
Originally Posted by Hbryanlopez View Post
my only night shot so far. ill get some more later.

Nice job on the alignment HBL. Kudos on the DIY, I didn't have the nerve ....

Lots of night shots here - same projectors.

5th Gen HID / Projector retrofit installation (pics).
__________________
2010 Blizzard Pearl SR5/P - traded
2018 Superwhite SR5/P ... IS350 retrofit.
philsey is offline   Reply With QuoteReply With Quote
Old 06-05-2012, 08:32 PM #9
mikey's2010SR5's Avatar
mikey's2010SR5 mikey's2010SR5 is offline
Senior Member
 
Join Date: Feb 2010
Location: Bay Area, CA
Posts: 3,454
Real Name: Mike
mikey's2010SR5 will become famous soon enough mikey's2010SR5 will become famous soon enough
mikey's2010SR5 mikey's2010SR5 is offline
Senior Member
mikey's2010SR5's Avatar
 
Join Date: Feb 2010
Location: Bay Area, CA
Posts: 3,454
Real Name: Mike
mikey's2010SR5 will become famous soon enough mikey's2010SR5 will become famous soon enough
Very nice. I too did not have the nerve so I shelled out the cash-o-la. I bet you will be happier since you did it on your own.
mikey's2010SR5 is offline   Reply With QuoteReply With Quote
Old 07-07-2012, 11:04 AM #10
mace.'s Avatar
mace. mace. is offline
Senior Member
 
Join Date: Dec 2011
Location: Madison, CT
Posts: 1,037
mace. is on a distinguished road
mace. mace. is offline
Senior Member
mace.'s Avatar
 
Join Date: Dec 2011
Location: Madison, CT
Posts: 1,037
mace. is on a distinguished road
So I'm finally giving this a shot. I have the first headlight apart and the reflector mounted to my workbench bench aimed at the garage door. A regular bulb is installed and powered by an external battery. Now I just have to wait for the sun to go down as it's too bright in my garage to properly mark the beam on the backside of the garage door. I'll post more pics over the weekend to show my progress.
mace. is offline   Reply With QuoteReply With Quote
Reply


Posting Rules
You may not post new threads
You may not post replies
You may not post attachments
You may not edit your posts

BB code is On
Smilies are On
[IMG] code is On
HTML code is On

Forum Jump

Similar Threads
Thread Thread Starter Forum Replies Last Post
Get a projector retrofit for your 3rd gen! so_LED 3rd gen T4Rs 23 02-21-2012 03:17 PM
my most recent HID Projector Retrofit rickashay 3rd gen T4Rs 22 11-08-2011 01:22 AM
Who’s interested in a HID/Projector retrofit? philsey 5th gen T4Rs 81 08-08-2011 09:04 AM
HID Projector Retrofit akaknowlesy 4th Gen T4Rs 14 11-10-2010 12:07 PM
HID Projector for retrofit... beirish 4th Gen T4Rs 1 04-10-2007 01:00 PM

Powered by vBadvanced CMPS v3.2.2

All times are GMT -4. The time now is 02:33 AM.

Powered by vBulletin® Version 3.8.11
Copyright ©2000 - 2024, vBulletin Solutions Inc.
Search Engine Optimisation provided by DragonByte SEO (Pro) - vBulletin Mods & Addons Copyright © 2024 DragonByte Technologies Ltd.
Feedback Buttons provided by Advanced Post Thanks / Like (Lite) - vBulletin Mods & Addons Copyright © 2024 DragonByte Technologies Ltd.
User Alert System provided by Advanced User Tagging (Lite) - vBulletin Mods & Addons Copyright © 2024 DragonByte Technologies Ltd.
***This site is an unofficial Toyota site, and is not officially endorsed, supported, authorized by or affiliated with Toyota. All company, product, or service names references in this web site are used for identification purposes only and may be trademarks of their respective owners. The Toyota name, marks, designs and logos, as well as Toyota model names, are registered trademarks of Toyota Motor Corporation***Ad Management plugin by RedTyger
 
Copyright © 2020