It always bothers me a little when I see people on here buy TE headlights for their Limited or SR5. Blacking them out yourself is relatively easy, and far less expensive. Last time I had a headlight apart I decided to take some pics and put a how-to together so people can feel confident doing this on their own.
This can easily be completed in a weekend. I would recommend doing the entire mod on day one, let the headlight sit overnight, and put back on the truck day two.
What you need before you begin:
- A household oven
- Piece of cardboard that will fit in the oven
- Phillips head screw driver
- Gloves
- Spray paint of choice (Krylon fusion for plastic is my go-to)
- Clear window/door silicone
- Clamps
To begin remove the headlights from your truck. Unless you have an aftermarket bumper you will have to remove, or at least pull forward your bumper cover. See
here for a detailed write-up on removing the bumper cover and headlights courtesy of
@
Shogun
.
You can get the headlights off without removing the entire bumper cover, see
here courtesy of
@
Ducmonsta
. Then refer to previous link for location of headlight bolts.
Once your headlights are off you are ready to begin.
Preheat your oven to 300 degrees. Don't worry, even though this sounds scary nothing is going to happen to the lights.
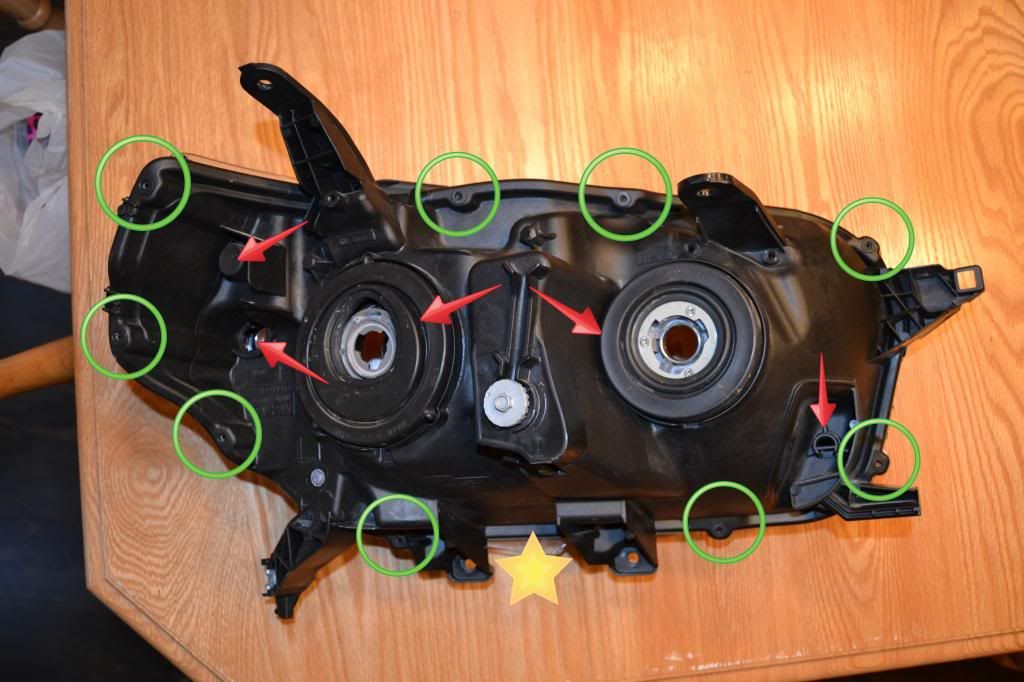
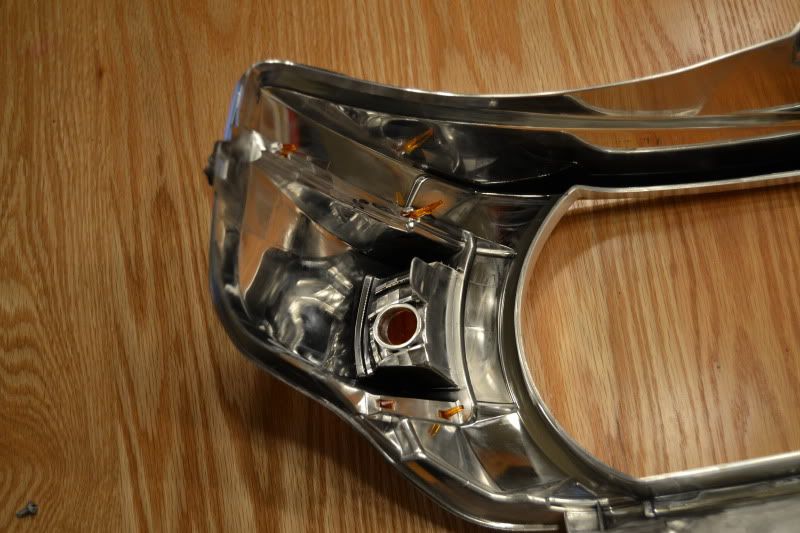
Remove anything from the lights that could melt in the oven. The red arrows show plastic pieces which should be removed. Be sure to remove any light bulbs, don't forget the marker light bulb. Also remove all the screws around the light (green circles). The star indicates where a pice is (not pictured) that screws into those two holes which your bumper cover clips to. this piece should be removed as well.
Once everything is removed from the light, and the oven is preheated to 300, turn the oven OFF. Put your piece of cardboard in the oven and place your light on top of it. Make sure no pieces of your light are touching the oven, or the oven rack, they will melt. You are only using the heat in the oven to soften the glue, not baking them as you would if the oven were on.
Leave the headlight in there for ten minutes. You can use this time to prep the second light.
After ten minutes put your gloves on and take the light out. You want to work quickly as the glue is very strong and is easiest to work with when it's fresh out of the oven. Begin pulling to separate the clear lens from the black, back part of the housing. I find it easiest to start at the side closest to the high beam. Getting it started is the hardest part. Once you get a finger or two in there (no dirty jokes please) it'll loosen up. Don't try to pull using the tabs, they will be soft from being in the oven and can break. if they break you may not be able to bolt the light back on the truck. As you pry the lens from the housing take it slow and break the black glue apart with your fingers (I've usually removed my gloves by this point). You do not want this glue to attach to your lens or reflector bowl.
After the headlight is apart you'll have the back and the reflector bowl as one piece

And the lens and bezel as a second piece
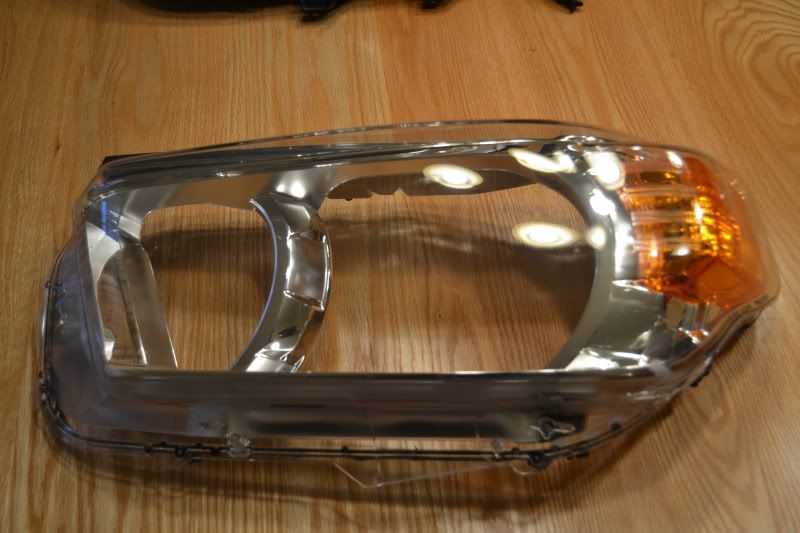
flip the lens over and remove three screws holding the bezel in
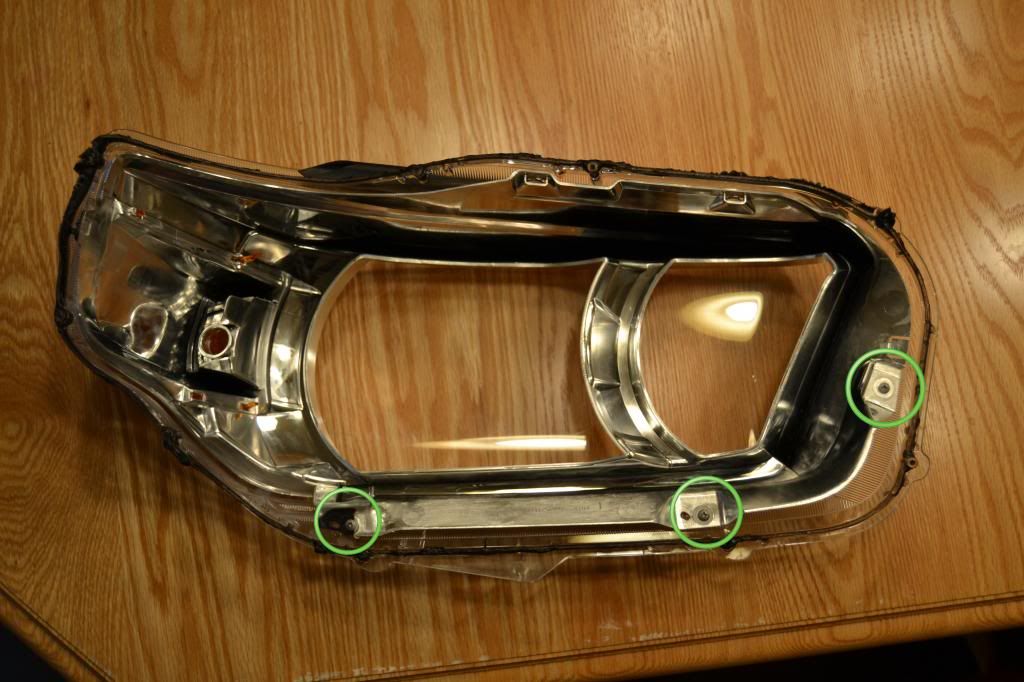
now you just have this
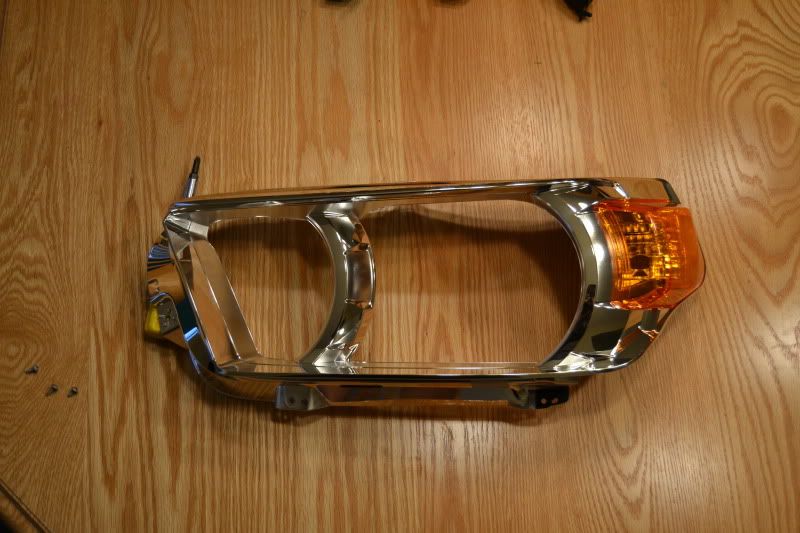
remove the marker lens. this can be a bit tricky and it's very possible you will break one of these tabs. take your time.
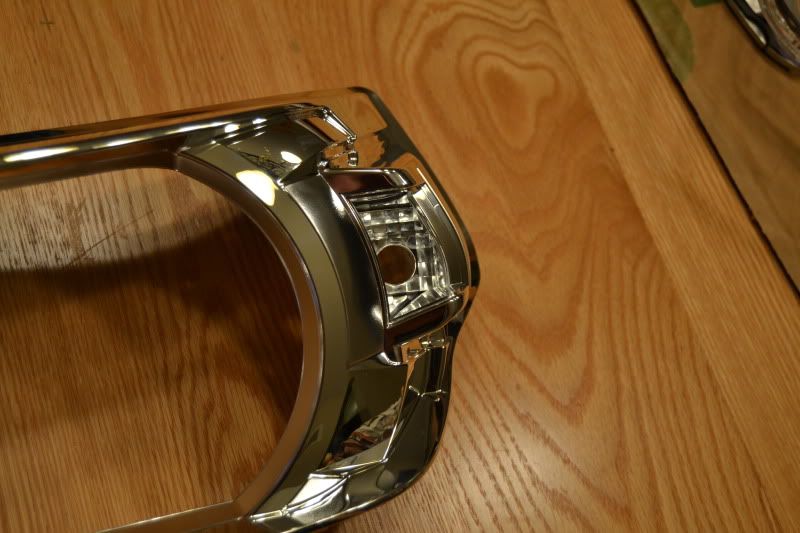
now you have this

this is where your marker bulb comes through, and you could tape it off before painting, or just paint it. It'll be brighter if you tape it off.
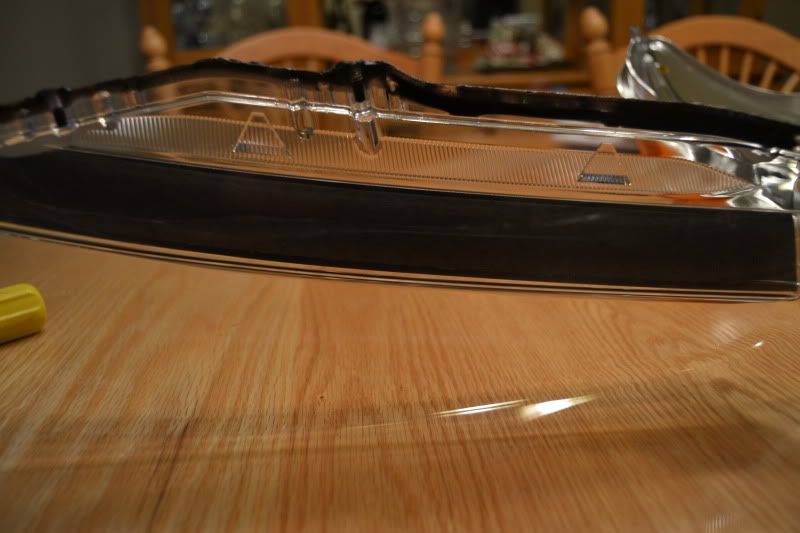
Spray paint the entire bezel. Once it's dry put it back in the lens. make sure it is on the three tabs in the lens. Here are 2 of them, the other is in the corner
screw in the bezel with the 3 screws you removed.
Place the lens back on top of the housing and make sure all the screw holes are lined up. Put in as many of the screws as you can.
Preheat the oven back to 300. Once it reaches 300 turn it OFF and put the headlight in for 10 minutes. After 10 minutes remove the light and tighten all the screws you started before you put it in. If you have some clamps you can put them around the housing to press tight the lens and the back. After everything is cooled down i like to go around the entire light with clear window/door silicone just to be sure.
Let it sit overnight and reinstall the next day. and just like that you have black (or blue, or red, or purple, or whatever color paint you buy) headlights! And it cost you time and a few bucks!
__________________
Quote:
Originally Posted by 7harper

First 5th with real CO's  |
2017 White TRD OR, Icons, BFG Mud-Terrains, Konig Countersteer, Retro Headlights, Gobi stuff


 Threaded Mode


