 07-11-2016, 11:40 PM
|
#1
|
 |
Member
|
|
Join Date: Feb 2013
Location: Calgary, Alberta
Age: 37
Posts: 344
|
|
|
Member
Join Date: Feb 2013
Location: Calgary, Alberta
Age: 37
Posts: 344
|
 Greasing Upper Control Arms - Very frequently?
Who here needs to grease their upper control arm main pivot bushings very frequently? I'm talking 2-4 times / month.
I'm running Camburg Ball Joint UCA's and have noticed major play in the arms when the tires are lifted off the ground. I can grab each arm and rock it about the main pivot bushings / long mounting bolt. After I pump 5-10 shots of grease on each side - they go back to being normal with no play whatsoever.
This doesn't seem normal. The arms have had 6 months of use (and some abuse). I can't see my bushings being worn out already. Need to nail this down soon as I'm leaving for a 10 day trip next week.
Or is this normal and I just need to sock the grease to it all of the time?
I'm using Amsoil Multipurpose Synthetic FWIW
Tried emailing Camburg but no reply - I'll be calling them in the morning.
__________________
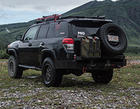
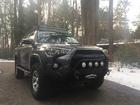
2012 Trail Edition (No KDSS, Fox 2.5's front, OME rear, 34" KO2's and 33" STT PRO's, Camburg UCA's, Total Chaos LCA's, Custom bumpers and sliders, Baja Utility Rack)
Build Thread
Instagram
Overland Bound Member #2992 
|

|
 Reply With Quote Reply With Quote
|
|
07-11-2016, 11:49 PM
|
#2
|
 |
Senior Member
|
|
Join Date: Jan 2012
Location: Fruita, CO
Age: 43
Posts: 3,984
|
|
|
Senior Member
Join Date: Jan 2012
Location: Fruita, CO
Age: 43
Posts: 3,984
|
Sounds like you destroyed your UCA bushings by over greasing with a grease gun, which is common. Replace the bushings and from now on use 2-3 pumps with the UCA pivot nut removed, then re-tighten, every 5-10K miles.
|
|
|
Reply With Quote
|
|
07-12-2016, 12:03 AM
|
#3
|
|
Member
|
|
Join Date: Feb 2013
Location: Calgary, Alberta
Age: 37
Posts: 344
|
|
|
Member
Join Date: Feb 2013
Location: Calgary, Alberta
Age: 37
Posts: 344
|
Quote:
Originally Posted by Jeremy556

Sounds like you destroyed your UCA bushings by over greasing with a grease gun, which is common. Replace the bushings and from now on use 2-3 pumps with the UCA pivot nut removed, then re-tighten, every 5-10K miles.
|
Ah - now that makes sense. If that's the case, I can guarantee I was over greasing them.
I thought that if I disassembled anything, I would need another wheel alignment but after thinking about it, it's probably not required.
__________________
2012 Trail Edition (No KDSS, Fox 2.5's front, OME rear, 34" KO2's and 33" STT PRO's, Camburg UCA's, Total Chaos LCA's, Custom bumpers and sliders, Baja Utility Rack)
Build Thread
Instagram
Overland Bound Member #2992
|
|
|
Reply With Quote
|
|
07-12-2016, 01:55 AM
|
#4
|
|
Senior Member
|
|
Join Date: Mar 2014
Location: Bay Area
Posts: 1,029
|
|
|
Senior Member
Join Date: Mar 2014
Location: Bay Area
Posts: 1,029
|
Damn, I think i did the same couple of weeks ago. Instruction was to loosen the bolts, pump gease until it seeps through and tighten. Maybe i can save it somehow. How does it get damage with the excess grease?
__________________
'14 4Runner Limited Redwood: Suntek films, AVS visors, BAMF Sliders, WT Liners, 35% tint, TE37 18x9, 285/65 RidgeGrappler, Spidertraxx, Gobi Rack, Bilsteins 6112/5160, ICON Overland, CVT Mt. Shasta, TRD skid, RCI aluminum skids, BW flares, TC UCAs
'14 RX350 F-Sport: '02 GS430: '92 Integra GS
'14 S-Work Enduro: '13 Canfield Yelli Screamy
|
|
|
Reply With Quote
|
|
07-12-2016, 02:24 AM
|
#5
|
|
Member
|
|
Join Date: Feb 2013
Location: Calgary, Alberta
Age: 37
Posts: 344
|
|
|
Member
Join Date: Feb 2013
Location: Calgary, Alberta
Age: 37
Posts: 344
|
I think I found the culprit to my problem. The main bolt was no where near 85 ft lbs. I loosened the nut right off, added 2-4 pumps of grease and retorqued it to 85. I guess I was greasing it so much because it was near finger tight only.
Sent from my SM-G900W8 using Tapatalk
__________________
2012 Trail Edition (No KDSS, Fox 2.5's front, OME rear, 34" KO2's and 33" STT PRO's, Camburg UCA's, Total Chaos LCA's, Custom bumpers and sliders, Baja Utility Rack)
Build Thread
Instagram
Overland Bound Member #2992
Last edited by AirspeedX; 07-12-2016 at 02:27 AM.
|
|
|
Reply With Quote
|
|
07-12-2016, 02:26 AM
|
#6
|
|
Member
|
|
Join Date: Feb 2013
Location: Calgary, Alberta
Age: 37
Posts: 344
|
|
|
Member
Join Date: Feb 2013
Location: Calgary, Alberta
Age: 37
Posts: 344
|
Quote:
Originally Posted by Magnetic4R
Damn, I think i did the same couple of weeks ago. Instruction was to loosen the bolts, pump gease until it seeps through and tighten. Maybe i can save it somehow. How does it get damage with the excess grease?
|
I would take the zerks out and see if any grease comes out. Loosen off the pivot bolt nut as well to take away the pressure. Add the zerks back in. Regrease. Then retorque the nut.
Other than that, you're looking at a new bushing and sleeve kit. $60usd
Sent from my SM-G900W8 using Tapatalk
__________________
2012 Trail Edition (No KDSS, Fox 2.5's front, OME rear, 34" KO2's and 33" STT PRO's, Camburg UCA's, Total Chaos LCA's, Custom bumpers and sliders, Baja Utility Rack)
Build Thread
Instagram
Overland Bound Member #2992
|
|
|
Reply With Quote
|
|
07-12-2016, 06:23 AM
|
#7
|
 |
Senior Member
|
|
Join Date: Jun 2013
Location: Midland, MI
Age: 36
Posts: 1,983
Real Name: Charles
|
|
|
Senior Member
Join Date: Jun 2013
Location: Midland, MI
Age: 36
Posts: 1,983
Real Name: Charles
|
Just a side note,
I am NOT a lubrication expert but I do know that the Grease supplied by Camburg for the Bushings feels much different then what I would consider "standard auto bearing grease". No idea if it matters but I bent over and bought the $40tube from them. I am sure there are cheaper options out there but I got new bushings with the same order. Mine lasted ~30kmiles.
FWIW to replace both UCA bushings was a 4hr weekend job for me (average shade tree mechanic) the 1st took about 75% of that time and the second was cake once I had done it once (technically I had already done it on the original install but that was a couple years ago)
__________________
2014 Trail Edition Premium, 285/70/R17 BFG KM2, RadFlo 2.5" Coilovers and Rear Shocks, 50qt ARB Fridge, OTRATTW Switches, BudBuilt Bumpout Sliders, Gobi Rack + Ladder / 40" Rigid E2 /Rotopax and MaxTrax mounted, ARB CKMTA12, 270amp Alternator, Southern Style Slimline Hybrid Front Bumper w/ Warn Zeon 10S and Front Fogs, Metal Oil Canister, Sound Deadening Insulation w/ Focal Front Speakers,Black Weather Tech mats and custom pin striping & dents (the trees & bushes did it for free)
|
|
|
Reply With Quote
|
|
07-14-2016, 04:19 PM
|
#8
|
|
Member
|
|
Join Date: Dec 2015
Location: CDA
Posts: 140
|
|
|
Member
Join Date: Dec 2015
Location: CDA
Posts: 140
|
Can someone advise if the camburg performance ballpoint kit (newer black style) has 2 or 4 greasing locations? I only see pictures of them disassembled, and in those it appears there are 4. But when I look at my installed unit I seem to only find 2, one on either end. I'd appreciate any insight. Also, anything needed to be greased under the dust cap?
__________________
2013 T4R TE
My Adventures
|
|
|
Reply With Quote
|
|
07-14-2016, 04:37 PM
|
#9
|
|
Senior Member
|
|
Join Date: Jun 2013
Location: Midland, MI
Age: 36
Posts: 1,983
Real Name: Charles
|
|
|
Senior Member
Join Date: Jun 2013
Location: Midland, MI
Age: 36
Posts: 1,983
Real Name: Charles
|
Quote:
Originally Posted by mike5
Can someone advise if the camburg performance ballpoint kit (newer black style) has 2 or 4 greasing locations? I only see pictures of them disassembled, and in those it appears there are 4. But when I look at my installed unit I seem to only find 2, one on either end. I'd appreciate any insight. Also, anything needed to be greased under the dust cap?
|
There are 2 on the frame mounting bushings (the 2 you mention) they should be installed on the lower side and then there is 1 under the cap that is for the Ball Joint. The grease you use for the 2 are different then the 1.
Sounds like you already have them but make sure to follow the instructions for greasing, you need to looses the nut/bolt to pull the washers back from the bushings
The black arms are the same as the older grey arms the only change was color and that Camburg now sells them with the Ball Joints pre pressed in where as the old ones were pressed in by the end user OR a middle man like Wheelers etc
__________________
2014 Trail Edition Premium, 285/70/R17 BFG KM2, RadFlo 2.5" Coilovers and Rear Shocks, 50qt ARB Fridge, OTRATTW Switches, BudBuilt Bumpout Sliders, Gobi Rack + Ladder / 40" Rigid E2 /Rotopax and MaxTrax mounted, ARB CKMTA12, 270amp Alternator, Southern Style Slimline Hybrid Front Bumper w/ Warn Zeon 10S and Front Fogs, Metal Oil Canister, Sound Deadening Insulation w/ Focal Front Speakers,Black Weather Tech mats and custom pin striping & dents (the trees & bushes did it for free)
|
|
|
Reply With Quote
|
|
07-14-2016, 06:13 PM
|
#10
|
 |
Elite Member
|
|
Join Date: Dec 2014
Location: Utah
Posts: 5,019
|
|
|
Elite Member
Join Date: Dec 2014
Location: Utah
Posts: 5,019
|
Out of curiosity - can anyone explain to me why they are using a greasable bushing with such a short lifespan when the OEM style is extremely durable, quiet, and needs no maintenance?
|
|
|
Reply With Quote
|
|
07-15-2016, 12:17 AM
|
#11
|
|
Member
|
|
Join Date: Jan 2014
Posts: 359
|
|
|
Member
Join Date: Jan 2014
Posts: 359
|
Quote:
Originally Posted by Jetboy
Out of curiosity - can anyone explain to me why they are using a greasable bushing with such a short lifespan when the OEM style is extremely durable, quiet, and needs no maintenance?
|
I can only assume they do it as a cost saving measure. The OEM bushings (48632-60040) seem to run from $30-$45 each, whereas the Camburg replacement kit is $60 for all 4. UCAs are pretty expensive already but you'd think they could offer it as an upgrade option maybe?
__________________
2010 4Runner Trail Edition
|
|
|
Reply With Quote
|
|
07-15-2016, 12:37 AM
|
#12
|
 |
Senior Member
|
|
Join Date: Feb 2014
Location: Texas
Posts: 3,991
|
|
|
Senior Member
Join Date: Feb 2014
Location: Texas
Posts: 3,991
|
I had the camburgs on for about 10k and then sold them to run uniballs. They looked brand new and the bushings were in perfect shape. I think I greased them once..but only because it was easy. Just loosen the bolt to let the grease run out the channels.
__________________
2011 SR5 4x4, Magnuson Supercharger, ICON ET coil overs, MT ICON LT rear, MT offset lower links, URD Y-Pipe, TC UCAs, Baja Rack, MT Sliders, RCI Aluminum skids, 4.56 gearing with ARB lockers front and rear. 305/70 Goodyear MTRs (34") on Konig Countersteer 17x8. Addicted front bumper, Custom undercover tube protection rear. LT font or SAS going on next.
1989 Hilux - 22RE, SAS, hydro assist, Full Exo cage, dual ultimate cases, RCVs, 529s w Detroit locker rear + ARB front, Diamond Axle, bead locks, 40s.
|
|
|
Reply With Quote
|
|
07-17-2016, 08:11 PM
|
#13
|
|
Member
|
|
Join Date: Dec 2015
Location: CDA
Posts: 140
|
|
|
Member
Join Date: Dec 2015
Location: CDA
Posts: 140
|
I think I need some advice. I got the grease gun and grease. Per procedure I'd like to loosen the bolts first. One side is 17mm and the other 19mm. Only tool I can get onto either side is a wrench. I can't get a socket/ratchet in there. Basically space issue as the tools interfere with the inner body panel. As a result I think i just don't have enough leverage to loosen either side from the wheel well area. How should I be going about this?
Any advice is greatly appreciated.
__________________
2013 T4R TE
My Adventures
Last edited by mike5; 07-17-2016 at 10:44 PM.
|
|
|
Reply With Quote
|
|
07-17-2016, 10:50 PM
|
#14
|
|
Senior Member
|
|
Join Date: Jan 2012
Location: Fruita, CO
Age: 43
Posts: 3,984
|
|
|
Senior Member
Join Date: Jan 2012
Location: Fruita, CO
Age: 43
Posts: 3,984
|
Quote:
Originally Posted by mike5
I think I need some advice. I got the grease gun and grease. Per procedure I'd like to loosen the bolts first. One side is 17mm and the other 19mm. Only tool I can get onto either side is a wrench. I can't get a socket/ratchet in there. Basically space issue as the tools interfere with the inner body panel. As a result I think i just don't have enough leverage to loosen either side from the wheel well area. How should I be going about this?
Any advice is greatly appreciated.
|
Remove the splash shields, remove the 12mm bolt and push the brake lines out of the way.
|
|
|
Reply With Quote
|
|
07-17-2016, 11:39 PM
|
#15
|
|
Member
|
|
Join Date: Dec 2015
Location: CDA
Posts: 140
|
|
|
Member
Join Date: Dec 2015
Location: CDA
Posts: 140
|
Quote:
Originally Posted by Jeremy556
Remove the splash shields, remove the 12mm bolt and push the brake lines out of the way.
|
Ahh, I didn't think about that. Assuming this works, then I think I'm set as I need to loosen one side effectively.
One more question, should I put anti-seeze on there?
__________________
2013 T4R TE
My Adventures
|
|
|
Reply With Quote
|
 Posting Rules
|
You may not post new threads
You may not post replies
You may not post attachments
You may not edit your posts
HTML code is On
|
|
|
|


 Linear Mode


