 05-15-2017, 12:08 AM
|
#16
|
 |
Member
|
|
Join Date: Jan 2012
Location: Denver, CO
Posts: 439
|
|
|
Member
Join Date: Jan 2012
Location: Denver, CO
Posts: 439
|
Picked up a Rear Recovery Point from
@ Inv4drZm

He designed them for the 4th Gens, but these work perfectly on the left rear side! They're sold bare, and I painted mine orange to help it stand out in mud and what-not.
To make it work on the right rear, the OEM exhaust needs to be modified. If you already have an after market exhaust, you're one step ahead.
Also, I passed my HAM radio test this weekend. If you want some great study material, check out HAMStudy.org. The flash card style study material is great because they explain the answers rather than just trying to memorize the correct answer.
__________________
2016 Trail Premium Tires and sliders and some interior mods...
2005 SR5 Silver mod list
FOR SALE: Rear Diff Breather Fitting; 4th Gen Center Diff Switch w/ pigtails
Last edited by sigepbiker; 06-11-2020 at 11:13 AM.
Reason: Fixed photo link
|

|
 Reply With Quote Reply With Quote
|
|
08-02-2017, 03:39 PM
|
#17
|
|
Member
|
|
Join Date: Jan 2012
Location: Denver, CO
Posts: 439
|
|
|
Member
Join Date: Jan 2012
Location: Denver, CO
Posts: 439
|
Time for some updates
Moving the USB and AUX port into the glove compartment was one of the first things I changed. Being able to leave my iPod plugged and not worrying every time I parked was great. I've since added a BlueFire 4.2A Dual USB Charger to the blank next to it. This one was a little more complicated...
I had to remove the glove compartment to be able to remove the circular blank. The blank has a key slot to prevent it from rotating, so the width of the present hole was nearly identical to the hole needed for the USB charger.

I ran the wiring across the dash board to the interior fuse panel. The spot four down from the top left is blank, so using a Add-A-Tap worked out perfectly. The other tap is only hot with the ignition on.

Picked up an OEM Sliding Rear Cargo Deck from a guy off Craigslist. I really wanted this when I bought my 4Runner from the dealership, so I was excited when I read through
@ alpinecowboy
's thread: pure gold! Had I not found his thread, I probably would have given up on having this.

The guy didn't, however, have the Cargo Organizer that prevents your stuff from falling off the slider when it's pulled out, so I picked one up. Here's the Toyota P/N: PT924-89100-20
__________________
2016 Trail Premium Tires and sliders and some interior mods...
2005 SR5 Silver mod list
FOR SALE: Rear Diff Breather Fitting; 4th Gen Center Diff Switch w/ pigtails
|
|
|
Reply With Quote
|
|
09-26-2017, 10:16 PM
|
#18
|
|
Member
|
|
Join Date: Jan 2012
Location: Denver, CO
Posts: 439
|
|
|
Member
Join Date: Jan 2012
Location: Denver, CO
Posts: 439
|
DRL's Re-wired
Reason: After adding Bi-Xenon HIDs and wiring the solenoid to the High Beam circuit, the solenoid is energized by the low voltage (6V) of the DRL's. I'm concerned that having the solenoids energized for long periods of time could cause them to burn out quicker (or maybe it's all mental and I'm paranoid over nothing).
Either way, when it's all said and done, I want to have the Bi-Xenon solenoids be the only thing connected to the high beam circuit, and the DRL signal turn on "demon eyes" in the HID projector. These two steps will open up the OEM High Beams to be wired independently for additional off-road lights. Leaning towards Baja Designs Squadron-R.
Step 1 Complete!
After another trip to the junkyard for some more OEM Pins, I was able to make 6 jumper wires to connect the pins of the High Beam Relay to the engine fuse box. Pin 2 controls the DRL's. By removing it from the High Beam relay, the High Beams will still work correctly, but the DRL's will not turn on.


Here's pictures, with the car running, of the headlamps:
1. Parking lights w/ no DRL's
2. High Beams still work. As of now, I have the Bi-Xenon solenoid and OEM High Beams wired together with a splitter from TRS.

 Step 2: (waiting on parts)
By connecting Pin 2 from the fuse box to a new relay solenoid (to gain 12V) and then 12V power to the "demon eyes", the DRL's will be back to working. The Low Beams and the DRL’s will not be on at the same time which make sense since they are in the same projector and the Low Beams would out shine the DRL’s.
Updates to come...
UPDATED!!
So, the high beam relay with DRL's isn't as simple as redirecting DRL power from the OEM relay to a new relay. I've pulled the wiring and put it back to original. Also, the lower 6V power supplied for DRL's does not activate the Bi-Xenon solenoids. I think I'm safe...
Leaving on the bench for later as of now...
__________________
2016 Trail Premium Tires and sliders and some interior mods...
2005 SR5 Silver mod list
FOR SALE: Rear Diff Breather Fitting; 4th Gen Center Diff Switch w/ pigtails
Last edited by sigepbiker; 11-17-2018 at 06:48 PM.
|
|
|
Reply With Quote
|
|
10-04-2017, 04:53 PM
|
#19
|
|
Member
|
|
Join Date: Jan 2012
Location: Denver, CO
Posts: 439
|
|
|
Member
Join Date: Jan 2012
Location: Denver, CO
Posts: 439
|
Finally buttoned up the last of my ARB Differential Breather install. I added a tee fitting to include the Factory E-Locker Breather onto the same line for the Rear Differential.
8mm Push to Connect tee fitting w/ 1/4" NPT-M
1/4" NPT-F to 1/8" barb fitting
Hose clamp


FYI: The fittings from ARB included in the kit have the same threads as the OEM breather in the rear diff housing.
Here's a picture of where I mounted the breather in the engine bay.

This location will allow for me to extend the breather lines for the front diff, trans, and transfer case to the same location in the future.
__________________
2016 Trail Premium Tires and sliders and some interior mods...
2005 SR5 Silver mod list
FOR SALE: Rear Diff Breather Fitting; 4th Gen Center Diff Switch w/ pigtails
|
|
|
Reply With Quote
|
|
08-30-2018, 01:10 PM
|
#21
|
|
Member
|
|
Join Date: Jan 2012
Location: Denver, CO
Posts: 439
|
|
|
Member
Join Date: Jan 2012
Location: Denver, CO
Posts: 439
|
Quad Air-up System
There have been some ideas out there for airing up/down quicker. SponsoredByWifey on Instagram has a cool system as well as TrailRecon on Youtube. I kinda merged the two and put my own spin on it.
Here's a brief list of what you'll need to get started. As for the specialized equipment, the part numbers included are from Zoro.com:
50 ft of 3/8" hose
3 Tee Fitting
10 Hose Barb fitting
4 90° Hose Barb fitting
20 Hose Clamps
3 Quick Disconnect Plugs (Male)
2 Quick Disconnect Sockets (Female)
1 Ball Valve G3007751
4 Schrader Valves
4 Anchor Coupling G0639204
8 Air Chuck G4016166
I started with the hard (driver) side first because I'm a glutton for punishment... 
Because of where I mounted the couplings/schrader valve in the engine bay on the driver side, I needed an elbow for the hose barb. A straight barb fitting would not fit. Plus, using an elbow for all the frame mounted hose connections removes the hard bends. Here's how the fittings fit together.
Front:
 Rear:
Rear:

The anchor coupling requires a 3/4" hole for mounting. Here's how they look installed in the wheel wells:
Front Driver

 Rear Driver
 Front Passenger

 Rear Passenger

Because my air compressor is located in the bottle jack storage compartment, I ran the hoses from the rear wheel to the compressor. I had an extra tee fitting I mounted the ball valve to. My plan is to remove the middle Quick Disconnect Socket and add another Schrader valve. This way, I can still use my Staun deflators and my tire pressure gauge to check pressure as I air up and down.

UPDATE:
I've since upgraded the hose routing and added a manifold.
Ran the tubing from the rear driver connection point through a factory grommet into the jack compartment.
The blue manifold has a shutoff valve, gauge, and relief valve. I haven't set the relief valve yet, but the idea is to have it pop and then reseat at my desired PSI, ~36PSI. Then it will be "fully hands-free".

__________________
2016 Trail Premium Tires and sliders and some interior mods...
2005 SR5 Silver mod list
FOR SALE: Rear Diff Breather Fitting; 4th Gen Center Diff Switch w/ pigtails
Last edited by sigepbiker; 05-16-2024 at 01:59 PM.
Reason: Fixed picture links
|
|
|
Reply With Quote
|
|
10-19-2018, 02:14 PM
|
#22
|
|
Member
|
|
Join Date: Jan 2012
Location: Denver, CO
Posts: 439
|
|
|
Member
Join Date: Jan 2012
Location: Denver, CO
Posts: 439
|
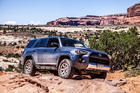
Finally Doesn't "Look" Stock
Made some changes: Gamiviti Roof Rack and General Tires ATX
I ordered the C ratings, but Discount ordered the E rating, so I got a free upgrade!

Here some detail shots of the Gamiviti Rack. Tim's a member of my local wheeling club and a great guy to work with. His specialty is Land Cruisers, but he supports other Toyotas. This is a great rack, and the customization is limitless! I like how the light bar is behind the fairing. Can't Q-Beam bad drivers, but the wind noise is absent!


I trimmed the fairing to follow the curve of the roof a little better. Here's a close up shot of the edge trim I bought off Amazon to help make the cut look better and prevent the fairing from rubbing the paint.

Next up: Wire up and aim the light in time for next weekend's night run...
__________________
2016 Trail Premium Tires and sliders and some interior mods...
2005 SR5 Silver mod list
FOR SALE: Rear Diff Breather Fitting; 4th Gen Center Diff Switch w/ pigtails
Last edited by sigepbiker; 06-11-2020 at 11:20 AM.
Reason: Fixing photos
|
|
|
Reply With Quote
|
|
10-29-2018, 01:58 PM
|
#23
|
|
Member
|
|
Join Date: Jan 2012
Location: Denver, CO
Posts: 439
|
|
|
Member
Join Date: Jan 2012
Location: Denver, CO
Posts: 439
|
New Bracket for ARB CKMA12
Quote:
Originally Posted by sigepbiker

Mounted an ARB CKMA12 in the bottle jack compartment.
...
UPDATE!!
The OEM bracket that holds the jack tools started to crack, so I made a new bracket.
|
After hearing too much creaking going over any bump in the road, I found out the OEM bracket was cracking. Not really designed to hold the weight of a compressor. So, worked with a buddy to bend and cut some metal into an amazingly designed shape...

Mounted up with the plastic trim removed. It is tight in there!


Quote:
Originally Posted by sigepbiker
The best part of this mod - the door still fits and hides everything!
|
Yup!! Door still closes.

__________________
2016 Trail Premium Tires and sliders and some interior mods...
2005 SR5 Silver mod list
FOR SALE: Rear Diff Breather Fitting; 4th Gen Center Diff Switch w/ pigtails
Last edited by sigepbiker; 11-17-2018 at 06:17 PM.
Reason: Fixing photos
|
|
|
Reply With Quote
|
|
10-29-2018, 02:18 PM
|
#24
|
|
Member
|
|
Join Date: Jan 2012
Location: Denver, CO
Posts: 439
|
|
|
Member
Join Date: Jan 2012
Location: Denver, CO
Posts: 439
|
Rising Sun 4x4 Club Spooky Night Run
Got to go on my first night run and use my light bar properly!

Love how my light bar sits hidden behind the fairing. Wired it up in a pinch with a Y splitter off the headlights. Tried to use the fog lights, but the OEM plugs don't match. Maybe next year I'll have it on it's own switch.
Pot luck dinner before sun down.

Kinda eerie being out in the middle of nowhere and pitch black. Good thing for the LED bar!

__________________
2016 Trail Premium Tires and sliders and some interior mods...
2005 SR5 Silver mod list
FOR SALE: Rear Diff Breather Fitting; 4th Gen Center Diff Switch w/ pigtails
Last edited by sigepbiker; 11-17-2018 at 06:29 PM.
Reason: Fixed photos
|
|
|
Reply With Quote
|
|
11-02-2018, 10:42 PM
|
#25
|
|
Member
|
|
Join Date: Jan 2012
Location: Denver, CO
Posts: 439
|
|
|
Member
Join Date: Jan 2012
Location: Denver, CO
Posts: 439
|
Well, went back through and fixed all the links for the photos. I think I now understand how to properly share photos from Google Photos. Not as straight forward as you would think...
Rising Sun Snow Run

Moab Weekend

Cruise Moab

Rising Sun Ghost Town Run

__________________
2016 Trail Premium Tires and sliders and some interior mods...
2005 SR5 Silver mod list
FOR SALE: Rear Diff Breather Fitting; 4th Gen Center Diff Switch w/ pigtails
Last edited by sigepbiker; 06-11-2020 at 11:54 AM.
Reason: fixing photos
|
|
|
Reply With Quote
|
|
09-28-2019, 11:51 AM
|
#26
|
 |
Senior Member
|
|
Join Date: Feb 2010
Location: Bay Area, CA
Posts: 3,454
Real Name: Mike
|
|
|
Senior Member
Join Date: Feb 2010
Location: Bay Area, CA
Posts: 3,454
Real Name: Mike
|
Quote:
Originally Posted by sigepbiker
Moving the USB and AUX port into the glove compartment was one of the first things I changed. Being able to leave my iPod plugged and not worrying every time I parked was great. I've since added a BlueFire 4.2A Dual USB Charger to the blank next to it. This one was a little more complicated...
I had to remove the glove compartment to be able to remove the circular blank. The blank has a key slot to prevent it from rotating, so the width of the present hole was nearly identical to the hole needed for the USB charger.
I ran the wiring across the dash board to the interior fuse panel. The spot four down from the top left is blank, so using a Add-A-Tap worked out perfectly. The other tap is only hot with the ignition on.
Picked up an OEM Sliding Rear Cargo Deck from a guy off Craigslist. I really wanted this when I bought my 4Runner from the dealership, so I was excited when I read through
@ alpinecowboy
's thread: pure gold! Had I not found his thread, I probably would have given up on having this.
The guy didn't, however, have the Cargo Organizer that prevents your stuff from falling off the slider when it's pulled out, so I picked one up. Here's the Toyota P/N: PT924-89100-20 |
Is the blank you but the add a circuit in, 4th one down on the left, is that an ignition hot? Looking to add some Baja Designs LP6s and want the backlight amber to come on when the ignition is on.
Thanks
Mike
|
|
|
Reply With Quote
|
|
09-30-2019, 12:00 PM
|
#27
|
|
Member
|
|
Join Date: Jan 2012
Location: Denver, CO
Posts: 439
|
|
|
Member
Join Date: Jan 2012
Location: Denver, CO
Posts: 439
|
Quote:
Originally Posted by sigepbiker
I ran the wiring across the dash board to the interior fuse panel. The spot four down from the top left is blank, so using a Add-A-Tap worked out perfectly. The other tap is only hot with the ignition on.
|
Quote:
Originally Posted by mikey's2010SR5
Is the blank you but the add a circuit in, 4th one down on the left, is that an ignition hot? Looking to add some Baja Designs LP6s and want the backlight amber to come on when the ignition is on.
Thanks
Mike
|
The tap shown on the top right is the one you want. It's hot only with the ignition turned on.
But if this is just for the switch backlight, you could also tap into the wires of the other switches on your dash. Then they would dim appropriately.
__________________
2016 Trail Premium Tires and sliders and some interior mods...
2005 SR5 Silver mod list
FOR SALE: Rear Diff Breather Fitting; 4th Gen Center Diff Switch w/ pigtails
|
|
|
Reply With Quote
|
|
10-02-2019, 12:06 AM
|
#28
|
|
Senior Member
|
|
Join Date: Feb 2010
Location: Bay Area, CA
Posts: 3,454
Real Name: Mike
|
|
|
Senior Member
Join Date: Feb 2010
Location: Bay Area, CA
Posts: 3,454
Real Name: Mike
|
Quote:
Originally Posted by sigepbiker
The tap shown on the top right is the one you want. It's hot only with the ignition turned on.
But if this is just for the switch backlight, you could also tap into the wires of the other switches on your dash. Then they would dim appropriately.
|
Think that is the one I used. Actually the ignition fuse. Does what I want. I actually got off my butt and got a circuit tester to make quick work of it. Thanks though.
|
|
|
Reply With Quote
|
|
03-20-2020, 02:54 PM
|
#29
|
|
Member
|
|
Join Date: Jan 2012
Location: Denver, CO
Posts: 439
|
|
|
Member
Join Date: Jan 2012
Location: Denver, CO
Posts: 439
|
Quote:
Originally Posted by sigepbiker
Moving the USB and AUX port into the glove compartment was one of the first things I changed. Being able to leave my iPod plugged and not worrying every time I parked was great. I've since added a BlueFire 4.2A Dual USB Charger to the blank next to it. This one was a little more complicated...
I had to remove the glove compartment to be able to remove the circular blank. The blank has a key slot to prevent it from rotating, so the width of the present hole was nearly identical to the hole needed for the USB charger.
I ran the wiring across the dash board to the interior fuse panel. The spot four down from the top left is blank, so using a Add-A-Tap worked out perfectly. The other tap is only hot with the ignition on.
|
@ CO4Rexplorer
- the photo of the fuse box should make clear where to pull your power from.
__________________
2016 Trail Premium Tires and sliders and some interior mods...
2005 SR5 Silver mod list
FOR SALE: Rear Diff Breather Fitting; 4th Gen Center Diff Switch w/ pigtails
|
|
|
Reply With Quote
|
 Posting Rules
|
You may not post new threads
You may not post replies
You may not post attachments
You may not edit your posts
HTML code is On
|
|
|
|


 Linear Mode


