 02-27-2018, 06:27 PM
|
#1
|
 |
Member
|
|
Join Date: Jan 2018
Location: Park City!!!
Posts: 90
Real Name: Taylor Noelle
|
|
|
Member
Join Date: Jan 2018
Location: Park City!!!
Posts: 90
Real Name: Taylor Noelle
|
PC_Overland Adventures and Build Thread
My perpetual pet project and adventure thread. The wife is so patient.
Purchased my 2018 TRDORP January 10th. I off-loaded my 2015 Chevy Colorado to acquire the 4Runner. Ive honestly never really been a Toyota guy. To be clear, Ive never really been brand loyal to any car company. Ive always thought of the vehicle as a tool and an extension of myself and as Ive grown and changed, so to have my vehicles. This was motivated by the pending acquisition of an off road tear-drop trailer (Hiker Trailer) and the desire to start more overlanding exploring with my family. While I agree that the 4Runner is a bit long in the tooth, I can think of no other vehicle that can perform as well both as a DD and as an overlanding rig. Below, I will try and document my build. Ive never done this before so guidance is greatly appreciated.

This was not the best decision and I should have done more research on the truck before buying this. I negotiated down quite a bit on the price but ultimately, its a leveling kit with SR5 Stock shocks. The Predator steps would see trail damage the first time out and Ive got RCS sliders coming soon. I do quite like the XD rims and the 275/17/79 KO2s. Im not sure yet if I will ultimately upsize to 285/70/17s. Live and learn I suppose.
Upgrades:
Interior:
Custom Platform: http://www.toyota-4runner.org/5th-ge...ml#post2958721
Exterior:
Window tint - Ceramic
Xenon Depot HID11 Xenon low beams and Pro LED High beams
RCI metal works skids: oil pan, transfer case, transmission, rear diff, gas tank
RCI metal works sliders - These were DOM steel tubing and ~20lbs lighter than C4
Gamiviti Rack (steel)
Gobi Ladder
Mechanical:
ARB Snorkel: http://www.toyota-4runner.org/5th-ge...ml#post2955489
Pedal Commander throttle controller
ARB rear diff and E-locker breather
Suspension - Fox 2.5 coilovers with RR & compression adjusters (front), Fox 2.5 RR with compression adjusters and Icon Overland Springs (rear)
Electronic:
Shrockworks dual battery (pictures coming)
S-pod SE touchscreen
Extreme LED Pro Series 2D 30 light bar
ARB 50Q fridge freezer
Sent from my iPad using Tapatalk
__________________
2018 TRD ORP: RCI sliders and full skid package/ King 2.5 Front & Rear with RR / Total Chaos UCA / Gamiviti Rack / ARB Safari Snorkel/ Shrockworks Dual Battery / SPOD SE touchscreen / BFG KO2s 275/70/17 / ARB dual compressor / ARB diff breather / Xenon Depot HID/LEDs / Extreme LED / Pedal Commander
Last edited by delgadtn; 05-16-2018 at 12:06 AM.
|

|
 Reply With Quote Reply With Quote
|
|
02-27-2018, 06:59 PM
|
#2
|
 |
Member
|
|
Join Date: Feb 2017
Location: Seymour's Bay
Posts: 172
|
|
|
Member
Join Date: Feb 2017
Location: Seymour's Bay
Posts: 172
|
Quote:
Originally Posted by delgadtn

Below, I will try and document my build. Ive never done this before so guidance is greatly appreciated.
|
The next 2 pages of most build threads include up close pictures of the new Husky floor mats that were placed and plastidipping at least 1 item. Just kidding..kind of.
Great picture though!
__________________
The tea in Nepal is very hot.
|
|
|
Reply With Quote
|
|
02-27-2018, 07:24 PM
|
#3
|
|
Member
|
|
Join Date: Jan 2018
Location: Park City!!!
Posts: 90
Real Name: Taylor Noelle
|
|
|
Member
Join Date: Jan 2018
Location: Park City!!!
Posts: 90
Real Name: Taylor Noelle
|
Quote:
Originally Posted by Louise
The next 2 pages of most build threads include up close pictures of the new Husky floor mats that were placed and plastidipping at least 1 item. Just kidding..kind of.
Great picture though!
|
If I could actually figure out how to upload multiple photos on Tapatalk I would post my Spod Touchscreen install.
Sent from my iPad using Tapatalk
__________________
2018 TRD ORP: RCI sliders and full skid package/ King 2.5 Front & Rear with RR / Total Chaos UCA / Gamiviti Rack / ARB Safari Snorkel/ Shrockworks Dual Battery / SPOD SE touchscreen / BFG KO2s 275/70/17 / ARB dual compressor / ARB diff breather / Xenon Depot HID/LEDs / Extreme LED / Pedal Commander
|
|
|
Reply With Quote
|
|
02-27-2018, 08:28 PM
|
#4
|
|
Member
|
|
Join Date: Jan 2018
Location: Park City!!!
Posts: 90
Real Name: Taylor Noelle
|
|
|
Member
Join Date: Jan 2018
Location: Park City!!!
Posts: 90
Real Name: Taylor Noelle
|
PC_Overland Build Thread
Spod Install:
https://i.imgur.com/Em8NXQD.jpg
I debated for quite sometime whether to get the standard 6 switch model or the SE LCD screen model. I wanted ultimate flexibility and a clean look. I did not want to put a huge hole through my firewall grommet and I really liked that the digital model runs only an Ethernet cable through the firewall. With the SE model, I have only a small hole through my firewall and I was easily able to seal it with silicone. With the digital Spod I also do not have to change out the fuses based on my accessory as the SourceSE board modulates the current directly. Each input is still rated at 30 Amps and I also have ability to add additional Sources while keeping a single Control Module and toggling between up to four different Sources (Its quite unlikely that I will require 32 circuits). Finally, I really like how I can monitor the board temperature and my battery voltage on the control module.
https://i.imgur.com/4tLh6yA.jpg
Using the universal bracket I secured the control module to the top of my fuse box. I used rubber washers and applied silicone around the screws to maximize the seal. Living in Utah the winters can be quite nasty and fighting salt corrosion is a constant battle.
https://i.imgur.com/sUFOGdu.jpg
Fishing a coat hanger through the grommet on the drivers side was actually quite easy. The most challenging bit was running the wire under the steering column, over the dash knee-airbag assembly to the center stack.
https://i.imgur.com/UgPBqTz.jpg
https://i.imgur.com/gyoYb2i.jpg
I used a graduated bit to make a hole in the otherwise useless storage slot in the center stack. This bit was not cheap but it makes a really clean hole and I like how I can increase the diameter in a graduated fashion. As much as it hurt to drill holes in to the fascia of a brand new vehicle, this was the best spot I could think to mount the screen. IPA helps with courage. I had initially planned to mount the screen on the bottom drivers side windshield by the A-pillar using a ram-mount suction cup. I like the final placement much better as it does not obstruct my view, is still easily accessible, and is somewhat hidden from prying eyes. Too, it is through bolted to the center stack and so requires tools and a bit of know how to forcible remove it. Overall, I really like the look here and Im very happy with this install.
https://i.imgur.com/Em8NXQD.jpg
https://i.imgur.com/MXsQUGx.jpg
Sent from my iPad using Tapatalk
__________________
2018 TRD ORP: RCI sliders and full skid package/ King 2.5 Front & Rear with RR / Total Chaos UCA / Gamiviti Rack / ARB Safari Snorkel/ Shrockworks Dual Battery / SPOD SE touchscreen / BFG KO2s 275/70/17 / ARB dual compressor / ARB diff breather / Xenon Depot HID/LEDs / Extreme LED / Pedal Commander
Last edited by delgadtn; 02-27-2018 at 08:42 PM.
|
|
|
Reply With Quote
|
|
04-09-2018, 05:52 AM
|
#5
|
|
Member
|
|
Join Date: Jan 2018
Location: Park City!!!
Posts: 90
Real Name: Taylor Noelle
|
|
|
Member
Join Date: Jan 2018
Location: Park City!!!
Posts: 90
Real Name: Taylor Noelle
|
Gamiviti rack ready for install
My Gamiviti rack is complete and ready for install. Can't wait to make it over to Denver to bolt it up.

__________________
2018 TRD ORP: RCI sliders and full skid package/ King 2.5 Front & Rear with RR / Total Chaos UCA / Gamiviti Rack / ARB Safari Snorkel/ Shrockworks Dual Battery / SPOD SE touchscreen / BFG KO2s 275/70/17 / ARB dual compressor / ARB diff breather / Xenon Depot HID/LEDs / Extreme LED / Pedal Commander
|
|
|
Reply With Quote
|
|
04-09-2018, 07:59 AM
|
#6
|
|
Member
|
|
Join Date: Apr 2014
Location: Denver
Posts: 388
|
|
|
Member
Join Date: Apr 2014
Location: Denver
Posts: 388
|
Should upload some pics of your snorkel install
|
|
|
Reply With Quote
|
|
04-10-2018, 07:08 AM
|
#7
|
|
Member
|
|
Join Date: Jan 2018
Location: Park City!!!
Posts: 90
Real Name: Taylor Noelle
|
|
|
Member
Join Date: Jan 2018
Location: Park City!!!
Posts: 90
Real Name: Taylor Noelle
|
ARB Safari Snorkel installed.
Spoiler alert, this is not a how to write up on snorkel install, I took the easy way and had a reputable shop install it. This is my rational for installing the snorkel and why I chose to punt the install to someone else.
While I like the look of the snorkel, it is quite obtrusive and becomes the first thing you see on the truck. It is essentially a permanent modification to the truck; going back to OEM would be quite expensive. Further, I wanted to make sure I would get adequate use from the snorkel and that it was not a "cosmetic upgrade." I thought long and hard if I wanted to cut a 6 inch hole in the fender of a new $40k and what it might do to resale. After a fair amount of consideration and really thinking about my plans for the truck, I opted to bite the bullet and go for the snorkel. I don't plan on selling the vehicle for at least ~150K miles and I figured I would get my money out of it. I might as well make the vehicle mine. To be clear, my main reason for getting a snorkel is clean cool air. Living in Utah, a lot of my exploration is in the desert. The sand in Utah is incredibly fine and has a way of finding it's way everywhere. I remember the sane when I went tent camping in Moab for the first time, "once you set up a tent in the desert of Utah, it never comes back from the desert." I have found this to be quit true. Point being is that the it is incredibly dusty and hot in the desert and the air intake is quite vulnerable to sand and extremely hot air. I may do a river crossing here and there but based on my current objectives, if I am ever in water deep enough that my intake is below water, something has gone terribly wrong.
I know there are other brands and some less expensive snorkel options people have installed on the 4Runner, however, when I'm going to be putting something this obtrusive and permanent on the exterior of my vehicle, I want the fit to be perfect and to last a long time. If the snorkel breaks down or fails, essentially the entire fender is going to need to be replaced; not an inexpensive proposition. Thus, I went with the Safari Snorkel (part number SS450HP). This ran me $553. I watched the
@ LifestyleOverland
video of his FTS Snorkel install
https://youtu.be/K-2FZSSAxQk
and the
@ Hltoppr
post write up on the Safari snorkel install.
ARB Safari Snorkel Install
I am not a mechanic however I am decently mechanically inclined. Still, this was 5-6" hole being cut in to my fender as well as multiple perfectly spaced bolt holes in to my fender and A-pillar. While I do the majority of the work on Maggie, if messed up in any way, at best I would have a poor cosmetic outcome susceptible to early rust and corrosion, at worst I would have to spend a couple thousand dollars in body work and a new air box. I called around to some local 4-wheel shops and found one a trusted, who has done a couple hundred of them in the past. After talking with them, they were willing to do the job for around $300 in labor; not cheap but in my mind well worth the money in time and experience.
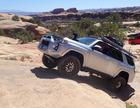
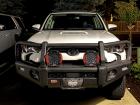
Here is the 4Runner still in the garage after install:

And on the Trail:


I am really happy with how it turned out. When you are in the driver seat you really can not even see the snorkel as it is tucked well behind the A-pillar and out of view. The only part I can see is the every top "hook," of the snorkel. I did not silicone in the drain hole as I want to make sure that if I am driving during a heavy rain that there is an exit for water that enters the intake. Even with that, it would be wise to check the air box every so often to make sure that bugs do not clog the drain hole. I am really glad that I did this mod and that I off loaded the work. I would definitely do this again.
Cheers.
__________________
2018 TRD ORP: RCI sliders and full skid package/ King 2.5 Front & Rear with RR / Total Chaos UCA / Gamiviti Rack / ARB Safari Snorkel/ Shrockworks Dual Battery / SPOD SE touchscreen / BFG KO2s 275/70/17 / ARB dual compressor / ARB diff breather / Xenon Depot HID/LEDs / Extreme LED / Pedal Commander
|
|
|
Reply With Quote
|
|
04-10-2018, 11:37 AM
|
#8
|
|
Member
|
|
Join Date: Aug 2016
Location: Flagstaff, Arizona
Posts: 164
|
|
|
Member
Join Date: Aug 2016
Location: Flagstaff, Arizona
Posts: 164
|
Yup! Lots and lots of dust and sand in Utah! I was just doing some training with a Rebelle Rally team there last weekend!

-H-
|
|
|
Reply With Quote
|
|
04-10-2018, 01:22 PM
|
#9
|
|
Junior Member
|
|
Join Date: Apr 2018
Location: Houston
Posts: 17
|
|
|
Junior Member
Join Date: Apr 2018
Location: Houston
Posts: 17
|
I am really looking forward to seeing where your adventure takes you. I joined the forum because I too would like to set up my 5th gen for over landing.
|
|
|
Reply With Quote
|
|
04-10-2018, 02:40 PM
|
#10
|
 |
Member
|
|
Join Date: Jun 2016
Location: Mesa, AZ.
Posts: 127
|
|
|
Member
Join Date: Jun 2016
Location: Mesa, AZ.
Posts: 127
|
Nice
Quote:
Originally Posted by delgadtn
Spoiler alert, this is not a how to write up on snorkel install, I took the easy way and had a reputable shop install it. This is my rational for installing the snorkel and why I chose to punt the install to someone else.
While I like the look of the snorkel, it is quite obtrusive and becomes the first thing you see on the truck. It is essentially a permanent modification to the truck; going back to OEM would be quite expensive. Further, I wanted to make sure I would get adequate use from the snorkel and that it was not a "cosmetic upgrade." I thought long and hard if I wanted to cut a 6 inch hole in the fender of a new $40k and what it might do to resale. After a fair amount of consideration and really thinking about my plans for the truck, I opted to bite the bullet and go for the snorkel. I don't plan on selling the vehicle for at least ~150K miles and I figured I would get my money out of it. I might as well make the vehicle mine. To be clear, my main reason for getting a snorkel is clean cool air. Living in Utah, a lot of my exploration is in the desert. The sand in Utah is incredibly fine and has a way of finding it's way everywhere. I remember the sane when I went tent camping in Moab for the first time, "once you set up a tent in the desert of Utah, it never comes back from the desert." I have found this to be quit true. Point being is that the it is incredibly dusty and hot in the desert and the air intake is quite vulnerable to sand and extremely hot air. I may do a river crossing here and there but based on my current objectives, if I am ever in water deep enough that my intake is below water, something has gone terribly wrong.
I know there are other brands and some less expensive snorkel options people have installed on the 4Runner, however, when I'm going to be putting something this obtrusive and permanent on the exterior of my vehicle, I want the fit to be perfect and to last a long time. If the snorkel breaks down or fails, essentially the entire fender is going to need to be replaced; not an inexpensive proposition. Thus, I went with the Safari Snorkel (part number SS450HP). This ran me $553. I watched the
@ LifestyleOverland
video of his FTS Snorkel install
https://youtu.be/K-2FZSSAxQk
and the
@ Hltoppr
post write up on the Safari snorkel install.
ARB Safari Snorkel Install
I am not a mechanic however I am decently mechanically inclined. Still, this was 5-6" hole being cut in to my fender as well as multiple perfectly spaced bolt holes in to my fender and A-pillar. While I do the majority of the work on Maggie, if messed up in any way, at best I would have a poor cosmetic outcome susceptible to early rust and corrosion, at worst I would have to spend a couple thousand dollars in body work and a new air box. I called around to some local 4-wheel shops and found one a trusted, who has done a couple hundred of them in the past. After talking with them, they were willing to do the job for around $300 in labor; not cheap but in my mind well worth the money in time and experience.
Here is the 4Runner still in the garage after install:
Attachment 292725
And on the Trail:
Attachment 292726
Attachment 292727
Attachment 292728
I am really happy with how it turned out. When you are in the driver seat you really can not even see the snorkel as it is tucked well behind the A-pillar and out of view. The only part I can see is the every top "hook," of the snorkel. I did not silicone in the drain hole as I want to make sure that if I am driving during a heavy rain that there is an exit for water that enters the intake. Even with that, it would be wise to check the air box every so often to make sure that bugs do not clog the drain hole. I am really glad that I did this mod and that I off loaded the work. I would definitely do this again.
Cheers. |
Looks great! How are you liking the snorkel? Have you seen any MPG improvement city or HW?
__________________
2014 KDSS TRAIL NATTY BLU. 285/75R17 Toyo AT2,Camburg BJ UCA, OME full kit with 2885 front and 2895 rear, factory 3rd row seat swap, HeftyFab full skids, 30in LED, and custom built rear bumper. 125k mi, 4 kids and going strong.
|
|
|
Reply With Quote
|
|
04-10-2018, 05:36 PM
|
#11
|
|
Member
|
|
Join Date: Jan 2018
Location: Park City!!!
Posts: 90
Real Name: Taylor Noelle
|
|
|
Member
Join Date: Jan 2018
Location: Park City!!!
Posts: 90
Real Name: Taylor Noelle
|
Quote:
Originally Posted by Asugm13
Looks great! How are you liking the snorkel? Have you seen any MPG improvement city or HW?
|
I really like it a lot! I have only had it for 1 week so too soon to tell. Im not expecting too much though. I still havent upgraded the filter itself. I suppose I will at some point.
Sent from my iPhone using Tapatalk Pro
__________________
2018 TRD ORP: RCI sliders and full skid package/ King 2.5 Front & Rear with RR / Total Chaos UCA / Gamiviti Rack / ARB Safari Snorkel/ Shrockworks Dual Battery / SPOD SE touchscreen / BFG KO2s 275/70/17 / ARB dual compressor / ARB diff breather / Xenon Depot HID/LEDs / Extreme LED / Pedal Commander
|
|
|
Reply With Quote
|
|
04-14-2018, 12:03 AM
|
#12
|
|
Member
|
|
Join Date: Jan 2018
Location: Park City!!!
Posts: 90
Real Name: Taylor Noelle
|
|
|
Member
Join Date: Jan 2018
Location: Park City!!!
Posts: 90
Real Name: Taylor Noelle
|
PC_Overland Build Thread
Well...it's finally done!!! After researching platforms and drawers, and considering the need to maintain the cargo area for both daily driving and overlanding, I decided that I would make my own platform. My needs were:
1) OEM look
2) Subtract minimal existing available space
3) Lighter weight than the ARB drawer system
4) Easily Removable
5) Avoid hacking away at trim and equipment
6) Modularity with multiple tie down points
7) Flush with folded down rear sears
8) Slide out table
9) Ability to mount a fridge slide
It's taken about 2 months from the initial conception to get it finally mounted up. There was a lot of on site engineering at play here and every row of screw placement, router channel, etc... had to be considered in order for it all to come together. I mounted it to the body using the existing 4 corner mounting points in the back. Only 1 piece of trim was removed (the carped ramp piece just behind the second row seats) and it can be easily re-installed if needed. I had to fabricate stand-off using pvc pipe to raise the platform above the trim and keep it level. The carpet and sound deadening material remains in place beneath the platform.
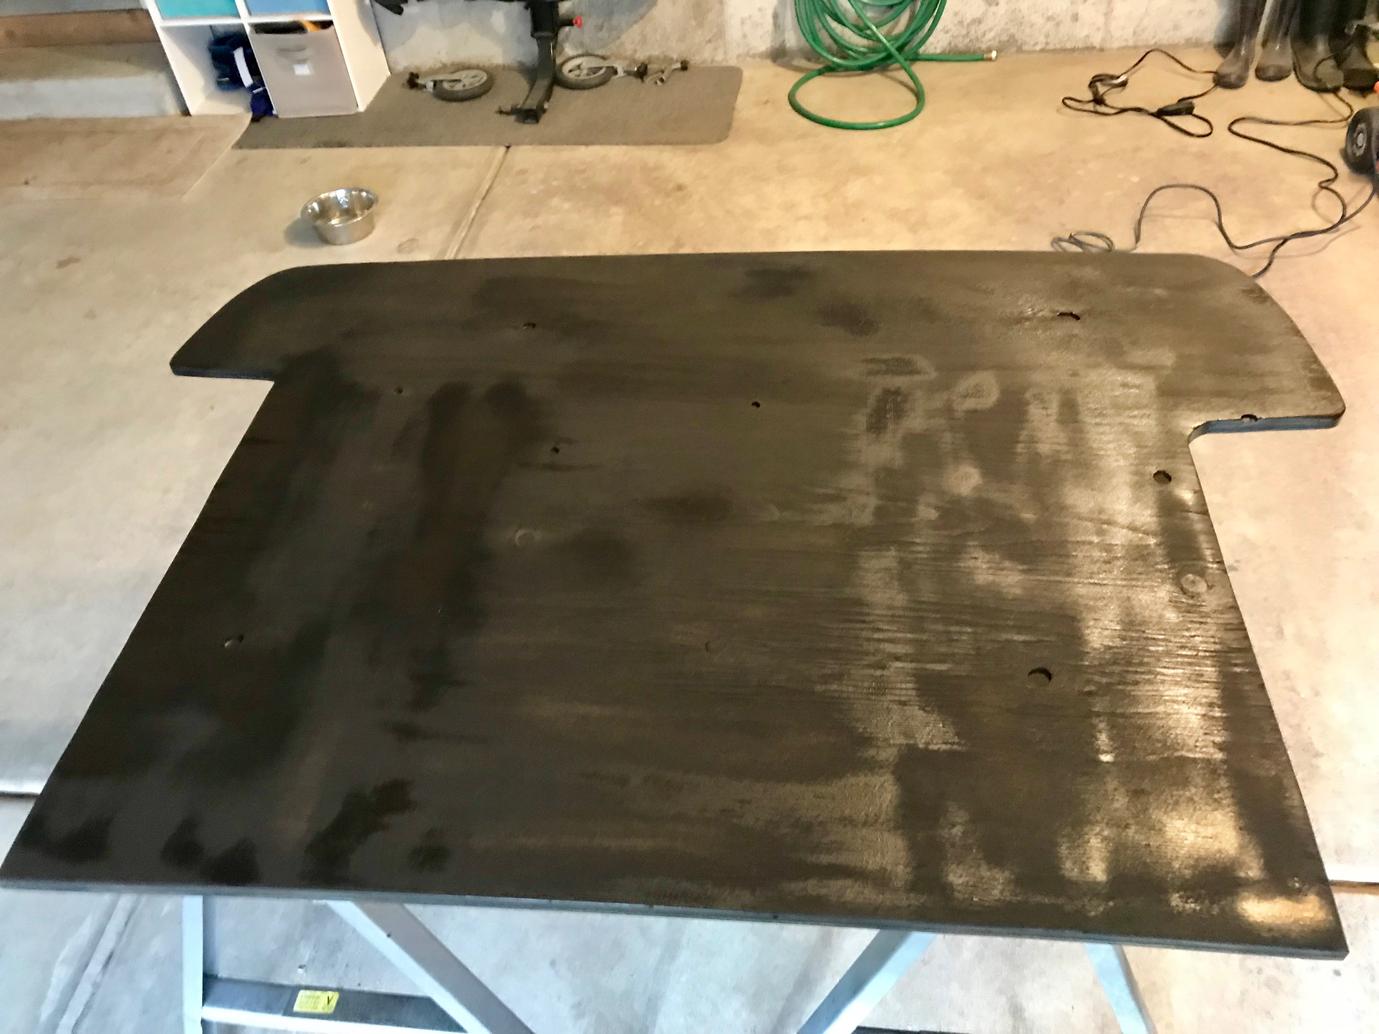
The platform is made of 4x8' 3/4 inch ply as a base, with 1/2 birch as the top sheet. I could not find a 4x8' section of birch and I had to get 3 2x4' sections to make the top sheet. Below is the underside of the ply wood base after a fresh coat of paint. It was slightly bowed and thus I had to spend a week slowly bending it out flat.
Figuring out the stand off height and the screw length was one of the hardest parts and by far the biggest pain in the A$$. I used 2" pvc pipe as stand-offs to raise the platform. The pipe on the right is cut to 2 5/8" and is positioned around the two body holes in the very back next to the lift gate. The pipe on the left is cut to 1 3/8" and is positioned around the two body holes behind the second row seat. The screws are M6 screws and use the existing frame holes. They go through the platform, the stand-offs, and into the body. I used 100mm and 80mm for the long and short stand off positions respectively. I countersunk the screws into the platform by 1/2".

Here is the platform before I added the slide out table, fridge slide, and drilled the mounting holes. I purchased recessed L-track on Amazon and simply cut it to fit the router channels. The channels are 1 1/4" wide and 1/4" deep. I painted the platform using Rust-Oleum undercoat and truck bed liner. It gives it a nice texture and is really durable. It should be pretty abrasion resistant.


Not pictured, in order to figure out exactly where I needed to drill the holes in the platform so they would mate perfectly with the frame holes, I sacrificed 4 screws. I got 4 extra 100 mm M6 screws and cut the head off of them so they were essentially only the threads. After loosely threading them in to the frame holes of the car, I floated the platform over top of them and positioned the platform where I thought the final resting place would be. Then, with a rubber mallet, I gave a good wack to the platform where it rested on top of the decapitated screws. Once the platform was removed, there was a nice indentation marking the screw position. I simply drilled that out.
Here is the final platform.


The slide out is 24" & 32". I just used cabinet slides available at home depot. I'm sure you could get heavy duty slides and do the same. The table should hold 25 lbs or so and that should be sufficient for my needs. I've driven it around for a few days now and there is no rattle at all. The weight of the platform without the fridge slide is ~40lbs. The entire platform can be removed by removing the 4 screws with a Philips driver and the truck can go back to OEM simply by adding back the factory hooks and trim piece. This took a ton of time and as I said, there was a ton of on-site engineering involved. Knowing all the dimensions now, this would be way easier to go back and repeat the project. I'm super stoked on it.
-T-
__________________
2018 TRD ORP: RCI sliders and full skid package/ King 2.5 Front & Rear with RR / Total Chaos UCA / Gamiviti Rack / ARB Safari Snorkel/ Shrockworks Dual Battery / SPOD SE touchscreen / BFG KO2s 275/70/17 / ARB dual compressor / ARB diff breather / Xenon Depot HID/LEDs / Extreme LED / Pedal Commander
Last edited by delgadtn; 04-17-2018 at 12:09 PM.
Reason: Typo
|
|
|
Reply With Quote
|
|
04-14-2018, 08:29 AM
|
#13
|
 |
Member
|
|
Join Date: Mar 2016
Posts: 438
Real Name: The guy in the van down by the river
|
|
|
Member
Join Date: Mar 2016
Posts: 438
Real Name: The guy in the van down by the river
|
Nice use of the pvc
__________________
"Some desire is necessary to keep life in motion"
2016 TRD Pro build
|
|
|
Reply With Quote
|
|
05-15-2018, 11:31 PM
|
#14
|
|
Member
|
|
Join Date: Jan 2018
Location: Park City!!!
Posts: 90
Real Name: Taylor Noelle
|
|
|
Member
Join Date: Jan 2018
Location: Park City!!!
Posts: 90
Real Name: Taylor Noelle
|
PC_Overland Adventures and Build Thread
Gamiviti Rack:
Anyone who has ever looked at adding an expedition rack has searched these forums and google reviews until our eyes pop out. Like everyone else, I wanted my cake and to eat it too; who doesnt? My issue, Maggie came with a sunroof. As much as I wanted an expedition roof rack, I wanted to preserve the sunroof and I wanted to be able to mount my Yakima cross bars for skis, boats and bikes. Recognizing all of the issues with steel racks, I had to have my sunroof and Yakima rack. This ultimately lead me to steel roof racks. Yes I understand the rust and corrosion issues. But, why does it seem that everyone is ok with steel bumpers, sliders, and skids but when it comes to roof racks steel is 7th sin? Regardless, I went with steel. If it rusts and I am not happy with it, I will switch out to aluminum in a few years.
While they make a fine product, I am not particularly a fan of the the major player in the steel game with the 4Runner. I do have the ladder but thats really only because I could not find a suitable alternative that I liked. I came across Tim Gamiviti from the IH8MUD forums as he is big in the Land Cruiser scene with expedition roof racks. I really liked his product and he was really great to work with. After several dozen emails and multiple design considerations we settled on a design. I mounted it up a few weeks ago however I have been under wraps a bit until he was comfortable with me posting it up. While he does not offer a ton of accessories at this point, the expo bar spacing is 3 and I have been able to use multiple accessories from other manufacturers without issue. I have also fabd up a few brackets of my own for my Rotopax with plans to fab up a bracket for my Maxtrax; mind you I have no intention of welding and I limit my scope to a hacksaw, file, and drill. He does offer a really cool design with a
awning mounts and I mounted that up tonight. So far I am quite happy with it.


Those towers you see are the custom risers that I mounted my Yakima landing pads to. These will mate. With my Yakima Control towers.

Another view before install.

Here she is all mounted up. The fairing actually flips up to reveal my light bar. This keeps the wind noise down but still lets me expose and use my light bar when off road. I did have my roof professionally drilled although it is not entirely necessary. I wanted the extra security and ultimately my roof already has 8 holes in it from the factory. What is another 4 if done properly?
I will post up a few more once I get my accessories mounted up. Something to consider if you like the look of a traditional steel rack.
__________________
2018 TRD ORP: RCI sliders and full skid package/ King 2.5 Front & Rear with RR / Total Chaos UCA / Gamiviti Rack / ARB Safari Snorkel/ Shrockworks Dual Battery / SPOD SE touchscreen / BFG KO2s 275/70/17 / ARB dual compressor / ARB diff breather / Xenon Depot HID/LEDs / Extreme LED / Pedal Commander
Last edited by delgadtn; 05-15-2018 at 11:39 PM.
|
|
|
Reply With Quote
|
|
05-17-2020, 12:45 AM
|
#15
|
 |
Member
|
|
Join Date: Oct 2013
Location: Dallas
Posts: 59
|
|
|
Member
Join Date: Oct 2013
Location: Dallas
Posts: 59
|
Numbers?
Quote:
Originally Posted by delgadtn
Well...it's finally done!!! After researching platforms and drawers, and considering the need to maintain the cargo area for both daily driving and overlanding, I decided that I would make my own platform. My needs were:
1) OEM look
2) Subtract minimal existing available space
3) Lighter weight than the ARB drawer system
4) Easily Removable
5) Avoid hacking away at trim and equipment
6) Modularity with multiple tie down points
7) Flush with folded down rear sears
8) Slide out table
9) Ability to mount a fridge slide
It's taken about 2 months from the initial conception to get it finally mounted up. There was a lot of on site engineering at play here and every row of screw placement, router channel, etc... had to be considered in order for it all to come together. I mounted it to the body using the existing 4 corner mounting points in the back. Only 1 piece of trim was removed (the carped ramp piece just behind the second row seats) and it can be easily re-installed if needed. I had to fabricate stand-off using pvc pipe to raise the platform above the trim and keep it level. The carpet and sound deadening material remains in place beneath the platform.
The platform is made of 4x8' 3/4 inch ply as a base, with 1/2 birch as the top sheet. I could not find a 4x8' section of birch and I had to get 3 2x4' sections to make the top sheet. Below is the underside of the ply wood base after a fresh coat of paint. It was slightly bowed and thus I had to spend a week slowly bending it out flat.
Attachment 293128
Figuring out the stand off height and the screw length was one of the hardest parts and by far the biggest pain in the A$$. I used 2" pvc pipe as stand-offs to raise the platform. The pipe on the right is cut to 2 5/8" and is positioned around the two body holes in the very back next to the lift gate. The pipe on the left is cut to 1 3/8" and is positioned around the two body holes behind the second row seat. The screws are M6 screws and use the existing frame holes. They go through the platform, the stand-offs, and into the body. I used 100mm and 80mm for the long and short stand off positions respectively. I countersunk the screws into the platform by 1/2".
Attachment 293136
Here is the platform before I added the slide out table, fridge slide, and drilled the mounting holes. I purchased recessed L-track on Amazon and simply cut it to fit the router channels. The channels are 1 1/4" wide and 1/4" deep. I painted the platform using Rust-Oleum undercoat and truck bed liner. It gives it a nice texture and is really durable. It should be pretty abrasion resistant.
Attachment 293129
Attachment 293130
Not pictured, in order to figure out exactly where I needed to drill the holes in the platform so they would mate perfectly with the frame holes, I sacrificed 4 screws. I got 4 extra 100 mm M6 screws and cut the head off of them so they were essentially only the threads. After loosely threading them in to the frame holes of the car, I floated the platform over top of them and positioned the platform where I thought the final resting place would be. Then, with a rubber mallet, I gave a good wack to the platform where it rested on top of the decapitated screws. Once the platform was removed, there was a nice indentation marking the screw position. I simply drilled that out.
Here is the final platform.
Attachment 293131
Attachment 293132
Attachment 293133
Attachment 293135
The slide out is 24" & 32". I just used cabinet slides available at home depot. I'm sure you could get heavy duty slides and do the same. The table should hold 25 lbs or so and that should be sufficient for my needs. I've driven it around for a few days now and there is no rattle at all. The weight of the platform without the fridge slide is ~40lbs. The entire platform can be removed by removing the 4 screws with a Philips driver and the truck can go back to OEM simply by adding back the factory hooks and trim piece. This took a ton of time and as I said, there was a ton of on-site engineering involved. Knowing all the dimensions now, this would be way easier to go back and repeat the project. I'm super stoked on it.
-T- |
Do you happen to still have detailed length/width measurements for the platforms size and where to cut to make the side wings.
Also, to hold the table slides, is that a 2x4 on its side?
This platform looks exactly what Ive had pictured in my head, very well built.
__________________
@And_Font
2021 TRDOP -- Ironman4x4 suspension -- ARB Bumper Solis Lights -- Prinsu rack -- RSG sliders -- Tandem wheels -- 285/70r17 BFG Ko2 -- etc
|
|
|
Reply With Quote
|
 Posting Rules
|
You may not post new threads
You may not post replies
You may not post attachments
You may not edit your posts
HTML code is On
|
|
|
|


 Linear Mode


