Quote:
Originally Posted by SherpaEquipmentCo

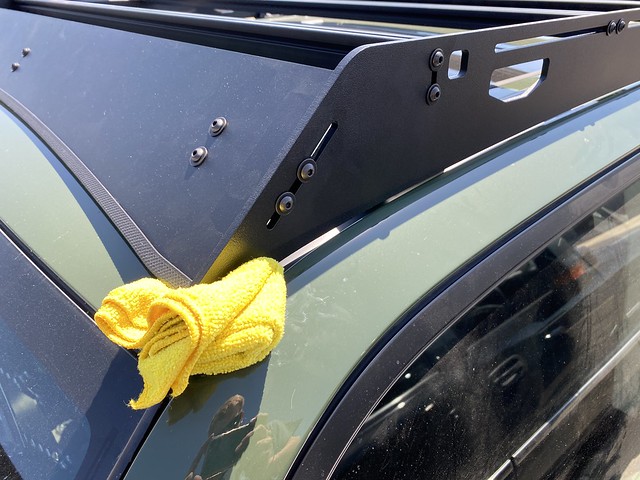 Untitled Untitled by alex fleming, on Flickr
This is how we do it here at the shop. Leave the middle mount of the rack loose, get the fronts tights, pull the rag, tighten the middle mounts and you're good to go. A buddy gently pushing up on the corner of the rack also works. |
I appreciate you posting this, I just talked to Will this morning about my adjustable feet and this helped me when adjusting it, feels much more secure now. Firstly, this is a very well made rack and it exceeds my expectations once mounted. The whole Sherpa team has been patient and responsive during my ordering and install, hats off to a small group of guys making a great product, can't wait to put this through its paces.
A few points of feedback for the Sherpa team after my install this weekend:
1) You have 7/8" bolts (the hex heads) listed in the online instructions but 1" listed on your packing list.
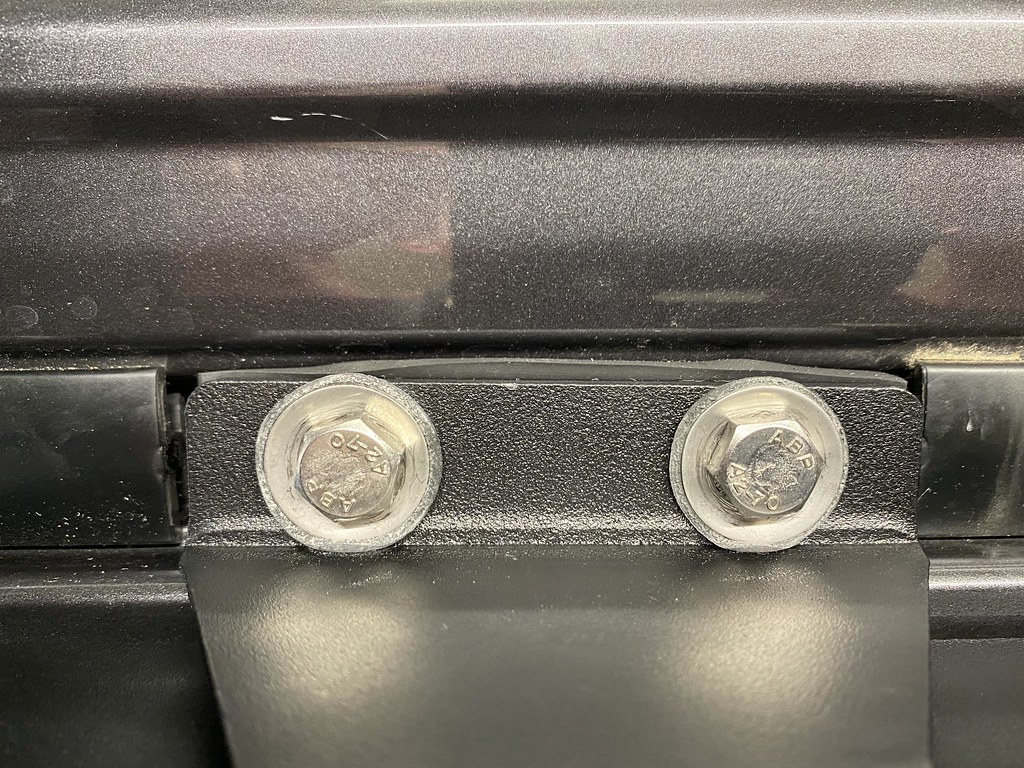
2) I was a bit confused during the install about which way the rubber feet are supposed to fit over the channels...one side is somewhat concave, and the other side is flush. I went concave side down on all 4 and they seemed to fit ok, but confirmation in the instructions would have made me feel better since this is the piece of the install that guarantees weather sealing, and the hardest part to reverse/fix one the rack is on.
3) Another point about the feet, there are no instructions on how tight the foot bolts should be. It feels like you can turn forever without increased torque because the rubber feet and the rubber on the washers continues to compress. Will mentioned that you should stop before the washers become concave...well, lesson learned too late on that one, all my washers are concave.
A bit more detail in the instruction book would be helpful for these crucial steps.
Here's a pic of how much my rubber is compressed right now, and the bolts still turn with ease.


 Linear Mode


