 11-28-2023, 04:53 PM
|
#16
|
 |
Senior Member
|
|
Join Date: Jan 2006
Location: Southern California
Posts: 1,096
|
|
|
Senior Member
Join Date: Jan 2006
Location: Southern California
Posts: 1,096
|
I really appreciate all of the responses, especially pictures. Hopefully this thread will become a resource for those just starting to think about adding ditch lights to their rig.
__________________
Jim _ My Adventure Blog: http://suntothenorth.blogspot.com
2018 TRD Off Road Premium
ARB on-board compressor - RadFlo coilovers & rear suspension - Engel freezer-fridge - All Pro LCAs - African Outback roof rack, RCI skid plates
|

|
 Reply With Quote Reply With Quote
|
|
11-29-2023, 04:00 AM
|
#17
|
 |
Member
|
|
Join Date: Jul 2018
Location: Socal
Posts: 560
|
|
|
Member
Join Date: Jul 2018
Location: Socal
Posts: 560
|
Quote:
Originally Posted by TRD PANTHER

What type of lighting will you use for your peripheral/ditch lights on the front bumper?
|
Probably going Lil Bs with S2s in the outer most location pointed about 60-90ish degrees outward. Don’t have the bumper yet but that’s the idea in my head lol who knows how it’ll actually look and perform
|
|
|
Reply With Quote
|
|
11-29-2023, 04:52 AM
|
#18
|
 |
Senior Member
|
|
Join Date: Nov 2018
Location: SoCal
Posts: 1,303
Real Name: BLACK TRD PRO
|
|
|
Senior Member
Join Date: Nov 2018
Location: SoCal
Posts: 1,303
Real Name: BLACK TRD PRO
|
Quote:
Originally Posted by Humble Leader
haha. the greenlane brackets have been vibration free for me. They also do not require both hood bolts to be removed to install them and are still sturdy (no hood misalignment to worry about). I looked at SDHQ, they are nice as well and probably more sturdy. the reason I didn't go with them is because of rust. if you live in a salt /winter environment the aluminum will be better
I liked baja because of not having to deal with wiring in the backlight feature - that wasn't important to me (I did look at DD). also availability was key for me. it was easy for me to get baja on amazon including any replacement parts and harnesses. the s2 pros are very bright and a good low profile option. I have the baja non street legal fogs in amber and the combination of these two is insane. if I were to do it again though I would buy the squadron pros. reason being I think they are a better bang for the buck and brighter, but not enough so to make me want to upgrade. looking back low profile was key for me, but now meh not so much
I have the lights maybe at 10.5 and 1.5 in reference to a clock face. a good combination of side ways and forward light. there aren't too many videos on the s2 lights but this guy has a good video showing the light output - he is running s2 sports, not the pros which are brighter
BAJA DESIGNS LIGHTS!! YOU CAN SEE EVERYTHING!! - YouTube
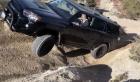
ya I changed my avatar - reminds me when I see it that no matter how prepared you are, how much you scout the terrain , sometimes you're just going to have a bad day. actually less than a week later after I got stuck there two guys got stuck on a trail just north of there. one went into the mud and someone tried to recover and also got stuck at about 930 at night in the rain... they both got out though after a third person came to help. this time of year the mud can be deceiving... I went alone since I wanted to get one last ride this year before the trail closes until May. that was also a mistake since I was pretty far from home with mediocre cell service. had my ham radio but I wasn't going back into my truck to use it and find a repeater that was actually being monitored, and it was much warmer in the sun outside of the truck lol |
Mud is one of my least favorites. Except for fire roads and simple 4wheeling, I dont go out by myself anymore. Winch?
|
|
|
Reply With Quote
|
|
11-29-2023, 04:54 AM
|
#19
|
|
Senior Member
|
|
Join Date: Nov 2018
Location: SoCal
Posts: 1,303
Real Name: BLACK TRD PRO
|
|
|
Senior Member
Join Date: Nov 2018
Location: SoCal
Posts: 1,303
Real Name: BLACK TRD PRO
|
Quote:
Originally Posted by blksubykid
Probably going Lil Bs with S2s in the outer most location pointed about 60-90ish degrees outward. Dont have the bumper yet but thats the idea in my head lol who knows how itll actually look and perform
|
Maybe youll set a new trend.
|
|
|
Reply With Quote
|
|
11-29-2023, 10:27 AM
|
#20
|
 |
Senior Member
|
|
Join Date: Mar 2021
Location: Canada
Posts: 1,159
|
|
|
Senior Member
Join Date: Mar 2021
Location: Canada
Posts: 1,159
|
Quote:
Originally Posted by TRD PANTHER
Mud is one of my least favorites. Except for fire roads and simple 4wheeling, I dont go out by myself anymore. Winch?
|
no winch. there aren't many winch set ups for the early 5th gen bumpers. a winch would also mean upgraded suspension and springs. my suspension is functioning just fine and if there's one thing about me, it's that I don't like spending money when I don't have to lol. although in this situation a winch would not have helped. no where to really hook on to
__________________
A mistake that makes you humble is much better than an achievement that makes you arrogant
|

|
Reply With Quote
|
|
11-29-2023, 02:54 PM
|
#21
|
|
Senior Member
|
|
Join Date: Jan 2006
Location: Southern California
Posts: 1,096
|
|
|
Senior Member
Join Date: Jan 2006
Location: Southern California
Posts: 1,096
|
For those that have installed brackets that require backing the hood bolts out; any particular warnings or techniques to keep in mind?
I was thinking about first drawing a line on the inside of the hood, around the bracket where the two pieces mate. I'd like to make sure I keep the hood alignment exactly where it is.
__________________
Jim _ My Adventure Blog: http://suntothenorth.blogspot.com
2018 TRD Off Road Premium
ARB on-board compressor - RadFlo coilovers & rear suspension - Engel freezer-fridge - All Pro LCAs - African Outback roof rack, RCI skid plates
|
|
|
Reply With Quote
|
|
11-29-2023, 03:42 PM
|
#22
|
|
Senior Member
|
|
Join Date: Mar 2021
Location: Canada
Posts: 1,159
|
|
|
Senior Member
Join Date: Mar 2021
Location: Canada
Posts: 1,159
|
Quote:
Originally Posted by teotwaki
For those that have installed brackets that require backing the hood bolts out; any particular warnings or techniques to keep in mind?
I was thinking about first drawing a line on the inside of the hood, around the bracket where the two pieces mate. I'd like to make sure I keep the hood alignment exactly where it is.
|
easiest way is to remove one bolt without touching the other. then put the bracket in and the bolt back. tighten it tight enough that you can just pivot the bracket with applying some force, start where you can't move the bracket then loosen slowly until you can. then remove the other bolt and pivot the bracket to line up the holes. tighten everything up
__________________
A mistake that makes you humble is much better than an achievement that makes you arrogant
|
|
|
Reply With Quote
|
|
11-29-2023, 04:43 PM
|
#23
|
|
Senior Member
|
|
Join Date: Jan 2006
Location: Southern California
Posts: 1,096
|
|
|
Senior Member
Join Date: Jan 2006
Location: Southern California
Posts: 1,096
|
Quote:
Originally Posted by Humble Leader
easiest way is to remove one bolt without touching the other. then put the bracket in and the bolt back. tighten it tight enough that you can just pivot the bracket with applying some force, start where you can't move the bracket then loosen slowly until you can. then remove the other bolt and pivot the bracket to line up the holes. tighten everything up
|
Thanks. Somewhere I had read a snippet that implied that technique but your details explain it clearly. I'm going to add some more coats of paint to my brackets and install them tomorrow when the lights arrive. I think I've settled upon where I will install the sPod box under the hood and have to work out some brackets.
__________________
Jim _ My Adventure Blog: http://suntothenorth.blogspot.com
2018 TRD Off Road Premium
ARB on-board compressor - RadFlo coilovers & rear suspension - Engel freezer-fridge - All Pro LCAs - African Outback roof rack, RCI skid plates
|
|
|
Reply With Quote
|
|
11-29-2023, 06:20 PM
|
#24
|
|
Senior Member
|
|
Join Date: Feb 2016
Location: phoenix
Posts: 2,298
|
|
|
Senior Member
Join Date: Feb 2016
Location: phoenix
Posts: 2,298
|
Quote:
Originally Posted by Humble Leader
easiest way is to remove one bolt without touching the other. then put the bracket in and the bolt back. tighten it tight enough that you can just pivot the bracket with applying some force, start where you can't move the bracket then loosen slowly until you can. then remove the other bolt and pivot the bracket to line up the holes. tighten everything up
|
exactly.
__________________
2016 TE : Grocery Getter, 34/10.5R17 Toyo at3, Prinsu Rack, King Coilovers, DuroBumps, ToyTec HD 2.0 springs, King shocks, King hydro bumps, Total Chaos mounts, DirtKing Fabrication UCA, VIVID RACING Tune, URD Y pipe, RCI skids, Marlin Crawler gussets, DRKDSS everything
|
|
|
Reply With Quote
|
|
11-30-2023, 10:32 AM
|
#25
|
|
Senior Member
|
|
Join Date: Mar 2021
Location: Canada
Posts: 1,159
|
|
|
Senior Member
Join Date: Mar 2021
Location: Canada
Posts: 1,159
|
Quote:
Originally Posted by teotwaki
Thanks. Somewhere I had read a snippet that implied that technique but your details explain it clearly. I'm going to add some more coats of paint to my brackets and install them tomorrow when the lights arrive. I think I've settled upon where I will install the sPod box under the hood and have to work out some brackets.
|
I think you're really going to like the spod / switch pros / auxbeam / whatever box you use (if you haven't used them before). one of my 'do overs' I'd like to have had is going right to my switch pros instead of first running wires into the cab and having switches. I did it for the ditch lights and air compressor. but after installing my switch pros earlier this year and rewiring I wish I would have done it right from the start. so much cleaner and easier, no more taking apart trim panels inside etc.
__________________
A mistake that makes you humble is much better than an achievement that makes you arrogant
|
|
|
Reply With Quote
|
|
12-01-2023, 02:04 PM
|
#26
|
|
Senior Member
|
|
Join Date: Feb 2016
Location: phoenix
Posts: 2,298
|
|
|
Senior Member
Join Date: Feb 2016
Location: phoenix
Posts: 2,298
|
Quote:
Originally Posted by Humble Leader
I think you're really going to like the spod / switch pros / auxbeam / whatever box you use (if you haven't used them before). one of my 'do overs' I'd like to have had is going right to my switch pros instead of first running wires into the cab and having switches. I did it for the ditch lights and air compressor. but after installing my switch pros earlier this year and rewiring I wish I would have done it right from the start. so much cleaner and easier, no more taking apart trim panels inside etc.
|
one set of wires is ok. then suddenly i had 3 sets and the antennae wire going thru the fire wall. such a disaster.
__________________
2016 TE : Grocery Getter, 34/10.5R17 Toyo at3, Prinsu Rack, King Coilovers, DuroBumps, ToyTec HD 2.0 springs, King shocks, King hydro bumps, Total Chaos mounts, DirtKing Fabrication UCA, VIVID RACING Tune, URD Y pipe, RCI skids, Marlin Crawler gussets, DRKDSS everything
|
|
|
Reply With Quote
|
|
12-01-2023, 10:44 PM
|
#27
|
|
Member
|
|
Join Date: May 2019
Location: Denver, NC
Posts: 376
|
|
|
Member
Join Date: May 2019
Location: Denver, NC
Posts: 376
|
hah you want a disaster, I have 2 0 gauge, 2 or 3 4 gauge plus other stuff. This is split on the left and right side of the firewall. this is all getting cleaned up very soon.
|
|
|
Reply With Quote
|
|
12-06-2023, 02:03 AM
|
#28
|
|
Senior Member
|
|
Join Date: Jan 2006
Location: Southern California
Posts: 1,096
|
|
|
Senior Member
Join Date: Jan 2006
Location: Southern California
Posts: 1,096
|
__________________
Jim _ My Adventure Blog: http://suntothenorth.blogspot.com
2018 TRD Off Road Premium
ARB on-board compressor - RadFlo coilovers & rear suspension - Engel freezer-fridge - All Pro LCAs - African Outback roof rack, RCI skid plates
|
|
|
Reply With Quote
|
 Posting Rules
|
You may not post new threads
You may not post replies
You may not post attachments
You may not edit your posts
HTML code is On
|
|
|
|


 Linear Mode


