 04-23-2014, 08:39 AM
|
#31
|
 |
Member
|
|
Join Date: Mar 2014
Location: STL MO
Age: 65
Posts: 54
Real Name: John
|
|
|
Member
Join Date: Mar 2014
Location: STL MO
Age: 65
Posts: 54
Real Name: John
|
New member and I just came across this thread. I noticed a number of suggestions for waterproofing the bolt holes. One suggestion I did not see was the use of teflon tape. It is used in plumbing applications for threaded connections under pressure. It would seem to be more than adequate for stopping any water leakage and it has the added benefit of being easily removed (unlike a loctite solution).
Anybody try this or have any thoughts about using it.
|

|
 Reply With Quote Reply With Quote
|
 04-23-2014, 10:42 AM
|
#32
|
 |
Member
|
|
Join Date: Dec 2009
Location: Killeen, TX
Posts: 94
|
|
|
Member
Join Date: Dec 2009
Location: Killeen, TX
Posts: 94
|
Quote:
Originally Posted by JAD

New member and I just came across this thread. I noticed a number of suggestions for waterproofing the bolt holes. One suggestion I did not see was the use of teflon tape. It is used in plumbing applications for threaded connections under pressure. It would seem to be more than adequate for stopping any water leakage and it has the added benefit of being easily removed (unlike a loctite solution).
Anybody try this or have any thoughts about using it.
|
I did used teflon tape on all of bolts and is working great after a few years of car washes and rain storms.
__________________
Joaquin
2010 4Runner
2016 BMW M235i

|

|
 Reply With Quote Reply With Quote
|
 04-23-2014, 01:07 PM
|
#33
|
 |
Senior Member
|
|
Join Date: Sep 2008
Location: coastal maine
Posts: 2,732
|
|
|
Senior Member
Join Date: Sep 2008
Location: coastal maine
Posts: 2,732
|
Quote:
Originally Posted by JAD

New member and I just came across this thread. I noticed a number of suggestions for waterproofing the bolt holes. One suggestion I did not see was the use of teflon tape. It is used in plumbing applications for threaded connections under pressure. It would seem to be more than adequate for stopping any water leakage and it has the added benefit of being easily removed (unlike a loctite solution).
Anybody try this or have any thoughts about using it.
|
i used Teflon tape on the bolt threads and a little silicone around the bolt heads for the ones where the gasket material came up when removing the factory bolts. (unlike SR5 & Limited, 10-13 Trail Edition already has the brackets and gasket underneath) a couple came out perfectly clean and left the gasket sealed in place intact; Teflon tape on threads only for those. been about a year. no leaks so far.
__________________
10 TE - salsa, KDSS+JBL+Nav
ICON XT COs (+IVD) & tubular UCAs • ICON rear coils & 2.5 remote reservoirs + shin guards • Shrockworks • FN Five Star + 285/70 Mickey Thompson MTZ • TRD CAI + aFe Pro Dry S • Magnaflow • ARB diff breather • rack delete + Thule • H9 lo, 9011 hi, selective Y fog • FJ shifter • ScanGauge
06 SE, galactic gray V8: sold // 93 SR5, lots of rust, salt, & mods: R.I.P. // 71 FJ40, never should've let it go
Last edited by sandcrawler; 04-23-2014 at 01:11 PM.
|

|
 Reply With Quote Reply With Quote
|
 04-23-2014, 01:15 PM
|
#34
|
 |
Member
|
|
Join Date: May 2010
Location: Portland, Or
Age: 43
Posts: 773
|
|
|
Member
Join Date: May 2010
Location: Portland, Or
Age: 43
Posts: 773
|
Quote:
Originally Posted by W8kbrder

In front of the Rado is a 1971 Series IIa Land Rover w/ Defender 90 axles/coils, transmission and transfer case, military spec engine w/ headwork, etc etc. I'm a huge Rover fan.
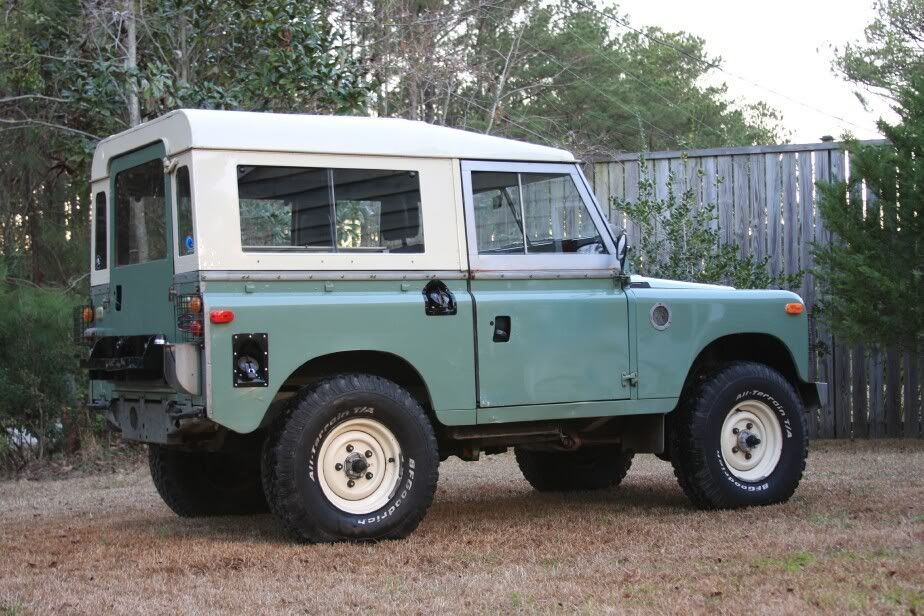 |
That Land Rover is cool beyond words! If you have a build thread anywhere on the interwebs, I would love to see it!
|

|
 Reply With Quote Reply With Quote
|
 04-23-2014, 03:37 PM
|
#35
|
 |
Member
|
|
Join Date: Mar 2014
Location: STL MO
Age: 65
Posts: 54
Real Name: John
|
|
|
Member
Join Date: Mar 2014
Location: STL MO
Age: 65
Posts: 54
Real Name: John
|
SandCrawler--does that mean I might only need to acquire the plastic covers after removal of the brackets with no other hardware necessary. I have the 2014 TE.
|

|
 Reply With Quote Reply With Quote
|
 04-23-2014, 05:54 PM
|
#36
|
 |
Senior Member
|
|
Join Date: Sep 2008
Location: coastal maine
Posts: 2,732
|
|
|
Senior Member
Join Date: Sep 2008
Location: coastal maine
Posts: 2,732
|
Quote:
Originally Posted by JAD

SandCrawler--does that mean I might only need to acquire the plastic covers after removal of the brackets with no other hardware necessary. I have the 2014 TE.
|
the 14+ Trail has the same roof rack as the SR5 & Limited so i can only assume you need the complete kit (bolts, brackets and covers) as laid out in the first post in this thread.
btw "@" in front of a username (exact spelling) generates a "mention" which shows up in the user's control panel, letting them know there's someone asking a question, etc. like this:
@ JAD
good luck. 
__________________
10 TE - salsa, KDSS+JBL+Nav
ICON XT COs (+IVD) & tubular UCAs • ICON rear coils & 2.5 remote reservoirs + shin guards • Shrockworks • FN Five Star + 285/70 Mickey Thompson MTZ • TRD CAI + aFe Pro Dry S • Magnaflow • ARB diff breather • rack delete + Thule • H9 lo, 9011 hi, selective Y fog • FJ shifter • ScanGauge
06 SE, galactic gray V8: sold // 93 SR5, lots of rust, salt, & mods: R.I.P. // 71 FJ40, never should've let it go
|

|
 Reply With Quote Reply With Quote
|
 04-23-2014, 06:55 PM
|
#37
|
 |
Member
|
|
Join Date: Mar 2010
Location: Gig Harbor
Posts: 201
|
|
|
Member
Join Date: Mar 2010
Location: Gig Harbor
Posts: 201
|
Quote:
Originally Posted by JAD

New member and I just came across this thread. I noticed a number of suggestions for waterproofing the bolt holes. One suggestion I did not see was the use of teflon tape. It is used in plumbing applications for threaded connections under pressure. It would seem to be more than adequate for stopping any water leakage and it has the added benefit of being easily removed (unlike a loctite solution).
Anybody try this or have any thoughts about using it.
|
I recently developed a leak from the rear driver's side rack fitting. I pulled it off and went to town with 3M 4200 marine sealant. In theory it should be water-tight from the factory, but after miles on the road with paddleboards and gear tugging at those bolts, I have little confidence in a rubber washer. My solution isn't pretty, but it sure as shit won't leak. 4000 / 4200 is good stuff and if needed, can be disassembled. Stay away from the 5200 unless you like heat guns, hammers and crowbars.
__________________
2010 Silver Trail Edition
|

|
 Reply With Quote Reply With Quote
|
 04-23-2014, 07:33 PM
|
#38
|
|
Junior Member
|
|
Join Date: Mar 2014
Location: Waialua
Posts: 10
|
|
|
Junior Member
Join Date: Mar 2014
Location: Waialua
Posts: 10
|
Quote:
Originally Posted by FlyNavy

I recently developed a leak from the rear driver's side rack fitting. I pulled it off and went to town with 3M 4200 marine sealant. In theory it should be water-tight from the factory, but after miles on the road with paddleboards and gear tugging at those bolts, I have little confidence in a rubber washer. My solution isn't pretty, but it sure as shit won't leak. 4000 / 4200 is good stuff and if needed, can be disassembled. Stay away from the 5200 unless you like heat guns, hammers and crowbars.
|
Any pictures you got on how you did it
|

|
 Reply With Quote Reply With Quote
|
 04-23-2014, 07:51 PM
|
#39
|
 |
Member
|
|
Join Date: Mar 2010
Location: Gig Harbor
Posts: 201
|
|
|
Member
Join Date: Mar 2010
Location: Gig Harbor
Posts: 201
|
Quote:
Originally Posted by Jskc1026

Any pictures you got on how you did it
|
No pics, unfortunately. I simple pulled the bracket and bedded it, ensuring that sealant worked its way between the sheet metal and the plastic tubes extending inside. I reattached the rack and put plenty of sealant on the threads of the screws.
In the process, the fitting that holds the backing plate for the screws fell off inside of the headliner. As an added bonus I got to learn how to take that down, as well as find out how sensitive it is to prying. Enjoy
__________________
2010 Silver Trail Edition
|

|
 Reply With Quote Reply With Quote
|
 04-24-2014, 08:17 PM
|
#40
|
|
Junior Member
|
|
Join Date: Mar 2014
Location: Waialua
Posts: 10
|
|
|
Junior Member
Join Date: Mar 2014
Location: Waialua
Posts: 10
|
Quote:
Originally Posted by FlyNavy

No pics, unfortunately. I simple pulled the bracket and bedded it, ensuring that sealant worked its way between the sheet metal and the plastic tubes extending inside. I reattached the rack and put plenty of sealant on the threads of the screws.
In the process, the fitting that holds the backing plate for the screws fell off inside of the headliner. As an added bonus I got to learn how to take that down, as well as find out how sensitive it is to prying. Enjoy
|
Ever thought about using windshield glue
|

|
 Reply With Quote Reply With Quote
|
 04-24-2014, 09:33 PM
|
#41
|
 |
Member
|
|
Join Date: Mar 2010
Location: Gig Harbor
Posts: 201
|
|
|
Member
Join Date: Mar 2010
Location: Gig Harbor
Posts: 201
|
Quote:
Originally Posted by Jskc1026

Ever thought about using windshield glue
|
I imagine there are plenty of options out there that would work. I use 3M on my boat and it happened to be handy. I hate to see a whole tube go to waste...
__________________
2010 Silver Trail Edition
|

|
 Reply With Quote Reply With Quote
|
 06-26-2014, 05:05 PM
|
#42
|
|
Junior Member
|
|
Join Date: Jun 2014
Location: Metairie, LA
Posts: 11
|
|
|
Junior Member
Join Date: Jun 2014
Location: Metairie, LA
Posts: 11
|
I might just be overlooking it in this thread, but where di you order the parts from?
|

|
 Reply With Quote Reply With Quote
|
 06-26-2014, 06:15 PM
|
#43
|
 |
Member
|
|
Join Date: Apr 2014
Location: NC
Posts: 586
|
|
|
Member
Join Date: Apr 2014
Location: NC
Posts: 586
|
Quote:
Originally Posted by justind2405

I might just be overlooking it in this thread, but where di you order the parts from?
|
My local toyota dealer
__________________
2014 TE-KDSS
OPOR sliders, RCI aluminum full skids+(gas tank & A-arms), Icon Stage 2 w/ 3in overland springs, Cooper ST Maxx 255/80, Undercover HWMS w/ Superwinch Talon, K9 2.2
Daily:99 rav4 - OME baby lift, 31s, 5 speed Past:91 LC - built
|

|
 Reply With Quote Reply With Quote
|
 07-13-2014, 04:27 PM
|
#44
|
|
Member
|
|
Join Date: Jul 2014
Location: Wild Omar
Posts: 66
|
|
|
Member
Join Date: Jul 2014
Location: Wild Omar
Posts: 66
|
Thanks for the how to post. I was installing factory cross rails so I only needed the first part. For removing the caps, I used a stiff blade putty knife with a beveled edge as well as a rag. The blade is 1.5" wide so it better distributes the load and the leading edge is almost knife thin.
The cheapo molding and trim tool set from HF would probably be good for this too.
__________________
White 2014 TE "Ms Piggy"
|

|
 Reply With Quote Reply With Quote
|
 07-24-2014, 09:34 PM
|
#45
|
|
Member
|
|
Join Date: Jul 2014
Location: Upstate NY
Posts: 35
|
|
|
Member
Join Date: Jul 2014
Location: Upstate NY
Posts: 35
|
Thank you for posting this DIY. I just removed the factory rails, then didn't like the naked look, and put them back on (with thread locker and some RTV for the belt + suspenders approach).
Re: removing the rail caps, I first gently heated the caps with a heat gun. For the prying, I used a carpentry grade 2" wide chisel, covered in painters tape. Bevel side of the blade up. Worked very well.
-Mawgie
|

|
 Reply With Quote Reply With Quote
|
 Posting Rules
|
You may not post new threads
You may not post replies
You may not post attachments
You may not edit your posts
HTML code is On
|
|
|
|