 07-17-2011, 02:03 PM
|
#31
|
 |
Member
|
|
Join Date: Dec 2010
Location: Charlotte, NC
Posts: 294
|
|
|
Member
Join Date: Dec 2010
Location: Charlotte, NC
Posts: 294
|
I just wanted to say that I finally finished this mod a few weeks ago with the wires running into the door as Snooper recommended. I used the small LEDs that I posted on Feb 1st, but elected to use two on each side. I'm finding that they provide plenty of light in the back and are more discreet than some of the other options.
I haven't fully appreciated how great this mod was until I was out on the drop zone last night and digging around in the cargo area after dark and with no ambient light - these lights worked great! (Too great, because all the moths started coming in the truck).
Great mod, and I fully recommend it. For the members more timid about disassembling their vehicle, this is a great starter mod with lots of functionality.
__________________
2011 Mag Grey Limited Probably not as modded out as yours
War Eagle!
|

|
 Reply With Quote Reply With Quote
|
|
07-17-2011, 02:20 PM
|
#32
|
|
Senior Member
|
|
Join Date: Aug 2010
Location: Carmel, IN
Posts: 2,765
|
|
|
Senior Member
Join Date: Aug 2010
Location: Carmel, IN
Posts: 2,765
|
Quote:
Originally Posted by Snooperstyle

|
I got my kit from Griots Garage.
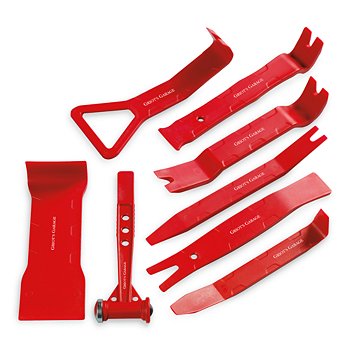
Here: 8-Piece Trim Panel Removal Tools with Hammer - Griot's Garage
Okki
__________________
Okki's Build Thread - 2010 Limited: Shrockworks Rock Rails & Full Skids, Gobi Rack, OPT7 LED Roof LIGHT Bar, Rigid E-Series Bumper Light Bar, Hella Horns, Auxiliary Fuse Box, Cobra ST75, TRD Rims, Discoverer ATP LT265/70R17, Rotopax, ARB Twin Compressor, Cargo Area Pressure Gauge and Chuck, Icon billet trailing- and A-arms, Dobinsons Shocks/Coils, Fumuto Oil Valve, Northstar Group 31M, CBI Front & Rear Bumpers !!!
========================================
 Any time...Anywhere.. My cat can take you.
|
|
|
Reply With Quote
|
|
03-15-2012, 04:15 AM
|
#33
|
 |
Junior Member
|
|
Join Date: Mar 2012
Posts: 4
|
|
|
Junior Member
Join Date: Mar 2012
Posts: 4
|
i know this goes against most peoples beliefs but for something with as low a draw as LED lights i wouldnt worry about running the power to the battery nor would i worry about a relay. i would just tap into the cig lighter(as long as its got power full time) and go from there. tap into that wire, run that to the switch then to the lights and ground the lights on a screw/bolt in the rear. 
__________________
Connecting People.Powering the would.  turn signal light
|
|
|
Reply With Quote
|
|
03-15-2012, 02:11 PM
|
#34
|
 |
Member
|
|
Join Date: Apr 2010
Location: Calgary
Age: 49
Posts: 606
|
|
|
Member
Join Date: Apr 2010
Location: Calgary
Age: 49
Posts: 606
|
__________________
My Truck(Bro Show)
|
|
|
Reply With Quote
|
|
05-27-2012, 09:30 PM
|
#35
|
 |
Senior Member
|
|
Join Date: Nov 2010
Location: Mesa, AZ
Posts: 1,377
Real Name: Dave
|
|
|
Senior Member
Join Date: Nov 2010
Location: Mesa, AZ
Posts: 1,377
Real Name: Dave
|
__________________
A human being should be able to change a diaper, plan an invasion, butcher a hog, conn a ship, design a building, write a sonnet, balance accounts, build a wall, set a bone, comfort the dying, take orders, give orders, cooperate, act alone, solve equations, analyze a new problem, pitch manure, program a computer, cook a tasty meal, fight efficiently, die gallantly. Specialization is for insects.
Last edited by limamike; 05-27-2012 at 09:53 PM.
|
|
|
Reply With Quote
|
|
05-27-2012, 09:35 PM
|
#36
|
 |
Elite Member
|
|
Join Date: Feb 2011
Location: Maryland
Age: 54
Posts: 6,876
Real Name: Jeff
|
|
|
Elite Member
Join Date: Feb 2011
Location: Maryland
Age: 54
Posts: 6,876
Real Name: Jeff
|
Quote:
Originally Posted by limamike
because I could not, for the life of me, get any kind of adhesive to stick to the upper plastic - I even used citrus cleaner and acetone(!) to clean up the plastic (I fully expect to see the plastic melted tomorrow morning).
|
Alcohol, my friend, alcohol.
Pics aren't working for me??
__________________
HERE FISHY FISHY FISHY!
|
|
|
Reply With Quote
|
|
05-27-2012, 09:53 PM
|
#37
|
|
Senior Member
|
|
Join Date: Nov 2010
Location: Mesa, AZ
Posts: 1,377
Real Name: Dave
|
|
|
Senior Member
Join Date: Nov 2010
Location: Mesa, AZ
Posts: 1,377
Real Name: Dave
|
Quote:
Originally Posted by Antman
Alcohol, my friend, alcohol.
Pics aren't working for me??
|
They're working for me!
__________________
A human being should be able to change a diaper, plan an invasion, butcher a hog, conn a ship, design a building, write a sonnet, balance accounts, build a wall, set a bone, comfort the dying, take orders, give orders, cooperate, act alone, solve equations, analyze a new problem, pitch manure, program a computer, cook a tasty meal, fight efficiently, die gallantly. Specialization is for insects.
|
|
|
Reply With Quote
|
|
05-27-2012, 09:58 PM
|
#38
|
|
Elite Member
|
|
Join Date: Feb 2011
Location: Maryland
Age: 54
Posts: 6,876
Real Name: Jeff
|
|
|
Elite Member
Join Date: Feb 2011
Location: Maryland
Age: 54
Posts: 6,876
Real Name: Jeff
|
All good now!
__________________
HERE FISHY FISHY FISHY!
|
|
|
Reply With Quote
|
|
05-27-2012, 11:30 PM
|
#39
|
 |
Member
|
|
Join Date: Jul 2010
Location: Charleston, SC
Posts: 718
|
|
|
Member
Join Date: Jul 2010
Location: Charleston, SC
Posts: 718
|
Watch out for those jet airplanes landing back there! The Boeing Dreamliner nearly landed in mine last week on a test flight...
I still love my ridiculously bright LEDs back there! They have been the most useful mod of everything I have done...
Way to go limamike!
__________________
2010 LTD 4x4, blk/sbl, nav, remote start MODS/ADDS: TE Conversion; ICON Stage 2 w/ LRUCAs; 285/70/17 DuraTracs; Baja Rack; SW Sliders, ARB CKMA12 onboard air; Fiamm horns; Tan Huskys; 30% tint; 5" mangowalk; LED lights in interior, puddle lights, license plate, engine compartment, and cargo area; small tool box under the hood; removed cargo tray stopper; reverse cam switch; 4-pin trailer light hookup relocation; K&N air filter; AVS bug deflector; 3m carbonfiber chrome coverup (except door handles); midland CB; Firestik 2' hood-mounted CB antenna.
|
|
|
Reply With Quote
|
|
07-31-2012, 01:42 AM
|
#40
|
 |
Junior Member
|
|
Join Date: May 2010
Location: Politics City (the District)
Posts: 20
|
|
|
Junior Member
Join Date: May 2010
Location: Politics City (the District)
Posts: 20
|
Very nice man!
__________________
~wait'll they get a load of me...  ~
2006 Titanium Sport V8/XenonDepot HID Volt 6000K kit/Steelcraft powder black bullbar/LED interior Mod/Pioneer AVH-X3500BHS/265/70R-17 General Grabber AT/Matte Black powdercoated stock wheels/Spidertrax Spacers/Daystar 2.5/1.5 lift/Blackout O-Ring Headlights/Flowmaster mod/15% tint all round
|
|
|
Reply With Quote
|
|
08-29-2012, 07:37 PM
|
#41
|
 |
Senior Member
|
|
Join Date: Dec 2011
Location: Glen Allen/Richmond VA
Age: 32
Posts: 2,378
|
|
|
Senior Member
Join Date: Dec 2011
Location: Glen Allen/Richmond VA
Age: 32
Posts: 2,378
|
i think im going to mount it to the side window on one of the edges. dont know if it will be at the top of the side window or the side yet. i will see how it looks when i get it and see ho hard it is to run the wires. its one of the first modes im going to do
Last edited by kevinpt; 08-29-2012 at 11:47 PM.
|
|
|
Reply With Quote
|
|
12-07-2013, 08:06 PM
|
#42
|
|
Member
|
|
Join Date: Nov 2013
Location: Denver, CO
Posts: 402
|
|
|
Member
Join Date: Nov 2013
Location: Denver, CO
Posts: 402
|
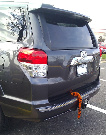
So dumb question, how hard do you have to pry the rear light plastic pieces off? I tried today but it felt like I would break it if any harder. Let me know if you have any advice or another link that would help better. Thanks
__________________
'14 Mag Grey Trail
Installed: Bilstein 5100 with Toytec Super Flex Coils, Gobi Stealth Rack, Rigid SR in front and rear, 265 Duratracs, Shrockworks Sliders, RCI Skids, LED light swap, Rotopax mounted in cargo area.
Sold-2008 Shadow Mica SR5
Sold-1996 Silver SR5
|
|
|
Reply With Quote
|
|
12-07-2013, 08:22 PM
|
#43
|
|
Senior Member
|
|
Join Date: Nov 2010
Location: Mesa, AZ
Posts: 1,377
Real Name: Dave
|
|
|
Senior Member
Join Date: Nov 2010
Location: Mesa, AZ
Posts: 1,377
Real Name: Dave
|
Quote:
Originally Posted by WODWorldWide
So dumb question, how hard do you have to pry the rear light plastic pieces off? I tried today but it felt like I would break it if any harder. Let me know if you have any advice or another link that would help better. Thanks
|
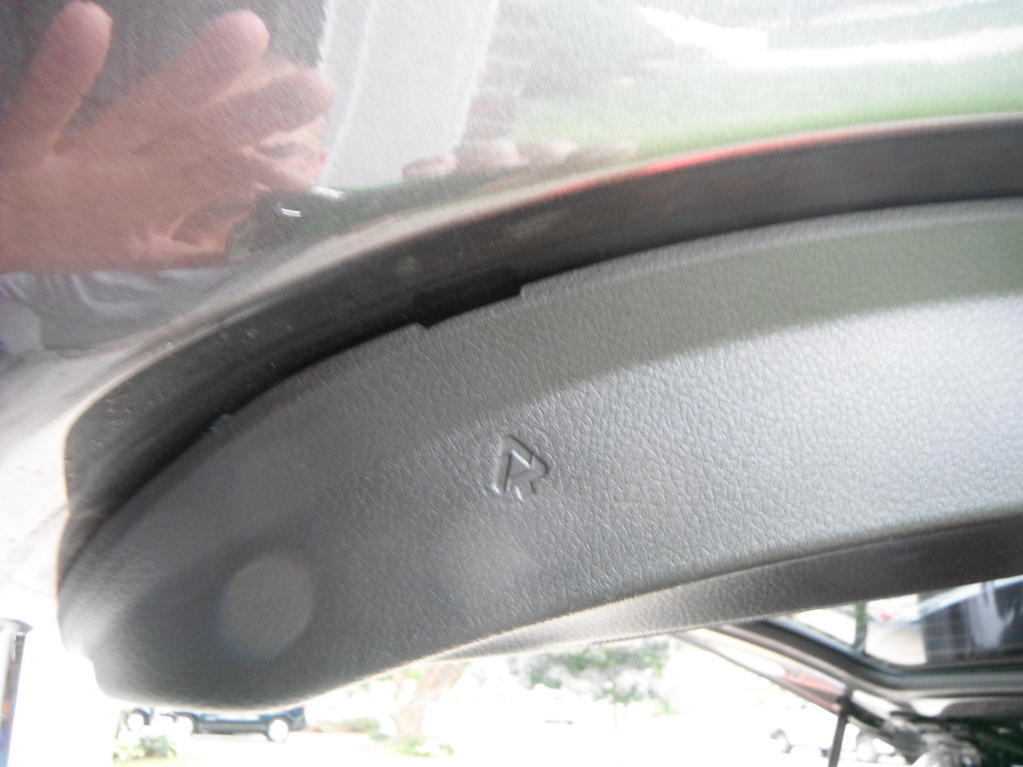
Which rear light plastic pieces? The lights in the rear hatch? You have to insert an object (like a flathead screwdriver) that can pry a small plastic latch/catch on either the inside or outside of the light (can't remember which side right now, but my gut is telling me inside) and simply apply some pressure in and down to get the light to come loose. They are in there pretty well, and I do remember having to use a bit more muscle than most other pieces, but the key is the hitting it from the correct side as they lock into place from only one side. If you hit it from the wrong side and really muscle into it you will definitely break the entire light housing.
__________________
A human being should be able to change a diaper, plan an invasion, butcher a hog, conn a ship, design a building, write a sonnet, balance accounts, build a wall, set a bone, comfort the dying, take orders, give orders, cooperate, act alone, solve equations, analyze a new problem, pitch manure, program a computer, cook a tasty meal, fight efficiently, die gallantly. Specialization is for insects.
|
|
|
Reply With Quote
|
|
12-07-2013, 08:27 PM
|
#44
|
|
Member
|
|
Join Date: Nov 2013
Location: Denver, CO
Posts: 402
|
|
|
Member
Join Date: Nov 2013
Location: Denver, CO
Posts: 402
|
Quote:
Originally Posted by limamike
Which rear light plastic pieces? The lights in the rear hatch? You have to insert an object (like a flathead screwdriver) that can pry a small plastic latch/catch on either the inside or outside of the light (can't remember which side right now, but my gut is telling me inside) and simply apply some pressure in and down to get the light to come loose. They are in there pretty well, and I do remember having to use a bit more muscle than most other pieces, but the key is the hitting it from the correct side as they lock into place from only one side. If you hit it from the wrong side and really muscle into it you will definitely break the entire light housing.
|
Thanks. It's definitely from the left since that's where the indention is and what it says earlier in the post. I just really need to put some muscle into it. The other ones came out so easily I thought I was going to break the rear hatch ones. Appreciate the help and I'll see what I can break back there tomorrow.
__________________
'14 Mag Grey Trail
Installed: Bilstein 5100 with Toytec Super Flex Coils, Gobi Stealth Rack, Rigid SR in front and rear, 265 Duratracs, Shrockworks Sliders, RCI Skids, LED light swap, Rotopax mounted in cargo area.
Sold-2008 Shadow Mica SR5
Sold-1996 Silver SR5
|
|
|
Reply With Quote
|
|
12-07-2013, 08:32 PM
|
#45
|
|
Elite Member
|
|
Join Date: Feb 2011
Location: Maryland
Age: 54
Posts: 6,876
Real Name: Jeff
|
|
|
Elite Member
Join Date: Feb 2011
Location: Maryland
Age: 54
Posts: 6,876
Real Name: Jeff
|
Quote:
Originally Posted by WODWorldWide
So dumb question, how hard do you have to pry the rear light plastic pieces off? I tried today but it felt like I would break it if any harder. Let me know if you have any advice or another link that would help better. Thanks
|
Honestly, it's way easier to just pull off the entire hatch plastic trim since you need it off anyway. Pull it out from the passenger side (you will see the slot where you start prying) and yank all the plastic pins loose. Then you can reach in there and unplug both hatch lights. Push the panel off the window channel and you have everything off.
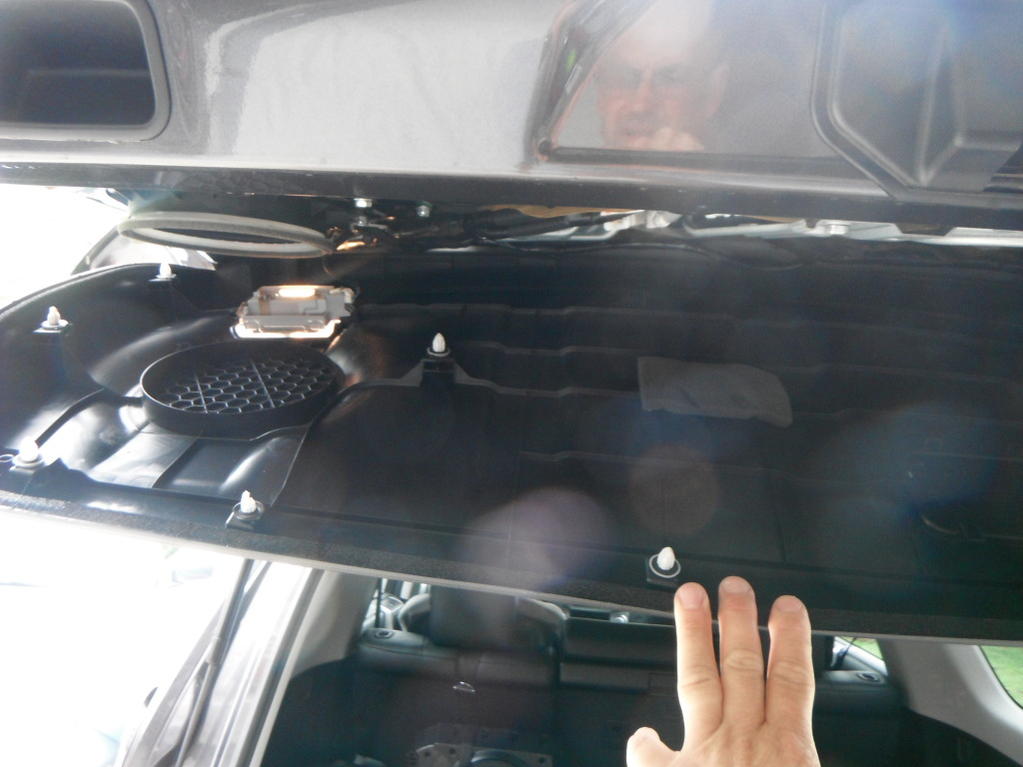
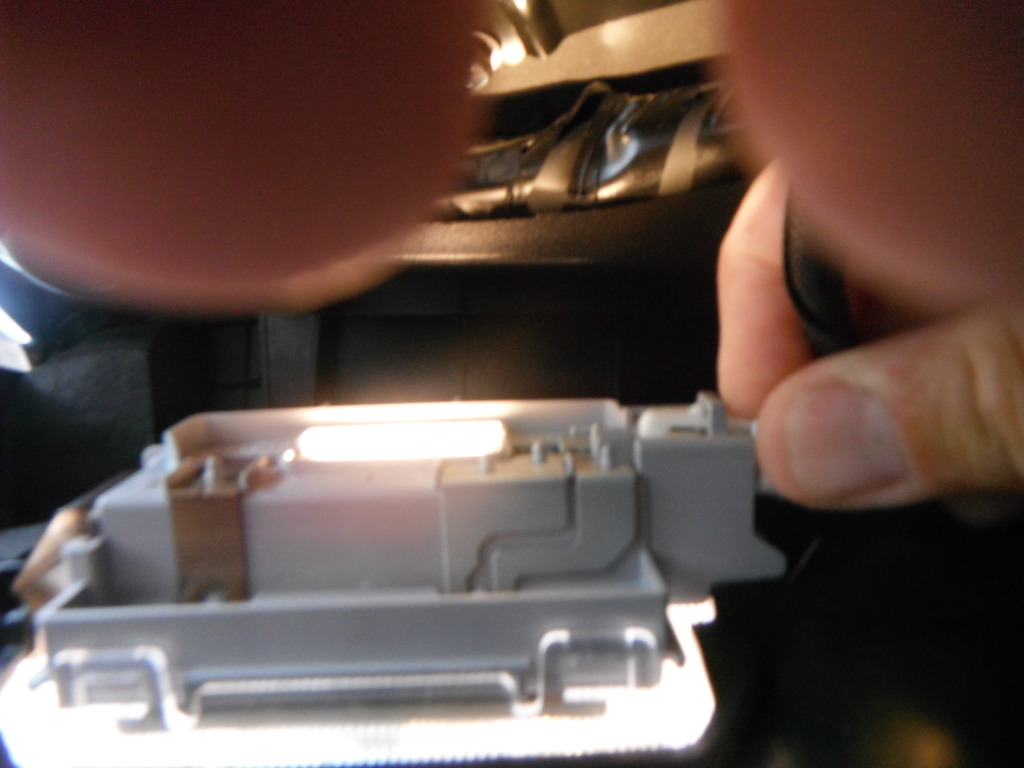
Easy to get to those lights now.
.
.
.
.
__________________
HERE FISHY FISHY FISHY!
|
|
|
Reply With Quote
|
 Posting Rules
|
You may not post new threads
You may not post replies
You may not post attachments
You may not edit your posts
HTML code is On
|
|
|
|


 Linear Mode


