( I love to fish, just wanted to write that in here somewhere)
ANTMAN MOD #1
Here's my Airlift 1000 airbag install.
It's easily the best bang-for-the-buck mod @ $100. The Airbags are very useful- for those who don't know- for preventing rear-end sag under heavy load. I tow a boat regularly, and a 19ft camper (haven't yet), so these were a necessity. Lots of people on here have installed this kit, so what makes mine different? Well- I installed an onboard compressor, and it only cost me $20 bucks. ...
This is the driver's side bag installed in the spring
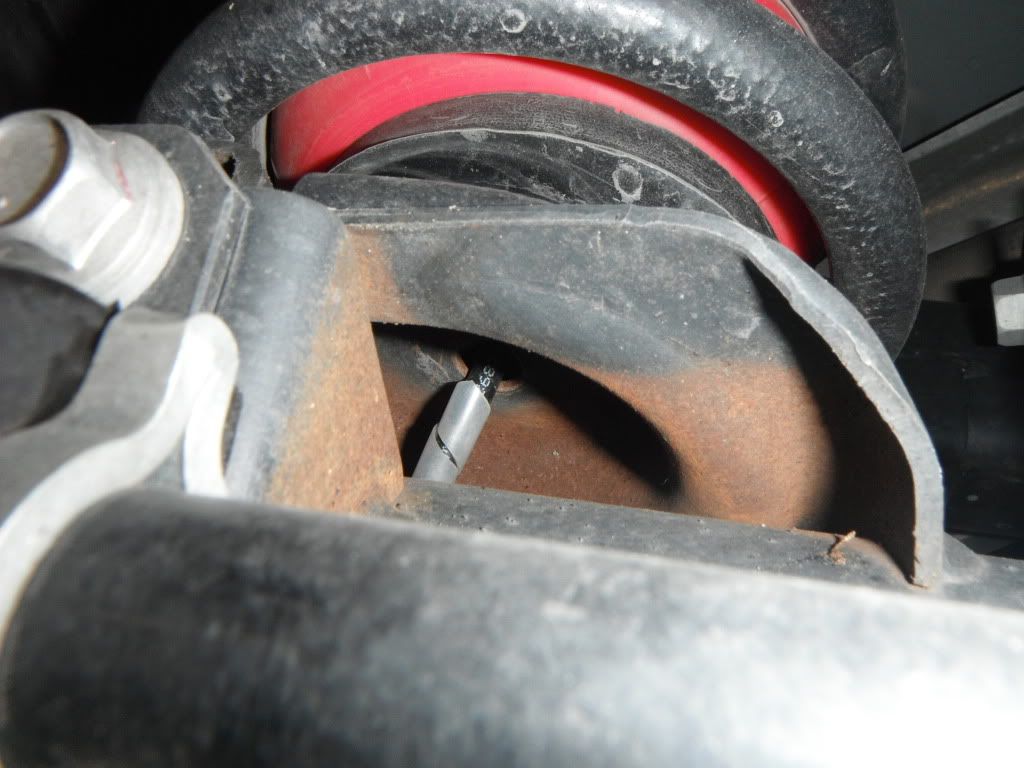
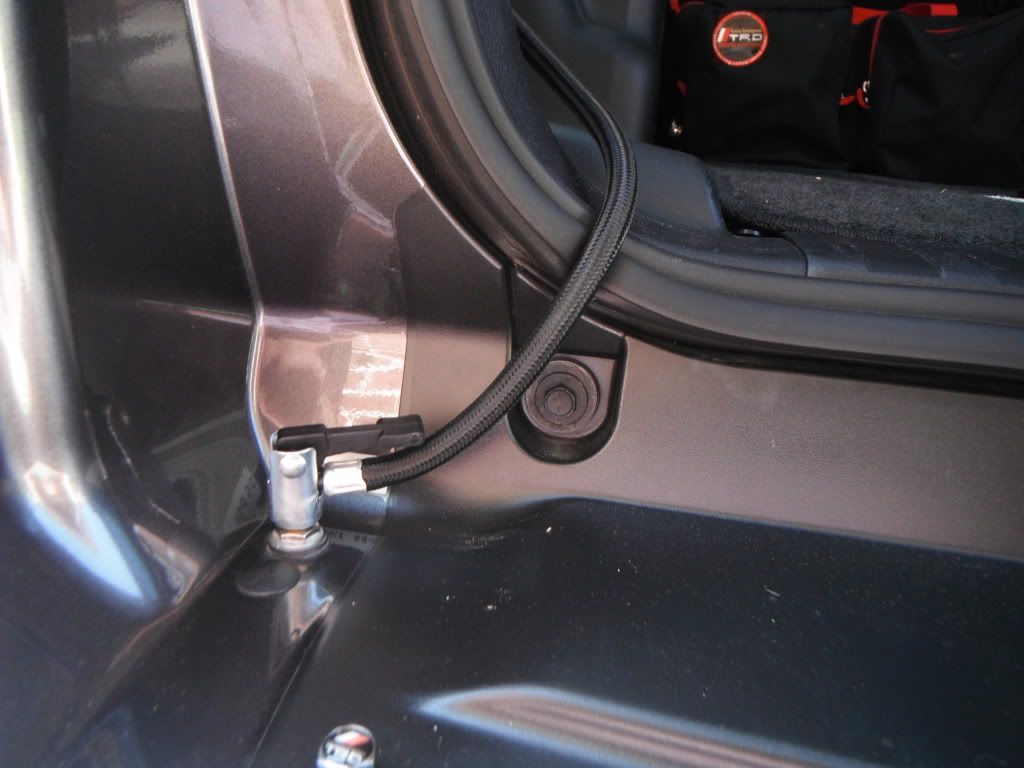
Here you can see where the line exits under the spring perch
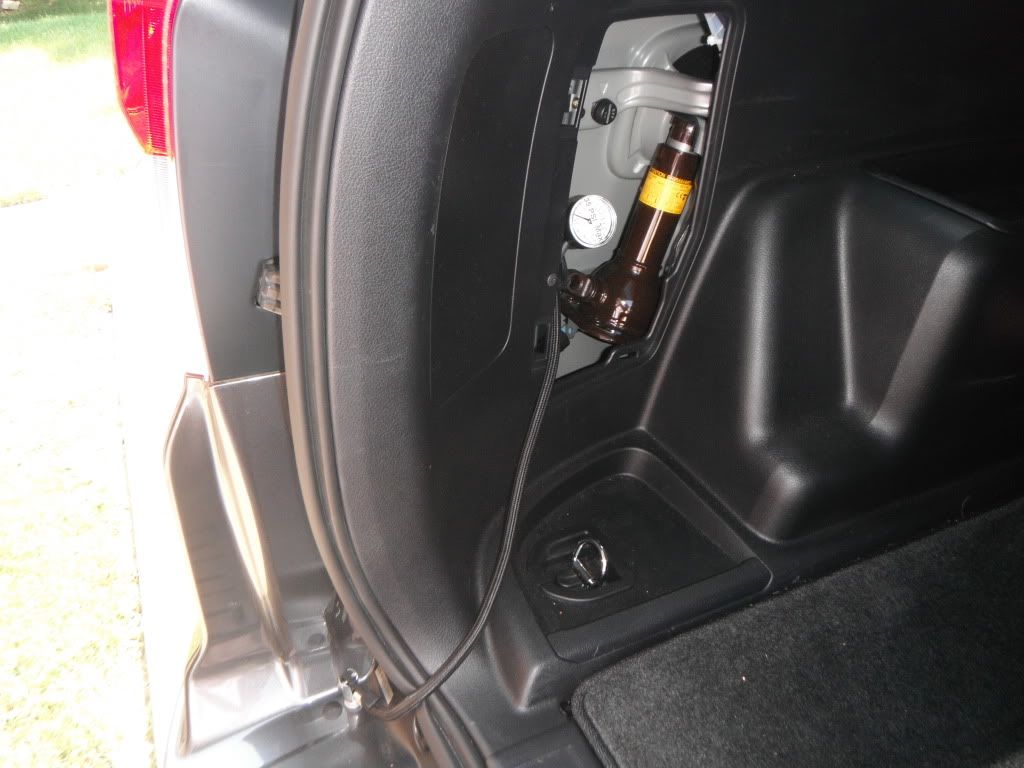
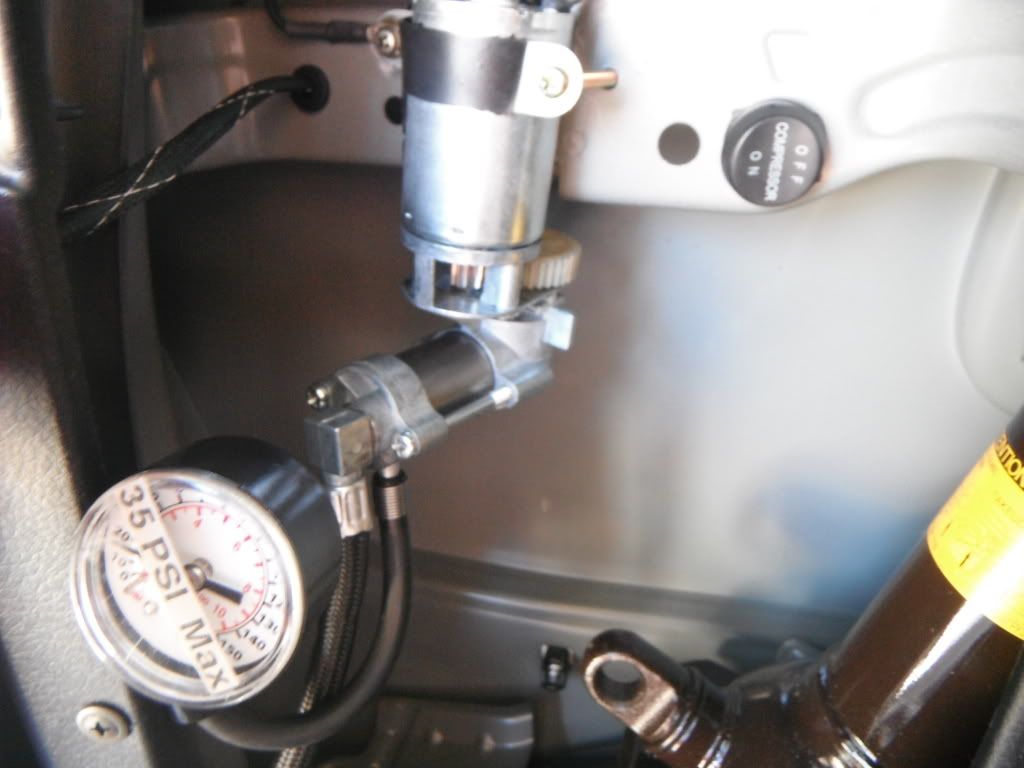
I installed the compressor in the jack storage area....
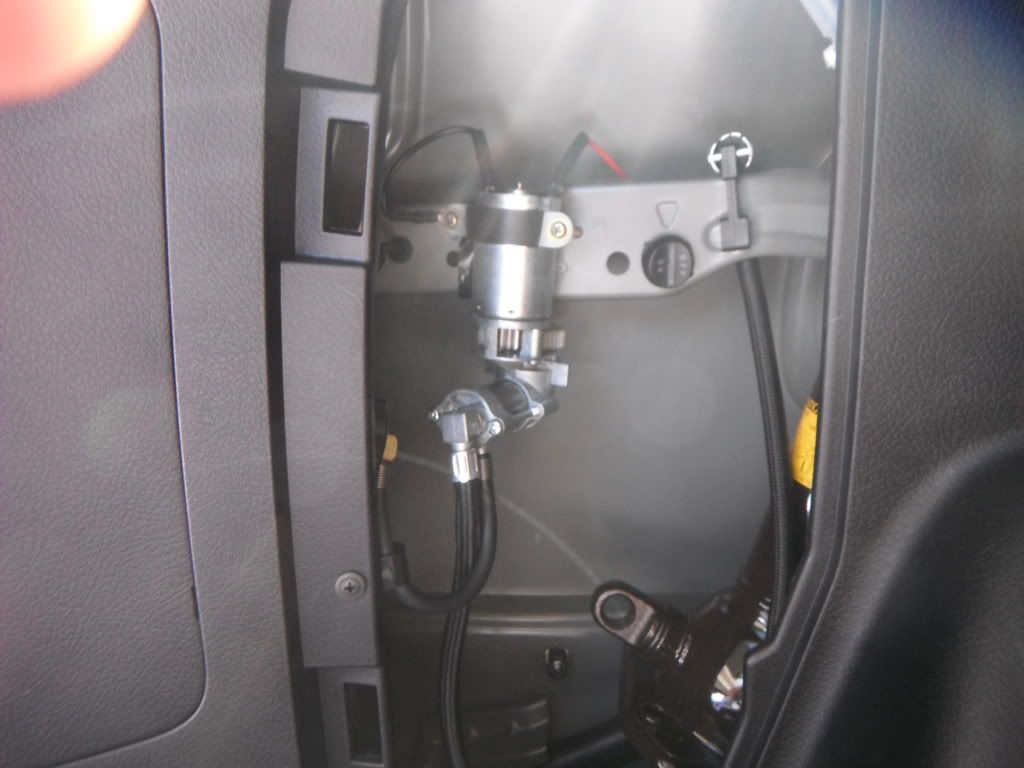
Looks pretty wierd, huh? I picked up a 12v inflator at Target for $20 on the clearance rack because, well, it was only $20. I planned on using it to inflate the airbags, and I kept it in the cargo area. It was always in the way. I took it apart, and this is what you see. I was able to use the switch, air hose, and the air guage as well from the original plastic case. It's wired to the 12v outlet in the passenger side rear wheelwell.
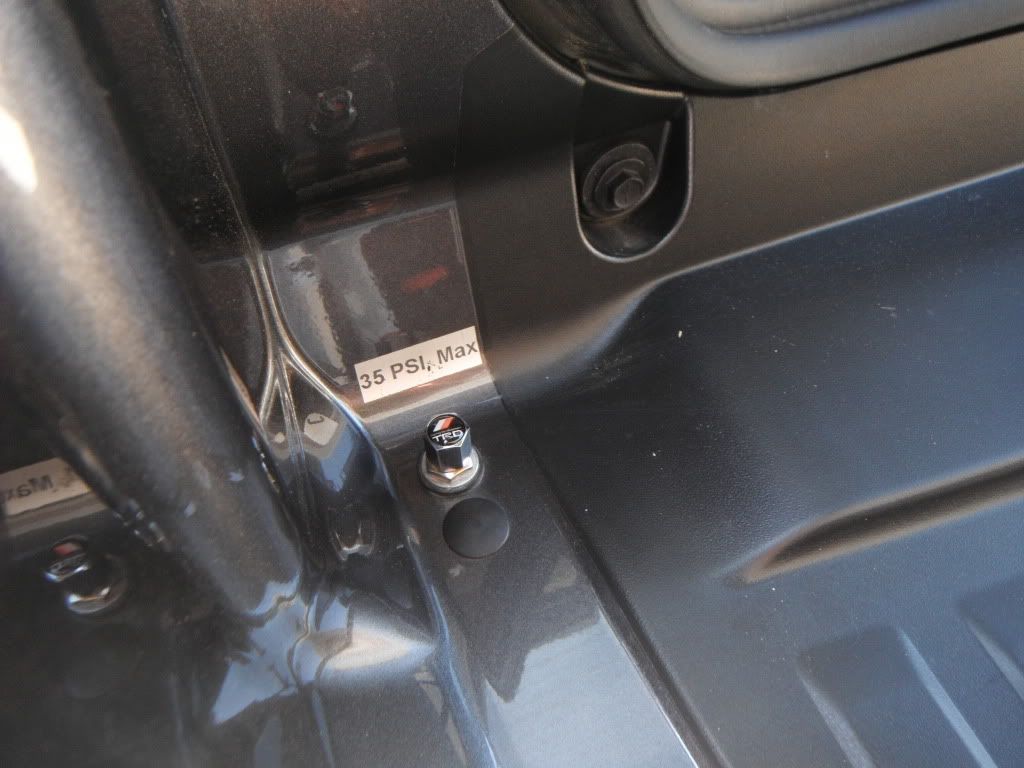
The switch, literally, just plugged into a factory square hole... The guage is on a flexible hose that pushes inside the cover.
This works VERY well, and everything tucks away nice and neatly behind the jack panel. Since the airbags have a working range between 10-35 PSI, it's not required to work very hard to inflate the system. I have used this probably 15-20 times, and it brings a smile to my face every time because I think it's kinda cool.
Maybe not for everyone, but then again, a lot of my mods are that way!
Dude, I've been paying attention to what you and Sp8ball have been doing for a while. Must say that you're quite the guru with this stuff. Awesome job.
__________________
2011 Blizzard Pearl SR5... MOD's Incoming! Wife approval pending
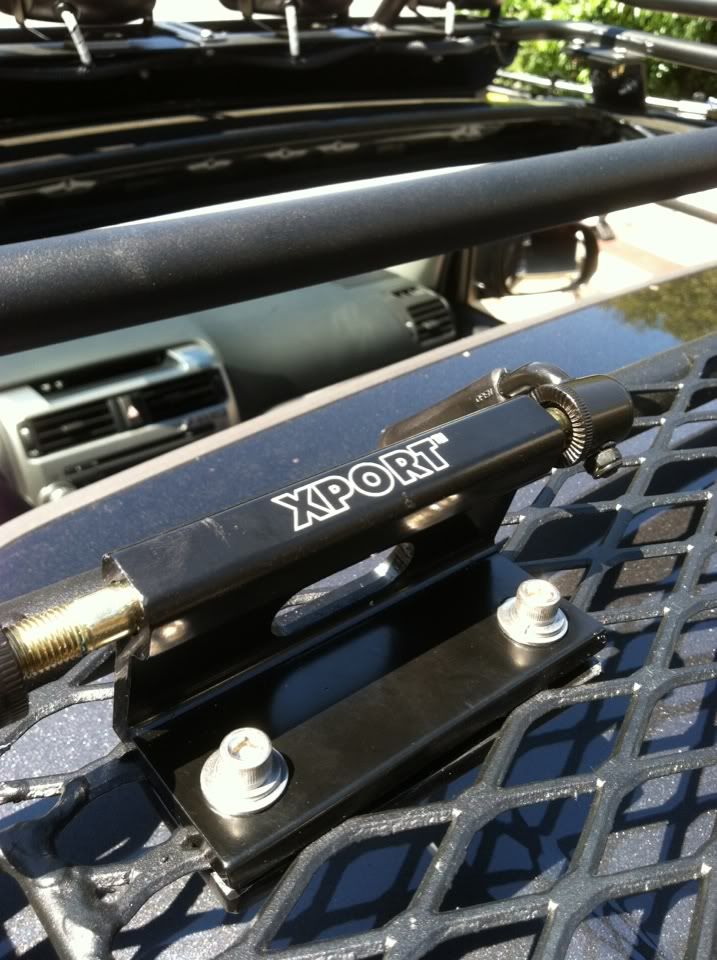
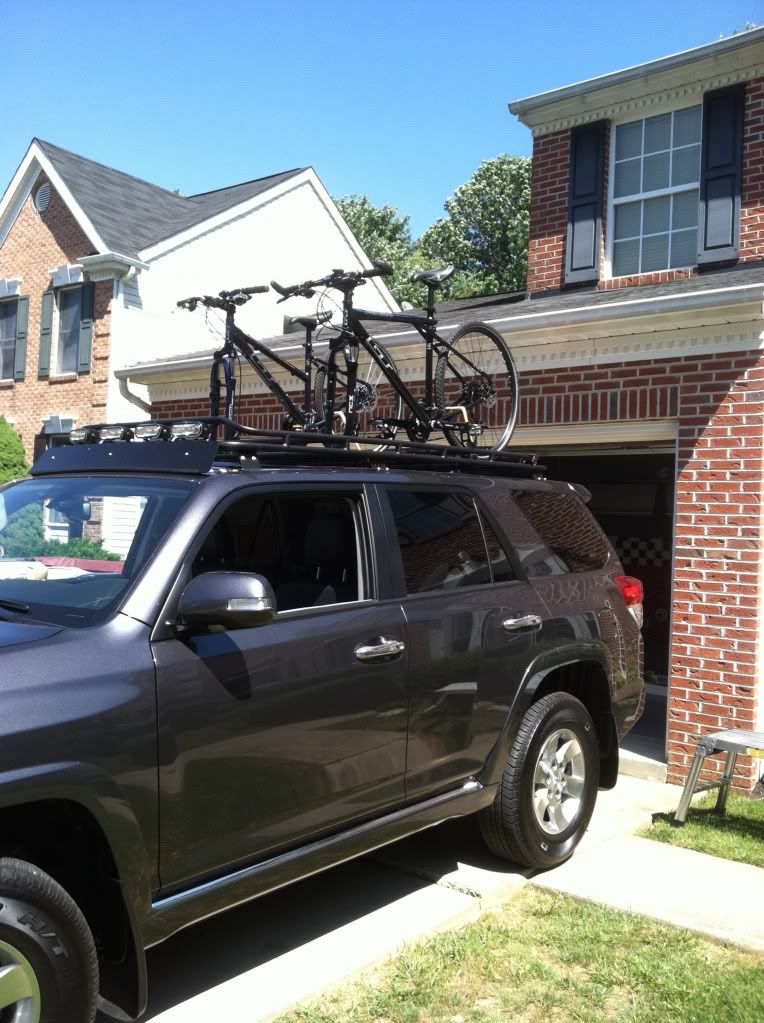
Here are my Gobi Stealth fork-down bike mounts- ANTMAN style...
I love my Gobi Stealth! I wanted to install some bike mounts on the crossrails, but I will also use the rack to haul stuff like plywood, drywall, etc. The standard Thule fork-down mounts sit on top of the rails, so I would need to remove them to haul big stuff, not an option. Plus they cost quite a bit more than what I came up with.
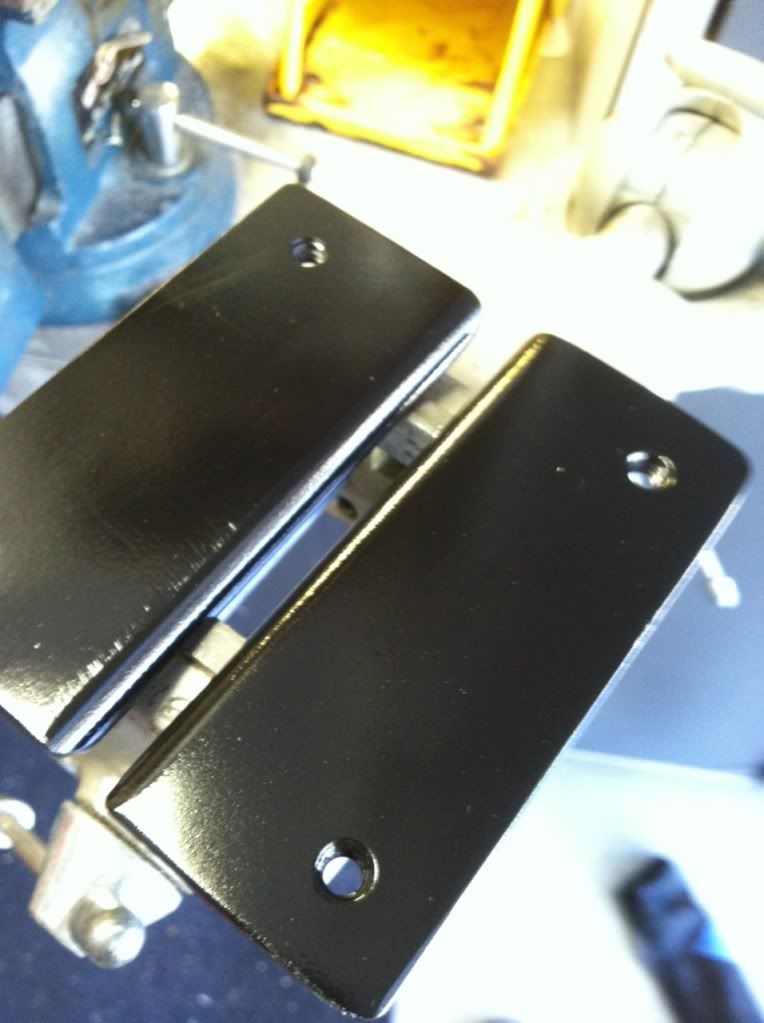
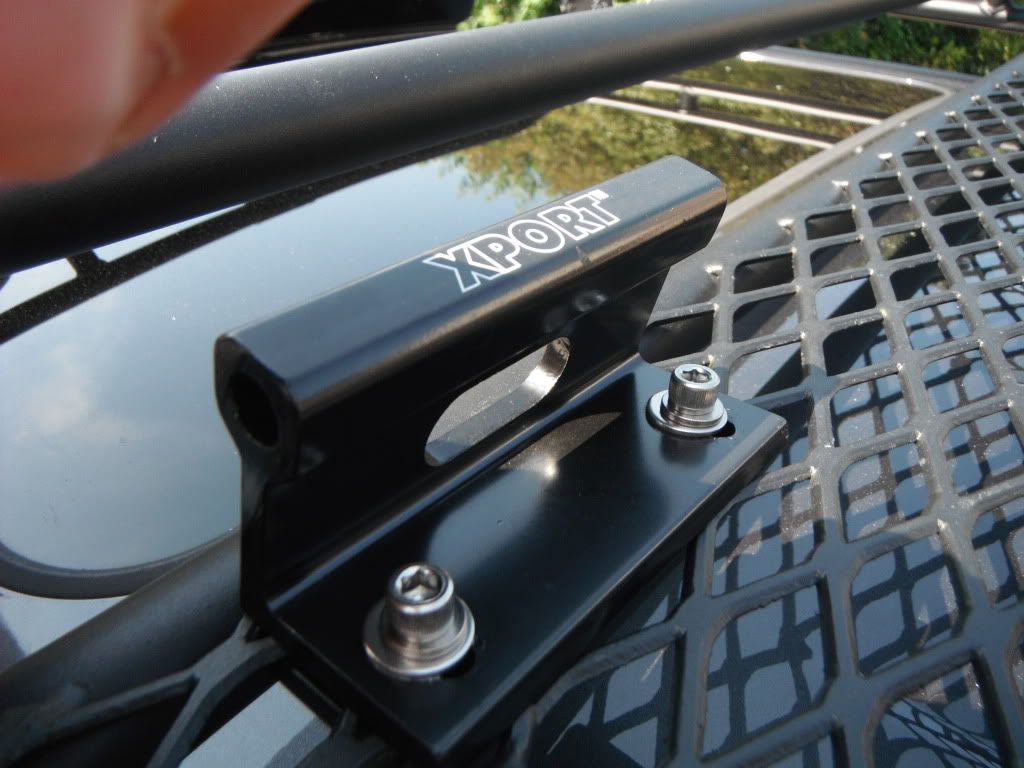
These are mounts from Performance Bike. They cost $15 a piece, and are pretty well made out of aluminum. Only real issue I have with them is that they can't be locked...
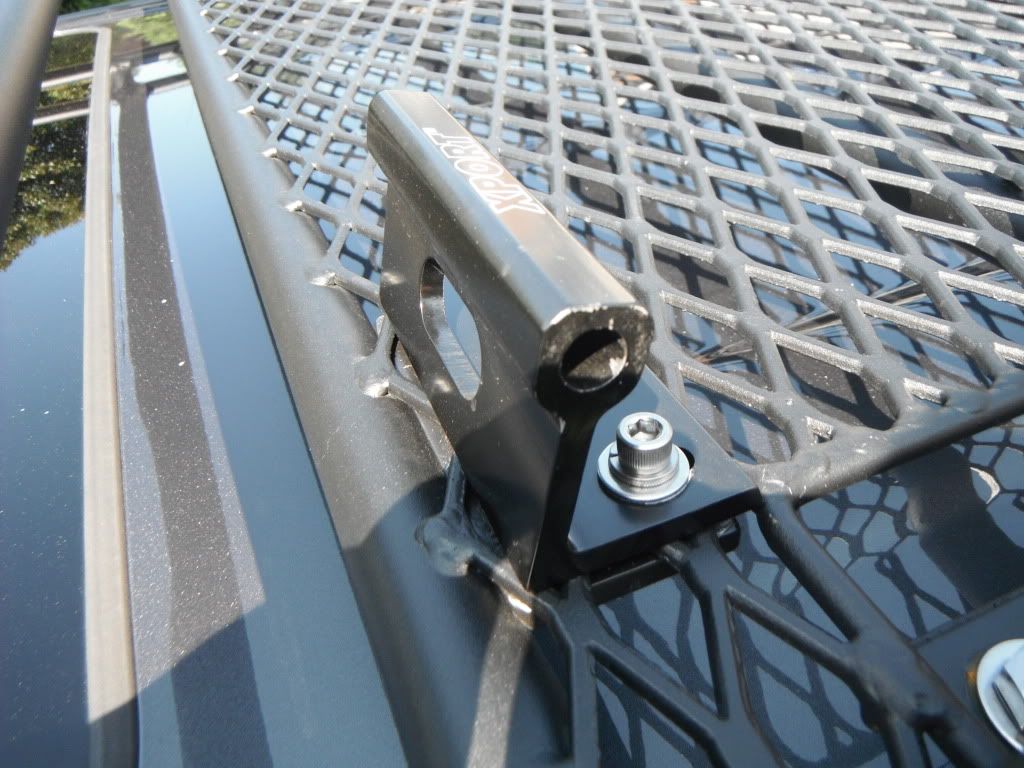
I fabbed up some backing plates out of 1/4" aluminum, and tapped some holes to accept mounting bolts. This distributes the load over a wider area of the steel mesh. All the hardware- 1/4-20x3/4" Allen bolts, washers, and split-ring lock washers- is stainless steel.
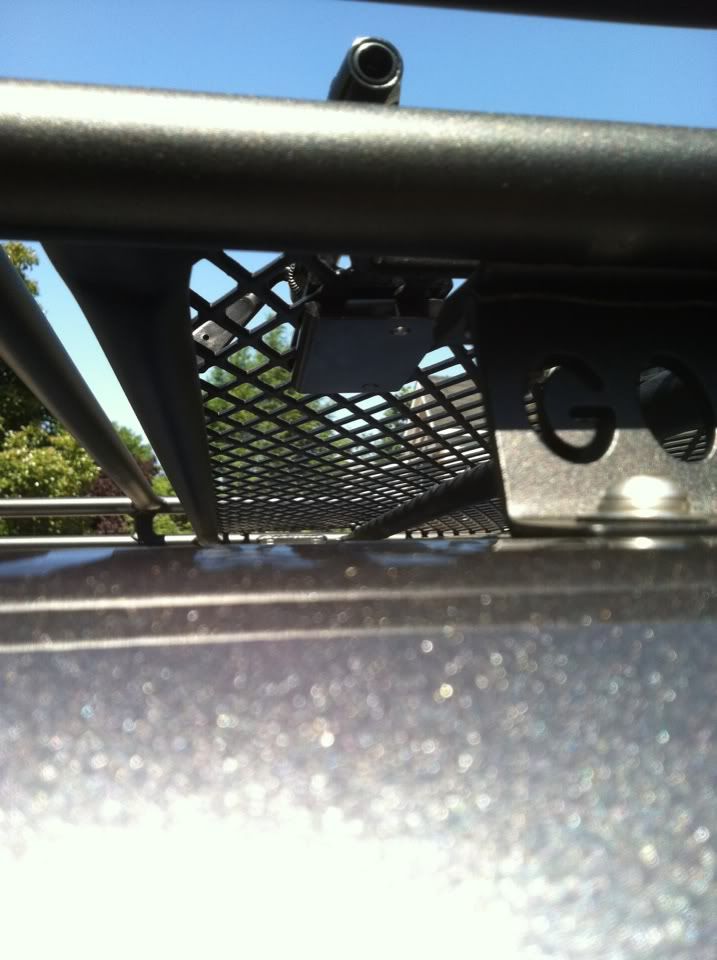
The mesh is pretty stout- I can stand up there with only a little flex- but I tried different areas and this corner seems to be the strongest spot. The bikes are very stable, and only flex the metal a tiny bit if you shake them...
Currently, I am using some high quality flat bungi cords to lock down the rear wheels, but I am looking into some Yakima wheel straps that I will mount up in the future. Will update the post when that happens.
I've had the bikes on the interstate at 75mph, and also on some curvy roads, and all has been great.
Antman, did you hook up the lines to inflate at the same time or is each side independent?>>
If you look at the pic with the TRD valve cap, you can see a black plastic plug I installed to cover the hole I made for the second inflation valve. This was just in case I decide to go that route in the future. For now, I'm happy with the one line inflating both bags equally.
Can you get a padlock and lock the turn handle to the expanded metal?
Quote:
Originally Posted by Antman
ANTMAN MOD#2
Here are my Gobi Stealth fork-down bike mounts- ANTMAN style...
I love my Gobi Stealth! I wanted to install some bike mounts on the crossrails, but I will also use the rack to haul stuff like plywood, drywall, etc. The standard Thule fork-down mounts sit on top of the rails, so I would need to remove them to haul big stuff, not an option. Plus they cost quite a bit more than what I came up with.
These are mounts from Performance Bike. They cost $15 a piece, and are pretty well made out of aluminum. Only real issue I have with them is that they can't be locked...
I fabbed up some backing plates out of 1/4" aluminum, and tapped some holes to accept mounting bolts. This distributes the load over a wider area of the steel mesh...
The mesh is pretty stout- I can stand up there with only a little flex- but I tried different areas and this corner seems to be the strongest spot. The bikes are very stable, and only flex the metal a tiny bit if you shake them...
Currently, I am using some high quality flat bungi cords to lock down the rear wheels, but I am looking into some Yakima wheel straps that I will mount up in the future. Will update the post when that happens.
I've had the bikes on the interstate at 75mph, and also on some curvy roads, and all has been great.
__________________
2020 Land Cruiser Heritage Edition, White Knuckle Sliders, to be added: Engel Fridge, GOBI Roof Rack, Old Man Emu Lift P51 Suspension, Full Underbody Protection, Shrockworks Front Bumper, Hybrid Conversion, stay tuned.
Reata- yeah that padlock's a good idea, but it won't be too practical. Those bikes are waaaay up there! If someone wants to steal my bikes that bad, I figure they need 'em more than me. Now if I see them rolling down the road on my bike- they will get a firsthand view of my airbags as I run their a$$ over!!! Thanks for the idea!
Reata- yeah that padlock's a good idea, but it won't be too practical. Those bikes are waaaay up there! If someone wants to steal my bikes that bad, I figure they need 'em more than me. Now if I see them rolling down the road on my bike- they will get a firsthand view of my airbags as I run their a$$ over!!! Thanks for the idea!
(in my best bugs bunny voice) oh, the travesty! Wait until you get back into singletrack haha! You will be locking it up tighter than Fort Knox! My hitch mounted setup has not one, not two but THREE locks and I live in a very low crime place. I use them mostly when I go riding out of state. My rack has a frame lock, my rack has a locking pin to the receiver and I use a cable lock for the wheels.
I have followed your mods on SP8ball's thread and I think you have done some really cool mods. Keep it up!
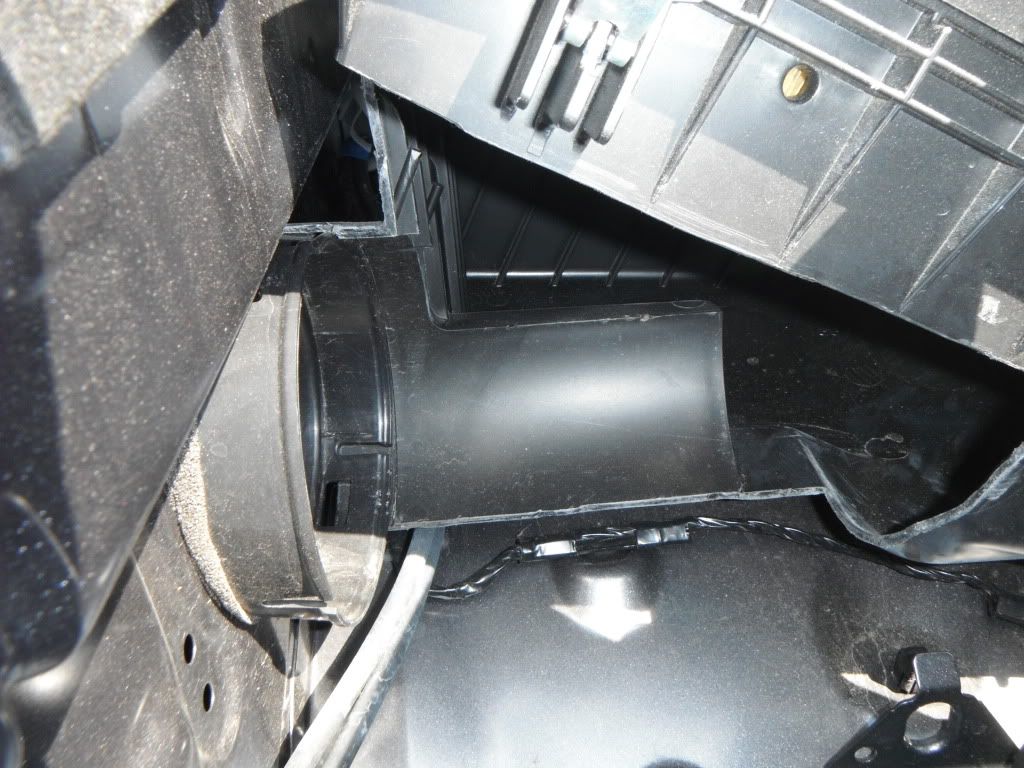
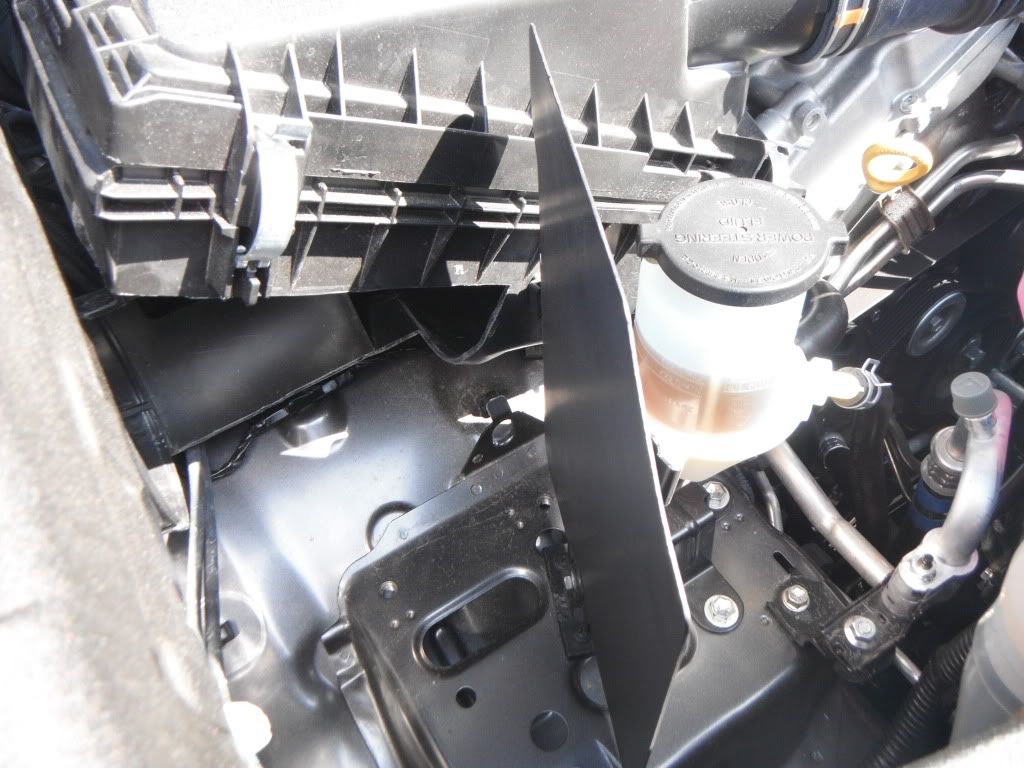
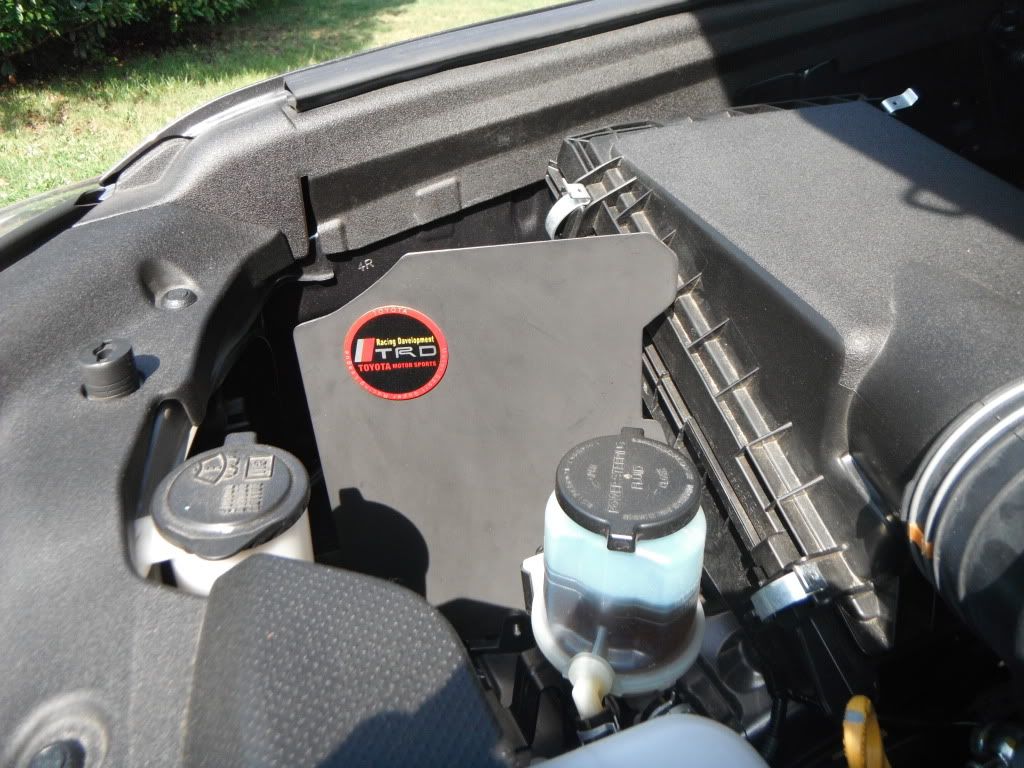
DIY Airbox mod. This was the first mod that I posted on this forum (I think), and I pretty much got blasted for it. I have updated the design a little with an aluminum heatshield, and plugged the "ice cream scoop" back into the box...Also added a K&N drop-in filter (please save the crapola about the oil screwing MAF sensors up and all that- been using K&N for 15 yrs, no prob)
You guys weren't very nice! I got a complex and it took me months, months! to get the courage to start my own build thread because of the lashings... Then it came to me- nobody else has the guts to chop up their airbox, or is it that I just like to cut stuff up for no reason....
Whatever- I still like this mod, and maybe someone (?) can benefit from it in some way:
This is a shot of the cutout with the air scoop inserted back into the fenderwell. This should help to channel some air in there...
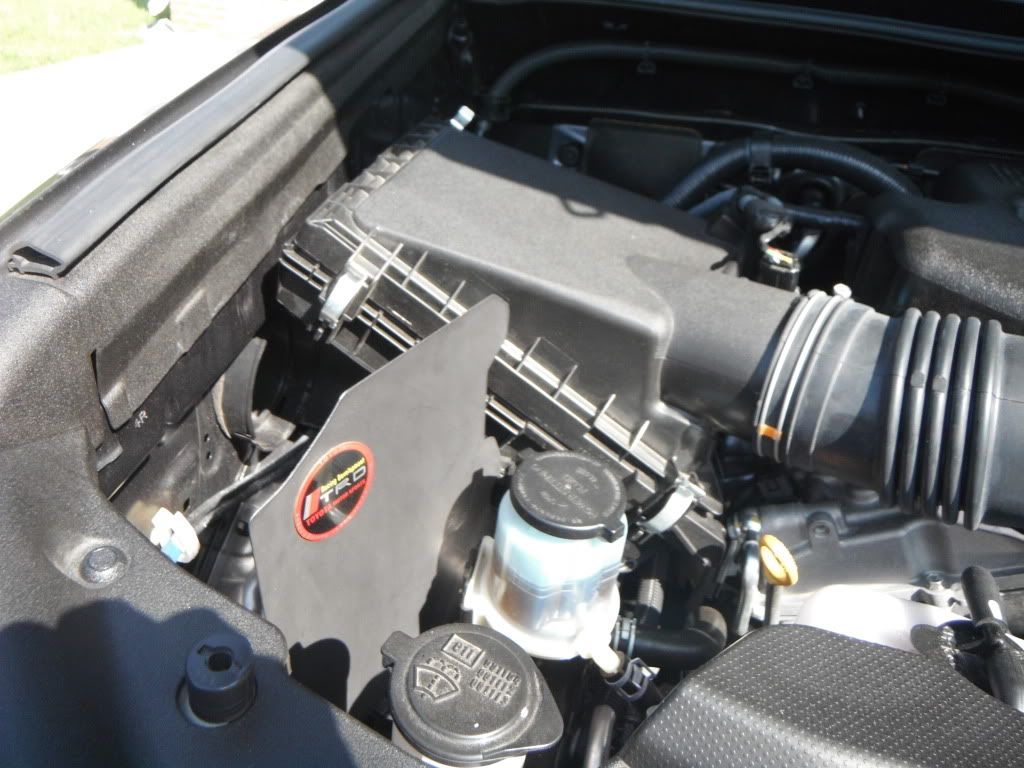
I made a heatshield out of aluminum plate to help -uh- shield some heat... from the intake. The TRD badge was a gift from Sp8Ball ...
I have driven in a few 100 degree days, and didn't notice a real lack in any performance. It sounds great when you get on the throttle- especially when combined with my Magnaflow muffler. That's the main reason I like it. The induction noise reminds me of my built 302 in my '69 Mustang (first car, long gone) VrOOOOOOOOOOOOOOOOOM!!! That's what it sounds like.


 ( I love to fish, just wanted to write that in here somewhere)
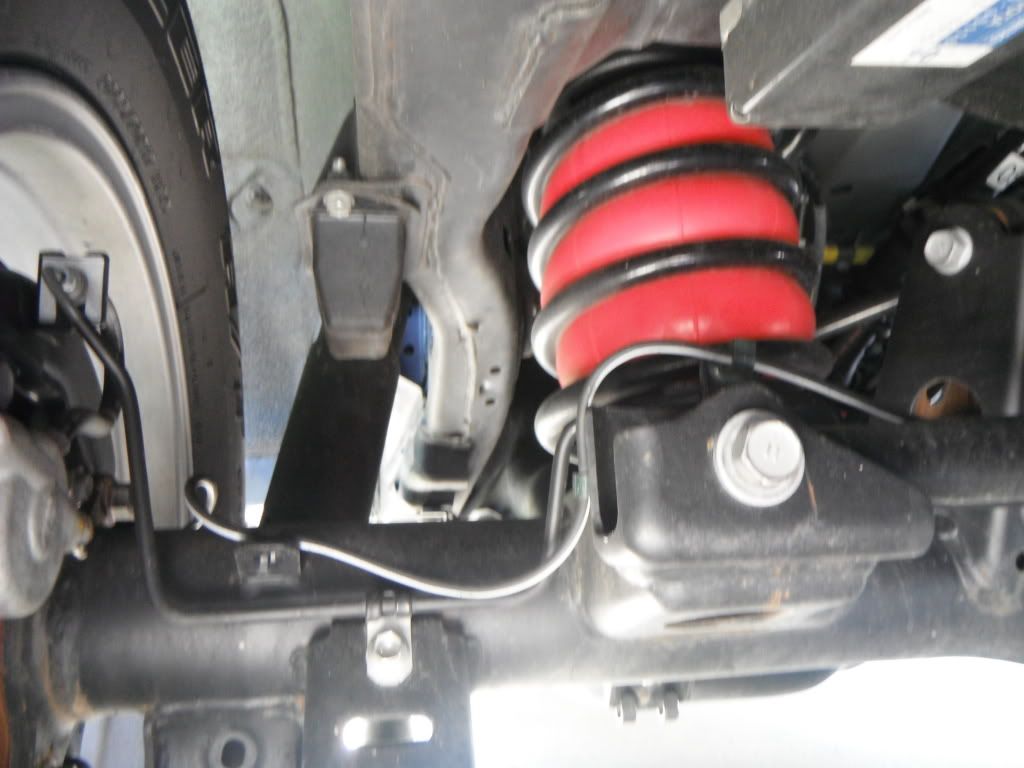


 Then it came to me- nobody else has the guts to chop up their airbox, or is it that I just like to cut stuff up for no reason....


 Linear Mode


