 04-25-2016, 08:57 PM
|
#16
|
 |
Member
|
|
Join Date: Dec 2013
Location: Aurora, Ohio
Posts: 69
|
|
|
Member
Join Date: Dec 2013
Location: Aurora, Ohio
Posts: 69
|
Quote:
Originally Posted by joeynational

love the stance on your rig. I'm also running 3rd gen rear coils, can you give me a link where you bought your BJ spacers? I would like mine to sit just like yours, it looks very level. Thats all you did right? 3rd gen coils and BJ spacers?
|
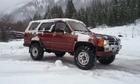
Thank you. Correct, I used newer 3rd gen rear coils. I believe before '99 they were a bit shorter/weaker, but I could be wrong. And then BJ spacers on the front. I did put slightly longer shocks in the back to compensate for the smal amount of lift, but that had no effect on the lift height. i still need to get longer shocks up front. The link for the spacers is below.
4Crawler Offroad Toyota 2WD/4WD IFS Front Ball Joint Spacers for Pickup, 4Runner and T100
scroll down and you will see "Buy Now"
__________________
'86 4Runner "El Chapo"
'85 Extra cab
|

|
 Reply With Quote Reply With Quote
|
|
04-25-2016, 09:10 PM
|
#17
|
 |
Member
|
|
Join Date: Mar 2016
Location: PHX, AZ
Posts: 330
|
|
|
Member
Join Date: Mar 2016
Location: PHX, AZ
Posts: 330
|
Thanks dude! How did you like the 265/75s? I just picked up some trail edition rims but they are 17s. I was thinking of 265/70 but like i said i love how yours is set up! What does the 75 make the tire like 32"?
|
|
|
Reply With Quote
|
|
04-25-2016, 09:22 PM
|
#18
|
|
Member
|
|
Join Date: Dec 2013
Location: Aurora, Ohio
Posts: 69
|
|
|
Member
Join Date: Dec 2013
Location: Aurora, Ohio
Posts: 69
|
Quote:
Originally Posted by joeynational
Thanks dude! How did you like the 265/75s? I just picked up some trail edition rims but they are 17s. I was thinking of 265/70 but like i said i love how yours is set up! What does the 75 make the tire like 32"?
|
Not a problem. they are great! They don't stuff the fender has much as my 31x10.5 duractracs, but the Coopers are great for DD. the 265/75r15 comes out to be about 30.6". they end up sitting a little taller and narrower than the 265/70.
in your case, a 265/75/17 will simply give it an extra 2 inches, so 32.6".
__________________
'86 4Runner "El Chapo"
'85 Extra cab
|
|
|
Reply With Quote
|
|
04-30-2016, 03:37 AM
|
#19
|
 |
Member
|
|
Join Date: Jan 2015
Location: 48.7135° N, 118.0253° W
Posts: 90
Real Name: Ed
|
|
|
Member
Join Date: Jan 2015
Location: 48.7135° N, 118.0253° W
Posts: 90
Real Name: Ed
|
Nice looking 4runner! Interior turned out great, how did you get the carpet to follow the contour of your wheel wells so good, looks like it was pre-formed and made for it!
|
|
|
Reply With Quote
|
|
04-30-2016, 09:21 AM
|
#20
|
|
Member
|
|
Join Date: Dec 2013
Location: Aurora, Ohio
Posts: 69
|
|
|
Member
Join Date: Dec 2013
Location: Aurora, Ohio
Posts: 69
|
Quote:
Originally Posted by rustED_
Nice looking 4runner! Interior turned out great, how did you get the carpet to follow the contour of your wheel wells so good, looks like it was pre-formed and made for it!
|
Thank you!
The carpet was a bit difficult at first. I did the wheel wells separate. I mocked it up with a big piece of paper. I laid it on the top of the wheel well, smoothed it down the middle, about where the hook is to strap cargo down. Because this just has 1 90 degree angle, the paper could contour to both the top and side. This gave me basically a max width of what the paper would have to be. I trimmed a long strip of paper to be this width, and the length was a bit longer than the whole wheel well. Then, I laid it back on the top and side (in the middle again) and started forming towards the back of the wheel well, you keep the top edge of the paper butted up against the wall, and the Bottom of the paper butted up against the floor. As you make your way down the wheel well, you will get excess paper as the wheel well starts to angle down. Pinch the excess paper to ensure the paper is flat on the top and flat on the sides. Once you do this all the way down, and at the bottom, you should have the paper laying flat on all parts of the wheel well with excess hanging around. Make sure to make a hard crease where the excess. Then remove the paper and cut at your fold lines. You will have an interesting looking piece of paper, but it will form together to follow the whole contour of the wheel well.
To make things easier, I did the front and back of the wheel well on separate pieces of paper, but added the templates together when cutting out the carpet.then the template for the one side is just the opposite for the other side, so you only have to make a template for one side.
Test test test. Do a lot of tests and trimming where needed to ensure that the carpet is close after the first cut. You can always trim a little more when you are forming the carpet on the wheel well, so obviously leave a little extra everywhere just in case.
I then used some spray adhesive to keep it down. I'm actually quite happy about how it turned out, and even when close up, you can't see the seam along the curve of the wheel well.
Sorry if this makes no sense at all, pictures would probably help. I can take some pictures of the process if you would like. I am no professional, this was my first time laying carpet over contours, but it does look pretty good.
__________________
'86 4Runner "El Chapo"
'85 Extra cab
|
|
|
Reply With Quote
|
|
05-22-2016, 09:54 PM
|
#21
|
|
Member
|
|
Join Date: Dec 2013
Location: Aurora, Ohio
Posts: 69
|
|
|
Member
Join Date: Dec 2013
Location: Aurora, Ohio
Posts: 69
|
Little bit of an update.
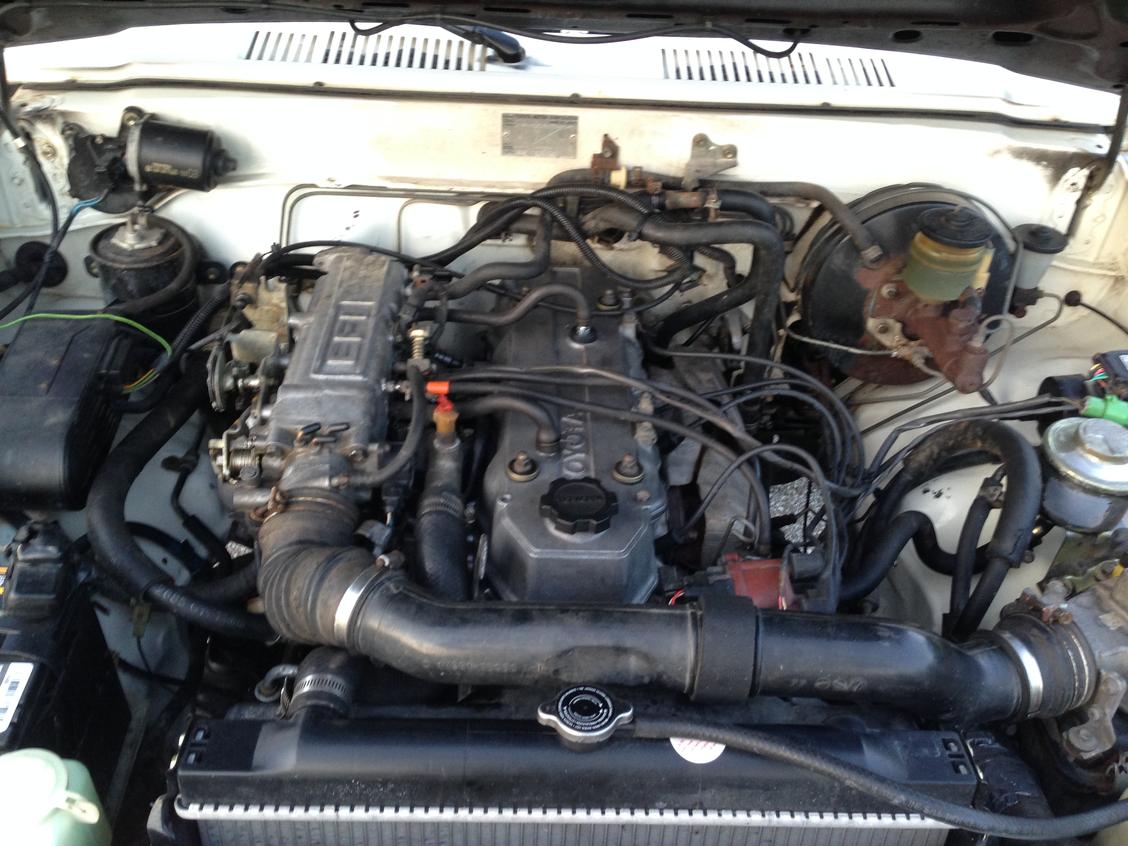
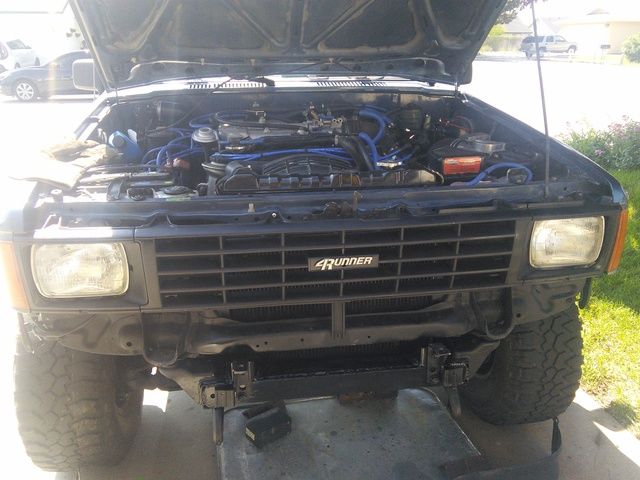
This weekend I addressed my rough idle upon warm starts by taking the IACV off and giving it a good cleaning. I also deleted the egr, cleaned the upper and lower intakes, replaced the PCV valve and put some new fuel injectors in.
after buttoning up everything the first time, with new gaskets and all, I had a coolant leak between the block and the lower intake... UGHH!!! so, I ended up pulling everything off, buying new gaskets again, and coating the two surfaces with silicon. worked like a charm!
drove back to school tonight and everything seems to be fine, i just need to do a little adjusting to the idle.
no pictures of anything, just a before and after engine shot (Sorry for the terrible quality). started to do some cleaning, but definitely needs some more.
before:
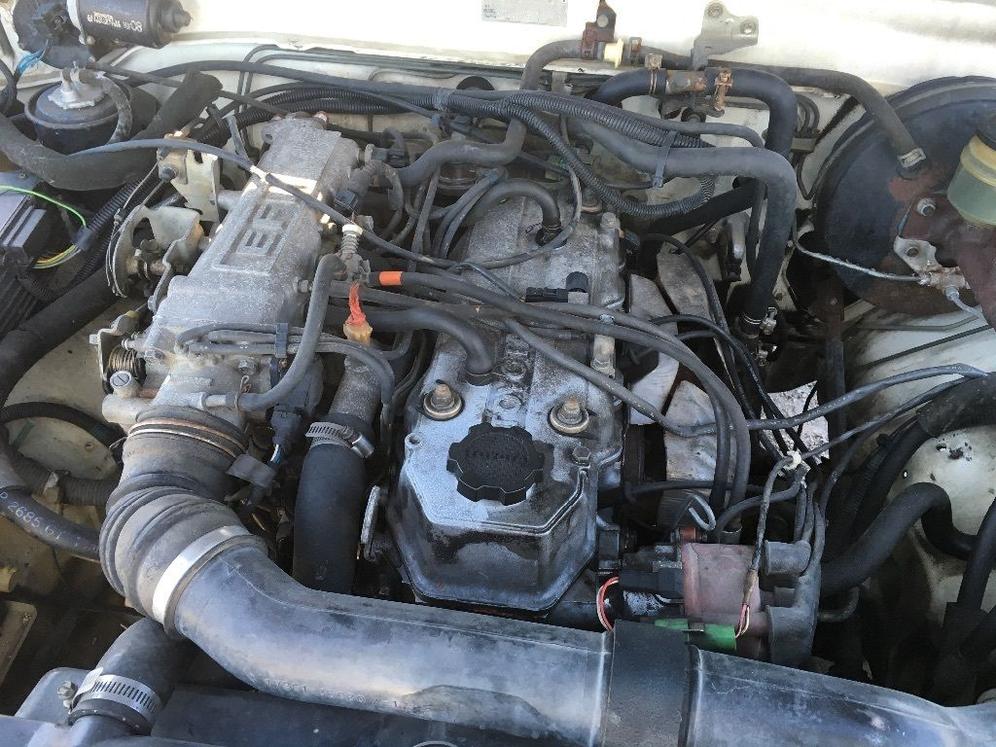
after:
__________________
'86 4Runner "El Chapo"
'85 Extra cab
|
|
|
Reply With Quote
|
|
01-04-2017, 12:04 PM
|
#22
|
|
Member
|
|
Join Date: Dec 2013
Location: Aurora, Ohio
Posts: 69
|
|
|
Member
Join Date: Dec 2013
Location: Aurora, Ohio
Posts: 69
|
Happy New Year everyone! It's been awhile since I have posted on here. I've just been bogged down with school.
The 4Runner is doing awesome! I've had a few hiccups here and there, but she gets to and from school everyday (50 miles round trip)
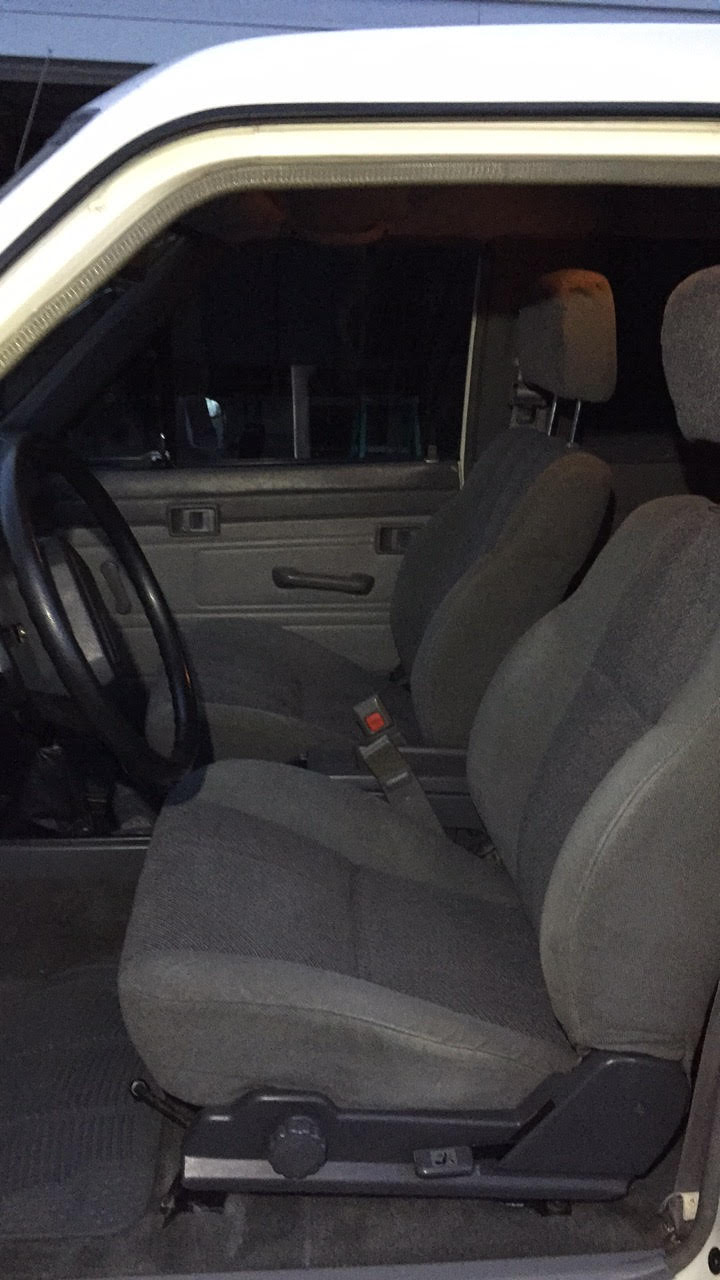
Last week when I was at the gym, my friend and I drove up, him in his army green plasti dipped FJ Cruiser, and me in my 4Runner. We noticed there was a nice, lifted FJ Cruiser outside. We went in to workout and eventually the owner of the lifted FJ asked about my 4Runner. He had actually stopped by my house close to 2 years ago because he saw my 85 extra cab sitting outside in the street. He owns a FJ40, FJ80, Fj Cruiser, & an 84 extra cab. Long story short, he GAVE me some awesome grey seats after I told him that my front seats were trash! Merry Christmas to me!
My interior is officially complete.

__________________
'86 4Runner "El Chapo"
'85 Extra cab
|
|
|
Reply With Quote
|
|
01-04-2017, 12:56 PM
|
#23
|
|
Member
|
|
Join Date: Sep 2013
Location: Nor Cal
Posts: 312
|
|
|
Member
Join Date: Sep 2013
Location: Nor Cal
Posts: 312
|
Wow nice guy, those are sr5s too!
|
|
|
Reply With Quote
|
|
01-07-2017, 05:24 AM
|
#24
|
|
Member
|
|
Join Date: Dec 2013
Location: Meridian ID
Posts: 379
|
|
|
Member
Join Date: Dec 2013
Location: Meridian ID
Posts: 379
|
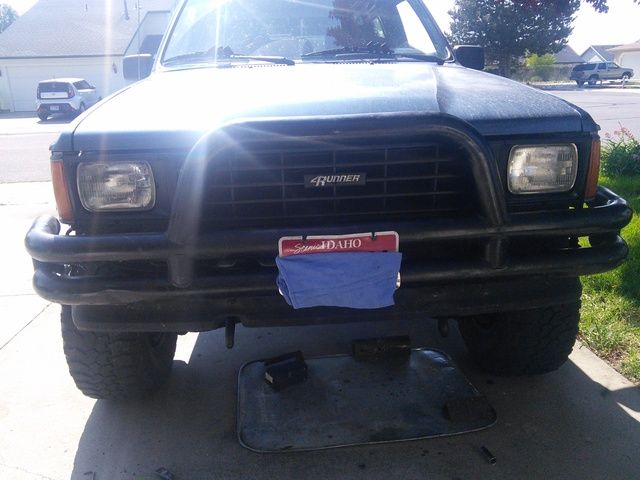
I have a 2 wheel drive Grill on mine as well. I put in a 4Runner logo instead of the Toyota and really like the way it looks.
|
|
|
Reply With Quote
|
|
01-14-2017, 02:50 PM
|
#25
|
|
Member
|
|
Join Date: Dec 2013
Location: Aurora, Ohio
Posts: 69
|
|
|
Member
Join Date: Dec 2013
Location: Aurora, Ohio
Posts: 69
|
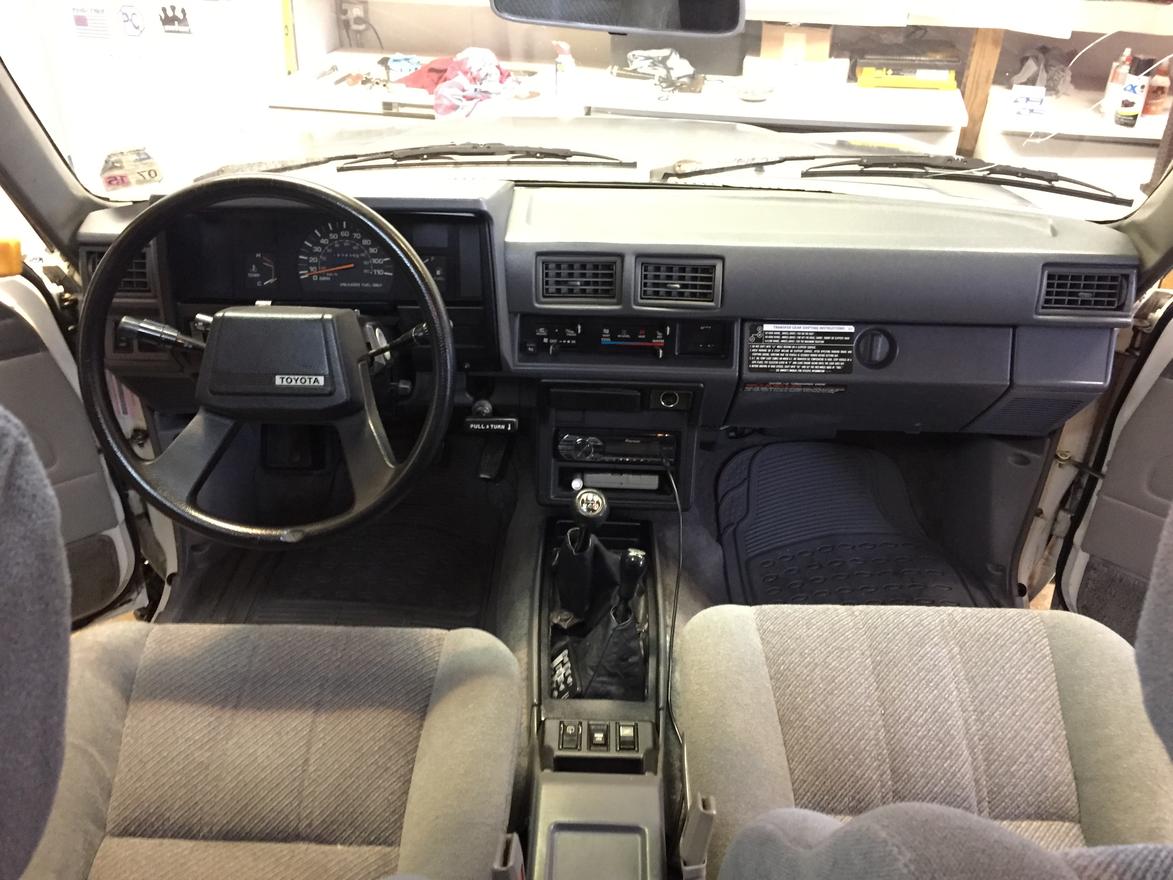
Here's a few more interior shots with the new seats. Oh, and a new glove box with the transfer case instructions. It came from a turbo, so it has a note about the turbo below the transfer case instructions

__________________
'86 4Runner "El Chapo"
'85 Extra cab
|
|
|
Reply With Quote
|
|
01-14-2017, 03:05 PM
|
#26
|
|
Member
|
|
Join Date: Dec 2013
Location: Aurora, Ohio
Posts: 69
|
|
|
Member
Join Date: Dec 2013
Location: Aurora, Ohio
Posts: 69
|
Finally decided to replace my old leaf springs. I was running the original springs along with the zuk mod using 3rd gen coils. The original springs were giving me a ton of axle wrap, and my u-joints were finally toast.
So, I went with OME medium load springs (CS009R) with a u-bolt flip kit and new bushings. I replaced my u-joints and rear pinion seal while I was at it.
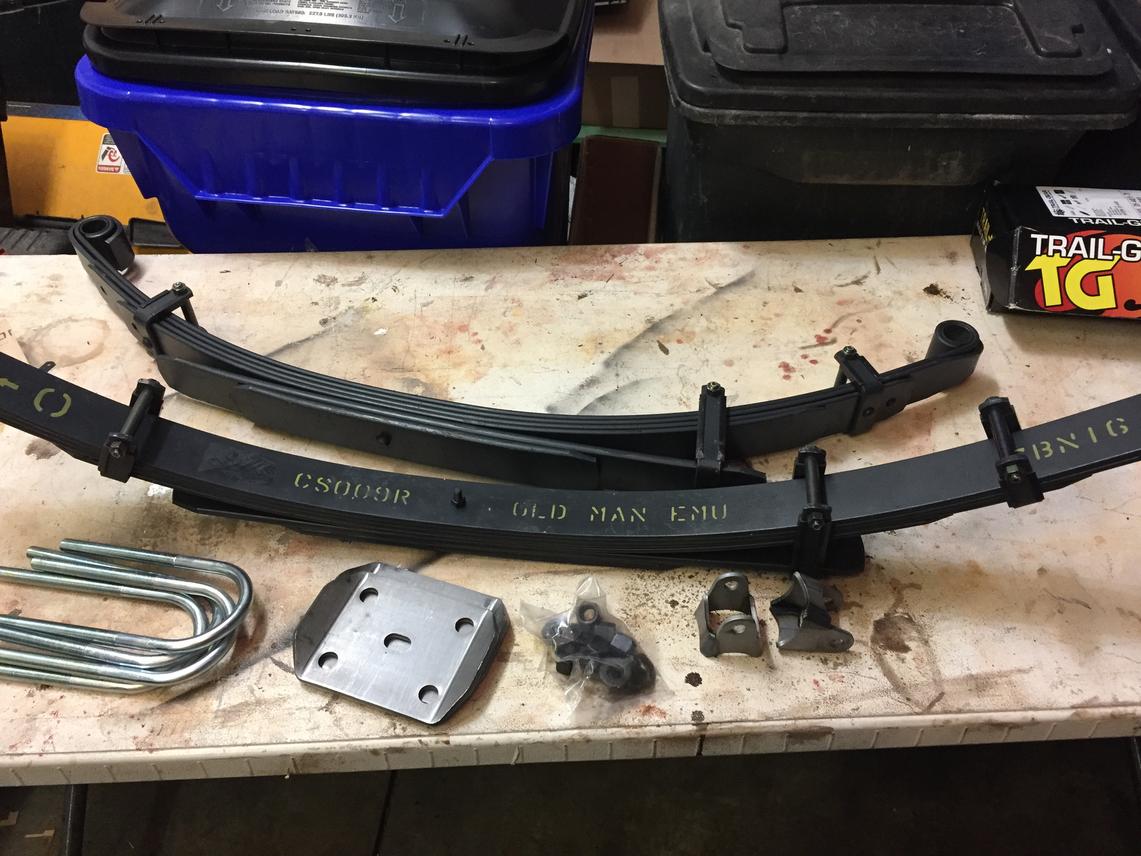
old setup:
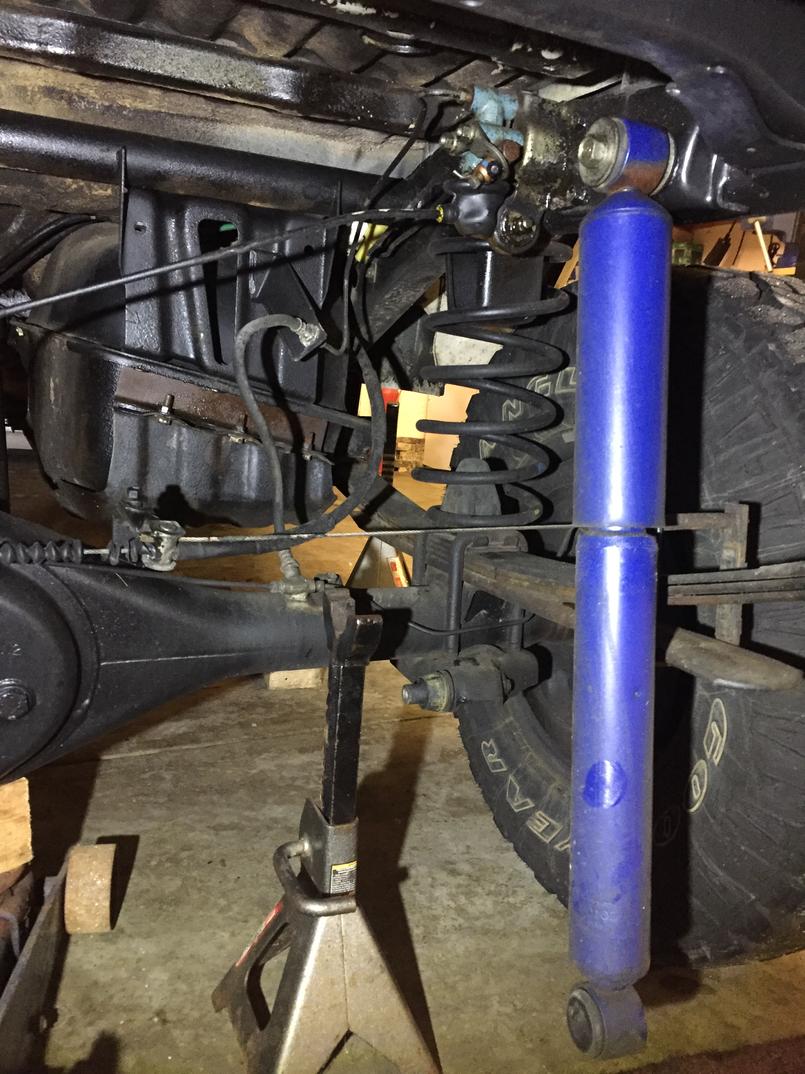
new setup:

Pretty good stance with ball joints spacers up front:

Finished product underneath:


Still have to put my bump stops back on and trim the ends u-bolts a bit.
__________________
'86 4Runner "El Chapo"
'85 Extra cab
|
|
|
Reply With Quote
|
|
01-14-2017, 06:39 PM
|
#27
|
|
Member
|
|
Join Date: Mar 2016
Location: PHX, AZ
Posts: 330
|
|
|
Member
Join Date: Mar 2016
Location: PHX, AZ
Posts: 330
|
looking good! SO you didnt touch the torsions at all to get it level? Most OME leafs i see look much higher in the back.
|
|
|
Reply With Quote
|
|
01-14-2017, 07:42 PM
|
#28
|
|
Member
|
|
Join Date: Dec 2013
Location: Aurora, Ohio
Posts: 69
|
|
|
Member
Join Date: Dec 2013
Location: Aurora, Ohio
Posts: 69
|
Quote:
Originally Posted by joeynational
looking good! SO you didnt touch the torsions at all to get it level? Most OME leafs i see look much higher in the back.
|
Thanks! Correct, I didn't touch the torsion bars. But, I do have bj spacers and I don't know if the torsion bars were cranked prior to owning it
__________________
'86 4Runner "El Chapo"
'85 Extra cab
|
|
|
Reply With Quote
|
|
01-18-2017, 01:55 AM
|
#29
|
|
Member
|
|
Join Date: Dec 2013
Location: Meridian ID
Posts: 379
|
|
|
Member
Join Date: Dec 2013
Location: Meridian ID
Posts: 379
|
Saw you on on Facebook. what I would recommend is moving your switches from the center console up above your radio. I have pictures to show what I did just don't have them on here at the moment. But I do have some I could send you through Facebook if you were interested. I can see if I can try to get them to upload here as well but I have to figure out how to get back into my Photobucket. Some reason I'm not able to sign in
After you get that done you can easily put the plugs from the radio area down into the center console or you could do like I did and get the coin holder out of the second generation forerunners. I just did that so that I could carry around $6 worth of quarters for emergency use. I can actually get 3 more quarters and because I broke the center piece out of each one. I just don't like having my switch is down there where something can get spilled on them or my daughter could step on them and break them. She likes to climb through from the front to back that way or at least did when she was younger.
|
|
|
Reply With Quote
|
|
01-19-2017, 02:08 PM
|
#30
|
|
Member
|
|
Join Date: Dec 2013
Location: Aurora, Ohio
Posts: 69
|
|
|
Member
Join Date: Dec 2013
Location: Aurora, Ohio
Posts: 69
|
Quote:
Originally Posted by airdreams1
Saw you on on Facebook. what I would recommend is moving your switches from the center console up above your radio. I have pictures to show what I did just don't have them on here at the moment. But I do have some I could send you through Facebook if you were interested. I can see if I can try to get them to upload here as well but I have to figure out how to get back into my Photobucket. Some reason I'm not able to sign in
After you get that done you can easily put the plugs from the radio area down into the center console or you could do like I did and get the coin holder out of the second generation forerunners. I just did that so that I could carry around $6 worth of quarters for emergency use. I can actually get 3 more quarters and because I broke the center piece out of each one. I just don't like having my switch is down there where something can get spilled on them or my daughter could step on them and break them. She likes to climb through from the front to back that way or at least did when she was younger.
|
That sounds pretty cool, but I don't have any issues with where they are now. Plus, I don't want to cut up any of my clean plastics. Thanks for the recommendation though!
__________________
'86 4Runner "El Chapo"
'85 Extra cab
|
|
|
Reply With Quote
|
 Posting Rules
|
You may not post new threads
You may not post replies
You may not post attachments
You may not edit your posts
HTML code is On
|
|
|
|


 Linear Mode


